

SCROLLWORK
Unit III · Lesson 9FEATHER STRUCTURE & CURING
PROFESSOR QUILLBERRY NOCTURNE
Scrollwork Library • Master Scribe & Illuminator
Professor's Introduction

A sealed note from Professor Nocturne, to be opened before the lesson begins.
You have held a pen. You have studied the surface. You have mixed the ink and arranged the desk. Now we come to the quill itself, and I must warn you: almost everything you think you know about it is decoration.
The quill on a greeting card, full-plumed and romantic, never wrote a manuscript. The feather a scribe actually used was a stripped, hardened, carefully chosen thing, and it began its working life long before the penknife touched it. It began with anatomy, and with patience.
This lesson is about the feather as the bird made it, and the quill as the scribe made it. They are not the same object. By the end, you will know the difference, and you will never look at a feather the same way again.
— Q.N.
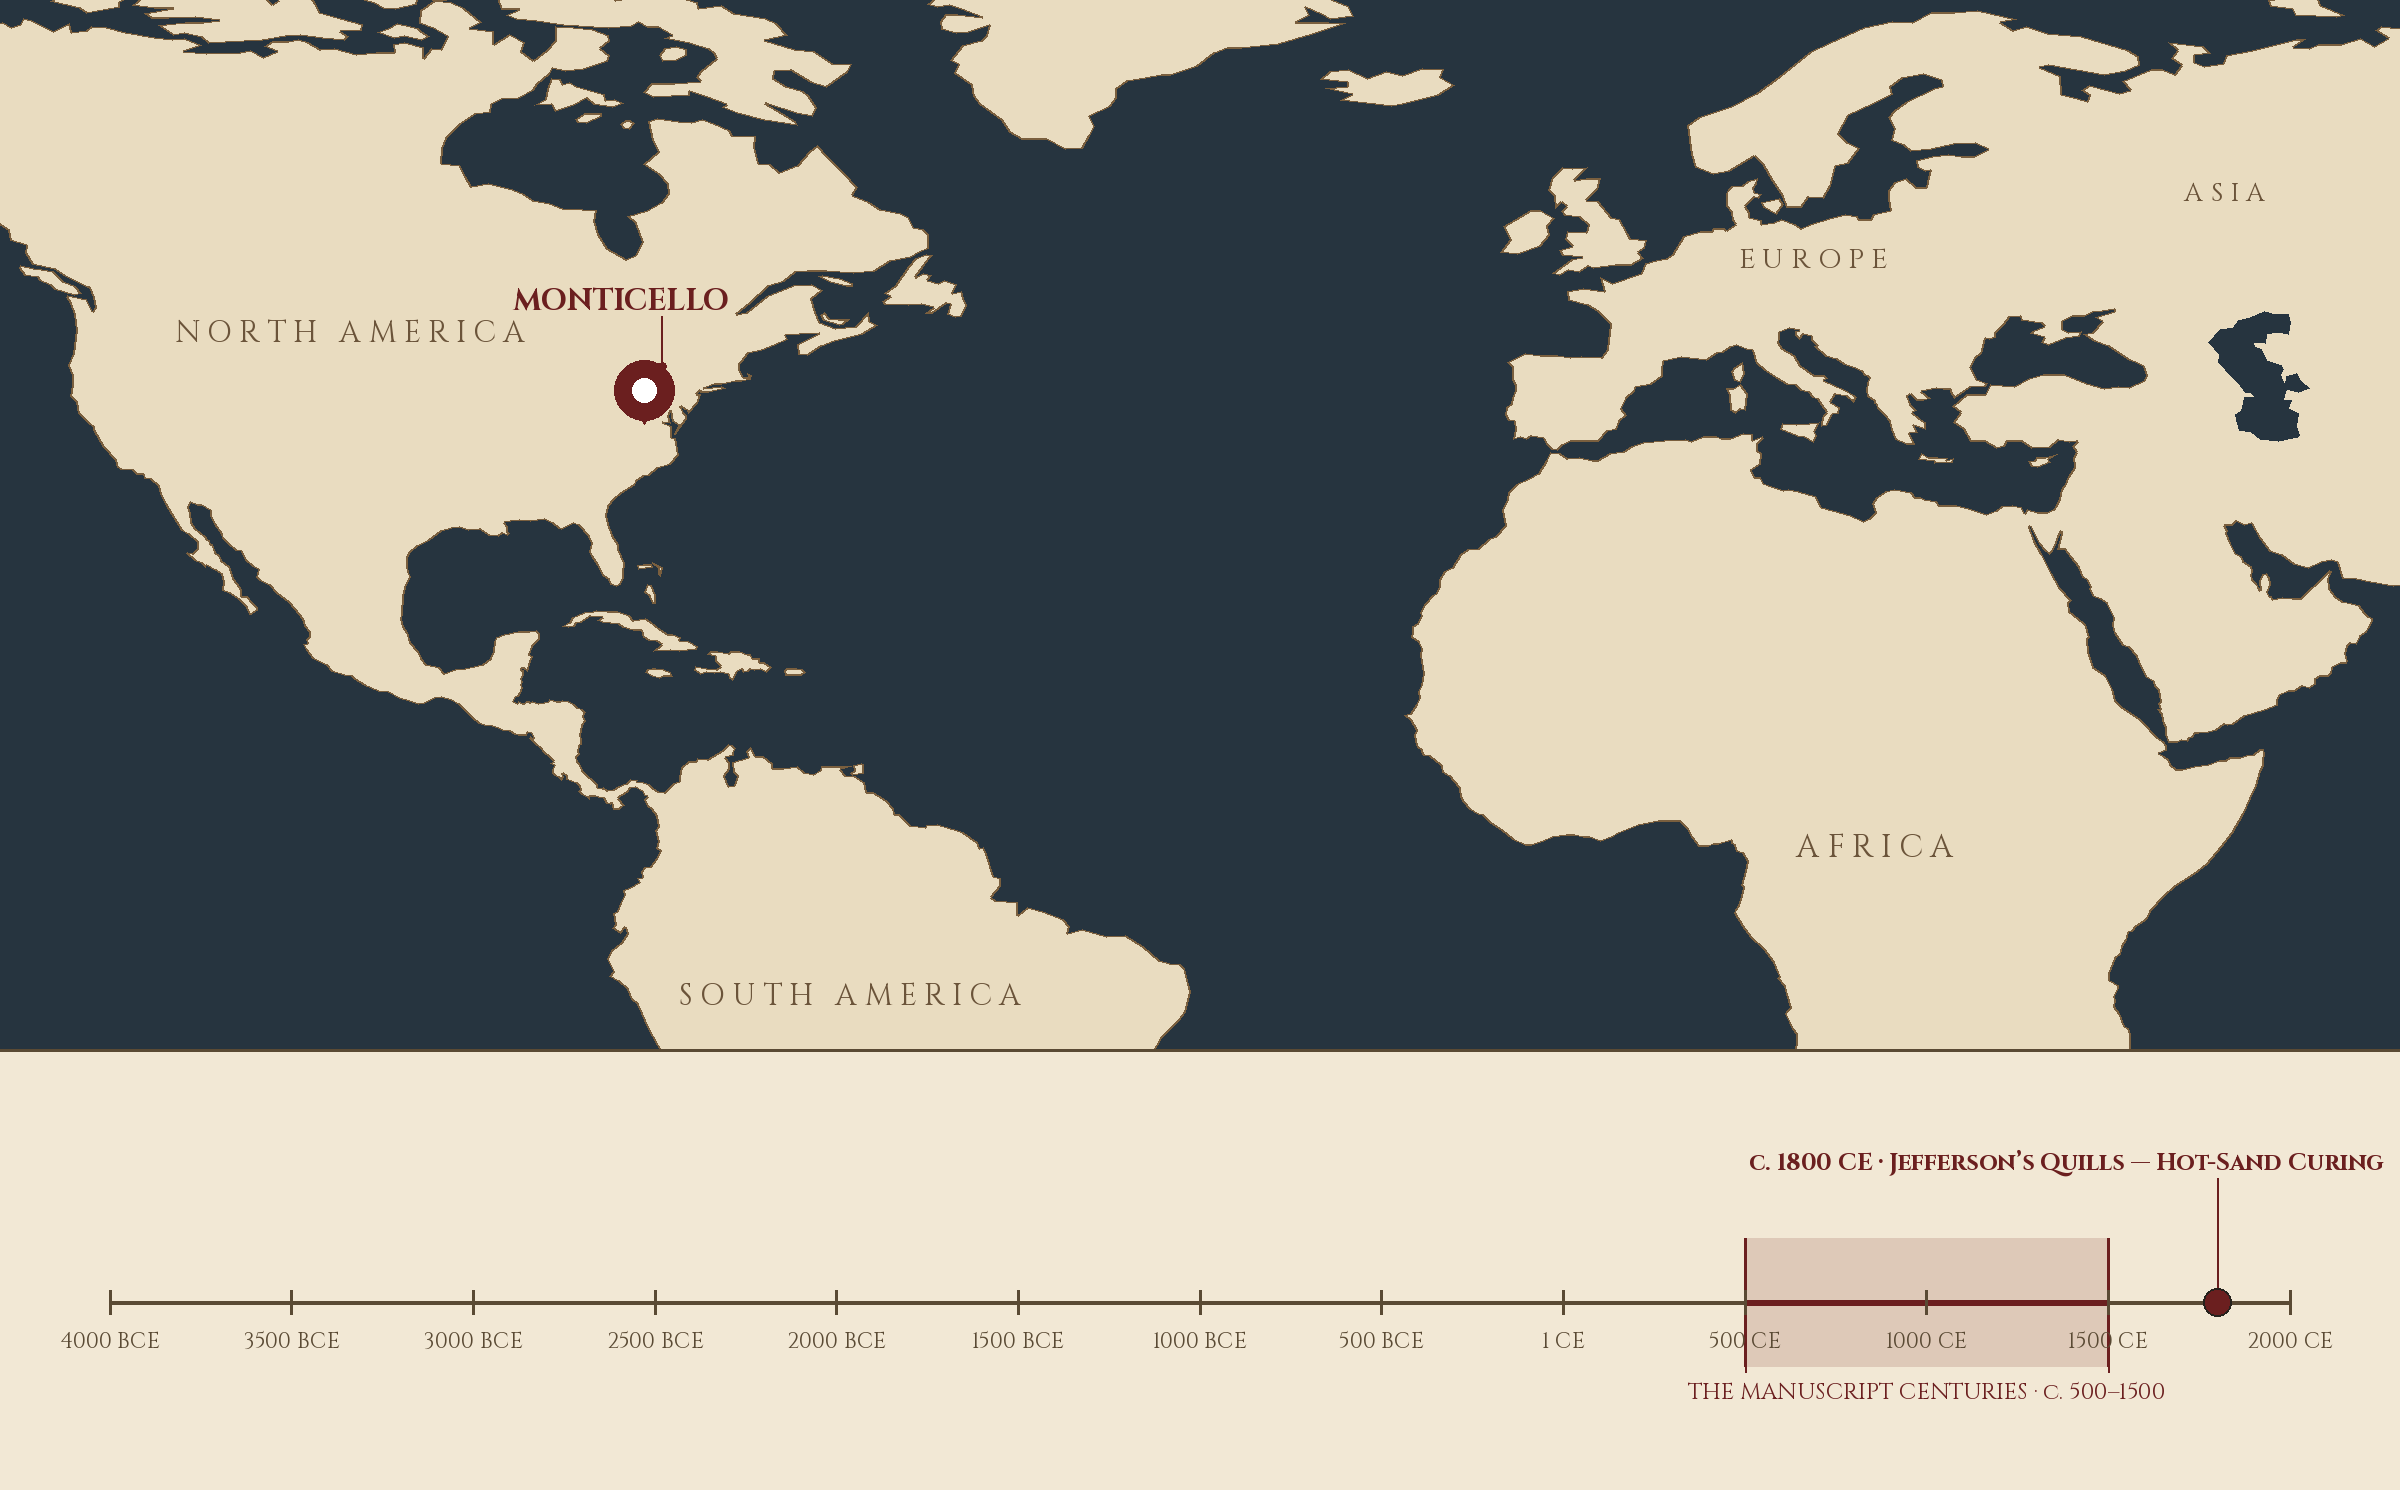
Where and when: Monticello, Virginia, c. 1800 CE — Jefferson's Quills — Hot-Sand Curing. The pin is this lesson. The line beneath the map is our road: every stop a place where writing changed, every lesson a pin.
Lesson Objectives
By the end of this lesson, you will be able to:
- Define rachis, barbules, vane, curing, remiges, and moult
- Explain why only certain feathers can become quills, and which birds supplied them
- Describe the two historical curing methods and what each one does to the feather shaft
- Evaluate the left-wing claim honestly: what is true in it, and what the cutting knife made irrelevant
Reading this lesson: ★ marks the passages to remember. They return on the unit quiz and the class test. Check in questions ask the material back as you go; answer them in your workbook when you meet them.
Working this lesson: Your assignment packet is the first download on this page. Work in it as the lesson moves along, answering each assignment as its subject is taught — or read the lesson through for your notes and take the assignments as homework afterward. Both are proper ways to sit this class. Signposts in the reading tell you where each assignment belongs. Written answers are short answers in your own words; a few honest lines are worth more than a filled page.
Your Assignment Packet
This lesson's assignments live in its packet: the Lexicon Handout (every term, course terms marked ◆), Materials, Guided Practice, the Assignment Manual with its answer key for self-checking, the Reflection Questions, and the Workbook Checklist. Download the packet before you begin and keep it beside you as you read.
The Architecture of a Feather
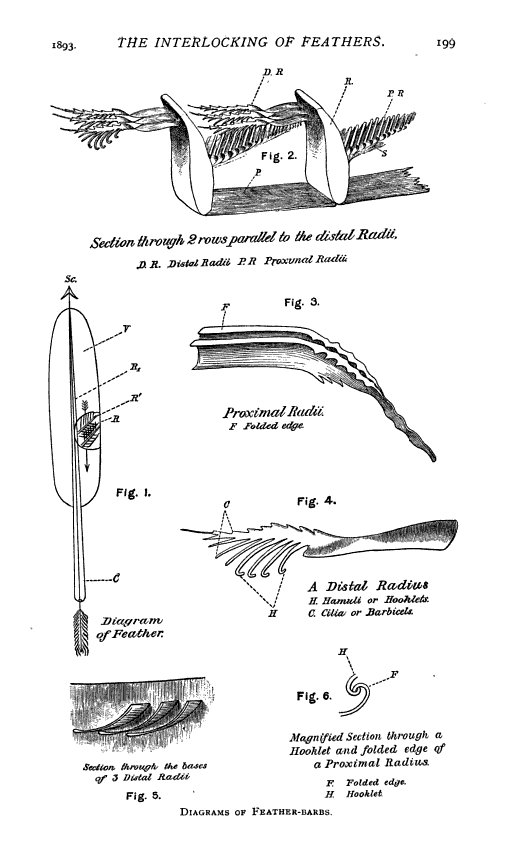
A feather under the naturalist's eye: Pycraft's diagrams of 1893 label the very parts this lesson names, down to the hamuli of Fig. 4, the tiny hooklets that zip the vane shut.
W. P. Pycraft, diagrams from "The Interlocking of Feathers," 1893, via Wikimedia Commons. Public domain.
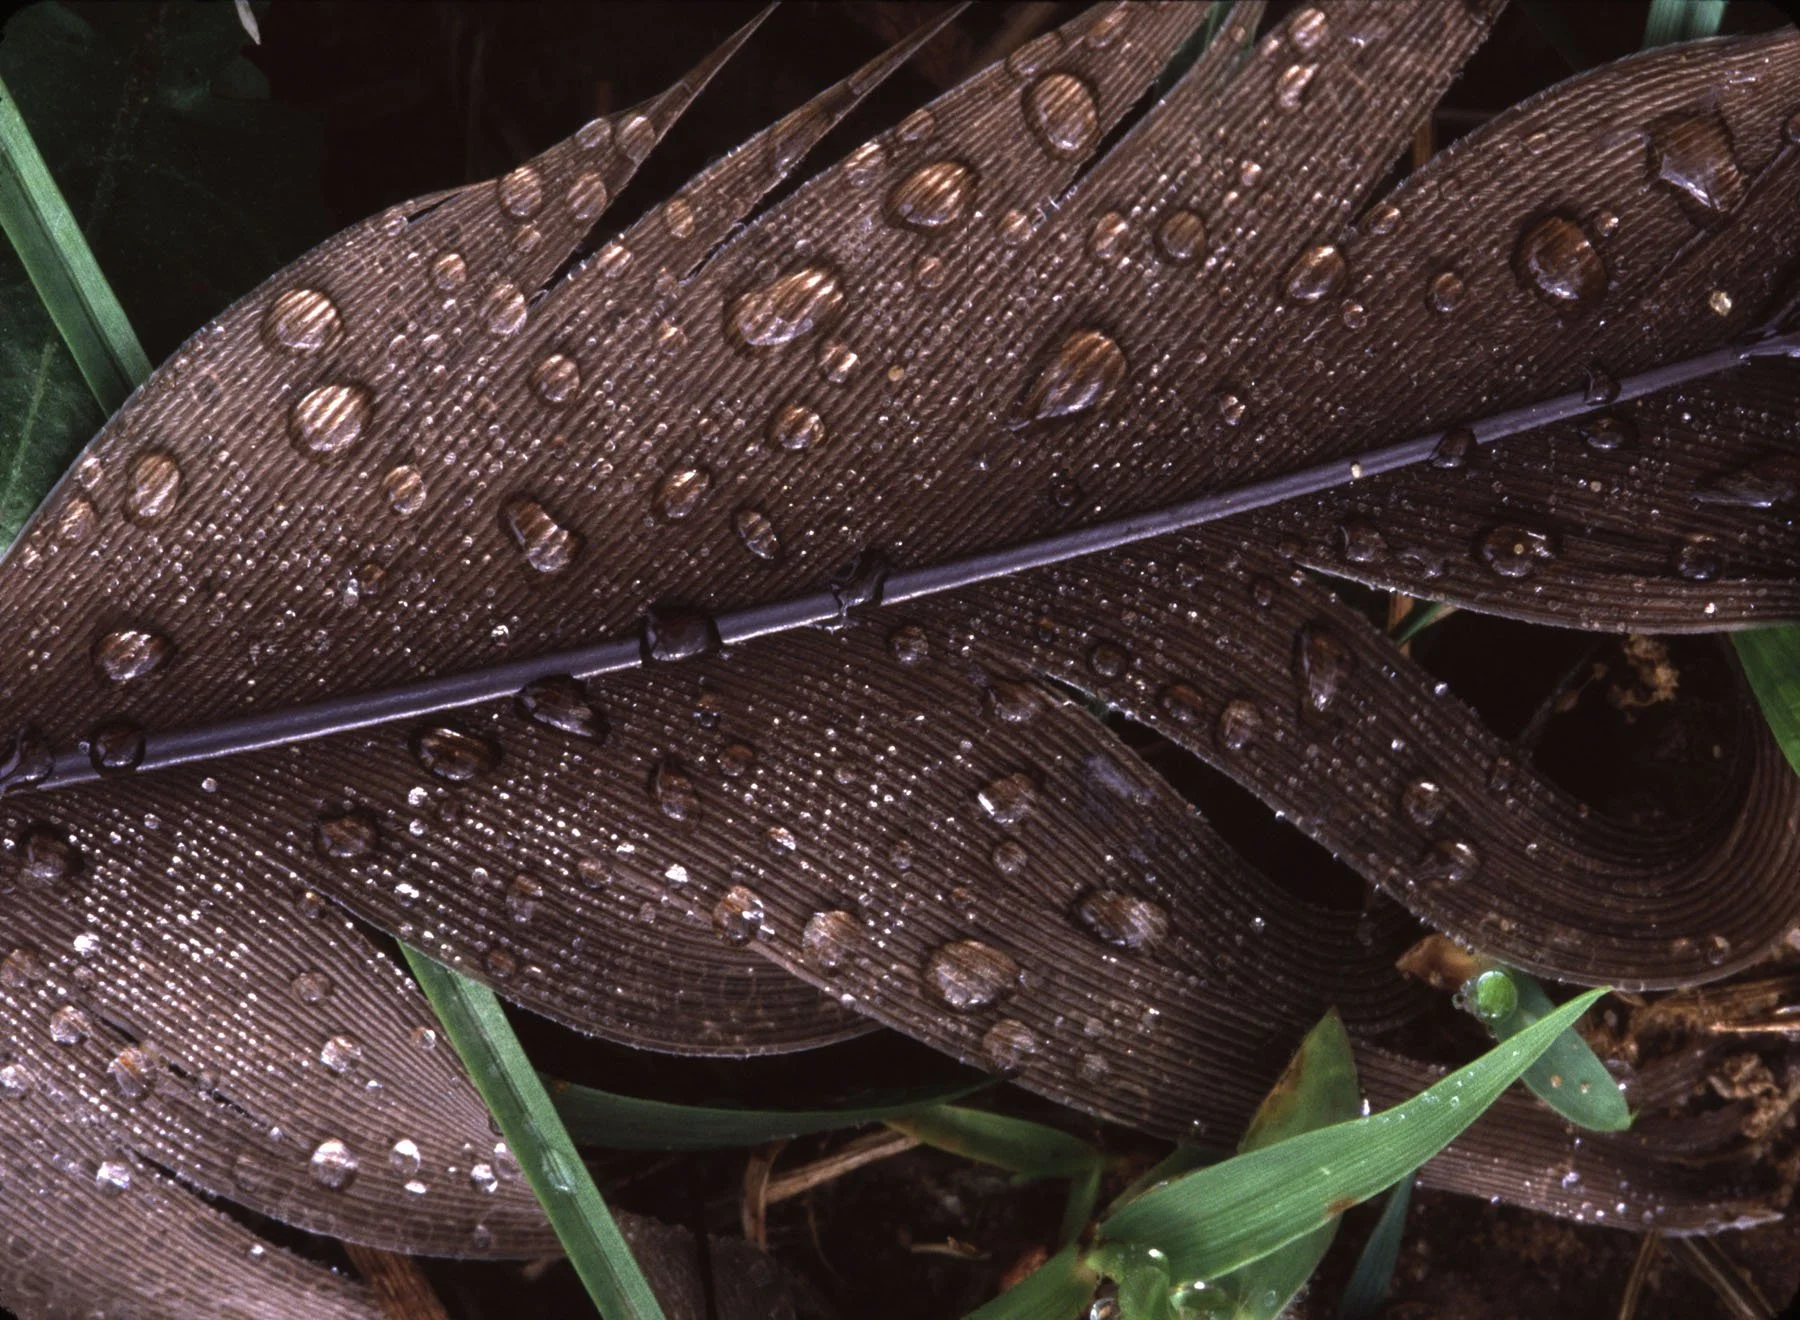
A flight feather as the scribe found it: one moulted Canada goose feather, its rachis strong and its vane complete, the raw material of the quill before any curing begins.
U.S. Fish & Wildlife Service photograph, via the Digital Public Library of America / Wikimedia Commons. Public domain.
A feather looks simple. It is not. Under your fingers it is one of the most precisely engineered structures in nature, and the scribe's whole craft depended on understanding it.
Every feather is built from keratin, the same protein in your hair and fingernails (defined in Lesson 2). The central support running the length of the feather is the shaft, and the shaft has two parts with two different jobs.
★ The lower part, the smooth hollow tube that sat inside the bird's skin, is the calamus. You met this term in Lesson 2: it is the barrel of the future pen, the part the nib will be cut from. Above the skin line, the shaft becomes solid. This solid upper section is the rachis. The rachis is the spine of the feather. It carries everything else.
★ From the rachis extend the barbs, hundreds of fine filaments angling off at roughly forty-five degrees on each side (also Lesson 2). But the barbs alone do not make a surface. Each barb carries two rows of microscopic filaments called barbules, and the barbules carry even tinier hooks, the hamuli or barbicels. The hooks of one barb catch the flanges of the next, zipping the whole structure together like a fastener. This interlocked surface, the flat working face of the feather on each side of the rachis, is the vane.
You can feel this mechanism yourself. Take any large feather and draw your fingers down the vane against the grain. The barbs separate; the surface unzips. Now smooth it back toward the tip, as a bird does with its bill when preening. It rezips. That zipper is the difference between a feather that flies and a handful of fluff.
Check in: What zips the vane together, and why does a down feather, lacking that mechanism, stay soft?
Not all feathers have it. Down feathers lack interlocking barbules entirely; they are soft because nothing zips. The feathers with the full hook-and-flange system are called pennaceous feathers, and they are the only kind that can become a quill. A scribe selecting feathers was, whether he named it or not, selecting for pennaceous structure: a strong rachis, an intact vane, and a long clean calamus.
At the base of the calamus you will find a small opening, the inferior umbilicus, where blood and nutrients once flowed to the growing feather. When the feather finished growing, this opening sealed with a horny plate. The calamus also contains a dry, spongy remnant of the feather's living pulp. None of this matters to the bird anymore. All of it matters to the scribe, because the calamus is the pen, and its hollowness, its length, and its wall thickness decide what kind of nib it can carry.
❦ In your workbook: record the architecture of a feather — calamus below, rachis above, and the zipper of the vane — in your own way — copy, sketch, or note what matters.
In your packet: Assignment II — The Feather Anatomy Study ◐ begins here. Work it now, or mark the place and take it as homework — your choice.
Which Feathers Become Quills
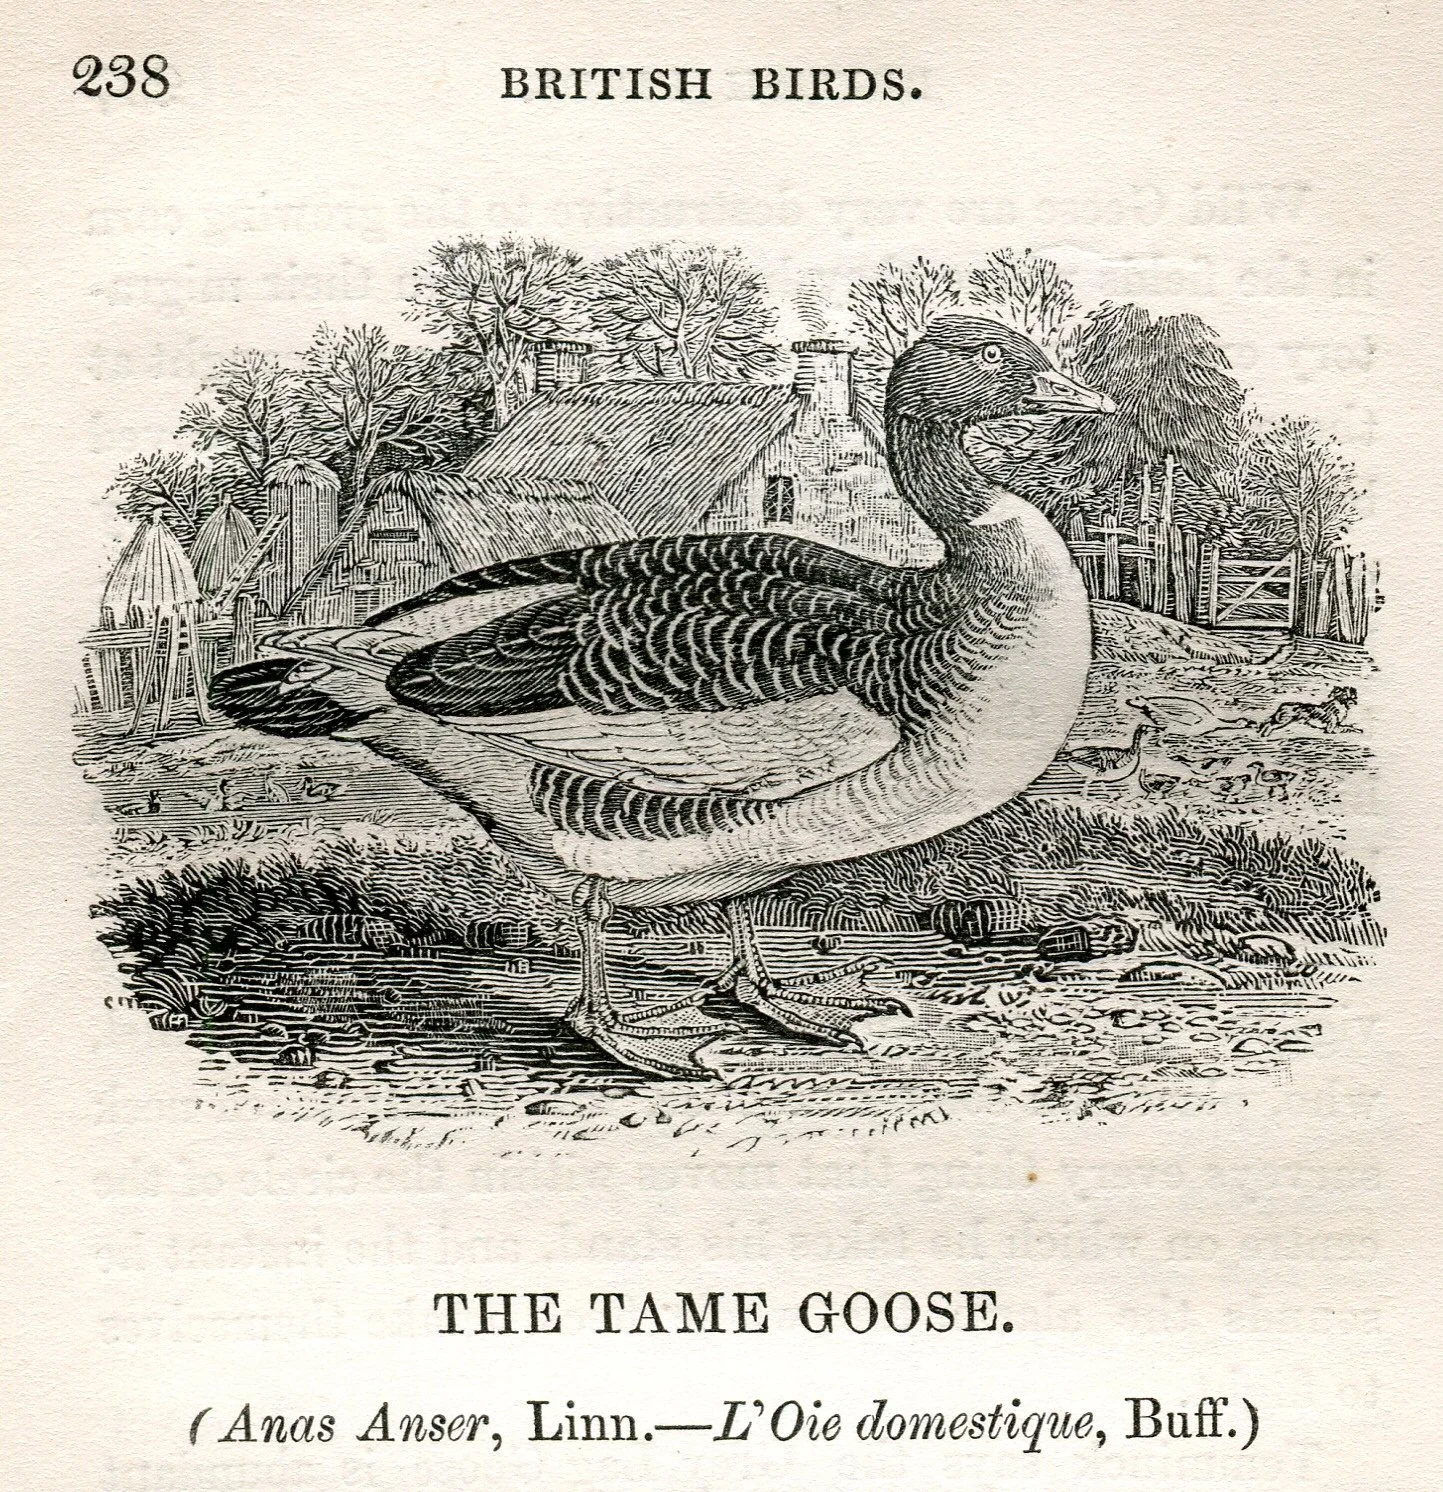
The tame goose: the gooseyard, not the wild sky, supplied most of the scriptorium's quills, and Bewick's engraving shows the bird every scribe knew.
Thomas Bewick, "The Tame Goose," History of British Birds, via Wikimedia Commons. Public domain.
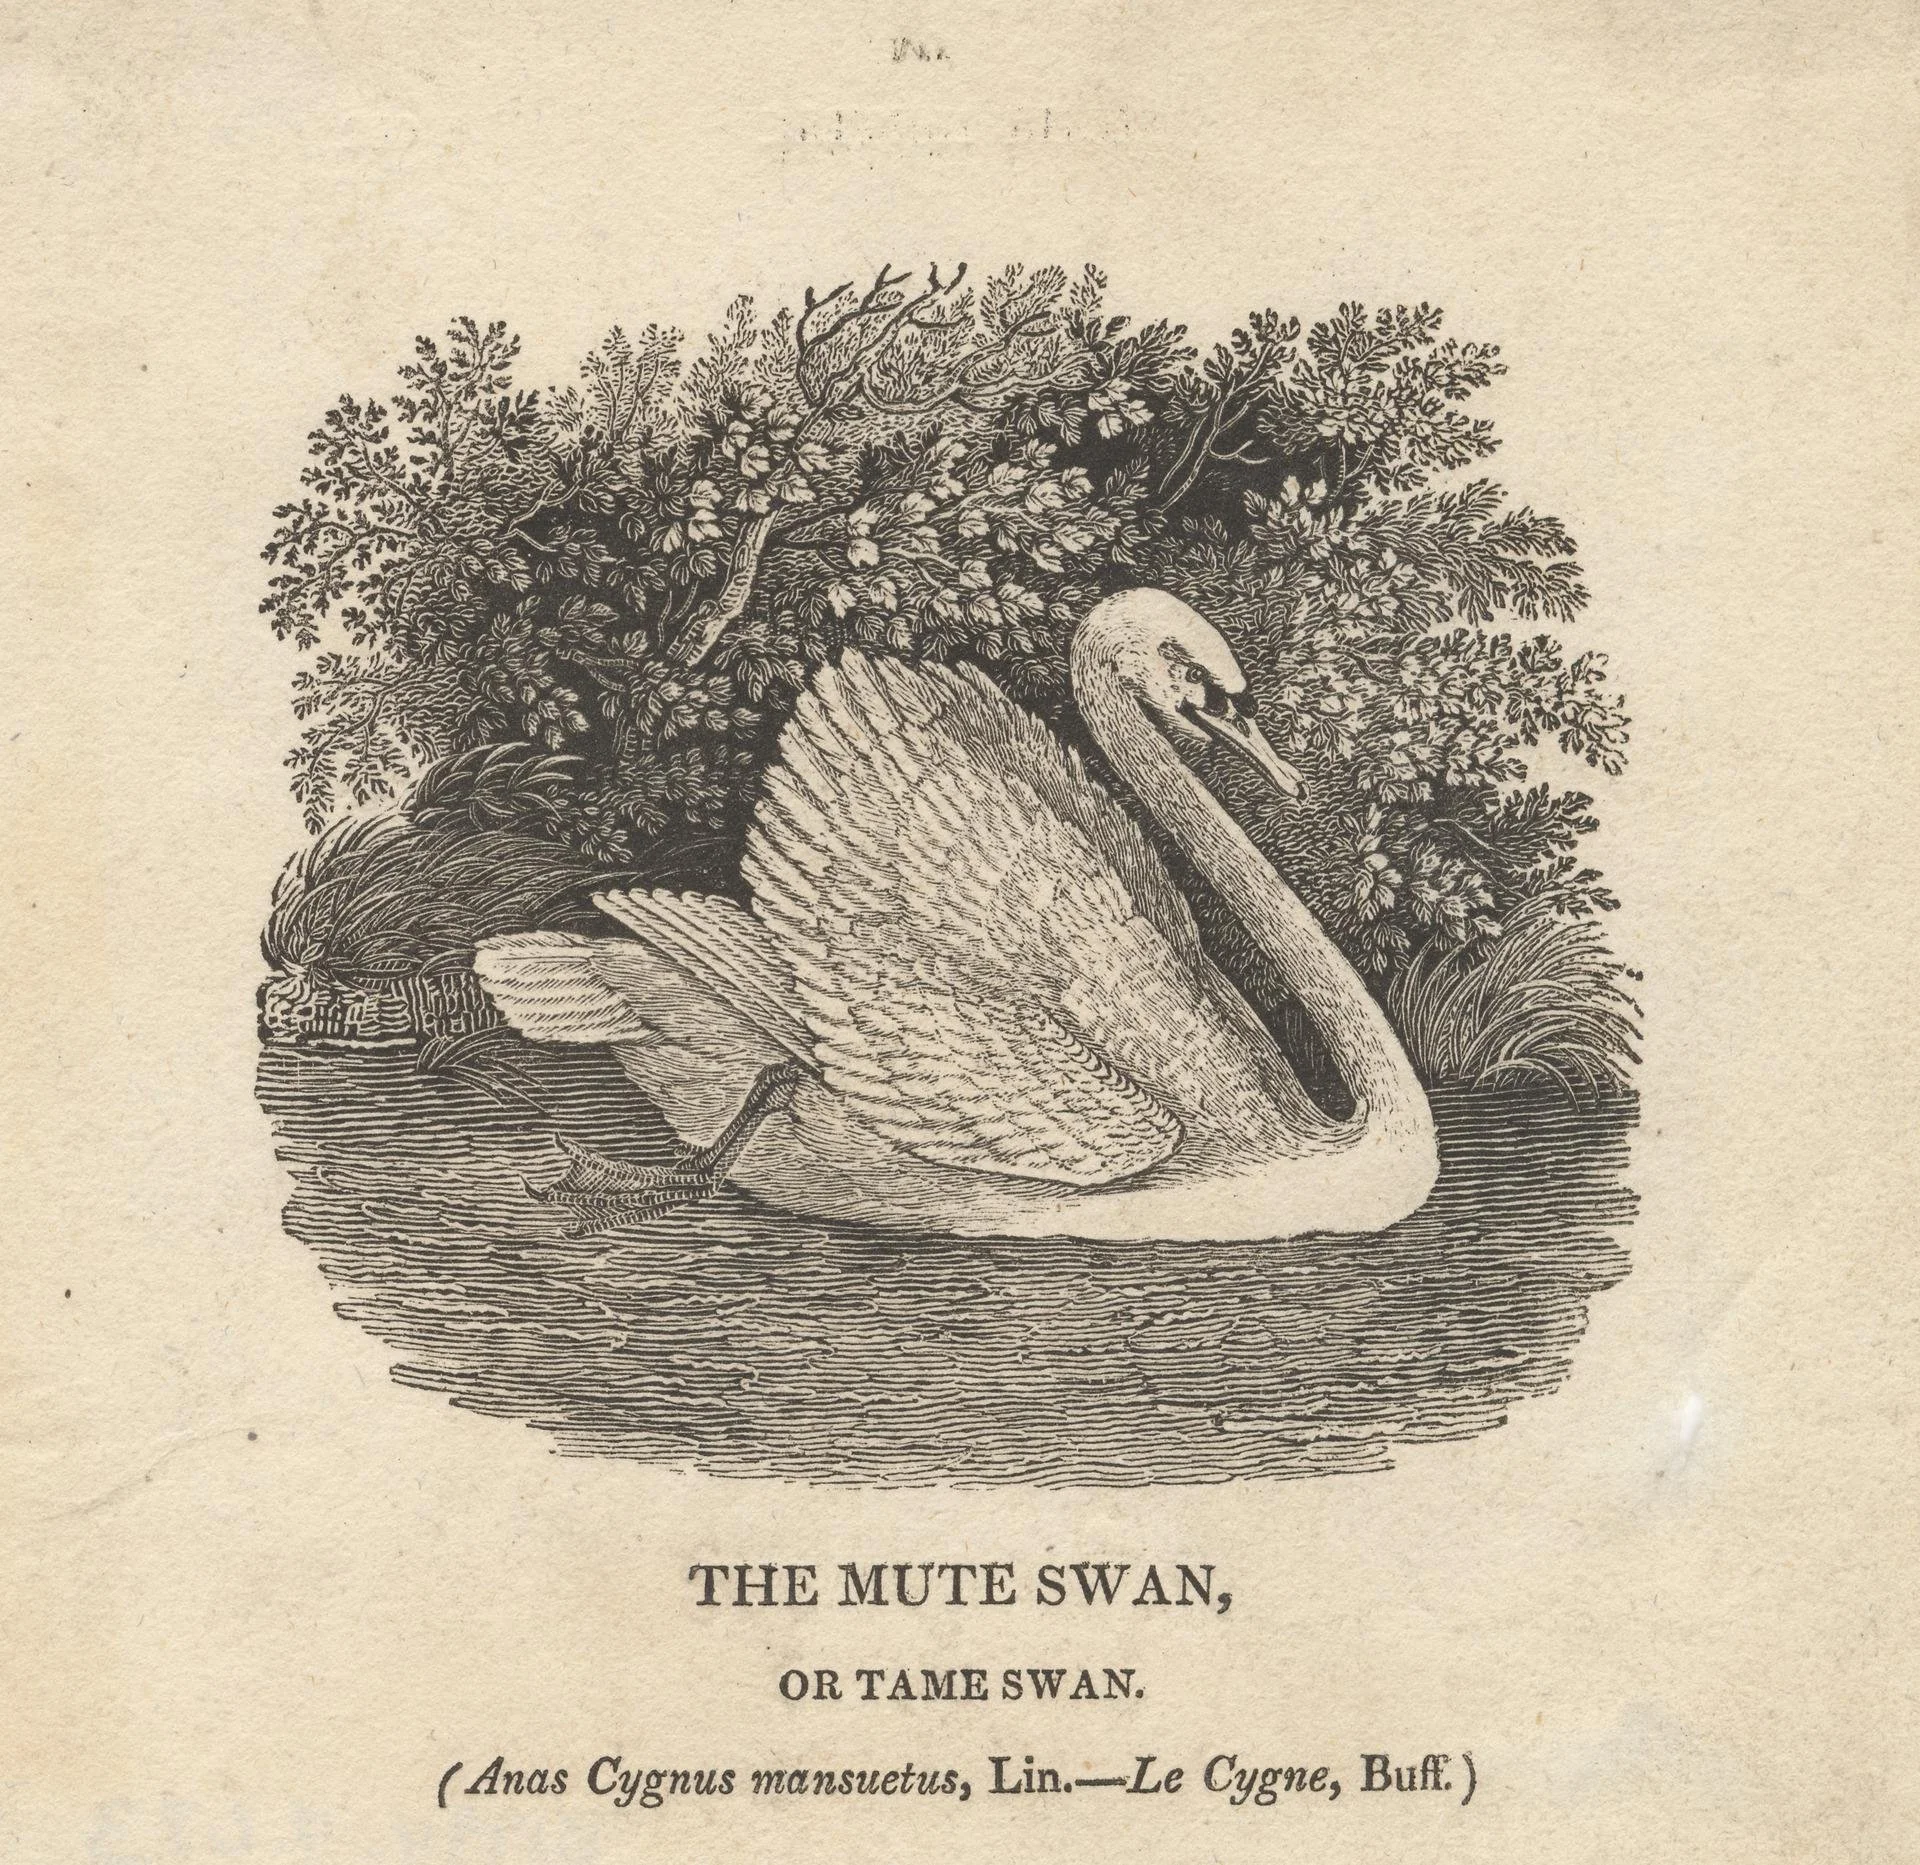
The mute swan: its feathers are the goose's, enlarged; the swan quill is broader in the barrel and more flexible in the finished pen, made for display lettering rather than ordinary lines.
Thomas Bewick, "The Mute Swan," History of British Birds, via Wikimedia Commons / Yale Center for British Art. CC0.
Not every feather, and not every bird.
The working quills of Europe came overwhelmingly from the remiges, the flight feathers of the wing. These are the longest, strongest, most heavily engineered feathers a bird grows, built to bear the stresses of flight. Their rachis is thick, their calamus long, and their keratin dense. A body feather cannot do this work. A tail feather can serve in a pinch, but the wing feathers were the standard.
★ The bird that supplied Europe was the goose. Goose feathers were the everyday quill: strong enough for regular writing, plentiful enough for every scriptorium, schoolroom, and counting house on the continent. Each bird, however, could supply only about ten to twelve good quills, the best of them the outer primary feathers. The demand was enormous. In later centuries, when the quill trade went industrial, the port of St. Petersburg was reported to be sending some twenty-seven million quills a year to Britain alone. Every one of them began as a single feather on a single wing.
★ Scarcer birds supplied specialist quills. Swan feathers, larger and stronger, were reserved for big, bold lettering, the kind of display script that needed a broad confident stroke. Crow feathers, small and fine, were prized for tiny precise work: accounting, annotations, the cramped margins where a goose quill would be a club. Depending on the writer's needs and what could be had, scribes also worked with feathers from the turkey, eagle, owl, and hawk. The principle never changed: match the feather to the line you need.
★ The best quills, the sources agree, came from the moult: the bird's annual shedding of old feathers. A feather dropped naturally in the moult is fully grown, fully hardened, and free of the blood supply that a plucked growing feather still carries. Flight feathers from the spring moult were the prized ones. Spring was the season, and the gooseyard the place.
Check in: A scribe needs quills for tiny account-book figures, and another for one grand ceremonial charter. Which bird supplies each, and what property of the feather decides it?
★ Here is where I must correct something you have probably heard. It is often said that right-handed writers must use feathers from the left wing, because the feather's natural curve bends away from the writer's line of sight, while left-handers take the right wing. There is a grain of truth in it: flight feathers are asymmetric, and the curve is real. But the claim outruns the evidence. Working quills were cut down to six or eight inches long, and at that length the curve barely matters. The sources that repeat the rule most confidently are also the ones describing full-length decorative quills, the kind nobody wrote with. Use the wing rule as a guide if you like. Do not mistake it for a law. The knife, not the wing, decided how the quill sat in the hand.
❦ In your workbook: record which feathers become quills — the remiges, the goose, the swan, the crow, and the moult — in your own way — copy, sketch, or note what matters.
Curing: The Feather Becomes a Quill
A fresh feather cannot write. This is the central fact of the lesson, and the one the romantic image leaves out.
A newly taken feather is soft. Its keratin is still full of the bird's oils, its calamus walls are flexible, and a nib cut into it would collapse, spread, and blot within pages. Before the penknife comes the curing: the slow transformation of a soft feather shaft into a hard, springy, ink-worthy barrel.
★ The old method was time. Feathers were left to air-dry for months, sometimes a full year or more. Drying drove off moisture and oils and let the keratin settle into its hardened state. A drawer of feathers aging in a scriptorium was as much a part of the furniture as the desks. The method asked nothing but patience, and patience was something a monastery had.
★ The faster method was heat. The feather barrels were buried in hot sand or hot ashes for a few minutes, sometimes seconds, until the shaft hardened and, as the practitioners described it, went clear or transparent. Thomas Jefferson, who wrote voluminously and cared about his tools, is said to have bred special geese to keep himself in quills; the accounts of his practice describe the hot-sand method: feathers buried in hot, dry sand to harden the points before the penknife came out. Other recipes called for hardening in acids or alum (those stay history in this course — we practise air and hot sand). The principle in every case was the same: drive out the softness, set the keratin, and leave a barrel that would hold an edge.
Curing did two things at once. It hardened the shaft so the nib would keep its shape under the pressure of writing, and it removed the natural oils that would otherwise repel ink or let it slide uncontrollably down the barrel. An uncured quill and a cured one are different instruments. The first is a feather. The second is a pen.
Check in: Name the two things curing accomplishes at once — and what happens to a nib cut into an uncured feather.
A sealed note from Professor Nocturne, opened mid-lesson.
Mark it here and hold this distinction, because students lose it. The feather is the bird's work. The quill is the scribe's. Between them stands the curing: months in a drawer, or minutes in hot sand, and a judgment about when the barrel is ready that no recipe can fully write down. Every craft has a step like this, a transformation you cannot see but must respect. In ours, it is the first one.
— Q.N.
❦ In your workbook: record the curing — time in the drawer, minutes in the sand, and the two things it does at once — in your own way — copy, sketch, or note what matters.
In your packet: Assignment III — The Curing Observation ◐ begins here. Work it now, or mark the place and take it as homework — your choice.
Selecting and Storing
A scribe choosing quills looked for what the work required. Length of calamus first: the barrel must be long enough to cut and recut, because a quill was sharpened constantly and a working scribe could wear one out in about a week. Thickness of wall second: too thin and the nib flexes and sprays; too thick and it will not slit cleanly. Straightness third, though as we have seen, the knife forgives much. And the vane, paradoxically, mattered least of all.
★ For the barbs were stripped. This surprises everyone, so I will say it plainly: the historical working quill was a bare barrel. Manuscript illuminations show scribes holding stripped shafts, sometimes with a short stub of vane left near the top, sometimes with none at all. The barbs served no purpose in writing; they caught on sleeves, they shed, they got in the way. The fully plumed quill, gorgeous on a greeting card, is largely a Victorian invention, a romantic idea of what a scribe's pen should look like. The real thing was plainer and better.
Stripping was done with the penknife or the fingers, and the bare quill was stored upright, points up, in a quill holder or a simple pot, away from damp. Damp was the enemy of a cured quill: it softened the keratin the curing had hardened, and a softened quill wrote like a brush when a pen was wanted. A scribe's quills were his reserve of future writing, and he kept them as carefully as a soldier keeps powder dry.
Check in: The greeting-card quill is fully plumed. What did the scribe's working quill actually look like — and what single storage enemy could undo the curing?
❦ In your workbook: record the scribe's choosing — length, wall, straightness, and the stripped barrel — in your own way — copy, sketch, or note what matters.
In your packet: Assignment IV — The Scribe's Selection ✎ begins here. Work it now, or mark the place and take it as homework — your choice.
What the Quill Remembers
There is a reason this lesson comes before the cutting. In the next lesson you will take up the penknife, and the knife will ask things of you: a steady hand, a clean angle, a slit neither too deep nor too shallow. Everything the knife needs to know is written in the feather already. The calamus tells you where the nib can be. The curing tells you whether the barrel will hold. The bird, the moult, and the sand tell you how the quill came to be ready.
The quill remembers all of it. Your job, when you cut, is to listen.
❦ In your workbook: record what the quill remembers — the bird, the moult, and the sand — in your own way — copy, sketch, or note what matters.
Guided Practice
Assignment II — The Feather Anatomy Study ◐ ★
Objective: Identify every structural part of a real feather and demonstrate the vane's zipper mechanism.
Instructions:
- Examine your feather with the magnifying glass. Locate the calamus (the smooth hollow base), the rachis (the solid upper shaft), and the barbs angling off each side. Find the small opening at the very base of the calamus, the inferior umbilicus.
- Draw a labeled diagram in your workbook naming each part: calamus, rachis, barbs, vane, and the umbilicus. Measure the calamus length and the total shaft length with your ruler and record both.
- Perform the zipper test: draw your fingers down the vane against the grain to unzip the barbs, then smooth them back toward the tip to rezip, as a preening bird does. Describe in two or three sentences what you felt and what it tells you about why only pennaceous feathers can become quills.
- Write one paragraph: if you were a scribe choosing quills, what would you look for in the calamus, and why?
To submit: Your labeled diagram with measurements and your two written paragraphs.
Your keepsake: this labeled anatomy diagram is the reference sheet for your first cutting in Lesson 10: the calamus you measured here is the barrel your penknife will meet. Keep it at the front of your Unit III work.
❦ Workbook path: working on paper instead? Draw the labeled diagram from the lesson's account — calamus, rachis, barbs, vane, and the umbilicus — and write the zipper as the lesson describes it: how the barbules' hooks unzip against the grain and rezip toward the tip, and why that mechanism decides which feathers can become quills. Then write the scribe's paragraph exactly as the assignment asks: what you would look for in the calamus, and why.
Materials
Required (Level One — household items)
- One large feather: a craft-store feather, a feather found outdoors, or any large bird feather. Goose or turkey craft feathers are ideal and cost almost nothing. This is your study specimen; you will not be cutting it.
- A magnifying glass or phone macro lens: for examining barbs and the calamus opening. The barbule hooks are too small to see, but the barbs, the rachis, and the hollow calamus are all visible.
- Paper and pencil: for the labeled anatomy diagram and the selection exercise.
- A ruler: for measuring the calamus and the full shaft.
Suggested (Level Two — historically closer)
- Several real goose or turkey quill feathers: sold by craft and calligraphy suppliers as quill feathers. Having three or four lets you compare wall thickness, calamus length, and curvature.
- Fine dry sand and a heat-safe pan: for the supervised hot-sand curing demonstration. An adult must handle the heated sand; it causes burns. Work outdoors or in a ventilated area.
- A penknife or craft knife (adult use only): an adult may use it to strip a spare feather's barbs, exactly as the lesson describes; students observe only.
Safety: hot sand causes serious burns. The Level Two curing demonstration must be done by an adult, with heat-safe gloves, in a ventilated area. Blades are adult tools in this lesson; students observe the stripping and cutting. The core lesson (anatomy study, the zipper test, the selection exercise) needs only a feather and a magnifier.
No purchased kits are required. The core lesson is fully achievable with a single craft feather and a magnifying glass.
Reflection Questions
Answer the following questions in your workbook.
- Why can only pennaceous feathers become quills? What does the zipper mechanism have to do with it?
- A fresh feather is soft and full of oils. Why does each of those two facts disqualify it as a pen?
- What is the honest version of the left-wing rule? What is true in it, and what did the penknife make irrelevant?
- Why were the barbs stripped from working quills, and what does that tell you about the difference between a tool and a decoration?
- A monastery and a busy town scribe both need quills. Why might they choose different curing methods?
- You have studied the feather as the bird made it. What has to change before it becomes the scribe's quill, and who does that changing?
Workbook Checklist — Lesson 9
In my workbook I have:
- ☐ named the feather's parts — calamus, rachis, barbs, barbules, and vane — and explained the zipper that holds the vane together
- ☐ explained why only pennaceous feathers can become quills
- ☐ completed the feather anatomy study: labeled diagram, calamus and shaft measurements, and the zipper test (Guided Practice)
- ☐ told the birds apart by their work: goose for everyday writing, swan for display, crow for fine lines
- ☐ described both curing methods, by time and by heat, and the two things curing accomplishes at once
- ☐ compared the cured and uncured shaft and said why an uncured feather fails as a pen (Assignment III)
- ☐ matched feathers to the three commissions and corrected the left-wing rule honestly (Assignment IV)
- ☐ explained why working quills were stripped, and how cured quills were stored away from damp
☐ Lesson completed Date: ___ Signature: ___
Professor's Review
A sealed note from Professor Nocturne, to be opened at the lesson's end.
You now know the feather as anatomy: calamus below, rachis above, barbs and barbules zipped into the vane. You know the birds: the goose for everyday work, the swan for display, the crow for fine lines, and the moult as the season of gathering. You know the curing: time or heat, patience or sand, and the judgment in between.
And you know the three corrections. The wing rule is a guide, not a law. The plumed quill is decoration, not history. And no feather writes until it has been cured.
In the next lesson, the penknife. Bring a steady hand and everything you learned here.
— Q.N.
PROFESSOR QUILLBERRY NOCTURNE
Scrollwork Library
Master Scribe & Illuminator
Cross-Class Connections

Runes · Lesson 18 — The Celtic Manuscript Tradition (goose and swan quills; the wedge-shaped ascenders those feathers left all over Insular script)
Webblethorn's Insular scribes wrote with quill pens from goose or swan — the very birds on this lesson's shelf — and every wedge-shaped ascender on their pages is this lesson's barrel at work: the stroke begins with the nib's full width and lifts away to a point. The anatomy you studied here is fossilized in her letterforms.
Runes · Lesson 17 — The Need for Speed (uncial written with the reed calamus; the "quills in ancient Rome" misconception, corrected)
Her Rome corrects the same romantic error this lesson corrects, from the other side: the great uncial book hand was written with the reed calamus, not the feather, and the quill arrives later than most people picture it. Read her correction beside this lesson's wing rule. Both are the record set straight.
Runes · Lesson 18 — The Celtic Manuscript Tradition
My Insular scribes wrote with quill pens from goose or swan, the very birds on this lesson's shelf, and every wedge-shaped ascender on their pages is this lesson's barrel at work. The anatomy you studied here is fossilized in my letterforms. Come and read the fossils.
Runes · Lesson 17 — The Need for Speed
My Rome corrects the same romantic error this lesson corrects, from the other side: the great uncial book hand was written with the reed calamus, not the feather, and the quill arrives later than most people picture it. Read my correction beside this lesson's wing rule. Both are the record set straight, and I invite you to check them against each other.
PROFESSOR THISTLELOOM WEBBLETHORN
Runes & Ancient Writing

Creative Arts · Unit I, Lesson 6 — The Materials Library & First Tool-Making (Timberclank's workshop names this lesson outright: he supplies the materials side of the pens Nocturne teaches)
Professor Timberclank's scholars choose and prepare the writing stock itself — reed, feather, and shelf — while this library teaches the pens and their curing. His lesson sends his scholars to this one by name. A feather's second life, from bird to barrel, is staged between his bench and this desk.
Creative Arts · Unit I, Lesson 6 — The Materials Library & First Tool-Making
My scholars choose and prepare the writing stock itself, reed, feather, and shelf, while Professor Nocturne's library teaches the pens and their curing, and my lesson sends my scholars to his by name. A feather's second life, from bird to barrel, is staged between my bench and his desk. Come and stage your part of it.
PROFESSOR COGBRANCH TIMBERCLANK
Creative Arts Workshop
Further Reading & Sources
These are real places to continue. Each one rewards a visit.
- "Quill" — Wikipedia. The most complete single overview of quill history: birds, curing, cutting, and the trade. A solid first stop. en.wikipedia.org/wiki/Quill
- "Pennaceous Feather" — Wikipedia. The feather anatomy behind the lesson: calamus, rachis, barbs, barbules, and the zipper mechanism, with clear diagrams. en.wikipedia.org/wiki/Pennaceous_feather
- Bird Feather Anatomy — PetCoach. A veterinarian-reviewed walkthrough of feather structure, from calamus to hooklets, written for clarity. mobile.petcoach.co/amp/article/bird-feather-types-anatomy-growth-color-and-molting
- "Learn How to Write with a Quill Pen" — Washington's Headquarters. Includes the Colonial Williamsburg account of quill preparation: goose feathers, the left-wing claim, and burial in hot sand. hvparent.com/write-with-a-quill-pen
- Project Beak: Feather Parts (archived). A classroom-friendly feather anatomy page, preserved by the Internet Archive, with the unzip-and-rezip demonstration. web.archive.org/web/20190304072800/http://projectbeak.org/adaptations/feathers_parts.htm
Browse the Scrollwork shelf in the school Library for readable editions of these works.
Submit your work for this lesson using the form below.
CONTINUE IN THE SCROLLWORK LIBRARY
← Previous · Lesson 8: Ink Flow & Preservation Next · Lesson 10: Cutting the Quill →
Unit III — Quills & Pencraft Scrollwork Library — All 26 Lessons
The rest of Unit III: Lesson 10 · Cutting the Quill · Lesson 11 · Broad Nibs & Pointed Nibs