

Creative Arts
Unit V, Lesson 19Clay I: Pinch, Coil & Slab
Professor Cogbranch Timberclank
Master Artisan, Head of House Occidens
The Creative Arts Workshop • School of Evershade
Professor's Introduction

Aprons on, scholars, and sleeves pushed up. Today the bench gives you the oldest shaped material in the world.
Clay is earth that remembers. Wet, it takes any form a hand suggests. Dry, it holds the form. Fired, it holds the form for longer than the hand, the house, or the civilization that made it. People were shaping clay and hardening it in fire before they were farming, before they had metal, before they had writing, and when writing did arrive, among the first things it was written on was this: a tablet of prepared clay, pressed with a reed. Professor Webblethorn's scholars meet that tablet in Runes. This lesson is where the clay under it comes from, and how it is prepared.
You will learn the three hand-building methods that have carried every pot from the first vessels to this morning: pinch, coil, and slab. No wheel, no mold, no machinery. A lump of clay, two hands, and methods so well fitted to the material that twenty thousand years have not improved them, only repeated them.
We build for the garden today: a flower pot, plant markers, and name tiles, the workshop's steady clay work. Begin with the practice pieces. Clay forgives a beginner almost everything except impatience, and it keeps its own record of both.
PROFESSOR COGBRANCH TIMBERCLANK
Creative Arts Workshop
Master Artisan, Head of House Occidens
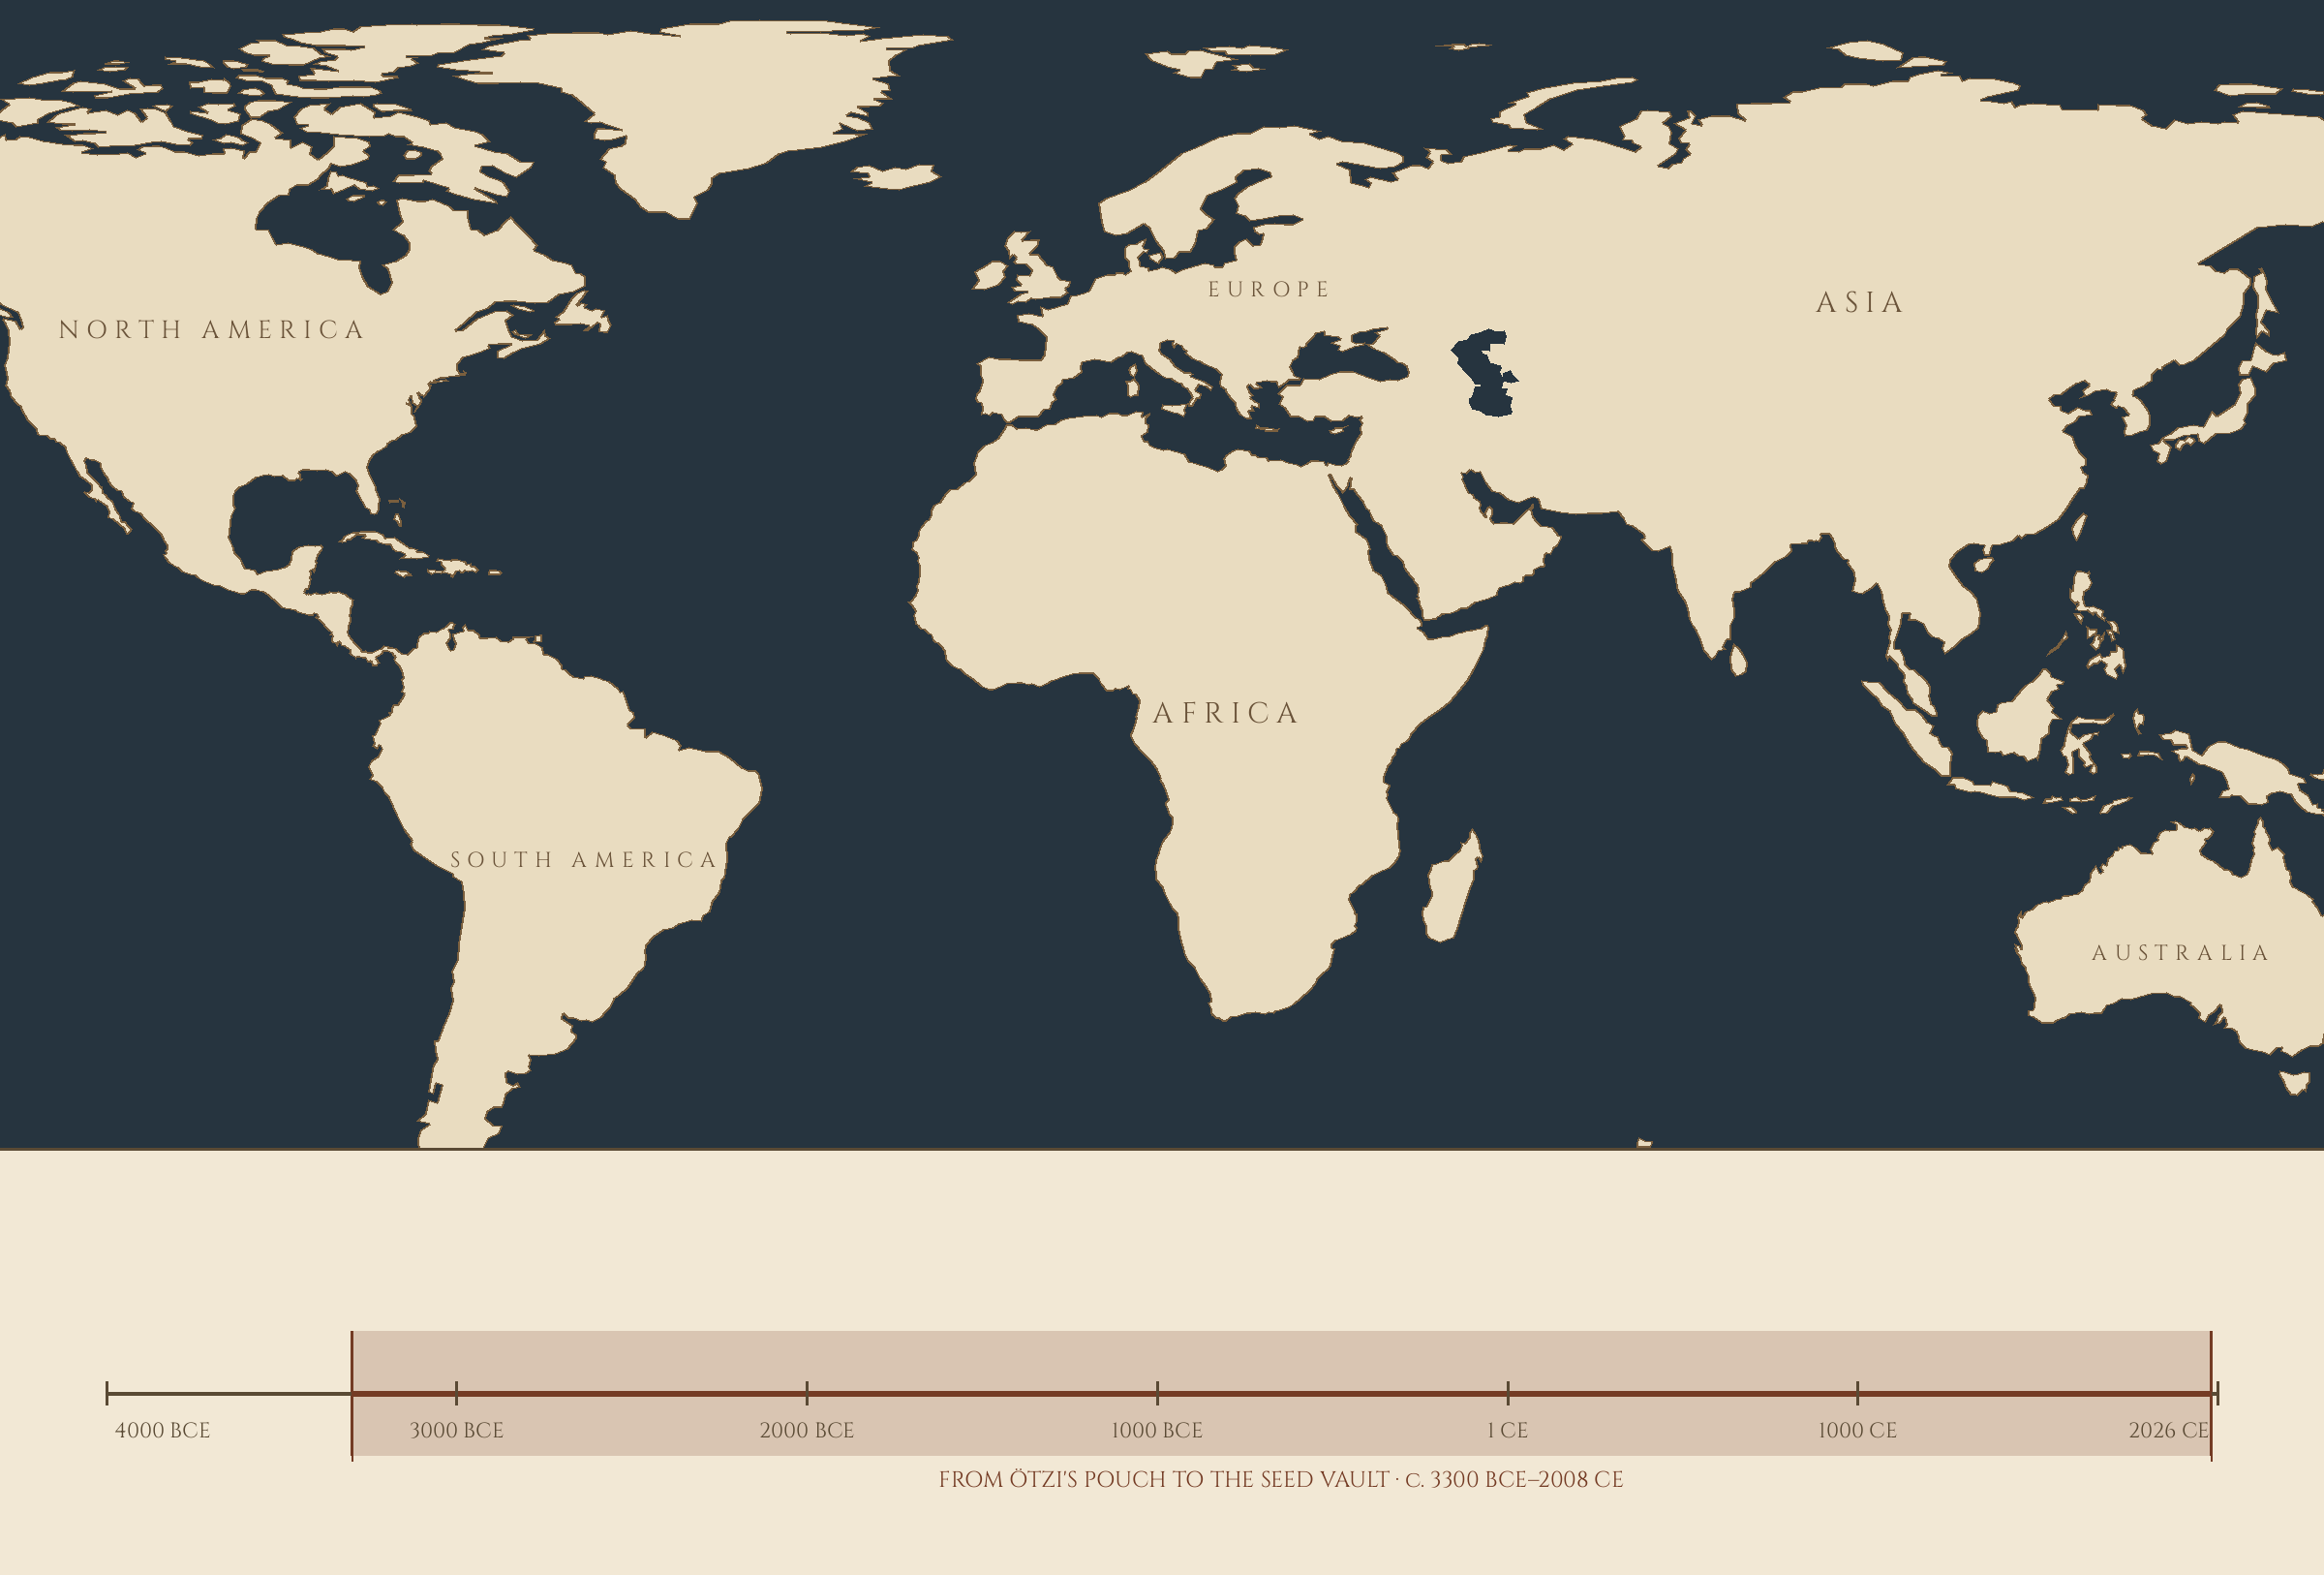
Lesson Objectives
By the end of this lesson, students should be able to:
- Tell the story of the earliest ceramics: the fired figures of Dolní Věstonice and the first pottery vessels, including the Xianrendong and Jōmon finds.
- Explain what clay is, what wedging does, and why trapped water and uneven thickness are a pot's two enemies.
- Prepare clay by wedging it to an even consistency, free of air pockets.
- Build a pinch pot with walls of even thickness and a settled base.
- Roll, join, and smooth a coil so the join disappears into the wall.
- Roll a slab to even thickness with guides, and cut it true for markers and tiles.
- State the dust rule for dry clay and keep it.
Your Assignment Packet
This lesson's assignments live in its packet: the Lexicon Handout (every term, course terms marked ◆), the Assignment Manual, and the Reflection Questions. Download the packet before you begin and keep it beside you as you read — work from it as each subject is taught, or take the assignments as homework afterward.
The Oldest Fired Things
The oldest ceramic objects in the world are not pots. They are figures. At Dolní Věstonice, in what is now the Czech Republic, people of the Gravettian culture shaped small figures of animals and of a woman from the local loess earth, mixed with a little powdered charred bone, and fired them at temperatures a modern kiln would call modest, somewhere between 500 and 800 degrees. The famous Venus of Dolní Věstonice is dated to between about 31,000 and 27,000 years ago. She is the oldest known ceramic article, and she carries a detail a scholar should sit with: a child's fingerprint, found pressed into her surface by a scan in 2004. The first fired clay we have was handled, in part, by a child. This bench is older than anyone's pride about it.
Vessels came later, and later than most people expect. The earliest pottery vessels yet found come from Xianrendong Cave in China, where sherds have been dated to about 20,000 to 19,000 years ago, made by mobile hunter-gatherers some ten thousand years before farming reached them. Some of the sherds are scorched, which suggests the pots were used for cooking. In Japan, the Jōmon people's pottery followed by about 14,500 BCE at the latest reckoning, decorated by pressing cords into the wet clay, which is what Jōmon means: cord-marked. Pottery, scholars, was not invented by settled farmers with grain to store. It was invented by people on the move who wanted a pot that could sit in a fire, and it spread because a clay vessel does work no basket or skin can do.
Hold those dates against the methods. The Jōmon potter coiled and pressed. The Egyptian potter pinched and coiled. The Mesopotamian scribe rolled a slab and cut a tablet. Your hands today are doing the same work with the same three movements, and the clay cannot tell the difference between your century and theirs. Almost nothing else in this workshop can say that.
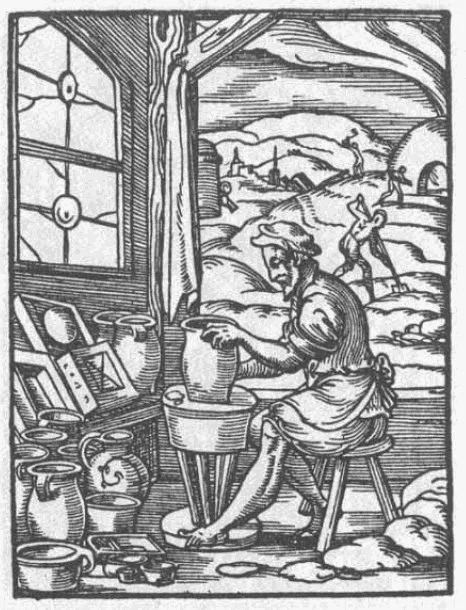
A potter in his workshop forming ware, vessels at every stage around him, 1568 woodcut.
Woodcut from the Ständebuch (Book of Trades), Frankfurt, 1568. Public domain, via Wikimedia Commons.
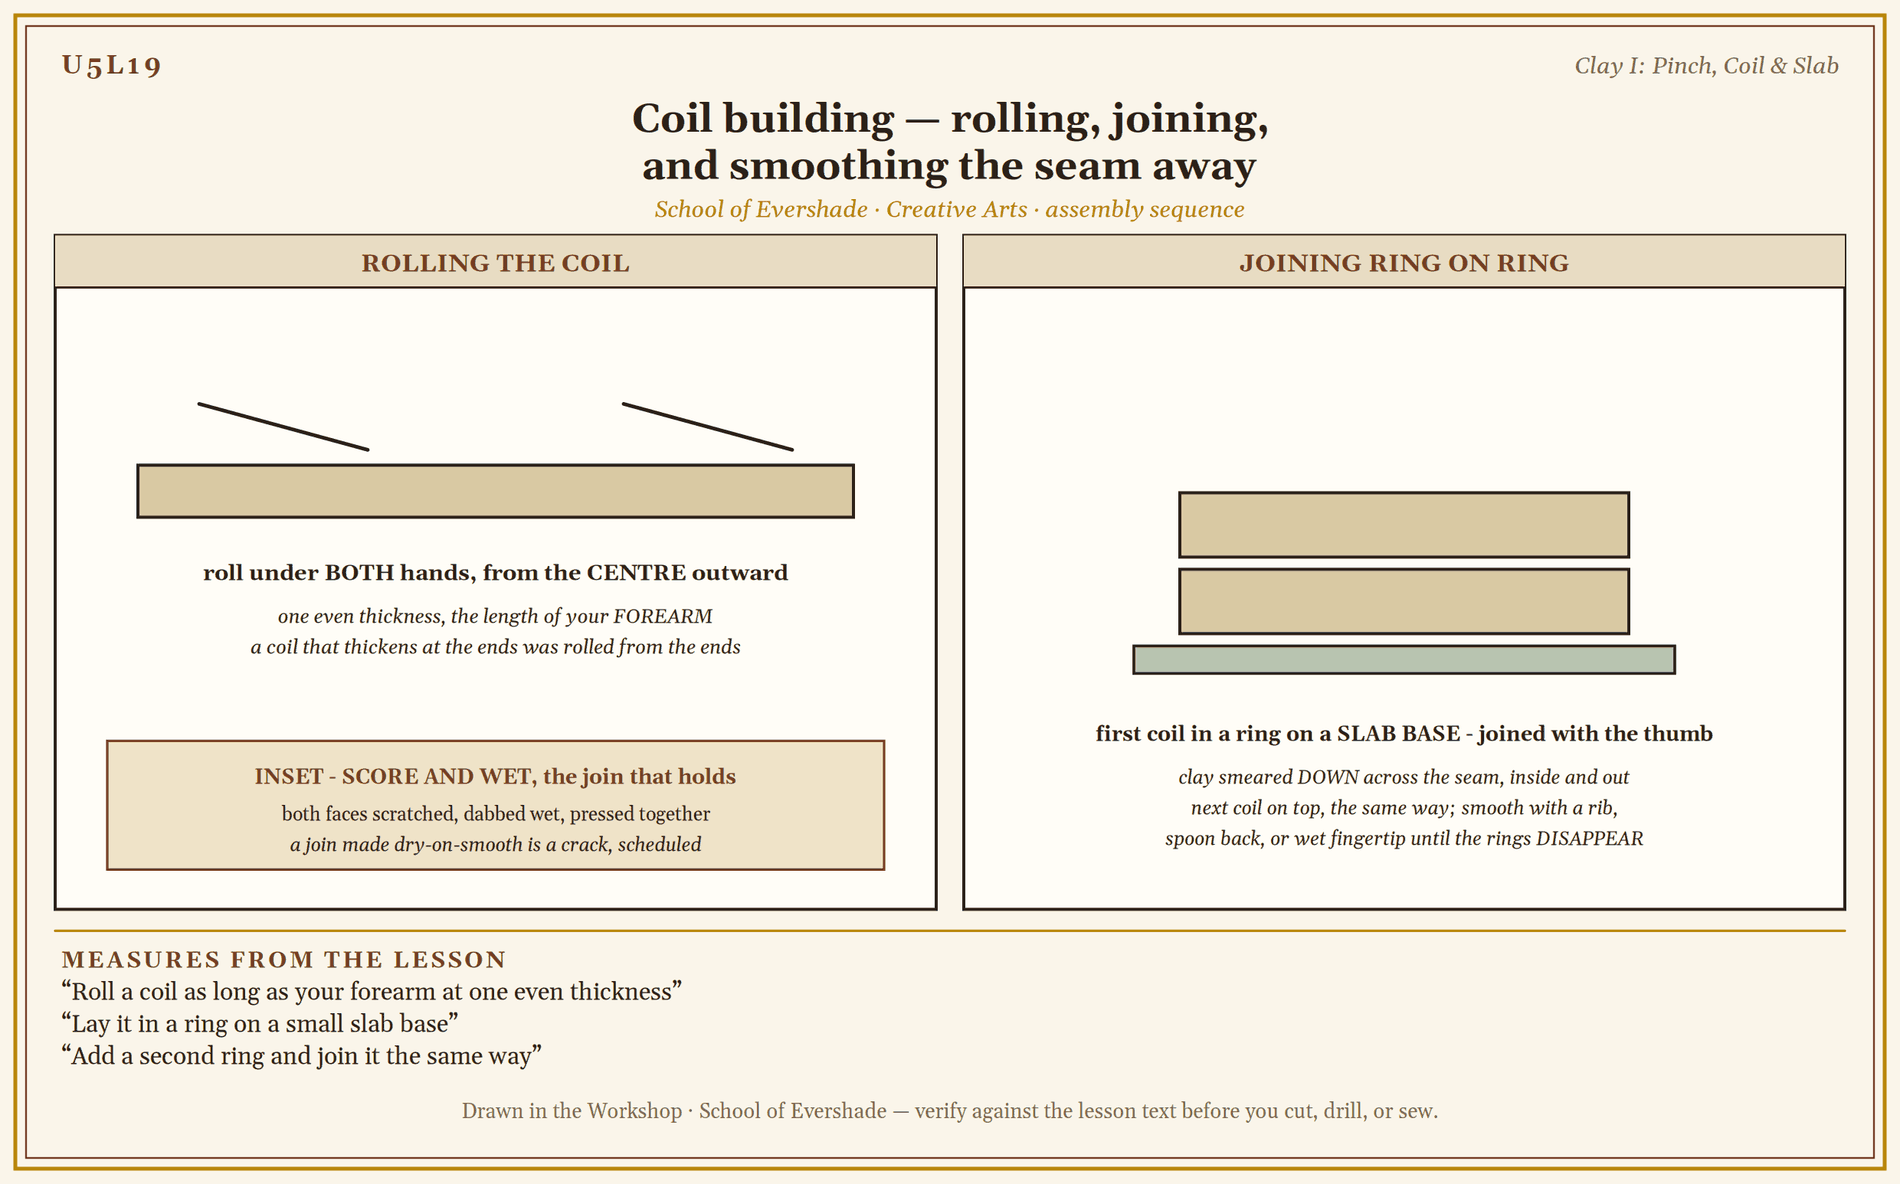
Coil building — rolling, joining, and smoothing the seam away
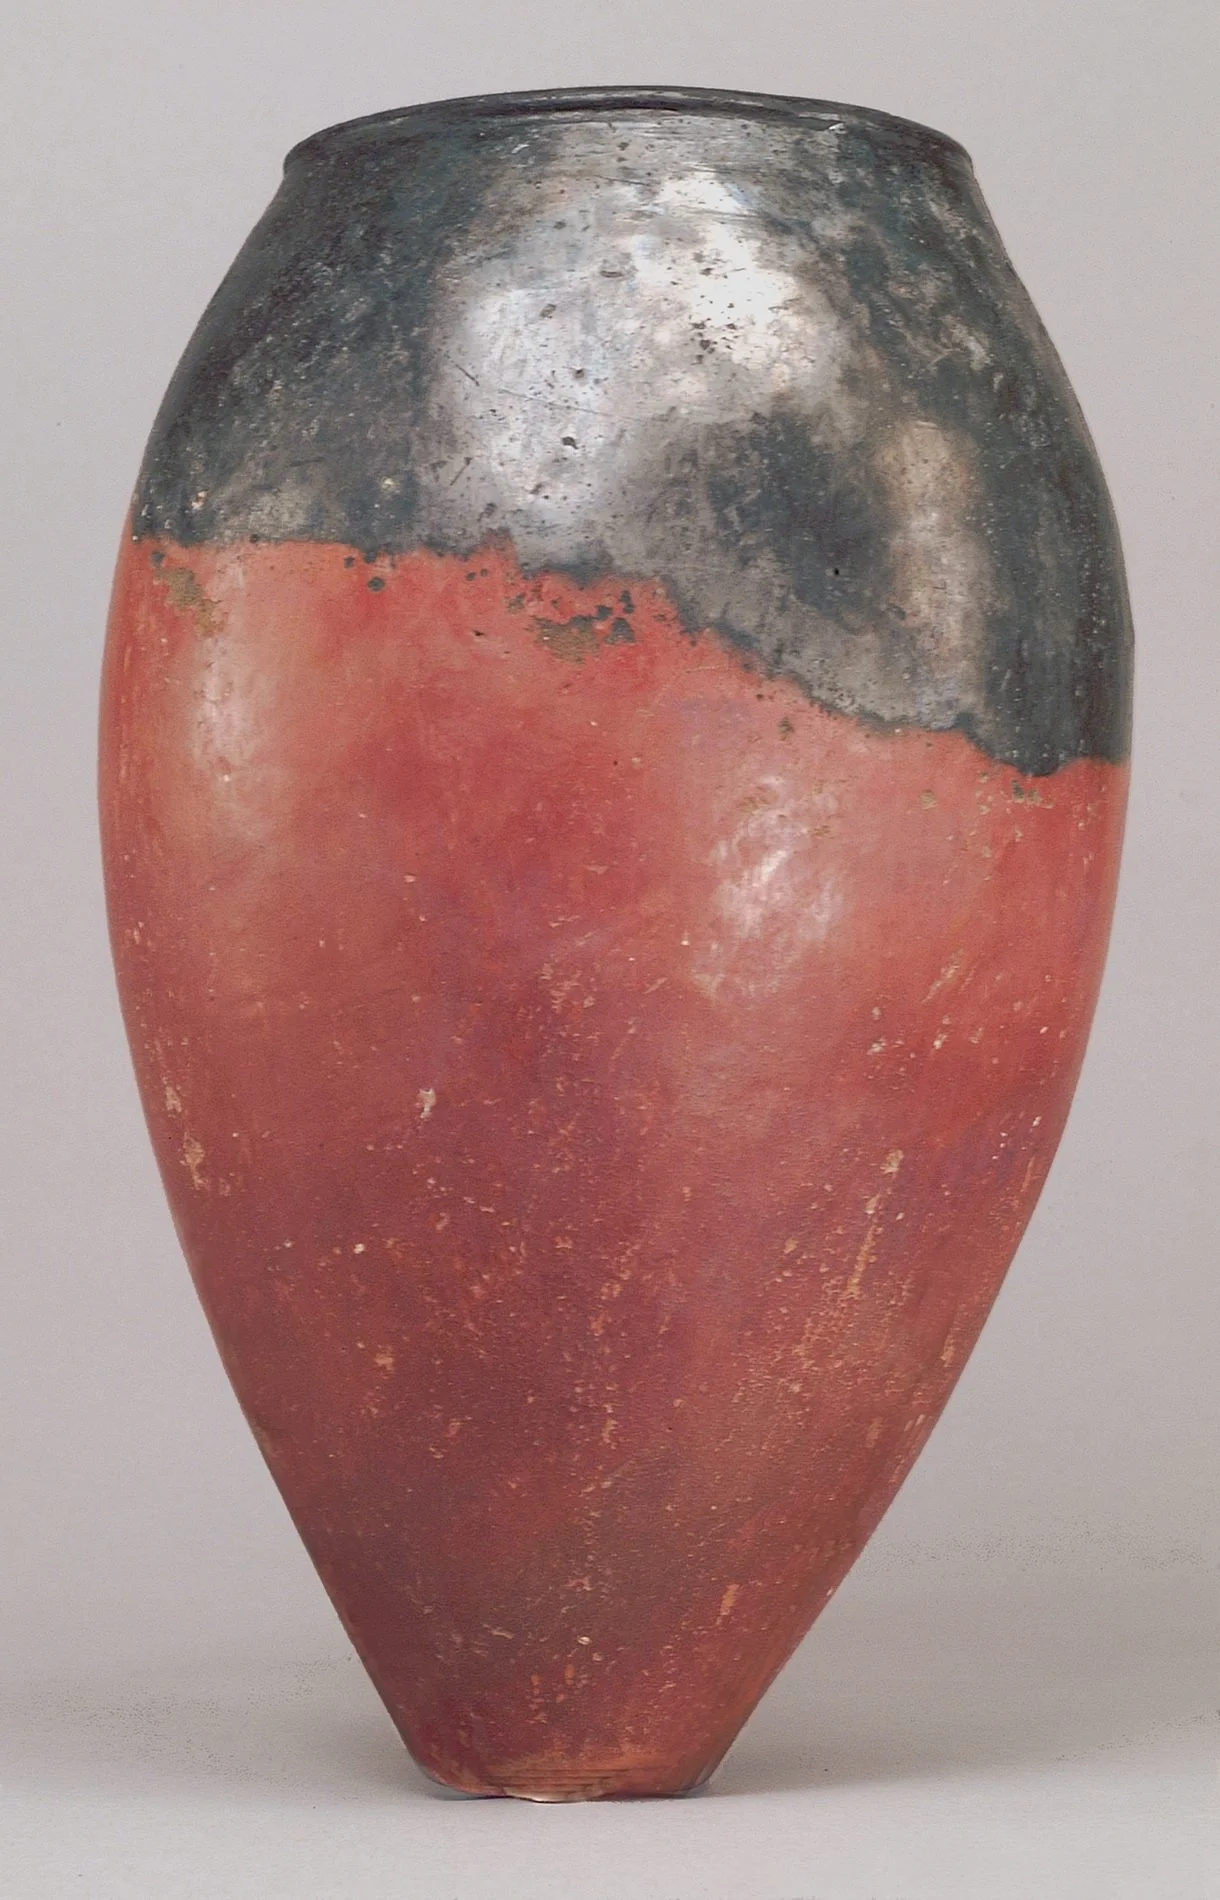
A black-topped red ware jar, Predynastic Egypt (Naqada II, ca. 3650–3300 BCE) — polished red body, blackened rim, made entirely by hand.
The Metropolitan Museum of Art (Object 36.1.4), Open Access (CC0).
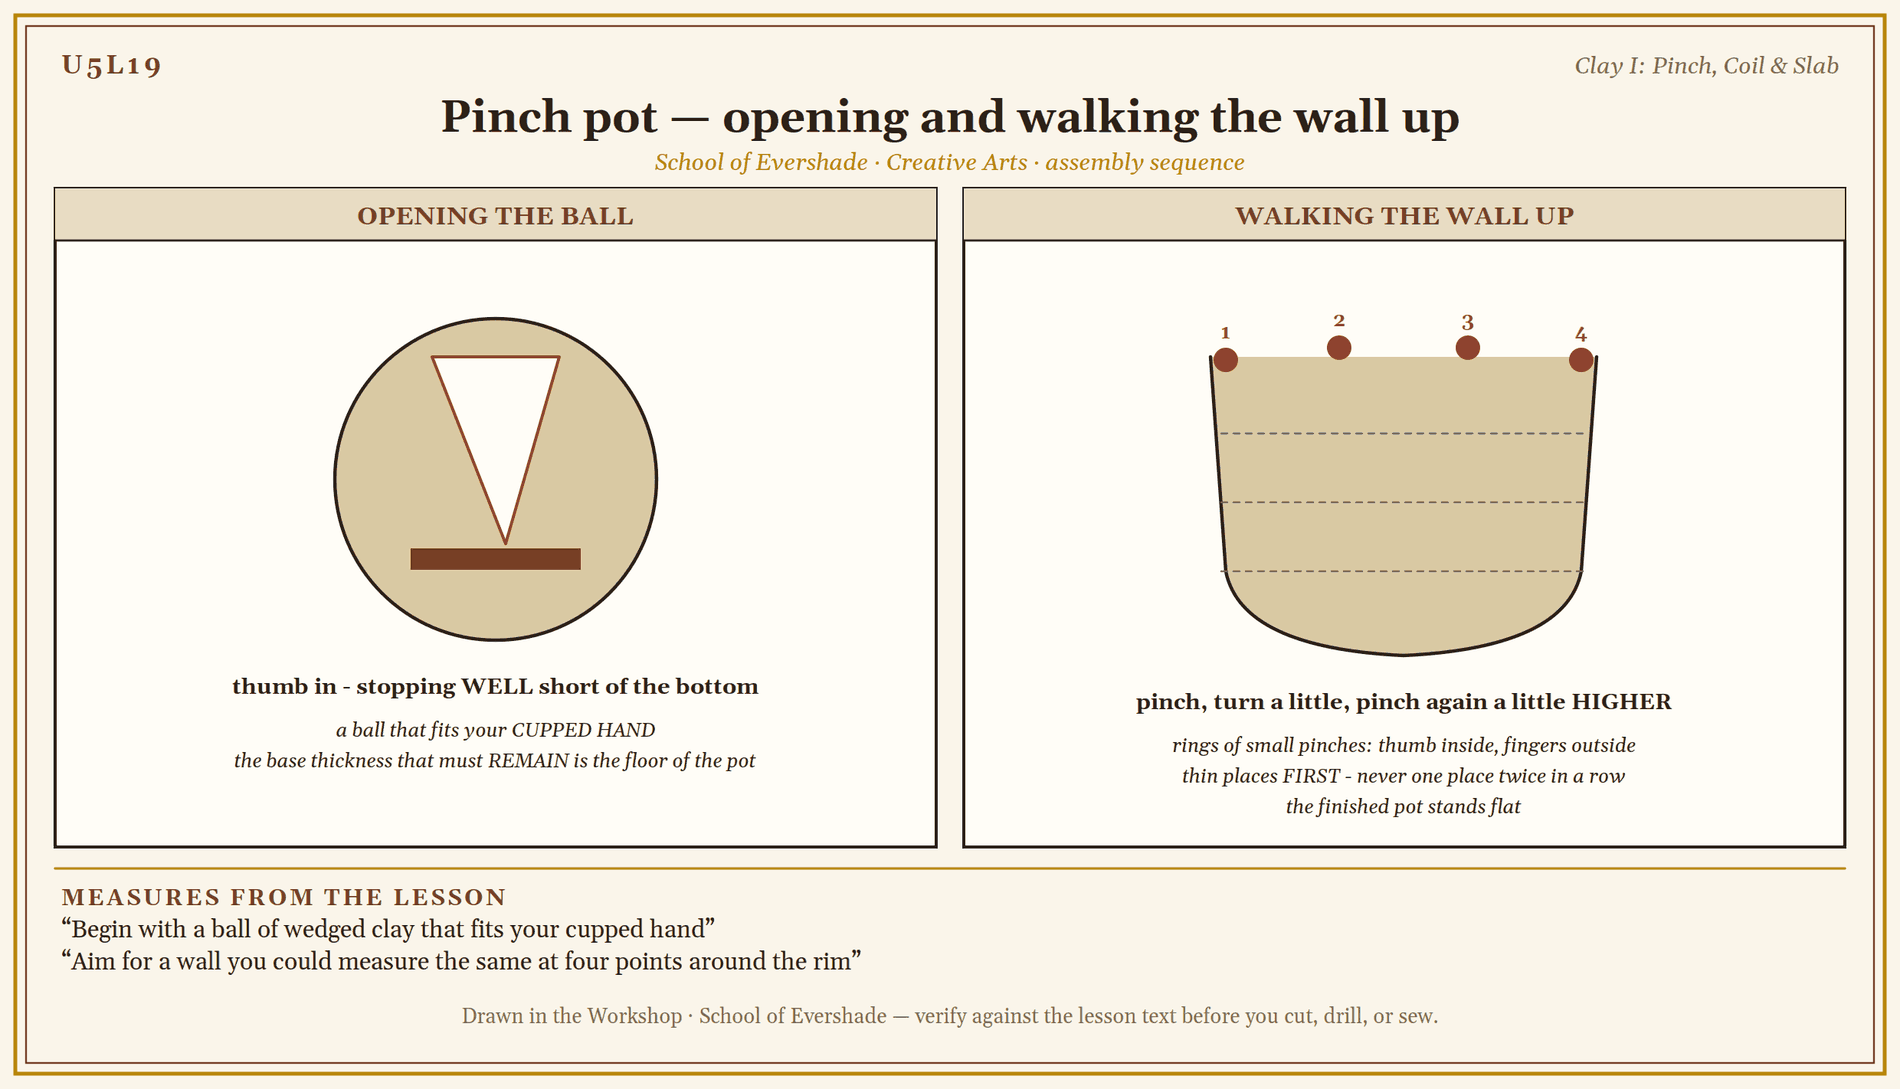
Pinch pot — opening and walking the wall up
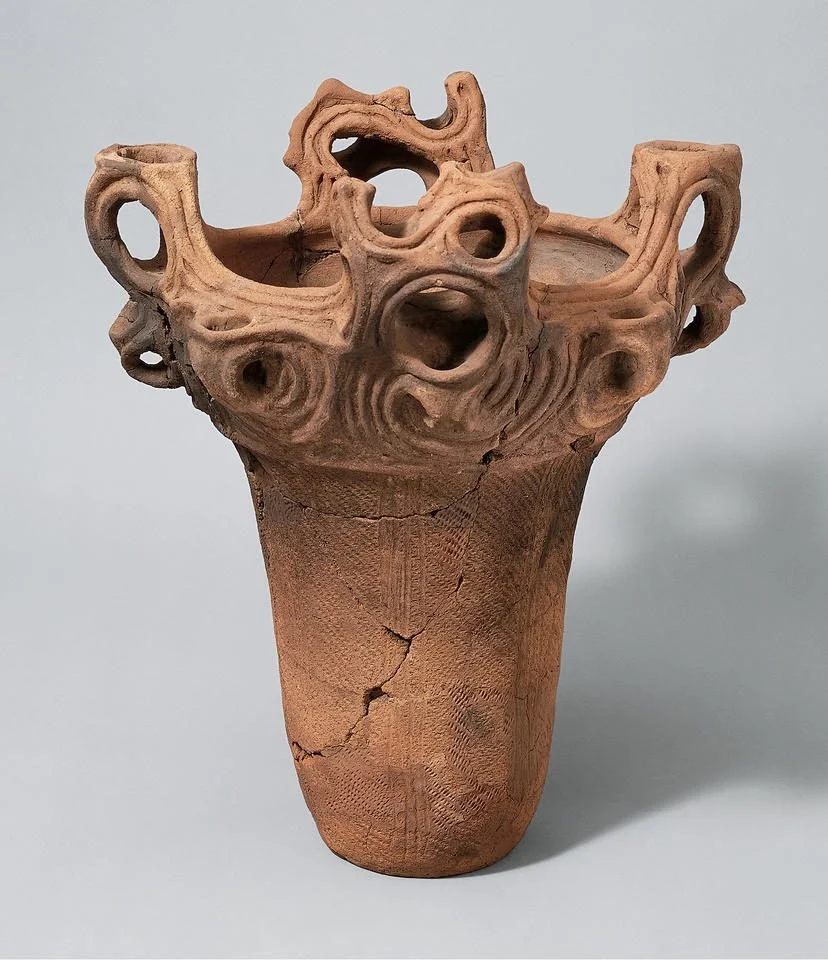
A "flame-style" deep pot (kaen doki), Middle Jōmon period, Japan (3500–2500 BCE) — earthenware with cord-marked and incised decoration, the rim rising in sculpted flame-like points, 53.1 cm high.
The Metropolitan Museum of Art (Object 2015.300.258), Open Access (CC0).
Preparing the Clay
Clay is rock worn down to dust and carried by water until it settles: a mineral flour that drinks water and becomes plastic, which is the potter's word for shapeable and willing. Dry clay is powder. Overwet clay is soup. Between them is the working state, and wedging is how you find it and keep it.
Wedging does three jobs. It evens the moisture, so no part of the lump is wetter or drier than another. It evens the consistency, working out lumps and stiff patches. And it drives out trapped air, which matters more than any other preparation in this craft, because water trapped inside a wall turns to steam in the firing and can blow a piece apart. Even our gentle air-dry and oven work in the next lesson punishes air and uneven walls with cracks. Wedge on a clean bench or a canvas board, pressing and folding the clay away from you, turning it a quarter turn, pressing again, until the lump cuts smooth and uniform if you slice it with the wire.
Thickness is the second law. A wall that changes thickness dries unevenly, and uneven drying is where cracks are born. Every method in this lesson is, underneath its shape, a way of keeping thickness even: pinching a little at a time and turning the work constantly, rolling coils between both palms so no place swells, rolling slabs between guide sticks so the roller itself enforces the gauge.
A Sealed Note from Professor Timberclank
Clay is gentle work, scholars, and its one real hazard is quiet, so we will say it once and keep it always.
Dry clay is dust, and clay dust carries silica, which lungs do not forgive. So: clay is worked damp, never dry-sanded, never dry-swept. Trimmings are gathered while they are leather-hard or wet, spills are wiped up with a wet cloth, and the bench is washed down, not brushed. A floor cleaned dry raises the dust you cannot see and breathes it for you. We do not do that here.
Hands are washed when the work stops, before food, as at every bench in this workshop. Practice pieces are work pieces: nothing made in a practice session is used for food or drink, whatever it resembles. And any firing, kiln or oven, belongs to an adult's hands and an adult's judgment, under Lesson 5's rules of heat. We stop. We make it safe. Then we begin again.
PROFESSOR COGBRANCH TIMBERCLANK
Creative Arts Workshop
Master Artisan, Head of House Occidens
Technique: Pinch, Coil, and Slab
Pinch. Begin with a ball of wedged clay that fits your cupped hand. Push your thumb into the center, stopping well short of the bottom, which must stay thick enough to stand on. Then pinch and turn: squeeze the wall gently between thumb inside and fingers outside, turn the ball a little, pinch again a little higher, and walk the wall up in rings of small pinches. Thin places first, always, and never one place twice in a row. The pot is done when the wall is one even thickness from rim to base, and the base sits flat.
Coil. Roll a rope of clay between your palms, or on the bench under both hands, moving from the center outward so the rope stays one thickness. Lay the first coil on a slab base and join it with your thumb, smearing a little clay down across the seam inside and out. Add the next coil on top, join it the same way, and smooth the wall with a rib, a spoon back, or a wet fingertip until the rings disappear. A join you skip is a crack you scheduled. Score and wet the surfaces wherever two dry-ish pieces must join: scratch both faces, dab them wet, and press together, because clay joins to clay by roughness and moisture, not by hope.
Slab. Roll the clay between two guide sticks of the thickness you want: quarter-inch sticks for markers and tiles. Roll from the center out, lift and turn the slab once so it does not marry the bench, and roll again to the sticks. Cut with a straight edge, peel away the waste, and let the pieces rest to leather-hard before handling. A fresh slab bends. A leather-hard slab works like board, and can be stamped, incised, and pierced cleanly.
Finish. Smooth rims with a wet fingertip; a cracked rim left rough will cut like paper. Pierce marker holes while leather-hard, not wet. Set finished pieces to dry slowly, covered loosely if the room is warm, because slow drying is even drying.
Practice Practical: First Forms
This drill is checked for wedging done honestly, even thickness, and joins smoothed until they disappear.
- Wedge. Take a lump of clay the size of two fists. Wedge it for a full count of fifty presses, turning as you go. Cut it with the wire and look at the face: even color, no lumps, no air holes showing. If the face fails the look, wedge twenty more.
- The pinch pot. Ball the clay, open it with your thumb, and pinch the wall up in slow rings, turning constantly. Aim for a wall you could measure the same at four points around the rim. Set it down: it should stand flat and steady.
- The coil. Roll a coil as long as your forearm at one even thickness, checking it against your fingers as it grows. Lay it in a ring on a small slab base, join it with your thumb inside and out, and smooth until the seam is gone. Add a second ring and join it the same way.
- The slab. Roll a slab between the guide sticks, lift, turn, and roll again. Cut two plant markers and one name tile from it, straight and true. Stamp or incise a name or a simple mark on the tile while it is soft.
- Rest and record. Set all pieces to rest toward leather-hard, covered loosely. In your notebook, record which method gave you the most even wall, where your pinch pot thinned without permission, and whether your coil join survived smoothing.
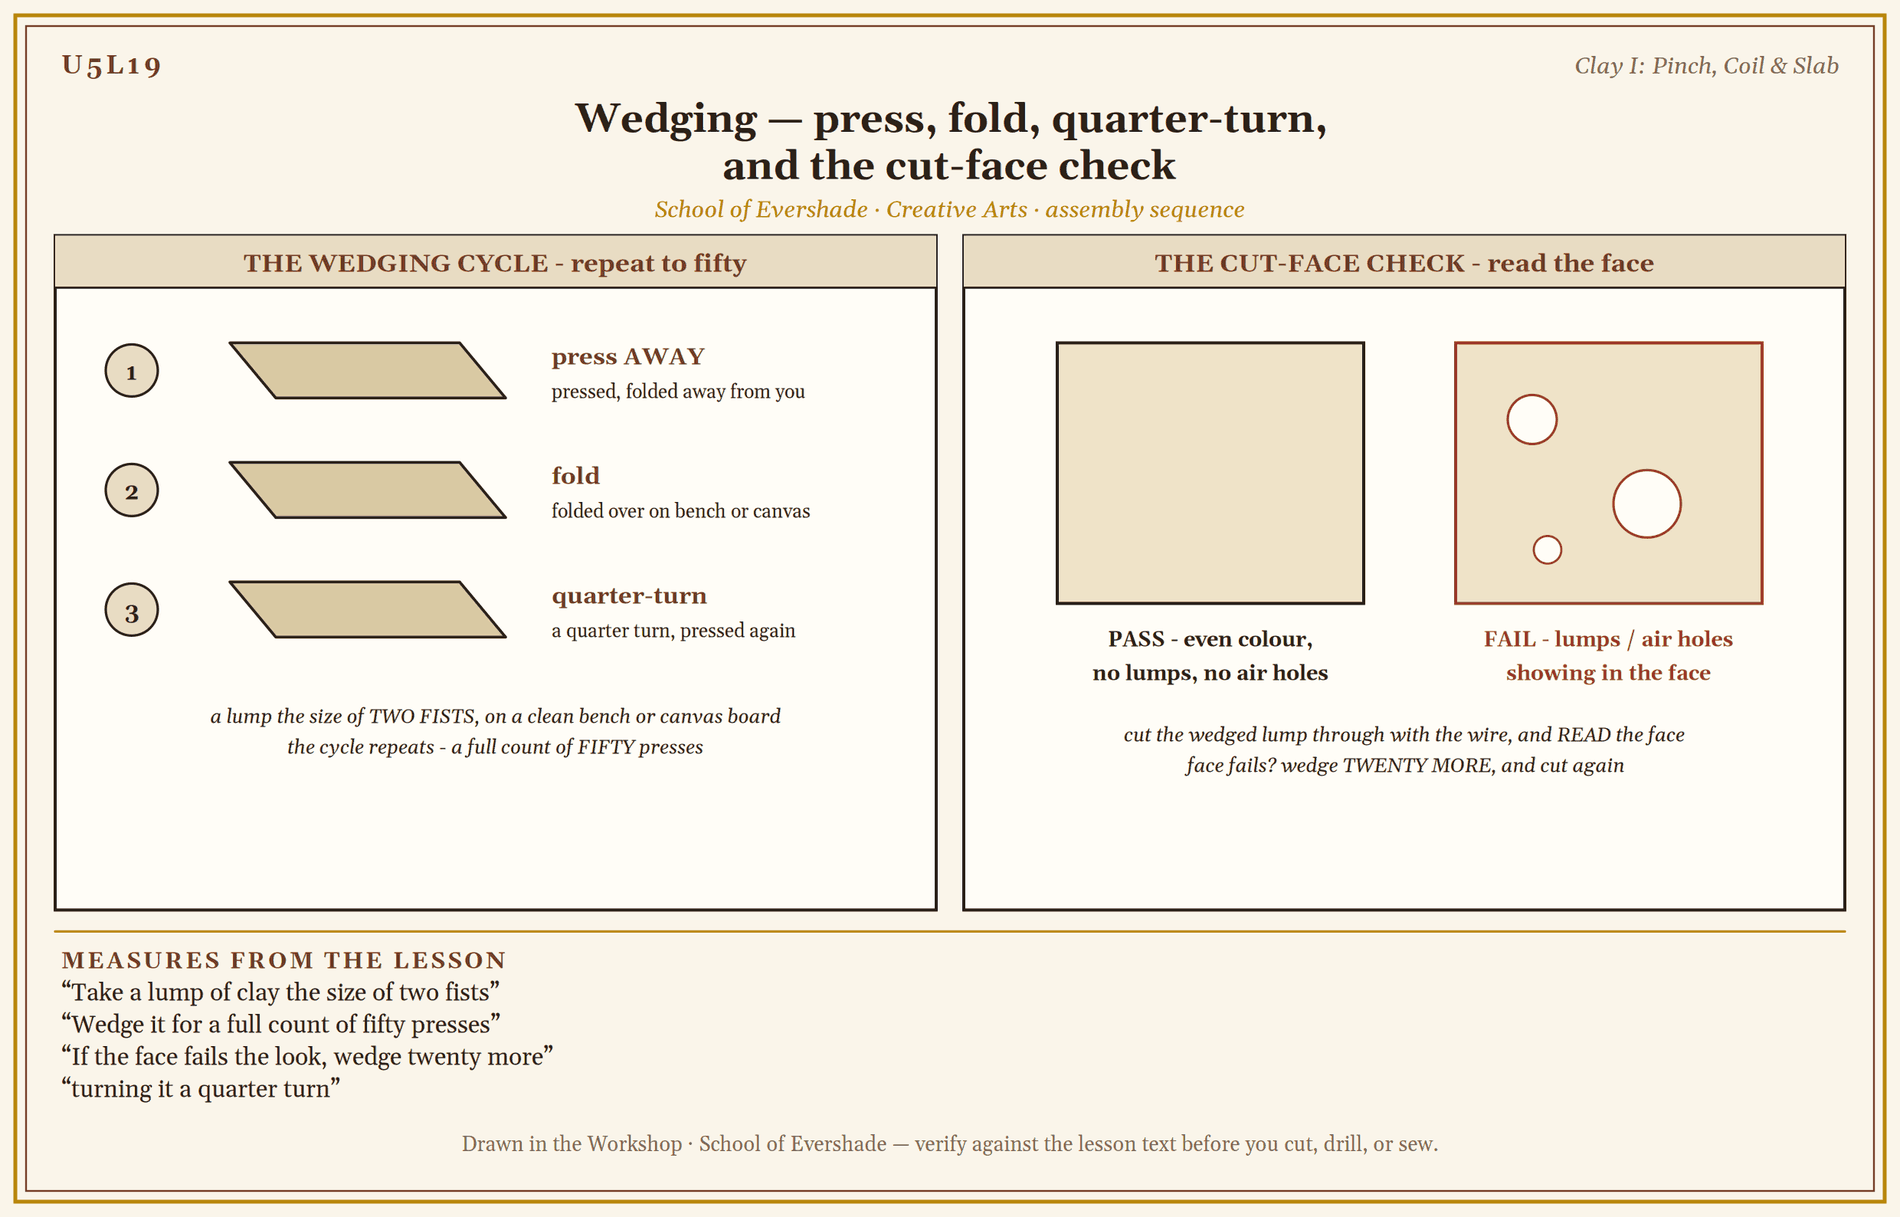
Wedging — press, fold, quarter-turn, and the cut-face check
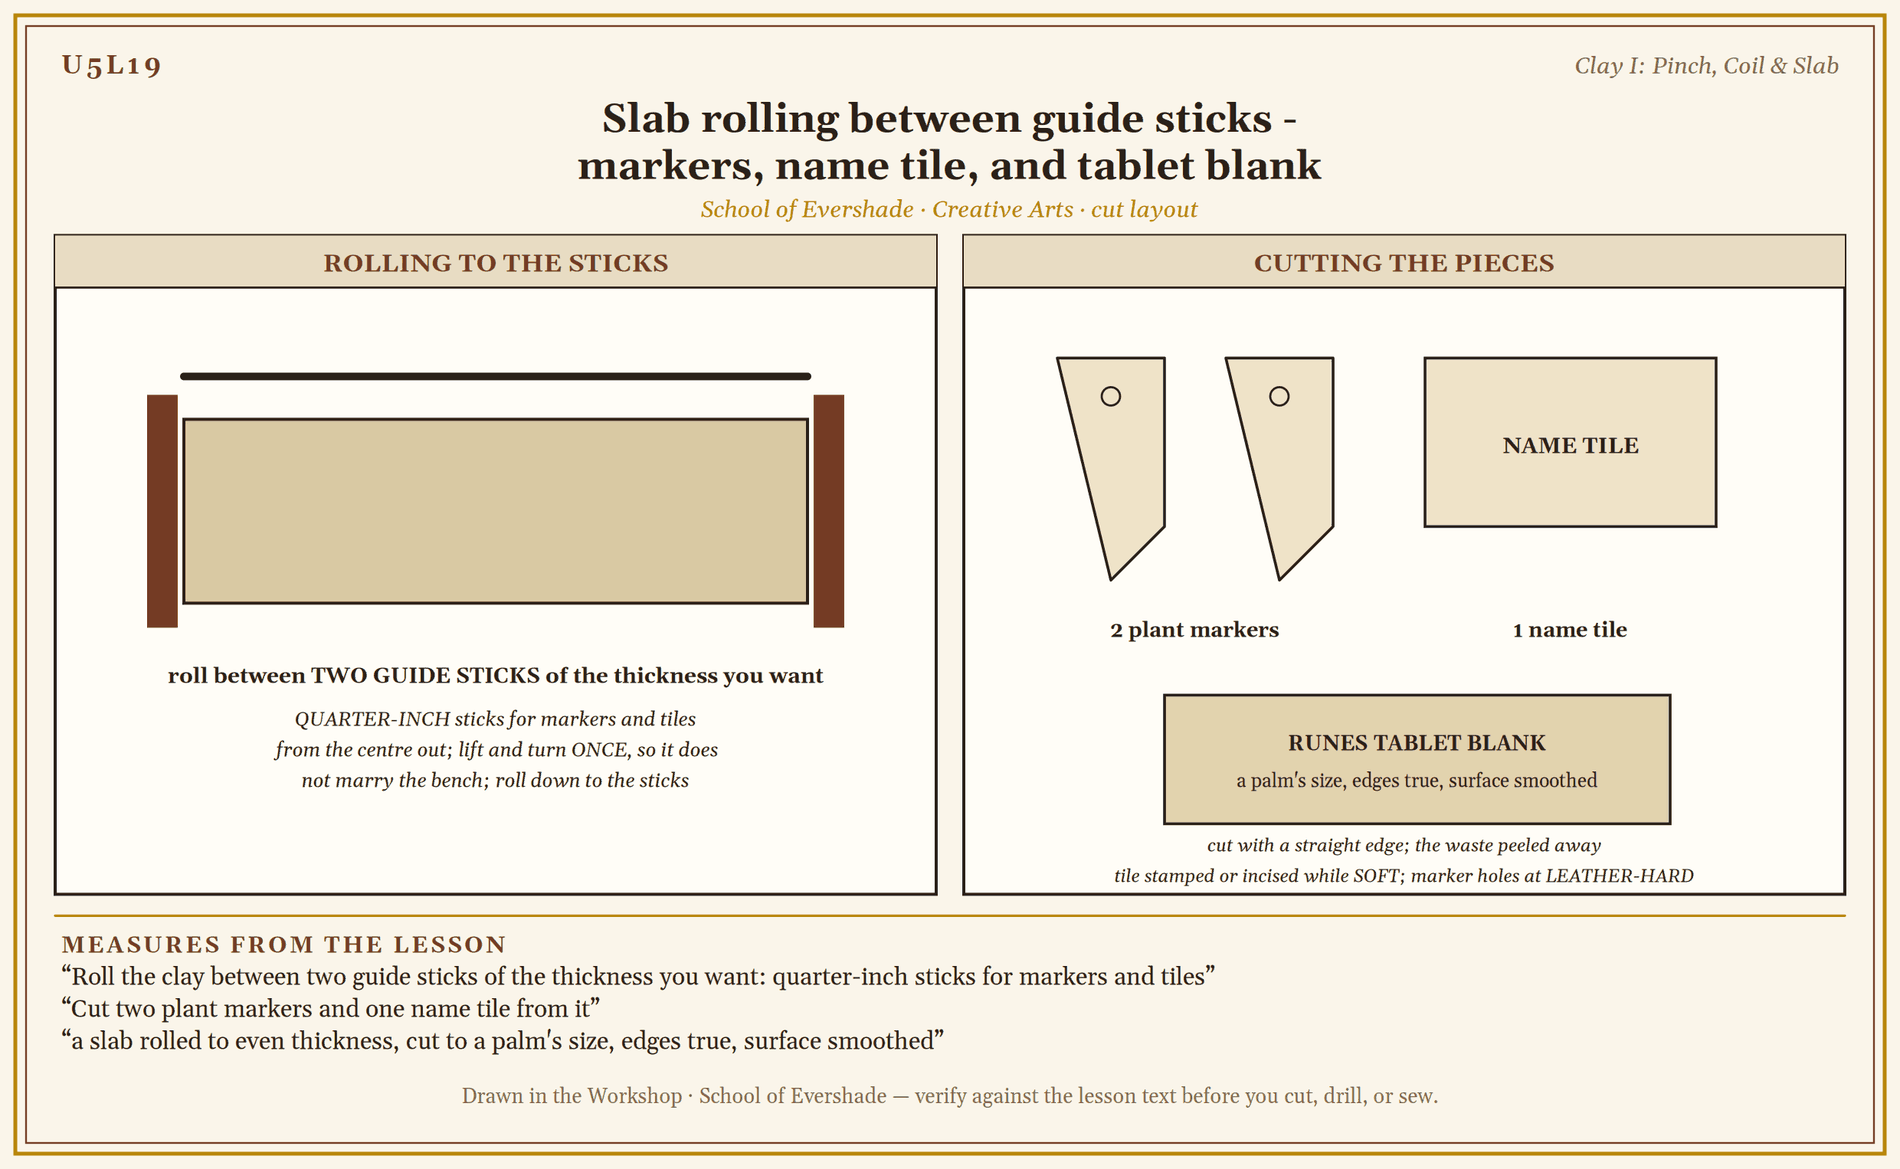
Slab rolling between guide sticks - markers, name tile, and tablet blank
Assignment Manual
Assignment key: ✎ written work · ⚒ hands-on practical · ◐ both
Assignment I ⚒ — First Forms
Complete the Practice Practical in this lesson: a wedged lump with a clean cut face, a pinch pot of even wall, a coil joined and smoothed until its seam disappears, and a slab rolled to the guide sticks and cut into two markers and a name tile.
Assignment II ✎ — Twenty Thousand Years of Pots
Write a short history of the first ceramics: the fired figures of Dolní Věstonice, the cooking pots of Xianrendong, and the cord-marked ware of the Jōmon. For each, give its age as best the evidence allows, what it was for, and what it overturns in the easy story that pottery began with farming.
Assignment III ◐ — The Tablet Under the Writing
Professor Webblethorn's scholars press cuneiform into prepared clay. Make one tablet blank the Runes way: a slab rolled to even thickness, cut to a palm's size, edges true, surface smoothed, and rested to the firmness a stylus wants. Write a short accompanying note: what the clay preparation in this lesson (wedging, even thickness, the right dryness) has to do with whether the writing on it survives, and check your tablet after a day for cracks.
Materials
Level One (household)
- Air-dry clay or earthenware clay from a craft supplier, a bag shared by the bench
- A smooth board, tray, or canvas square to work on
- Two wooden guide sticks or dowels of even thickness, and a rolling pin kept for clay
- A table knife or clay wire for cutting, and a ruler
- A small pot of water, a sponge or cloth for wet wiping, and a rib tool or old spoon
- An apron, and a bucket for clay scraps and wash water (never the sink in quantity: clay settles in pipes)
Level Two (historical)
Everything in Level One, plus:
- Earthenware clay dug or bought as a dry body and slaked down in water, in the oldest manner
- A wooden paddle and a rounded river stone as anvil, for paddle-and-anvil shaping
- A cord-wrapped paddle or a piece of cord, to try the Jōmon cord-marked surface on a test piece
- A reed or cut quill and a wedge-ended stick, to feel the tablet tools of Lesson 6's clay work from the clay's side
Both levels prepare and build the same way. Level Two works the clay from closer to the ground it came from.
Reflection Questions
Answer the following questions in your workbook.
- The oldest fired clay object known carries a child's fingerprint. What does that detail change about how you picture the first potters?
- Pottery was invented by people on the move, not settled farmers. Why might a cooking pot matter enough to invent before there were stores of grain to keep?
- Every method in this lesson is a way of keeping thickness even. Why is evenness, of all the virtues, the one clay insists on?
- A join you skip is a crack you scheduled. Where else in the workshop does a small step done now decide a failure weeks later?
- Your hands today used movements unchanged for twenty thousand years. What is different about learning those, compared with learning the secateurs, an invention of your own era's grandparents?
Professor's Review
Good earth under your nails, scholars, and three forms standing on the bench that your hands understand now.
You have wedged clay until it cut clean, raised a wall by pinching and turning, hidden a coil's seam, and rolled a slab to the sticks. You also know whose work you have been repeating: the Gravettian figure-maker, the Xianrendong cook, the Jōmon cord-presser. The garden's pots and markers will come from this bench all year, and Runes' tablets are already less of a mystery to you than they were.
Let the pieces dry slowly. Next lesson we give the clay its grown forms: the apothecary's jar, the relief tile, and the mold, and we talk honestly about fire, and about what to do when there is no kiln.
PROFESSOR COGBRANCH TIMBERCLANK
Creative Arts Workshop
Master Artisan, Head of House Occidens
Cross-Class Connections

Runes · Unit I, Lesson 1 — Cuneiform — The Structural Wedge
In my classroom, scholars, the first writing is pressed into clay: wedge by wedge into tablets, and the bulla, the clay envelope that sealed the earliest records. A plain note in my lesson sends my scholars here for the material under their fingers — the preparing, wedging, and pressing of clay are taught at this bench, in this lesson. Come and write as the first scribes wrote, and let the clay work you learn here carry your hand. The note is a reference, not a prerequisite; my lesson stands complete on its own.
PROFESSOR THISTLELOOM WEBBLETHORN
Runes & Ancient Writing
Further Reading & Sources
Wikipedia. "Venus of Dolní Věstonice." The figure's full record: dated 31,000 to 27,000 years ago, the oldest known ceramic articles, a body of local loess with powdered charred-bone temper, fired at 500 to 800 degrees, and the child's fingerprint found in the 2004 tomograph scan, drawing on Vandiver and colleagues in Science (1989).
Wu, Xiaohong, et al. "Early Pottery at 20,000 Years Ago in Xianrendong Cave, China." Science 336 (2012): 1696–1700. The dating paper for the earliest vessels: sherds of 20,000 to 19,000 years ago, made by mobile foragers, some scorched from cooking, ten millennia before agriculture.
Wikipedia. "Jōmon Period." The cord-marked pottery tradition of early Japan, with the earliest fragments placed at about 14,500 BCE, and the long, settled culture that grew around the pot.
Barnett, William K., and John W. Hoopes, eds. The Emergence of Pottery: Technology and Innovation in Ancient Societies. Washington, DC: Smithsonian Institution Press, 1995. The scholarly collection on how and why pottery began, region by region. Print reference; consult in a library.
Student-friendly starting points for exploring this lesson's world. All links verified October 2026.
- Science News Explores. "World's Oldest Pots." The Xianrendong find told for younger readers: what the sherds were, how the dates were won, and why a cooking pot came before the farm.
- Wikipedia. "Venus of Dolní Věstonice." Her story in full, from the 1925 excavation to the fingerprint, with the firing temperatures and the strange, fragile company of fired figures she was found among.
Submit your work for this lesson using the form below.
CONTINUE IN THE CREATIVE ARTS WORKSHOP
← Previous · Lesson 18: Outdoor & Garden Tools: Handling, Cleaning & Care Next · Lesson 20: Clay II: Vessels, Tiles, Relief & Molds →
Unit V · Clay & the Garden Bench Creative Arts Workshop · All 39 Lessons
Bookstore Shelf The Library · Creative Arts Shelf Course Supplies
The rest of Unit V: Lesson 18 · Outdoor & Garden Tools · Lesson 20 · Clay II: Vessels, Tiles, Relief & Molds · Lesson 21 · Building the Plant Press · Lesson 22 · Garden Structures & Cold Frames