Creative Arts
Unit VII, Lesson 29Foil, Wire & Simple Metalwork
Professor Cogbranch Timberclank
Master Artisan, Head of House Occidens
The Creative Arts Workshop • School of Evershade
Professor's Introduction

Set up your bench, scholars. This is the last ticket of the course, and the oldest material family of all: metal, worked cold, with hand tools, the way it was worked for most of its history.
Metal frightens beginners out of proportion to its dangers. It looks permanent and unforgiving, and the tools for it sound like a blacksmith's forge. But the metalwork of this lesson is the quiet kind: thin foil pushed into relief from behind, wire drawn and bent and woven into chains, and small cast and cut work in the family of the seal matrix you met in Lesson 17. Foil is metal rolled or hammered very thin; it takes an embossed design from the gentlest pressure, which makes it the beginner's sheet metal. A matrix is the engraved or modeled original from which impressions are taken: for a seal, the metal die whose face, cut in reverse, presses the design into wax. No forge is lit in this lesson. The early medieval goldsmiths whose work fills museum cases did much of their finest work cold, at a bench, with punches and patience, and their methods are this lesson's method.
There is one habit metal teaches faster than any other material in this room: it remembers. Bend a wire once and it bends willingly; bend it back and forth in the same place and it hardens, resists, and then snaps. Work-hardening is not a flaw in the metal. It is the metal keeping its own log, and the maker who reads it works a piece in a planned order, each bend made once, in the right place, the way Lesson 2's measuring taught you to mark before cutting.
You will emboss a practice foil square and bend a wire joint until both come out clean. Then this lesson returns to Lesson 17's seal matrix and finishes it at full craft, in metal, as the goldsmiths' tradition intends.
PROFESSOR COGBRANCH TIMBERCLANK
Creative Arts Workshop
Master Artisan, Head of House Occidens
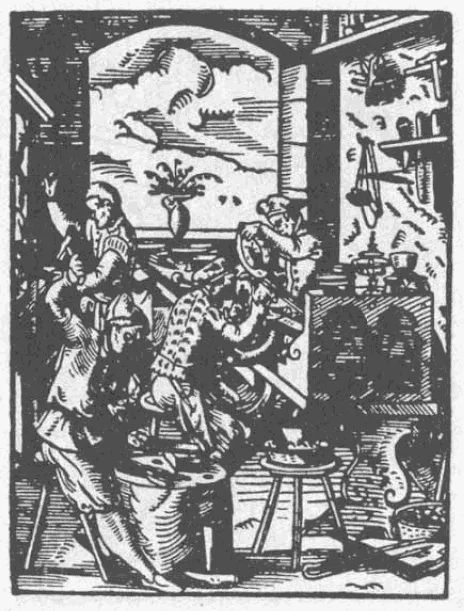
A goldsmith at his bench with his fine tools and finished work, 1568 woodcut.
Woodcut from the Ständebuch (Book of Trades), Frankfurt, 1568. Public domain, via Wikimedia Commons.
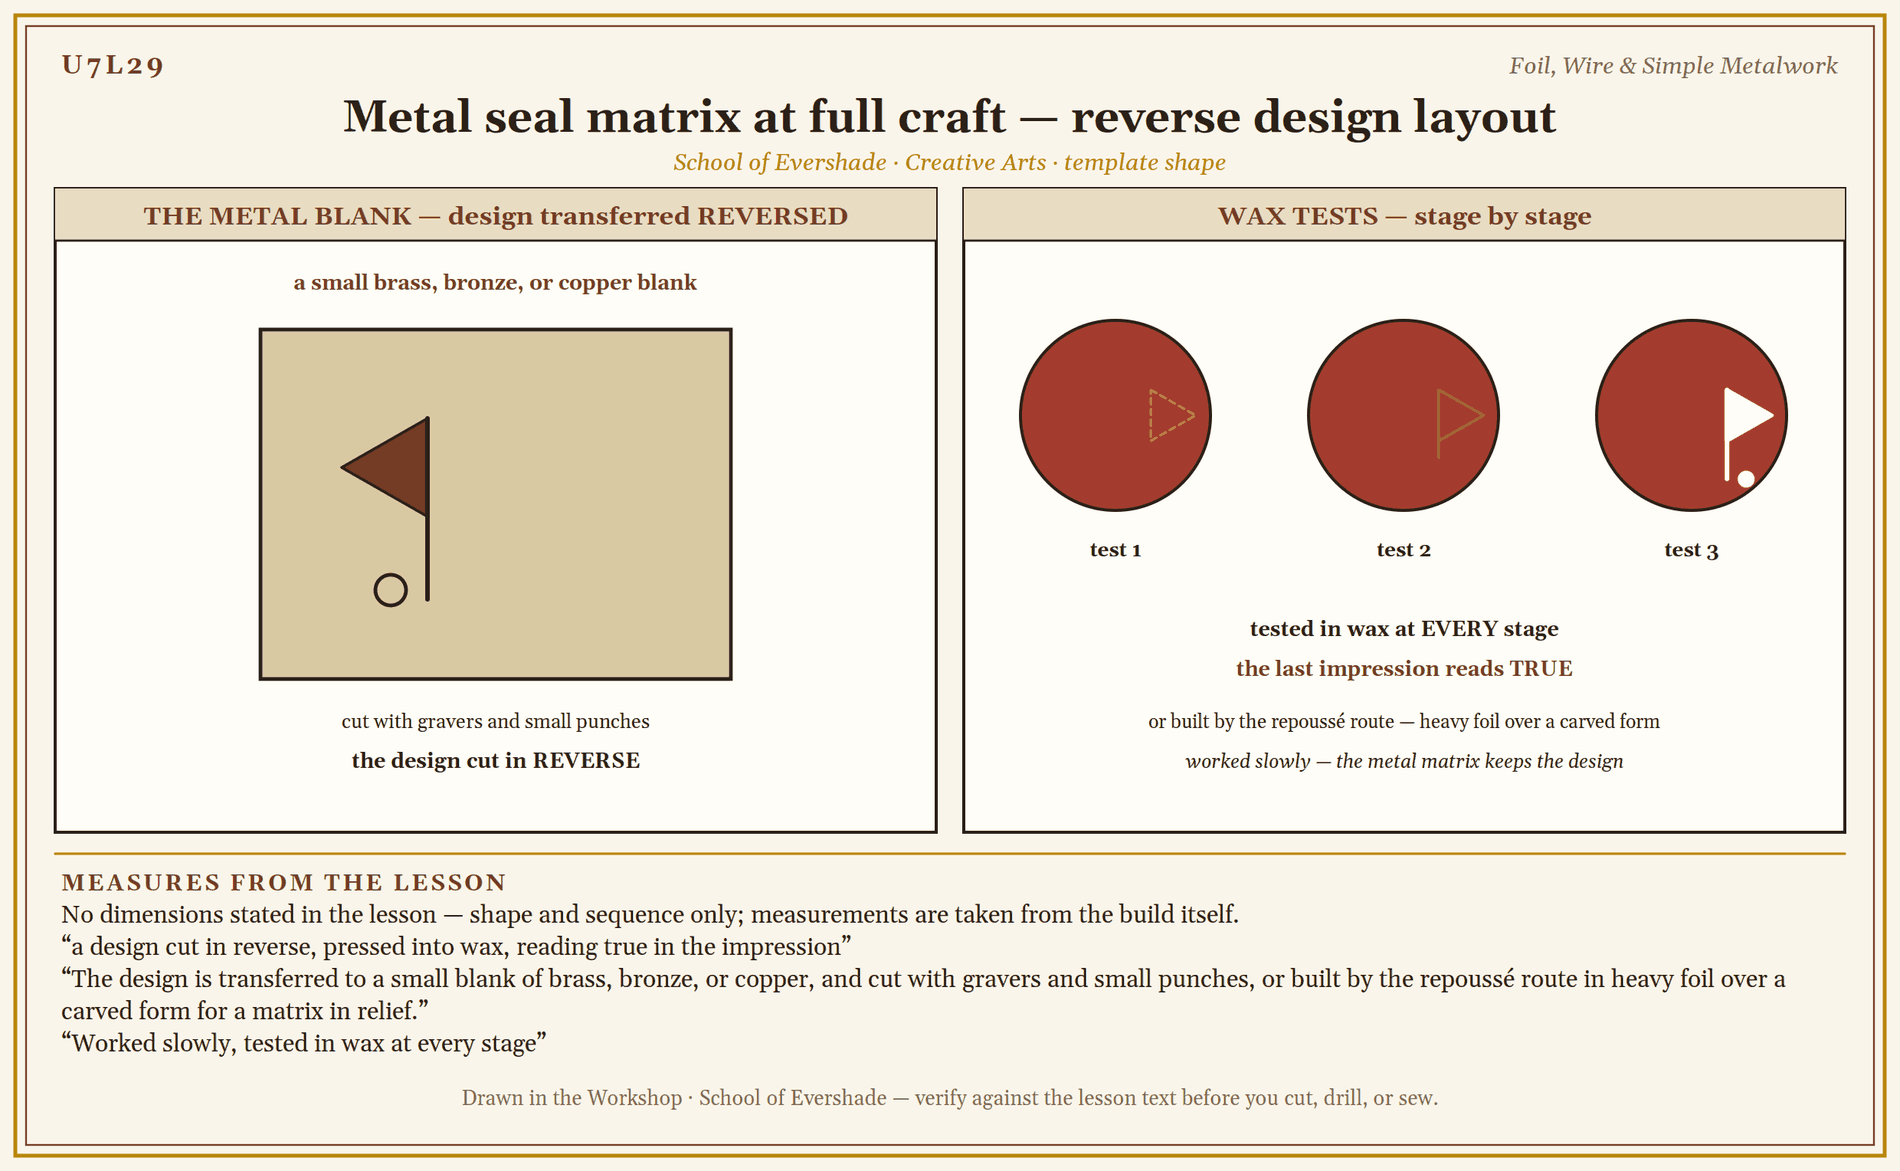
Metal seal matrix at full craft — reverse design layout
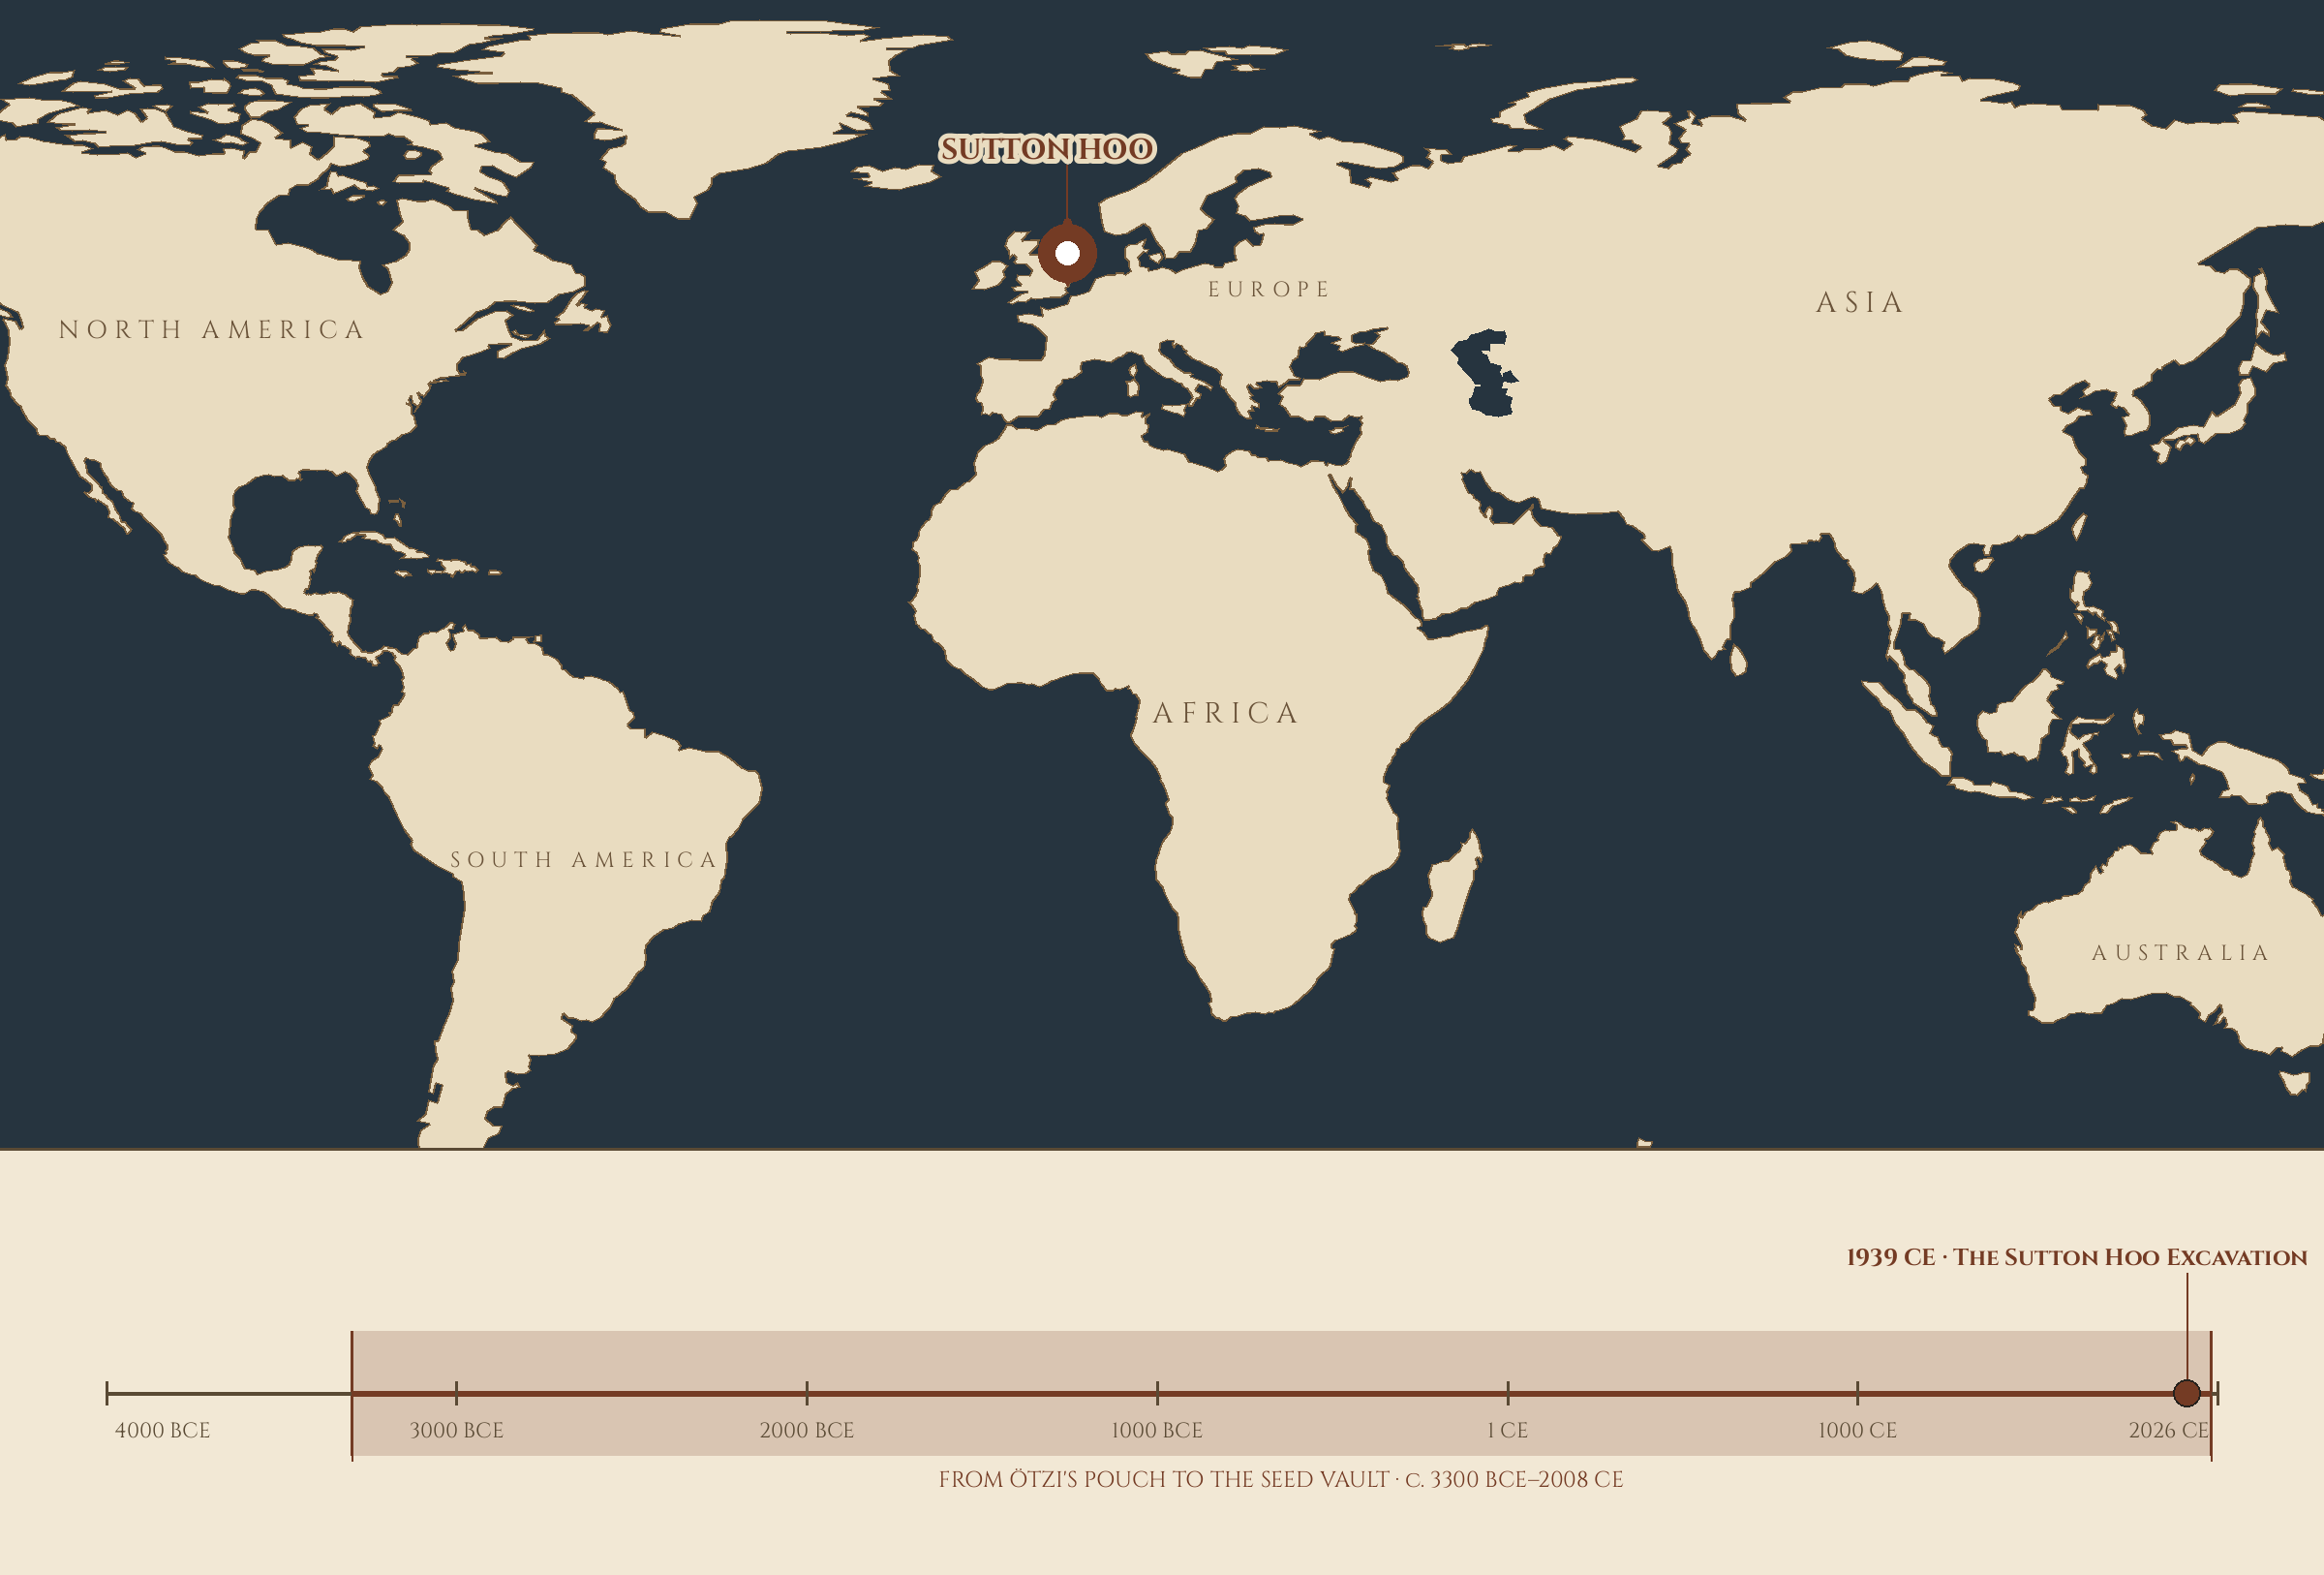
Where and when: Sutton Hoo, England — 1939 CE, the Sutton Hoo excavation.
Lesson Objectives
By the end of this lesson, students should be able to:
- Define repoussé and chasing and state which side of the metal each is worked from.
- Describe the Sutton Hoo ship burial at survey level and what its treasures show about early medieval metalwork.
- Explain drawn wire, and describe wire weaving as a chain-making tradition.
- Describe bronze at survey level as an alloy of copper and tin, hammered and cast.
- Emboss a practice foil square with a clean raised design, and bend a wire joint that holds.
- Finish a metal seal matrix at full craft, building on Lesson 17, and explain how it differs from the lesson's earlier versions.
Your Assignment Packet
This lesson's assignments live in its packet: the Lexicon Handout (every term, course terms marked ◆), the Assignment Manual, and the Reflection Questions. Download the packet before you begin and keep it beside you as you read — work from it as each subject is taught, or take the assignments as homework afterward.
The Goldsmith's Bench: Sutton Hoo
In 1939, on land owned by Edith Pretty at Sutton Hoo in Suffolk, the archaeologist Basil Brown uncovered the imprint of a ship twenty-seven metres long, buried in the earth with a chamber of treasures at its center. The burial dates to the early AD 600s. The British Museum, which holds the finds, describes a chamber filled with extraordinary objects: Byzantine silverware, gold jewellery of the highest craft, a great helmet, weapons, and feasting gear, the equipment of a king's household packed around a king's grave.
For this lesson, the treasure's lesson is its technique. The gold work of Sutton Hoo, shoulder clasps, buckles, and mounts, was made by repoussé and chasing, by filigree wires soldered into patterns, and by foil stamped and pressed over carved forms. Repoussé shapes sheet metal by hammering or punching it from the back, pushing the design up into relief on the front; the word is French for pushed up, and the work is exactly that. Chasing works sheet metal from the front, sinking lines and details into the surface with punches; it is repoussé's partner and opposite, one raising, the other sharpening and defining. Pressed foil in particular filled the early medieval world: thin sheets of gold or silver-gilt, stamped with a die so the same design could repeat across a belt, a helmet, or a brooch, decoration at the speed of a punch. The hands that made these things did much of their finest finishing work cold, at a bench — the raising, chasing, and stamping — between the hot work of casting and soldering, with tools a modern scholar would recognize in an afternoon. The distance between their bench and yours is skill and years, not kind.
Repoussé and chasing are far older than Sutton Hoo. The techniques date from antiquity and were used across the world, with gold and silver for fine work and copper, tin, and bronze for larger pieces. The golden mask of Tutankhamun was formed largely by repoussé from a sheet of gold, with its details chased after the form was raised. The Statue of Liberty, the largest repoussé work of all, is copper raised the same way, in sections, over wooden forms. One technique: a pharaoh's mask, a king's buckle, and a harbor statue.
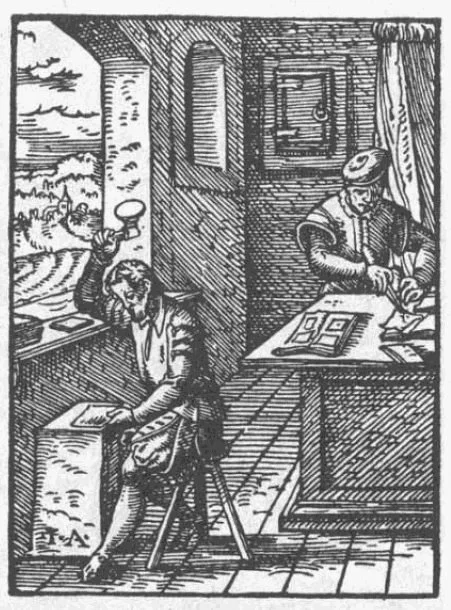
A goldbeater hammering metal into leaf/foil between skins, 1568 woodcut.
Woodcut from the Ständebuch (Book of Trades), Frankfurt, 1568. Public domain, via Wikimedia Commons.
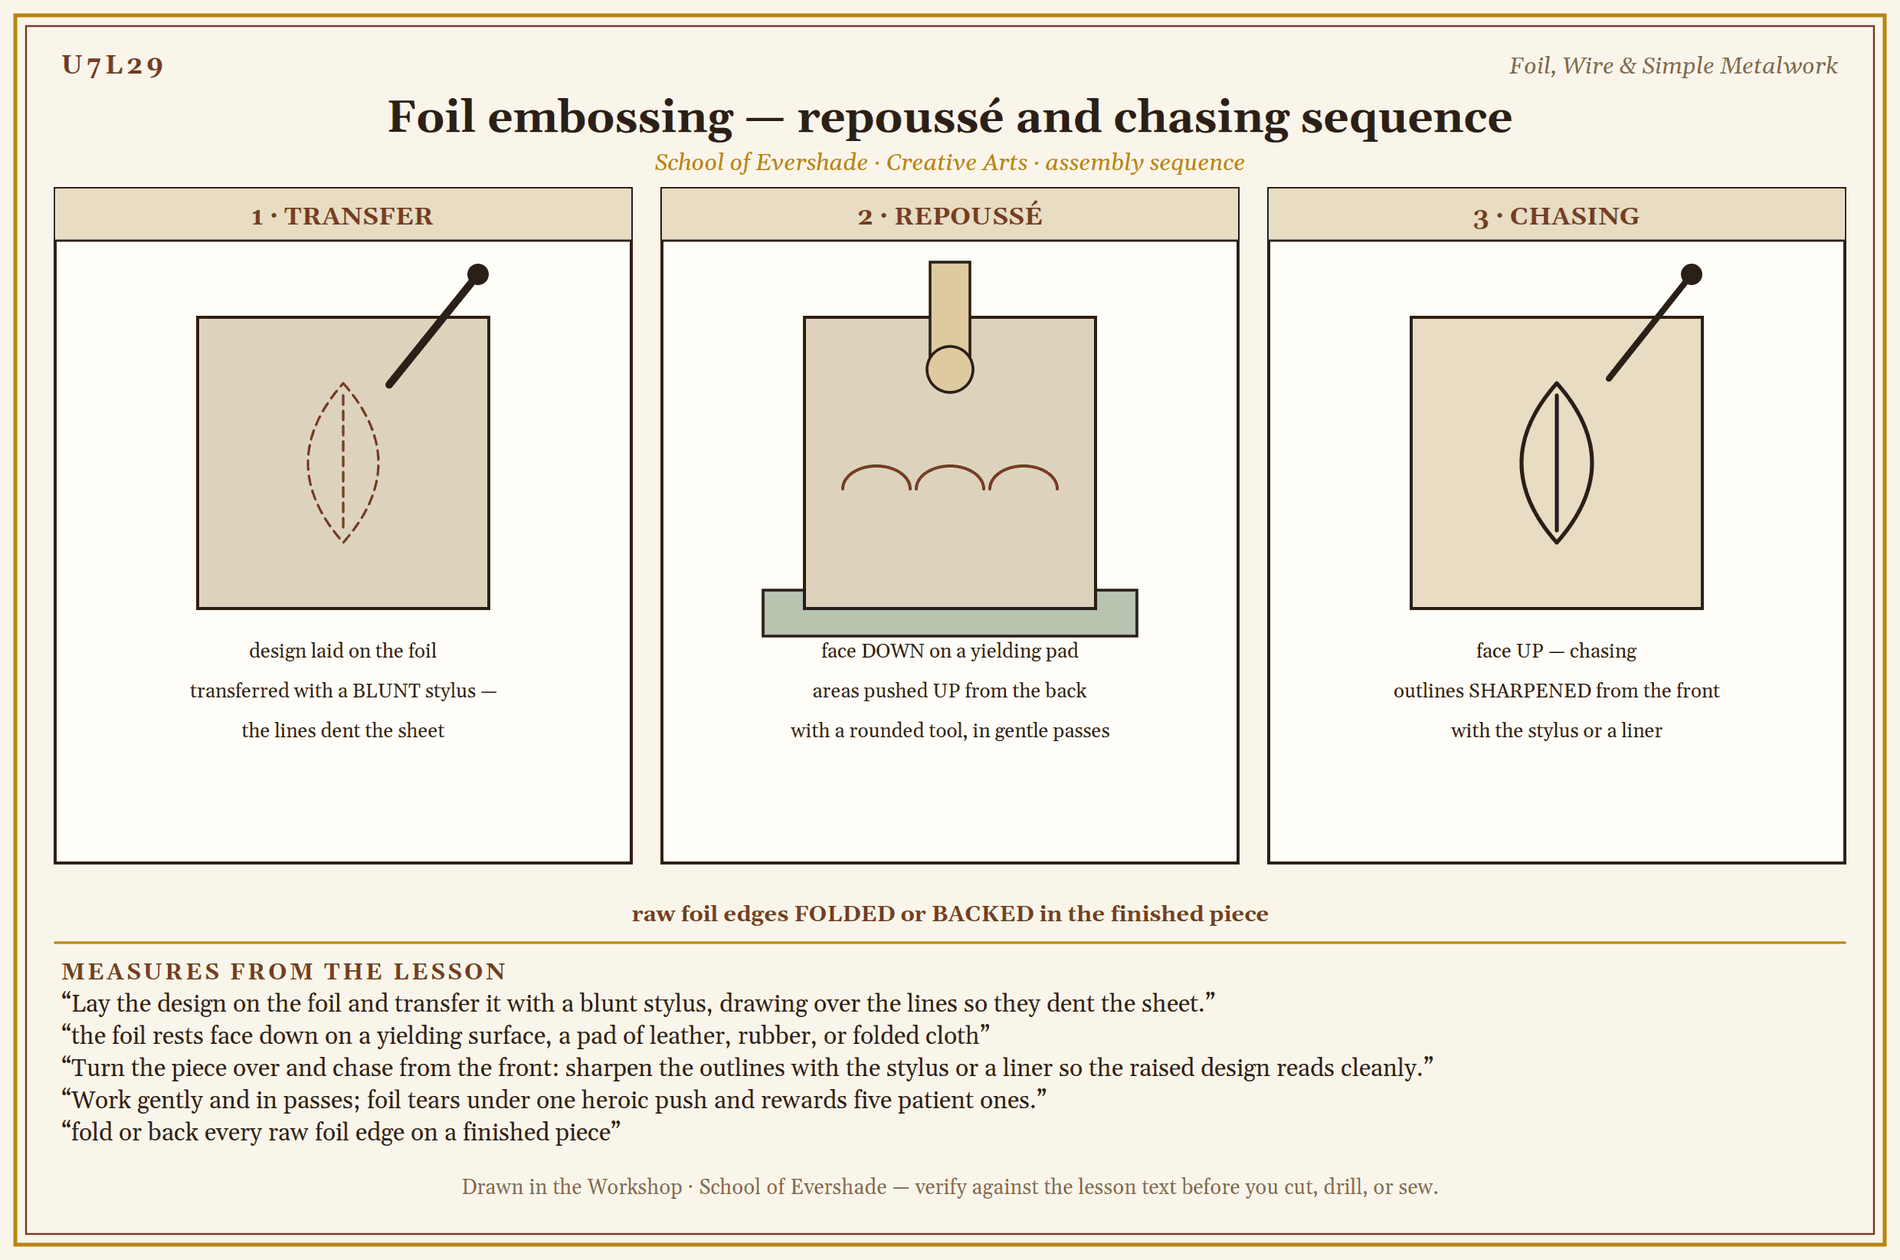
Foil embossing — repoussé and chasing sequence
Wire and Bronze
Wire begins as a rod and becomes itself by being drawn: pulled through a drawplate's holes, each smaller than the last, until it reaches its gauge. Drawing is ancient; the Fitzwilliam Museum's survey of Egyptian technology lists wire making among the gold worker's techniques, alongside casting, hammering, embossing, and soldering. In the Norse world, drawn wire was woven: fine chains made by looping wire through wire, link growing from link without a single solder joint, a tradition sometimes called trichinopoly work, a later British name borrowed from the Indian city where similar chains were made. A woven chain is this lesson's quiet marvel: strength out of repetition, made one loop at a time, by a method older than the castles.
Bronze stands behind both, at survey level: copper alloyed with tin, in Egyptian analysis anywhere from two to sixteen percent tin, an alloy stronger and harder than copper alone, with a lower melting point that made it easier to cast. Bronze was hammered and cast both, and hammering its edges made cutting tools that held an edge copper never could. The bronze matrix, the bronze tool, and the bronze bell all come from that single discovery, that a little tin changes copper into a new material. Scholars meet casting here as readers; this workshop's metal is worked cold, and the foundry belongs to other benches and other days.
A Sealed Note from Professor Timberclank
Metalwork's hazards are small, sharp, and easy to forget, which is exactly why we name them.
Cut wire has cut ends, and a cut end is a point. Every end in this lesson is finished: looped closed, filed smooth, or turned under, before the piece leaves the bench and before it is handed to anyone. Test a finished end with the back of a fingernail, never a fingertip's pad, and if it catches, it is not finished.
Cutting tools for metal, snips and side cutters, are used on metal only, held so the offcut falls to the bench and not toward a face, and small offcuts go straight into the bin: a wire clipping on the floor is a splinter waiting for a foot. Foil edges are edges too, thin enough to forget and sharp enough to remind you; handle foil by its face, and fold or back every raw foil edge on a finished piece.
And when a wire snaps because it was bent once too often, we do not curse the metal. We read its log, note where we overworked it, and begin the joint again with the bend planned better. We stop. We make it safe. Then we begin again.
PROFESSOR COGBRANCH TIMBERCLANK
Creative Arts Workshop
Master Artisan, Head of House Occidens
Technique: Embossing, Bending, and the Matrix
Embossing the foil. Lay the design on the foil and transfer it with a blunt stylus, drawing over the lines so they dent the sheet. Then work from the back: the foil rests face down on a yielding surface, a pad of leather, rubber, or folded cloth, and a rounded tool, a dapping punch, a smooth dowel end, or the ball of a burnisher, presses the design's areas up into relief. Turn the piece over and chase from the front: sharpen the outlines with the stylus or a liner so the raised design reads cleanly. Work gently and in passes; foil tears under one heroic push and rewards five patient ones. This is repoussé and chasing at their smallest and most forgiving scale.
Bending the wire joint. The drill joint is a closed loop joined to a straight piece: a ring through an eye. Form the eye by bending the wire around round-nose pliers or a mandrel, one smooth bend, planned. Form the ring the same way, thread the eye, and close the ring with its ends meeting flush. The rules are Lesson 2's rules in metal: mark the bend before you make it, make it once, and never wiggle a bend to adjust it, because the wiggle is the first page of the snap. If a joint must be remade, cut fresh wire; the old piece has hardening in it that no patience removes. Heat would remove it — annealing softens hardened metal — but that is hot work for another bench and an adult's hands, so in this lesson we cut fresh wire.
The matrix at full craft. Lesson 17 taught the seal matrix's logic: a design cut in reverse, pressed into wax, reading true in the impression. At full craft the matrix is metal. The design is transferred to a small blank of brass, bronze, or copper, and cut with gravers and small punches, or built by the repoussé route in heavy foil over a carved form for a matrix in relief. Worked slowly, tested in wax at every stage, the metal matrix keeps the design through a lifetime of sealings, where a carved wooden or cut lino matrix slowly wears. Test yours until the impression reads clean, then seal something worth sealing.
Finishing. Every piece from this bench is finished by the sealed note's standard: ends looped, filed, or turned under; foil edges folded or backed; surfaces wiped clean. A metal piece is finished when it can be handed to a friend without a warning.
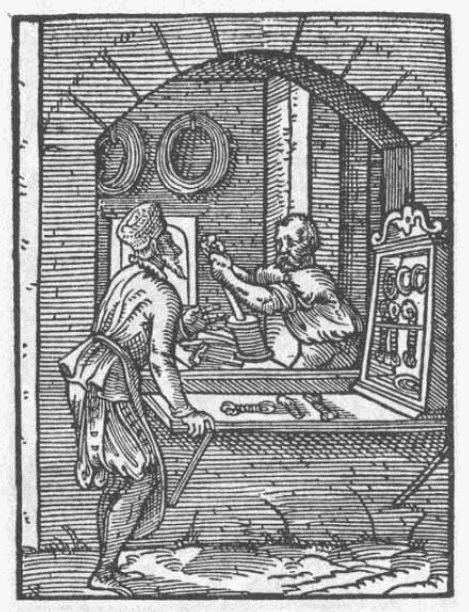
A wire drawer pulling metal through a drawplate to thin it into wire, 1568 woodcut.
Woodcut from the Ständebuch (Book of Trades), Frankfurt, 1568. Public domain, via Wikimedia Commons.
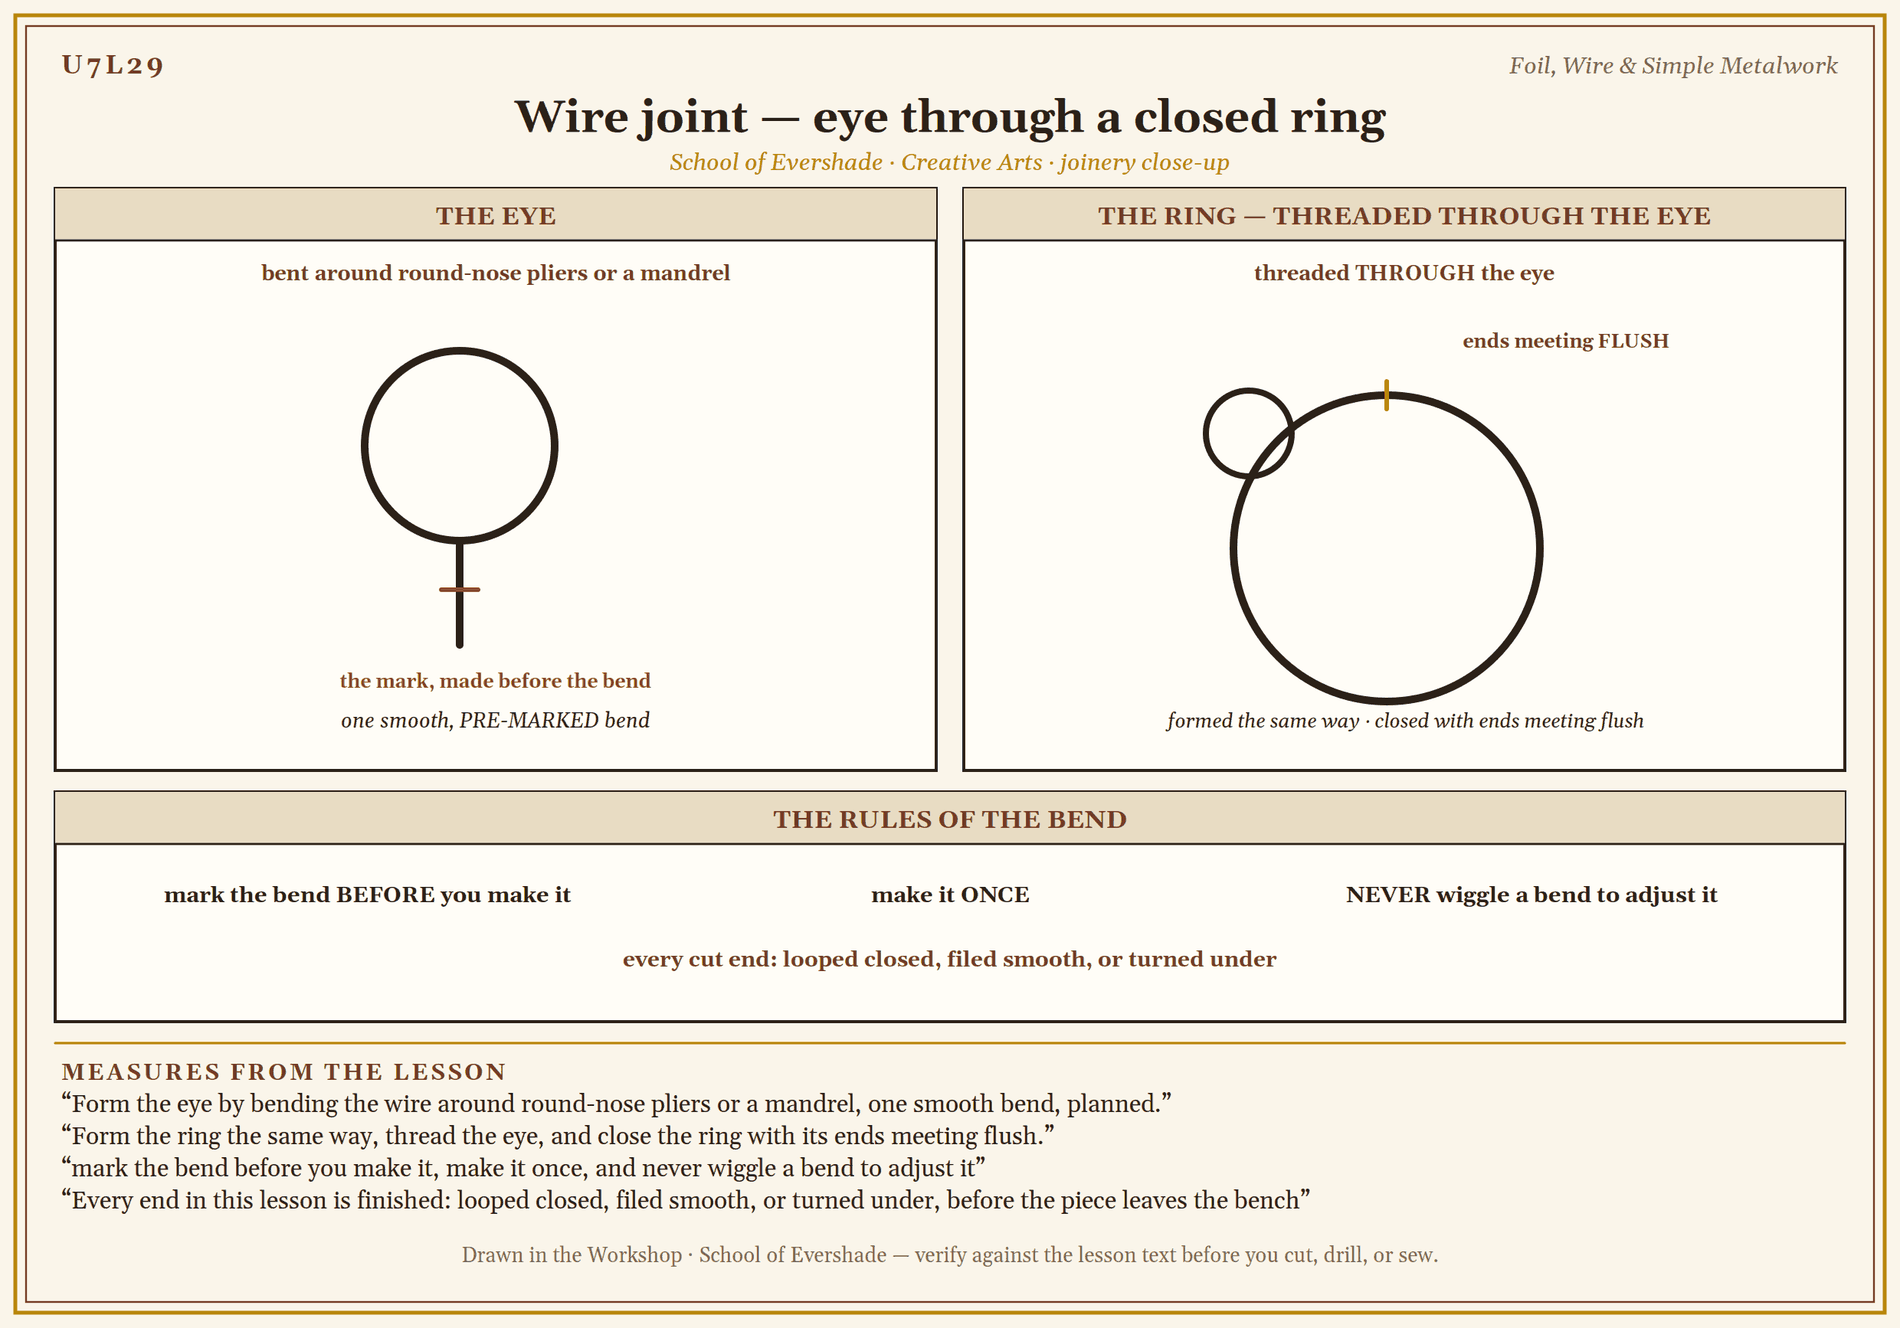
Wire joint — eye through a closed ring
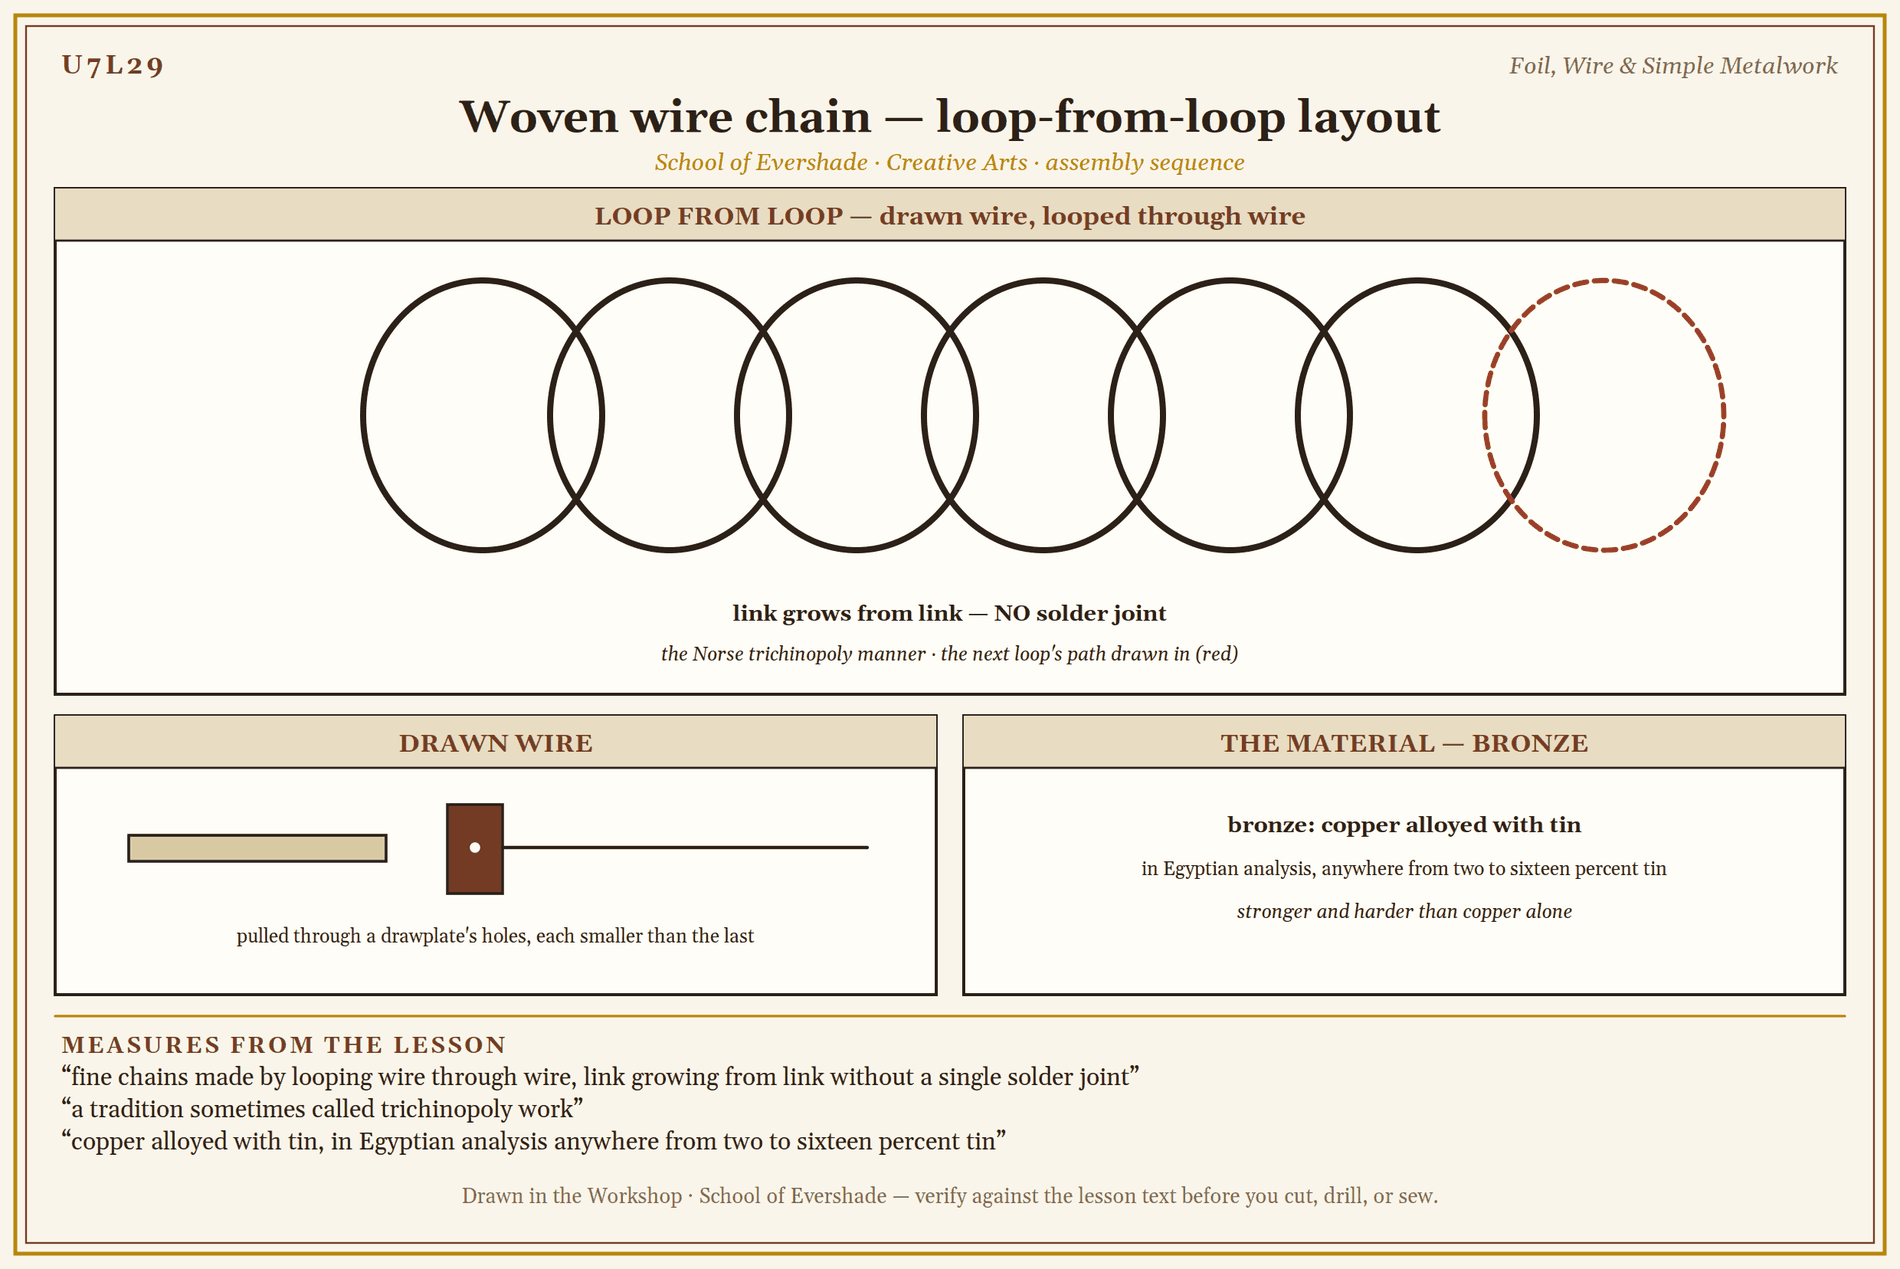
Woven wire chain — loop-from-loop layout
Practice Practical: Foil and Wire Drills
This drill is checked for clean relief and a sound joint, not for ornament. Both drills are done until they come out clean.
- Emboss the foil square. Cut a practice square of foil. Draw a simple design on it in stylus lines: a star, a leaf, or your house emblem reduced to bold shapes. Turn it face down on the pad and push the design's areas up from the back with the rounded tool, in gentle passes.
- Chase the front. Turn the square face up and sharpen every outline with the stylus from the front. Hold the finished square to the light: the design should read as raised, clean shapes, with no torn places. If it tore, note the push that tore it and begin the second square with that knowledge.
- Bend the eye. Cut a length of wire longer than you need. Mark the bend point. Around the pliers or mandrel, make one smooth bend into an eye. Do not wiggle it into place.
- Bend and close the ring. Form a ring the same way, thread it through the eye, and close it with the ends meeting flush. Test the joint with a gentle pull: it should hold its shape and move freely.
- Finish. File or turn under every cut end. Run the back of a fingernail over each one. If it catches, finish it again.
- Record and put away. Keep the cleanest foil square and the sound joint as your drill pieces, labeled with the date. Clippings in the bin, tools racked, bench brushed down.
When your foil design stands clean in relief and your wire joint holds without a sharp end anywhere on it, your hands have learned what this lesson is for.
Assignment Manual
Assignment key: ✎ written work · ⚒ hands-on practical · ◐ both
Assignment I ⚒ — The Practice Practical
Complete the drills in this lesson: an embossed foil square with a clean raised design and a wire joint, an eye through a closed ring, with every end finished. Your cleanest square and your sound joint are the record of the drill.
Assignment II ✎ — The Ship in the Earth
Using the lesson and the sources below, write a short account of the Sutton Hoo ship burial. Cover: how the ship and its chamber were found, what the British Museum tells us was in the burial, and two techniques from this lesson that the treasure's makers used, with one example object for each.
Assignment III ◐ — The Matrix at Full Craft
Build the full-craft version of your Lesson 17 seal matrix in metal, testing it in wax as you work. With the finished matrix, write a short comparison: what the metal matrix does that your Lesson 17 version could not, what it cost in time and patience, and which of the two you would hand to the next scholar learning seals, and why.
Materials
Level One (household)
- Tooling foil or heavy craft foil, a blunt stylus or dead ballpoint pen, a leather pad, rubber mat, or folded cloth to work on, and a soft dowel or burnisher
- Craft wire in an easy gauge, round-nose pliers, side cutters, and a mandrel (a pencil or dowel serves), with adult supervision
- A practice seal design from Lesson 17, sealing wax, and your Lesson 17 matrix for comparison
- A small file or emery board for finishing ends, and a tray to catch clippings
Level Two (historical)
Everything in Level One, plus:
- Brass or copper sheet in a workable gauge, and a metal blank for the full-craft matrix
- Gravers and small punches for cutting the matrix, or heavy foil and a carved form for a relief matrix
- Finer drawn wire and a second mandrel size, to try a short run of woven chain in the Norse manner
- A drawplate to see and, with an adult, to try the drawing of wire from a short rod
Both levels teach the same craft: relief pushed from the back and sharpened from the front, bends planned and made once, and ends finished before hands are. Level One's craft foil and Level Two's brass carry the same designs and the same standard.
Reflection Questions
Answer the following questions in your workbook.
- Where did your first wire joint fail, if it did, and what did the metal's log, its hardening, tell you about your bending?
- Repoussé raises a design from the back, where the maker cannot see the front. What does that demand of planning, and which earlier lesson taught you the same discipline?
- The Sutton Hoo treasure was buried whole in a ship. What does that decision tell you about what its makers valued metalwork for?
- Why does this workshop finish every cut wire end before a piece is handed over, and what does that rule say about the maker's responsibility?
- This is the course's last ticket. Which of the workshop's materials, paper, cloth, pigment, clay, wood, stone, or metal, remembers your mistakes most faithfully, and what has that taught you?
Professor's Review
The bench holds a square of foil with its design standing clean, and a small joint of wire that holds, and between them the last ticket of this course is earned.
You have worked the oldest material family cold, as its finest makers worked it: relief from the back, detail from the front, bends planned and made once, ends finished before hands. You have also remade an old friend in a new material, and your Lesson 17 matrix in metal will outlast every wax stick in the school.
One build remains, and it is not mine to assign in detail, because it is yours. The capstone follows: the Master Artisan's Build, in which you choose a piece that Evershade needs, plan it, log it, mend what goes wrong in it, and finish it. Every ticket in this course is in your hands now. Spend them well.
PROFESSOR COGBRANCH TIMBERCLANK
Creative Arts Workshop
Master Artisan, Head of House Occidens
Further Reading & Sources
The British Museum, "Sutton Hoo and Europe" gallery. The 1939 excavation, the twenty-seven metre ship, and the chamber's treasures, told by the museum that holds them.
Wikipedia, "Repoussé and Chasing." The two techniques defined and traced from antiquity, including the Tutankhamun mask and the Statue of Liberty.
Encyclopaedia Britannica, "Chasing." The short authoritative definition: chasing works the metal from the front, the opposite of embossing or repoussé, which works it from the back.
The Fitzwilliam Museum, "The Ancient Egyptians: Materials and Technology" fact sheet (PDF). Egyptian metalwork: copper and bronze, hammering and casting, and wire making among the gold worker's techniques.
Student-friendly starting points for exploring this lesson's world. All links verified October 2026.
- The British Museum's Sutton Hoo gallery pages. Begin with the helmet and the shoulder clasps, and look for the foil and filigree this lesson describes.
- Wikipedia's survey of repoussé and chasing, with its gallery. Masks, cauldrons, and armor across four thousand years of one technique.
- Print only: Elizabeth Coatsworth and Michael Pinder, The Art of the Anglo-Saxon Goldsmith (Boydell Press), the standard scholarly study of the craft tradition Sutton Hoo belongs to, held by larger libraries.
Submit your work for this lesson using the form below.
THE UNIT VII QUIZ
CREATIVE ARTS WORKSHOP · UNIT VII: CARVING & METAL
This quiz covers all 3 lessons of Unit VII — Carving & Metal. Complete it from memory, in one sitting if you can, before consulting your lesson notes — it is a measure of what has stayed with you, not of what you can look up.
The quiz has two parts. Part I gathers the lesson questions, grouped by the lesson they came from. Part II is a vocabulary matching exercise drawn from the unit’s lessons. When you have finished, score it honestly, note the result in your workbook, and revisit any lesson whose questions went wrong before you move on.
CONTINUE IN THE CREATIVE ARTS WORKSHOP
← Previous · Lesson 28: Runestones, Ogham Sticks & Inscription Plaques Next · Studio Extension E1: Precision Paper Instruments, Built to Last →
Unit VII · Carving & Metal Creative Arts Workshop · All 39 Lessons
Bookstore Shelf The Library · Creative Arts Shelf Course Supplies
The rest of Unit VII: Lesson 27 · First Cuts: Carving Safely · Lesson 28 · Runestones, Ogham Sticks & Inscription Plaques
From the Workshop Shelf
The printed companions to this lesson, from Professor Timberclank’s shelf in the shop.