
HERBOLOGY
Unit IV · Lesson 29Pressing & Preserving Plant Specimens
HERBOLOGY GREENHOUSE • UNIT IV • LESSON 29
PROFESSOR BERYL FERNFOOT
Herbology Greenhouse
Master Herbalist
Professor's Introduction

Welcome to Unit IV, scholars.
Units I, II, and III were about the living plant: knowing it, housing it, and multiplying it. Unit IV is about what happens next. The harvest comes in, and the gardener's work shifts from growing to keeping. Drying, pressing, storing, and honoring what the garden has given. This is some of the oldest human plant-work there is, and it begins, in this lesson, with the simplest act of preservation: pressing a plant flat between sheets of paper.
I want you to hold two pictures in your mind today. The first is your own press: newspaper, cardboard, a stack of heavy books on the kitchen table, and you arranging a leaf so its veins show. The second is a cabinet in London where a pressed delphinium has kept its blue flowers for nearly three hundred years. Both pictures show the same craft. The only difference is time.
There is something deeply hopeful about pressing a plant. A flower lasts a week. A pressed flower can outlive the gardener, the garden, and the century it grew in. Let us learn to do it well.
— Professor Beryl Fernfoot, Herbology Greenhouse • Master Herbalist • Head of House Oriens
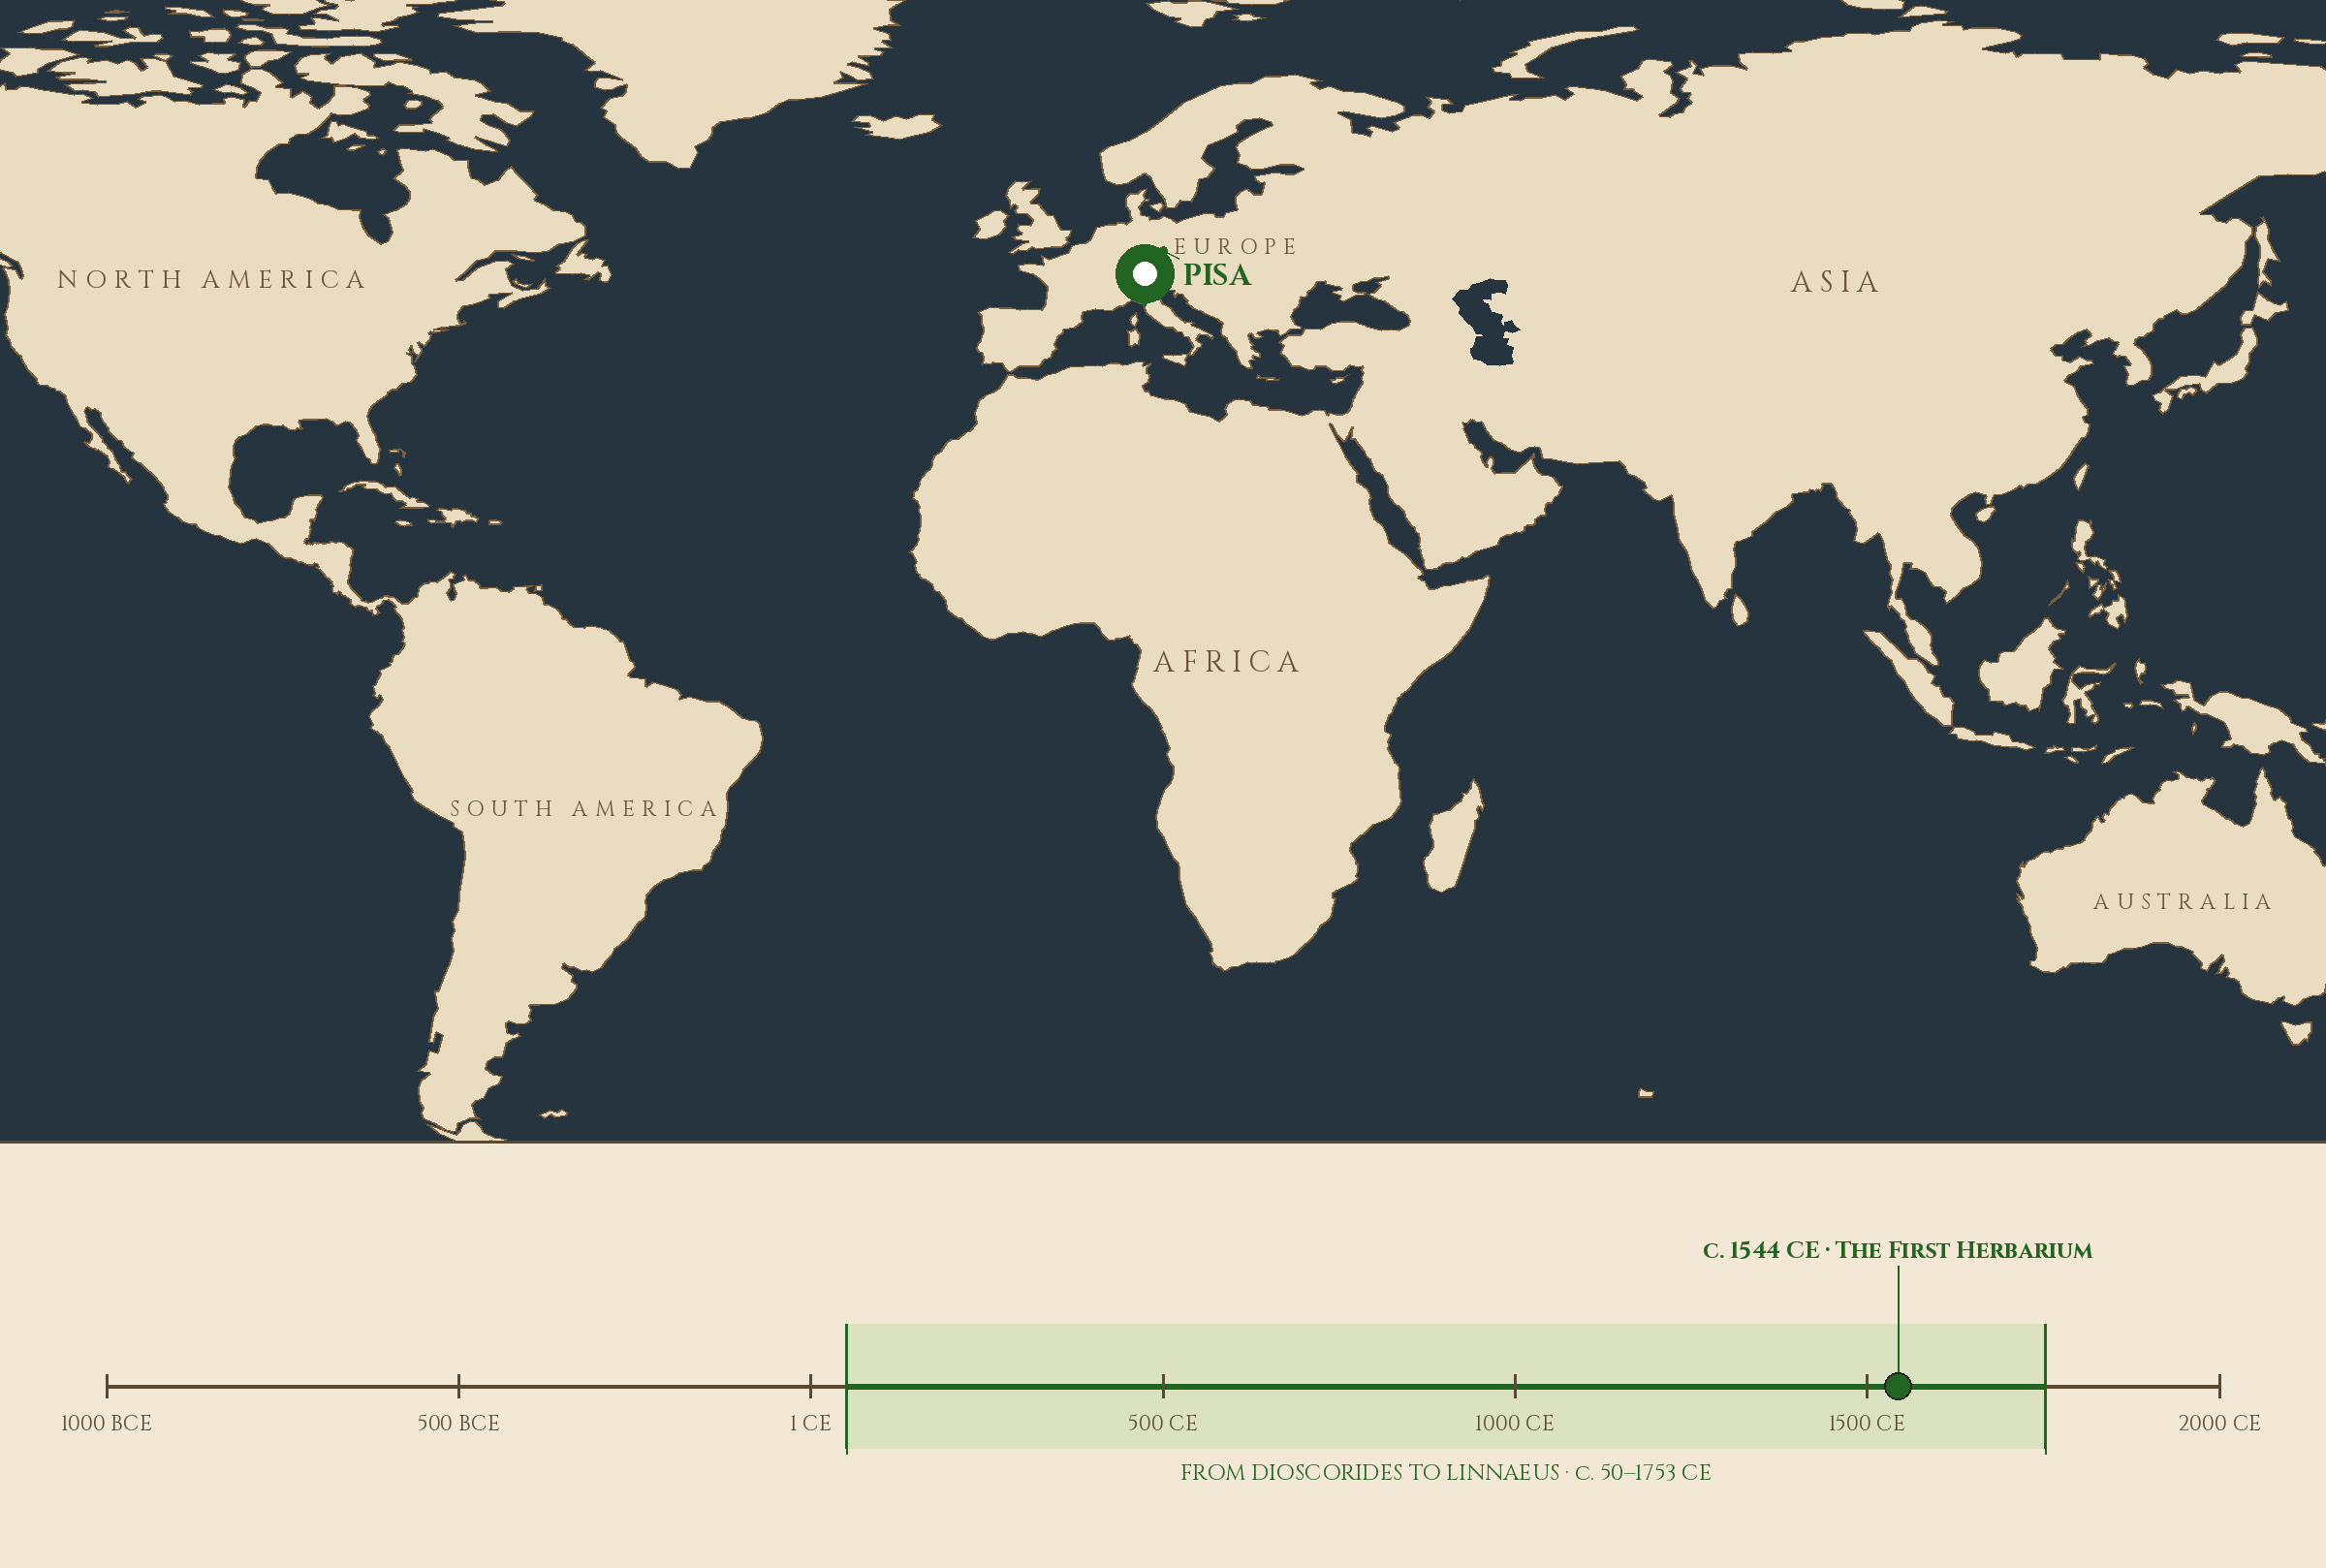
Where and when: Pisa, c. 1544 CE — The First Herbarium. The pin is this lesson. The line beneath the map is our road: every stop a place where the knowledge of plants changed, every lesson a step along it.
Lesson Objectives
By the end of this lesson, you will be able to:
- Explain what a herbarium is and describe how the tradition began in Renaissance Italy
- Name the contributions of Luca Ghini and Carl Linnaeus to specimen preservation
- Press plant specimens correctly using newspaper, blotters, and even weight
- Record complete specimen labels: plant name, date, place, habitat, and collector
- Mount a finished specimen on a herbarium sheet and begin your own personal herbarium
- Gather plant material responsibly, protecting wild and rare plants
Reading this lesson: ★ marks the passages to remember. They return on the unit quiz and the class test. Check in questions ask the material back as you go; answer them in your workbook when you meet them.
Working this lesson: Your assignment packet is the first download on this page. Work in it as the lesson moves along, answering each assignment as its subject is taught — or read the lesson through for your notes and take the assignments as homework afterward. Both are proper ways to sit this class. Signposts in the reading tell you where each assignment belongs. Written answers are short answers in your own words; a few honest lines are worth more than a filled page.
Your Assignment Packet
This lesson's assignments live in its packet: the Lexicon Handout (every term, course terms marked ◆), Materials, Guided Practice, the Assignment Manual with its answer key for self-checking, the Reflection Questions, and the Workbook Checklist. Download the packet before you begin and keep it beside you as you read.
Why Press a Plant?
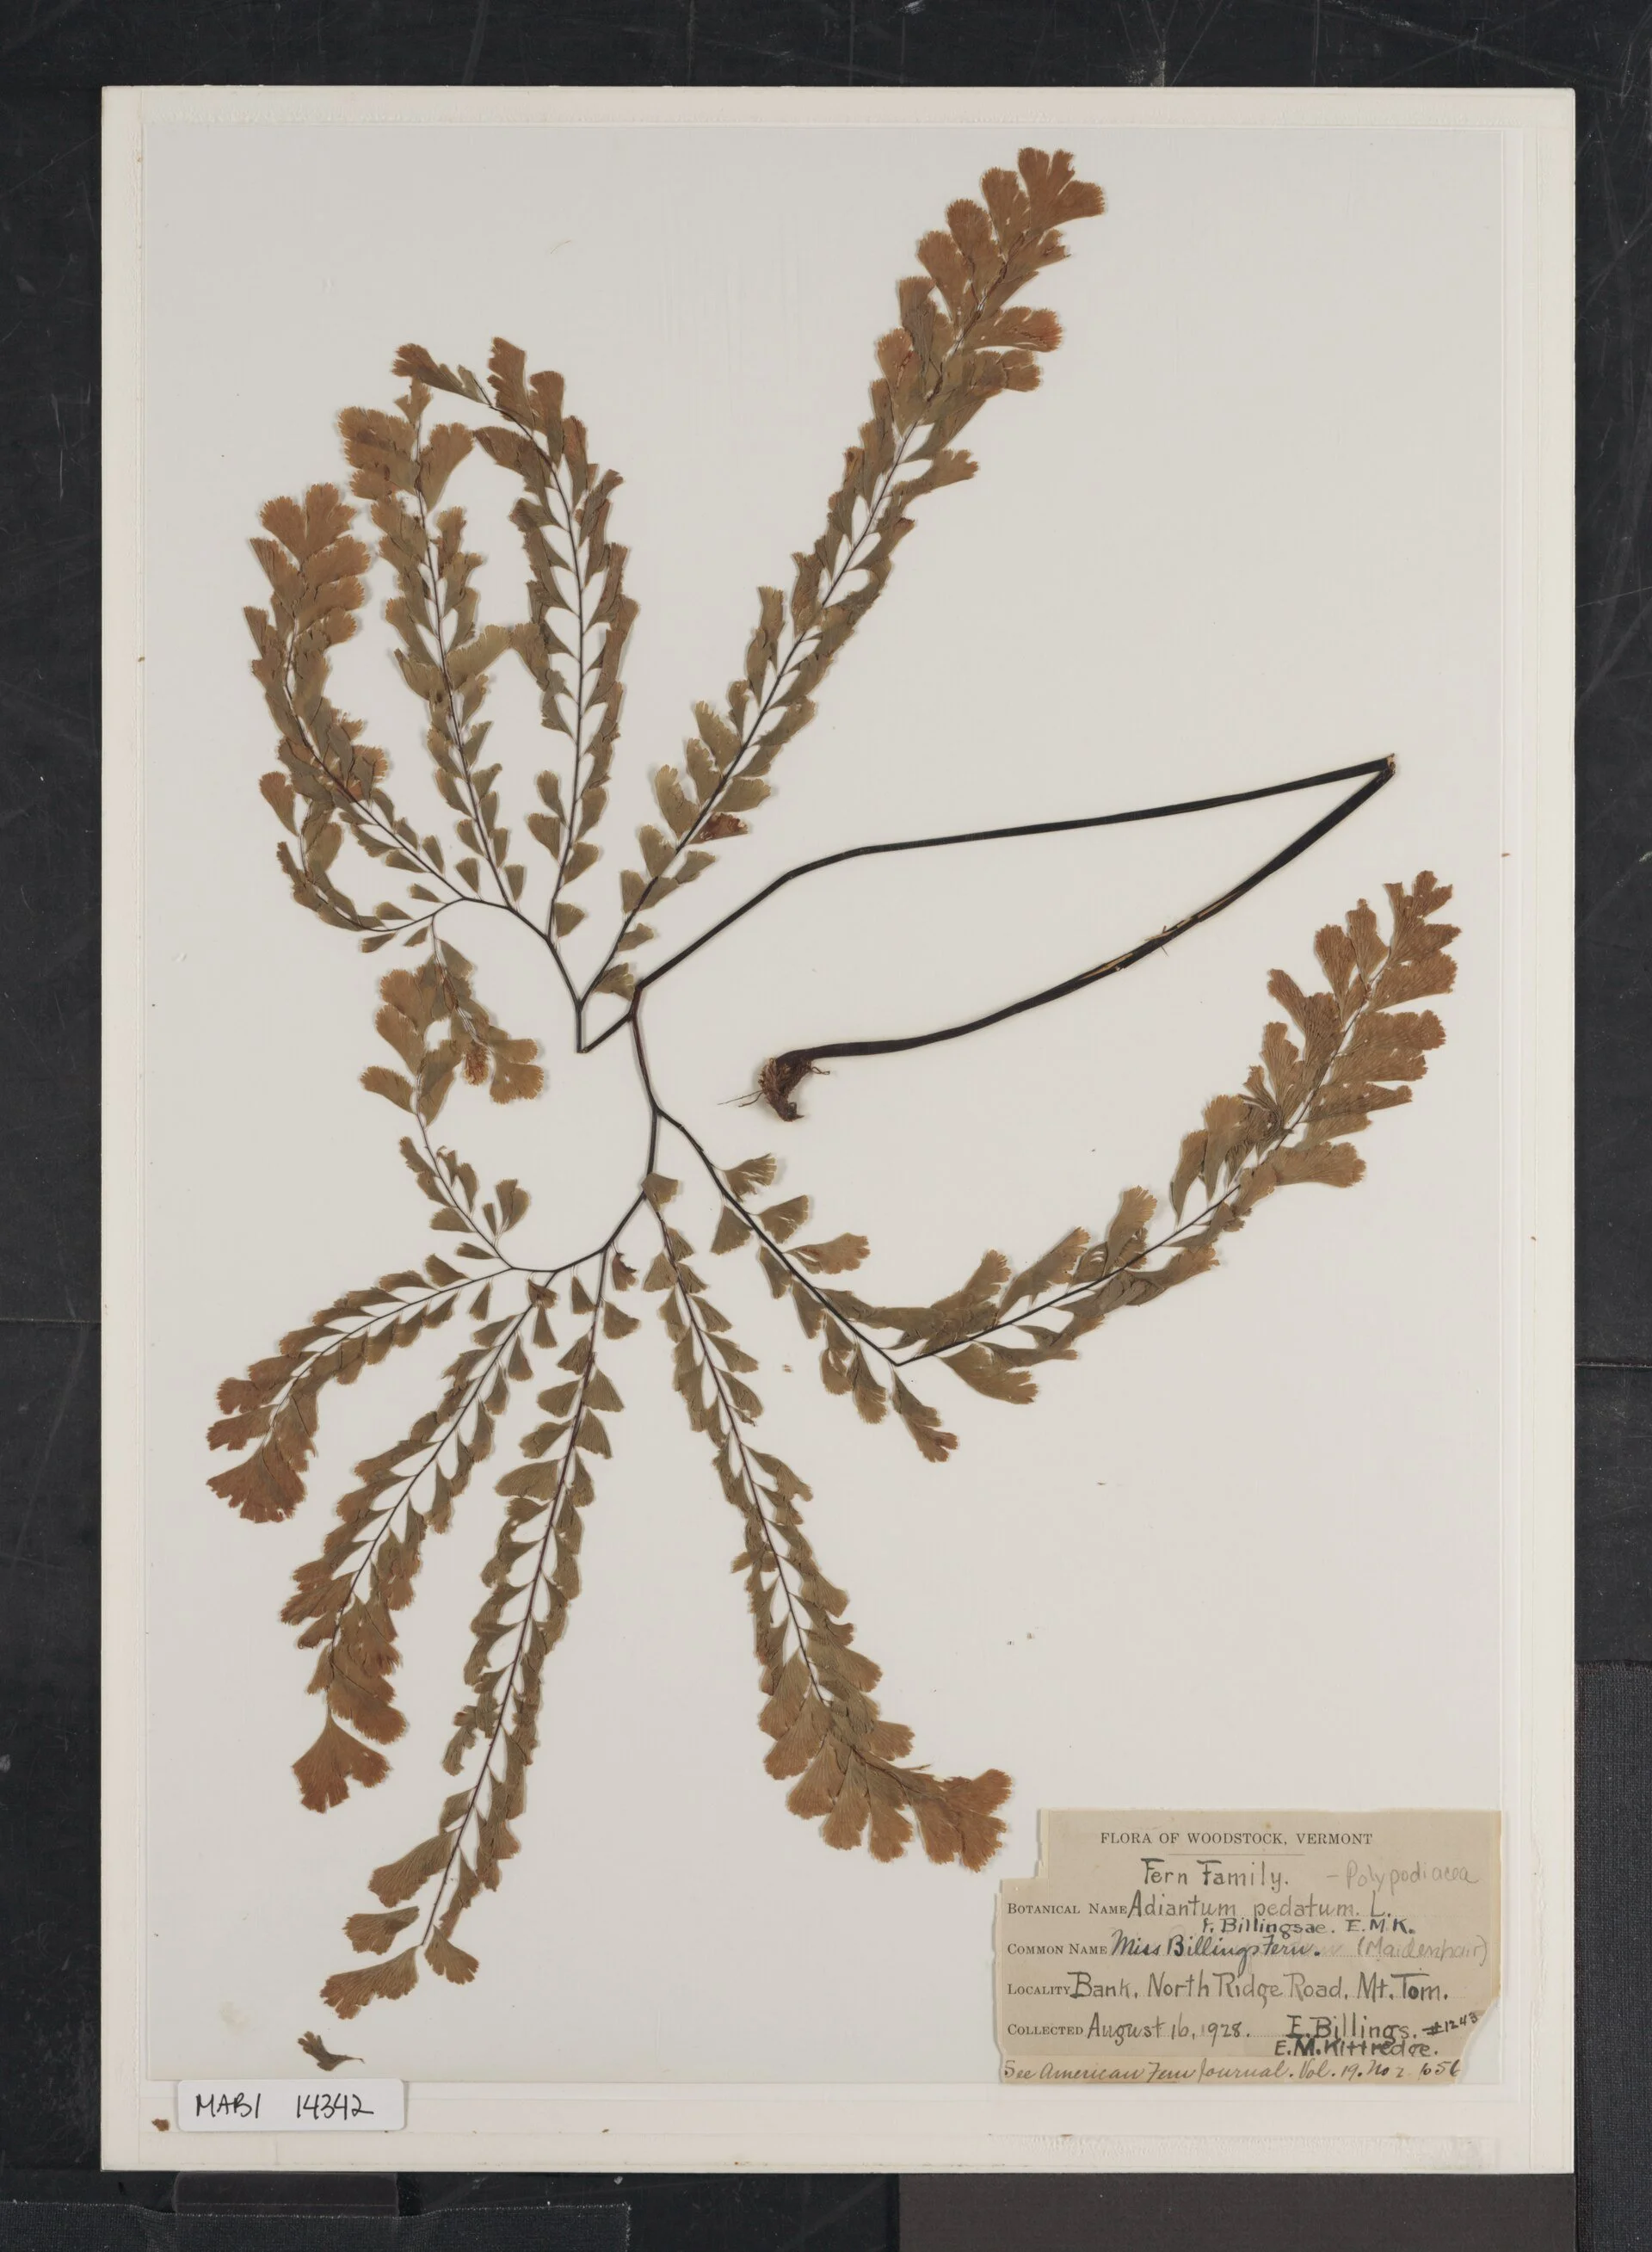
A well-pressed fern, filed as a record. Maidenhair fern (Adiantum pedatum), pressed and mounted at Woodstock, Vermont, and collected on August 16, 1928: the fronds keep their form nearly a century later, and the label in the lower right corner still says who gathered it, where, and when. Study and beauty are not opposites — this sheet is both.
Maidenhair fern specimen sheet, Billings-Kittredge Herbaria (Woodstock, Vermont, 1928), photographed by the U.S. National Park Service. Public domain.
A pressed plant is a portrait that does not fade on schedule. Flowers wilt in days, and even a careful sketch records only what the artist noticed. A pressed specimen keeps the real thing: the actual leaf with its actual veins, the actual flower with its petals counted and true. Held beside a living plant a year later, it answers the question "was it really shaped like that?" with the plant's own body.
★ Gardeners press plants for two reasons, and both matter. The first is study. When you press a specimen and label it with the date and place, you create a record that outlasts your memory. Next year, when the same plant blooms, you can compare. In five years, you can trace how your garden has changed. Botanists have done exactly this on the grand scale: collections of pressed plants, called herbaria, now hold hundreds of millions of specimens worldwide, and scientists still consult sheets pressed centuries ago to answer new questions about old plants.
Check in: Name the two reasons gardeners press plants — and say what a pressed specimen can answer that even a careful sketch cannot.
The second reason is simpler: beauty. A well-pressed fern, a spray of lavender, a maple leaf at its autumn brightest, these are lovely things, and arranging them is a quiet pleasure. Your pressed specimens will become bookmarks, study cards, and the pages of your own herbarium. And one day, when the Creative Arts workshop takes up bookbinding, the pages you press today can be bound into a book you made with your own hands.
So this lesson teaches an old craft with two faces: the scientist's record and the artist's keepsake. They are not opposites. The best herbarium sheets in the world are both.
❦ In your workbook: record why we press a plant in your own way — the portrait that does not fade, the two reasons, and the record that outlasts memory — copy, sketch, or note what matters.
The Herbarium: A Very Old Idea

Luca Ghini, the Bologna and Pisa teacher who created the first recorded herbarium around 1544. Living plants die back in winter and grow far away; Ghini's answer was to press them between paper and glue the flattened plants to sheets — a dry garden, a hortus siccus, that students could study in any season.
Portrait of Luca Ghini, artist unknown. Public domain.
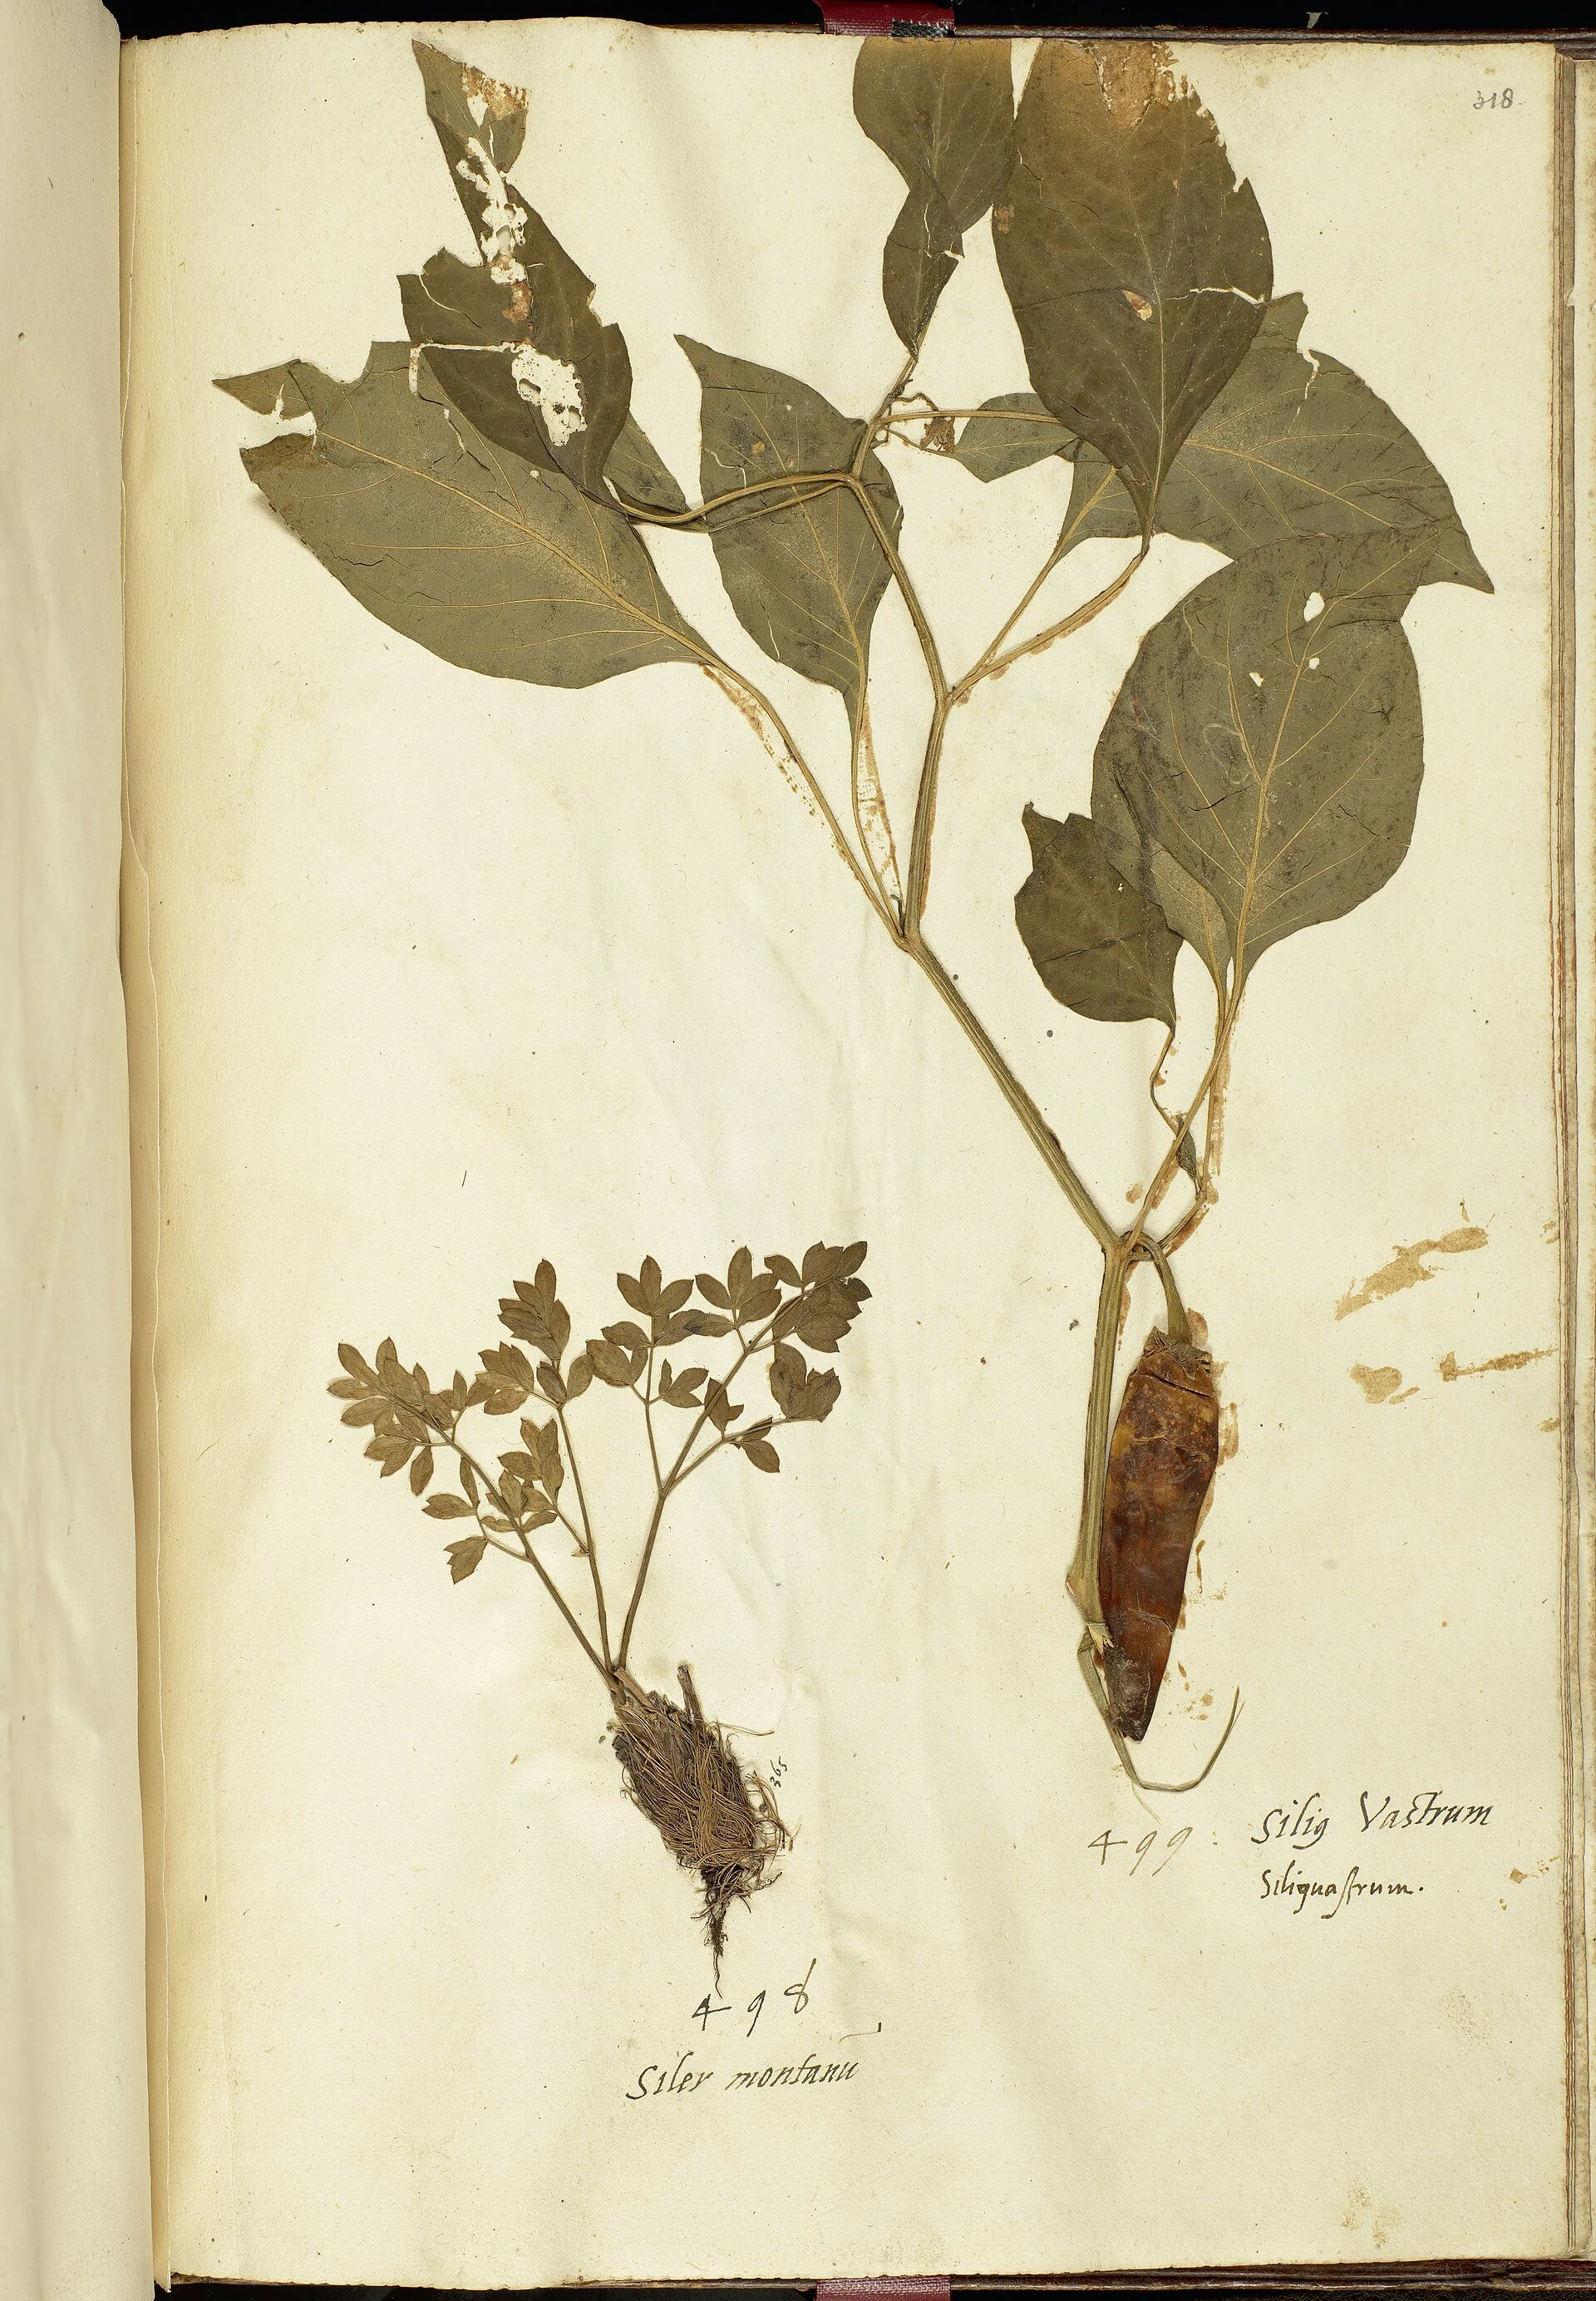
A page from the En tibi herbarium (c. 1558, now at Naturalis, Leiden): two pressed plants glued to one bound page, each with its name and number written beneath — a pepper, its dried fruit still hanging, at right, and a smaller rooted plant at left. The first herbaria were books like this; loose uniform sheets filed in cabinets came later, with Linnaeus.
Capsicum annuum page of the En tibi herbarium (Naturalis Biodiversity Center, Leiden, L.2111284); the herbarium is attributed to Francesco Petrollini. Public domain.
The story begins in Italy, in the 1540s, with a physician and botanist named Luca Ghini. Ghini taught medicinal plants at the universities of Bologna and Pisa, and he faced a problem every plant teacher faces: living plants die back in winter, they grow far away, and two students arguing about a description have nothing to settle the argument with. His solution was wonderfully direct. He dried plants by pressing them between pieces of paper, then glued the flattened plants to cardboard sheets. He called the collection a hortus siccus, a dry garden.
★ Ghini created the first recorded herbarium around 1544, and he recognized at once what it was good for: preserving specimens so they could be studied and exchanged as references among scholars. None of Ghini's own sheets survive, which is a loss the botanical world still notes. But his students carried the practice forward, and theirs survive. Gherardo Cibo began a herbarium in 1532. Andrea Cesalpino's specimens remain intact at Florence. And Ulisse Aldrovandi, another of Ghini's students, built a herbarium of some five thousand specimens between 1551 and 1586. Modern researchers have studied Aldrovandi's sheets to track how the plants of lowland Europe changed across five centuries, reading five hundred years of botanical history from paper and glue.
Check in: What teaching problem was Ghini solving — and what did he call his collection?
The early herbaria were bound into books, like the drawn herbals they were replacing. In the 1700s, Carl Linnaeus, the Swedish botanist who gave the living world its system of scientific names, ran into the practical problem of the bound book: as his collection grew, there was no way to insert a new specimen in its proper place. His answer became the standard the whole world still uses. Mount one specimen on each large sheet of paper. Make every sheet the same size. File the sheets in cabinets, grouped with their relatives, so new material can be added wherever it belongs. Walk into a major herbarium today and you will still see Linnaeus's system at work.
Check in: Why did the bound book fail a growing collection — and what three things did Linnaeus standardize instead?
Linnaeus's own specimens survive at the Linnean Society of London, and they make the strongest possible argument for the craft. A delphinium he pressed, Delphinium grandiflorum, was photographed for a digital archive in 2001. Its flowers were still blue: papery, translucent, with pollen still visible on the page. Pressed by a man's hands in the 1700s, still legible to a camera in 2001. That is what careful pressing can do.
The great collections grew from these beginnings. The herbarium at the Royal Botanic Gardens, Kew, in London, officially began in 1852, built from the private collection of its director William Hooker, and it is now one of the largest herbaria in the world. Its sheets include plants gathered on nineteenth-century expeditions and specimens hundreds of years old. And they are not museum pieces gathering dust. Researchers have used Kew's pressed plants to study how climate change shifts flowering time: one study compared 77 specimens of the early spider orchid, pressed between 1848 and 1958 and held at Kew and the Natural History Museum in London, against modern field observations, and found the pressed flowers told exactly the same story as the living ones.
When you press your first specimen today, you join this long line. Your sheet will not sit in Kew. But the method is the same, the care is the same, and the principle is the same: a plant, flattened with patience, labeled with honesty, can speak to the future.
❦ In your workbook: record the herbarium's story in your own way — Ghini's dry garden, Linnaeus's cabinets, and the blue delphinium — copy, sketch, or note what matters.
Professor's Mid-Lesson Note
Before we touch the press, scholars, one thought.
You may feel, looking at those centuries of botanists, that pressing is a grand and formal science and that your kitchen-table effort is something lesser. Set that feeling aside. Ghini pressed plants between paper because he needed to teach. Linnaeus changed the sheets because his cabinet was full. Every improvement in this craft came from someone solving a small, practical problem at their own table. Your small, practical problems count the same.
And remember that a herbarium is not a trophy case. The point was never to own the plant. The point was to know it, and to let others know it too. Press with that spirit, and your sheets will be honest ones.
— Professor Beryl Fernfoot, Herbology Greenhouse • Master Herbalist • Head of House Oriens
Pressing Technique: The Book and the Weight
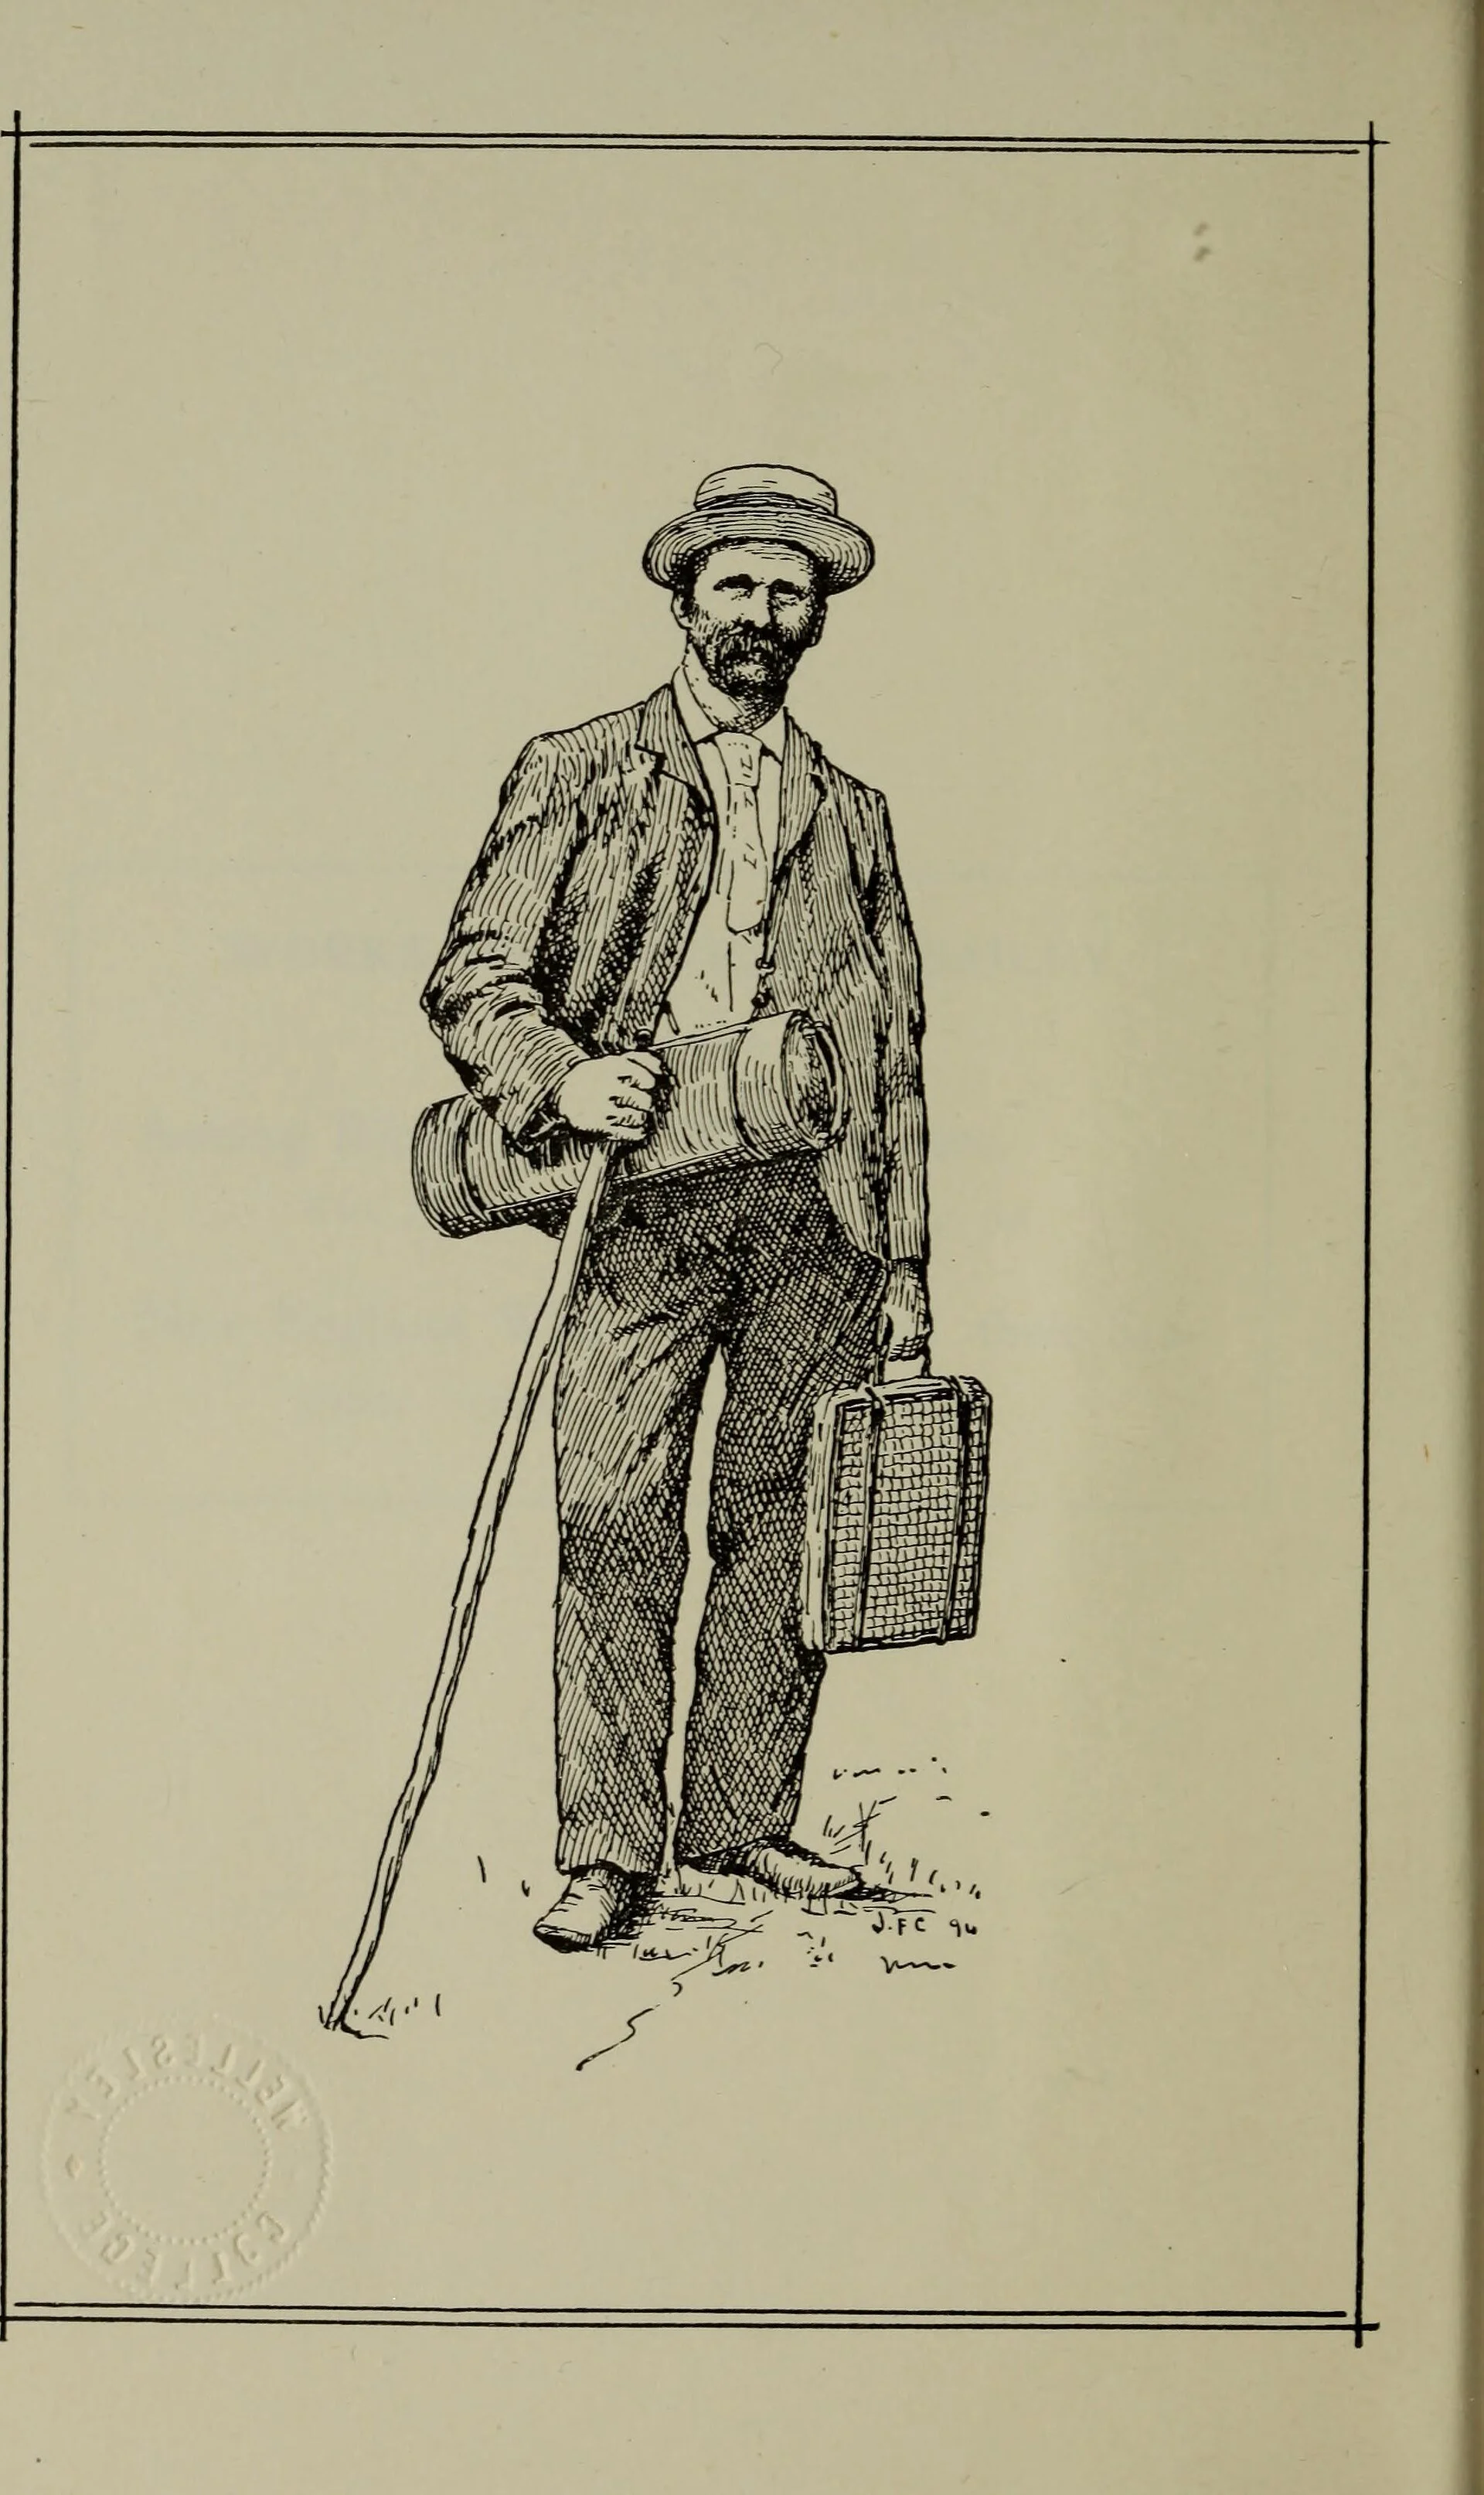
The field kit of 1899, from W. W. Bailey's Botanizing (1899): a collector with his walking stick, his tin collecting case, and — carried by its handle — a small strap-bound plant press. The lesson's press is the same sandwich at home: absorbent paper, cardboard, the plant between, and even weight on top.
W. W. Bailey, Botanizing; a guide to field-collecting and herbarium work (1899), plate drawn by J. F. Collins; scan via the Internet Archive / Biodiversity Heritage Library. Public domain.
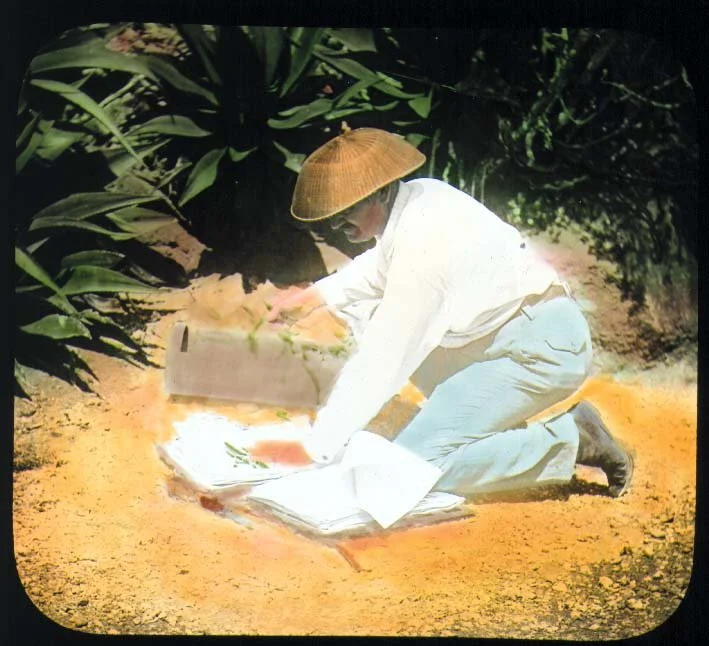
Pressing in the field, 1899: a botanist of the Allison V. Armour Expedition kneels at his open press, arranging a specimen in its papers where it grew. The lesson's kitchen-table press observes the same order — arrange the plant as it grew in life first, one leaf turned to show its underside, then close the papers and set the weight on.
Hand-coloured lantern slide, Allison V. Armour Expedition, 1899; Field Museum Library, via Flickr Commons. No known copyright restrictions.
Pressing is simple, but it rewards care at every step. The principle: remove the plant's water quickly and evenly, while holding it perfectly flat, so that nothing rots, wrinkles, or molds.
★ Gather in the morning, after the dew dries. A dry specimen presses far better than a wet one. Choose healthy, representative material: a stem with leaves, and flowers or fruit if the plant has them. Take a little more than you think you need, so you can arrange the best pieces. Never take the only specimen, never strip a plant bare, and never gather from the wild without knowing it is legal and abundant. Your own garden, a friend's garden with permission, or fallen material are the best sources. More on gathering ethics in the safety note at the end of this lesson.
Check in: When is the best moment to gather — and what three "nevers" govern taking material?
Prepare the press. You need no special equipment. A plant press is a sandwich: cardboard, absorbent paper, plant, absorbent paper, cardboard, repeated as many layers as you like, with weight on top. Use newspaper or blotting paper for the absorbent layers, never glossy flyers or magazine pages, which trap moisture instead of drawing it out. Cut cardboard to a uniform size. The weight can be a stack of heavy books, a box of books, anything heavy and flat that presses evenly.
Arrange the specimen. Lay the plant on one half of a folded newspaper sheet, spreading it as it grew in life. This is the step that separates a good specimen from a sad one. Turn at least one leaf to show its underside. Open one flower so its center shows, and leave one flower in profile so its shape reads. Avoid overlapping parts; where leaves overlap they trap moisture and darken. Trim away crushed or damaged pieces. If a stem is very thick, slice it lengthwise so it presses flat. Bulky seed heads can go in a small paper envelope kept with the sheet.
★ Press and wait. Fold the newspaper over the plant, stack the layers, and set the weight on top. Then comes the part beginners skip, and it matters most: change the damp papers. For the first two or three days, replace the newspaper around each specimen daily; the papers will feel damp because they are doing their work, drawing water out of the plant. After that, change them twice a week until the specimens are dry. Most thin leaves and flowers dry within one to two weeks. Fleshy stems and thick flowers take longer, sometimes three weeks or more. You will know a specimen is ready when it lifts from the paper without sticking and feels papery and stiff throughout. If you see mold, discard the specimen and start fresh; mold spreads to its neighbors.
Check in: For the first two or three days, how often do the papers change — and how do you know a specimen is ready?
A fan blowing gently across the press speeds drying and helps colors hold. Warm, dry air is your ally at every stage.
A note on color. Pressing preserves shape far better than color. Some colors hold beautifully: purples, oranges, and whites tend to keep. Blues are unpredictable, sometimes lasting, sometimes fading to beige within months. Expect change, and do not be disappointed by it. The Linnaean delphinium kept its blue for centuries, but it is the exception that proves the rule. A faded specimen is still a true record of form, and form is what the herbarium is for.
❦ In your workbook: record the pressing technique in your own way — the sandwich, the arrangement, and the paper-change schedule — copy, sketch, or note what matters.
In your packet: Exercise I — The First Pressing ⚒ begins here. Work it now, or mark the place and take it as homework — your choice.
The Specimen Label: A Plant's Passport
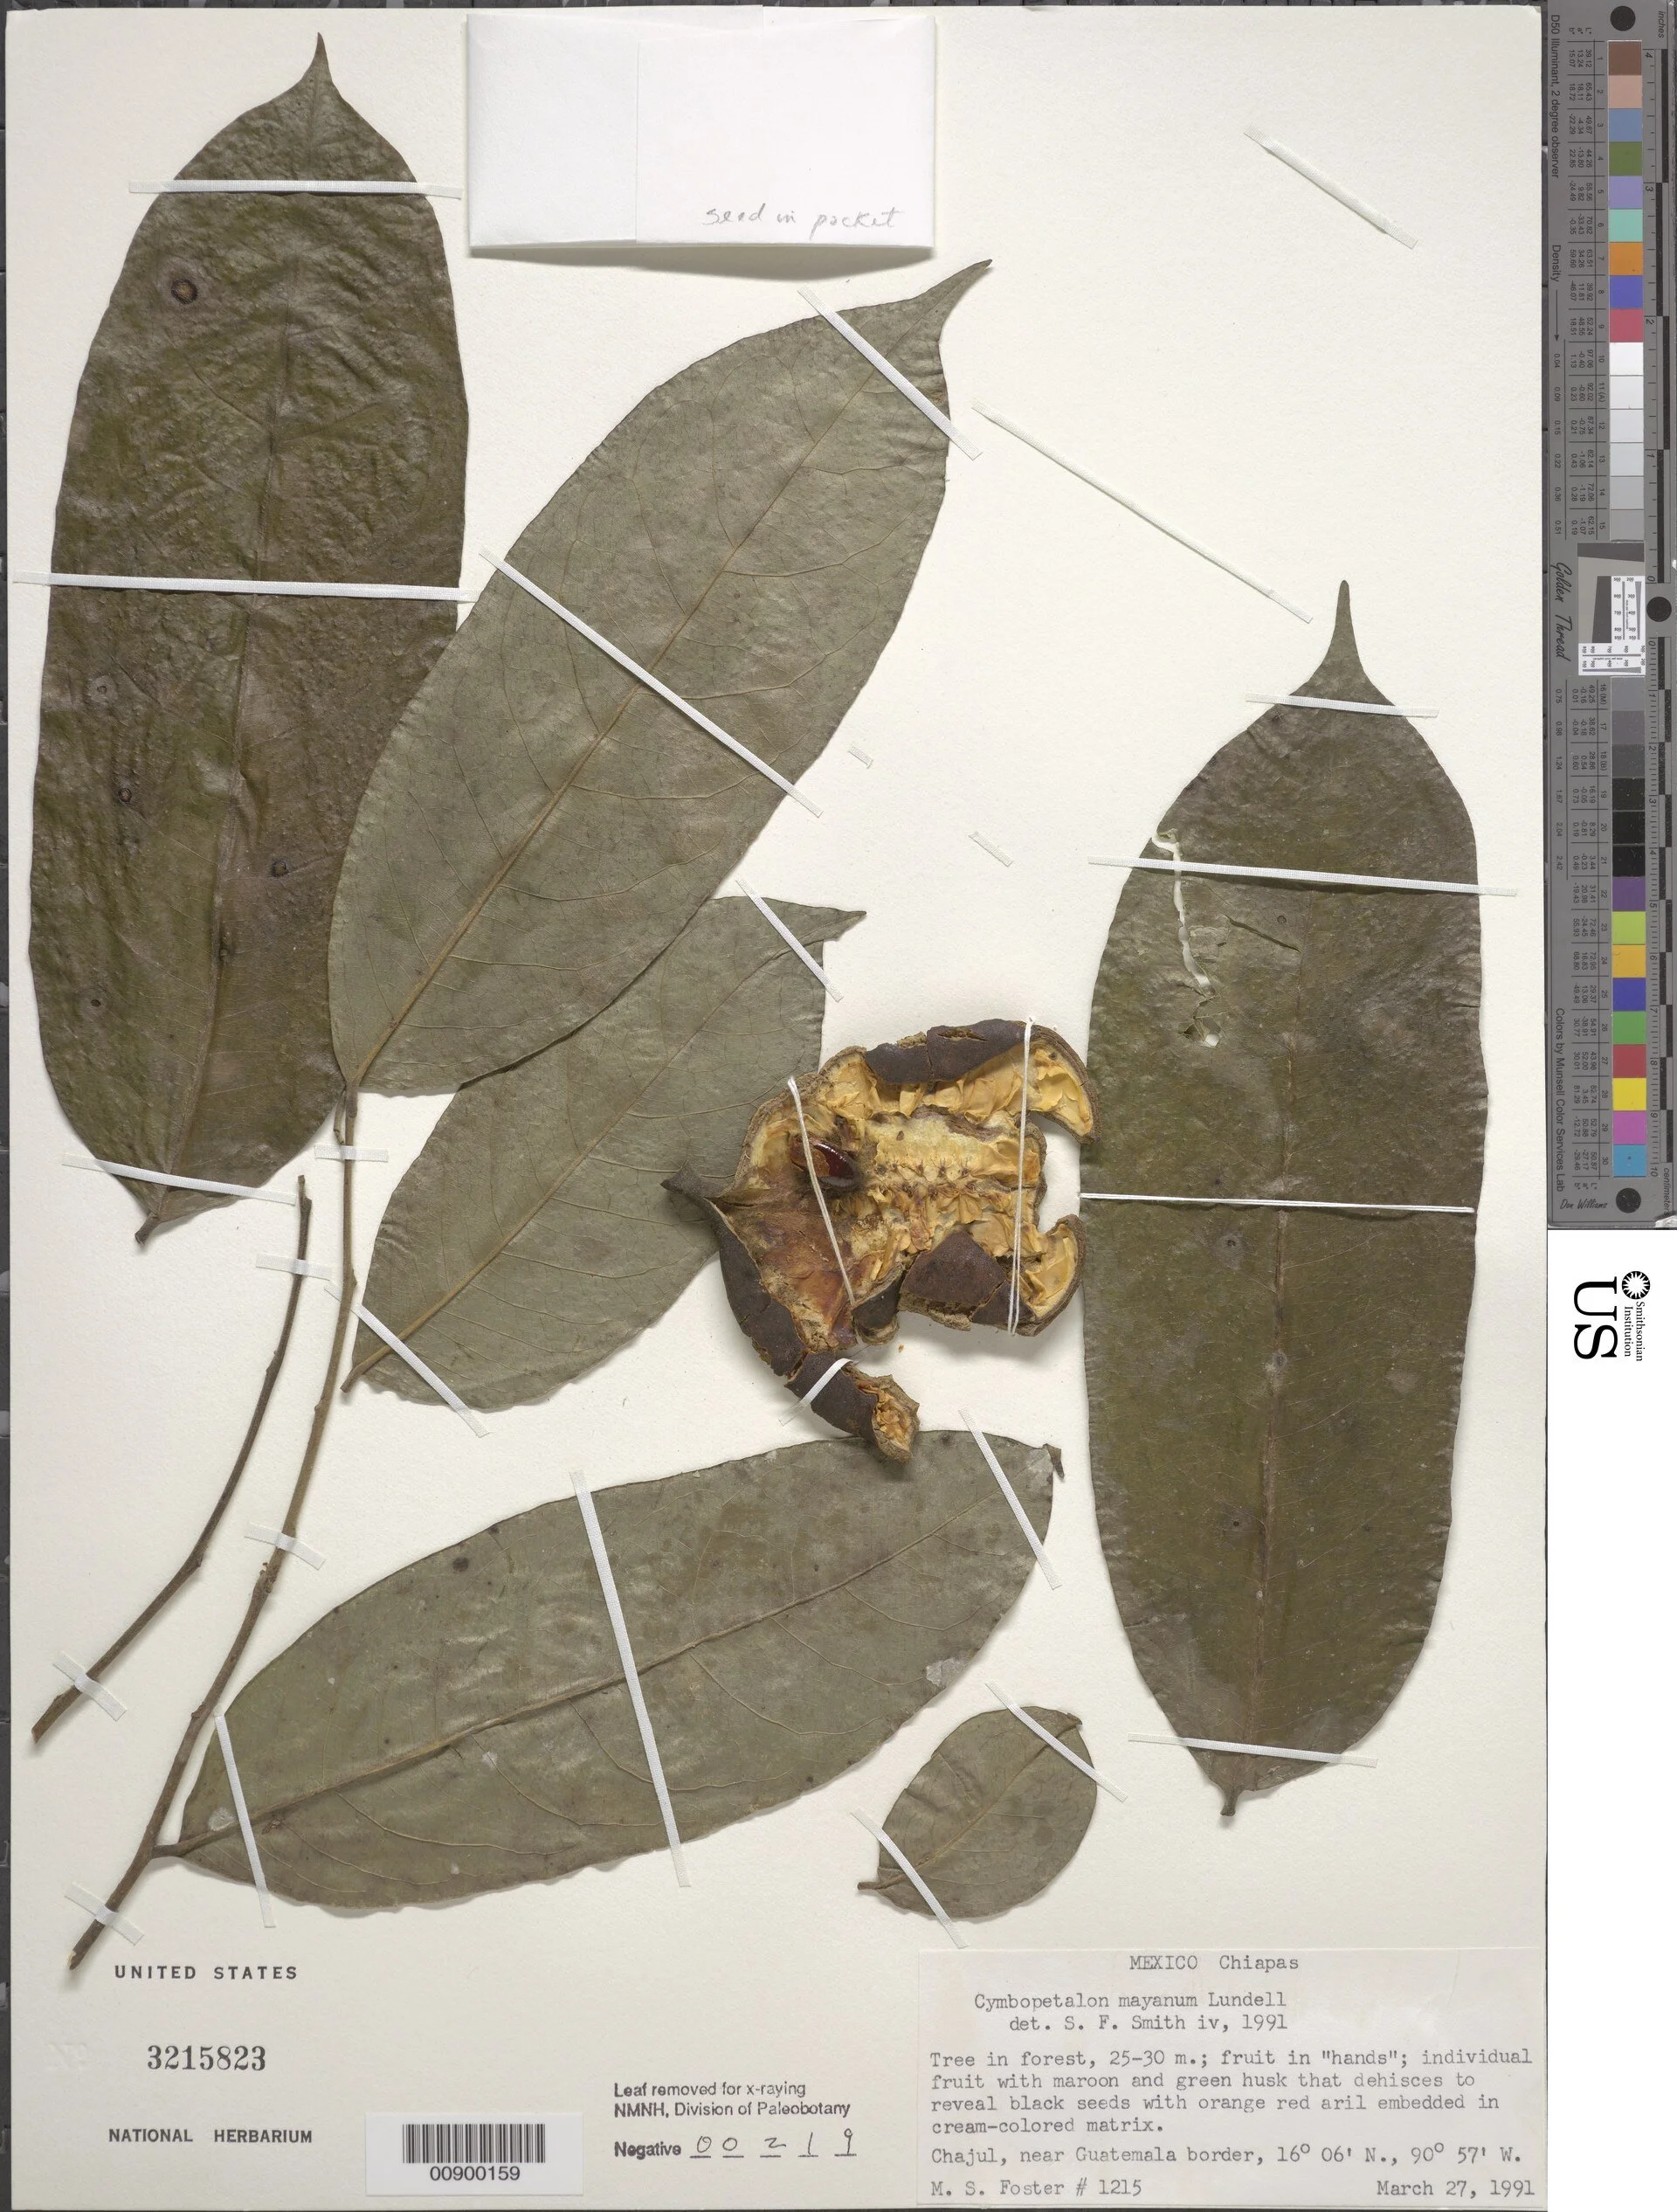
The label as passport, in its modern form. A voucher sheet at the U.S. National Herbarium: Cymbopetalum mayanum, collected in Chiapas, Mexico, on March 27, 1991, by M. S. Foster (collection no. 1215) — habitat, place with coordinates, and collector all on the label, loose seed kept in the pocket glued at the top of the sheet, exactly where the lesson puts the fragment envelope.
Herbarium specimen of Cymbopetalum mayanum, U.S. National Herbarium, Smithsonian Institution (NMNH-00900159; collected by M. S. Foster). CC0.
A pressed plant without a label is a beautiful mystery and a scientific dead end. The label is what turns a keepsake into a record. Every specimen you press gets a label, written in pencil or archival ink, and the habit of labeling completely is the single most important habit this lesson teaches.
★ A complete specimen label records:
- The plant's name, common and scientific, as far as you can determine it. If you are unsure, write what you know and mark it as tentative. An honest "unidentified mint family" beats a confident wrong name.
- The date of collection, written fully: day, month, year.
- The place, specific enough that someone could find the spot again: not "the park" but "the north bed of the community garden on 9th Street, Lawrence."
- The habitat, a few words on where and how it grew: sunny border, damp ditch edge, oak shade.
- The collector, your name. Every herbarium sheet in the world carries its collector's name, from Ghini's students to you.
- A collection number, if you are building a series: your first specimen is number 1, and the numbers climb from there. Matching numbers in your field notebook tie the pressed sheet to everything you observed while the plant was alive.
Check in: Name the six things a complete label records — and say why an honest tentative name beats a confident wrong one.
Write the label when you press, not later. Memory fades faster than petals. Keep a field notebook, even a small one, where each number gets a few lines of living-plant observations: height, companions, insects visiting, scent. The pressed sheet preserves the body. The notebook preserves the life.
❦ In your workbook: record the specimen label in your own way — its six entries, and the notebook that preserves the life beside the sheet that preserves the body — copy, sketch, or note what matters.
In your packet: Exercise II — The Specimen Label ✎ begins here. Work it now, or mark the place and take it as homework — your choice.
Mounting the Specimen
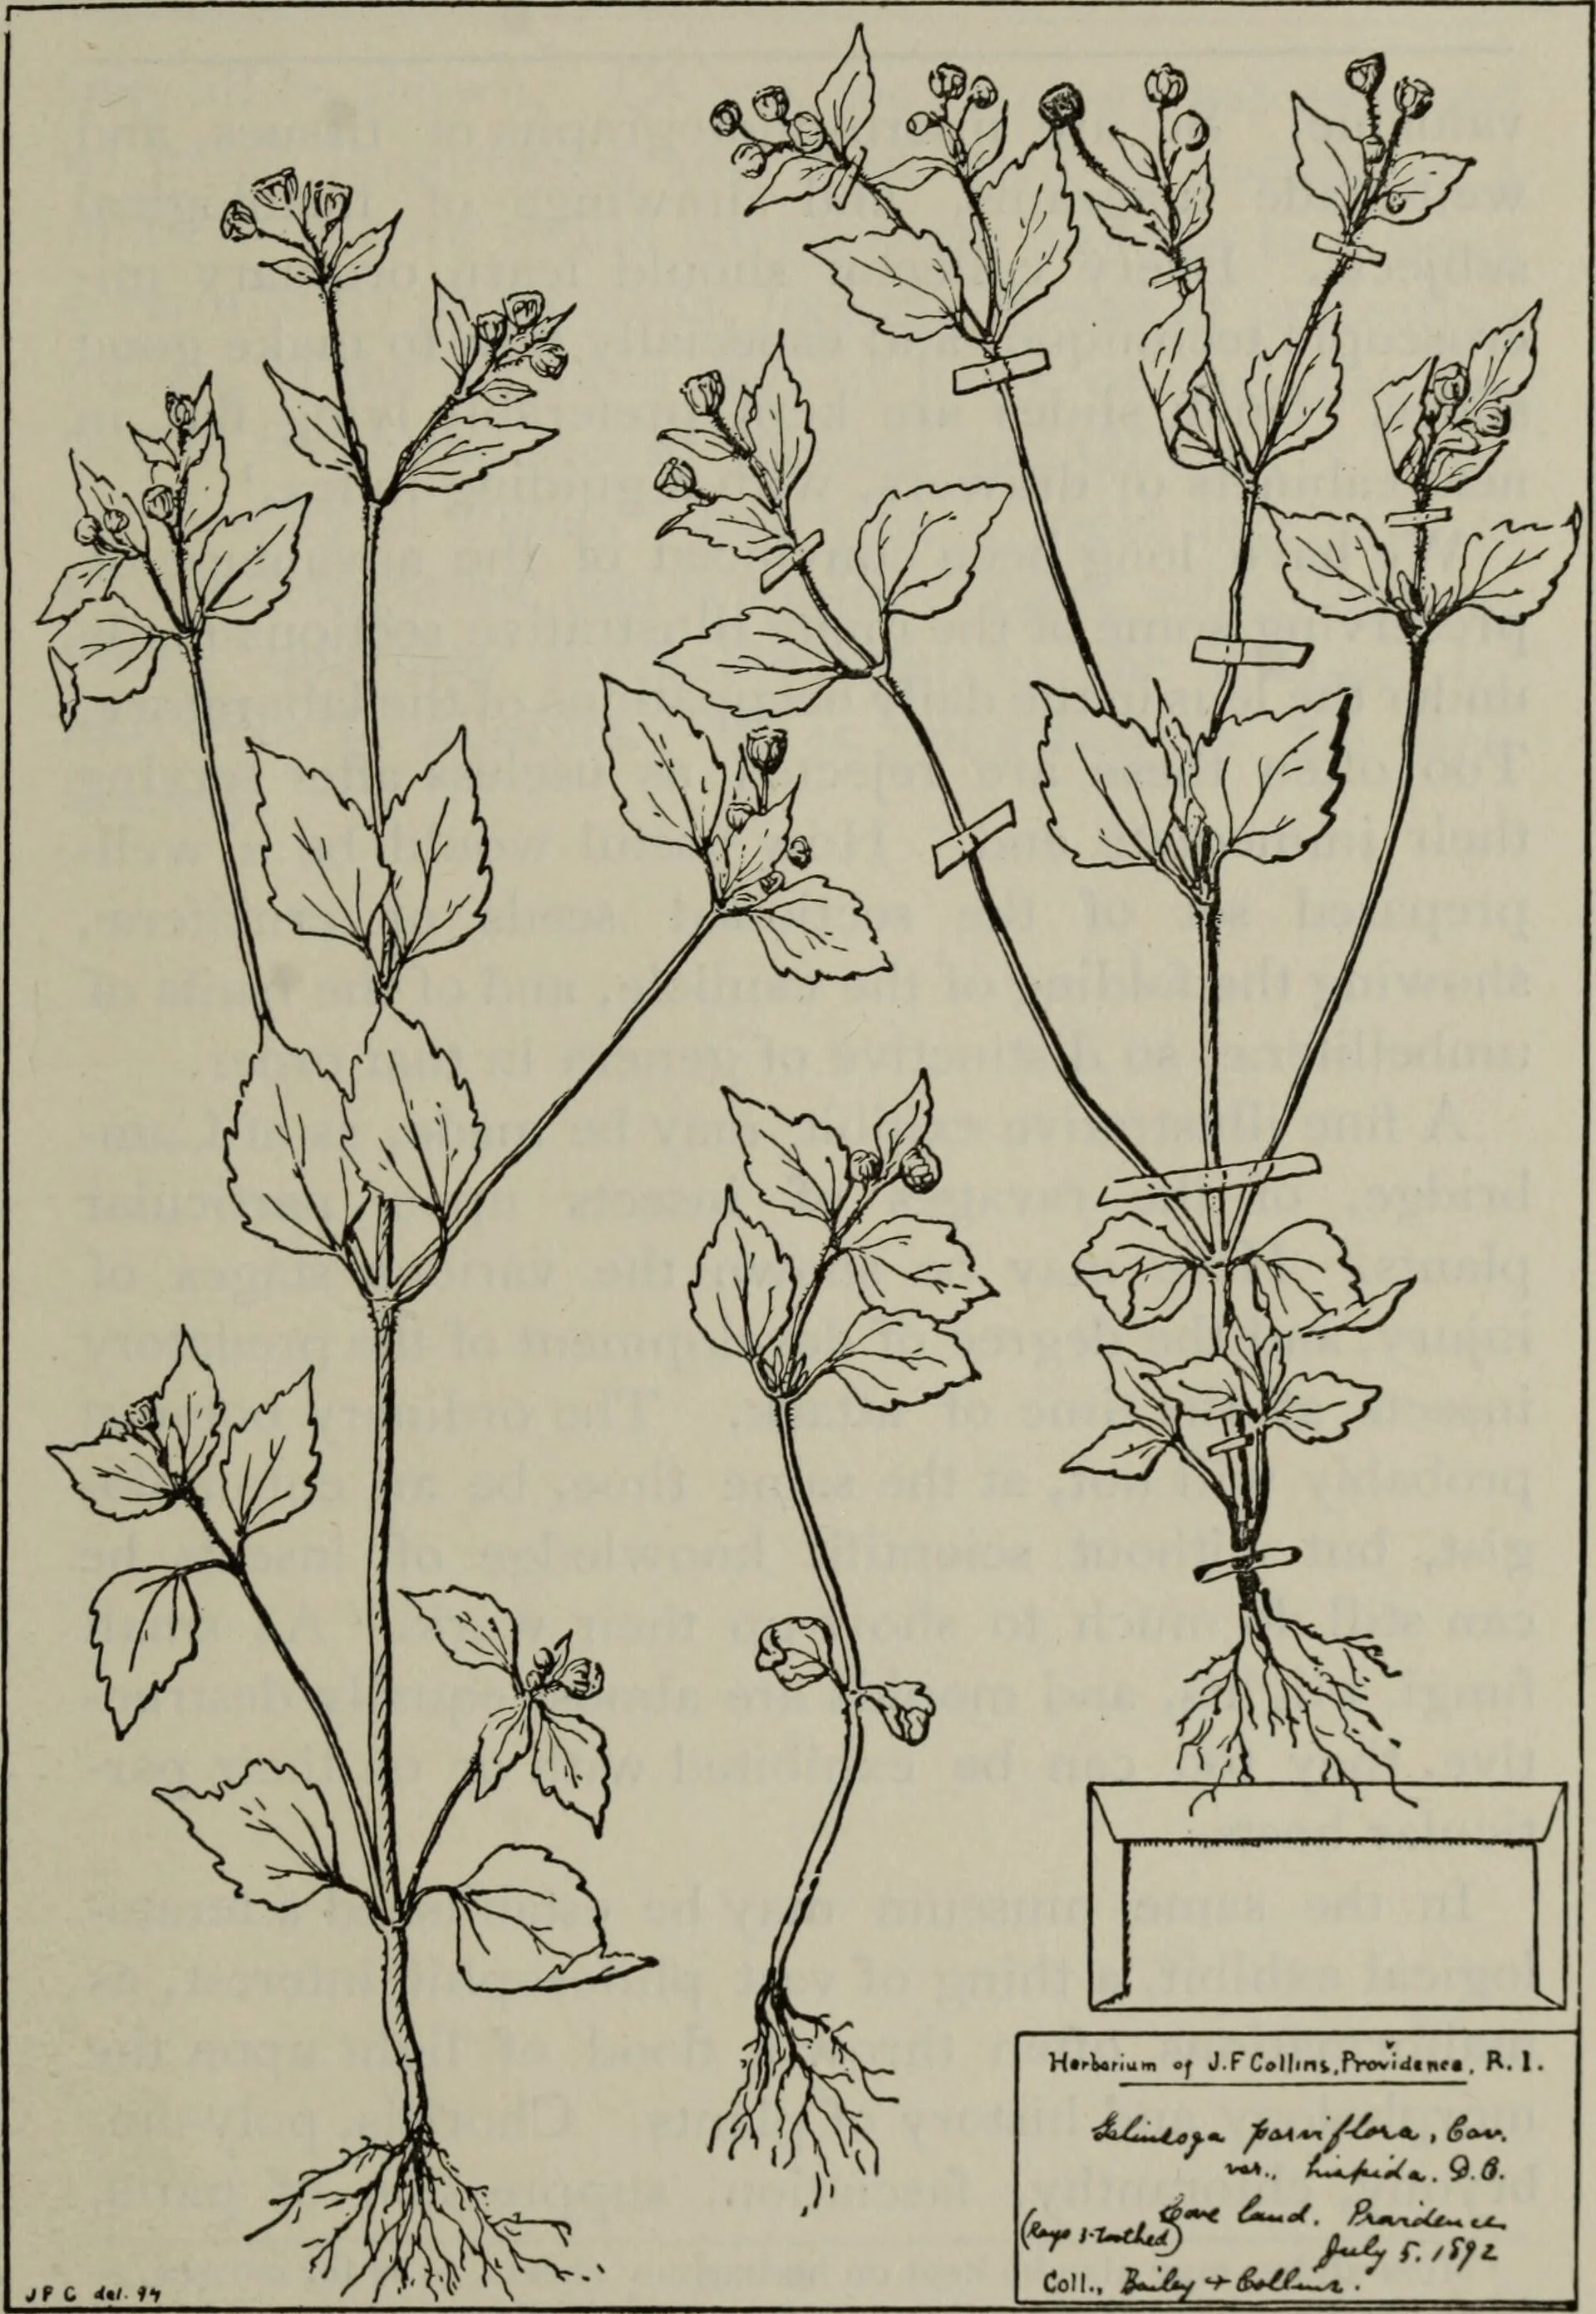
Mounting, drawn from a real sheet for Bailey's Botanizing (1899). Count the tape strips: a few anchor points at stem and branch hold the plant while its structure stays visible — never glue down every leaf. Below the plant, the fragment envelope; in the lower right corner, where every botanist looks first, the label: name, place ("Bare land, Providence"), date (July 5, 1892), and collectors.
W. W. Bailey, Botanizing; a guide to field-collecting and herbarium work (1899), plate drawn by J. F. Collins from the Collins herbarium sheet; scan via the Internet Archive / Biodiversity Heritage Library. Public domain.
When a specimen is fully dry, it is ready for its permanent home: the herbarium sheet. Mounting is the craft of fastening the plant to its sheet so it will survive decades of handling.
★ Use stiff paper, ideally acid-free, since ordinary paper yellows with age and can stain the specimen. Arrange the dried plant on the sheet the way it lay in the press, then fasten it with small strips of archival tape or dots of glue at the stem and branch points. Never glue down every leaf; a few anchor points hold the plant while letting its structure show. Fragile flowers may need a tiny tent of tissue to protect them. Glue the label in the lower right corner of the sheet, where every botanist will look for it first. Loose seeds or fragments go in a small envelope glued to the sheet.
Check in: Where does the label go on the sheet — and why are a few anchor points better than gluing down every leaf?
Store finished sheets upright in folders, in a dry place out of direct sun. A shelf of folders is a herbarium, whether it holds six sheets or six thousand. Yours begins today.
❦ In your workbook: record mounting in your own way — anchor points, the label's corner, and upright storage out of the sun — copy, sketch, or note what matters.
In your packet: Exercise III — The Herbarium Shelf ⚒ begins here. Work it now, or mark the place and take it as homework — your choice.
Your Familiar's Pressed Portrait
Your first herbarium sheets should include your Scholar's Familiar. Choose a healthy stem with good leaves, and a flower if your plant is blooming, and press it as this lesson teaches. Label it completely: name, date, place, habitat, collector, collection number 1. Mount it on your first herbarium sheet. This is the opening page of a record that will grow with your studies: the same plant, pressed again in a year, will show you how much it, and you, have changed.
Press two or three specimens in total for this lesson: your Familiar and one or two more plants that interest you. Arrange each one with care. You are making pages for a book that does not exist yet, the personal herbarium you will bind in the Creative Arts workshop when that class comes to its bookbinding lessons. Press well now, and your future book will be a beautiful one.
If you do not keep a Scholar's Familiar, adopt a plant you can visit regularly, a park tree's fallen leaves, a neighbor's garden flower with permission, even a handsome sidewalk weed, and press specimens from it exactly the same way. The pressing skills are identical; only the ownership differs.
❦ In your workbook: record your Familiar's pressed portrait in your own way — the stem you chose, its label, and what a second pressing in a year would show — copy, sketch, or note what matters.
Pressed Flowers Beyond the Herbarium
Not every pressed plant needs to become a scientific record. The same technique makes lovely small things, and the Greenhouse encourages both uses.
Pressed flowers and leaves make beautiful bookmarks: mount a small specimen on a strip of card, cover it with clear contact paper or laminate it, and trim the edges. They make study cards too: press the parts of a flower separately, petals, stamens, a single leaf, and mount each on its own card with its name, and you have a set of botanical flashcards no shop can sell you. A framed arrangement of pressed autumn leaves is a gift worth giving.
One caution travels with all decorative work. Pressed plant crafts are for looking at, not for eating or brewing. Some pressed plants are toxic, and pressing does not make a plant safe. Keep decorative specimens clearly separate from anything in your kitchen, label them as display only, and never press a plant you cannot identify and then use it in anything that touches food or skin. Beauty first, safety always.
❦ In your workbook: record pressed flowers beyond the herbarium in your own way — the small things the technique makes, and the display-only caution that travels with them — copy, sketch, or note what matters.
Safety Notes
Gathering is the step where care matters most, for the plants and for you.
★ Gather responsibly. Take only from your own garden, or with the owner's clear permission. In parks and wild places, take fallen material first: leaves, petals, and seed heads the plant has already released. Never gather a plant you cannot identify. Never gather anything rare, protected, or growing in a fragile habitat, and when in doubt, photograph instead of picking. A good rule for wild gathering: take no more than one stem in twenty, and only where the plant grows abundantly. The plant community was there before you and should be undisturbed after you.
Check in: State the one-in-twenty rule — and what you do instead when you are in doubt about a wild plant.
Handle moldy specimens with care and discard them. Mold on a press can spread to neighboring sheets and irritate lungs, so work in ventilated space, and if a specimen molds, bag it and throw it away rather than trying to save it. Wash your hands after handling press papers and specimens.
Press only plants you can identify, and keep every pressed specimen, however pretty, away from food preparation. Some of the loveliest pressed flowers belong to toxic plants. Display-only means display-only.
Heavy books stacked as a press should sit on a stable surface where they cannot topple onto small feet. Keep the press where it will not be knocked over.
❦ In your workbook: record the safety notes in your own way — responsible gathering, the mold rule, and display-only means display-only — copy, sketch, or note what matters.
Guided Observation: Reading the Plant Before It Enters the Press
This lesson's observation is the arranger's eye, worked in full before any weight goes on: a close reading of the plant material you are about to press, noting everything the press must preserve — because once the papers close, the living arrangement is gone and only your notes remember it.
You will need:
- the plant material you will press (a healthy stem from your garden or your Familiar, or fallen material — a park tree's fallen leaves serve exactly as well)
- a folded sheet of newspaper, opened flat
- your field notebook
- a pencil
Look at the living arrangement. Lay the plant on the open newspaper and spread it as it grew in life. Note how the leaves sit along the stem, which way the flower faces, and where the stem branches. This arrangement — not a tidier one — is what the specimen must show.
Turn one leaf. Turn at least one leaf to show its underside and compare the two faces: the veins stand out below, and the color is often paler. A good specimen shows both faces, because a botanist three hundred years from now cannot turn the leaf over for herself.
Read the flower two ways. Open one flower so its center shows, and leave one flower in profile so its shape reads. Count the petals while the flower is still fresh and write the count in your notebook; the pressed sheet keeps the petals counted and true, but your note is the check on them.
Note what pressing must preserve. In your field notebook, beside the collection number this specimen will carry, record the living plant: height, companions, insects visiting, scent. The pressed sheet preserves the body. The notebook preserves the life.
Consider:
- What does the leaf's underside show that its top does not?
- Which colors do you expect to hold, and which to fade — and why is the faded sheet still a true record?
- What did you write in the notebook that the press itself cannot keep?
No-plant alternative: work the same reading on fallen material — a park tree's fallen leaves, petals, and seed heads the plant has already released.
Workbook path: if no material is within your reach this week, work the reading on a clear photograph of a plant you know, or on a flower pressed long ago in a book — sketch its arrangement, mark which leaf you would turn, and write the notebook entry the specimen should have carried. The arranger's eye is the skill; the fresh stem is its next occasion.
Materials
Required (Level One — household items)
- Newspaper or blotting paper: several sheets per specimen; never glossy flyers or magazine pages, which trap moisture.
- Cardboard: cut to a uniform size, one piece between each specimen layer for ventilation.
- Heavy books or a flat weight: a stable stack on a sturdy surface for even pressure.
- Scissors: for trimming specimens and cutting paper to size.
- Pencil and small labels: for writing specimen labels at pressing time; pencil does not run if paper dampens.
- Glue stick or small tape strips: for mounting the finished specimen.
- Stiff paper or white card: for the herbarium sheet; acid-free paper is ideal.
- Your grow ledger and a field notebook: for collection numbers and living-plant observations.
Suggested (Level Two — historically closer)
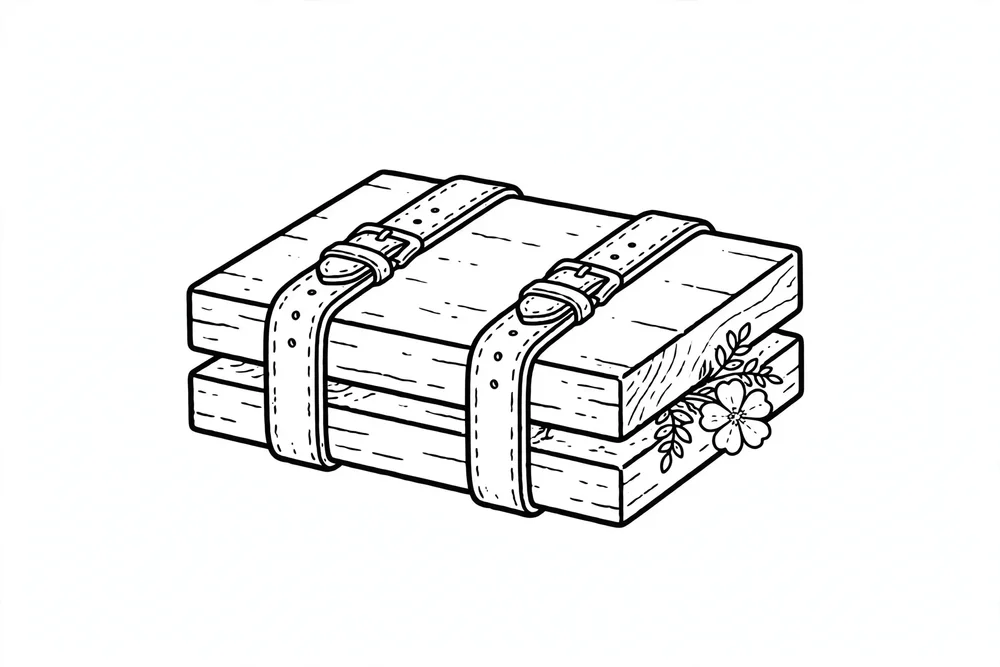
- A wooden plant press: two boards with straps or belts, cardboard ventilators, and blotting paper, the traditional field botanist's kit.
- Archival mounting strips and acid-free herbarium sheets: the professional standard Linnaeus would recognize.
- A bound field journal: numbered pages in the style of a nineteenth-century collecting notebook.
Safety notes: Gather responsibly: take only from your own garden or with clear permission. In wild places, take fallen material first and never gather rare or protected plants; when in doubt, photograph instead of picking. Never press a plant you cannot identify, and keep all pressed specimens away from food preparation. Some lovely pressed flowers belong to toxic plants; display-only means display-only. Moldy specimens go in the bag and out to the trash; do not try to save them. Work in ventilated space and wash your hands after handling press papers. Stack heavy books on a stable surface where they cannot topple. Keep the press where it will not be knocked over.
Reflection Questions
Answer the following questions in your workbook.
- Ghini pressed plants because he needed to teach when living plants were out of season or far away. What teaching problem does a pressed specimen solve that a written description cannot?
- Linnaeus replaced bound books with loose uniform sheets in cabinets. Explain in your own words why the bound book failed as collections grew, and what the cabinet system made possible.
- The lesson says a faded specimen is still a true record. What does pressing preserve well, what does it preserve poorly, and why is the preserved part the one science needs most?
- A friend wants to press a rare wild orchid they found on a hike. Using this lesson's gathering ethics, explain what they should do instead and why.
- Your herbarium begins with collection number 1. Imagine a botanist opening your folder three hundred years from now. What would make your sheets useful to them, and what would make them useless?
Workbook Checklist — Lesson 29
In my workbook I have:
- ☐ explained what a herbarium is and how the tradition began with Ghini's dry garden in Renaissance Italy
- ☐ named what Linnaeus standardized — one specimen per large uniform sheet, filed in cabinets — and why the bound book failed
- ☐ pressed two or three specimens under even weight, changing the papers daily for the first three days, then twice a week
- ☐ recorded the paper changes and each specimen's drying time in my grow ledger, noting which colors held and which faded
- ☐ written a complete label for every specimen — name, full date, specific place, habitat, collector, and collection number
- ☐ kept living-plant observations beside each collection number in my field notebook
- ☐ mounted my best specimen on a herbarium sheet, label in the lower right corner, and filed it as my personal herbarium's first sheet
- ☐ gathered responsibly — permission first, fallen material before picked, nothing rare or protected, no more than one stem in twenty
☐ Lesson completed Date: ___ Signature: ___
The Professor's Closing Note
You began this lesson with newspaper and heavy books. You end it with membership in one of the oldest scientific traditions in the world.
Somewhere in London, a delphinium pressed before your great-grandparents were born still shows its blue flowers to anyone who opens the right cabinet. Somewhere in Florence, sheets pressed by Ghini's students still teach botanists about the plants of the 1500s. And on your shelf, your first herbarium sheets are drying: your Familiar's leaves, a flower from the garden, each with its label in your own hand.
They belong together, those cabinets and your shelf. Not because yours will sit in a museum, but because the method is the same and the honesty is the same. A plant, pressed flat, labeled truly. That is the whole craft, and it has not changed in five hundred years.
Next lesson, we turn from pressing to drying for use: the harvest brought in, cured, and stored. But that is another day's work. For now, change your papers, write your labels, and let time do the flattening.
The greenhouse doors stand open. Keep them flat and keep them true.
— Professor Beryl Fernfoot, Herbology Greenhouse • Master Herbalist • Head of House Oriens
Cross-Class Connections

Creative Arts · Unit V, Lesson 21 — Building the Plant Press
Boards flat and straps even, scholars — that is the whole of my lesson and the making of yours. Professor Fernfoot teaches what goes into the press: which plants, gathered when, arranged how, and mounted afterward onto the herbarium sheet. My bench builds the instrument itself — two boards checked true, straps drawn down in turns, ventilators and blotters in their order — and proves it on plain paper before any specimen is trusted to it. Build the press right, and it will keep a plant flat, dry, and recognizable longer than any of us will live.
Creative Arts · Unit II, Lesson 11 — Case Binding & Archival Boxes
Cases are not hurried, scholars, and neither are herbaria. The sheets you mount in the Greenhouse are pages of a book that does not exist yet; in my workshop you will learn to case such a book to measure — boards cut square, cloth turned in, the text block set into its case like a door into its frame — and to build the archival box in which a precious volume, or a great plant record, rests against the centuries it is meant to inform. Bring your herbarium sheets when they have grown into a herbal, and we will house them properly.
Further Reading & Sources
- History and Modern Uses of a Herbarium — University of Washington Bothell. Ghini, Linnaeus's cabinet system, and the Linnean Society's blue delphinium. - Luca Ghini — Wikipedia. The first recorded herbarium, the hortus siccus method, and his students' surviving collections. - Kew Herbarium — Wikipedia. Hooker's 1841 directorship, the 1852 founding, and the collection's historic specimens. - Exploring a 500-Year-Old Herbarium — GKToday. Aldrovandi's 1551–1586 herbarium and the Royal Society's five-century floristic study. - Squish it Flat! — Royal Alberta Museum. A friendly step-by-step pressing guide with daily paper-change advice. - The Botanist's Art: Pressing and Drying Flowers and Leaves — The Free Library. Blotter schedules, drying times, and which colors hold. Browse the Herbology shelf in the school Library for readable editions of these works.
End of Lesson 29.
Submit your work for this lesson using the form below.
CONTINUE IN THE HERBOLOGY GREENHOUSE
← Previous · Lesson 28: Drying Herbs the Traditional Way Next · Lesson 30: Seed Saving & Storage →
Unit IV — Harvest, Preservation & Use Herbology Greenhouse — All 37 Lessons
The rest of Unit IV: Lesson 27 · Timing the Harvest · Lesson 28 · Drying Herbs · Lesson 30 · Seed Saving · Lesson 31 · Culinary Herbs · Lesson 32 · Harvest Festival Project