

HERBOLOGY
Unit IV · Lesson 28DRYING HERBS THE TRADITIONAL WAY
PROFESSOR BERYL FERNFOOT
Herbology Greenhouse
Master Herbalist
Herbology Greenhouse • Unit IV: Harvest, Preservation & Use • Lesson 28
Professor's Introduction

Welcome to the greenhouse, gardeners,
Harvesting is only half the work of keeping a plant. In our last lesson we learned when and how to gather; now we learn how to keep what we have gathered, so that summer's work can flavor winter's kitchen.
Air-drying is the oldest preservation craft in the herbalist's keeping, older than any printed book, and it asks for almost nothing: string or rubber bands, a screen or a paper bag, a dark corner with moving air, and patience. People have hung herbs from rafters for thousands of years, and the method has barely changed, because the plant has barely changed and neither has the air.*
What has changed is our understanding of why it works, and that understanding will make your drying better. So let us hang our bundles, lay our screens, and learn to read dryness the way we have learned to read soil and light.
Take your time. Drying cannot be hurried, and that is rather the point.
— Professor Beryl Fernfoot, Herbology Greenhouse • Master Herbalist • Head of House Oriens

The line beneath the map is our road: every stop a place where the knowledge of plants changed, every lesson a step along it.
Lesson Objectives
By the end of this lesson, you will be able to:
- Explain what air-drying removes from a plant and why that preserves it.
- Hang-dry a bundle of herbs correctly, with proper bundle size, ties, and location.
- Screen-dry leaves, petals, and high-moisture herbs in a single layer with good airflow.
- Dry seed heads in paper bags and explain why seeds take longer than leaves.
- Use the crispness test to judge when herbs are fully dry.
- Condition dried herbs to equalize moisture before long-term storage.
- Store dried herbs in labeled, dated, airtight jars in a cool, dark place.
- Predict which herbs store well and which lose their character when dried.
Reading this lesson: ★ marks the passages to remember. They return on the unit quiz and the class test. Check in questions ask the material back as you go; answer them in your workbook when you meet them.
Working this lesson: Your assignment packet is the first download on this page. Work in it as the lesson moves along, answering each assignment as its subject is taught — or read the lesson through for your notes and take the assignments as homework afterward. Both are proper ways to sit this class. Signposts in the reading tell you where each assignment belongs. Written answers are short answers in your own words; a few honest lines are worth more than a filled page.
Your Assignment Packet
This lesson's assignments live in its packet: the Lexicon Handout (every term, course terms marked ◆), Materials, Guided Practice, the Assignment Manual with its answer key for self-checking, the Reflection Questions, and the Workbook Checklist. Download the packet before you begin and keep it beside you as you read.
What Drying Actually Does
A fresh leaf is mostly water. Drying removes roughly eighty to ninety percent of that water, and removing it is what preserves the herb. The organisms that spoil plant material, molds and bacteria chief among them, need moisture to grow. Take the water away and they cannot take hold. What remains is the plant's structure, its color, and, most importantly for the cook, its essential oils.
★ Essential oils are the fragrant compounds that give each herb its character. They are called volatile, which in this context means they evaporate easily into the air. This is why a fresh herb smells so strongly when you bruise it: you are releasing those compounds. Drying walks a careful line. Done well, it removes water while keeping most of the oils in place. Done poorly, with too much heat or sunlight, it drives the oils off with the water, and what remains is a shadow of the herb: dusty, faint, and disappointing.
Check in: Drying removes the water but must keep what in place — and what two mistakes drive it off with the water?
This is why every choice in this lesson matters. Darkness protects the oils from light, which breaks them down. Cool or warm room air, rather than hot air, evaporates water slowly without carrying the oils away. Whole leaves, stored whole, keep their oils locked inside until the moment you crumble them for use. Every good drying habit is really an oil-keeping habit.
You should also know, before we begin, that drying changes different herbs differently. The woody herbs, rosemary, thyme, oregano, sage, lavender, and bay, hold their oils in sturdy tissue and dry into something nearly as flavorful as the fresh plant. The tender herbs, basil, parsley, cilantro, chives, dill, and tarragon, are built mostly of water, and drying transforms them. They can still be dried, and we will learn how, but their flavor shifts and fades. A cook who knows this chooses what to dry with open eyes, and we will return to it before the lesson ends.
❦ In your workbook: record what drying actually does in your own way — the water removed, the oils kept, and the woody and tender difference — copy, sketch, or note what matters.
A Word on Timing
In our last lesson we learned to harvest at the peak of flavor: in the morning, after the dew has evaporated and before the heat of the day; before the plant flowers, when its energy is still in the leaves; and never more than a third of the plant at one gathering, so the plant can recover.
★ Dry what you harvest promptly. Herbs begin losing moisture and aroma the moment they are cut, and a harvest left wilting on the counter is already declining. The best drying starts within hours of the best harvest. If you must wait, stand the stems in water like a bouquet, out of direct sun, and begin drying the same day.
Check in: Why does the best drying start within hours of the best harvest — and what do you do with the stems if you must wait?
Prepare your harvest before it dries. Shake off dust and insects. Remove any bruised or damaged leaves; they will not improve in the drying process and may invite mold. If the herbs are dusty, rinse them briefly in cool water and shake or spin them thoroughly dry, because surface water left on the leaves is an invitation to mold. Most homegrown herbs need no washing at all, and skipping it preserves more of the surface oils.
Now, scholars, before your hands get busy, let me say the thing that matters most in this whole lesson. The enemy of good drying is not time or equipment. It is haste. Every moldy bundle, every dusty jar, every faded handful of herbs I have ever thrown away was the result of someone, often myself, deciding that almost dry was dry enough, or that sunlight would be fine just this once. The herbs do not care about your schedule. Give them what they ask for: small bundles, moving air, darkness, and all the time they need. They will repay you for months.
— Professor Beryl Fernfoot, Herbology Greenhouse • Master Herbalist • Head of House Oriens
❦ In your workbook: record the word on timing in your own way — prompt drying, the bouquet wait, and preparation before drying — copy, sketch, or note what matters.
Hang-Drying: The Classic Way
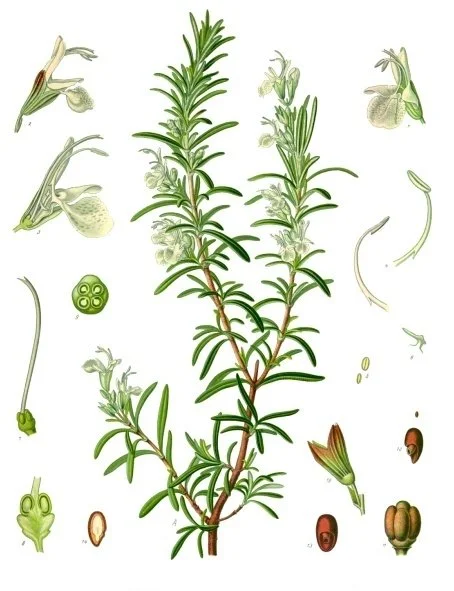
Rosemary (Köhler's Medizinal-Pflanzen, printed Rosmarinus officinalis — the plant is now written Salvia rosmarinus): long, straight, woody stems are bundle material. Gather five to ten stems, tie them at the base — a rubber band keeps its grip as the stems shrink — and hang the bundle upside down in a cool, dry, dark place with moving air. Keep bundles small: the center of a fat bundle never sees moving air, and it can mold while the outside looks fine.
Rosmarinus officinalis (now Salvia rosmarinus), plate from Franz Eugen Köhler, Köhler's Medizinal-Pflanzen (1887–1914). Public domain.
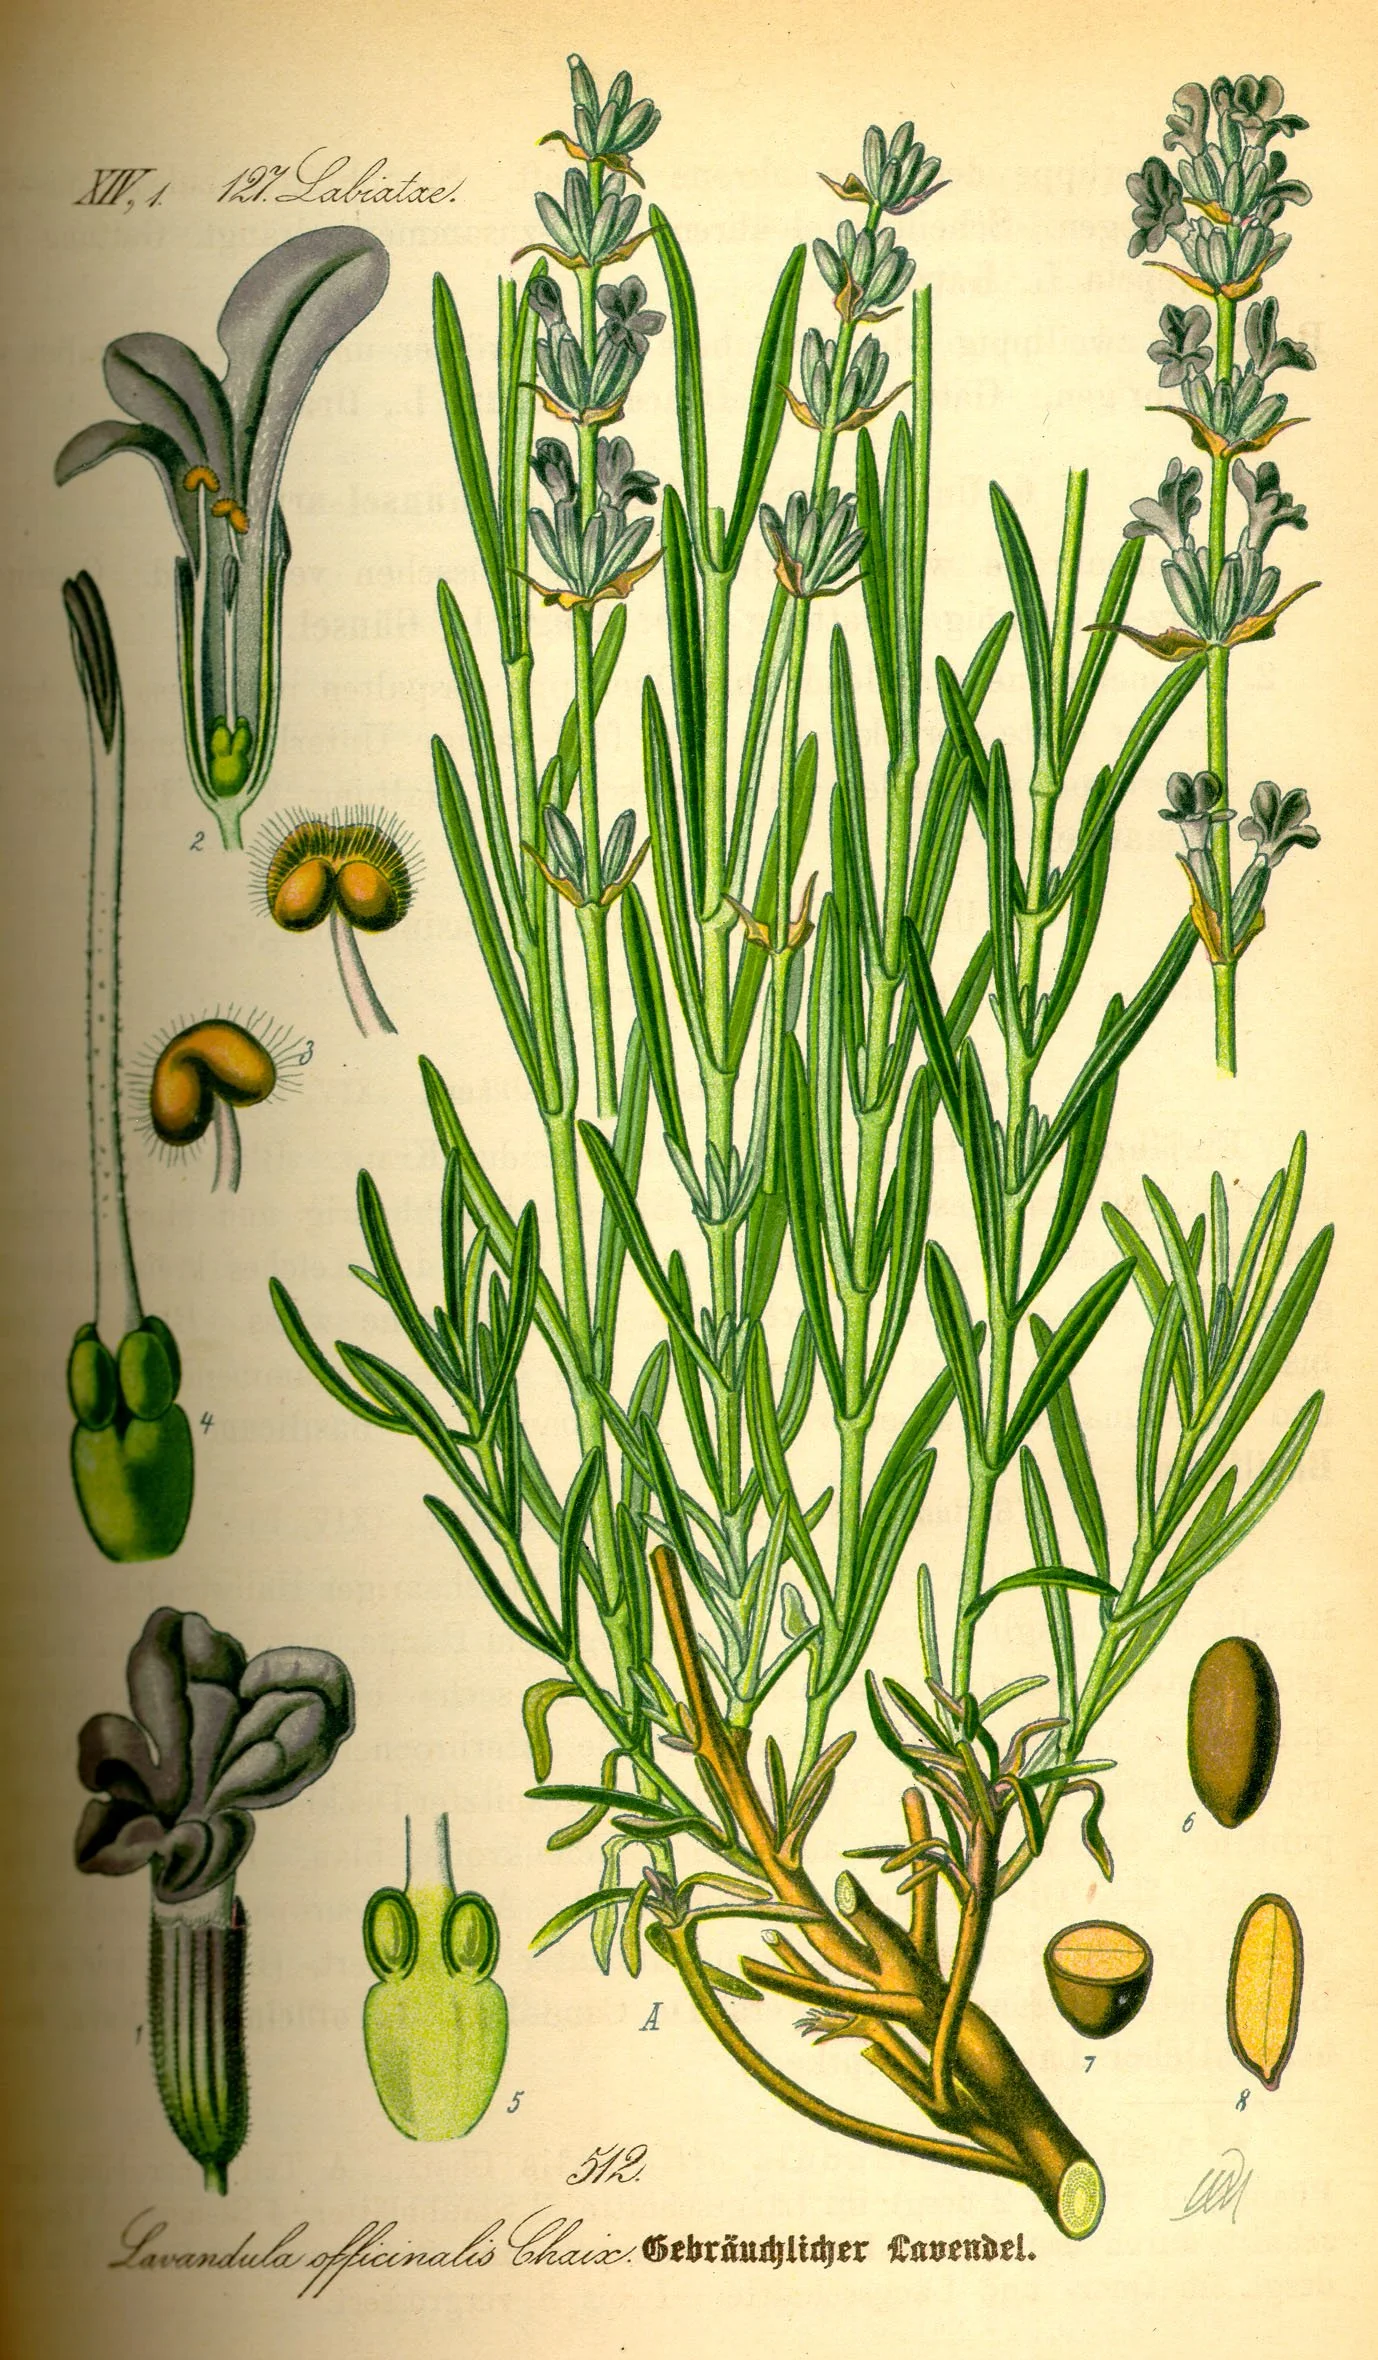
Lavender under its older name (Thomé plate 512, printed Lavandula officinalis — the same plant now written Lavandula angustifolia): a sheaf of long straight stems, each ending in its spike. Stems like these are tied in small bundles and hung upside down out of the light — sunlight breaks down the very oils drying is meant to keep, and a bundle hung in a sunny window dries quickly and keeps almost nothing. Lavender is one of the woody herbs that store well: dried in the dark and jarred only when fully crisp, it holds its fragrance for months.
Lavender, plate 512 from Otto Wilhelm Thomé, Flora von Deutschland, Österreich und der Schweiz (1885). Public domain.
Hang-drying is the method to learn first, because it is the oldest, the simplest, and the one that suits the greatest number of herbs. The woody herbs with long stems, rosemary, thyme, oregano, marjoram, lavender, and similar plants, dry beautifully this way.
★ Gather your stems into small bundles of five to ten stems. Small matters more than you would think. A bundle too large traps moisture in its center, where air cannot reach, and the inside of the bundle molds while the outside looks fine. Several modest bundles always outperform one ambitious one. If you have a large harvest, make more bundles, not bigger ones.
Check in: Why do several modest bundles always outperform one ambitious one — what happens at the centre of a bundle too large?
Tie each bundle near the base of the stems with a rubber band or twine. Rubber bands are the better choice, and here is why: as stems dry they shrink, and string tied snug on a fresh bundle hangs loose on a dry one, while a rubber band contracts with the stems and keeps its grip. Either will work if you check and retighten, but the rubber band forgives forgetfulness.
Hang the bundles upside down. The traditional reasoning is that hanging upside down keeps the essential oils in the leaves rather than draining down into the stems, and while modern growers debate the mechanism, the practice is universal and the results are excellent. Hang them from hooks, nails, a stretched line of twine, or an herb drying rack, anywhere the bundles can hang free with air moving around all sides. Do not press bundles flat against a wall; the side against the wall dries slowly and invites trouble.
★ The location matters enormously. Hang your herbs in a cool, dry, dark place with good airflow: a spare room, a garage, an attic corner, a closet with the door left open. The temperature should be warm but not hot; around seventy to eighty degrees Fahrenheit is ideal. If your climate is humid, set a fan on low nearby to keep the air moving. Moving air is the true engine of drying. Still air in a damp climate is how mold wins.
Check in: Name the drying location in full — temperature, light, and air — and say what still air in a damp climate invites.
Darkness is not optional. Sunlight degrades the color and flavor of drying herbs, breaking down the very oils you are trying to keep. A bundle hung in a sunny window will dry quickly and taste like nothing. If your only available spot receives some light, slip each bundle into a paper lunch bag with several holes punched in the sides for ventilation. The bag keeps out light and dust while the holes let air through. It also catches any leaves that crumble and fall, which is a small mercy at stripping time.
Check your bundles every day or two. Drying time varies with the herb, the air, and the weather, from a few days to a couple of weeks. Resist the urge to call them done early. The crispness test, which we will learn shortly, is the only judge that counts.
❦ In your workbook: record hang-drying in your own way — bundle size, the rubber band's reason, hanging upside down, and the dark, moving-air location — copy, sketch, or note what matters.
In your packet: Exercise I — The First Bundle ⚒ begins here. Work it now, or mark the place and take it as homework — your choice.
Screen-Drying: For Leaves, Petals, and the Wet Ones
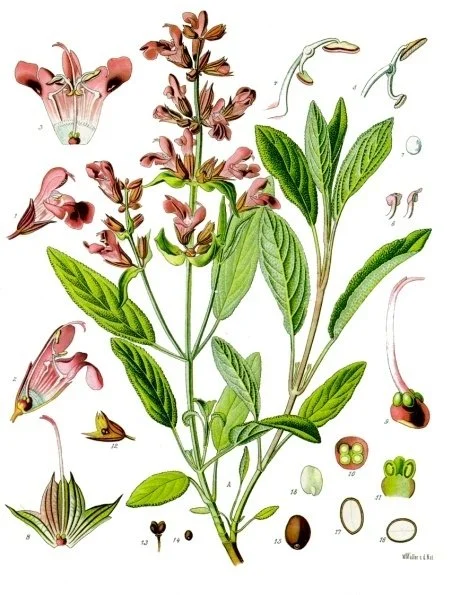
Garden sage, Salvia officinalis (Köhler's Medizinal-Pflanzen): leaves this large dry faster and more evenly spread out than bundled. Lay them in a single layer on a clean screen or rack, raised so air moves beneath as well as above — every leaf touching air, not another leaf — in a dry, shady place, and turn them once a day. A leaf that still bends or feels leathery is not done, however dry it looks.
Salvia officinalis, plate from Franz Eugen Köhler, Köhler's Medizinal-Pflanzen (1887–1914). Public domain.
Some herbs refuse to hang-dry well. The high-moisture herbs, basil, mint, parsley, cilantro, and chives, hold so much water in their soft tissue that a bundle of them rots from the inside before the outside dries. Large individual leaves, like sage, dry faster and more evenly when spread out. Flowers and petals, chamomile, calendula, and lavender buds, have no stems worth bundling. For all of these, the screen is the answer.
★ Lay the herbs in a single layer on a clean window screen, a mesh cooling rack, or a loosely woven basket. Single layer is the whole secret: every leaf should touch air, not another leaf. Elevate the screen on strips of wood, cans, or blocks so air circulates beneath as well as above. Set it in a dry, shady place with good ventilation, and turn the leaves once a day so each side takes its turn.
Check in: Single layer is the whole secret of the screen. What should every leaf touch — and what should it not touch?
A fan on low in the room helps enormously, especially in humid weather. If you are drying in a humid climate and the herbs seem to be stalling, a food dehydrator set to its lowest temperature, around one hundred degrees Fahrenheit, will finish the job in a few hours. Check hourly. Tender herbs like basil scorch and blacken at higher heat, which is why the lowest setting is the only setting for herbs.
Seeds, too, can be screen-dried when they have been separated from their heads, spread thin and stirred daily. But seed heads are easier to dry whole in bags, which brings us to the next method.
❦ In your workbook: record screen-drying in your own way — the single layer, air beneath as well as above, the daily turn, and the lowest-setting rule — copy, sketch, or note what matters.
Seed Heads and the Paper Bag
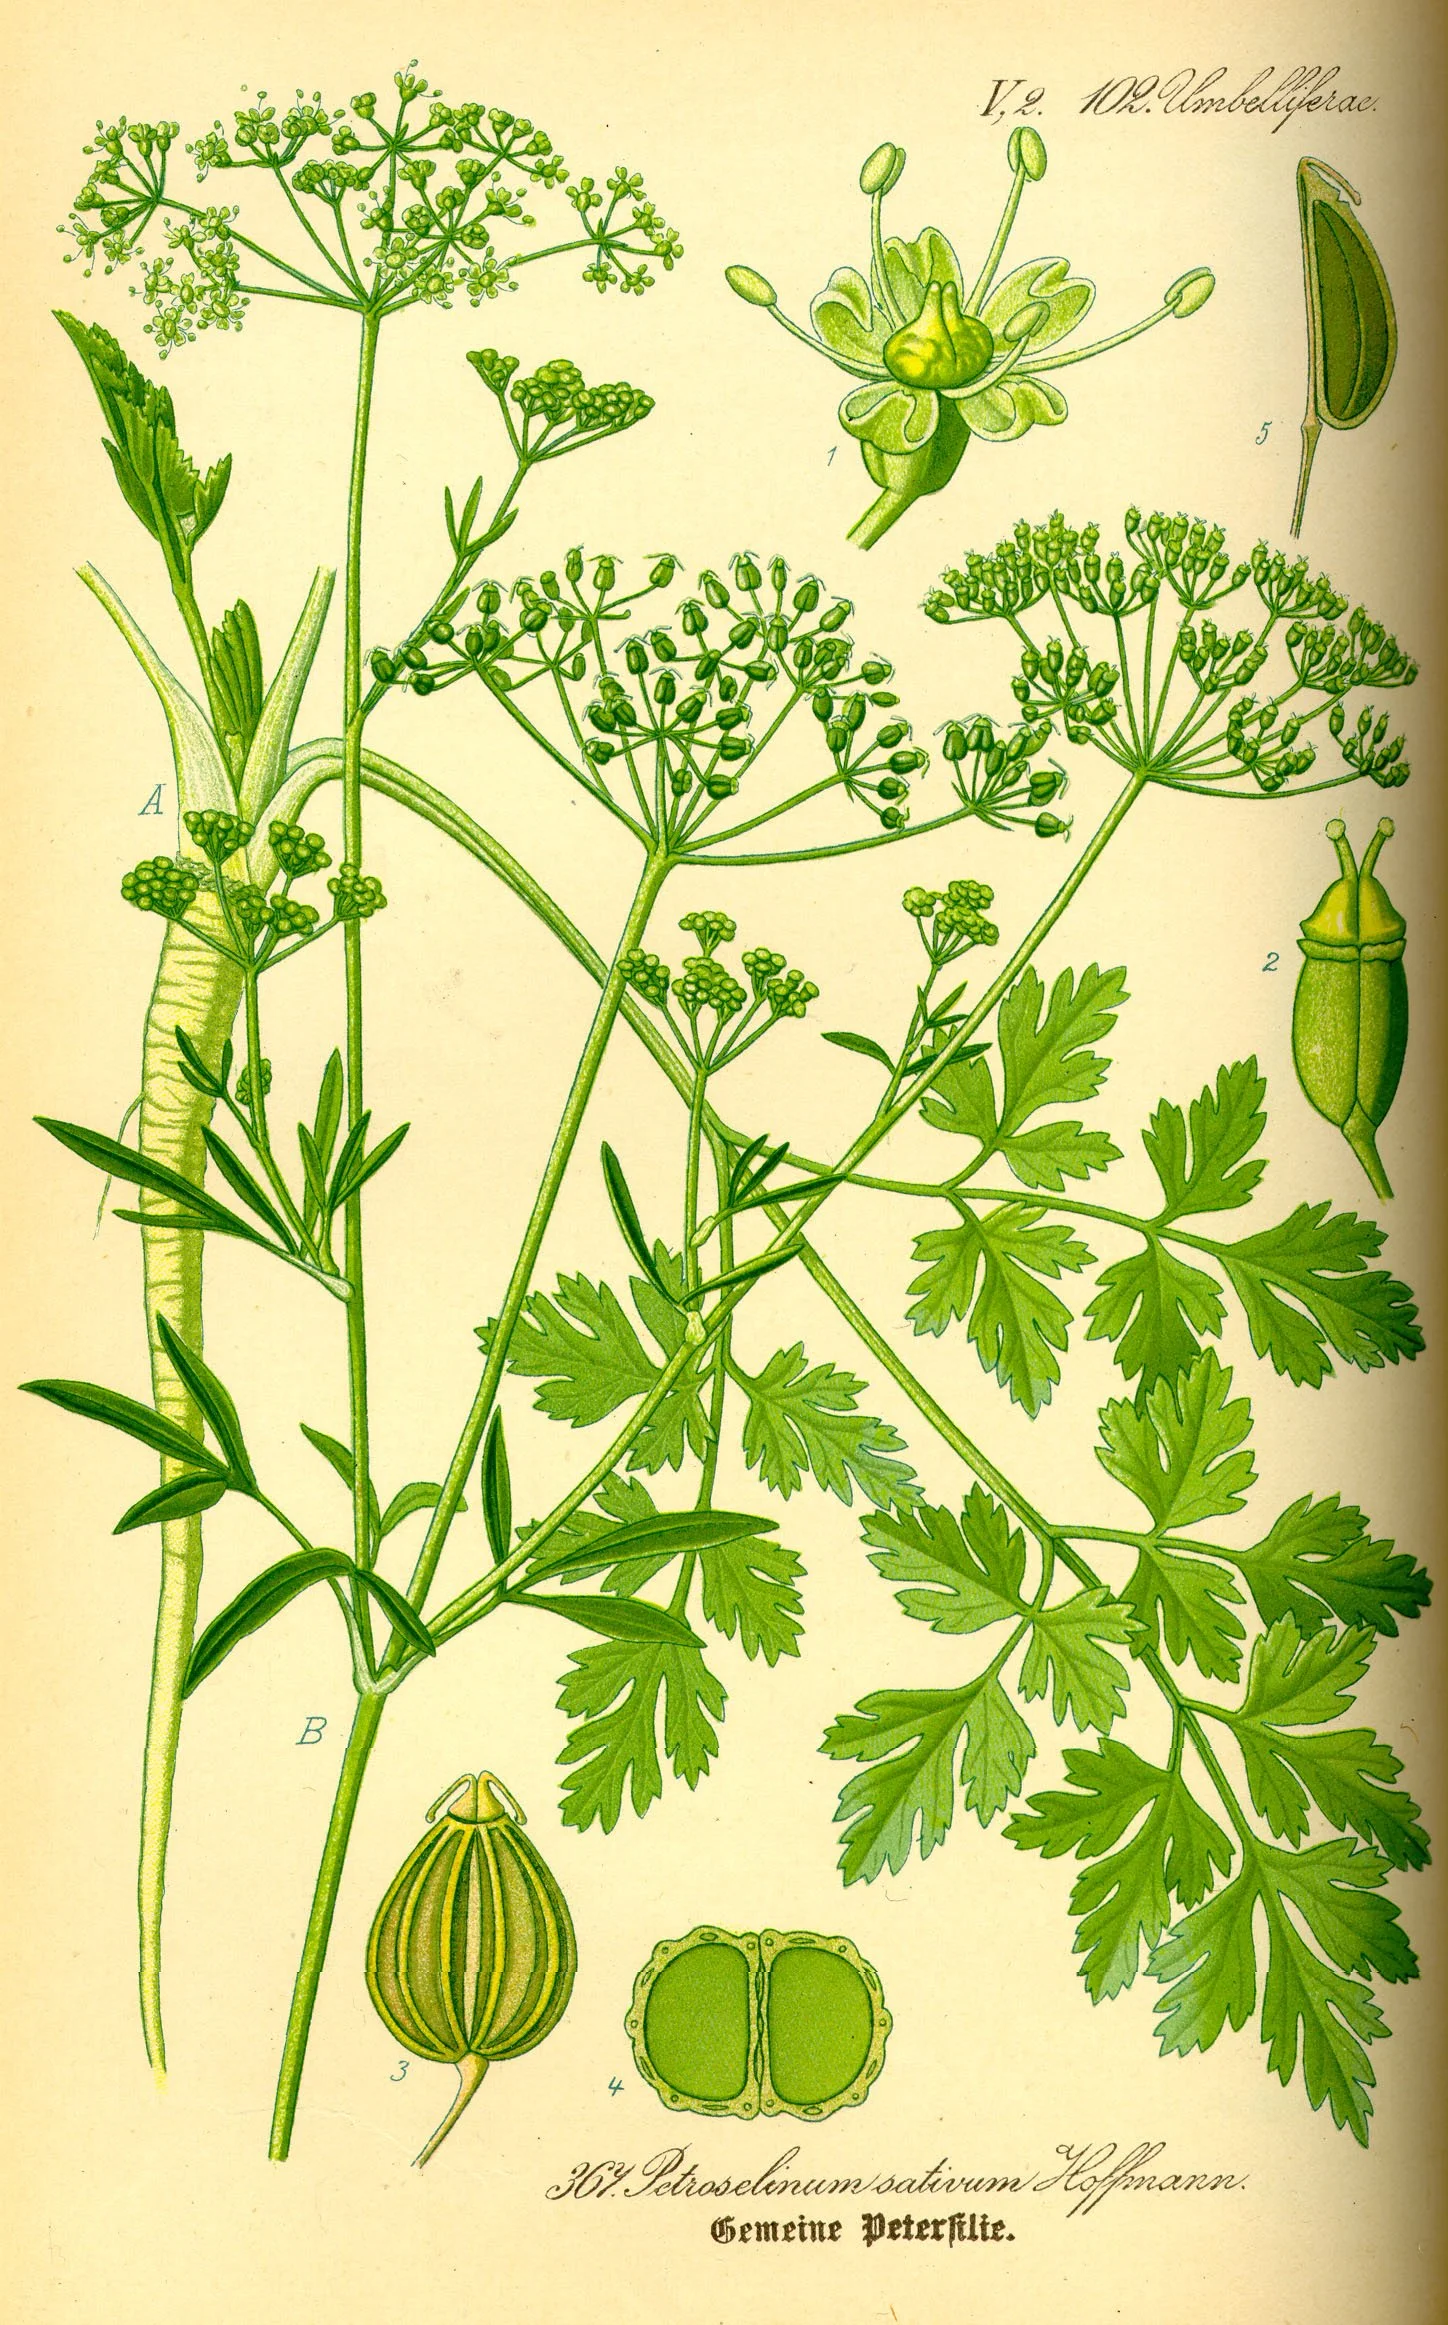
Parsley in its seed year, Thomé plate 367 — printed under its period name, Petroselinum sativum, a synonym of Petroselinum crispum. The umbrella of stalks is the umbel, the seed head that releases its seed the moment it is fully dry — which is why seed heads are not hung in open bundles. The whole head goes into a brown paper bag, the bag's neck is tied around the stems and hung upside down with a few holes poked for air, and the seeds fall into the bag as they finish. Thomé draws the plant green; give heads like these their longer time — a week or two is normal — then store the seed dry and labelled, with the plant name and the date.
Prof. Dr. Otto Wilhelm Thomé, Flora von Deutschland, Österreich und der Schweiz (1885), plate 367, via biolib.de. Public domain.
The paper bag method is the gardener's answer to a particular problem: ripe seed heads shatter. Dill, coriander, fennel, cumin, anise, and caraway all release their seeds the moment they are fully dry, and a bundle of seed heads hung in the open will scatter its harvest across the floor.
★ Gather the seed heads when the seeds are fully formed and beginning to turn from green to grey or brown. Cut the stems with several inches of stalk attached. Place the heads inside a brown paper bag, tie the neck of the bag around the stems, and hang the whole thing upside down in a warm, dry, ventilated place with low light. Poke a few small holes in the bag for airflow. As the heads finish drying, the seeds fall naturally into the bag, clean and collected.
Check in: Why are seed heads dried in paper bags rather than hung in open bundles — and what happens to the seeds as the heads finish drying?
Seeds take longer to dry than leaves, so be patient; a week or two is normal. When the heads are brittle and the seeds rattle loose with a shake, they are ready. Shake or rub the heads to release the remaining seeds, pick out the bits of chaff, and store the seeds in a paper envelope or a glass jar in a cool, dry place. Label the container with the plant name, the variety, and the date. Most seeds kept dry and cool remain viable for years.
❦ In your workbook: record seed heads and the paper bag in your own way — the shattering problem, the tied bag hung upside down, and the longer patience seeds ask — copy, sketch, or note what matters.
The Crispness Test
★ There comes a moment in every drying when the herbs look done, and looks are not enough. Herbs that seem dry can hold hidden moisture in their centers, and hidden moisture sealed into a jar becomes mold within days. The crispness test is how you know for certain.
Check in: Why are looks not enough at the end of a drying — what hides in the centres, and what does it become in a sealed jar?
Pick up a leaf and rub it between your fingers. A fully dried leaf feels crisp and crumbles easily, breaking into flakes at a touch. A leaf that is almost dry will bend, feel leathery, or resist crumbling. Bendable is not done. Stems should snap cleanly rather than flex. If anything bends, give the batch more time. Herbs left hanging longer than necessary come to no harm; herbs jarred too soon can ruin the whole batch.
When the leaves pass the test, strip them from the stems into a bowl or a paper bag. Rub the leaves gently over a coarse screen or press them through a large mesh strainer, and the crisp leaves will crumble away from the stems on their own. Try to keep the leaves as whole as possible at this stage. Whole leaves hold their oils far better than crushed ones, and you will crumble them at the moment of use, when their fragrance matters most.
❦ In your workbook: record the crispness test in your own way — crisp and crumbling against bendable and leathery, snapping stems, and whole leaves kept whole — copy, sketch, or note what matters.
In your packet: Exercise II — The Crispness Watch ◐ begins here. Work it now, or mark the place and take it as homework — your choice.
Conditioning: The Quiet Step
Even a batch that passes the crispness test can hold uneven moisture: some pieces drier than others, some leaves still holding a whisper of damp at their centers. Conditioning is the quiet final step that evens everything out before long-term storage.
★ Place the dried herbs loosely in a large, tightly closed container, a glass jar with its lid on. Once a day for two to four days, shake or stir the contents. The drier pieces will draw a little moisture from the damper ones, and the whole batch settles to the same safe dryness. Watch the inside of the jar. If droplets of moisture form on the lid or the glass, the batch is not dry enough: return it to the screen or the bundles for further drying, then condition again. No droplets, no damp smell, leaves still crisp after several days in the closed jar: the herbs are ready for their final home.
Check in: What is the purpose of conditioning — and what should you do if you find moisture droplets inside the conditioning jar?
This step takes almost no effort and prevents the most heartbreaking failure in the whole craft, a jar of beautiful herbs gone moldy from the inside. Do not skip it.
❦ In your workbook: record conditioning in your own way — the closed jar, the daily shake, and the droplet warning — copy, sketch, or note what matters.
Jars, Labels, and the Date
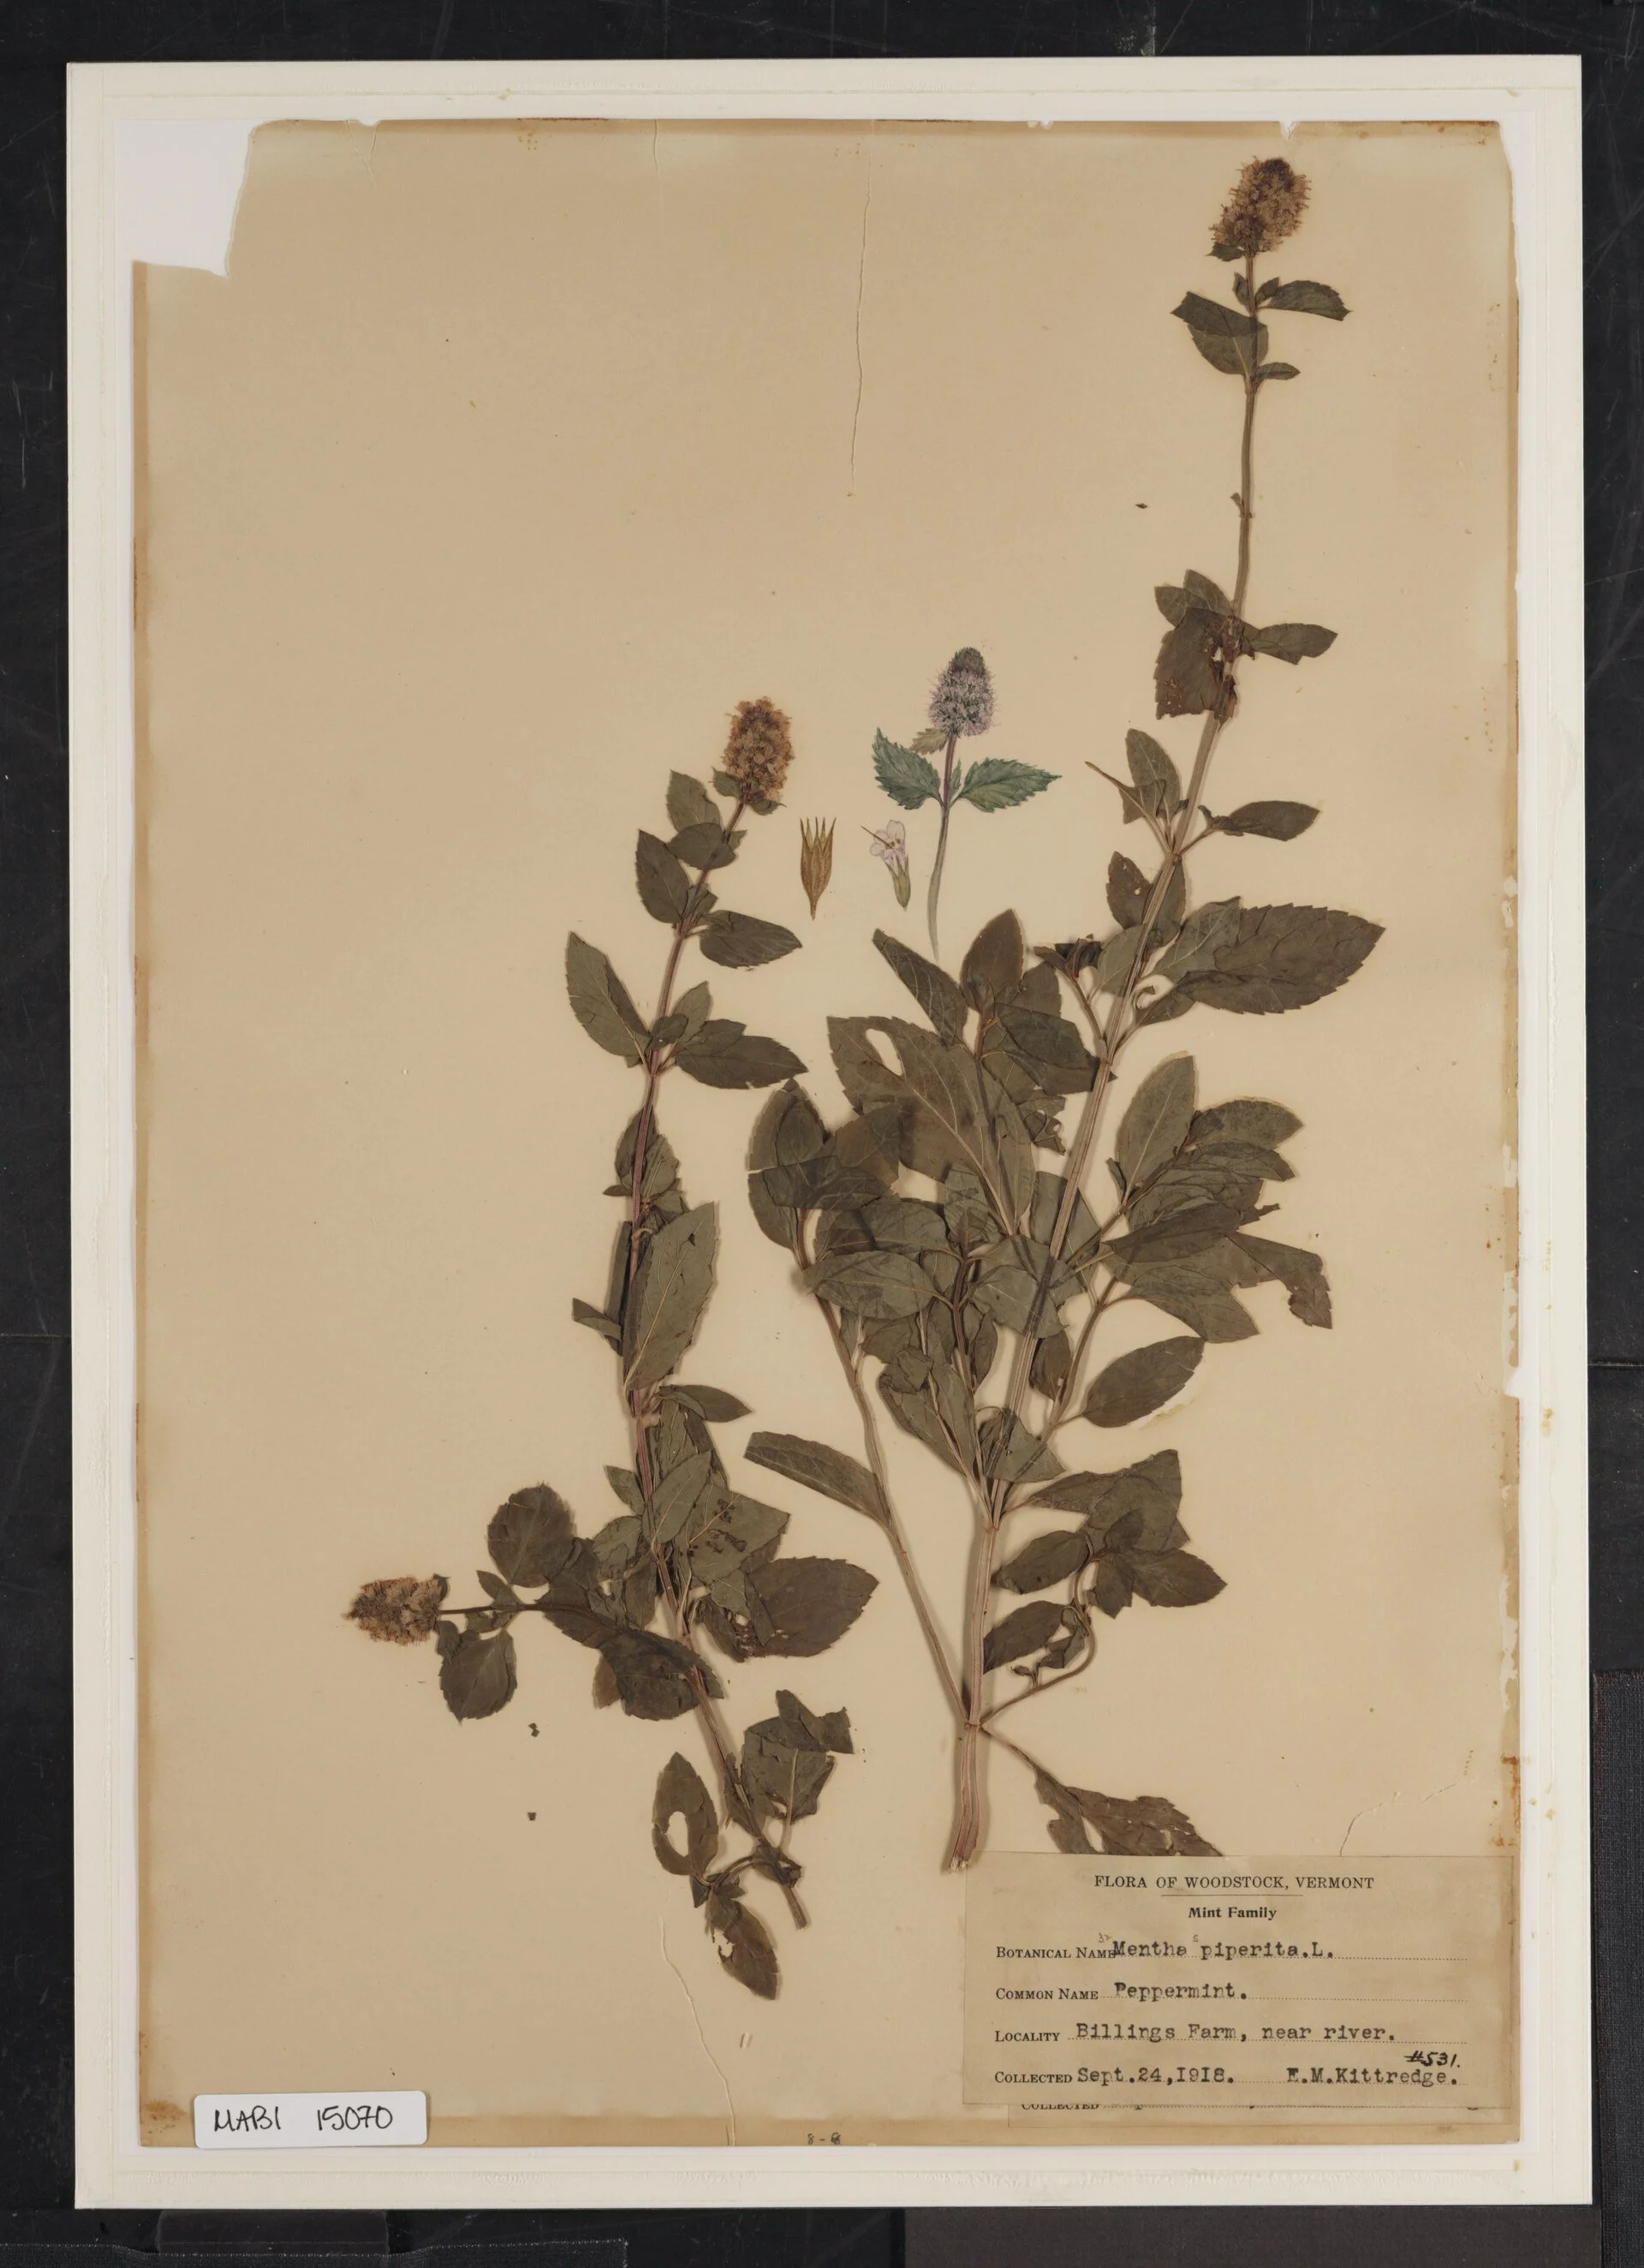
Dried plant material, filed the honest way: peppermint pressed and labelled at Woodstock, Vermont, in 1918, its label giving the botanical name, the common name, the place, and the date. A storage jar asks for the same discipline in shorter form — the herb's name and the date it was dried, on every jar, every time, because dried herbs all begin to look alike and an unlabelled jar is a mystery you cannot safely solve by tasting. Jar only what has passed the crispness test and finished conditioning: moisture sealed into a jar becomes mold, and a moldy batch is discarded whole.
Peppermint specimen sheet, Billings-Kittredge Herbaria (collected by F. M. Kittredge, Woodstock, Vermont, 1918), photographed by the U.S. National Park Service. Public domain.
★ Storage is simple, and the rules are absolute. Dried herbs go into airtight containers, glass jars with tight lids being the best and most traditional choice. Airtight keeps moisture out, and moisture is the enemy from the first day of drying to the last day of storage. Keep the jars in a cool, dark place: a cupboard, a pantry, a drawer. Light breaks down essential oils even in the jar, and heat does the same. The beautiful row of jars on a sunny kitchen shelf is a display, not storage.
Check in: Storage's rules are absolute. Where do the jars live — and why is the sunny kitchen shelf a display, not storage?
★ Every jar gets a label, and every label carries three things: the name of the herb, the date it was dried, and nothing left to memory. This is not fussiness. Dried herbs all begin to look alike after a few months, and an unlabeled jar is a mystery you cannot safely solve by tasting, because some herbs have toxic look-alikes and some dried materials should never be eaten at all. The date matters because dried herbs do not keep forever. Leafy herbs hold their best flavor for six months to a year; whole seeds keep longer. The smell test is your guide: crush a little between your fingers, and if the distinct scent is gone, the herb has given all it had. Compost it without regret and dry a fresh batch next season.
Check in: Why does the lesson insist that every jar be labeled with both the herb name and the date?
Never shake a jar of dried herbs over a steaming pot. The steam carries moisture straight into the jar, and repeated moisture is how mold begins. Shake the herbs into your hand or a spoon first, then into the pot.
❦ In your workbook: record jars, labels, and the date in your own way — airtight and dark, name and date on every jar, the smell test, and never over a steaming pot — copy, sketch, or note what matters.
In your packet: Exercise III — Conditioning and the Labeled Jar ⚒ begins here. Work it now, or mark the place and take it as homework — your choice.
What Stores Well and What Does Not
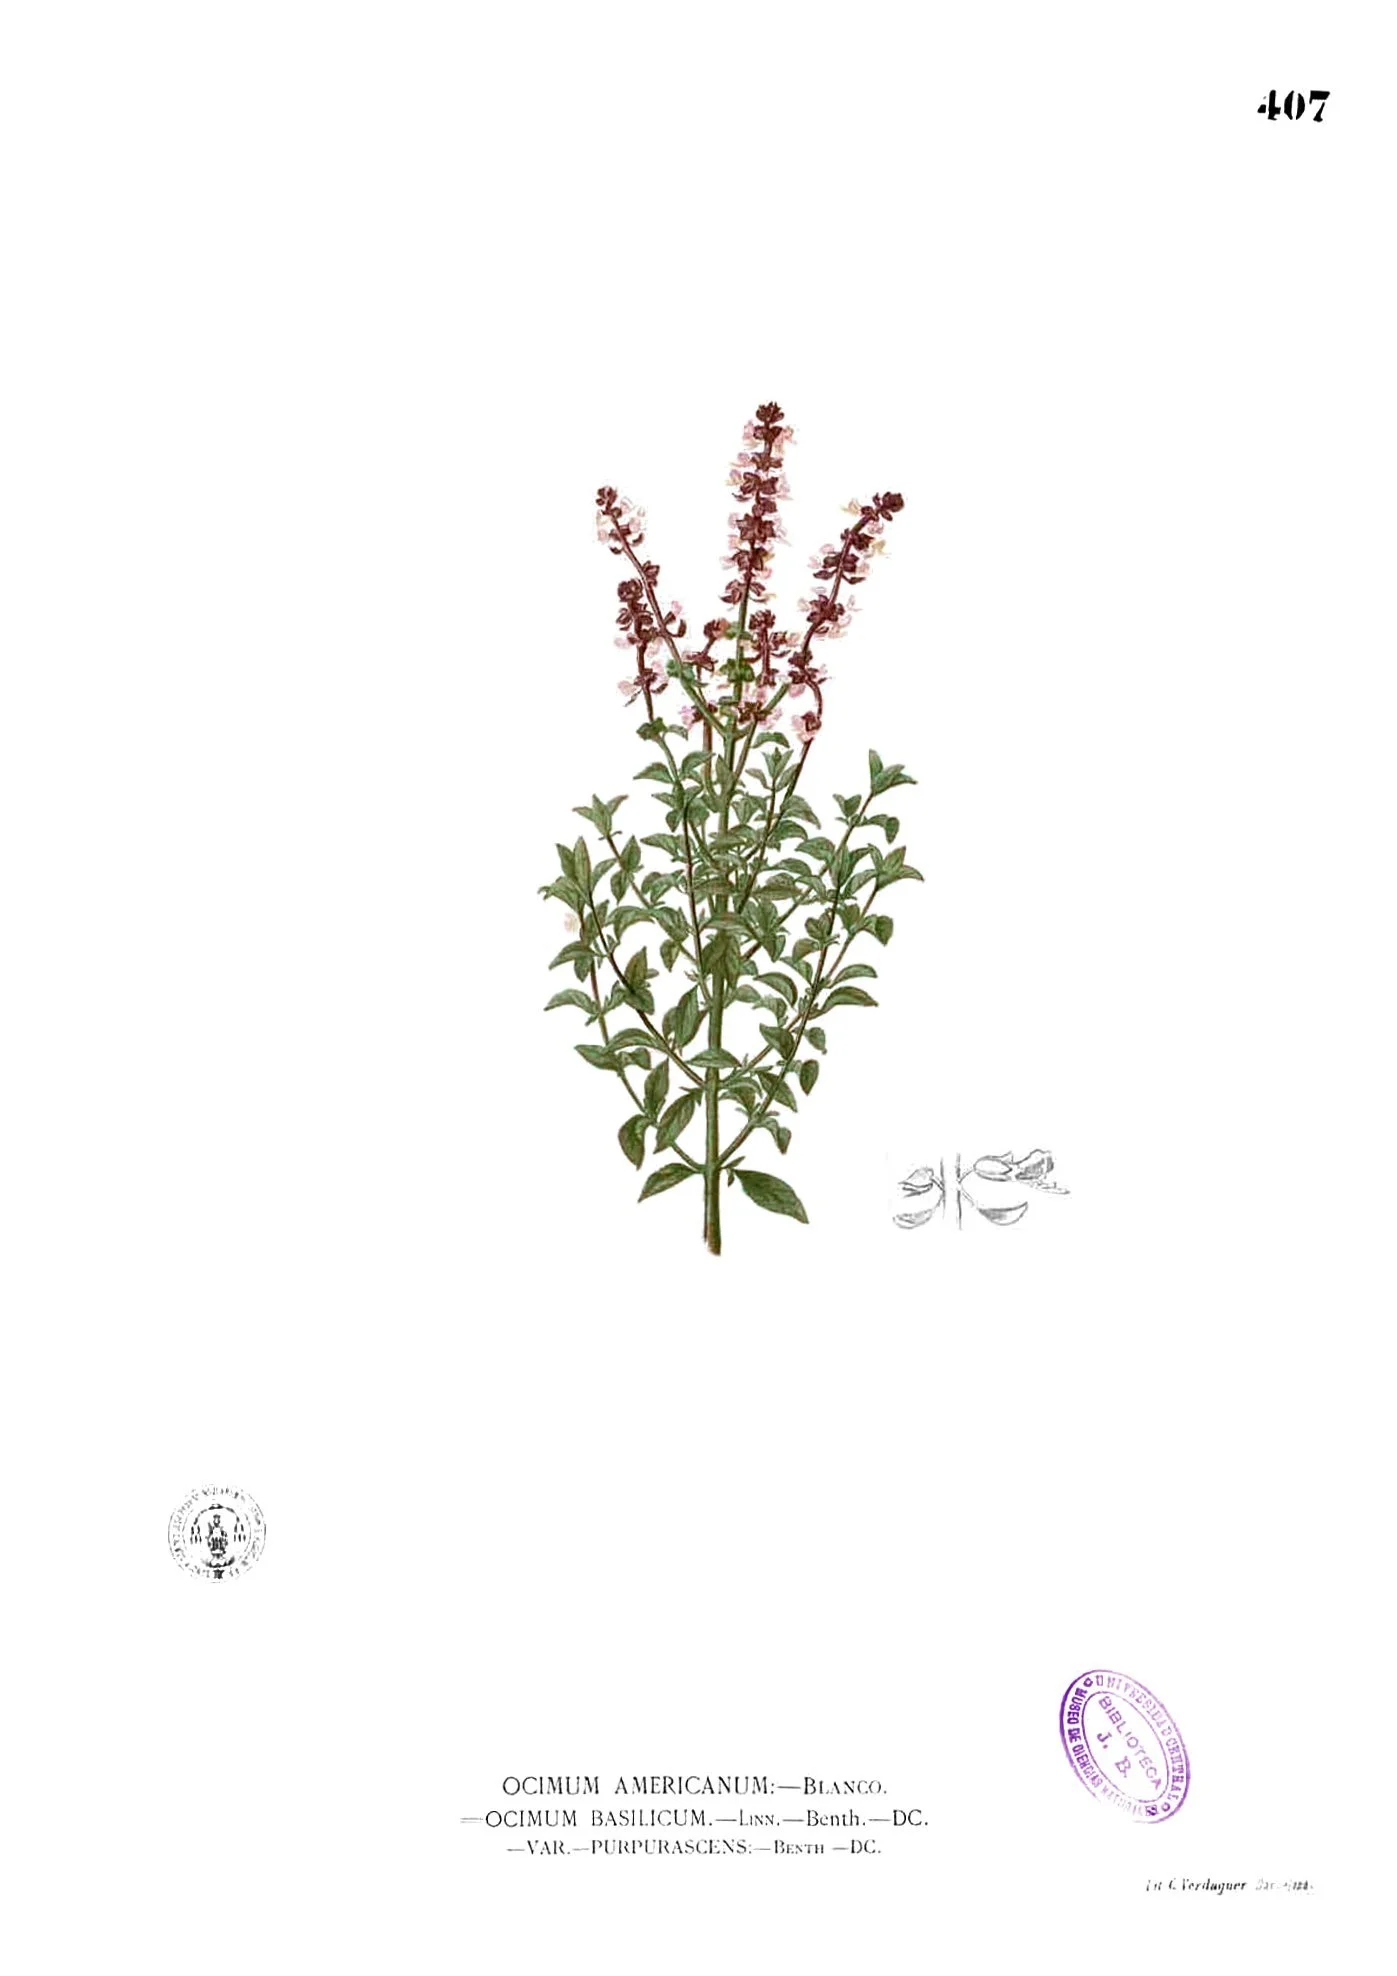
Basil (Blanco, Flora de Filipinas, plate 407 — the plate's caption gives Ocimum americanum, a synonym of Ocimum basilicum var. purpurascens): the tender herbs' warning made visible — a plant built mostly of water and soft leaf. Drying transforms such herbs: basil blackens at anything above low heat and molds readily in humid air, and the dried leaf keeps only a shadow of the fresh flavor. Dry it if you choose, with open eyes, by a quick method — the screen, or a dehydrator at its lowest setting — fully dry before it is jarred, and know that freezing keeps a tender herb's fresh character better.
Francisco Manuel Blanco, Flora de Filipinas, plate 407, via Wikimedia Commons.
★ Now the honest accounting I promised. The woody herbs, rosemary, thyme, oregano, marjoram, sage, lavender, and bay, dry into some of the finest flavored materials in the kitchen. Their sturdy tissue holds essential oils through the drying process, and many cooks prefer the dried versions for long-simmered dishes. If you are drying your first herbs, start here. They forgive beginner mistakes and reward you richly.
Check in: Which herbs should a first drying start with — and what quality of theirs forgives beginner mistakes?
The tender herbs, basil, parsley, cilantro, chives, dill leaf, tarragon, and chervil, are a different story. Built mostly of water, they lose much of their fresh character when dried. Dried basil in particular is a shadow of the fresh leaf, and basil is the trickiest herb to dry at all: it blackens at anything above low heat and molds readily in humid air. This does not mean you should never dry them. It means you should dry them with open eyes, using quick methods, screen-drying or a low dehydrator, and use them where their changed flavor still shines, in long-cooked dishes where they can infuse slowly.
There is no shame in choosing not to dry a tender herb. Freezing, herb butters, and vinegars preserve fresh character far better for these plants, and a good herbalist chooses the preservation that suits the plant, not the plant that suits the preservation. Drying is a craft, not a duty.
❦ In your workbook: record what stores well and what does not in your own way — the woody herbs' sturdy tissue, the tender herbs' changed character, and choosing the preservation that suits the plant — copy, sketch, or note what matters.
Common Drying Mistakes
Learn these now, and you will skip the failures most beginners collect.
★ Bundles too large. The single most common mistake. The center of a fat bundle never sees moving air, and it molds while the outside looks perfect. Five to ten stems. More bundles, not bigger ones.
Drying in sunlight. The sunny windowsill feels productive and destroys flavor. Light breaks down essential oils and bleaches color. Dark and airy beats bright and quick every time.
Jarring too soon. Almost dry is not dry. The crispness test and conditioning exist precisely because impatience ruins jars. When in doubt, give it three more days.
Wet leaves into the bundle. Herbs washed and bundled while still damp carry their mold risk with them. Shake, spin, or air-dry surface water away before bundling.
No airflow. A closet with the door shut in a humid house is a mold nursery. Crack the door, add a fan, or choose a breezier spot. Moving air is the engine; everything else is the frame.
Skipping the label. Six months from now, every jar looks the same. Name and date, every jar, every time.
❦ In your workbook: record the common drying mistakes in your own way — the six failures and the habit that answers each — copy, sketch, or note what matters.
Safety Notes
- If you see mold on drying or dried herbs, discard the entire batch. Do not pick out the moldy parts and keep the rest; mold you cannot see has already spread through the material.
- Shake off dust and inspect for insects before drying. Dampen and wipe dusty screens and racks before use.
- Wash your hands after handling dried herbs, especially before eating.
- Label every jar with the herb name and the drying date. Never eat, cook with, or give away any dried plant material you have not positively identified. Some herbs have toxic look-alikes.
- Store dried herbs away from small children and pets, in clearly labeled jars they cannot mistake for something else.
- Younger students should ask an adult for help with oven or dehydrator drying, and with hanging bundles out of reach.
- This lesson covers culinary and aromatic uses only. Drying does not make an unknown or inedible plant safe, and no lesson in this class gives medicinal recipes or dosages.
❦ In your workbook: record the safety notes in your own way — the whole-batch mold rule, the identification rule, and hand-washing — copy, sketch, or note what matters.
Guided Observation: Reading Dryness — The Daily Check and the Crispness Test
This lesson's observation is the drying watch itself, worked in full: a bundle or screen checked the way this lesson teaches — look first, feel second, test the centre where moisture hides longest, and let the crispness test, not the calendar, call the batch done.
You will need:
- a drying bundle or screen of your own (or market herbs dried the same way — see the alternative paths below)
- your journal
- a glass jar with its lid, for the conditioning watch
Check every day or two. Check your bundles every day or two. Drying time varies with the herb, the air, and the weather, from a few days to a couple of weeks. Resist the urge to call them done early. The crispness test, which we will learn shortly, is the only judge that counts.
Test the centre, where moisture hides longest. Pick up a leaf and rub it between your fingers. A fully dried leaf feels crisp and crumbles easily, breaking into flakes at a touch. A leaf that is almost dry will bend, feel leathery, or resist crumbling. Bendable is not done. Stems should snap cleanly rather than flex. If anything bends, give the batch more time.
Watch the conditioning jar. Place the dried herbs loosely in a large, tightly closed container, a glass jar with its lid on. Once a day for two to four days, shake or stir the contents. Watch the inside of the jar. If droplets of moisture form on the lid or the glass, the batch is not dry enough: return it to the screen or the bundles for further drying, then condition again.
Consider:
- Did the centre of the bundle dry at the same pace as its outside — and what did the difference teach you?
- How many days did the drying take, and whether the time surprised you?
- Did droplets form inside the conditioning jar — and what does each outcome settle?
No-fresh-herb alternative: perform the same watch on a single market or grocery bunch dried the same way; the observation skills are identical, and the lesson's own closing sends you to exactly that small bundle.
Workbook path: if no fresh herb is within your reach this week, judge a purchased dried herb instead — rub a leaf between your fingers for the crispness test, crush a little for the smell test, and audit its jar against this lesson's label rules (herb name, drying date, cool dark storage) — and record what each test told you. Reading dryness is the skill; the next bundle is its occasion.
Materials
Required (Level One — household items)
- Fresh herbs: a woody herb such as rosemary, thyme, oregano, or lavender. A market bunch works perfectly.
- Rubber bands or twine: for tying bundles. Rubber bands are best, since they shrink with the drying stems.
- Paper lunch bags and a hole punch: to slip over bundles for dust and light protection, with holes for airflow.
- A clean window screen, mesh cooling rack, or woven basket: for screen-drying leaves, petals, and tender herbs.
- Brown paper bags: for drying seed heads such as dill or coriander.
- Glass jars with tight lids: for conditioning and final storage.
- Labels and a marker: every jar gets the herb name and the drying date.
- Notebook and pencil: your drying journal for dates, methods, and crispness-test results.
Suggested (Level Two — historically closer)
- A hanging herb drying rack: holds bundles free on all sides for even airflow, as professional growers use.
- A food dehydrator: set to its lowest temperature (around 100 degrees Fahrenheit) for humid weather or tender herbs.
- Muslin bags: a traditional reusable alternative to paper bags for seed heads and dusty locations.
Safety notes: If you see mold on drying or dried herbs, discard the entire batch. Do not pick out the moldy parts and keep the rest. Never eat, cook with, or give away any dried plant material you have not positively identified. Some herbs have toxic look-alikes. Label every jar with the herb name and the drying date. Store jars away from small children and pets. A simple dust mask helps when stripping large batches of crumbly dried herbs. Wash your hands after handling dried herbs, especially before eating. Younger students: ask an adult for help with oven or dehydrator drying, and with hanging bundles out of reach.
Reflection Questions
Answer the following questions in your workbook.
- Why does sunlight harm drying herbs instead of helping them?
- A friend ties twenty stems of basil into one large bundle and hangs it in a sunny window. Name three things wrong with this approach and explain each.
- Why must seed heads be dried in paper bags rather than hung in open bundles?
- What is the purpose of conditioning, and what should you do if you find moisture droplets inside the conditioning jar?
- Why does the lesson insist that every jar be labeled with both the herb name and the date?
Workbook Checklist — Lesson 28
In my workbook I have:
- ☐ explained what drying removes — eighty to ninety percent of the water — and why removing it preserves the herb while keeping its essential oils
- ☐ hung small bundles of five to ten stems, tied with a rubber band, upside down in a cool, dry, dark place with good airflow at seventy to eighty degrees
- ☐ laid screen-drying in a single layer with air beneath as well as above, and turned the leaves once a day
- ☐ dried seed heads whole in a tied paper bag and given seeds their longer time — a week or two is normal
- ☐ judged dryness by the crispness test — crisp, crumbling leaves and snapping stems; bendable is not done — testing the centre of the bundle
- ☐ conditioned the batch in a closed jar, shaken daily, and read droplets inside the jar as a return-to-drying warning
- ☐ stored the herbs whole in a labeled, dated, airtight jar in a cool, dark place, and kept the safety rules: mold means the whole batch is discarded, never eat unidentified dried material, wash hands after handling
- ☐ completed the First Bundle, the Crispness Watch, and Conditioning and the Labeled Jar — or their market-bunch and workbook paths
☐ Lesson completed Date: ___ Signature: ___
The Professor's Closing Note
Scholars, you have now learned the grower's half of the preservation arts. You can bring a plant from seed to jar, and that is no small thing: it is the complete arc of the herbalist's year, from the first sowing to the winter shelf.
In our coming lessons we will meet the other preservations, the oils and the vinegars, the salts and the sugars, each with its own craft and its own cautions. But the dried jar will remain the foundation, the quiet staple on the shelf that asks nothing and gives for months.
Dry something this week, even a small bundle from the market. Hang it where you will see it. Watch it change. And when it is crisp and jarred and labeled in your own hand, you will understand why herbalists have done exactly this, in exactly this way, for longer than anyone can remember.
— Professor Beryl Fernfoot, Herbology Greenhouse • Master Herbalist • Head of House Oriens
Cross-Class Connections

Potions · Unit II, Lesson 15 — Receiving & Judging Dried Botanicals
Welcome to the receiving bench, scholars. Fernfoot has taught you to dry, and she owns that craft entirely; my bench begins where hers ends. Bring me what your bundles become, and I will teach you to judge it as the apothecary judges: by label, by look, by smell, and by the snap of the thickest stem — and to send a moldy batch, the whole batch, to the trash without a moment's salvage. We receive. We judge. We record.

Creative Arts · Unit VI, Lesson 25 — Drying Racks, Screens & Bench Furniture
Set up your bench, scholars. Fernfoot teaches what to dry and when to cut it in the Greenhouse; what it lies on while it dries belongs to my bench. In my workshop you will build the racks and screens this lesson dries on — frames true and square, mesh fitted so it can come out and be washed, air reaching every leaf from below as well as above — because a harvest dries well or it molds, and the difference is rarely the plant. It is the air.
Further Reading & Sources
- How to Harvest and Dry Herbs — Smithsonian Magazine — harvest timing, bundle size, and the one-third rule, with the paper bag method for sun protection. - Drying Herbs — Horticulture Magazine — rubber bands over string, dark airy locations at 70 to 80 degrees, screen-drying for large leaves, and the crispness test. - How to Dry Fresh Herbs: 4 Easy Ways + Storage Tips — Homestead and Chill — bundle vs screen methods matched to herb types, with fan and humidity guidance. - How to Harvest, Preserve, and Store Your Herbs — Ted's Gardens — checking dryness, the danger of jarring too soon, whole-leaf storage, and the smell test for freshness. - Seed Saving — Montana State University Extension — drying seed heads in paper bags, shattering, and cool dry seed storage. - Conditioning: The Often Forgotten Step in Dehydrating — UC Agriculture and Natural Resources — equalizing moisture before storage and reading condensation as a warning sign. Browse the Herbology shelf in the school Library for readable editions of these works.
Dry something this week, even a small bundle from the market, and let the air do the rest. — Professor Beryl Fernfoot, Herbology Greenhouse • Master Herbalist • Head of House Oriens
Plants from this lesson stand in the Materia Botanica, the school's shared archive — each kept with its lessons, its keepings, and its cautions. This lesson's company:
Bay laurelCalendulaChivesCorianderDill The whole Materia BotanicaPROFESSOR BERYL FERNFOOT · HERBOLOGY GREENHOUSE
Submit your work for this lesson using the form below.
CONTINUE IN THE HERBOLOGY GREENHOUSE
← Previous · Lesson 27: Timing the Harvest Next · Lesson 29: Pressing & Preserving Plant Specimens →
Unit IV — Harvest, Preservation & Use Herbology Greenhouse — All 37 Lessons
The rest of Unit IV: Lesson 27 · Timing the Harvest · Lesson 29 · Pressing & Preserving · Lesson 30 · Seed Saving · Lesson 31 · Culinary Herbs · Lesson 32 · Harvest Festival Project