

HERBOLOGY
Unit IV · Lesson 32Unit IV Harvest Festival Project
HERBOLOGY GREENHOUSE • UNIT IV • LESSON 32
PROFESSOR BERYL FERNFOOT
Herbology Greenhouse
Master Herbalist
Professor's Introduction

Scholars, every unit of this course has led here. Unit I taught you to observe. Unit II taught you to house. Unit III taught you to multiply and to prune. Unit IV has taught you to gather: the timing, the tools, the drying, the storage. Now you close the circle with a harvest of your own.
This lesson is not a lecture. It is a celebration with work clothes on. You will choose one real project, a dried herb bundle, a pressed specimen collection, a seed library, or a written harvest plan, and you will carry it through from the first plan to the last filed page. I will walk you through a complete example first, so you can see the whole shape of the work.
There is no quiz and no time limit. A harvest cannot be hurried, and neither can this lesson.
— Professor Beryl Fernfoot, Herbology Greenhouse • Master Herbalist • Head of House Oriens
The line beneath the map is our road: every stop a place where the knowledge of plants changed, every lesson a step along it.
Lesson Objectives
By completing this lesson, you will be able to:
- Choose a harvest project that fits your plants, your space, and your season: drying, pressing, seed saving, or harvest planning.
- Plan the project in writing before you gather a single stem.
- Harvest at the right time and in the right way, leaving every plant healthy.
- Preserve your harvest with a tested method: air drying, pressing, or seed storage.
- Assess your own work honestly against a checklist, and file the project as the closing record of Unit IV.
Reading this lesson: ★ marks the passages to remember. They return on the unit quiz and the class test. Check in questions ask the material back as you go; answer them in your workbook when you meet them.
Working this lesson: Your project packet is the first download on this page. Work in it as the lesson moves along, working each part of the project as its subject is taught — or read the lesson through for your notes and take the project afterward. Both are proper ways to sit this class. Signposts in the reading tell you where each part of the project belongs. Written answers are short answers in your own words; a few honest lines are worth more than a filled page.
Your Assignment Packet
This lesson's work lives in its project packet: the Lexicon Handout (every term, course terms marked ◆), Materials, Guided Practice (the project's four-part structure and the shape of the oregano example, so you can plan your own harvest project before you begin), the Assignment Manual with the project itself — its four parts and their checklists, printed as sheets you can work from — the Reflection Questions, which here are the project's Celebration and Honest Accounting, and the Workbook Checklist. There is no answer key in this packet, and that is by design: this project is self-assessed against its own checklists. Download the packet before you begin and keep it beside you as you read.
What Is the Harvest Festival Project?
Unit I ended with a botanical profile: a record of what a plant is. Unit II ended with a growing plan: a record of what a plant needs. Unit III ended with a stewardship project: a record of what you did for a plant. Unit IV ends with a harvest project: a record of what the plant gave, and how you honored the gift.
★ Harvesting is the moment the partnership pays out. You sowed, watered, watched, and waited, and now you gather. But a harvest is only half the work. The other half is preservation: getting what you gathered into a form that will last. An herb bundle that molds in the jar is not a harvest; it is a disappointment. A seed envelope that is never labeled is not a seed library; it is a mystery.
Your project has four paths. Choose one.
Path One: The Dried Harvest. Harvest and dry one or more bundles of herbs using the air-drying methods from this unit. Bundle, hang, wait, test for dryness, and store the harvest in labeled jars.
Path Two: The Pressed Collection. Press and mount at least three plant specimens with proper herbarium labels, building the collection your lesson on leaf study promised you back in Unit I. Specimens may come from your Familiar, your garden, or plants you have permission to collect.
Path Three: The Seed Library. Collect seeds from at least two plants, dry them fully, and store them in labeled paper envelopes ready for next season's sowing.
Path Four: The Harvest Plan. Write a complete harvest plan for a garden bed, a set of containers, or your Scholar's Familiar: what will be harvested, when, by what method, and how each part of the harvest will be preserved and stored. This is the right path when the harvest season has not yet arrived or when you are planning next year's garden.
★ All four paths require the same discipline: plan first, gather gently, preserve carefully, and assess honestly. All four end with a filed record in your Scholar's Familiar Journal. And all four share one rule that runs through all of Unit IV: the plant's health comes before your harvest. If a plant is too young, too weak, or not ready, you wait. A good harvester takes some and leaves plenty.
Check in: The four paths make different things. What discipline do they all share — and what is the one rule that runs through all of Unit IV?
❦ In your workbook: record the harvest festival project in your own way — what it records, how it differs from the profile, the plan, and the stewardship project, and the four paths you may choose between — copy, sketch, or note what matters.
In your packet: Unit IV Harvest Festival Project ◐ begins here. Work it now, or mark the place and take it as homework — your choice.
A Worked Example: Drying a Bundle of Oregano
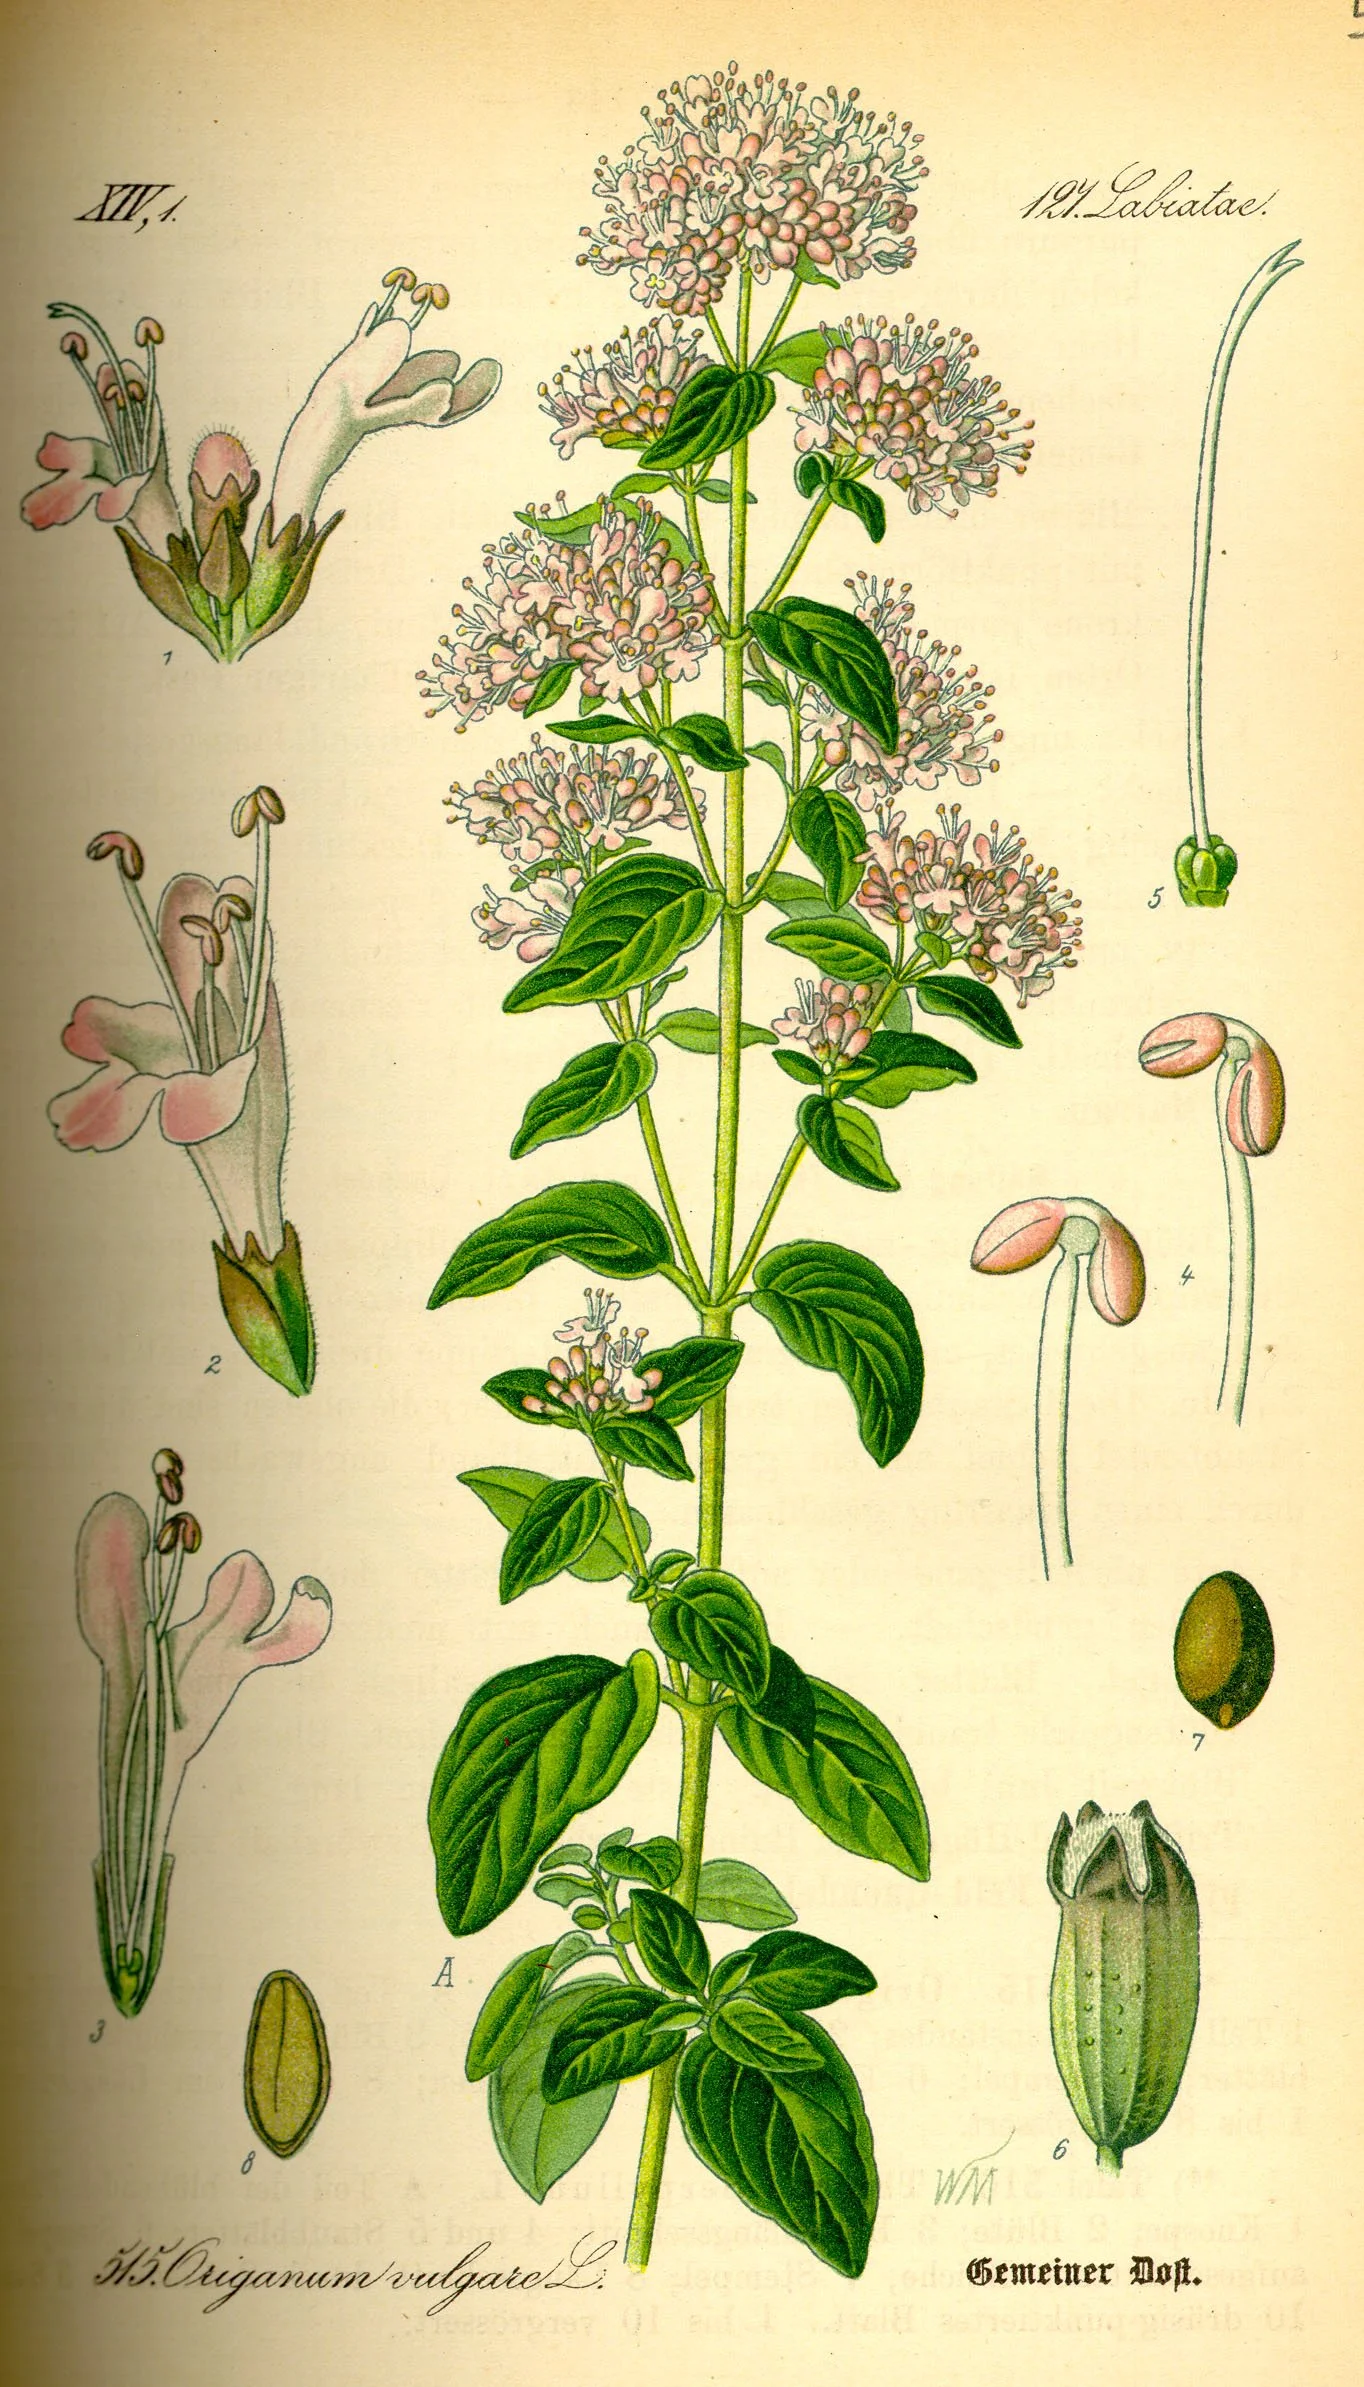
Oregano (Origanum vulgare), plate 121 of Thomé's Flora von Deutschland, Österreich und der Schweiz (1886) — the worked example's plant. Fernfoot's plan harvests it before full flower, when the leaves hold their peak flavor, and dries it in hanging bundles of five to seven stems.
Otto Wilhelm Thomé, Flora von Deutschland, Österreich und der Schweiz (1886), plate 121. Public domain.
Before you plan your own project, walk through a complete one with me. I have chosen oregano, a woody-stemmed herb that dries reliably and forgives small mistakes. The bundle method below is the same one gardeners have used for centuries, and every step of it has been verified by agricultural extension programs.
The Plan
Path chosen: Path One, The Dried Harvest.
Plant: Oregano, growing in a sunny container, well past its first flush of growth and not yet in full flower. Herbs are best harvested before they bloom, when the leaves hold their peak flavor.
Method: Air-dry in hanging bundles of five to seven stems.
Timing: A sunny morning, after the dew has evaporated and before the midday heat. Morning harvest gives you dry leaves full of flavor; midday heat saps the plant's aromatic oils.
Drying space: A dark, dry room with good airflow, a closet shelf or a spare room with a line strung across it. Darkness keeps the color bright; airflow keeps mold away.
Materials: Clean sharp scissors or snips, twine or rubber bands, a small paper bag with slits cut in it (optional, for catching any seeds and shielding the bundle from light), labels.
★ Success will look like: Bundles that dry in one to three weeks, leaves that crumble easily between the fingers, stems that snap, and jars of fragrant oregano labeled with the date.
If it fails, I will: Discard any bundle that shows mold or smells musty, and note what went wrong. A failed bundle is data, not defeat.
Check in: The plan is written before a single stem is cut. What does it decide in advance — the timing, the drying space, and what success and failure will look like?
❦ In your workbook: record the plan in your own way — the path and plant chosen, the timing and the drying space, and what success and failure would look like — copy, sketch, or note what matters.
In your packet: Project Part 1: The Plan ✎ begins here. Work it now, or mark the place and take it as homework — your choice.
The Gathering
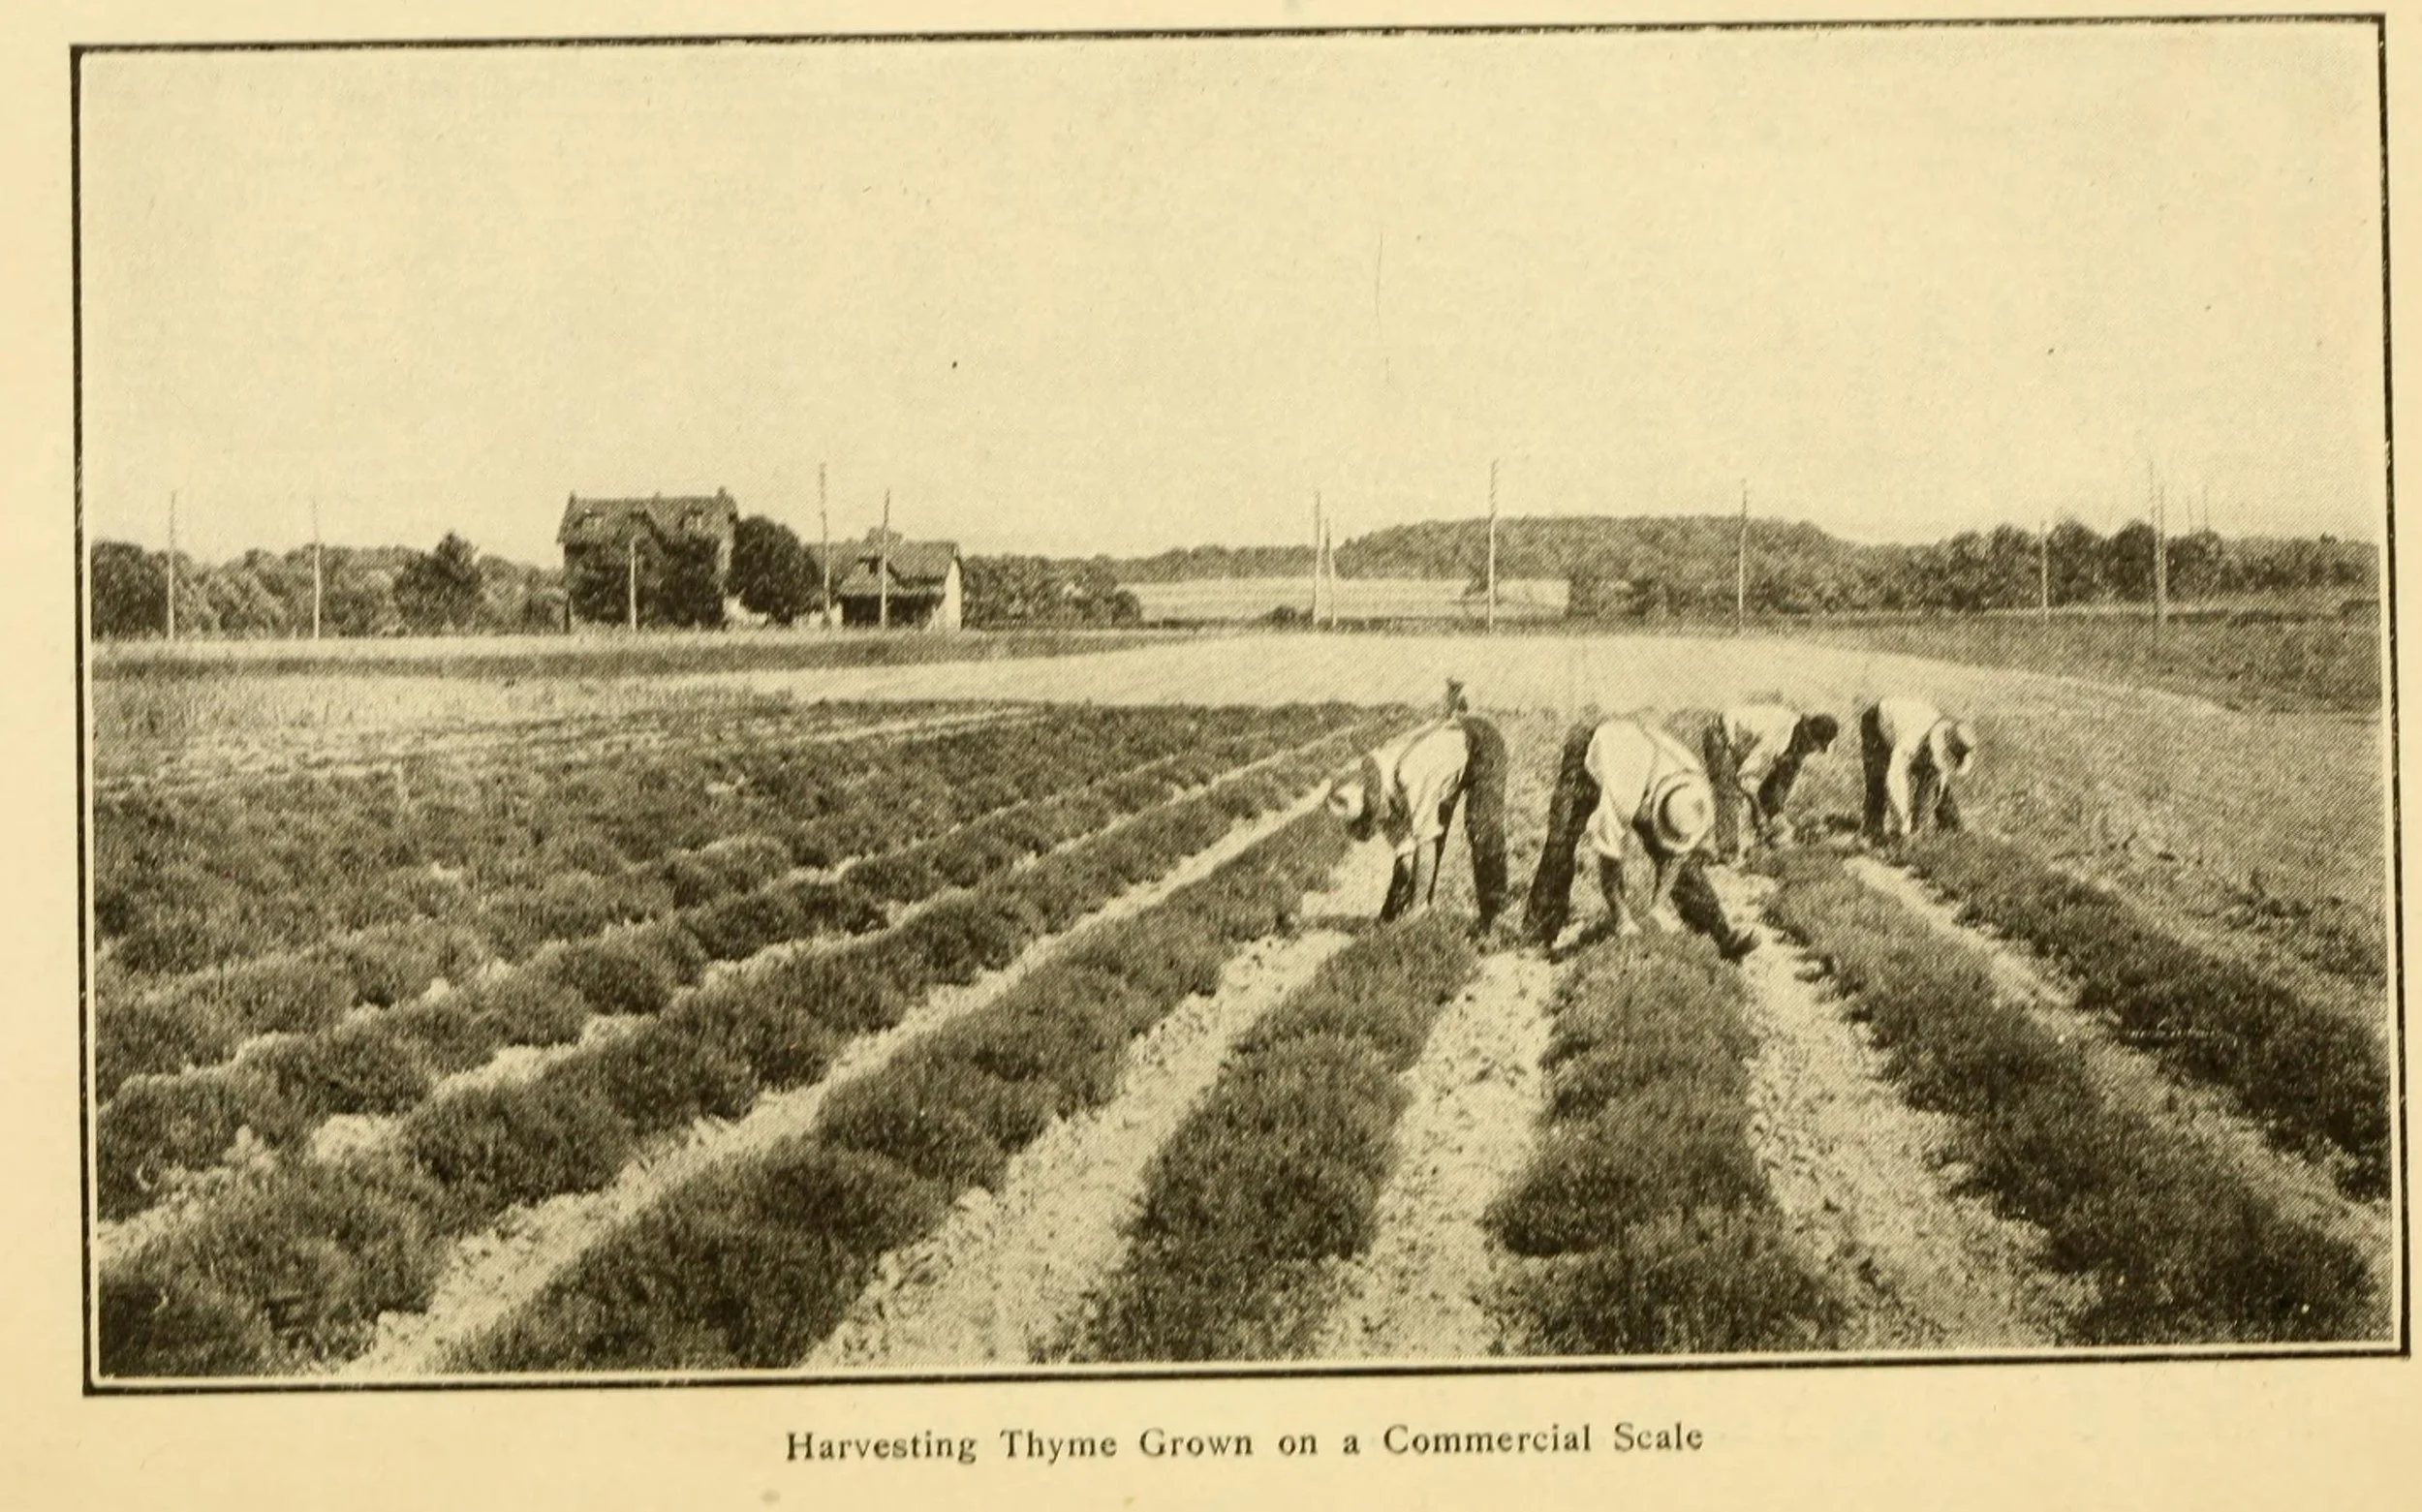
Harvesting thyme grown on a commercial scale, photographed for Kains's Culinary Herbs (1912): thyme cut by hand, row by row. The project's gathering follows the same discipline at garden scale — in the morning after the dew has dried, no more than a third of any plant, each stem cut cleanly just above a leaf pair.
M. G. Kains, Culinary Herbs: Their Cultivation, Harvesting, Curing and Uses (New York: Orange Judd Company, 1912), p. 18; scan via the Internet Archive. Public domain.
★ On harvest morning I cut stems with clean scissors, taking no more than a third of the plant's growth at any time. This is the restraint rule from your harvest lessons: the plant must keep enough leaves to go on living and growing. I cut just above a leaf pair, which is the same clean-cut habit you learned in your pruning lessons.
I shook each stem gently to dislodge any insects and inspected the leaves, discarding any that were yellowed, damaged, or diseased. I did not wash the stems; they were clean from a well-kept container, and washing adds moisture that must then be dried away. If your herbs are dusty, rinse them in cool water and pat them completely dry before bundling.
I stripped the leaves from the bottom inch or two of each stem where the bundle would be tied. Bare stems tie more securely, and removing lower leaves improves air circulation through the bundle.
Check in: In the gathering, how much of the plant does Fernfoot take at most — and where, exactly, does she cut?
❦ In your workbook: record the gathering in your own way — the one-third restraint, the clean cut above a leaf pair, and the inspection of every stem — copy, sketch, or note what matters.
In your packet: Project Part 2: The Gathering ⚒ begins here. Work it now, or mark the place and take it as homework — your choice.
The Preserving
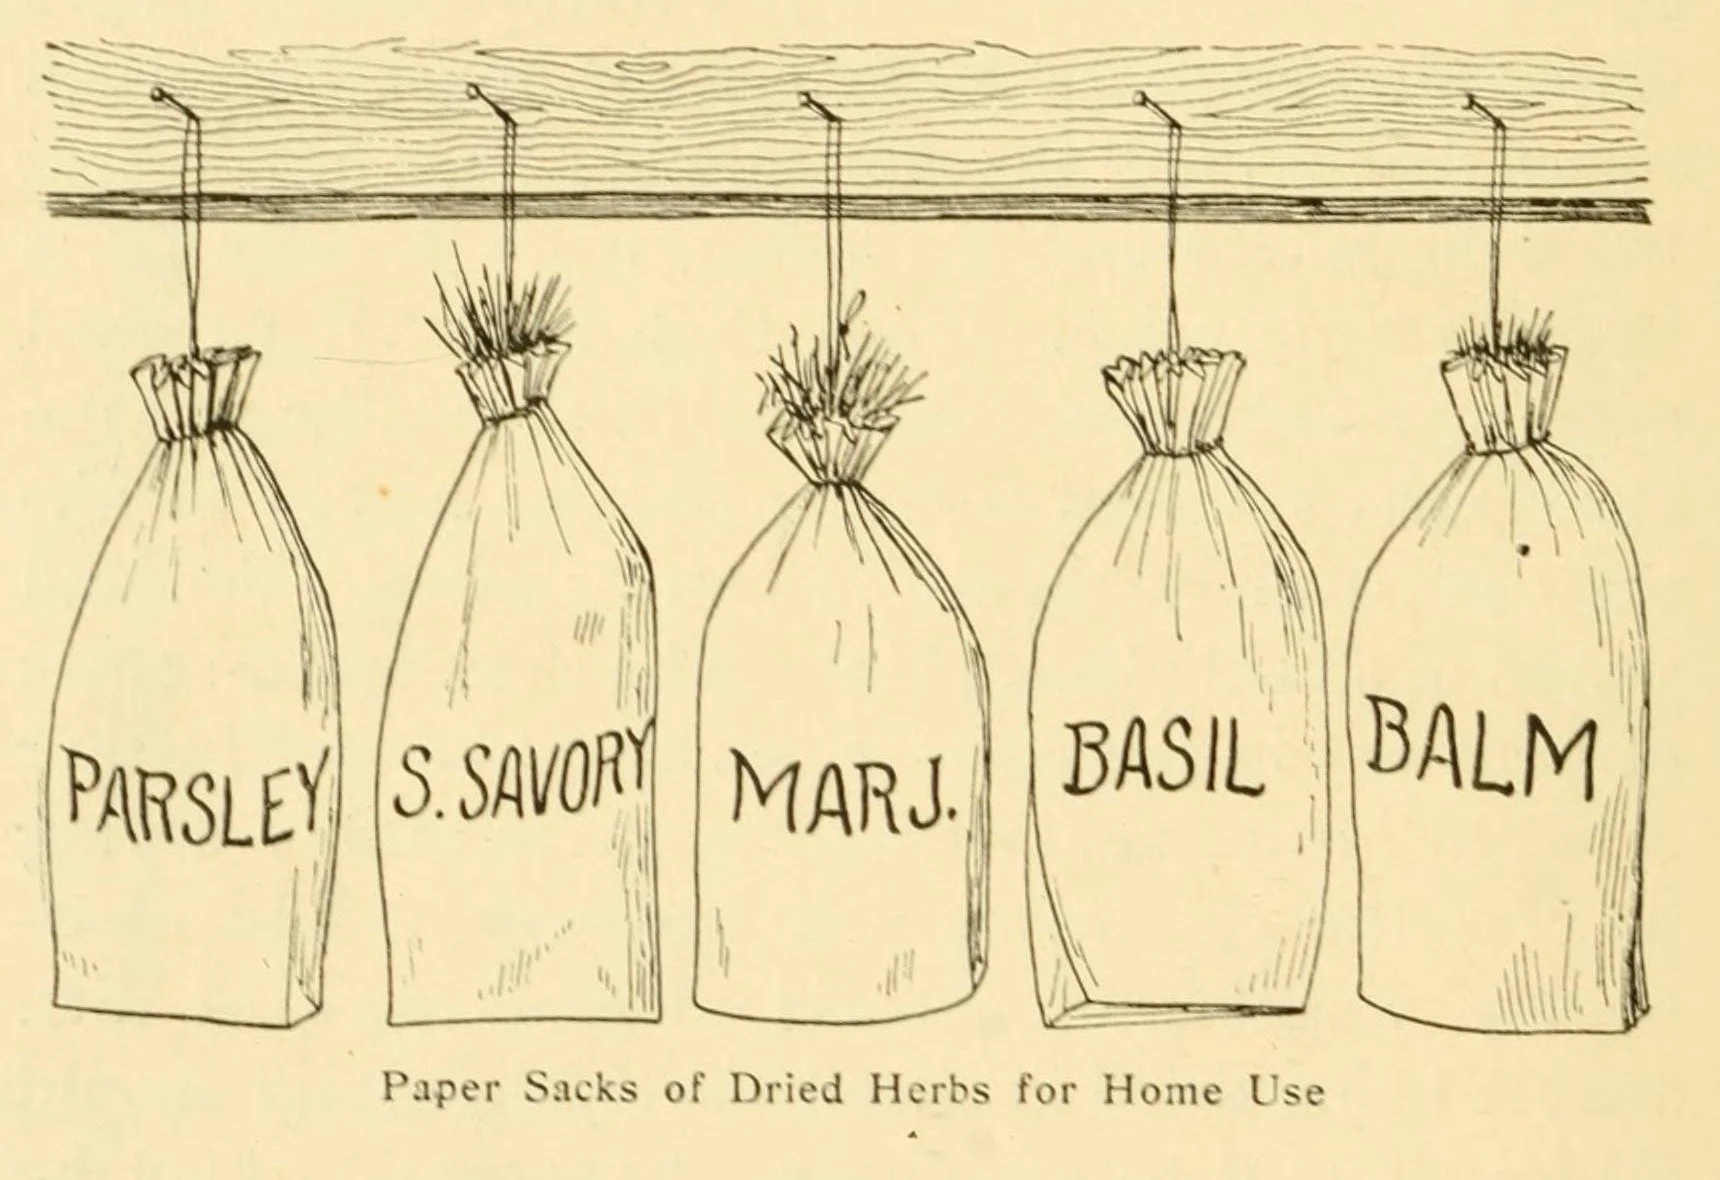
Dried herbs for home use, kept the keeping-house way in a 1912 manual: in labeled paper sacks, hung from a beam. The project's storage rule in one picture — the harvest is dried first, labeled as it is stored, and kept where air can move. Fernfoot's own finished oregano goes into a labeled glass jar in a cool, dark cupboard; the sack and the jar serve the same law: a jar without a label is a guess.
M. G. Kains, Culinary Herbs: Their Cultivation, Harvesting, Curing and Uses (New York: Orange Judd Company, 1912), p. 26; scan via the Internet Archive. Public domain.
I gathered five to seven stems into a loose bundle and secured them with a rubber band about two inches from the cut ends. Rubber bands are better than twine here: as the stems shrink while drying, a rubber band tightens with them, while twine stays loose and lets stems slip to the floor.
I hung the bundle upside down in my dark, ventilated drying space. The traditional reasoning is that hanging upside down keeps the essential oils in the leaves rather than draining down into the stems, and while modern growers debate the mechanism, the practice is universal and the results are excellent. I slipped a paper bag with slits cut in the sides over the bundle, tying it loosely at the neck: the bag catches anything that drops and shields the herbs from light. The slits let air move through, because air circulation is what separates drying from rotting.
★ Then I waited, checking the bundle every few days. For the first week the bundle felt cool and flexible. By the second week the leaves had darkened slightly and felt papery. I ran The Crumble Test: I rubbed a leaf between my fingers. When it crumbled easily to dry flakes, and when a stem snapped cleanly instead of bending, the bundle was done. Two of my three bundles passed the test at two weeks. The third bundle, hung in a corner with poor airflow, smelled faintly musty: the beginning of mold. I discarded that bundle entirely, moved my drying line to a breezier spot, and wrote down what I had learned. Mold is the one verdict you never argue with.
Check in: What two signs pass the Crumble Test — and what does Fernfoot do with the bundle that smells musty?
❦ In your workbook: record the preserving in your own way — the loose bundle and the rubber band, the dark ventilated space, and the Crumble Test that ends the wait — copy, sketch, or note what matters.
In your packet: Project Part 3: The Preserving ◐ begins here. Work it now, or mark the place and take it as homework — your choice.
The Celebration
★ I stripped the dried leaves from the stems over a clean tray and placed them in a small glass jar with a tight lid. I labeled the jar in permanent ink: plant name, variety if known, and the date of harvest. The jar went into a cool, dark cupboard, away from the stove and away from sunlight. Properly dried and stored herbs keep their best quality for about a year.
I photographed the jars and the hanging bundles, dated everything, and filed the whole record in my Scholar's Familiar Journal: plan, gathering notes, drying log with the failed bundle honestly recorded, and the final labeled jars. Then I cooked with some of it, because a harvest that is never used is only half a celebration.
That is the whole shape of the project: plan, gather, preserve, celebrate. Now it is your turn.
❦ In your workbook: record the celebration in your own way — the labeled jar in its cool, dark cupboard, the filed record with the failure honestly recorded, and a harvest actually used — copy, sketch, or note what matters.
In your packet: Project Part 4: The Celebration and Honest Accounting ✎ begins here. Work it now, or mark the place and take it as homework — your choice.
Professor Fernfoot
Scholars, notice what the worked example just taught you without saying it. The project is not really about the jar of oregano. The jar is the trophy, yes, and you may be proud of it. But the real learning lived in the decisions: when to cut, how much to take, where to hang, when to wait, and when to throw a bundle away.
The musty bundle was the most valuable part of my harvest. It taught me about airflow in a way no lesson could. Your own project will teach you something similar, something you can only learn with your hands. Make room for it. Plan for success, but leave a little space in your journal for the surprise that teaches you more than the success did.
— Professor Beryl Fernfoot, Herbology Greenhouse • Master Herbalist • Head of House Oriens
Your Turn: The Project
Choose one path. Read your choice carefully, then turn to the Assignment Manual at the back of this lesson and begin with Part 1: The Plan. Write the plan before you touch a single stem.
Path One: The Dried Harvest
★ Harvest and dry herbs by air drying. Cut in the morning after the dew has dried, taking no more than a third of any plant. Bundle five to seven stems loosely, secure with a rubber band, and hang upside down in a dark, dry, well-ventilated place. Herbs with high water content, such as basil or mint, dry more safely spread in a single layer on a screen or rack than in bundles. Wait one to three weeks. Run the Crumble Test: leaves should crumble easily and stems should snap. Discard anything that smells musty or shows mold. Strip the leaves into airtight jars, label with name and date, and store in a cool, dark place.
Path Two: The Pressed Collection
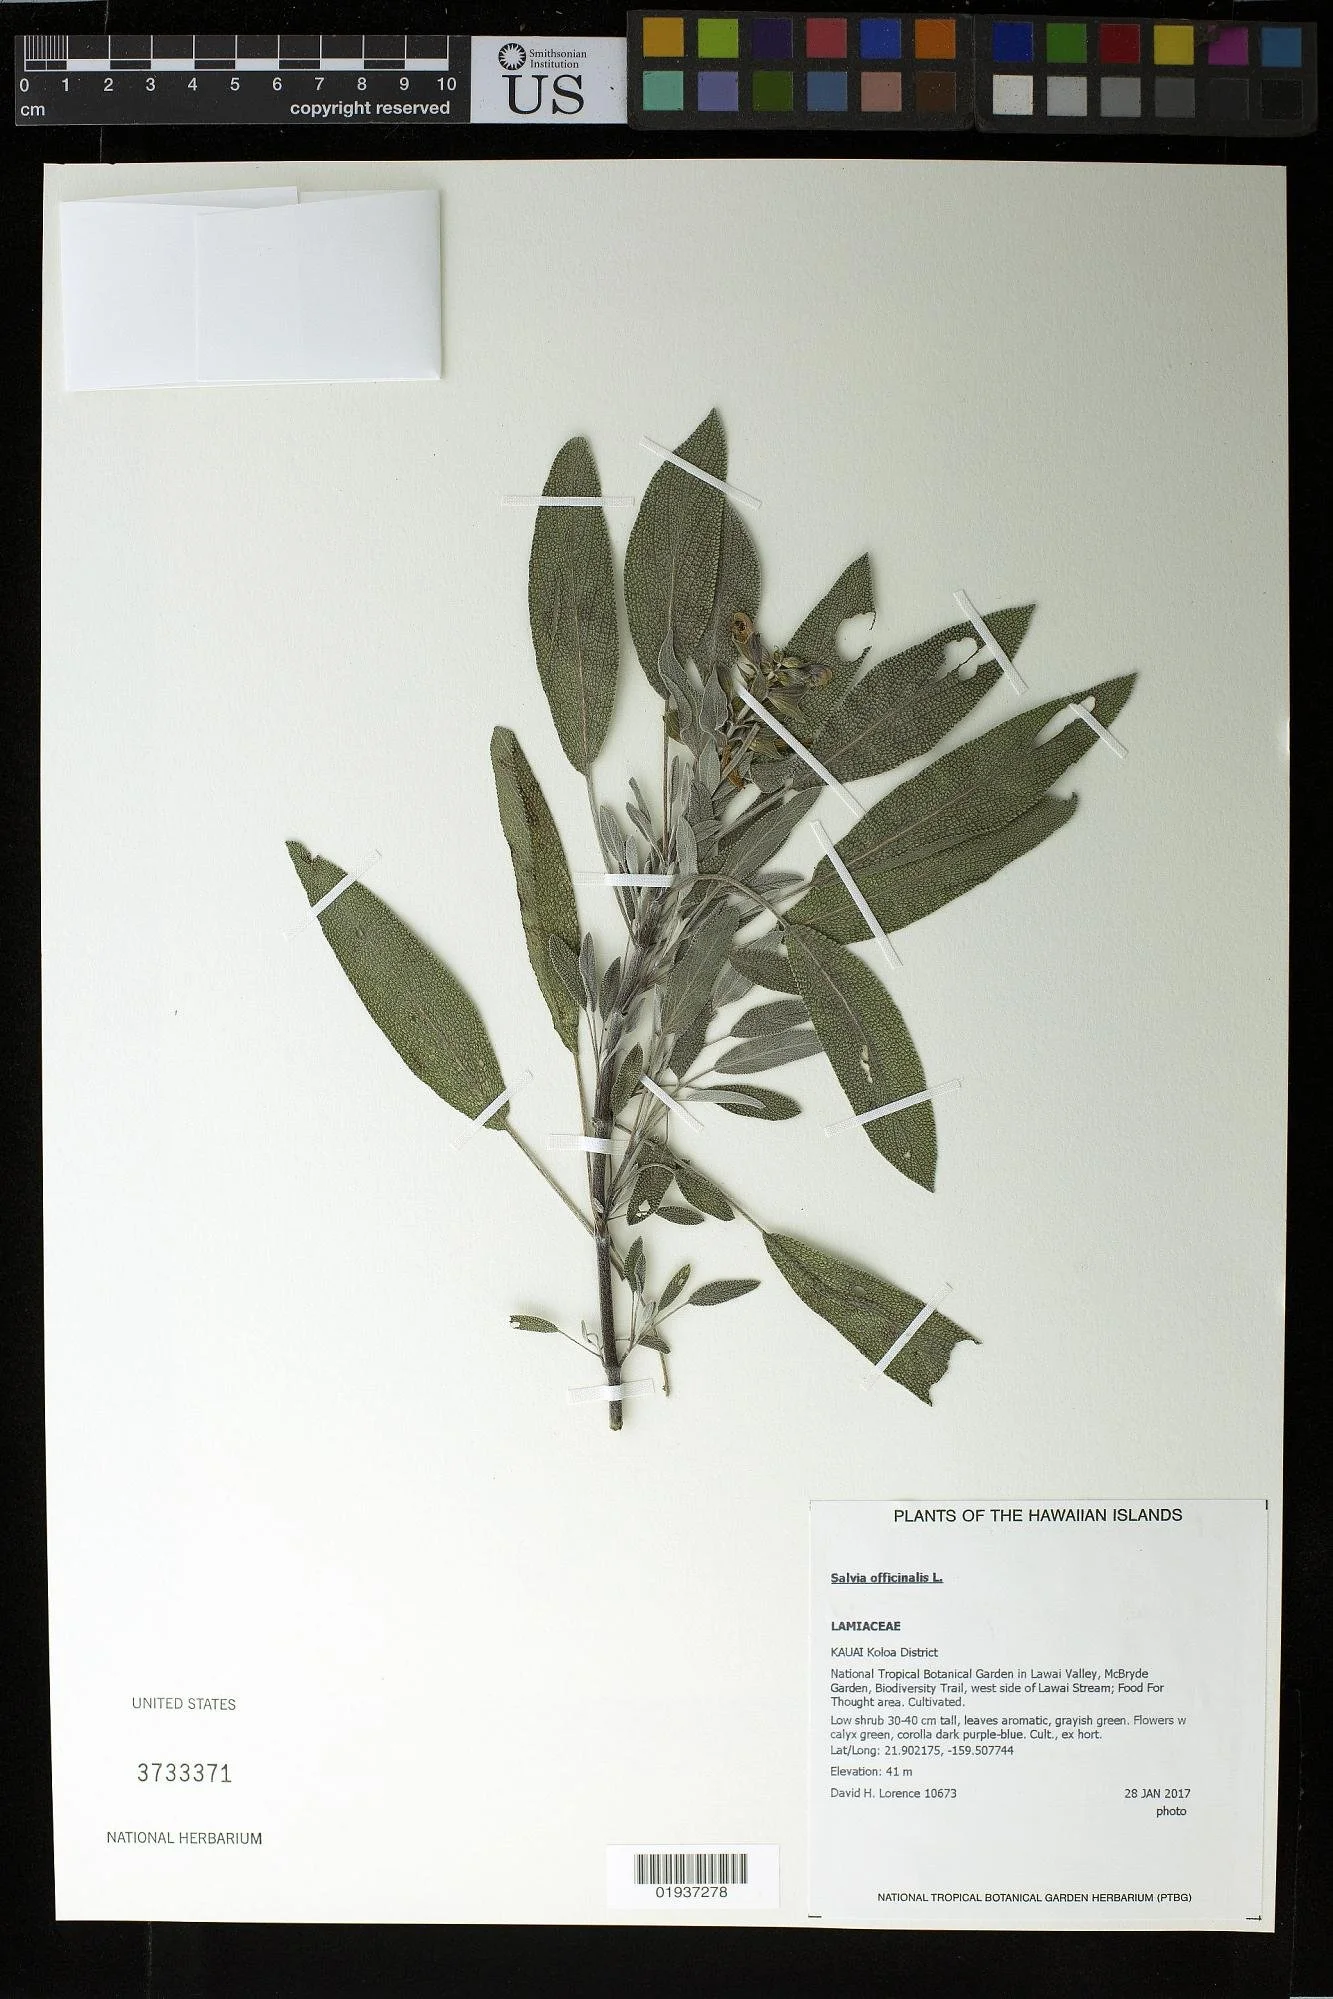
A real filed specimen, not a scholar's project page: sage (Salvia officinalis) pressed, mounted, and filed at the U.S. National Herbarium (sheet 3733371), collected by David H. Lorence at McBryde Garden, Kauai, on 28 January 2017. Its label gives what Path Two's labels give — plant name, where and when collected, and the collector's name. Your pressed collection is yours to make; this is simply what honest mounting and labeling look like.
Herbarium sheet US 3733371 (Smithsonian Institution, National Museum of Natural History, Botany), specimen collected by David H. Lorence, 2017; image via GBIF occurrence 2284227969. CC0.
Press and mount at least three specimens. Collect only from plants you own or have permission to collect from, and never collect in parks or nature preserves where picking is forbidden. Choose a healthy portion that shows the plant well: leaves, and flowers or seed heads if present. Arrange the specimen between sheets of newspaper, spreading the parts so leaves, flowers, and stems are all visible; flip one leaf to show its underside. Weight the stack with heavy books or a simple press. Change the damp newspaper in the first days to prevent mold. Most specimens dry in one to three weeks. Mount each finished specimen on sturdy paper with a label: plant name, where and when collected, and your name as collector. File the collection in your journal as the start of your own herbarium.
Path Three: The Seed Library
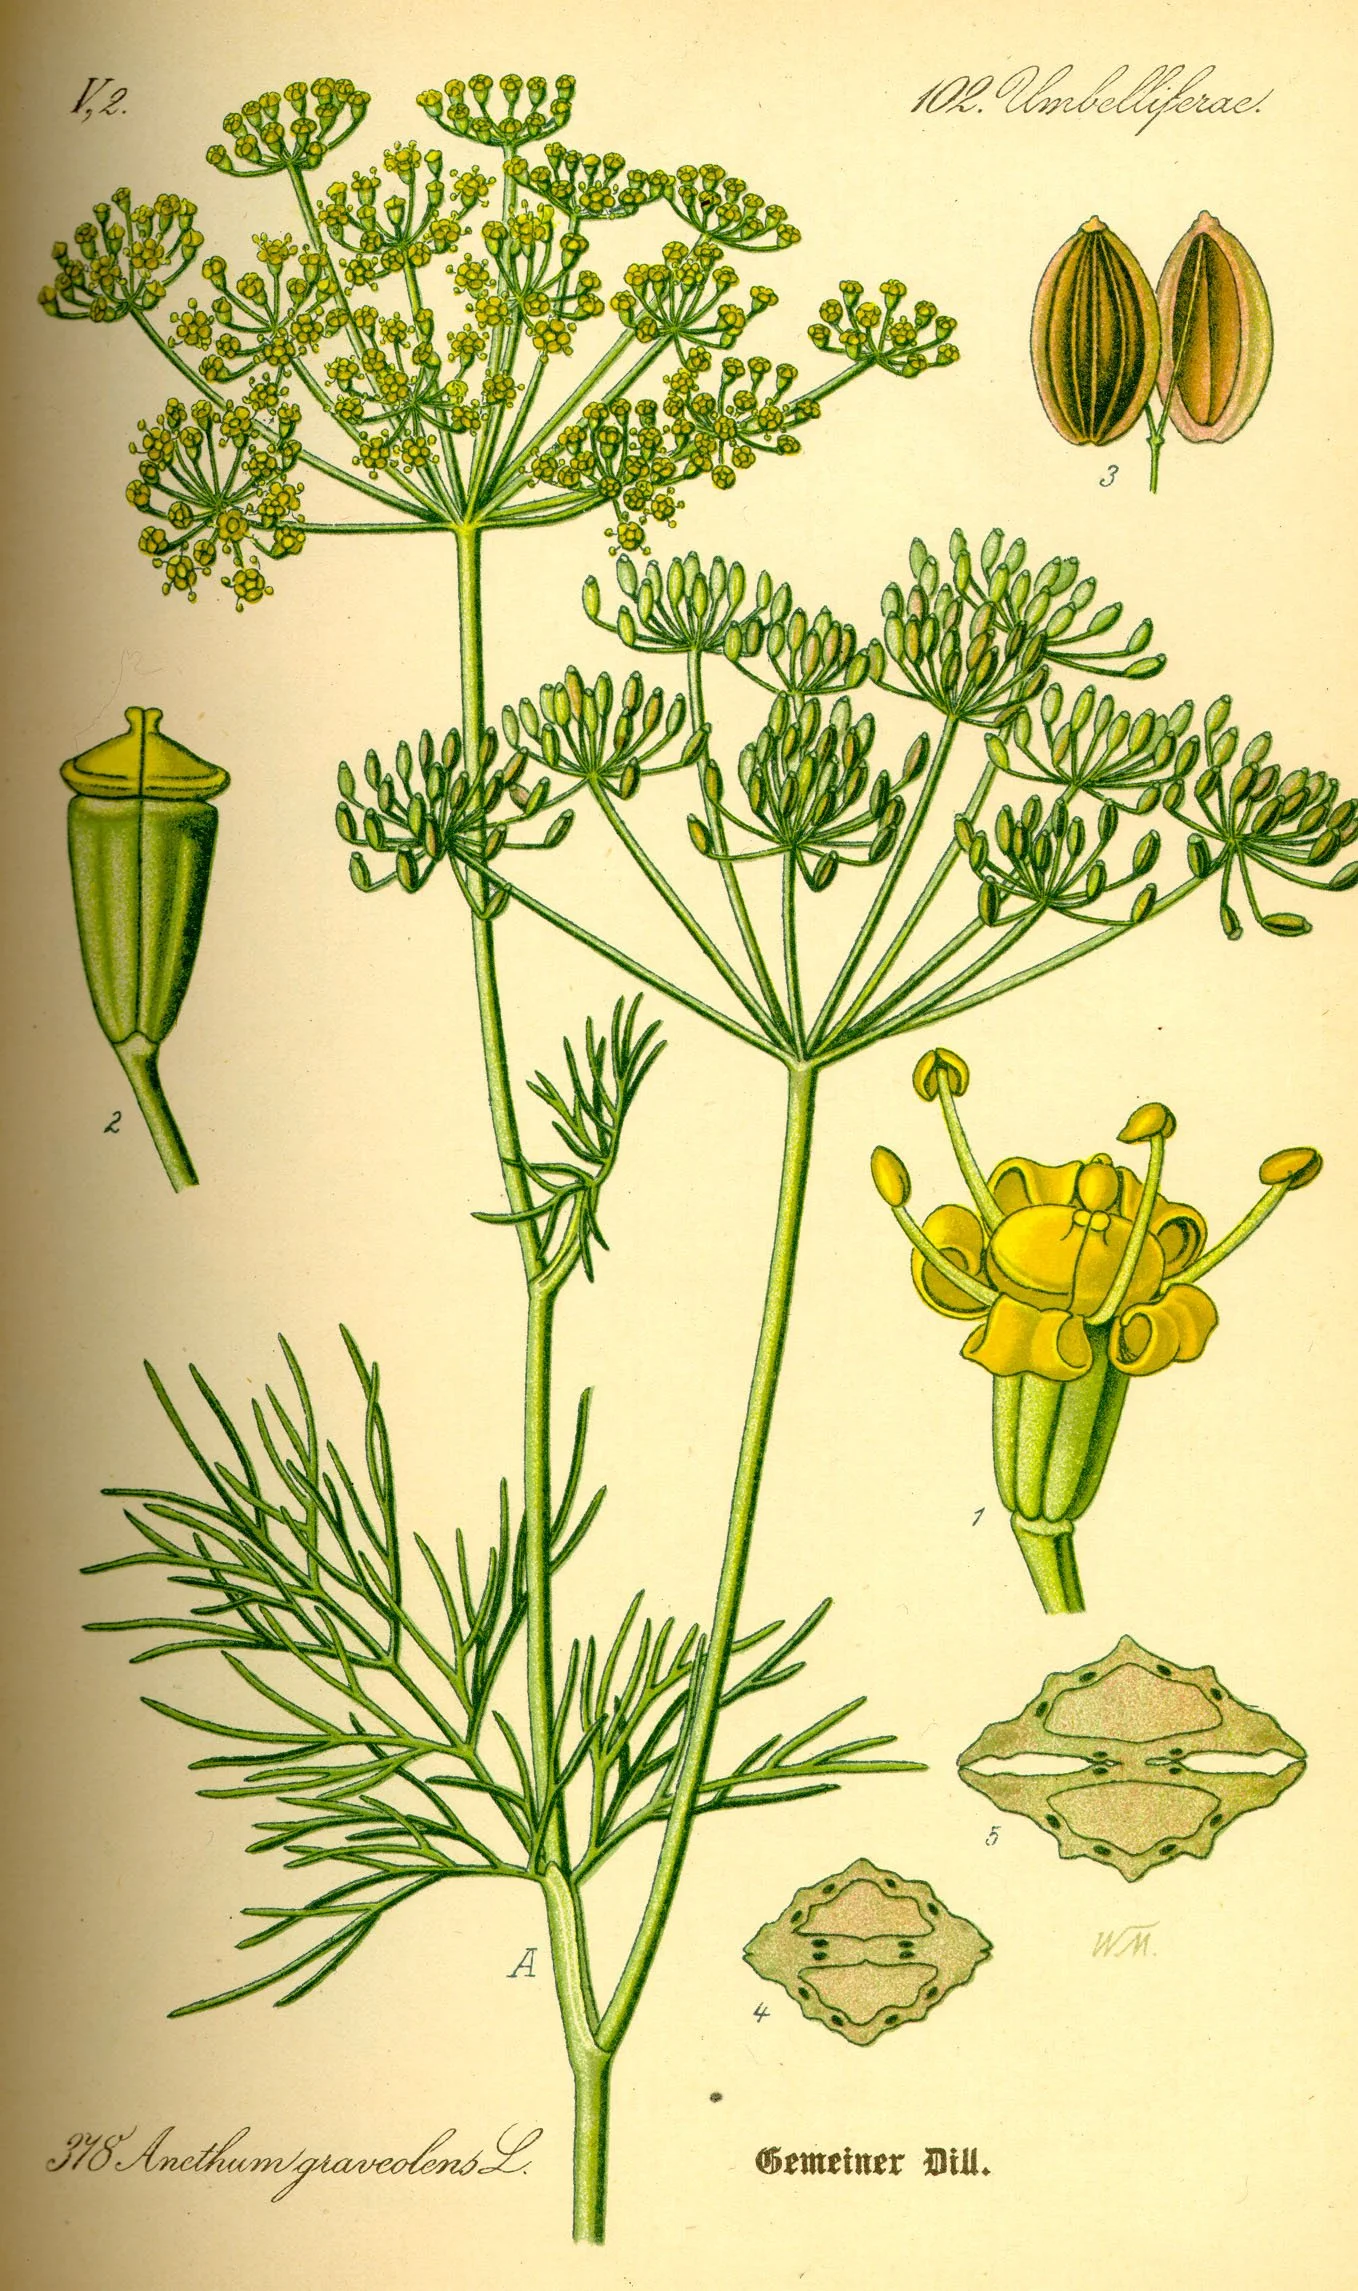
Dill (Anethum graveolens), plate 378 of Thomé's Flora (1885): one umbel in flower, a second carrying the seed heads, and the ripe seed drawn enlarged. Path Three works from heads like these — let them mature and dry on the plant, harvest on a dry day before they shatter and scatter, dry the seed fully, and store it in labeled paper envelopes, never plastic, in a cool, dark, dry place.
Otto Wilhelm Thomé, Flora von Deutschland, Österreich und der Schweiz (1885), plate 378. Public domain.
Save seeds from at least two plants. Let the seed heads mature and dry on the plant; harvest on a dry day. Some seed heads shatter and drop their seeds as soon as they are ripe, so watch them and harvest just before they scatter, or tie a paper bag over the head to catch the falling seed. Spread the collected seeds in a single layer on paper, out of direct sun, and let them air-dry for one to two weeks. Seeds must be thoroughly dry before storage or they will mold. Store in labeled paper envelopes, never plastic, which traps moisture: plant name, variety, and the date saved, written in permanent ink. Keep the envelopes in a cool, dark, dry place. Next spring, these envelopes become your sowing stock for Lesson 17 all over again.
Path Four: The Harvest Plan
Write the plan you would follow if the harvest were happening now. Choose a real bed, a set of containers, or your Scholar's Familiar. For each plant, record: what will be harvested (leaves, flowers, seeds), when (the harvest window: season, time of day, and stage of growth), how much (the one-third rule and any exceptions), the preservation method (drying, pressing, seed saving, or fresh use), the materials needed, and the storage plan with labels. Include a week-by-week calendar for the harvest season and a list of everything you would need to buy or gather. A good harvest plan is a project in itself, and next season you will be glad you wrote it.
If You Keep No Plant of Your Own
You can complete this project fully without owning a single plant. The observation and planning skills are identical; only the ownership differs.
- Path One or Two: Work with fallen material. Press fallen leaves, seed heads, and bark collected from paths and sidewalks, where nothing living was picked. For drying, ask a gardening neighbor or a community garden for a small share of their harvest, with permission, in exchange for a jar of the finished product.
- Path Three: Start your seed library from a seed swap, a library seed collection, or purchased seed packets. Cleaning, drying, dating, and filing seeds is the same craft wherever the seeds come from.
- Path Four: This path needs no plants at all. Plan the harvest for a community garden bed, a relative's garden, or a public herb garden you visit, with the gardener's permission.
- Every path: Visit a farmers market during harvest season and document what is being sold, how it was preserved, and what the sellers can tell you about timing. A market stall is a harvest festival you can study.
Your final defense will accept a complete field-observation record in place of a grow journal. This project is your first entry in that record.
❦ In your workbook: record your turn in your own way — the path you have chosen, what each path makes, and the no-plant paths if the plant is not your own — copy, sketch, or note what matters.
Unit IV Safety: The Harvest Recap
★ Harvest work is gentle work, but it has real rules. Carry these through your whole project.
- Mold is the line you do not cross. If dried material smells musty or shows any mold, discard it completely. Do not try to salvage it, and do not sniff it deeply to decide.
- Only harvest what you can identify with certainty. Never gather from a plant you are unsure about, and never taste or eat anything you cannot positively identify. Many wild plants have toxic look-alikes.
- Respect sprayed ground. Do not harvest from plants that may have been treated with pesticides or herbicides: roadsides, landscaped beds, and unknown lawns are not harvest sites.
- Keep dried herbs away from open flame. Dried plant material burns readily. Dry and store it well away from stoves, candles, and heaters.
- Mind your tools and your dust. Cut away from your body, supervise younger students with scissors and snips, and work in ventilated air when handling dusty dried material or seed chaff.
- Label everything. A jar without a label is a guess. A seed envelope without a date is a mystery. Label as you go, in permanent ink.
- Ask permission. Every plant you gather from belongs to someone, even if that someone is a park authority. Collect only where gathering is allowed.
Check in: Which line in this recap do you not cross — and which two other rules will you carry through your whole project?
❦ In your workbook: record the harvest recap in your own way — the mold line you do not cross, and the rules that travel with every gathering — copy, sketch, or note what matters.
Guided Observation: The Oregano Bundle, Walked Through Once More
Before you plan your own project, walk through a complete one with me. The worked example above is this lesson's guided practice: Fernfoot dries a bundle of oregano, part by part, so that you can watch the method before the project is yours. Walk it once more with these questions beside you:
- In The Plan, which path and plant were chosen, what timing was set, and what would success and failure look like?
- In The Gathering, how much of the plant was taken, where was each stem cut, and what was discarded before bundling?
- In The Preserving, why does a rubber band serve better than twine, and what does the slit paper bag do?
- In The Preserving, what did the Crumble Test show at two weeks, and what happened to the third bundle?
- In The Celebration, how was the finished harvest labeled and stored, and what was filed in the journal?
Plan, gather, preserve, celebrate. Write everything down. Date everything.
Materials
Required (Level One — household items)
- Your Scholar's Familiar Journal or a notebook
- A pencil or permanent marker
- Clean scissors or snips
- Twine or rubber bands
- Newspaper
- Paper bags
- Jars or envelopes
- Labels
Suggested (Level Two — historically closer)
- A bound blank book for your Scholar's Familiar Journal record
- A simple plant press or heavy books for the pressing path
- A screen or rack for high-moisture herbs
- A small glass jar with a tight lid
- A clean tray
Safety: Mold is the line you do not cross. If dried material smells musty or shows any mold, discard it completely. Only harvest what you can identify with certainty, and never taste or eat anything you cannot positively identify. Do not harvest from plants that may have been treated with pesticides or herbicides. Keep dried herbs away from open flame, and dry and store them well away from stoves, candles, and heaters. Cut away from your body, supervise younger students with scissors and snips, and work in ventilated air when handling dusty dried material or seed chaff. Label everything, in permanent ink. Collect only where gathering is allowed, and ask permission.
Reflection Questions
This project's reflection is its Celebration and Honest Accounting: there are no separate questions to answer, because the examiner is you. Sit down with your completed record and answer truthfully:
- ☐ What I planned: _______________
- ☐ What actually happened: _______________
- ☐ My harvest yielded: _______________ (jars, specimens, envelopes, or pages of plan)
- ☐ The most useful thing I observed was: _______________
- ☐ The failure or surprise I learned the most from was: _______________
- ☐ Next season I would change: _______________
- ☐ My record is complete, dated, and filed in my Scholar's Familiar Journal as the closing entry of Unit IV.
- ☐ I used some of my harvest, shared some, or displayed my collection: _______________
- ☐ I can explain, in my own words, why a harvester takes some and leaves plenty.
Workbook Checklist — Lesson 32
In my workbook I have:
- ☐ What I planned: _______________
- ☐ What actually happened: _______________
- ☐ My harvest yielded: _______________ (jars, specimens, envelopes, or pages of plan)
- ☐ The most useful thing I observed was: _______________
- ☐ The failure or surprise I learned the most from was: _______________
- ☐ Next season I would change: _______________
- ☐ My record is complete, dated, and filed in my Scholar's Familiar Journal as the closing entry of Unit IV.
- ☐ I used some of my harvest, shared some, or displayed my collection: _______________
- ☐ I can explain, in my own words, why a harvester takes some and leaves plenty.
☐ Lesson completed Date: ___ Signature: ___
Professor's Closing Note
And so Unit IV closes, scholars, and with it the whole arc of the growing year. You chose a plant with love in Lesson 1. You housed it with knowledge in Lesson 16. You multiplied it, shaped it, and freed its roots in Unit III. Now you have gathered its gifts and kept them well.
Look at what your hands have learned this year. They can sow, cut, divide, layer, pinch, prune, repot, harvest, dry, press, and save seed. That is not a list of chores. That is a craft, and it is yours now.
File this project carefully. It is the last record of Unit IV, and it will stand beside everything else when the time comes for your Master Herbologist Defense. But before that grand occasion, take a breath. Walk out to your plant, or your adopted plant, or your market stall, and thank it in whatever way feels right to you. Gardeners have always done this. It is the oldest part of the harvest, and the best.
The greenhouse doors stand open, as they always have. I will see you at the defense.
— Professor Beryl Fernfoot, Herbology Greenhouse • Master Herbalist • Head of House Oriens
PROFESSOR BERYL FERNFOOT
Herbology Greenhouse
Master Herbalist
Cross-Class Connections

Creative Arts · Unit V, Lesson 21 — Building the Plant Press
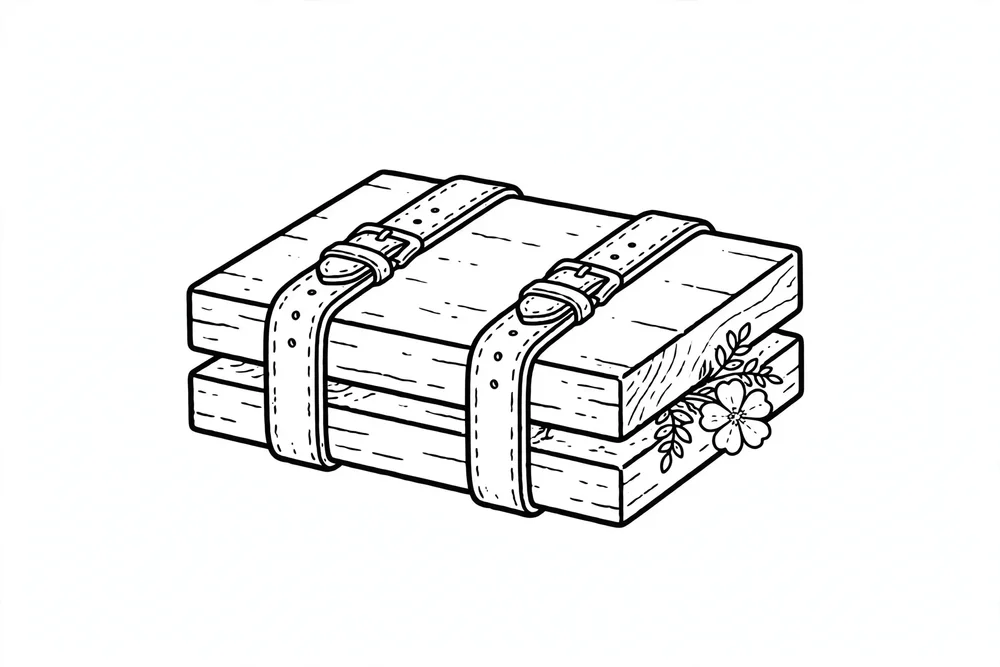
Bring me the specimen before you blame the press, scholars. Fernfoot teaches what goes into it — which plants, gathered when, arranged how, and mounted afterward onto the herbarium sheet — and her word governs every living thing you gather. My lesson builds the press itself: two boards, straps, and paper between, and it works or fails on evenness, so we prove it on plain paper first. A press built true will keep your pressed collection flat, dry, and recognizable for longer than any of us will live.
Creative Arts · Unit VI, Lesson 25 — Drying Racks, Screens & Bench Furniture
Set up your bench, scholars, and mind the air. A harvest dries well or it molds, and the difference is rarely the plant — it is whether the air can reach every leaf, from below as well as above. Fernfoot teaches what to dry and when to cut it, in the Greenhouse. What it lies on while it dries belongs to this bench: the rack, the screen, and the still room's slatted shelves at scholar scale. Spread your high-moisture herbs here, and let the air do its part.

Potions · Unit II, Lesson 15 — Receiving & Judging Dried Botanicals
Welcome to the receiving bench, scholars. In Herbology you learned how plants are grown, harvested, and dried — that is the grower's craft, and Professor Fernfoot owns it entirely; this lesson begins where hers ends, and Herbology Unit IV holds the drying knowledge itself. Bring your dried harvest to be judged as the laboratory judges its own: by color, aroma, texture, and label, with the snap test and the crumble test, and the grade it earns — prime, acceptable, quarantined, or rejected outright when mold or moisture condemns it. We receive. We judge. We record.
Further Reading & Sources
- Smithsonian Magazine: How to Harvest and Dry Herbs — harvest timing (morning after dew, before bloom), bundle sizes of five to ten stems, paper-bag shading, and the mold warning for high-moisture herbs. - MSU Extension: Saving Herb Seeds — letting herb seeds dry on the plant, catching shattering seed heads in paper bags, and storing in labeled paper envelopes in a cool, dry place. - Academy of Natural Sciences: Create Your Own Pressed Botanical Specimen — arranging, pressing between newspaper, weighting with books, and mounting with labels. - Penn State Extension: Saving Seeds from Your Garden — drying seeds on screens, the paper-envelope rule, labeling with variety and date, and testing germination. - Horticulture Magazine: Drying Herbs and Flowers — bundling technique, dark ventilated drying rooms, and the stem-snap dryness test. - Delaware State University Extension: Drying Flowers and Other Plant Materials — pressing between absorbent paper layers under weight, and the burying and hanging methods. Browse the Herbology shelf in the school Library for readable editions of these works.
School of Evershade · Herbology Greenhouse · For personal educational use
Submit your work for this lesson using the form below.
THE UNIT IV QUIZ
HERBOLOGY GREENHOUSE · UNIT IV: HARVEST, PRESERVATION & USE
Unit IV is complete: the harvest timed to the plant and the hour, herbs dried the traditional way, specimens pressed for keeping, seeds saved that will grow true, and the kitchen garden's classic herbs known by name. This quiz gathers the whole unit into one sitting. Take it from memory first, before you look back at your notes, because it measures what has stayed with you. If you completed the work marked ★ in your lesson packets, you have already practiced most of what it asks.
It stands beside this lesson's own Harvest Festival Project: the project is one complete piece of work, the quiz is the unit remembered. Two different kinds of proof, both worth having.
The quiz packet is a single download. Part I gathers questions from across the unit, Part II matches the unit's vocabulary, and the answer key waits at the back for self-checking. When you have finished, score it honestly, note the result in your workbook, and revisit any lesson whose questions went wrong before you move on to Unit V.
CONTINUE IN THE HERBOLOGY GREENHOUSE
← Previous · Lesson 31: Culinary Herbs in the Kitchen Garden Next · Lesson 33: Toxic Plants & Garden Safety →
Unit IV — Harvest, Preservation & Use Herbology Greenhouse — All 37 Lessons
The rest of Unit IV: Lesson 27 · Timing the Harvest · Lesson 28 · Drying Herbs · Lesson 29 · Pressing & Preserving · Lesson 30 · Seed Saving · Lesson 31 · Culinary Herbs
From the Greenhouse Shelf
The printed companions to this lesson, from Professor Fernfoot’s shelf in the shop.
Herbology — Familiar Journal Pages: Unit IV Lesson Pages — Lessons 27–32 (14 Pages)
$4.99
View in the Shop