

HERBOLOGY
Unit IV · Lesson 30SEED SAVING & STORAGE
PROFESSOR BERYL FERNFOOT
Herbology Greenhouse
Master Herbalist
UNIT IV • LESSON 30
Harvest, Preservation & Use
Professor's Introduction

Settle in, gardeners,
Do you remember Lesson 17? You held a seed between your fingers, you laid it in damp mix, and you waited. Then one morning a green hook pushed upward through the soil, and you had started something from almost nothing. It was a fine moment. I hope you marked it in your journal.
Today we close that circle. The seed you planted becomes a plant, the plant flowers, the flowers set seed, and if you do your part carefully, the autumn seed becomes next spring's garden. This is one of the oldest rhythms in the world, older than any school, older than writing, older than almost everything we teach. People have been saving seeds since the first time someone noticed that seeds from the best plants make the best crops. You are about to join that very long line.
Saving seeds is not complicated. It is careful. The seed already knows how to wait; your job is only to give it clean, dry, well-labeled conditions in which to do so. The work is in the details: harvesting at true maturity, cleaning away what can rot, drying completely, and labeling so honestly that a stranger could sow your seeds next year and know exactly what she was planting. An unlabeled seed, I will tell you again and again today, is a seed wasted.
Take your time with this one. The harvest asks nothing more than attention, and attention is what you have been training since Lesson 1.
— Professor Beryl Fernfoot, Herbology Greenhouse • Master Herbalist • Head of House Oriens
The line beneath the map is our road: every stop a place where the knowledge of plants changed, every lesson a step along it.
Lesson Objectives
By the end of this lesson, you will be able to:
- Explain why gardeners save seeds and why seeds saved from hybrids usually do not grow true
- Judge seed maturity by visible signs: dry pods and heads, hard seeds, full ripeness in fruits
- Describe the two processing paths: dry seeds (thresh, winnow, sort) and wet seeds (ferment, wash, dry)
- Clean a small seed harvest by threshing, winnowing, and sorting, removing chaff that could rot
- Dry seeds to true brittleness before any airtight storage, and explain why heat and moisture destroy viability
- Label every seed lot with name, variety, date, and source notes using a proper seed envelope
- Store seeds under cool, dark, dry conditions, and state Harrington's Rule in your own words
- Estimate how long common seeds stay viable and test old seeds with a germination test before sowing
Reading this lesson: ★ marks the passages to remember. They return on the unit quiz and the class test. Check in questions ask the material back as you go; answer them in your workbook when you meet them.
Working this lesson: Your assignment packet is the first download on this page. Work in it as the lesson moves along, answering each assignment as its subject is taught — or read the lesson through for your notes and take the assignments as homework afterward. Both are proper ways to sit this class. Signposts in the reading tell you where each assignment belongs. Written answers are short answers in your own words; a few honest lines are worth more than a filled page.
Your Assignment Packet
This lesson's assignments live in its packet: the Lexicon Handout (every term, course terms marked ◆), Materials, Guided Practice, the Assignment Manual with its answer key for self-checking, the Reflection Questions, and the Workbook Checklist. Download the packet before you begin and keep it beside you as you read.
The Full Circle
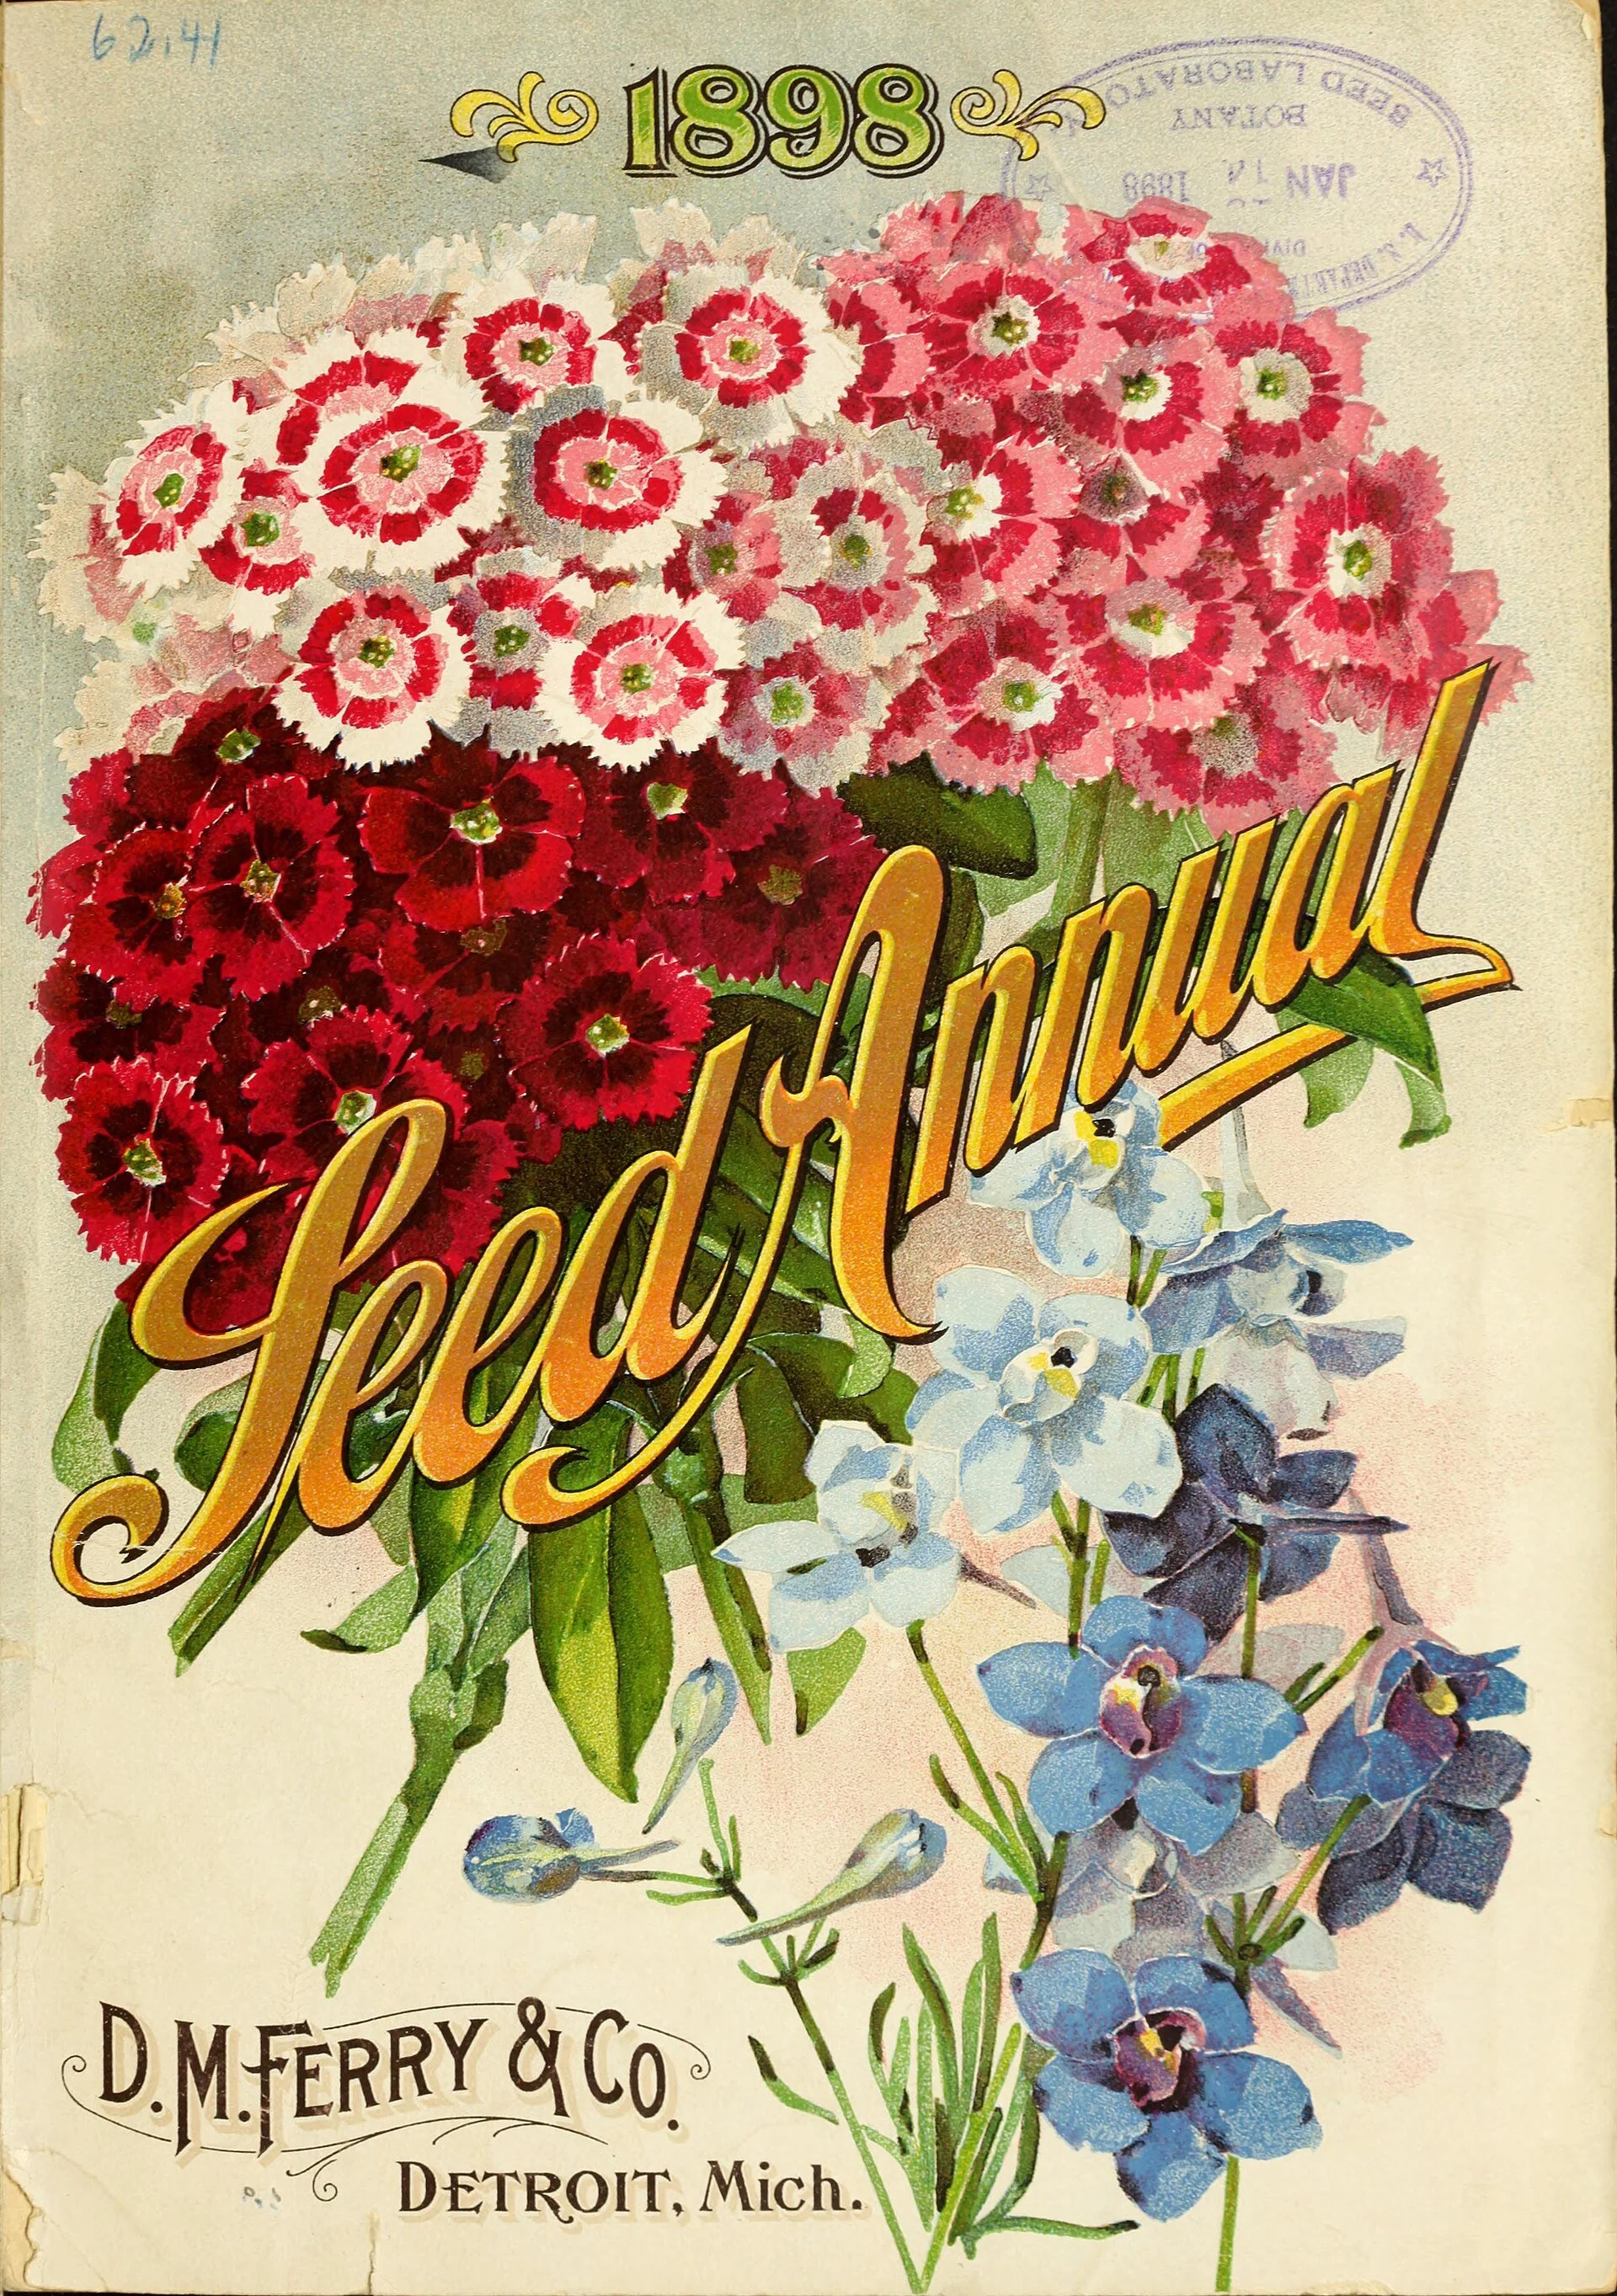
The other way next spring arrives: by catalogue. D. M. Ferry & Co.'s Seed Annual for 1898, Detroit — one of the great mail-order seed catalogues gardeners ordered from each spring. Saving your own seed closes that circle yourself: the varieties you love, already suited to your garden, kept in your own labelled envelopes instead of bought again.
D. M. Ferry & Co., Seed Annual 1898, front cover (Detroit, 1898). Public domain.
In Lesson 17 you learned what a seed needs in order to begin. Now you will learn what a seed needs in order to wait. A saved seed is a promise made to the future, and like all promises, its value depends on the care taken when it was made.
Gardeners have always saved seeds, and they did so for reasons that still hold. The first reason is selection. The seeds of your healthiest, earliest, most flavorful plants carry those tendencies forward. Year after year, your own saved seed grows a little more suited to your own soil, your own weather, and your own care. Seed companies call this local adaptation. Your grandmother would simply have said the seed learned the garden.
The second reason is continuity. Some varieties you love may be hard to buy again, or the company may stop carrying them. Your own envelope of seed is a private seed bank, a guarantee that next spring does not depend on a catalog.
The third reason is economy. A packet of seed bought each spring costs real money. A small jar of your own seed, stored well, sows the same bed for years.
The fourth reason is pleasure. There is a particular satisfaction in closing the circle yourself, in knowing that the tomatoes on your plate descended from tomatoes you chose, and that their seeds will descend from these. It is one of the quietest joys in gardening, and it is entirely free.
★ There is also a rule of honesty that comes with this joy, and we will state it plainly here because it governs everything else in the lesson. Seeds saved from hybrid plants do not usually grow true. A hybrid is the child of two distinct parent lines, bred for specific traits, and its seeds reshuffle those traits into a mixed and unpredictable offspring. An heirloom or open-pollinated variety, on the other hand, breeds true: its seeds grow into plants like their parent. This does not mean hybrid seeds are bad. It means they are a gamble rather than a copy. If you want certainty, save seeds from open-pollinated or heirloom plants, and check your seed packet or plant tag for the words "hybrid" or "F1" before you choose your seed parent.
Check in: In your own words: why do seeds saved from hybrid plants not usually grow true — and what words on a packet or tag warn you before you choose a seed parent?
Begin simply. Choose one plant this season, the healthiest of its kind in your keeping, and save its seed well. One envelope, done properly, teaches the whole craft.
❦ In your workbook: record the full circle in your own way — copy, sketch, or note what matters: the four reasons gardeners save seeds, and the hybrid rule of honesty that governs them all.
In your packet: Assignment II — Save One Kind of Seed ⚒ begins here. Work it now, or mark the place and take it as homework — your choice.
Reading Maturity: When the Seed Is Truly Ripe
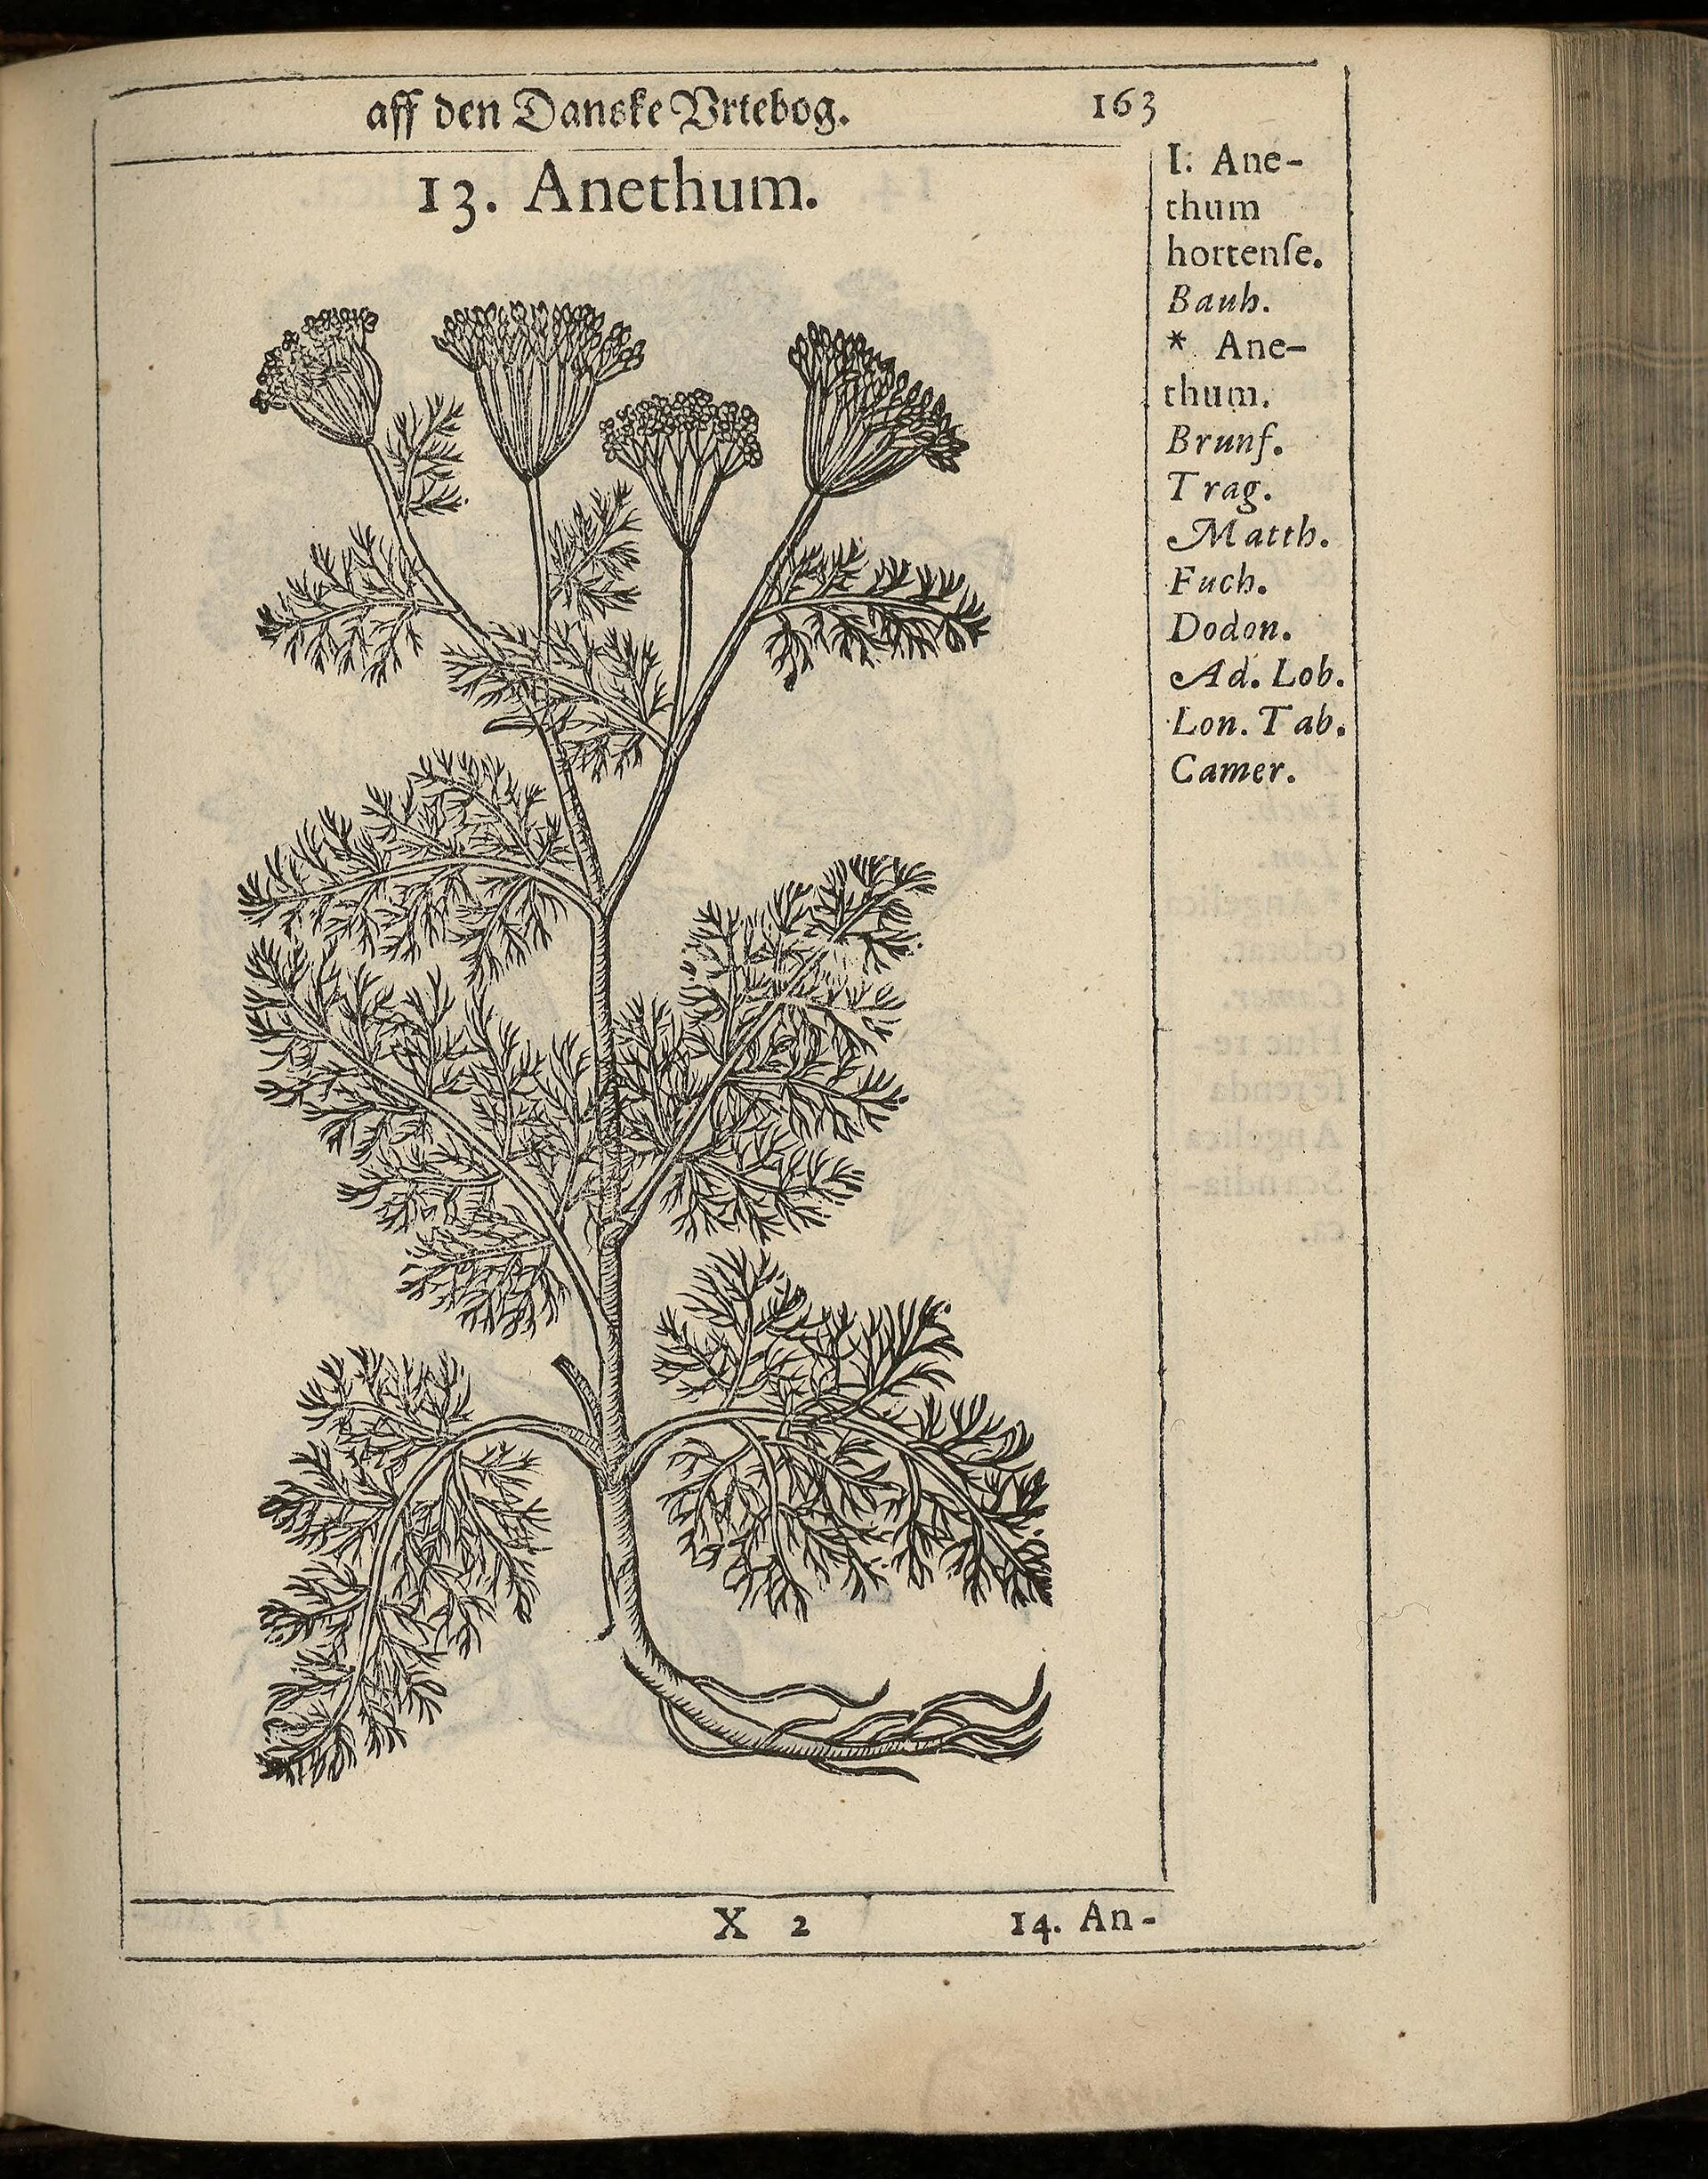
Dill (Anethum), woodcut in Simon Paulli's Danish herbal Flora Danica (1648). Dill takes the dry road in this lesson: the flat umbels at the top of the plant carry the seed, and the harvest waits until the heads are ripe and dry on the plant — then they are shaken inside a paper bag, never plastic, which traps moisture.
Simon Paulli, Flora Danica (1648), p. 163; digitised by the National Library of Norway. Public domain.
★ The single most common failure in seed saving is harvesting too early. A seed collected before it is mature is a seed whose embryo is not finished, and no amount of careful drying will fix that. Maturity has visible signs, and they are worth learning plant by plant.
Check in: Why can no amount of careful drying fix a seed harvested before maturity?
For dry seeds (beans, peas, lettuce, dill, most flowers): wait until the pods or heads are brown and dry on the plant. Beans and peas should rattle when you shake the pod. Lettuce seed heads should be fluffy and pale. If you squeeze a seed between your fingernails and it dents, it is not ready. A mature seed is hard and does not give.
For wet seeds (tomatoes, peppers, cucumbers, melons, squash): let the fruit become fully ripe, past the eating stage if needed. Tomatoes should be soft and fully colored. Peppers should be fully colored and beginning to wrinkle. Cucumbers and squash grown for seed should be left far beyond the harvest you would eat; the seed is not finished when the flesh is.
Watch the weather. Harvest seed heads on a dry day, ideally after the morning dew has lifted. Wet seed harvested into a bag is seed that will mold before it ever dries. If rain is coming or frost threatens, you may cut whole stems and finish drying indoors, hung upside down in a shaded, airy place. Frost can damage immature seeds, so do not gamble against the season.
And choose your seed parent while the plant is still growing. Mark the healthiest plants early, with a bit of string or a tag, so that you are saving seed from vigor and not from the plant that happened to survive. Save from the best. The envelope is a record of your judgment as much as of your garden.
❦ In your workbook: record reading maturity in your own way — copy, sketch, or note what matters: the dry-seed and wet-seed signs, the dry-day rule, and marking the healthiest plant early.
Two Roads: Dry Seeds and Wet Seeds
Once harvested, seeds travel one of two roads. Most of your garden will take the dry road. A smaller group of fruits demands the wet road. Learn both, and you can save nearly anything.
The dry road serves beans, peas, lettuce, dill, coriander, marigolds, sunflowers, and most herbs and flowers. These seeds ripen dry on the plant. Strip the pods or heads into a paper bag (never plastic, which traps moisture), finish drying them indoors for a week or two in shade with good air movement, then shell, shake, or rub the seeds free. Dry seeds that have finished drying on the plant need only cleaning and proper storage.
★ The wet road serves tomatoes, cucumbers, melons, and squash. Their seeds are wrapped in a wet, gel-like coating that actually inhibits germination. This coating must be removed before the seed is viable. For tomatoes, the time-honored method is fermentation. Scoop the seeds and their surrounding gel into a jar, add a little water, and leave it at room temperature for three to five days, stirring or swirling once or twice a day. The mixture will ferment and grow a thin skin of mold on the surface. Do not be alarmed; this is the process working. The good seeds sink to the bottom. Pour off the floating liquid and debris, rinse the sunken seeds in a fine sieve under running water, and spread them to dry. For cucumbers, melons, and squash, scooping the seeds out and washing them thoroughly in a sieve under running water is usually sufficient, followed by the same careful drying.
Check in: What does fermentation remove from a tomato seed — and how do you know the good seeds when you pour the jar off?
Fermentation does two kinds of good. It dissolves the germination-inhibiting gel, and it helps reduce seed-borne disease on the seed coat. It is not dangerous if you follow the method: keep the jar at room temperature, do not seal it airtight, stir daily, and rinse the seeds well afterward. Five days is the usual span; the sinking of the seeds is your signal.
❦ In your workbook: record the two roads in your own way — copy, sketch, or note what matters: which seeds take which road, and the fermentation method step by step.
In your packet: Assignment II — Save One Kind of Seed ⚒ continues here: its processing step follows the road this section teaches. Work it now, or mark the place and take it as homework — your choice.
Professor's Mid-Lesson Note
My scholars,
We have reached the point where some of you are thinking: this is a great deal of care for something so small. You are right, and that is exactly the point.
A seed is small the way a letter is small. What matters is not its size but what it carries. Inside each one is a plant waiting for its season, and every step you have read today, harvesting at maturity, cleaning away rot, drying to brittleness, labeling with care, is a way of honoring what the seed carries.
The students who succeed at seed saving are not the cleverest ones. They are the patient ones. The ones who wait for the pods to rattle. The ones who let the seeds dry one more day. The ones who write the label before they set the envelope down, not after.
Be one of those students. The future garden will thank you.
— Professor Beryl Fernfoot, Herbology Greenhouse • Master Herbalist • Head of House Oriens
Cleaning the Harvest: Threshing, Winnowing, Sorting
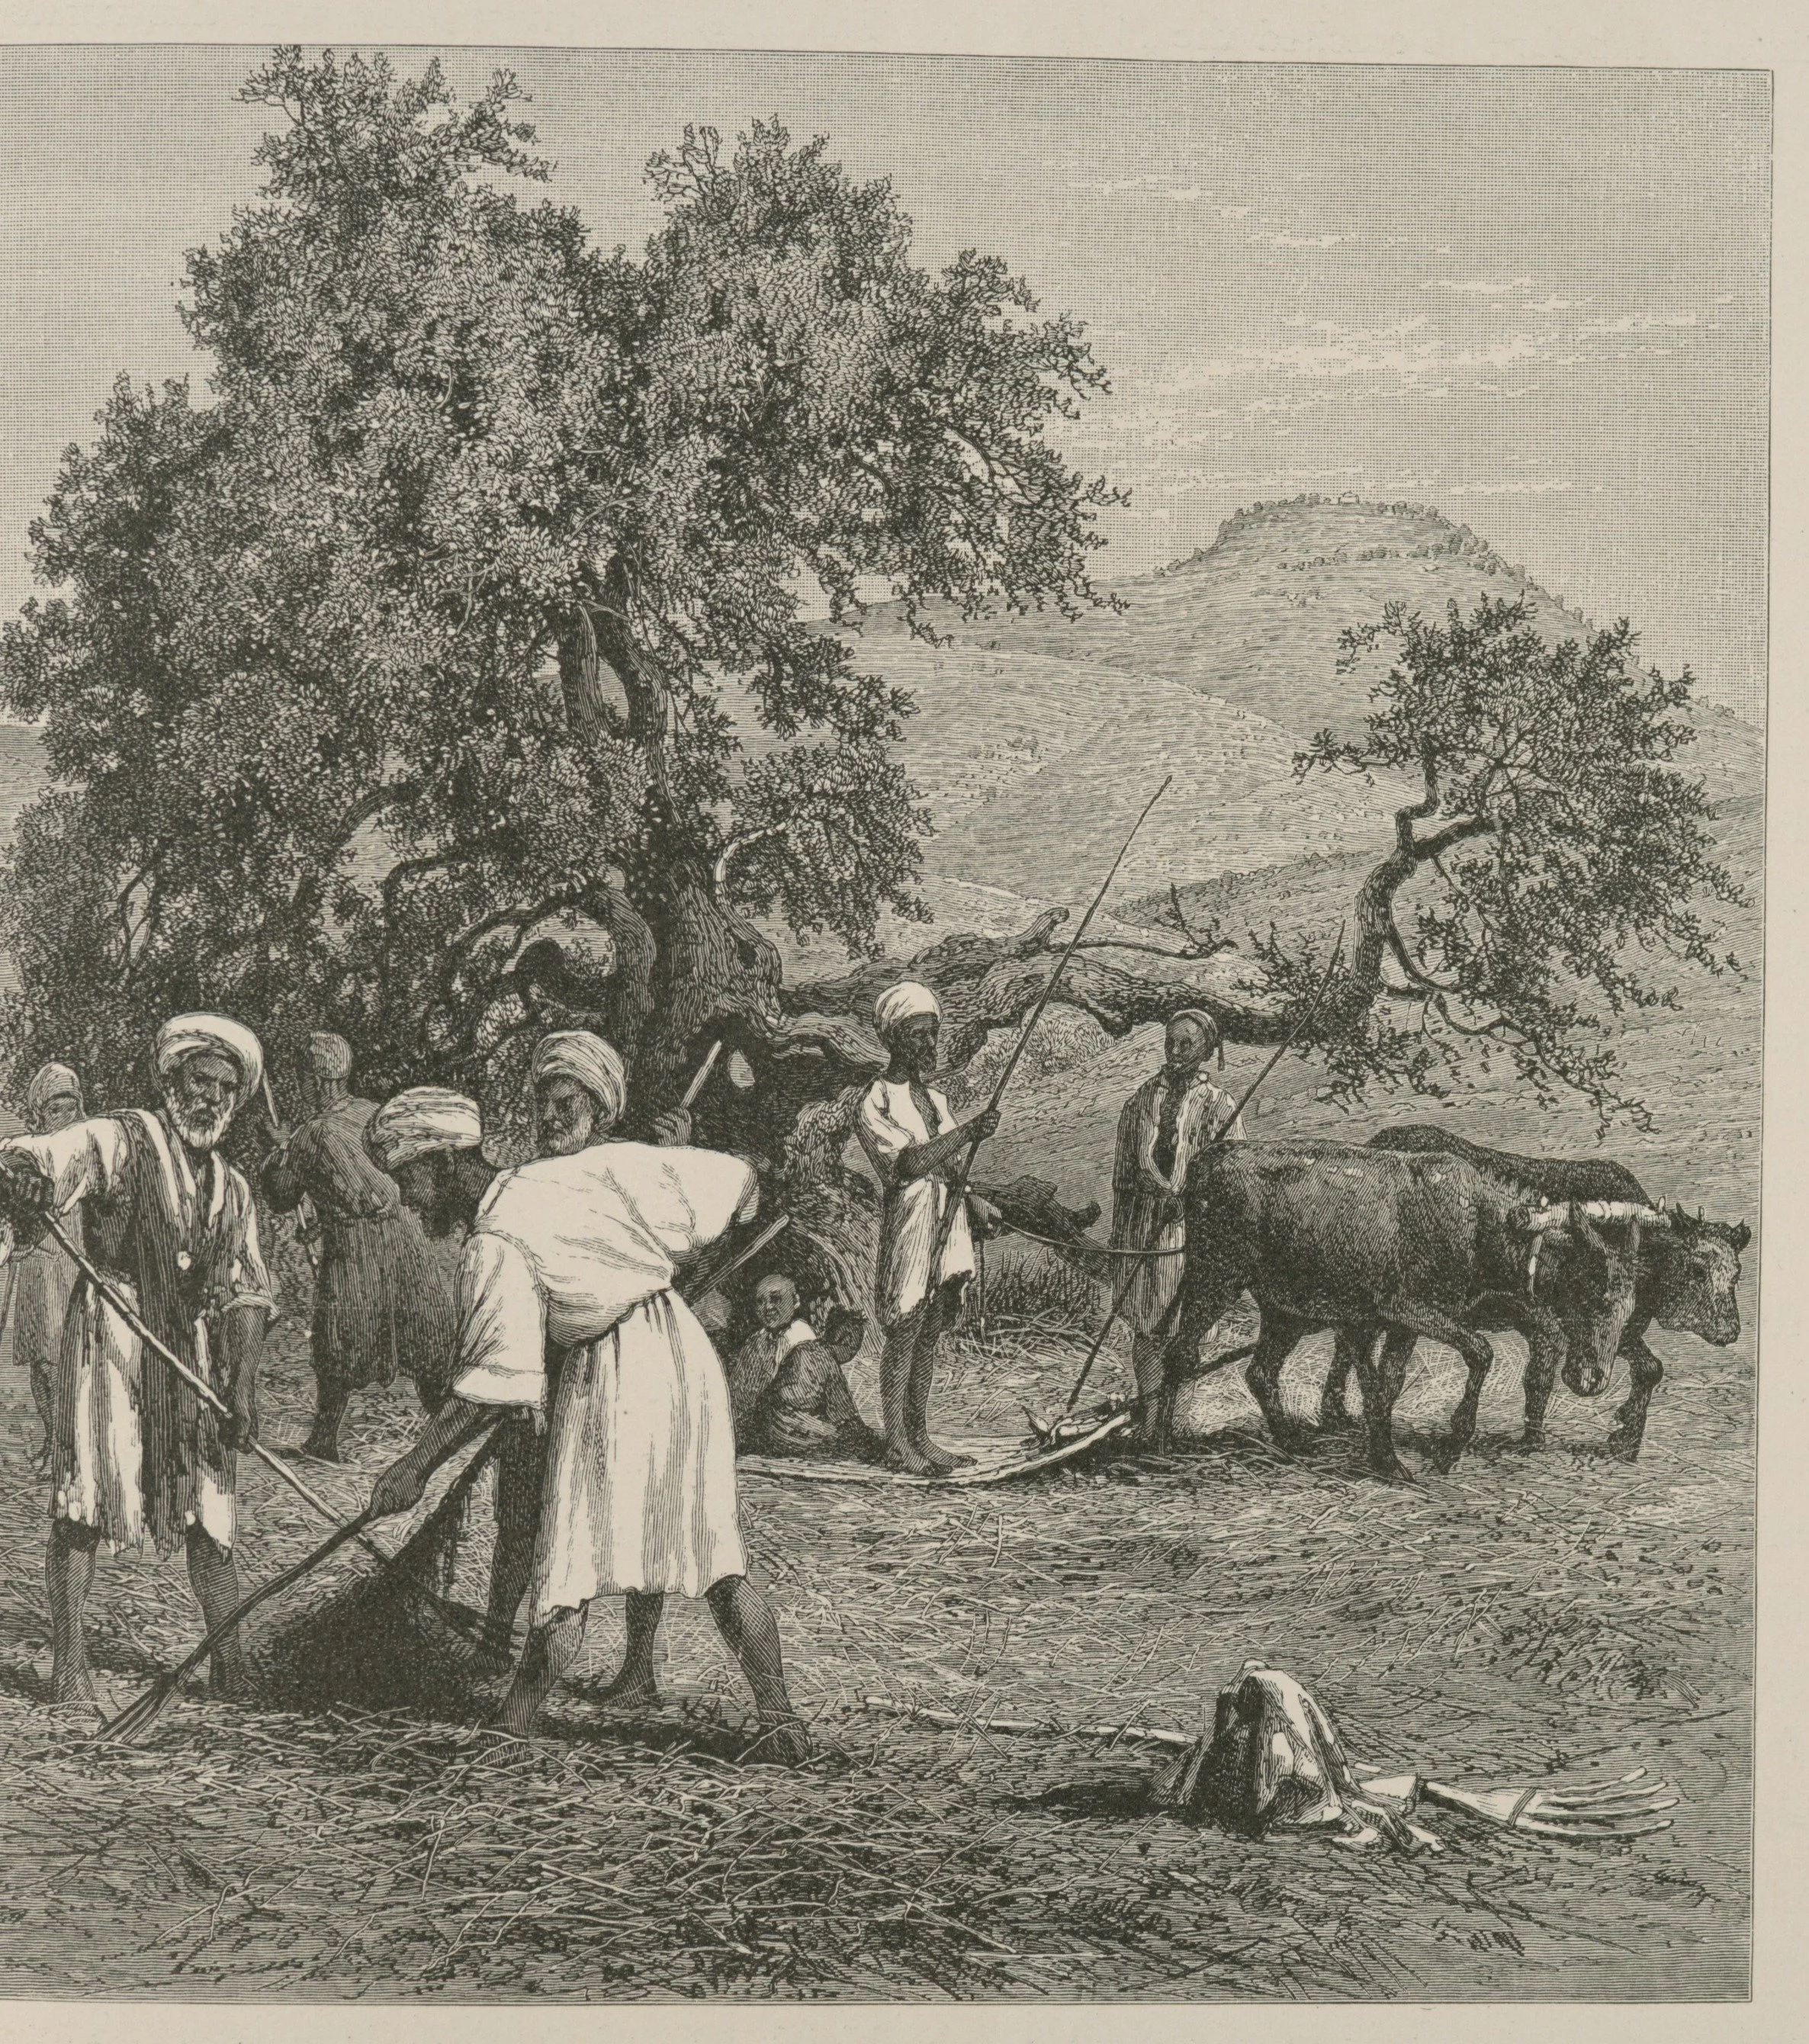
Threshing and winnowing, the first two steps of cleaning, on one floor. From Picturesque Palestine (c. 1881): at left, workers winnow grain with large wooden forks, throwing it into the air so the heavier seed falls and the light chaff blows aside; at right, oxen drag a flint-armed sledge that threshes the straw. Your kitchen version is smaller — hands, a tray, a gentle breeze — and it is the same work: clean seed stores; chaff holds moisture and rots.
"A Threshing-Floor," engraving in Picturesque Palestine, Sinai and Egypt (ed. Col. Charles W. Wilson, c. 1881); New York Public Library digital scan. Public domain.
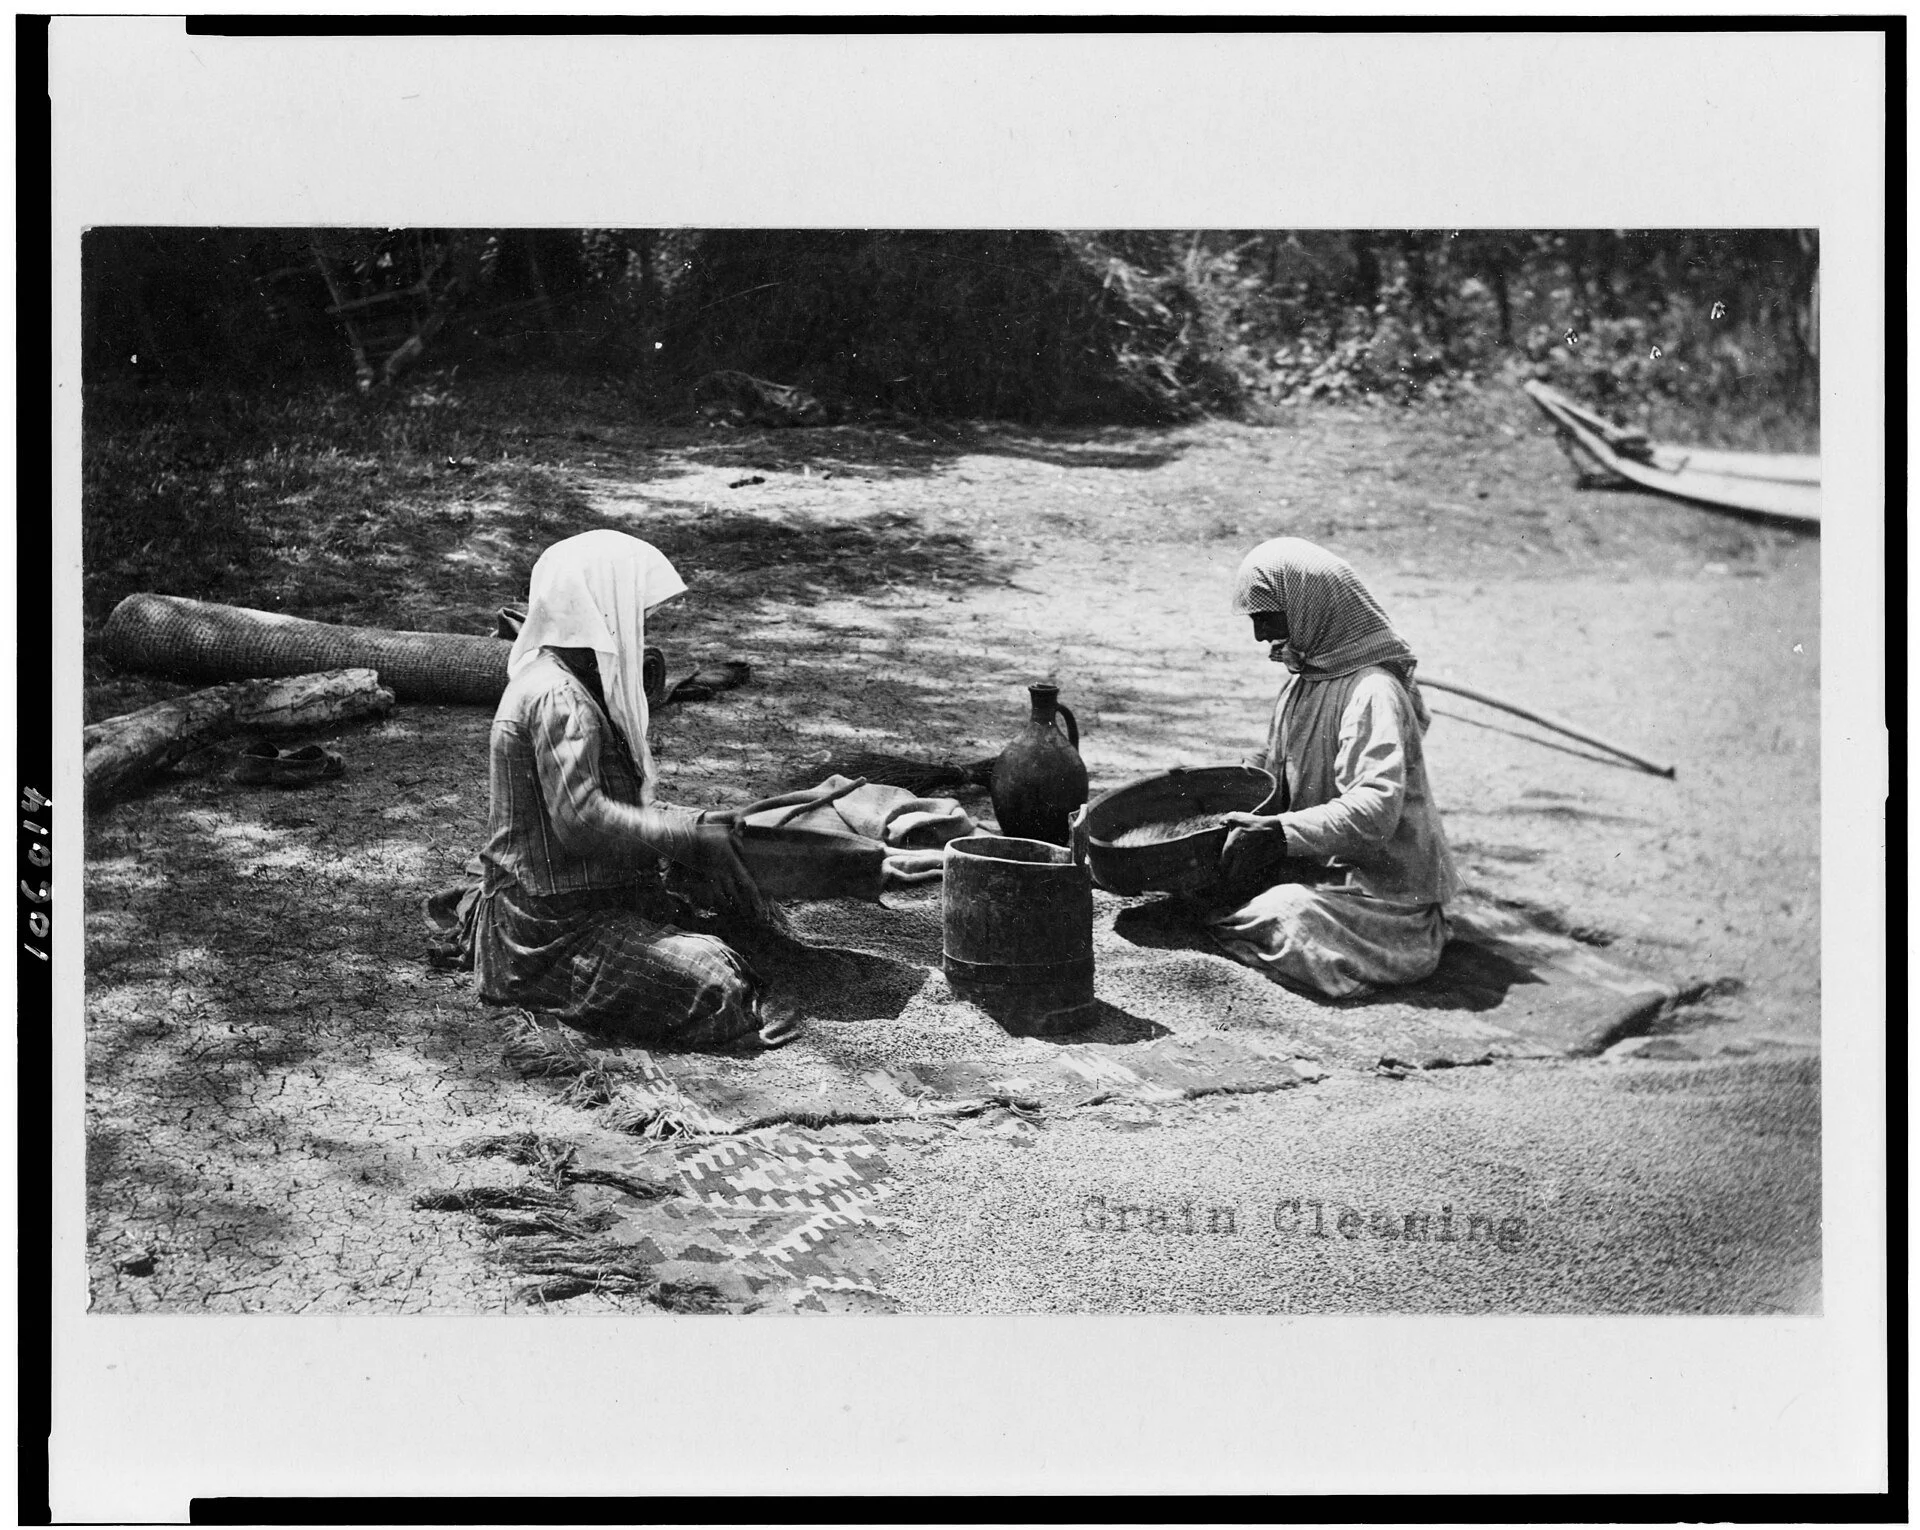
The final judgment, done by hand. Two women cleaning grain with shallow trays in the Caucasus, 1888, the heap spread on a mat between them in the open air. The lesson's sorting is this same patience at kitchen scale: spread the cleaned seed on a tray in good light, pick out everything broken, shrivelled, or discoloured — what goes into the envelope should be the best of the harvest, not all of it.
Photograph, Caucasus, Georgia, 1888; Library of Congress, Prints & Photographs Division (LCCN 92519155). Public domain.
Clean seed stores better than dirty seed. Every bit of leaf, stem, pod fragment, and dust you leave in the envelope is material that can hold moisture, harbor mold, or encourage fungal disease when sown. Clean your seed as carefully as you harvested it.
Threshing is the breaking free. For beans and peas, shell the pods by hand or crush them gently in a cloth bag and pick out the seeds. For lettuce and many flowers, rub the dry heads between your hands over a tray and the tiny seeds fall free. For seed heads like dill or coriander, shake them inside a paper bag until the seeds drop.
Winnowing is the separation. Pour the seeds slowly from one tray or bowl to another in front of a gentle breeze, or a fan on its lowest setting, or simply your own breath on a still day. The heavier seeds fall straight down. The light chaff blows aside. It is an old technique, older than farming itself as a science, and it works as well in your kitchen as it ever did in a threshing yard.
Sorting is the final judgment. Spread the cleaned seeds on a tray in good light and pick through them. Remove anything broken, shriveled, discolored, or damaged. Remove any seeds that look wrong for the variety. What goes into the envelope should be the best of the harvest, not all of it. A small envelope of excellent seed outperforms a large one of mixed quality every time.
★ This cleaning matters beyond tidiness. Chaff and plant debris left with seed tends to rot in storage, and that rot can encourage the very fungal diseases that attack seedlings. Clean seed is healthy seed, and healthy seed keeps.
Check in: In your own words: why does cleaning matter beyond tidiness — what does leftover chaff do in storage?
❦ In your workbook: record cleaning the harvest in your own way — copy, sketch, or note what matters: threshing, winnowing, and sorting, and what each one removes.
Drying: The Non-Negotiable Step
★ Here is the rule that everything else depends on: seeds must be dried to brittleness before they go into any airtight container. Even a small amount of trapped moisture can cause seeds to rot or mold in storage. This is the step beginners rush, and it is the step that ruins harvests.
Check in: State the rule this whole lesson depends on — and what even a small amount of trapped moisture does in storage.
Spread seeds in a single layer on paper plates, screens, or trays. Never use newspaper for wet seeds; the ink can transfer and the paper sticks. Dry them in the shade, in a warm, dry room with good air circulation. Do not dry seeds in direct sun, and never use an oven, even on its lowest setting. Temperatures warmer than about 96 degrees Fahrenheit can damage the embryo inside the seed, and an oven's lowest setting is still too hot. Slow and shaded is the way.
Drying takes days to weeks depending on the seed and the weather. Large seeds like beans need a full two weeks or more. Small seeds dry faster. Test with the fold test: a seed dry enough for sealed storage will snap or break cleanly when folded, not bend. Hard-coated seeds like beans and corn will shatter rather than mash when struck. When in doubt, give them one more day. Patience here is never wasted.
★ If you are unsure whether seed is dry enough, store it in a paper envelope rather than a sealed jar. Paper breathes and allows residual moisture to escape. Airtight storage is only for seed you are confident is truly dry.
Check in: A seed bends instead of snapping in the fold test. What does that tell you — and where should that seed be stored while it finishes drying?
❦ In your workbook: record drying in your own way — copy, sketch, or note what matters: shade and air, never an oven, the 96-degree limit, and the fold test.
The Seed Envelope: Labeling as Stewardship
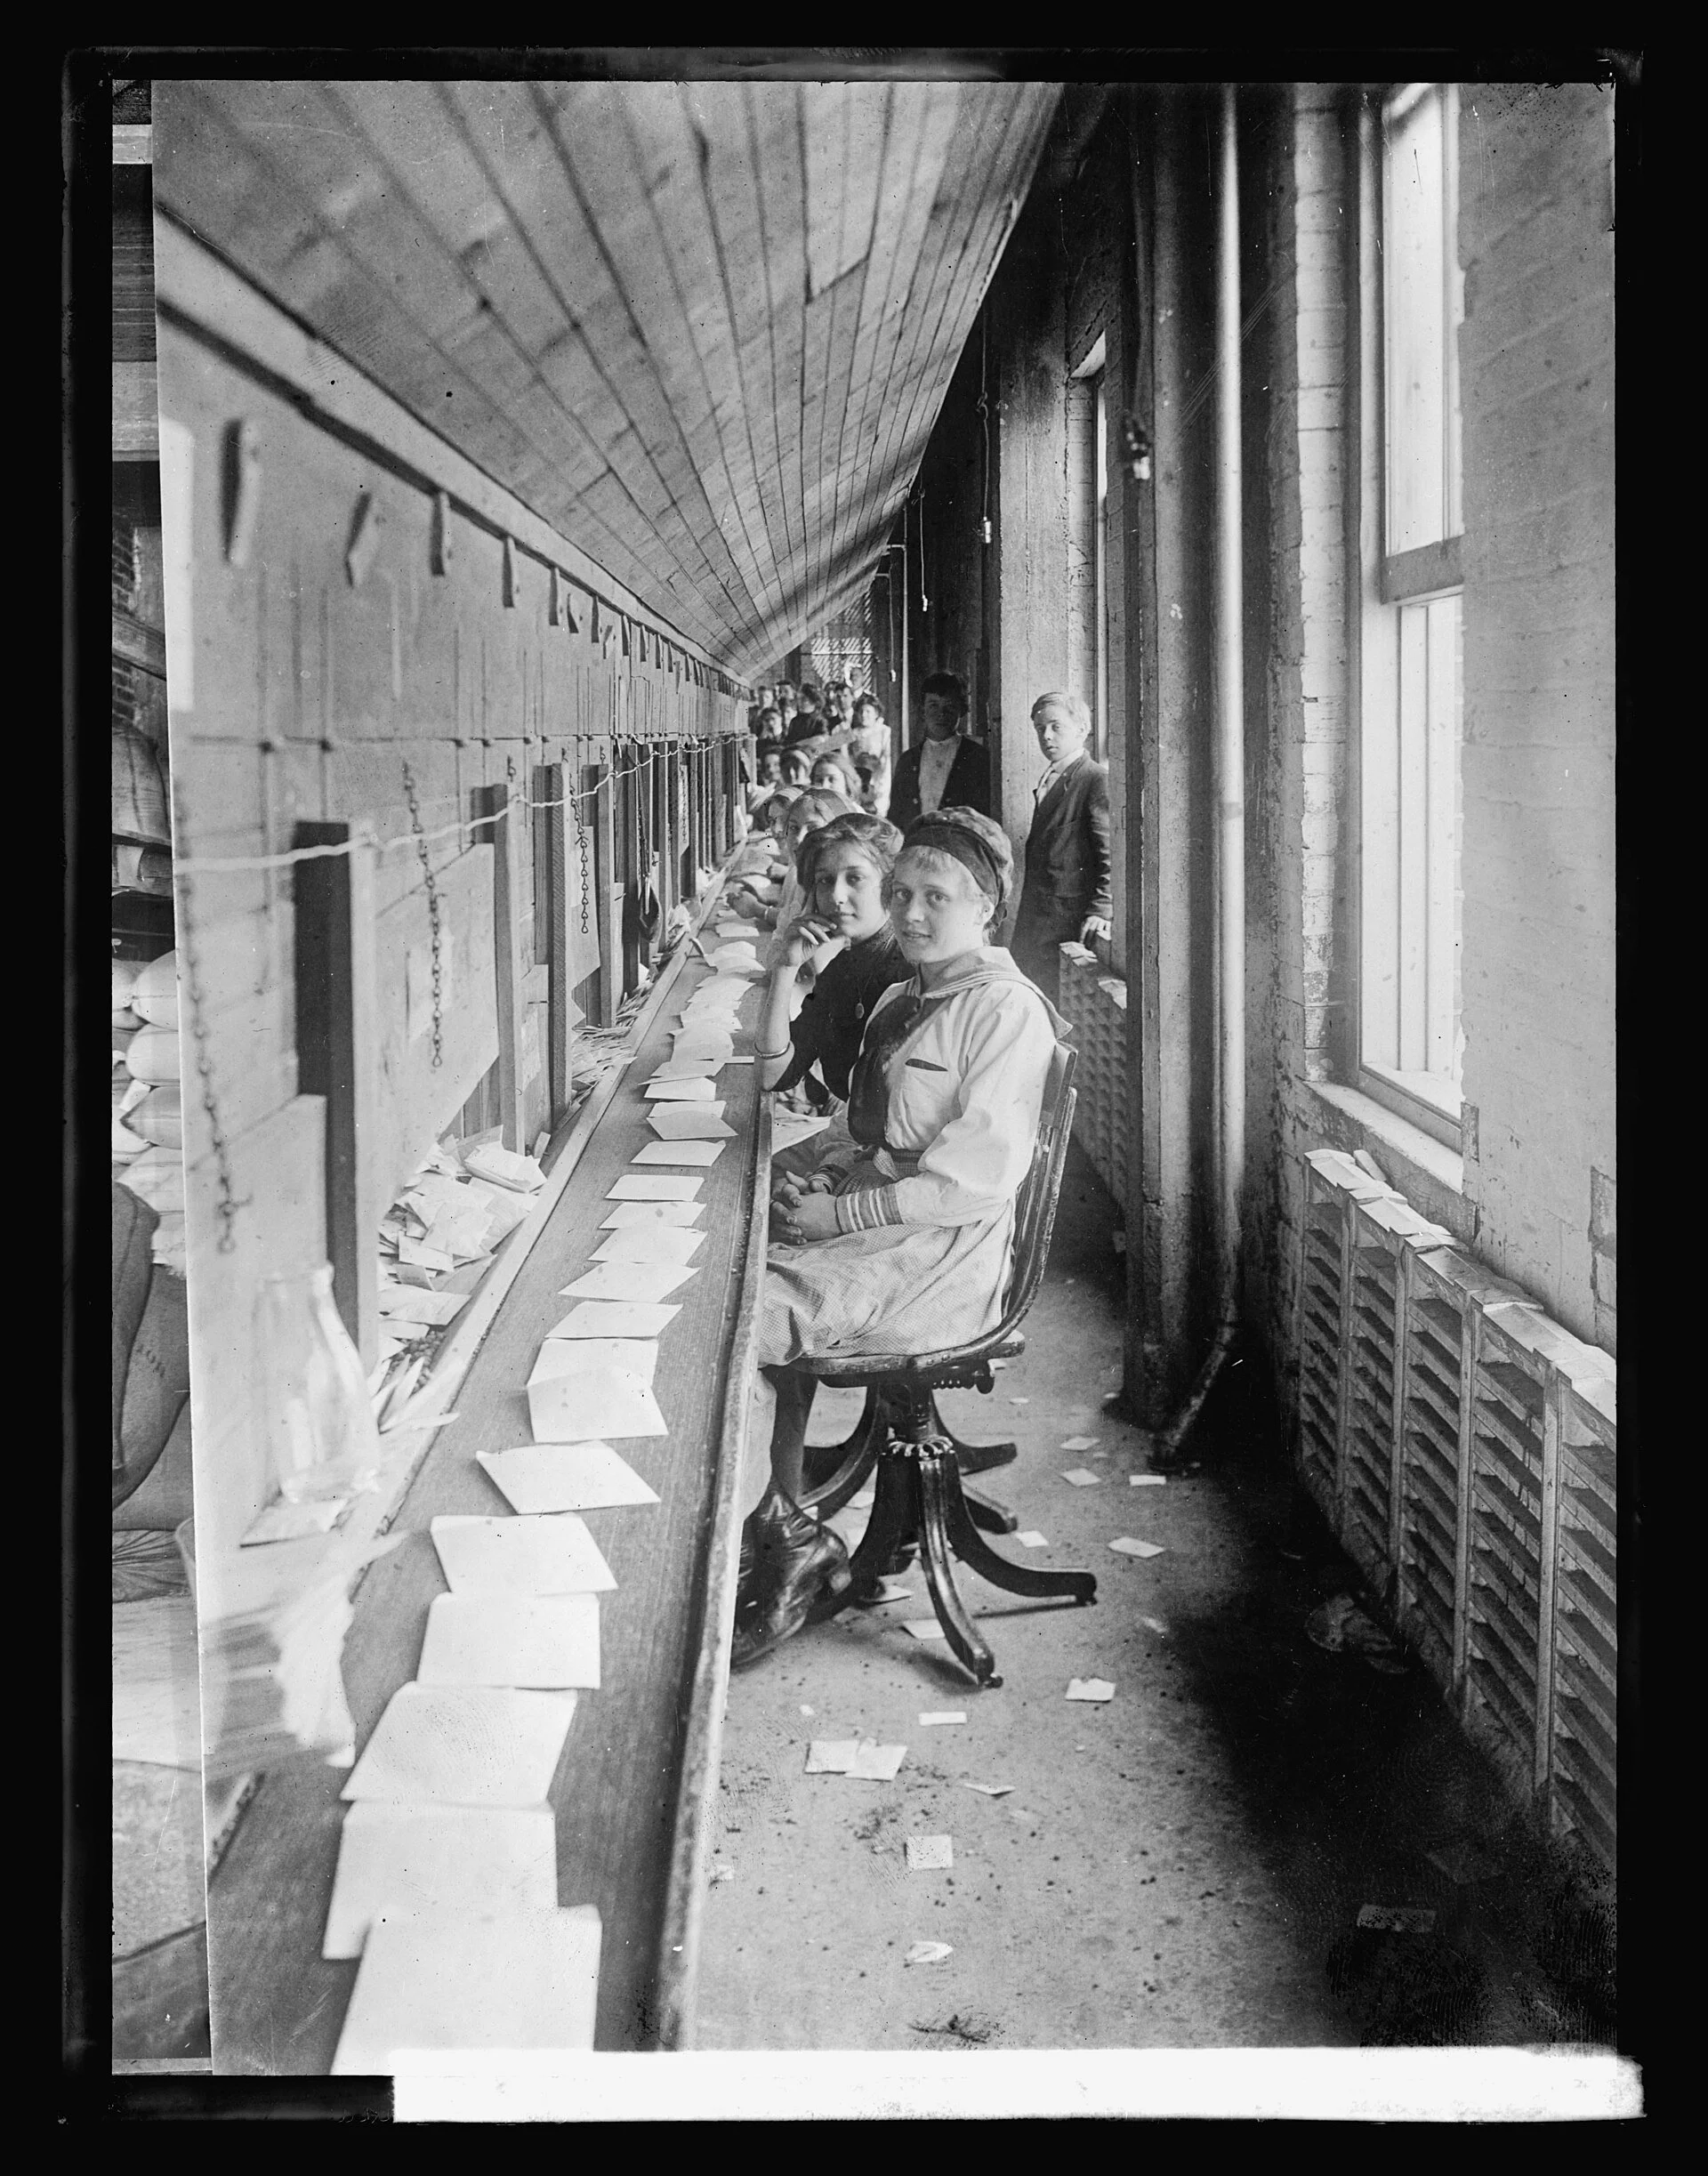
Seed in paper envelopes, at the scale of a nation. The U.S. Department of Agriculture's seed distribution room, 1916–17: a row of paper envelopes along the bench, each to be filled and sent out as one named lot of seed. Your seed envelopes are the same instrument folded by hand — plain paper that breathes, one lot to an envelope, and the label written at the moment of storage: plant name and variety, date, source, and your notes. An unlabeled seed is a wasted seed.
National Photo Company photograph, Department of Agriculture seed distribution, between 1916 and 1917; Library of Congress (LCCN 2016825969). Public domain.
★ Every seed lot gets a label, made at the moment the seeds go into storage, not later, not from memory. This is the lesson's firmest rule, and I want it fixed in your mind: an unlabeled seed is a wasted seed. In six months you will not remember which envelope held the cherry tomatoes and which held the paste tomatoes. Nobody does. The label remembers for you.
Check in: When is the label made — and why will your memory not do the job in six months?
Your envelope should carry, at minimum:
- The plant name, common and, if you know it, the variety
- The date collected, month and year
- The source, which garden or plant it came from
- Your notes: days to maturity, how it grew, any pest or disease trouble, whether it was the healthiest plant
The envelope itself is a small craft and a worthy one. A folded paper envelope, made from plain paper (never glossy or printed with heavy inks), holds the seeds, breathes safely, and carries the label on its face. Your Assignment III walks you through folding one. With practice you can make them in minutes, and a drawer of handmade, hand-labeled envelopes is one of the finest sights in a gardener's house.
There is a later pleasure attached to this craft. The seed envelopes you make this year fit beautifully into a seed storage box, the kind of sturdy divided box that keeps envelopes upright, sorted, and findable. Professor Timberclank's Creative Arts workshop will teach you to build one when that class's projects begin, and your envelopes will be ready to fill it. Think of today's envelopes as the first pages of a collection you will keep for years.
❦ In your workbook: record the seed envelope in your own way — copy, sketch, or note what matters: the four things every label carries, and why the label is made at the moment of storage.
In your packet: Assignment III — The Seed Envelope Craft ⚒ begins here. Work it now, or mark the place and take it as homework — your choice.
Storage: Cool, Dark, Dry
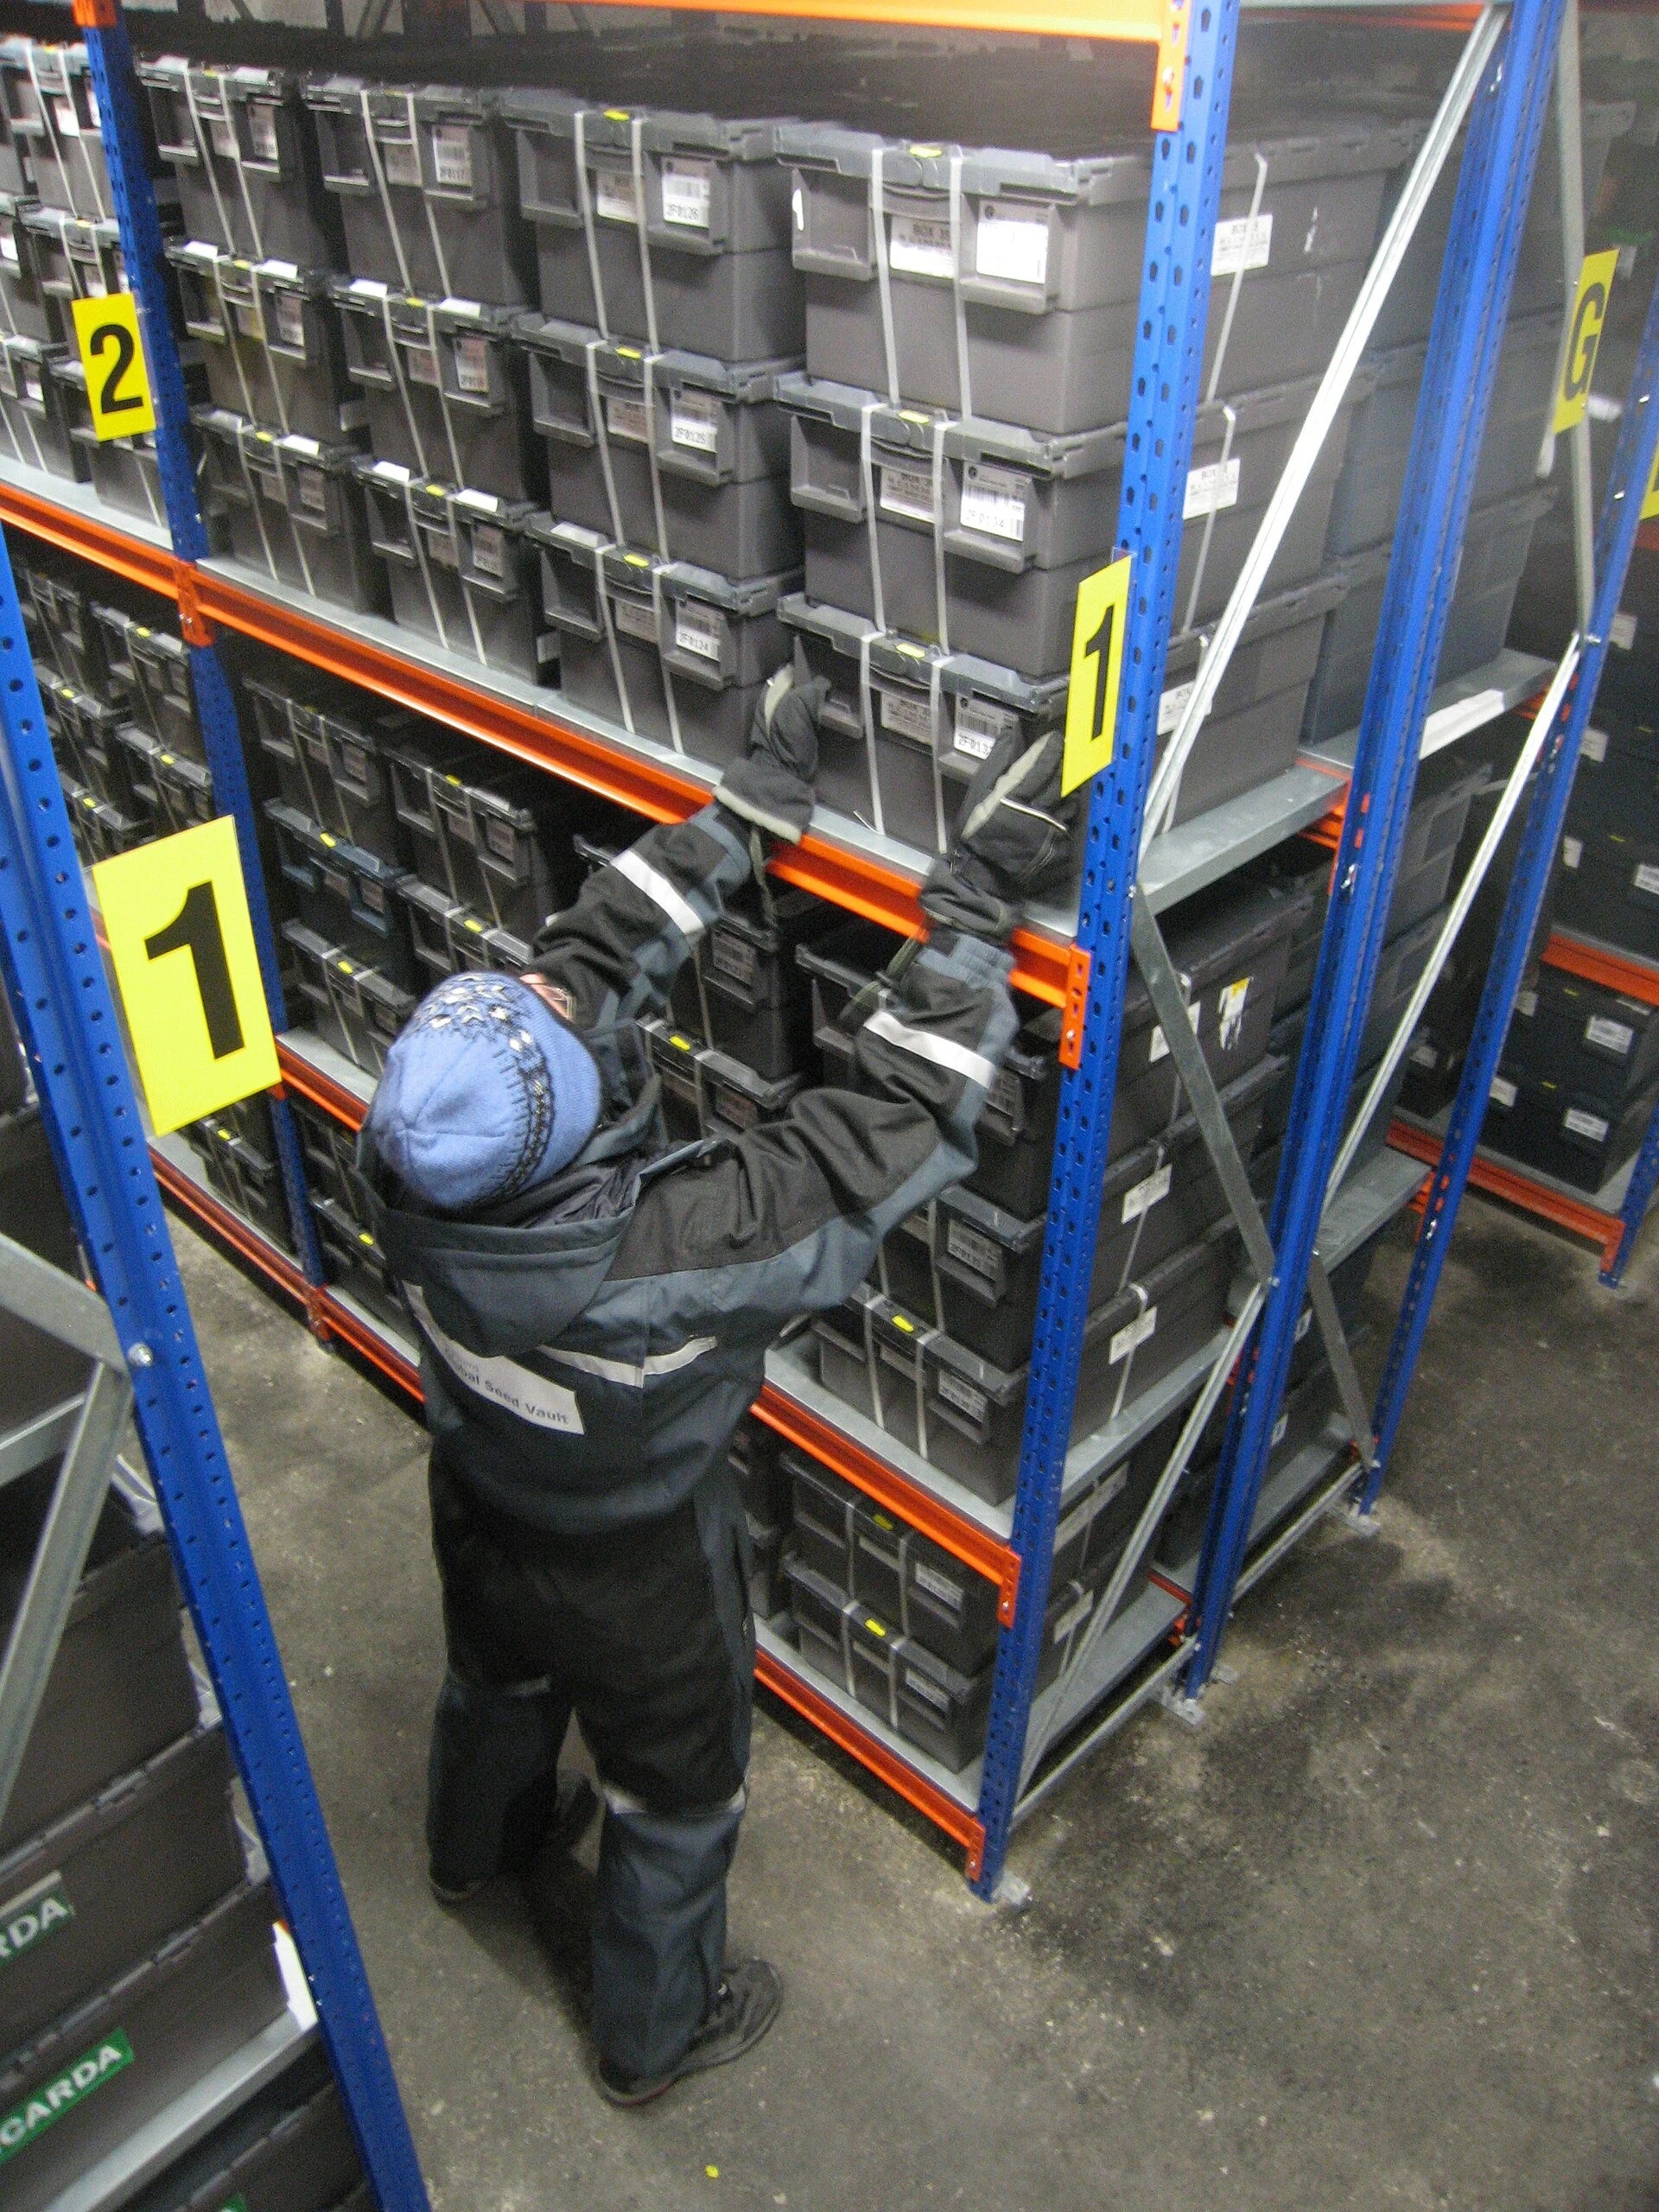
Cool, dark, dry — and labelled — at world scale. Inside the Svalbard Global Seed Vault (photographed 2008), a worker shelves a labelled box of seed samples among thousands: seed dried before sealing, kept cold and dark, every box carrying its identity. Your store is smaller and follows the same rule — Harrington's Rule: temperature in degrees Fahrenheit plus relative humidity under one hundred. A refrigerator near 40 degrees is the home form of this vault.
Photograph by Dag Endresen, inside the Svalbard Global Seed Vault, 27 February 2008 (via NordGen). Public domain.
Seeds are alive, but they are waiting. Everything about storage is arranged to keep that waiting quiet and long. The enemies of stored seed are the same two you have met all lesson: warmth and moisture, with light as their accomplice.
★ The classic guidance, known as Harrington's Rule, comes from seed science and is simple enough to memorize: the temperature in degrees Fahrenheit plus the relative humidity percentage should be less than one hundred. A refrigerator at 40 degrees and 40 percent humidity gives 80, which is excellent. A warm room at 75 degrees and 60 percent humidity gives 135, which is poor. The rule is not magic, but it captures the truth: cool and dry keeps seed alive, warm and damp spends it.
Seed scientists attach Harrington's name to a second thumb rule as well: within normal ranges, seed life roughly doubles for every ten-degree Fahrenheit drop in temperature, and for every one-percent drop in seed moisture. The sum above is the working check, the one to run on any shelf before you trust it; the doubling rule tells you what each step cooler and drier buys.
Check in: A shelf sits at 75 degrees and 60 percent humidity. Work Harrington's Rule on it: what is the sum, and what does the rule say about that shelf?
In practical terms: once your seeds are truly dry, store them in sealed glass jars or zip-close bags in a consistently cool place. A refrigerator, kept between about 32 and 41 degrees Fahrenheit, is ideal for home seed storage. Envelopes of different seeds can live together inside one larger sealed jar. Add a small desiccant to absorb stray moisture: a packet of silica gel works, and in a pinch, one to two tablespoons of powdered milk from a freshly opened package, wrapped in tissue, will absorb moisture for about six months.
A few cautions. Do not store seeds in the freezer unless you are certain they are fully dry; seeds with too much moisture are damaged by freezing, while seeds dried to about 8 percent moisture or below can be frozen safely. Do not store seeds in a damp basement, a hot attic, or a garden shed that swings between extremes. And keep seed storage out of reach of small children and pets, for two reasons: some seeds are toxic (you met morning glory's poisonous seeds in Lesson 18), and every seed envelope should be treated as something precious, not something to scatter.
Cool, dark, dry. Memorize those three words. They are the whole of seed storage.
❦ In your workbook: record storage in your own way — copy, sketch, or note what matters: Harrington's Rule with its two worked sums, the refrigerator range, and the freezer caution.
How Long Will They Last: Viability Windows
Every seed has a lifespan, and honesty requires saying that no seed lasts forever. Stored well, most vegetable seeds remain worth sowing for one to five years, with some keeping even longer. The numbers below are reasonable expectations for properly dried seed in cool, dry storage. They are guides, not guarantees; your conditions decide where in the range you land.
| Seed | Approximate viable life |
|---|---|
| Onion, parsley, parsnip | About 1 year |
| Pepper, sweet corn, okra | About 2 years |
| Bean, pea, carrot | About 3 years |
| Tomato, beet, cabbage family | About 4 years |
| Lettuce, radish, cucumber, squash, melon | About 5 years |
Herbs vary in the same way. Basil and mint seed may keep four to five years; dill, fennel, and coriander two to three; chives, rosemary, sage, and thyme around two; parsley, again, only about a year. Parsley is the lesson's cautionary tale: short-lived seed in the garden's short-lived list twice over.
★ Notice the pattern the table teaches: the short-lived seeds are the ones to sow fresh and to save anew each year. Onion, parsley, and parsnip seed should be saved yearly and sown from the newest harvest. The long-lived seeds, tomato, squash, lettuce, can be saved in abundance and drawn on for seasons.
Check in: Which three seeds does the table put at about one year — and what does that mean for how often you save them?
These windows also explain why the date on your envelope matters so much. A jar of tomato seed from last year is a treasure. A jar of onion seed from three years ago is a lesson in labeling, not a crop.
❦ In your workbook: record the viability windows in your own way — copy, sketch, or note what matters: the table's five rows, and the short-lived seeds you must save fresh each year.
In your packet: Assignment IV — The Viability Study ◐ begins here. Work it now, or mark the place and take it as homework — your choice.
The Germination Test
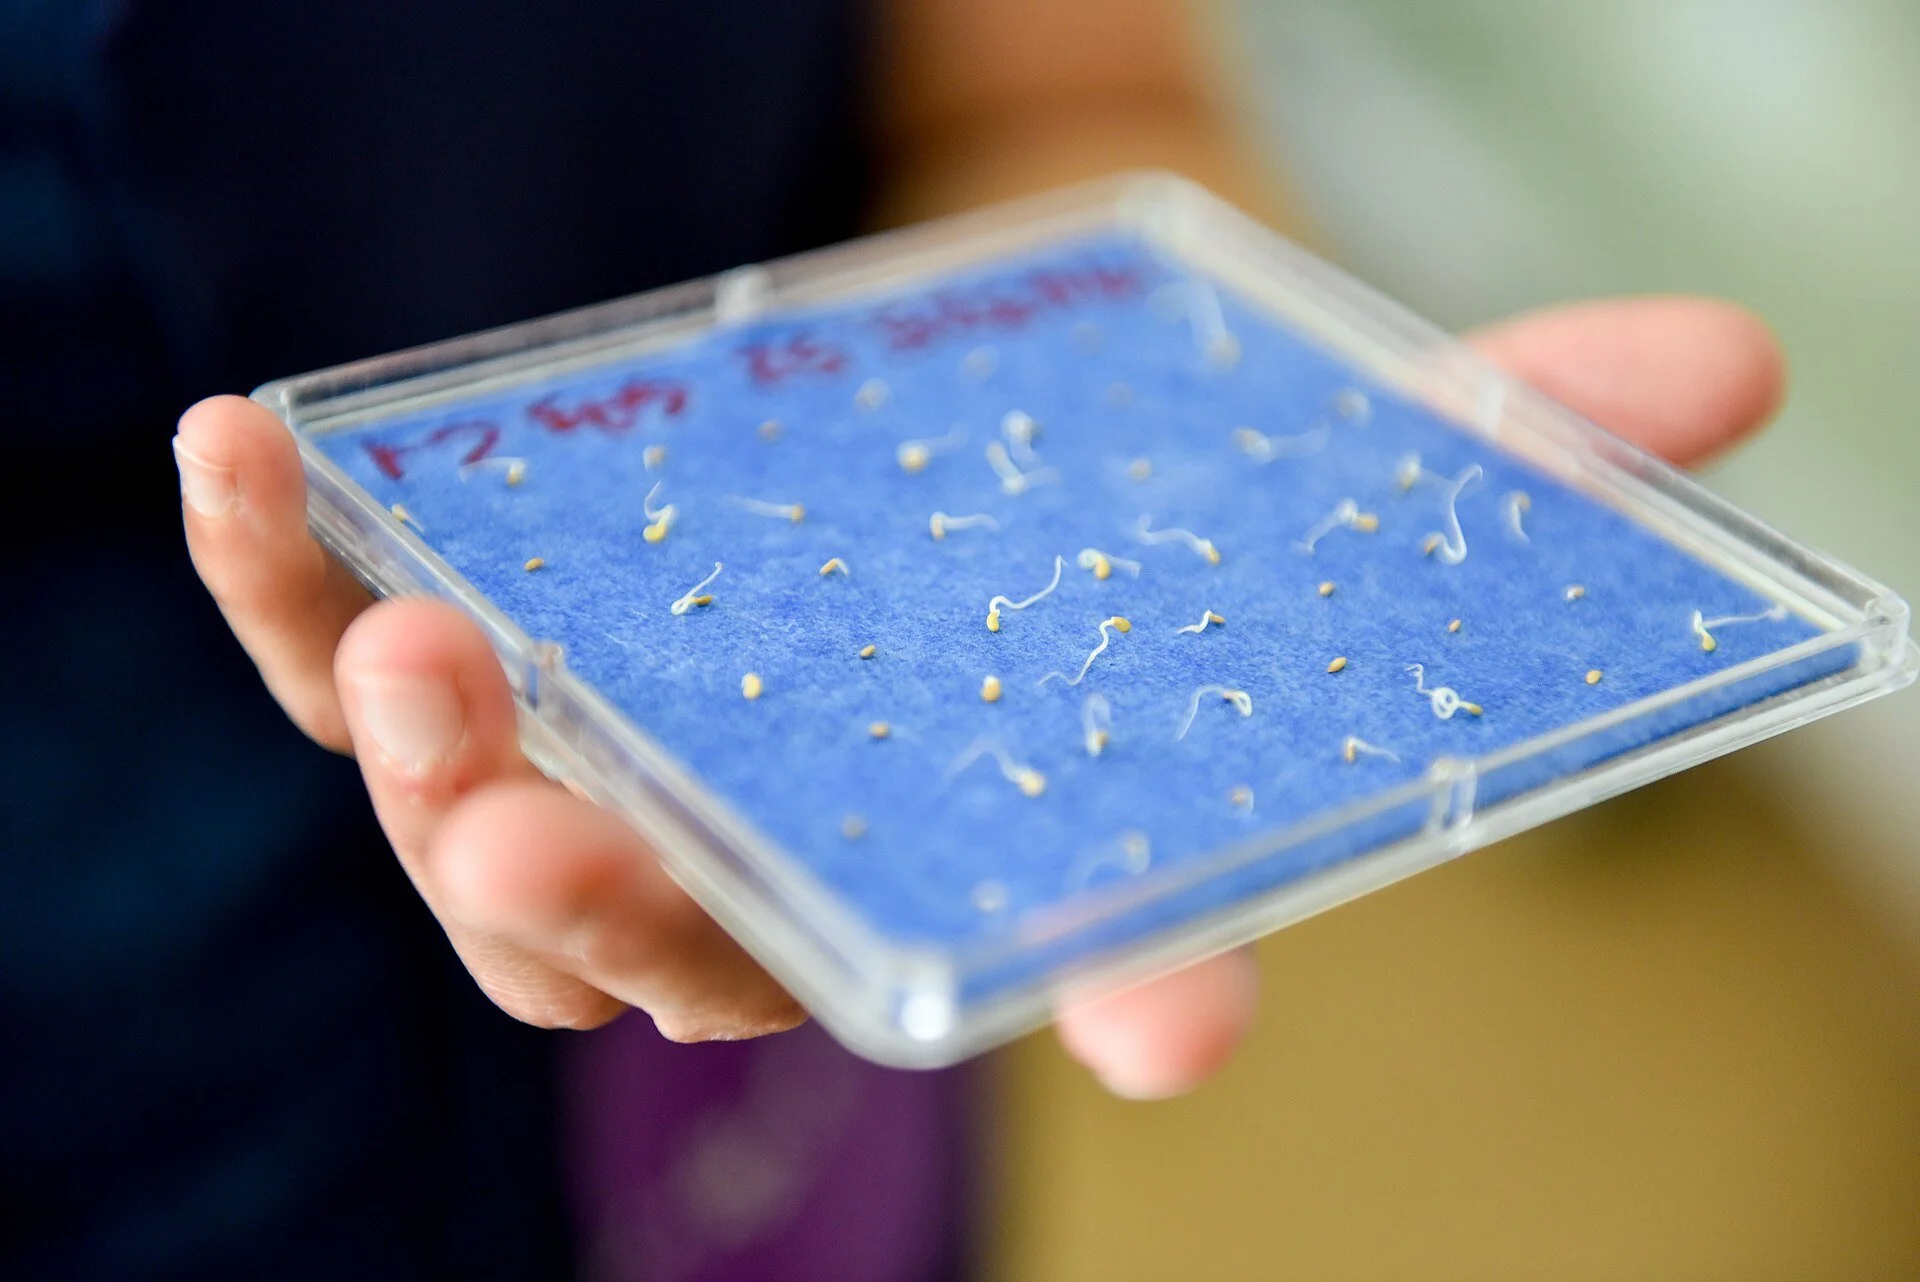
A germination test being read. At the USDA's national seed laboratory in Fort Collins, Colorado, a counted sample of stored seed sprouts on damp blotter: the white roots are the living seed, the unsprouted are the spent. Your test is the same audit at home — ten seeds on a damp paper towel, kept warm about a week, then counted. Seven of ten sprouted is seventy percent: sow a little more thickly. Three of ten: compost the lot and save fresh seed.
U.S. Department of Agriculture, Agricultural Research Service photograph (2016), National Laboratory for Genetic Resources Preservation, Fort Collins, Colorado. Public domain.
Before you sow old seed, or before you trust a saved lot to an important planting, test it. The germination test is simple, honest, and takes about a week.
★ Lay ten seeds on a damp (not dripping) paper towel, roll the towel up loosely with the seeds tucked inside, and place it in a plastic bag left open enough for air exchange. Keep it somewhere warm. After about a week, unroll and count how many have sprouted. Seven out of ten means seventy percent germination: sow a little more thickly than usual and you will be fine. Three out of ten means the lot is spent; compost it and save fresh seed next season.
Check in: Seven of ten seeds sprout in your test. What percentage is that — and what do you do at sowing time?
Test before the sowing season, not during it. A test in late winter tells you which envelopes to trust and which to replace, while there is still time to act. It is the seed saver's audit, and it closes one more small circle: the label told you the date, the table told you the expectation, and the test tells you the truth.
❦ In your workbook: record the germination test in your own way — copy, sketch, or note what matters: ten seeds, a damp towel, a week, and how to read the count.
Safety in the Seed Store
Seed saving is gentle work, but it carries real cautions, and they belong in this lesson plainly.
★ Some seeds are toxic. You already know morning glory seeds from Lesson 18. Castor bean, foxglove, and many ornamental seeds are poisonous if eaten. Always label toxic seeds clearly and store them apart from anything that could be mistaken for food seed. Never taste unidentified seeds to find out what they are.
Keep seeds away from small children and pets. Packets and envelopes are tempting to little hands. Store your seed collection on a high shelf or in a latched box, and teach young helpers that seed envelopes are tools, not toys.
Fermentation stays at room temperature in an open or loosely covered jar. Do not seal a fermenting jar airtight; gases need to escape. Rinse fermented seeds well before drying, and wash your hands after handling the ferment.
Dust and mold caution. Old, damp, or poorly dried seed can grow mold. If a lot smells musty or shows visible mold, discard it outdoors rather than breathing its dust. Work in ventilated space when cleaning large harvests.
The theme of every safety note in this lesson is the same as the theme of the lesson itself: care and labeling. A careful, well-labeled seed store is a safe one.
❦ In your workbook: record safety in the seed store in your own way — copy, sketch, or note what matters: toxic seeds labeled and apart, children and pets kept away, the open fermenting jar, and the mold caution.
Guided Observation: Reading a Seed Lot Before It Is Stored
This lesson's observation is the seed saver's judgment, worked in full and without harvesting anything: take one seed lot — a purchased packet, a market seed head, or a saved envelope — and read it the way this lesson teaches, from maturity signs to storage place, before a single seed is sown.
You will need:
- one seed lot to read: a purchased packet of seed, a dried seed head from a market or grocery bunch of herbs, or an envelope of saved seed
- a tray or plate, in good light
- your journal
- a pen
Read the maturity signs. For dry seeds, look for the lesson's signs: pods or heads brown and dry, seeds hard and not denting under a fingernail, beans and peas rattling in the pod. For a purchased packet, read instead what its label claims — and notice how much of the judgment the packet has done for you.
Judge the cleaning. Spread the lot on the tray in good light. How much chaff, pod fragment, or dust travels with it? Sort by eye: what is broken, shriveled, discolored, or damaged? Clean seed is healthy seed, and healthy seed keeps.
Test the dryness. Take one seed and fold it. A seed dry enough for sealed storage will snap or break cleanly when folded, not bend. Hard-coated seeds like beans and corn will shatter rather than mash when struck. If your seed bends, it needs more drying time — and a paper envelope, not a sealed jar, while it finishes.
Place the lot by Harrington's Rule. Name the place you would store this lot. Work the sum: the temperature in degrees Fahrenheit plus the relative humidity percentage should be less than one hundred. If your place fails the sum, choose a cooler, drier one — and say why.
Consider:
- Which maturity signs could you read on your lot, and which had the label already read for you?
- Did your seed snap, shatter, or bend — and what storage does that result allow?
- What sum does your storage place give under Harrington's Rule, and is it excellent or poor?
No-plant alternative: this observation needs no living plant and no harvest at all. A single purchased packet of seed, or one dried seed head cut from a market or grocery bunch of herbs, carries the whole exercise — the reading of signs is the skill; the garden harvest is its next occasion.
Workbook path: record the observation as a workbook seed-lot entry — the lot and its source, the maturity signs read, the chaff found, the fold-test result, and your Harrington's Rule sum with the storage place it chose.
Materials
Required (Level One — household items)
- Paper bags: for harvesting dry seed heads (never plastic, which traps moisture).
- Trays or paper plates: for threshing, winnowing, and drying seeds.
- A fine sieve or colander: for rinsing fermented or washed seeds.
- Paper towels: for drying wet seeds and for the germination test.
- Plain paper, scissors, tape or glue: for folding seed envelopes.
- A pen: for labels. The label is the assignment.
- A plastic bag: loosely closed, for the germination test.
- Your journal: for the dated harvest log and the viability study.
Suggested (Level Two — historically closer)
- A seed-cleaning screen set: for efficient threshing and sorting.
- Glass jars: for fermentation and for airtight storage.
- A dedicated drying rack with screens: for large harvests.
- Acid-free paper and archival pen: for envelopes that last as long as the seed.
- Silica gel packets: as desiccant in storage jars.
- A bone folder: for crisp creases on the seed envelopes.
- A petri dish or lidded container: for the germination test, with a thermometer to confirm warm conditions.
Safety notes: Never taste unidentified seeds. Keep all seed work away from small children and pets. Wash hands after handling fermenting seed, and work in ventilated space when cleaning large or dusty harvests. Some seeds are toxic. Always label toxic seeds clearly and store them apart from anything that could be mistaken for food seed. Fermentation stays at room temperature in an open or loosely covered jar. Do not seal a fermenting jar airtight; gases need to escape. If a lot smells musty or shows visible mold, discard it outdoors rather than breathing its dust. Scissors and craft knives require the usual care; younger students should have adult help with cutting.
Reflection Questions
Answer the following questions in your workbook.
- The lesson calls an unlabeled seed "a wasted seed." Why does labeling matter so much? Describe a situation in which a missing or wrong label could cause a real problem in a garden.
- Why must seeds be dried to brittleness before airtight storage? Explain what happens, step by step, when moist seed is sealed in a jar.
- Harrington's Rule says temperature in Fahrenheit plus relative humidity should stay under one hundred. A student stores seeds in a garage at 80 degrees and 70 percent humidity. Use the rule to evaluate this choice, and suggest a better arrangement.
- Seeds from hybrid plants do not usually grow true. Why might a gardener still choose to grow hybrids, and why might she still choose to save seed from them as an experiment rather than a plan?
- The lesson describes seed saving as "one of the oldest rhythms in the world." What does it mean to join a practice that old? What is the difference between buying seed each spring and closing the circle yourself?
Workbook Checklist — Lesson 30
In my workbook I have:
- ☐ stated the four reasons gardeners save seeds — selection, continuity, economy, and pleasure — and the hybrid rule: seeds saved from hybrid plants do not usually grow true
- ☐ read maturity by its signs: brown, dry, rattling pods for dry seeds; fully ripe, past-eating-stage fruit for wet seeds; a hard seed that does not dent
- ☐ described the two roads: thresh, winnow, and sort for dry seeds; ferment, wash, and dry for wet seeds, and said what fermentation removes
- ☐ cleaned a harvest in the right order — threshing, winnowing, sorting — and said why chaff left in storage rots and encourages fungal disease
- ☐ dried seed to brittleness in shade with air, never in an oven, and proved it with the fold test; stored uncertain seed in paper, not a sealed jar
- ☐ labeled every lot at the moment of storage with plant name and variety, collection date, source, and growing notes — an unlabeled seed is a wasted seed
- ☐ stored seed cool, dark, and dry, worked Harrington's Rule on my own storage place, and kept seed out of reach of small children and pets, toxic seeds labeled and apart
- ☐ read the viability table, named the short-lived seeds to save fresh each year, and run — or fully rehearsed — a ten-seed germination test and read its percentage
- ☐ completed Save One Kind of Seed, The Seed Envelope Craft, and The Viability Study — or their purchased-seed, market-seed-head, and paper-rehearsal paths
☐ Lesson completed Date: ___ Signature: ___
The Professor's Closing Note
Dear scholars,
You began this class by choosing a plant and learning to leave it alone. You learned its parts, its soil, its light, its water, its seasons. You learned to multiply it and to prune it, to watch for its troubles and to give it room to grow. And now you have learned to catch its future in an envelope and keep it safe until spring.
That is the whole craft, from seed to seed. It is not a large craft. It fits in a drawer.
Do this year's work well. Choose your one plant. Wait for true maturity. Clean the harvest, dry it to brittleness, label it as though a stranger's garden depended on it. Then put the envelope somewhere cool and dark, and let it wait. Next spring, when you tip those seeds into your palm, you will feel something that no bought packet can give you: the knowledge that the circle is unbroken, and that you are the one who kept it so.
I am proud of how far your hands have come since Lesson 1. Keep them gentle, keep them patient, and keep labeling.
— Professor Beryl Fernfoot, Herbology Greenhouse • Master Herbalist • Head of House Oriens
Cross-Class Connections

Creative Arts · Unit II, Lesson 7 — Paper, Card & Board Construction
Set up your bench, scholars. The seed envelope Professor Fernfoot's scholars fill in this lesson is a folded container, measured to its contents, closed against spilling, and labeled against forgetting — and in my workshop you will learn its construction true: folding, scoring, and pockets, the grain, and the crease that goes where you intended. Learn the fold here, and in her greenhouse you will only have to think about seeds.
Creative Arts · Unit VI, Lesson 26 — Shelves, Boxes & Storage That Lasts
Set up your bench, scholars. Fernfoot has taught you which seeds to save and how to keep them; my workshop builds the box that keeps them — a seed storage box with a fitted lid, paper envelopes labeled one lot to an envelope, and the rule no box can break: cool, dry, and dark. Bring me your labeled envelopes, and we will size the box to the collection they begin.

Celestial Studies · Unit I, Lesson 3 — The Tilted Year: Why We Have Seasons (named, no link — Celestial Studies has no live lesson slugs yet)
Fly up and look at the year whole, scholars. Every planting calendar in Professor Fernfoot's greenhouse runs on the tilt you will learn in my tower — the garden keeps the sun's schedule, whether the gardener knows it or not. The maturity you wait for, the frost you will not gamble against, and the spring your envelopes are waiting for all arrive on that tilted turning; come and learn why the seasons keep their appointments.
Further Reading & Sources
- Saving Vegetable Seeds — University of Minnesota Extension — Harvest, fermentation, drying, and refrigerator storage guidance from a university extension service. - Seed Saving Basics — West Virginia University Extension — Maturity signs, cleaning, chaff removal, and cool dry storage. - Seed-Saving Basics — Horticulture Magazine — Drying to brittleness, the 96-degree embryo limit, and labeling discipline. - How Long Can Garden Seed Be Kept? — Kansas State University Research and Extension — Seed longevity by crop — onion, parsley, and parsnip about one year — and cool, dry refrigerator storage. - Seed Harvest and Storage — UC Davis Fact Sheet — Harrington's Rule and the science of seed moisture and storage life. - How Long Do Seeds Last — Garden Betty Viability Chart — A detailed seed viability chart by vegetable, herb, and flower. Browse the Herbology shelf in the school Library for readable editions of these works.
End of Lesson 30.
Plants from this lesson stand in the Materia Botanica, the school's shared archive — each kept with its lessons, its keepings, and its cautions. This lesson's company:
BeetCastor BeanChiliChivesCoriander The whole Materia BotanicaPROFESSOR BERYL FERNFOOT · HERBOLOGY GREENHOUSE
Submit your work for this lesson using the form below.
CONTINUE IN THE HERBOLOGY GREENHOUSE
← Previous · Lesson 29: Pressing & Preserving Plant Specimens Next · Lesson 31: Culinary Herbs in the Kitchen Garden →
Unit IV — Harvest, Preservation & Use Herbology Greenhouse — All 37 Lessons
The rest of Unit IV: Lesson 27 · Timing the Harvest · Lesson 28 · Drying Herbs · Lesson 29 · Pressing & Preserving · Lesson 31 · Culinary Herbs · Lesson 32 · Harvest Festival Project