

Creative Arts
Unit I, Lesson 5Adhesives, Heat, Wax & Glass
Professor Cogbranch Timberclank
Master Artisan, Head of House Occidens
The Creative Arts Workshop • School of Evershade
Professor's Introduction

Set up your bench, scholars, and clear it of paper before we begin. Today we take up the materials in this workshop that ask for the most respect: the ones that are hot, the ones that are sharp in a way you cannot see, and the ones that hold the world together quietly while nobody thanks them.
Glue first. Every scholar thinks glue is a modern convenience until they learn that human beings were manufacturing adhesive before they were, strictly speaking, human beings, and that the furniture in the greatest tombs of Egypt is held together with the same family of glue I will warm in a pot for you today. Then heat, which glues and waxes both require, and which has its own short list of rules that I do not bend. Then glass, beautiful and treacherous, which the workshop handles by a few plain habits.
Some steps in this lesson are marked adult only. That is not a comment on your character. It is a comment on hot glue pots, which do not care about anyone's character. Read the sections, learn the reasons, and let the adults carry the hot things until the workshop says otherwise.
PROFESSOR COGBRANCH TIMBERCLANK
Creative Arts Workshop
Master Artisan, Head of House Occidens

Lesson Objectives
By the end of this lesson, students should be able to:
- Choose an adhesive for a given job and explain the choice: PVA, wood glue, hide glue, fish glue, or casein.
- Describe the history of adhesives from Neanderthal birch tar to twentieth-century PVA.
- Prepare and test small glue joints, label them, and evaluate their strength after curing.
- State the workshop rules for heat sources, hot wax, and the glue pot, including which steps are adult-only and why.
- Pour wax into a practice mold under supervision, and handle cooled wax work safely.
- Handle glass and ceramic pieces safely: edges, breakage, and cleanup, and explain the difference between a chip and a crack.
- Describe the beginnings of glassmaking and glassblowing.
Your Assignment Packet
This lesson's assignments live in its packet: the Lexicon Handout (every term, course terms marked ◆), the Assignment Manual, and the Reflection Questions. Download the packet before you begin and keep it beside you as you read — work from it as each subject is taught, or take the assignments as homework afterward.
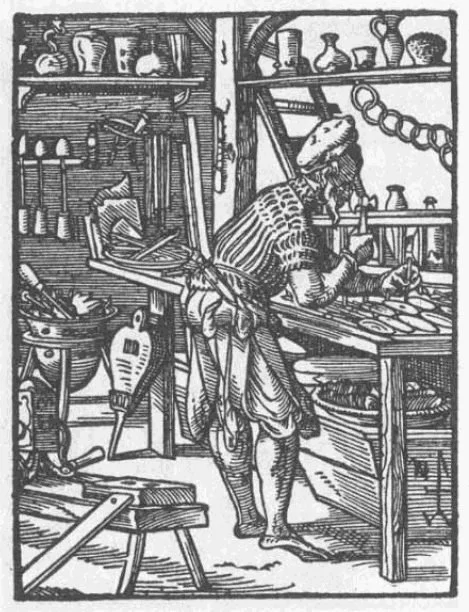
A glass worker at his furnace with finished glassware around him, 1568 woodcut.
Woodcut from the Ständebuch (Book of Trades), Frankfurt, 1568. Public domain, via Wikimedia Commons.
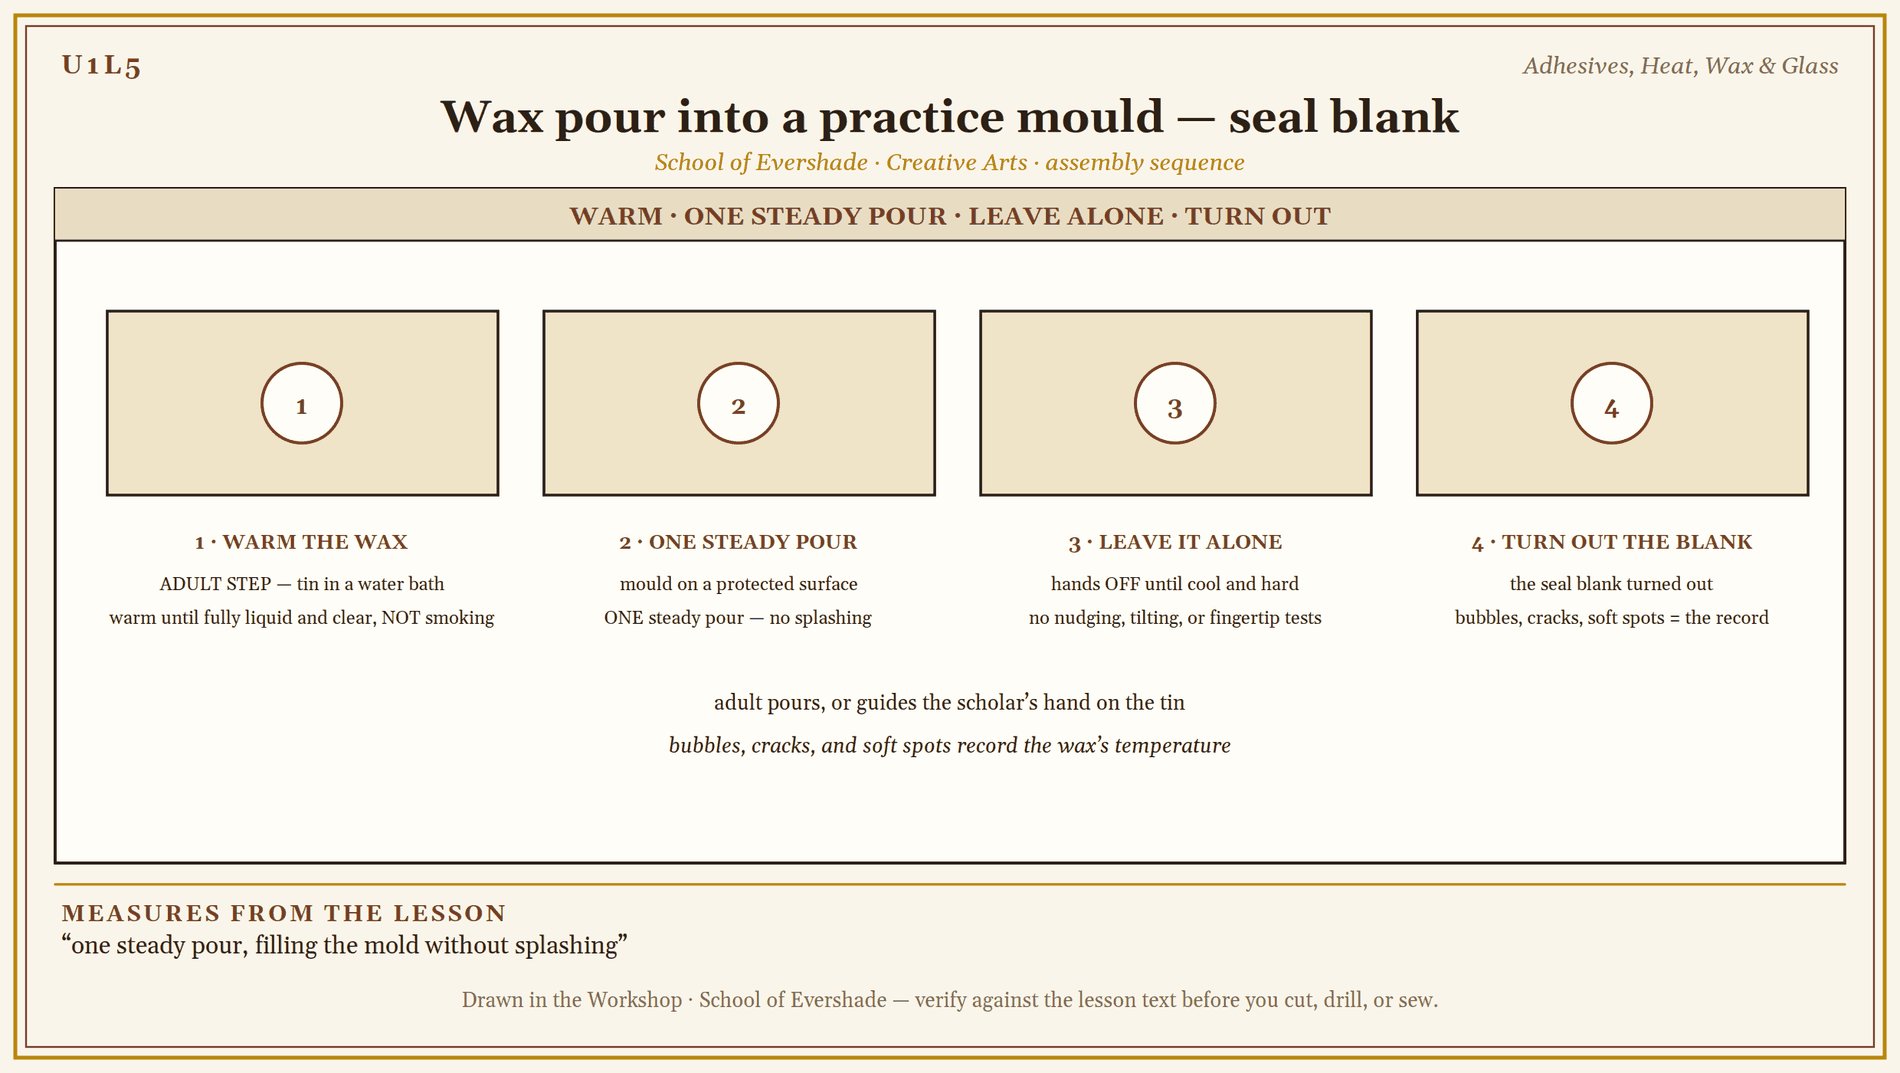
Wax pour into a practice mould — seal blank
The Oldest Glue in the World
The oldest manufactured adhesive we know of is not Egyptian, Greek, or Roman. It is older than our species' monopoly on making things. Neanderthals in Europe were producing birch bark tar, a black, sticky substance made by heating birch bark with limited air, at least 100,000 years ago and by some studied evidence nearer 200,000. They used it to haft stone tools onto wooden handles: the first glue joint in the record is also a lesson in this course's priorities, since a hafted axe is only as trustworthy as its tar.
By the time of the Egyptian New Kingdom, glue was a workshop industry. Hide glue, made by boiling down hides, hooves, and sinew, was used to veneer and join fine furniture; Egyptian tomb paintings show the glue pot warming over a fire in the craftsman's shop, which is to say the warm glue pot in this lesson has a pedigree of some three and a half thousand years. Furniture from the tomb of Tutankhamun, buried about 1323 BCE, still holds joints glued by those methods. Hide glue's virtues are the ones furniture makers praised ever after: it is strong, it sands clean, it does not creep under load the way some modern glues do, and above all it is reversible. Warmth and moisture soften it again, so a chair glued in the reign of a pharaoh can be taken apart, repaired, and reglued in ours. No other common adhesive offers that mercy.
Medieval craftsmen kept a small shelf of glues, each for its work. Theophilus Presbyter, writing his treatise on the crafts in the early twelfth century, gives recipes for hide glue, fish glue, and a cheese glue, the ancestor of casein glues, which set hard and resisted water better than hide glue did. Fish glue is an adhesive made from fish skins and, in its finest form, isinglass from sturgeon swim bladders; it stays flexible, tacks quickly, and has served bookbinders, luthiers, and gilders for centuries. Casein glue is an adhesive made from milk protein, known to medieval craftsmen, strong and water-resistant for its era, and unforgiving once set. Fish glue and isinglass served delicate work: instruments, gilding, manuscripts. Glair, beaten egg white, laid the gold on the illuminator's page. The lesson the shelf teaches is the one this lesson is built on: there is no best glue. There is a right glue for this material, this stress, and this maker's hope of one day taking it apart again.
The modern bottle arrived in the twentieth century. Polyvinyl acetate, PVA, was discovered in Germany in 1912 (Fritz Klatte; patented 1913) and became the white glue of every household after the Second World War: clean, safe, cheap, ready from the bottle, and strong enough for most indoor work. Aliphatic resin wood glues followed, stronger and more water-resistant. Hot-melt sticks gave makers a glue that sets in a minute and forgives nothing about temperature. The workshop uses them all, gladly, and teaches the old shelf beside them, because a scholar who knows only the bottle knows only half of holding things together.
Wax and Heat
Wax is the workshop's second hot material, and humans have been heating it for as long as they have kept bees and made records. In the ancient world, wax coated the wooden writing tablets of Greece and Rome, the original reusable notebook, and Unit IV of this course will make one. Roman-era Egypt produced encaustic painting, pigment suspended in hot beeswax, in portraits of startling life that survive today. Seals came to depend on wax: medieval documents were authenticated with beeswax seals for centuries before shellac-based sealing wax, the red sticks scholars know, became common in the sixteenth century and after.
Heat is wax's servant and its hazard, and the same is true of the glue pot. The rules are short, and they are in the sealed note below. Learn them as rules of the room, not of the lesson, because Unit IV's waxwork, the Potions laboratory's seals, and a good many candles in scholars' homes all obey the same physics.
Glass: A Brief History and a Careful Material
Glass vessels begin in the ancient Near East and Egypt about 3,500 years ago — glass itself, as beads, is older still — with small core-formed vessels, made by trailing molten glass over a shaped core of clay and dung that was scraped out when the glass cooled. Glass was precious then, a rival to gemstones. The revolution came in the first century BCE, on the Syro-Palestinian coast, when a craftsman first blew glass on the end of a hollow iron pipe. Glassblowing made vessels fast and cheap, and within a few generations the Roman world drank from glass, stored in glass, and glazed windows with it.
Glass on the bench is handled as what it is: a hard, brittle solid with edges sharper than most blades when broken. Sheets and vessels are carried with two hands, never by a rim or a neck. Edges of cut or broken glass are treated as blades under Lesson 3's rules. Broken glass is never picked up by hand; it is swept with brush and card into a rigid container, the floor checked barefoot-wary, and the pieces wrapped before they go to the bin. A chip is damage to an edge and may be smoothed and lived with. A crack is damage through the body of the piece, and a cracked vessel is retired from service, because glass under stress finishes its arguments suddenly and without notice. Annealing — the slow, controlled cooling of glass after shaping, which relieves internal stress — is the maker's answer to that stress; poorly annealed glass can crack on its own, later, for no visible reason.
A Sealed Note from Professor Timberclank
This note carries the rules of heat in this workshop. They are not long. They are not negotiable, and they are the same in every room of this castle where a flame or a hot pot is used.
One: a heat source is attended. Always. The scholar who lights it stays with it, and the adult responsible for it knows it is lit.
Two: hot things travel in one pair of hands, announced. "Hot pot coming through" is a sentence said aloud in this room, and everyone else's hands stay down until it has passed.
Three: wax and glue are warmed in a water bath, never over direct flame, and never to boiling. Overheated wax smokes, and wax that smokes is too hot. Take it off the heat and let it cool; it will wait for you. It is better at waiting than you are.
Four: if anything catches, spills on skin, or scalds, we stop. We make it safe. Cool water on a burn, an adult informed at once, and the work can look after itself. Then, and only then, we begin again.
PROFESSOR COGBRANCH TIMBERCLANK
Creative Arts Workshop
Master Artisan, Head of House Occidens
Technique: Choosing and Using Glue
Match the glue to the job. Porous materials (wood, paper, cloth) suit PVA and wood glue. Fine and repairable work suits hide glue. Delicate, flexible, or historical work may suit fish glue. Rough, damp, or outdoor work may want a modern waterproof adhesive. When in doubt, test on scrap: that is what the drill below is for.
Prepare the surfaces. Glue holds to clean, close-fitting surfaces. Dust, old finish, and gaps are the three common causes of failed joints. Dry-fit every joint first, without glue, the way Lesson 4 taught, and have the clamps ready and adjusted before the glue pot opens. A joint being fitted while glue dries is a joint being ruined at leisure.
Use less than you think. A thin, even film on both faces is stronger than a flood. Squeeze-out is wiped with a damp cloth at once for PVA, and left to gel and lifted for hide glue. Then clamp, check the piece is square, and respect the clamping time on the bottle or in the recipe, in full, without testing the joint early. Clamping time is the period during which a glued joint must be held still and under pressure while the adhesive sets; every glue has one. Most glue failures are patience failures wearing a disguise.
The glue pot. Dry hide glue is soaked in water until it swells, then warmed in a water bath to a thin syrup, about the warmth of a hot bath and never steaming hard. It is applied warm, clamps fast because it grabs as it cools, and its leftovers can be refrigerated and rewarmed for days. The pot work in the drill is done by, or directly beside, the supervising adult.
Practice Practical: Glue Tests and a Poured Seal Blank
This drill is checked for labeling, patience, and clean results. The heat steps are adult-led.
- Make the test joints. Bench drill first. Take your pairs of wood pieces. Glue three pairs, one each with PVA, wood glue, and (Level Two, or adult-prepared) warmed hide glue. Keep pieces of each pair numbered alike. Clamp each pair, check it sits square, and label it: glue, date, your initials. Set them aside for the full curing time, a day for a fair test. Do not test them early.
- The wax pour. Adult step at the stove: set the tin of wax in the water bath and warm until the wax is fully liquid and clear, not smoking. At the bench, set your mold on a protected surface. The adult pours, or guides your hand on the tin with theirs: one steady pour, filling the mold without splashing. Leave the wax entirely alone until it is cool and hard, then turn out your seal blank. Examine it: bubbles, cracks, and soft spots all record what the wax's temperature was, and your notebook should say what you conclude.
- Break the joints. After the full curing time, test each labeled joint the same way: hold one piece, and lever the other with steady pressure until the joint fails or your judgment says it will not. Look at the failure closely. Glue that fails cleanly off the surface was let down by preparation. A joint that tears wood fibers with it was stronger than the material, and that glue did its whole job. Record each result beside its label.
- Glass examination. With the adult, examine the glass jar and the chipped ceramic. Find the chip. Run a fingertip near, never along, an edge to see the workshop rule in action: we look with eyes, not fingers. Decide for each piece: serviceable, repairable, or retired, and say why, using the lesson's distinction between a chip and a crack.
- Put away. Glues capped and stored upright, brushes washed before they dry, wax and tin cold before they are shelved, test pieces kept labeled in your drill box, bench clean and paper put back.
When your records can say which glue held, which failed, and what the wax's temperature did to the pour, your judgment has learned what this lesson is for.
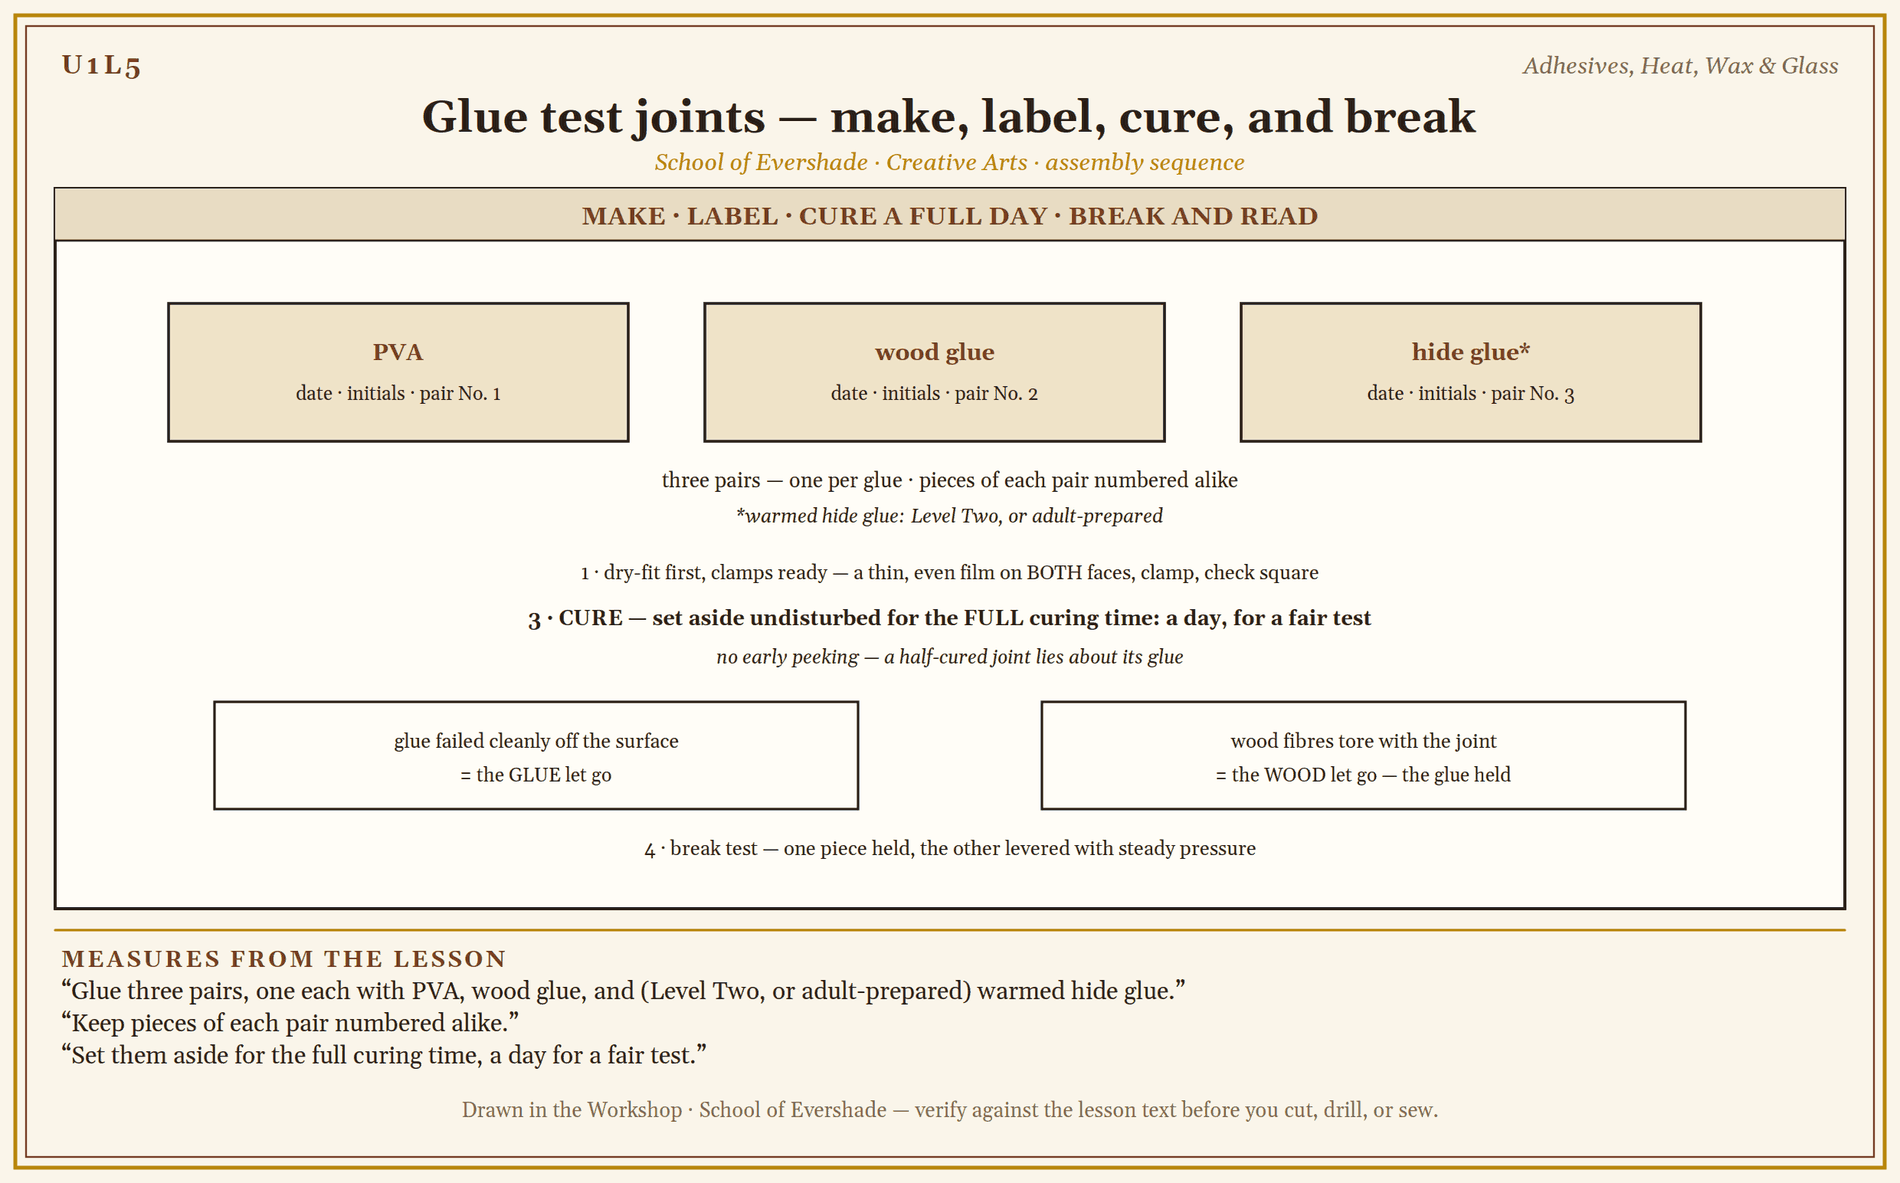
Glue test joints — make, label, cure, and break
Assignment Manual
Assignment key: ✎ written work · ⚒ hands-on practical · ◐ both
Assignment I ⚒ — The Practice Practical
Complete the drill in this lesson: three labeled glue-test joints, cured in full and broken fairly, a supervised wax pour into a practice mold, and the glass examination. Your labeled test pieces and written results are the record of the drill.
Assignment II ✎ — The Glue Shelf
Write a one-page guide, "Glues of the Workshop," covering hide glue, fish glue, casein glue, PVA, and wood glue: for each, what it is made of, one job it suits best, and one job it should not be given. End with the glue you would choose to repair a chair you intend to sit on for twenty years, and defend the choice in two sentences.
Assignment III ◐ — Reading Repairs
Find a repaired object in your home (glued furniture, a mended vessel, a patched hinge) with permission to examine it. Photograph or sketch the mend, and write a short report: what was joined, what adhesive or fastening seems to have been used, whether the mend has held, and whether the maker expected ever to take it apart again. Connect your answer to hide glue's great virtue: reversibility.
Materials
Level One (household)
- PVA white glue and a bottle of wood glue
- Six or more pairs of small matching wood pieces (craft sticks or offcuts) for the test joints
- Labels or masking tape and a pencil, for marking each test joint with its glue and date
- Spring clamps or heavy books for pressure
- Paraffin or beeswax pellets or a plain candle's worth of wax, a metal tin or small can for melting, set in a saucepan of water (water bath)
- A practice mold: a silicone ice tray, a greased metal lid, or a small foil cup
- A glass jar and a chipped ceramic piece to examine (examination only)
- A brush, dustpan or stiff card, and a rigid container for the breakage drill demonstration
- The supervising adult, present for all heat and wax steps
Level Two (historical)
Everything in Level One, plus:
- Hide glue granules or pearls, a small pot or electric glue pot, and a brush kept for glue
- Fish glue or liquid hide glue, for comparison
- Beeswax cakes, and a stick of shellac sealing wax for the Unit IV preview
- A thermometer for the water bath, if one is available
Both levels teach the same craft: choosing the adhesive, testing it honestly, and obeying the rules of heat. Level Two's scholar additionally learns the pot work that served furniture makers for three thousand years.
Reflection Questions
Answer the following questions in your workbook.
- Which of your test joints surprised you, and what did the surprise teach you about preparation or patience?
- Why has reversibility mattered so much in the history of furniture? What modern habits does it argue against?
- Which of the four rules of heat will be hardest to obey in a busy household kitchen, and how would you arrange things so it gets obeyed anyway?
- Neanderthals hafted tools with birch tar. What does it do to your idea of "primitive" technology to learn that the first adhesive was manufactured, on purpose, at a controlled process?
- Your wax pour recorded its own temperature in bubbles or cracks. What other workshop materials keep a record of how they were treated, that a careful scholar can learn to read?
Professor's Review
You have stood at the oldest workbench in this course today, and it is a pot of warm glue.
You can choose an adhesive and defend the choice, you have tested three glues with your own hands and read the results in torn fibers, and you have handled wax and glass under rules that will serve you in every room where hot and sharp things live. Professor Muddlenook's scholars will meet you again at Potions Unit I, Lesson 4, where a sealed note from this workshop stands guard over their first wax seals. What it says is what you have already learned here, in full.
Next lesson completes the foundation: the materials library itself, wood, paper, clay, fiber, metal, and stone, and your first tools made by your own hands.
PROFESSOR COGBRANCH TIMBERCLANK
Creative Arts Workshop
Master Artisan, Head of House Occidens
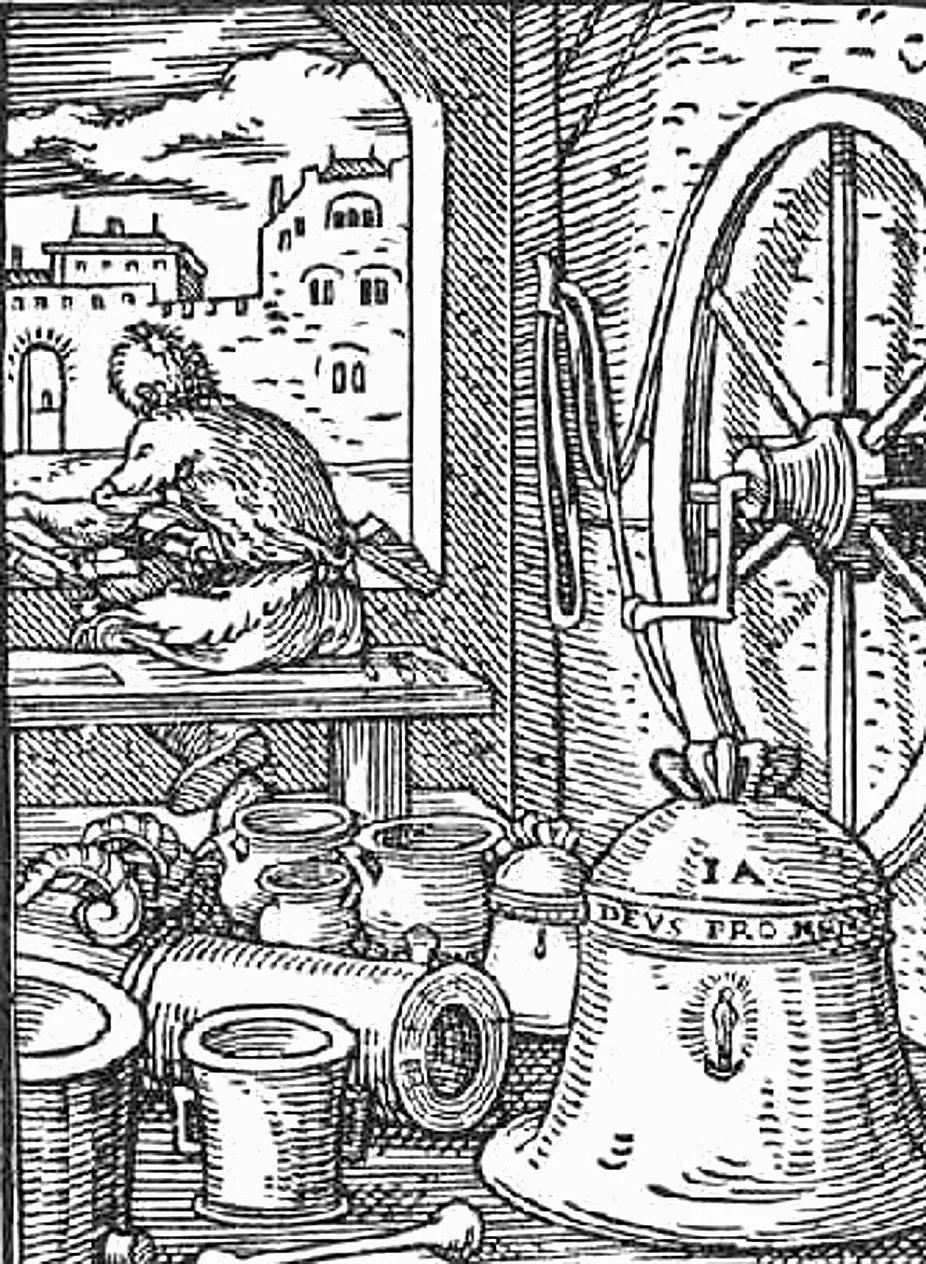
A bell founder's workshop, 1568 — casting metal in a mold over heat.
Woodcut from the Ständebuch (Book of Trades), Frankfurt, 1568. Public domain, via Wikimedia Commons.
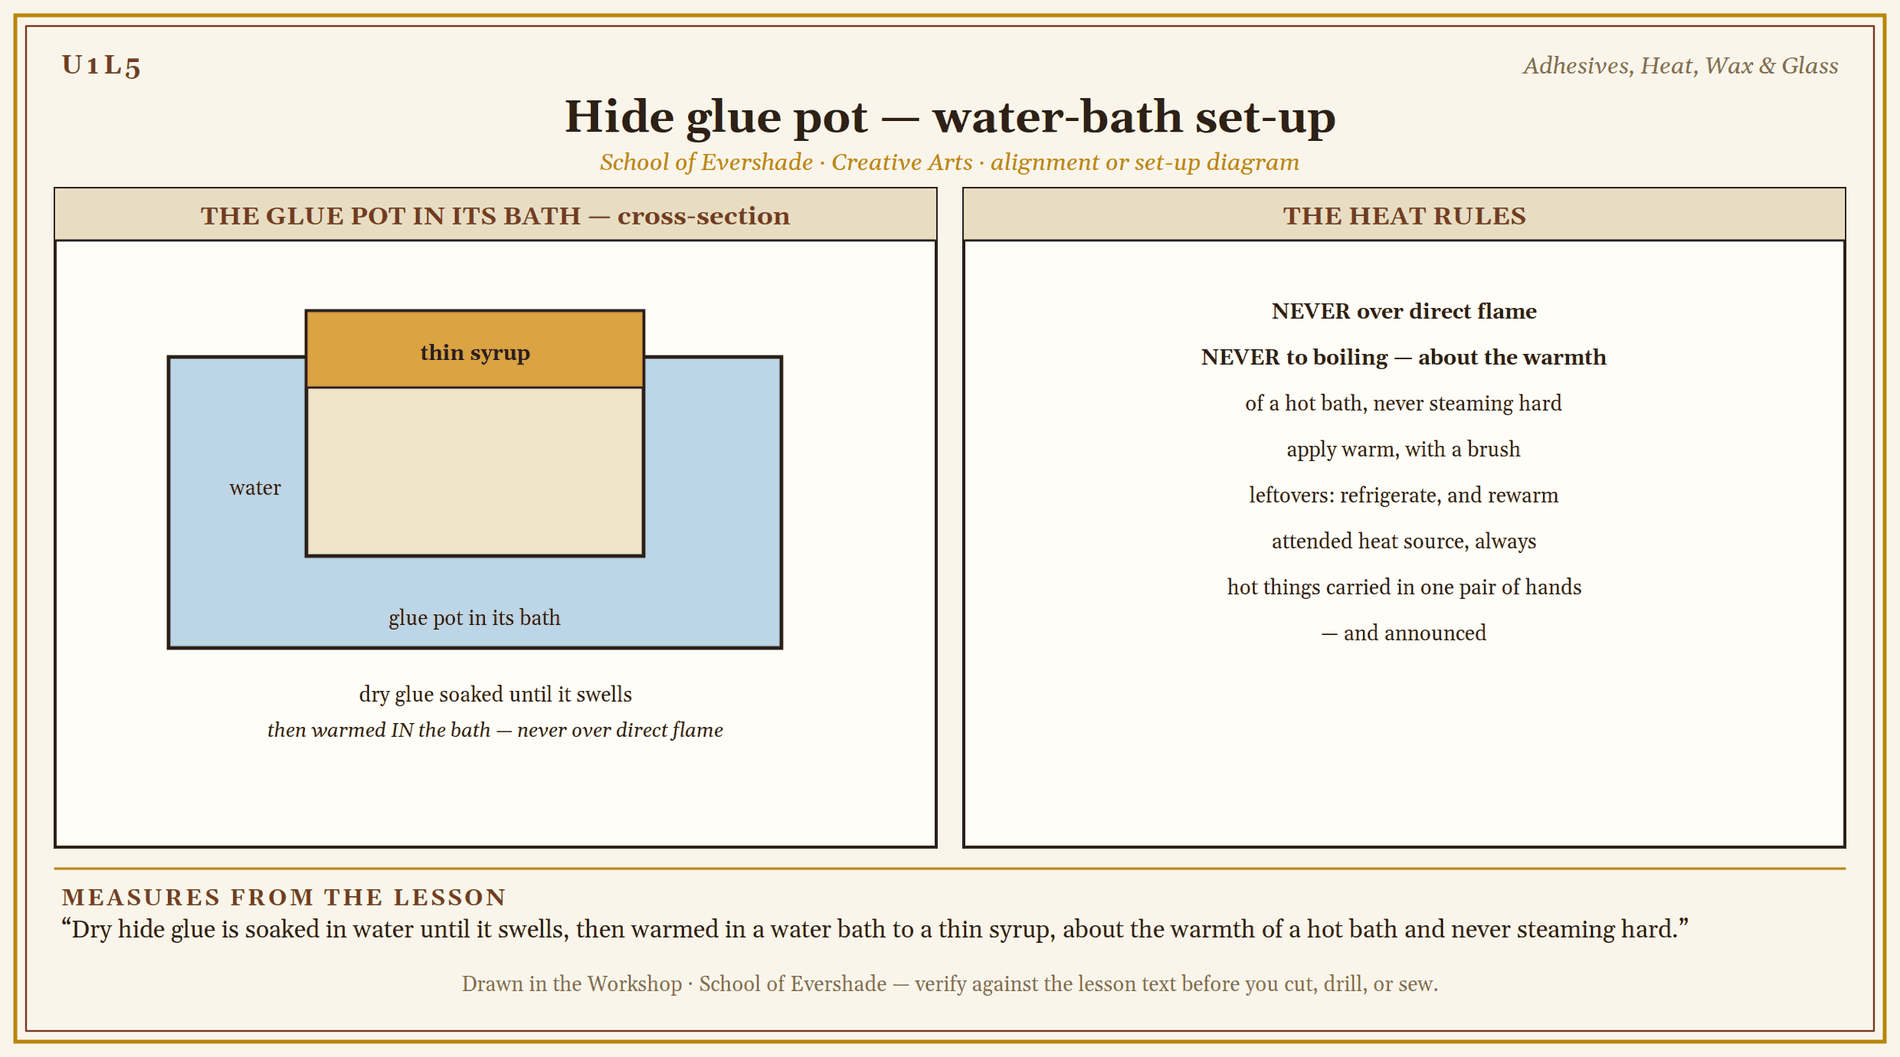
Hide glue pot — water-bath set-up
Cross-Class Connections

Potions · Unit I, Lesson 4 — Labels, Wax Seals & Ingredient Markings
Scholars, in my laboratory the wax seal is no decoration: it is the promise that what is in the jar is what the label says. My fourth lesson seals its jars under a sealed note from Professor Timberclank’s workshop, and the heat rules there are the heat rules of your Lesson 5, one set of rules school-wide. Come and practise the sealing at my bench, and keep the Workshop’s full teaching beside you when you want the whole of the craft.
PROFESSOR CRIMBLEBREW MUDDLENOOK
Potions Laboratory
Further Reading & Sources
Theophilus Presbyter. De diversis artibus (On Various Arts), early twelfth century. The medieval craftsman's own handbook, including recipes for hide, fish, and cheese glues; available in English translation (Dover edition, translated by Hawthorne and Smith).
Encyclopaedia Britannica. "Adhesive." On the history and families of adhesives, from natural glues to synthetics.
Encyclopaedia Britannica. "Glassblowing" and "Glass." On the beginnings of glassmaking and the invention of the blowpipe in the first century BCE.
The Metropolitan Museum of Art. Heilbrunn Timeline of Art History. Essays on Egyptian furniture and on Roman glass, including the encaustic portraits of Roman Egypt.
Student-friendly starting points for exploring this lesson's world. All links verified October 2026.
- Studies and museum reports on Neanderthal birch tar. Summaries from university research groups on the oldest known adhesive and the process that makes it, a sophistication that changed how scholars think about Neanderthal technology.
- Smarthistory, essays on Faiyum mummy portraits. The encaustic wax paintings of Roman Egypt, explained with images.
- Corning Museum of Glass, "Glass in History" resources. The Corning Museum's introductions to glassmaking across 3,500 years are the friendliest expert guide to this lesson's glass section.
- The Metropolitan Museum of Art, Heilbrunn Timeline of Art History, "Roman Glass." How Roman glassmakers cast and blew their vessels, and the eastern craftsmen whose skills the industry grew from, told through the museum's own objects.
Submit your work for this lesson using the form below.
CONTINUE IN THE CREATIVE ARTS WORKSHOP
← Previous · Lesson 4: Piercing, Drilling & Fastening Next · Lesson 6: The Materials Library & First Tool-Making →
Unit I · The Workshop Foundation Creative Arts Workshop · All 39 Lessons
Bookstore Shelf The Library · Creative Arts Shelf Course Supplies
The rest of Unit I: Lesson 1 · Welcome to the Creative Arts Workshop · Lesson 2 · Measuring, Marking & Leveling · Lesson 3 · Cutting, Scoring & Clamping · Lesson 4 · Piercing, Drilling & Fastening · Lesson 6 · The Materials Library