

HERBOLOGY
Unit I · Lesson 2ANATOMICAL ARCHITECTURE: FOLIAGE & STEMS
PROFESSOR BERYL FERNFOOT
Herbology Greenhouse · Master Herbalist
Herbology · Unit I: Morphology, Taxonomy & the Ancient Lore · Lesson 2
Professor's Introduction

Welcome in, scholars,
Last lesson you chose your companion. This lesson, you will truly begin to see it.
Most people look at a plant the way they glance at a passing stranger: a general impression, green and leafy, and then their attention moves on. A botanist looks the way you look at a dear friend across a crowded room. You notice the particular curve of a leaf, the exact way the stem rises, the small teeth along one margin that no other plant in the garden quite shares.
Leaves and stems are a plant's autobiography, written where anyone patient enough may read it. They tell you how the plant gathers sunlight, how it moves water from root to tip, how it survives drought or cold or hungry insects. Every shape is an answer to a question the environment once asked.
Take your time with this lesson. There is no hurry in the Greenhouse. The leaves are not going anywhere, and they reward the observer who lingers.
— Professor Beryl Fernfoot, Herbology Greenhouse • Master Herbalist • Head of House Oriens
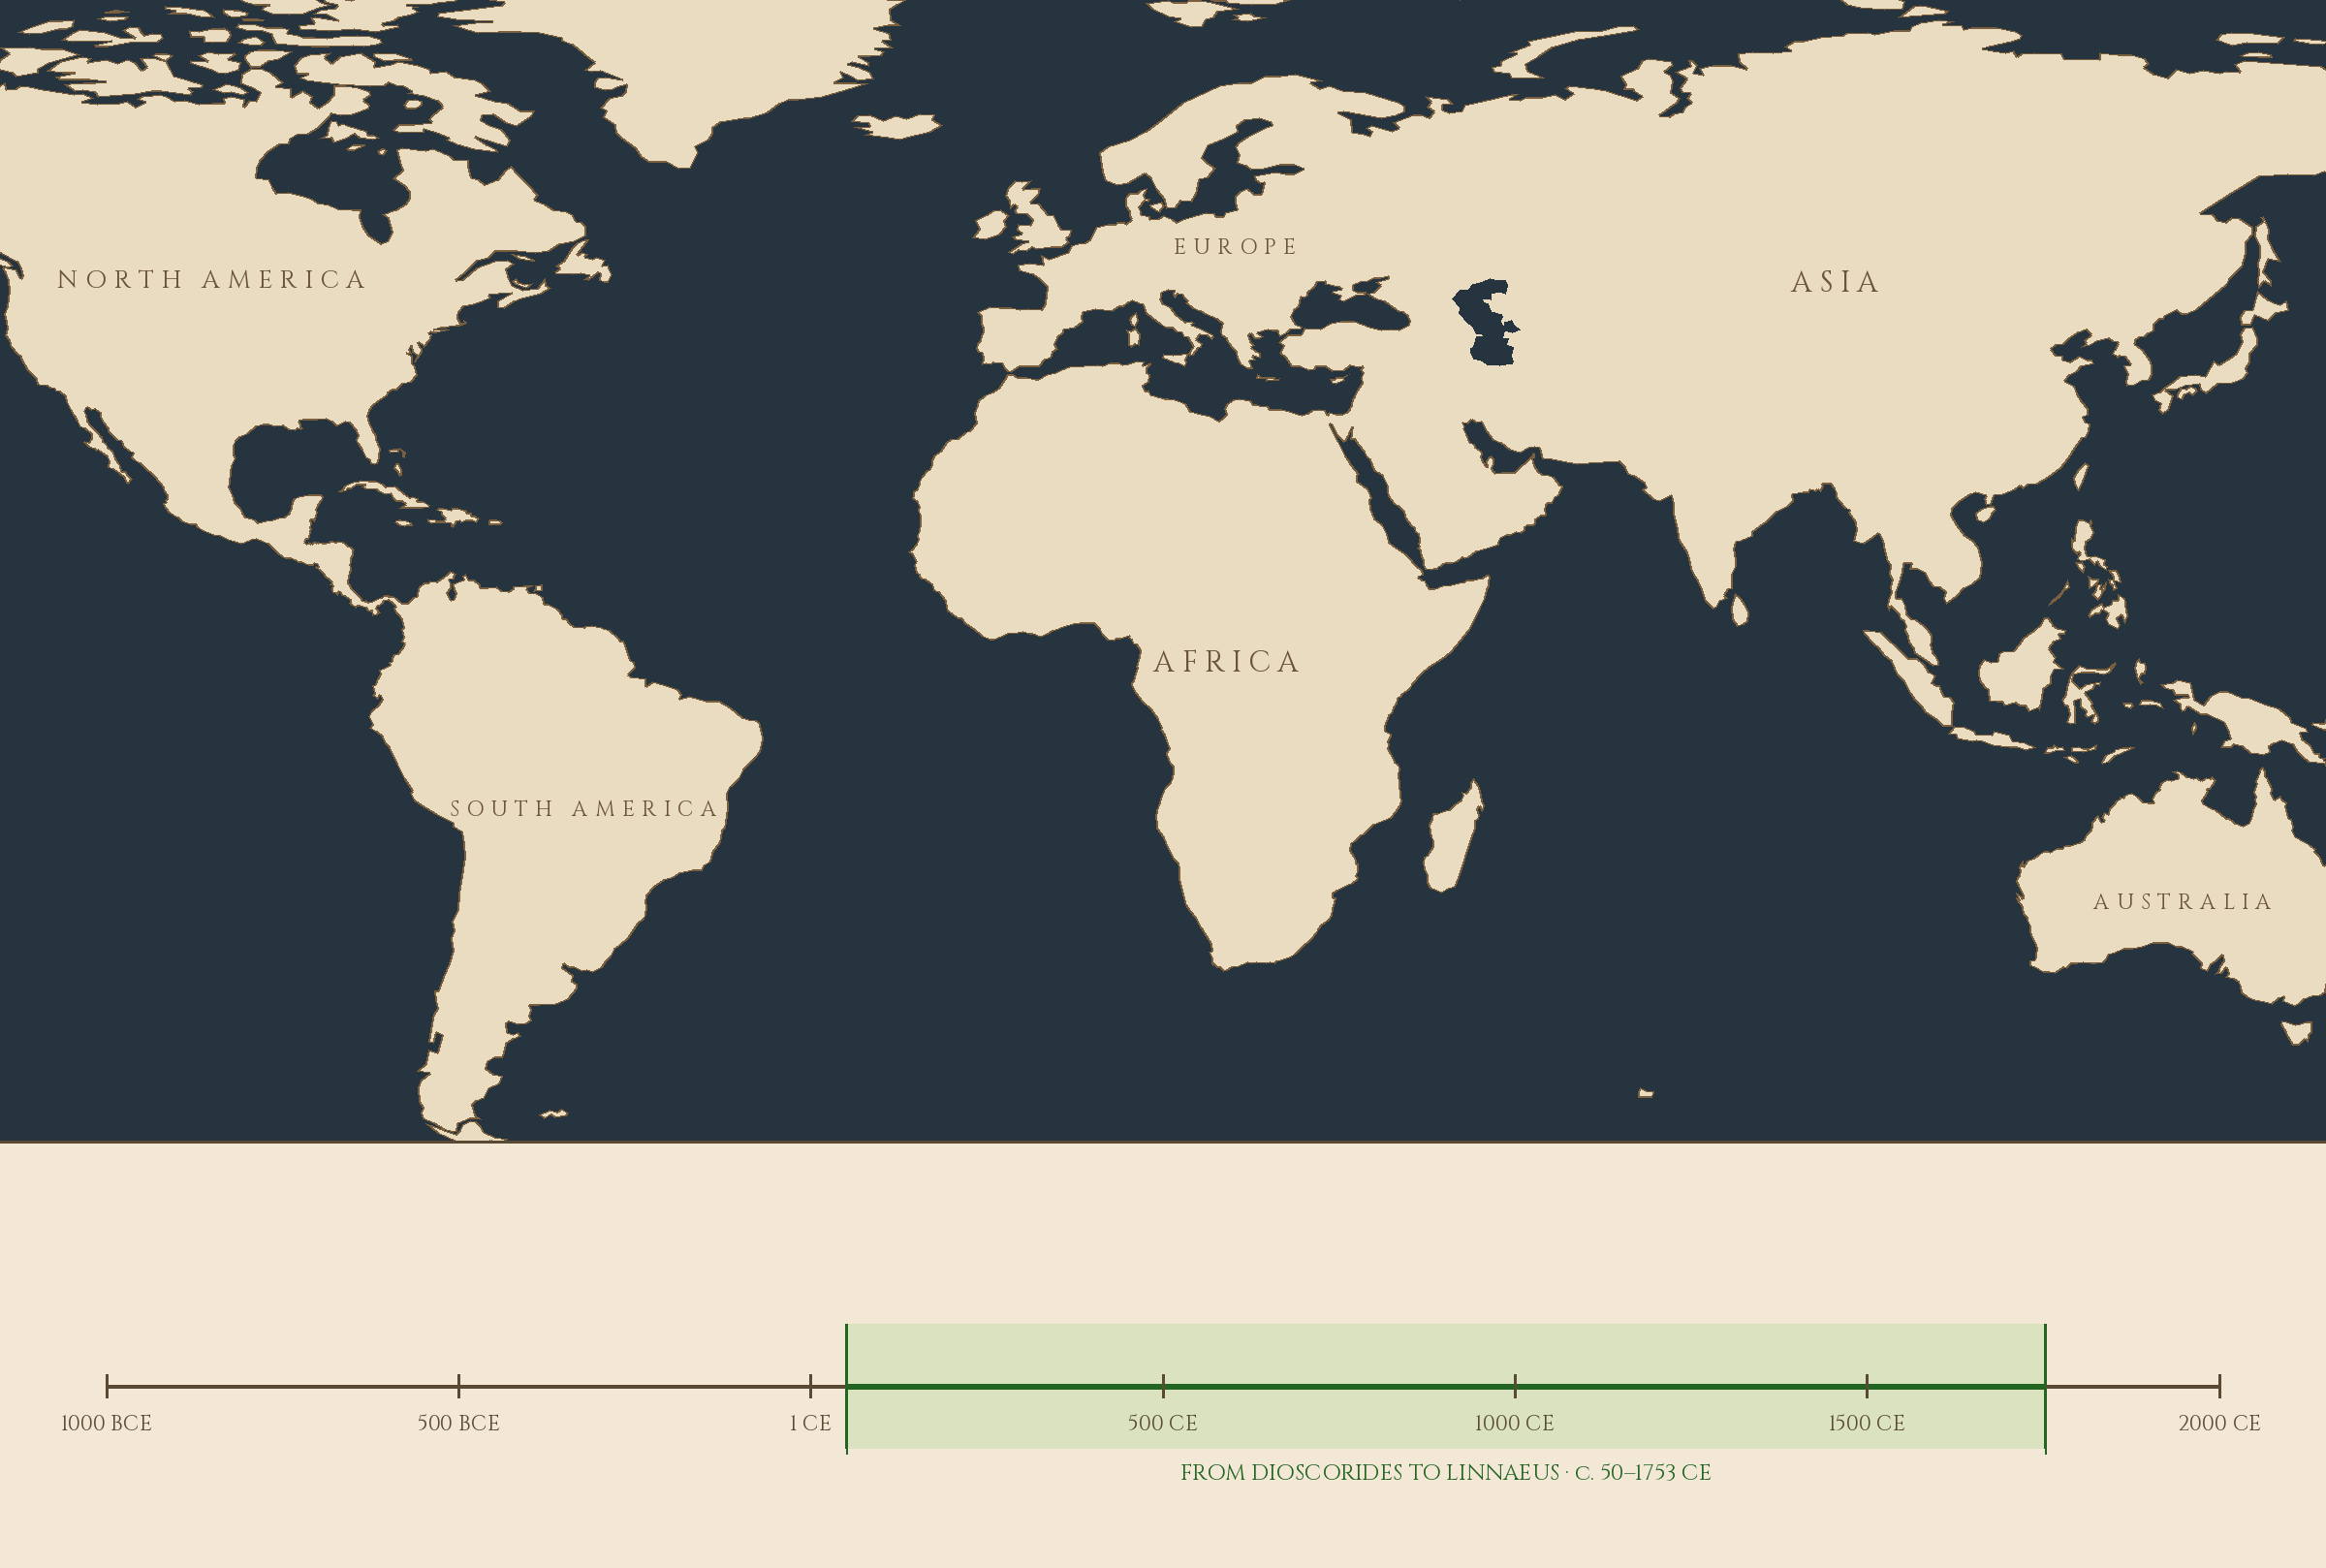
The line beneath the map is our road: every stop a place where the knowledge of plants changed, every lesson a step along it.
Lesson Objectives
By the end of this lesson, you will be able to:
- Describe the major leaf shapes using proper botanical terms, including ovate, lanceolate, cordate, and elliptic.
- Identify leaf margin types, including entire, serrate, dentate, crenate, and lobed.
- Distinguish alternate, opposite, and whorled leaf arrangements on a living stem.
- Recognize pinnate, palmate, and parallel venation patterns.
- Tell herbaceous stems from woody stems, and locate nodes and internodes.
- Conduct a careful leaf-and-stem observation of your Scholar's Familiar using a magnifying glass.
- Explain how foliage and stem features help identify an unknown plant.
Reading this lesson: ★ marks the passages to remember. They return on the unit quiz and the class test. Check in questions ask the material back as you go; answer them in your workbook when you meet them.
Working this lesson: Your assignment packet is the first download on this page. Work in it as the lesson moves along, answering each assignment as its subject is taught — or read the lesson through for your notes and take the assignments as homework afterward. Both are proper ways to sit this class. Signposts in the reading tell you where each assignment belongs. Written answers are short answers in your own words; a few honest lines are worth more than a filled page.
Your Assignment Packet
This lesson's assignments live in its packet: the Lexicon Handout (every term, course terms marked ◆), Materials, Guided Practice, the Assignment Manual with its answer key for self-checking, the Reflection Questions, and the Workbook Checklist. Download the packet before you begin and keep it beside you as you read.
Why Leaves Speak First
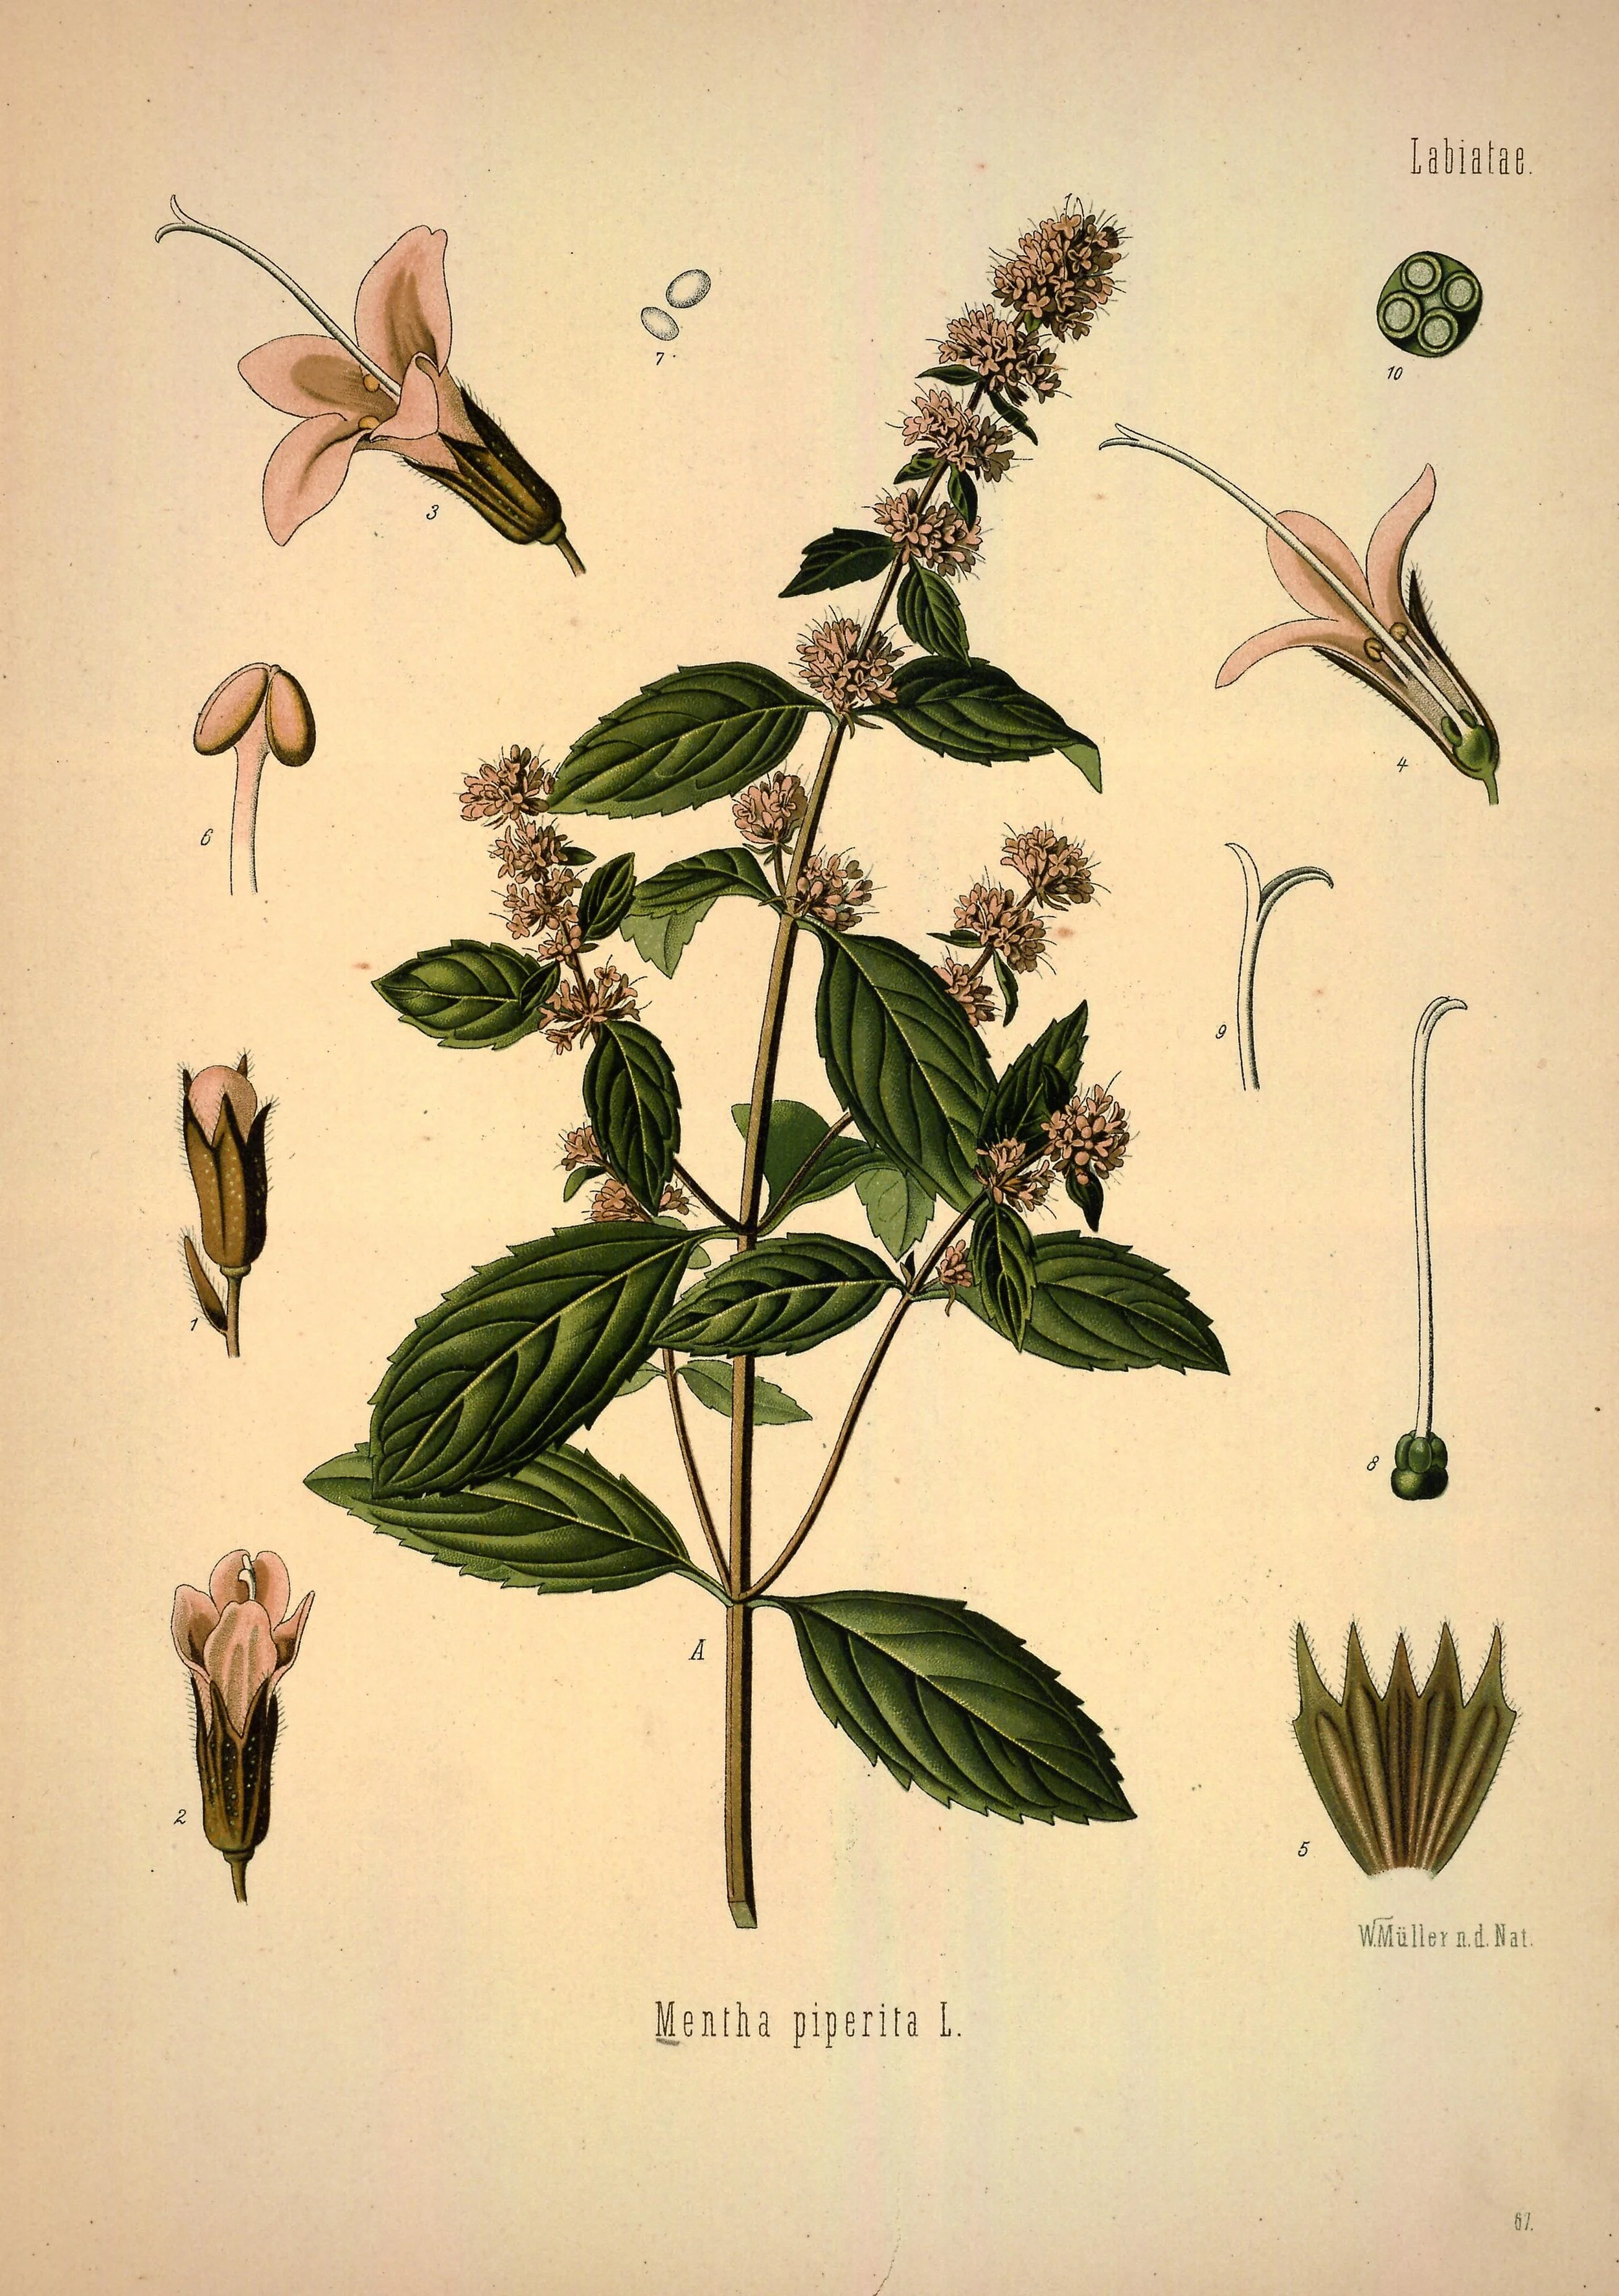
Peppermint (Mentha piperita), plate 67 of Köhler's Medizinal-Pflanzen (1887). Read it as the lesson teaches: leaves in opposite pairs, margins toothed like a saw — the mint family's signature, visible before any flower is named.
Franz Eugen Köhler, Köhler's Medizinal-Pflanzen (1887), plate 67, via the Biodiversity Heritage Library. Public domain.
★ When botanists meet an unfamiliar plant, they almost always begin with the leaves. There are good reasons for this. Leaves are usually the largest and most visible part of a plant. They are present for much of the growing season, unlike flowers, which may bloom for only a few weeks. And leaves carry an extraordinary amount of information in a small space: their shape, edge, arrangement, and vein pattern together form a signature nearly as distinctive as a fingerprint.
Consider two common garden herbs. Mint has square stems, opposite leaves with serrated margins, and a distinctive fragrance when bruised. Basil has square stems too — softer-cornered than mint's — opposite leaves with smooth or gently wavy margins, and its own unmistakable scent. A cook who confuses the two will notice at dinner. A botanist notices at a glance, because the leaves have already told their story.
Learning to read leaves is not memorization for its own sake. It is the foundation of plant identification, and identification is the foundation of everything else we do in the Greenhouse. You cannot research a plant's history, judge whether it is safe to handle, or understand its needs until you know what it is. The leaves will tell you, if you learn their language.
Check in: Why do botanists usually begin with a plant's leaves rather than waiting for its flowers?
❦ In your workbook: record why leaves speak first in your own way — what a leaf carries that a flower cannot be counted on to show — copy, sketch, or note what matters.
The Vocabulary of Shape
Botanists describe leaf shapes with a precise shared vocabulary. These terms may sound formal at first, but each one paints a picture, and once you have seen the shape, the word is easy to keep.
★ Ovate leaves are egg shaped, widest below the middle, near the stalk. Many familiar plants wear this shape. Obovate is its mirror: widest above the middle, like an upside down egg.
Check in: A leaf is widest above the middle, like an upside-down egg. Which term names it — and which of the lesson's three questions settled it?
Lanceolate leaves are long and narrow, widest below the middle and tapering to a point, shaped like the head of a lance. Grasses and many wildflowers carry lanceolate leaves. Linear leaves are even narrower, with margins nearly parallel, like blades of grass.
Elliptic leaves are oval, widest at the middle and tapering toward both ends. Oblong leaves are longer than wide with nearly parallel sides. Orbicular leaves are round or nearly so.
Cordate leaves are heart shaped, with a notched base where the stalk attaches. Sagittate leaves are arrowhead shaped. Reniform leaves are kidney shaped, wider than long. Spatulate leaves are spoon shaped, broad and rounded at the tip and narrowing toward the base. Deltate leaves are triangular.
A useful habit: when you meet a new leaf, ask yourself three questions. Where is it widest: below the middle, at the middle, or above? How long is it compared to its width? And what does it remind you of: an egg, a heart, a spear, a spoon? The answers will usually lead you to the right term.
❦ In your workbook: record the vocabulary of shape in your own way — the shapes themselves, and the three questions that lead you to each word — copy, sketch, or note what matters.
The Edges of Things: Margins
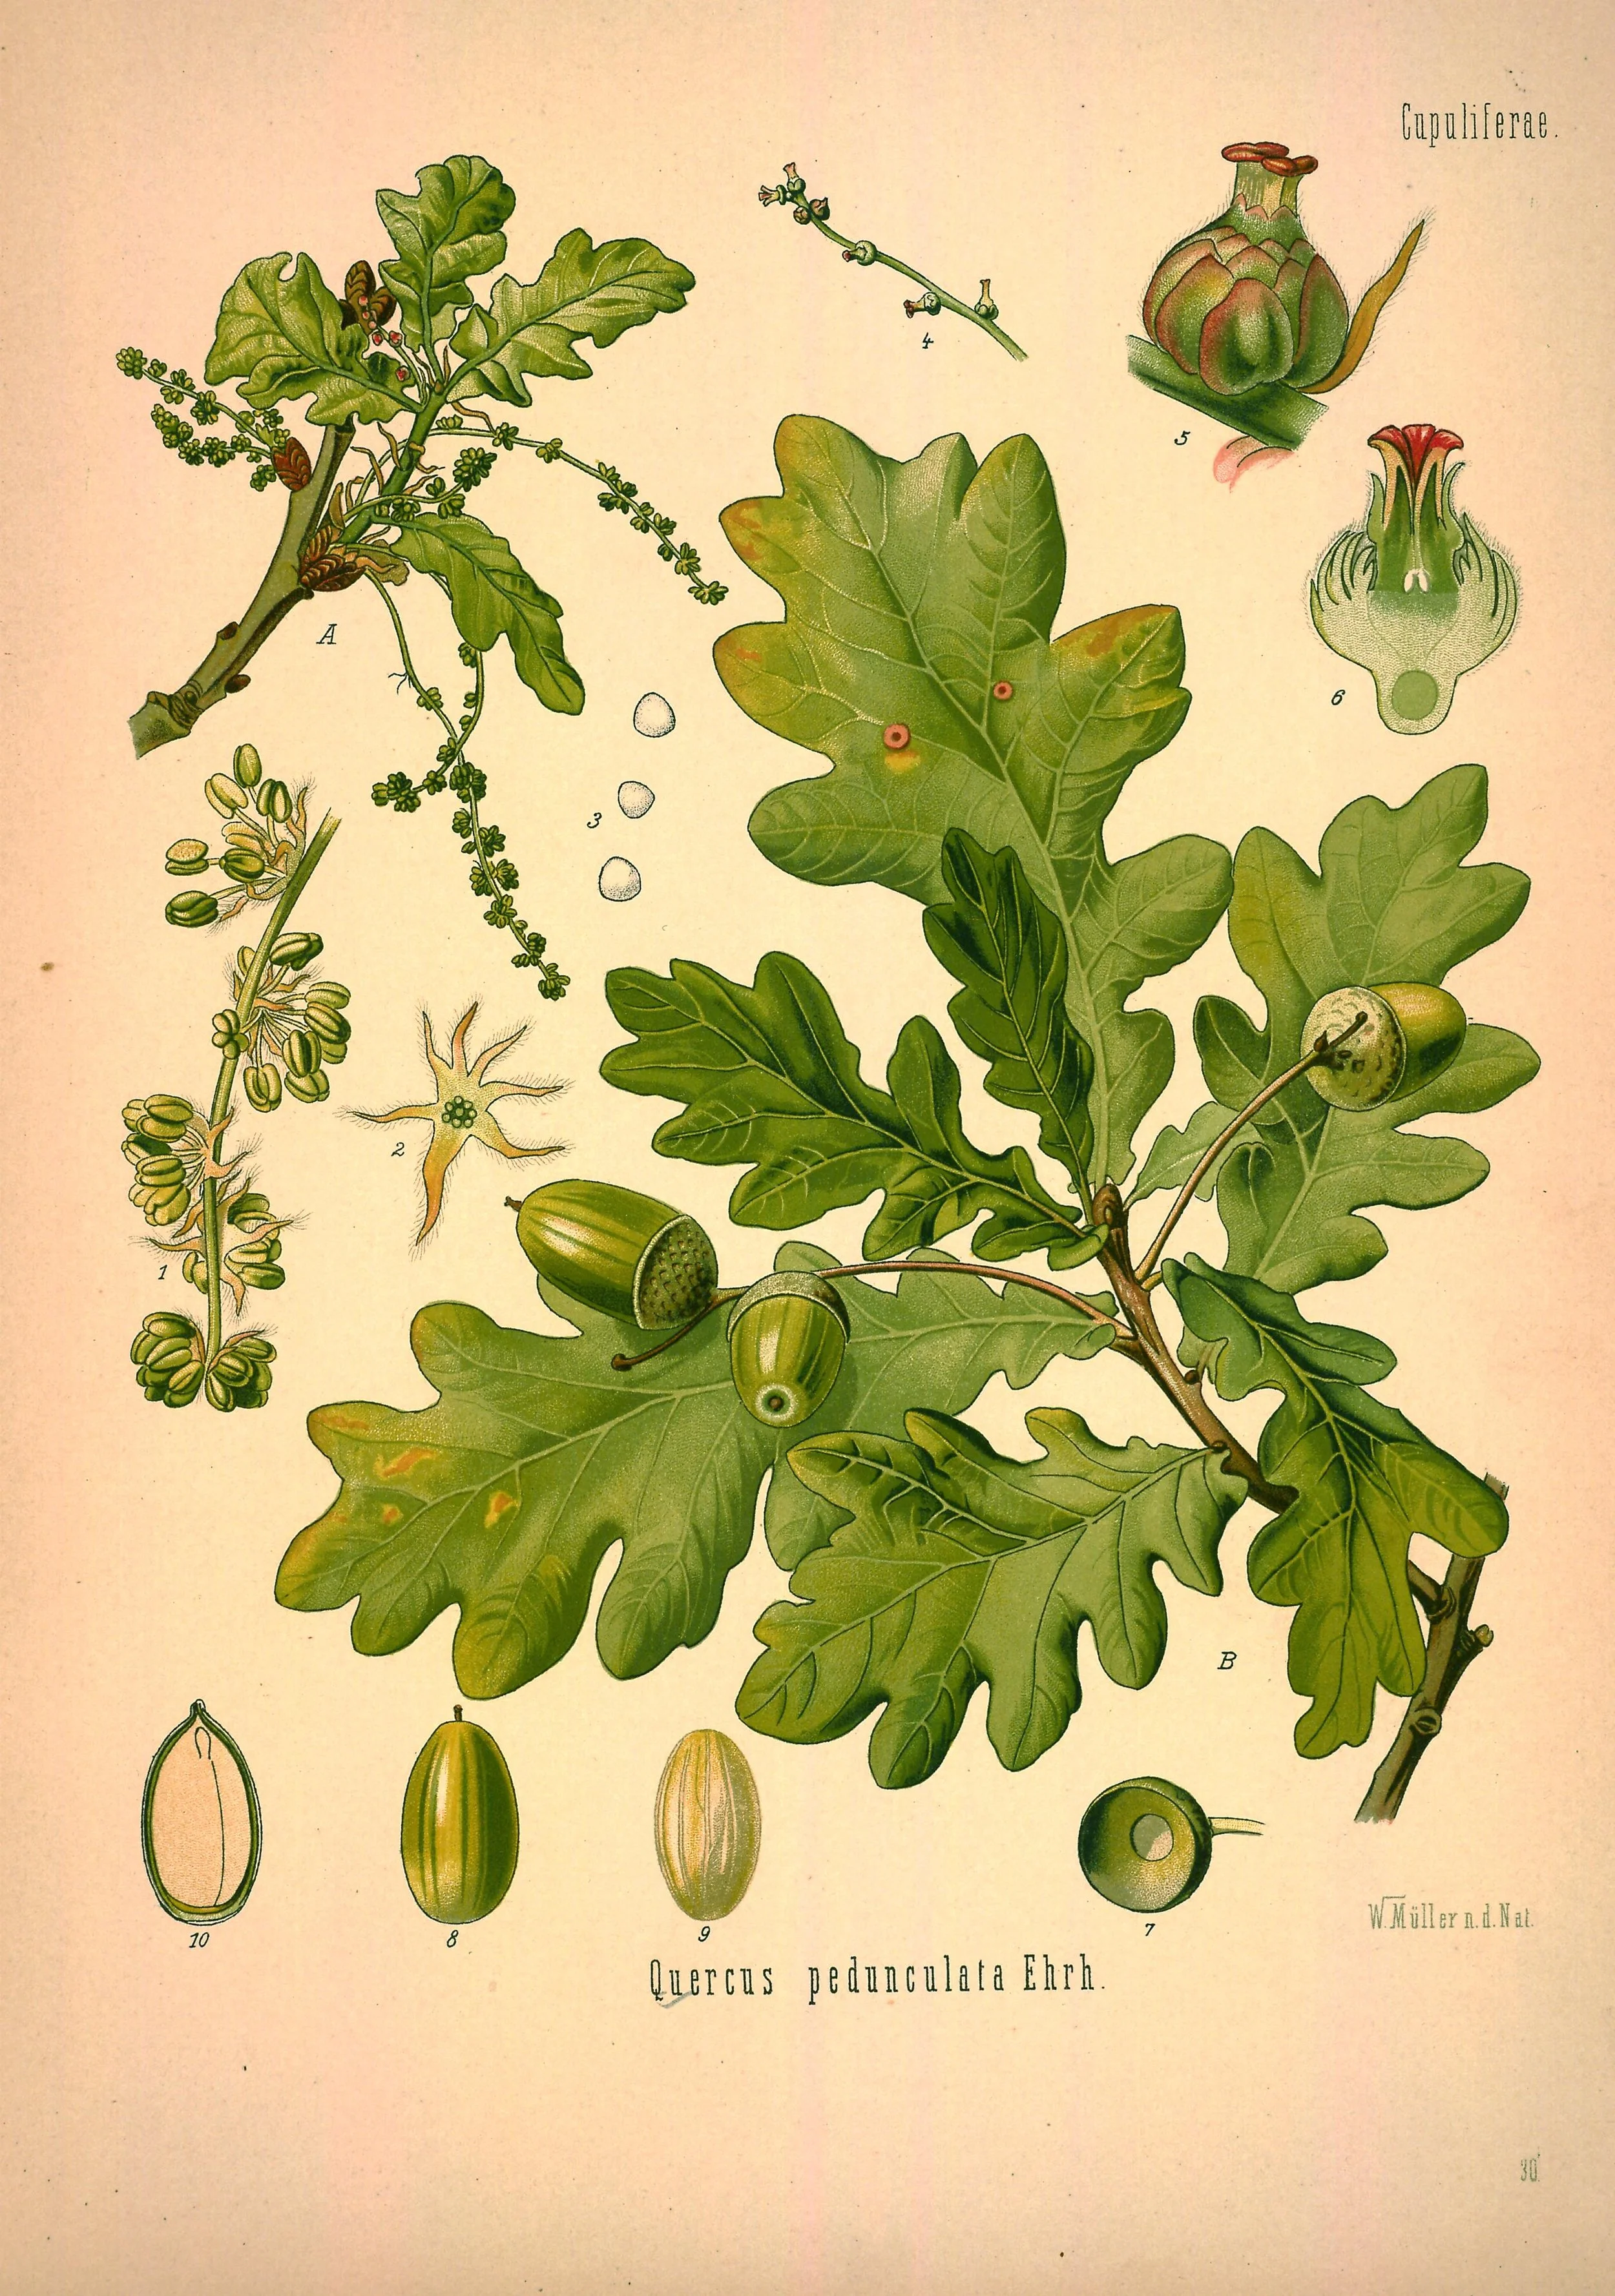
Pedunculate oak (Quercus robur, named Quercus pedunculata on the plate), plate 30 of Köhler's Medizinal-Pflanzen (1887): a lobed margin — rounded cuts that stop less than halfway to the midrib.
Franz Eugen Köhler, Köhler's Medizinal-Pflanzen (1887), plate 30, via the Biodiversity Heritage Library. Public domain.
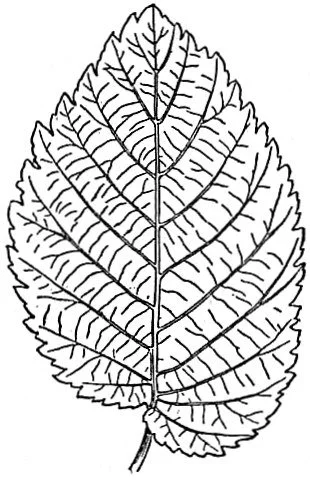
An elm leaf, from the "Leaf" article of the Encyclopaedia Britannica (11th edition, 1911): sharp teeth pointing toward the tip, the large teeth toothed themselves — a doubly serrate margin, with the veins running straight to the teeth.
Alfred Barton Rendle, "Leaf," Encyclopaedia Britannica (11th ed.), vol. 16 (1911), p. 323, fig. 3. Public domain.
★ The margin, the edge of the leaf blade — the leaf's broad, flat part — is one of the most reliable identification features. Margins vary less within a species than overall leaf size does, which makes them trustworthy witnesses.
An entire margin is smooth, with no teeth or notches at all. Many tropical houseplants have entire margins.
★ A serrate margin has sharp teeth that point forward, toward the leaf tip, like a saw blade. A dentate margin also has teeth, but they point outward rather than forward. Doubly serrate margins have large teeth that are themselves toothed, a feature you can see on elms.
Check in: Your fingertip finds sharp teeth along a margin. How do you tell serrate teeth from dentate teeth?
★ A crenate margin has rounded teeth, like the edge of a scallop shell. An undulate or wavy margin ripples gently without forming teeth. A sinuate margin waves more deeply.
Lobed leaves have indentations that cut less than halfway to the midrib, like the familiar oak leaf. When the cuts go deeper than halfway, botanists say cleft.
Run your finger gently along a leaf margin sometime. The difference between serrate and crenate, between teeth that bite and teeth that round, is something your fingertip learns faster than your eye.
❦ In your workbook: record the edges of things in your own way — the margin types, and which way each kind of tooth points — copy, sketch, or note what matters.
Professor Fernfoot
My patient observers,
You are doing beautifully. I can tell, because the questions I imagine you asking are exactly the right ones: "Is this tooth pointing forward or outward?" "Is the widest point truly below the middle?" That care, that willingness to look twice, is the whole of botanical skill. Nobody is born knowing these words. Every botanist you will ever meet once stood exactly where you are standing, squinting at a leaf and wondering.
A small encouragement: choose one leaf from your Scholar's Familiar and learn it completely. Its shape, its margin, its veins. Know that single leaf the way you know your own hand. Then choose another. Knowledge in the Greenhouse is built leaf by leaf, and there is no shame in going slowly. The plants do not mind. They have been waiting millions of years for someone to look closely. They can wait a little longer.
— Professor Beryl Fernfoot, Herbology Greenhouse • Master Herbalist • Head of House Oriens
How Leaves Are Arranged
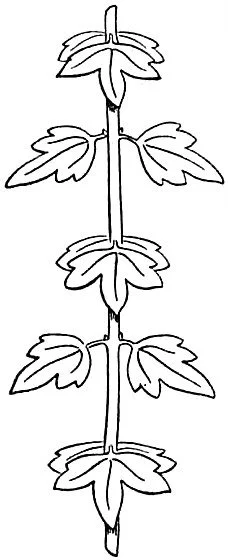
Opposite arrangement, from the Encyclopaedia Britannica (11th edition, 1911): two leaves at each node, each pair turned at right angles to the pair below — the arrangement of the mint family.
Alfred Barton Rendle, "Leaf," Encyclopaedia Britannica (11th ed.), vol. 16 (1911), p. 327, fig. 29. Public domain.
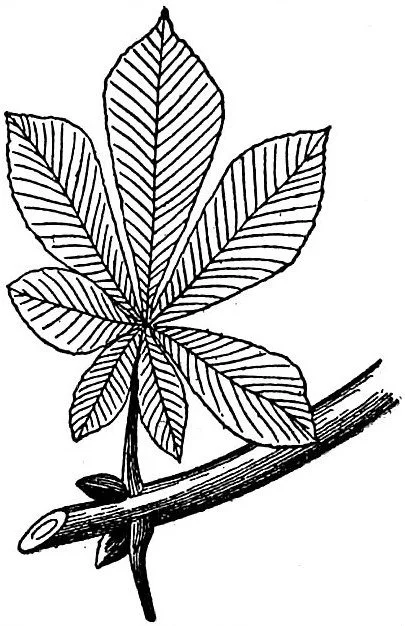
A palmately compound leaf — the horse-chestnut's, from the Encyclopaedia Britannica (11th edition, 1911): seven leaflets from one point, and at the base of the stalk, the bud that proves the whole fan is a single leaf.
Alfred Barton Rendle, "Leaf," Encyclopaedia Britannica (11th ed.), vol. 16 (1911), p. 325, fig. 18. Public domain.
Leaves do not attach to stems at random. Their arrangement follows patterns, and the pattern is often the fastest clue to a plant's identity.
★ In an alternate arrangement, leaves attach singly at each node, alternating sides up the stem. In an opposite arrangement, leaves attach in pairs, one on each side at the same node. In a whorled arrangement, three or more leaves circle the stem at a single node.
★ Here is a piece of field wisdom worth keeping: the mint family, the Lamiaceae, which includes mint, basil, rosemary, sage, thyme, and lavender, almost always has opposite leaves and square stems. Roll a mint stem between your fingers and feel the four corners. Once you know this, you can recognize a member of the mint family by touch alone, even with your eyes closed. Plant families often share such signatures, and learning them turns identification from guesswork into recognition.
Check in: You roll a stem between your fingers and feel four corners, and its leaves stand in pairs. Which family are you holding, and what two signs told you?
★ Leaves may also be simple, with a single undivided blade, or compound, with the blade divided into separate leaflets. Compound leaves come in two main forms: pinnately compound, with leaflets arranged along a central stalk like a feather, and palmately compound, with leaflets radiating from a single point like fingers from a palm. An important distinction: a compound leaf has a bud at the base of its stalk where it meets the stem, while individual leaflets do not. This is how you tell a branch with many small leaves from a single compound leaf.
❦ In your workbook: record how leaves are arranged in your own way — the three arrangements, the mint family's signature, and the bud that settles simple from compound — copy, sketch, or note what matters.
In your packet: Assignment III — Arrangement Survey ◐ begins here. Work it now, or mark the place and take it as homework — your choice.
In your packet: Assignment IV — The Mint Family Test ⚒ begins here. Work it now, or mark the place and take it as homework — your choice.
The Rivers Within: Venation
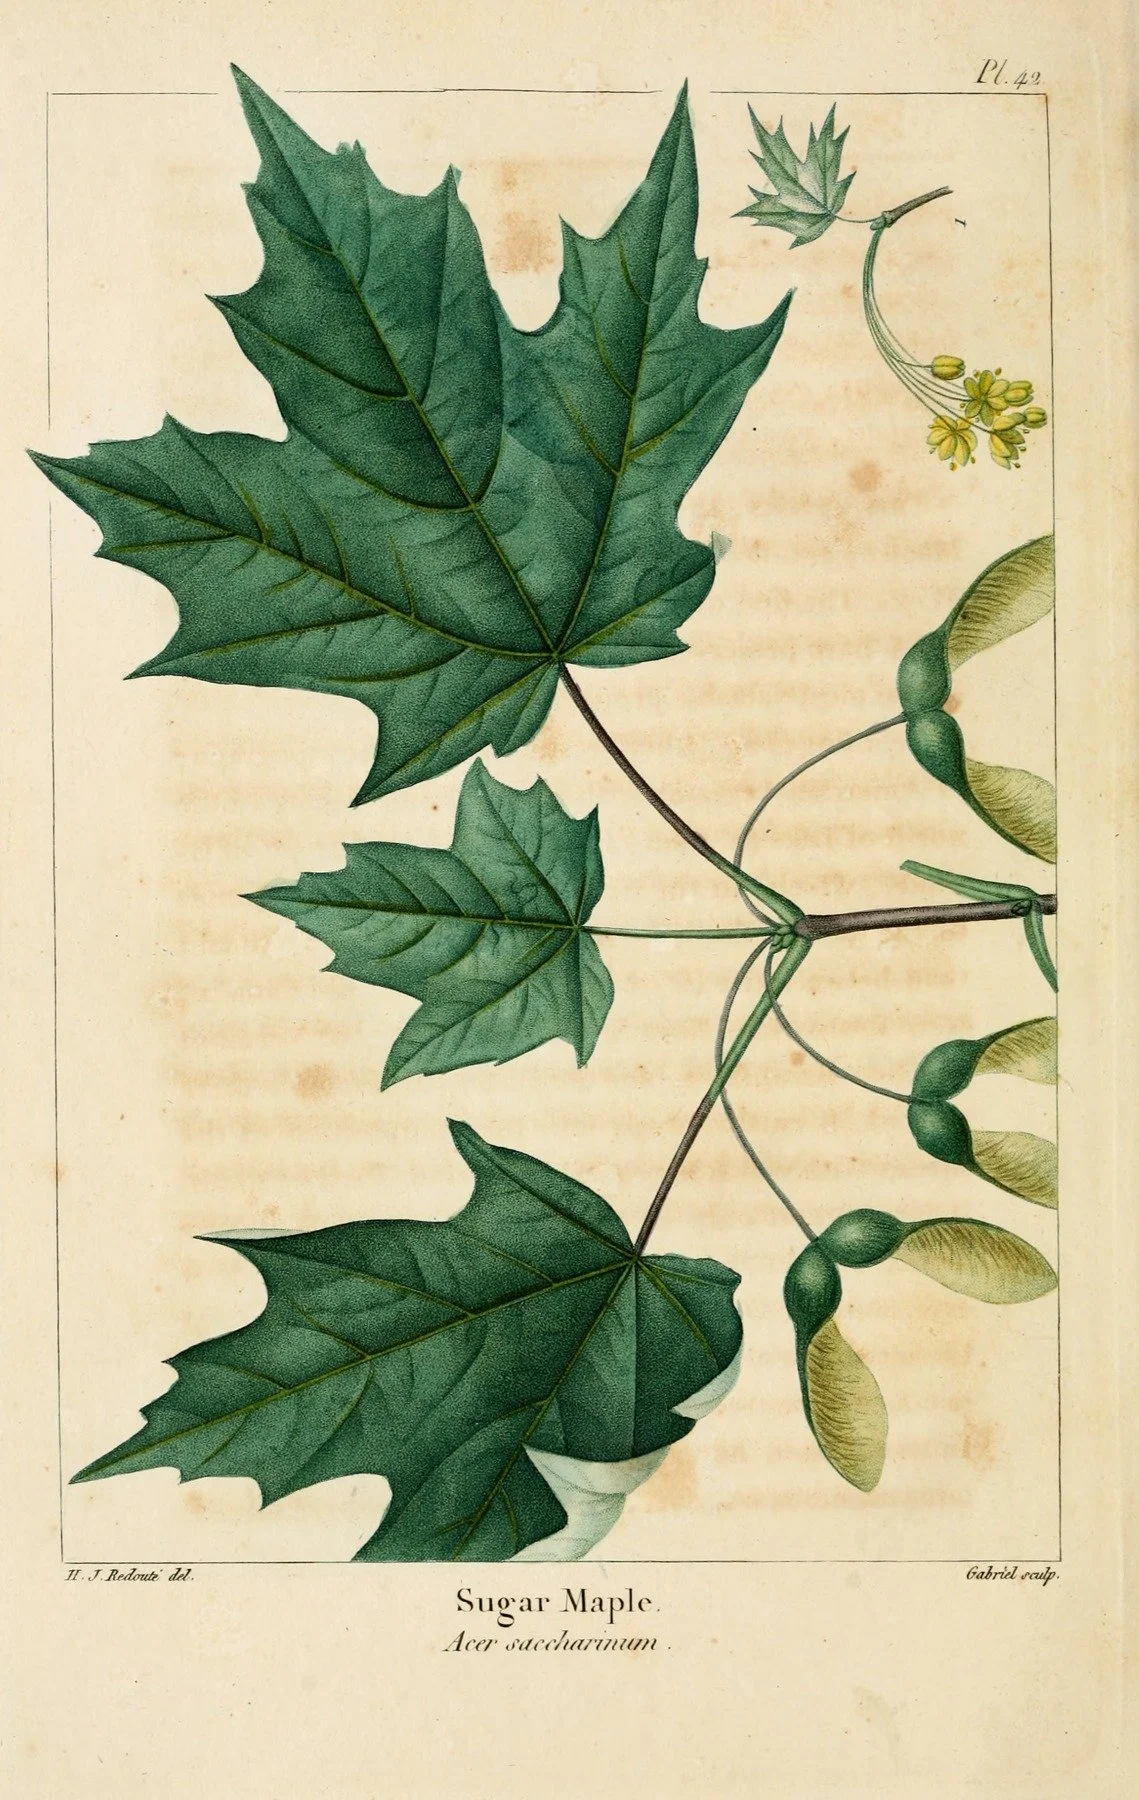
Sugar maple, plate 42 of Michaux's The North American Sylva (1819): the main veins radiate from one point at the base of the blade like fingers from a palm — palmate venation. (The name printed on the plate, Acer saccharinum, was the name then used for the sugar maple, Acer saccharum.)
François André Michaux, The North American Sylva (1819), plate 42; illustrated by Henri-Joseph Redouté, engraved by Gabriel. Public domain.
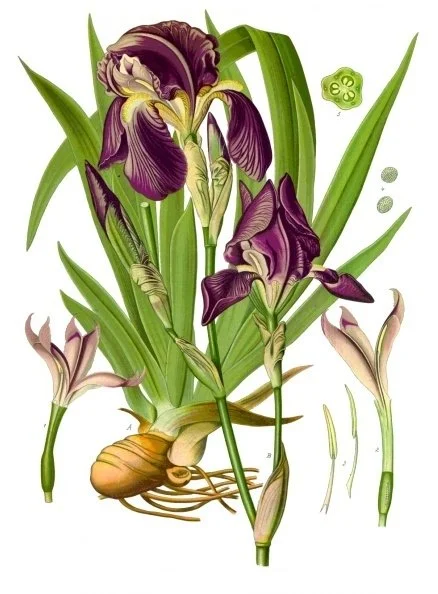
German iris (Iris × germanica), from Köhler's Medizinal-Pflanzen: sword-shaped leaves with their veins running side by side from base to tip — parallel venation, the hallmark of the monocots.
Franz Eugen Köhler, Köhler's Medizinal-Pflanzen (1897), plate 211 of the Köhler plate list. Public domain.
Hold a leaf up to the light. The network you see is the venation, the system of veins that carries water in and sugars out, and it follows three great patterns.
★ Pinnate venation has a central midrib with side veins branching off like a feather. Most broadleaf trees and garden plants are pinnately veined. Palmate venation has several main veins radiating from the base of the blade like fingers from a palm, as in maples. Parallel venation has veins running side by side from base to tip, the hallmark of grasses, lilies, and most monocots.
Check in: A leaf's veins run side by side from base to tip. Which pattern is it, and which great group of plants does it point to?
Venation is sturdy evidence. It changes little with the seasons and survives even in dried specimens, which is why herbarium botanists rely on it. When you press a leaf for your archive, as you will in a later unit, the veins will still be legible years from now.
❦ In your workbook: record the rivers within in your own way — the three venation patterns, and why the veins outlast the seasons as evidence — copy, sketch, or note what matters.
Stems: The Architecture Beneath
If leaves are the autobiography, stems are the architecture. They hold the leaves to the light, move water upward and sugars downward, and record the plant's strategy for survival.
★ Herbaceous stems are soft, green, and flexible. They die back to the ground in cold climates each year. Your basil, your mint, your spider plant: all herbaceous. Woody stems are hard and stiff with lignin, persisting year after year. Trees and shrubs are woody.
★ Along every stem run two landmarks. A node is the point where a leaf, branch, or bud attaches. An internode is the stretch of stem between two nodes. Nodes are where the action is: this is where new growth begins, where cuttings are taken, where the plant makes its decisions. When you learn propagation later in this course, you will come to know nodes intimately.
Check in: Where does new growth begin on a stem — and what is the stretch of stem between those points called?
★ The point where a leaf stalk meets the stem deserves attention too. Leaves attach by a petiole, the slender stalk, or sit directly on the stem, in which case they are called sessile. Whether a leaf has a petiole, and how long it is, can itself aid identification.
Growth habit describes the plant's overall form: upright, sprawling, climbing, rosette forming. It is the first thing you notice and the last thing you should trust alone, since habit changes with light and crowding. But combined with leaf shape, margin, arrangement, and venation, it completes the portrait.
❦ In your workbook: record the architecture beneath in your own way — herbaceous against woody, node against internode, petiole against sessile — copy, sketch, or note what matters.
Guided Observation: The Observer's Practice
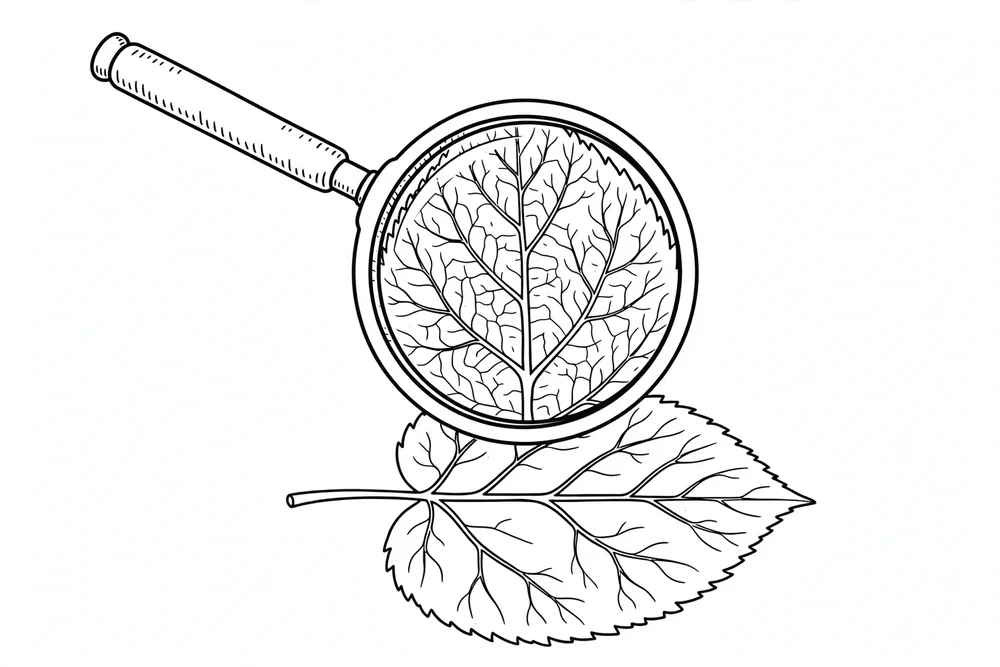
Botanical observation is a skill of the body as much as the mind. Here is how to practice it well.
Work in good natural light. Morning light is kindest. Hold the leaf gently; never tear a leaf from a plant you are studying unless you have a reason and permission. A magnifying glass transforms this work. Under magnification, the tiny teeth of a serrate margin become unmistakable, leaf hairs stand up like a forest, and vein patterns reveal themselves in full.
Observe systematically. Begin with the whole plant: its habit, its height, its general character. Move to a single stem: trace it from base to tip, noting where leaves attach. Choose one representative leaf, mature but undamaged, and study it completely: shape, margin, arrangement, venation, surface texture, petiole. Sketch what you see. A sketch, however rough, forces your eye to notice what a glance would skip. Botanists have sketched for centuries not because they were artists but because drawing is a form of seeing.
Record everything in your Scholar's Familiar journal. Date your observations. Note the light, the weather, the plant's condition. These notes become a baseline. Weeks from now, when new growth appears or the seasons turn, you will compare what you see against what you recorded today, and the plant's story will unfold in your own handwriting.
In your packet: Assignment II — The Single Leaf Study ◐ begins here. Work it now, or mark the place and take it as homework — your choice.
Materials
Required (Level One — household items)
- Your Scholar's Familiar and access to two other plants for observation (houseplants, garden plants, or outdoor plants you have permission to study).
- A magnifying glass: any handheld magnifier will do.
- Journal or notebook and pencil: for observations, tables, and sketches.
- A ruler: for measuring blade length and width.
Suggested (Level Two — historically closer)
- A 10x hand lens (loupe): the traditional botanist's magnifier, worn on a cord.
- A dedicated botanical sketchbook: unlined pages for observation drawings.
- Plant press or heavy books with absorbent paper: for pressing representative leaves for your archive (with permission).
Safety Notes
- Observe first and touch gently. Some plants have skin irritants, tiny stinging hairs, or sap that can bother sensitive skin.
- Never taste or chew any plant part during observation exercises. Identification study is done with eyes and fingertips, not the mouth.
- Wash your hands after handling plants and soil.
- Use magnifying glasses safely: never leave one in direct sunlight where it can focus light and start a fire, and never look directly at the sun through one.
- Younger students should have an adult nearby when working outdoors or with garden tools.
Reflection Questions
Answer the following questions in your workbook.
- Why do botanists usually begin identifying an unfamiliar plant with its leaves rather than its flowers?
- How does the combination of square stems and opposite leaves help identify the mint family even without seeing a flower?
- What is the difference between a simple leaf and a pinnately compound leaf, and how can you tell them apart in the field?
- Why is sketching considered a botanical skill rather than merely an artistic one?
- Which leaf feature did you find hardest to judge on your Scholar's Familiar, and what would help you decide?
Workbook Checklist — Lesson 2
In my workbook I have:
- ☐ described the major leaf shapes in proper botanical terms — ovate, lanceolate, cordate, elliptic, and their kin
- ☐ told the margin types apart: entire, serrate, dentate, crenate, and lobed
- ☐ told alternate, opposite, and whorled arrangements apart on a living stem
- ☐ recognized pinnate, palmate, and parallel venation
- ☐ told herbaceous stems from woody stems, and found nodes and internodes
- ☐ made a careful leaf-and-stem observation of my Scholar's Familiar with a magnifying glass
- ☐ explained how foliage and stem features help identify an unknown plant
☐ Lesson completed Date: ___ Signature: ___
Professor's Closing Note
And so we close our second lesson, my dears.
You came to this lesson seeing green. You leave it seeing ovate and serrate, alternate and pinnate, node and internode. The garden has not changed. You have. That is the quiet miracle of every lesson in this Greenhouse: the world stays exactly as it was, and yet, because you have learned to look, it becomes richer.
Your assignment is simple and joyful. Go to your Scholar's Familiar with your magnifying glass and your journal. Give it your full, unhurried attention. Write down everything the leaves and stems tell you, using your new vocabulary. If you are unsure of a term, guess, and mark your guess with a question mark. Uncertainty, honestly recorded, is worth more than confidence borrowed from someone else.
Next lesson, we descend below the soil to the root vaults, the hidden half of your plant's life. Until then, keep looking closely. The leaves are speaking.
— Professor Beryl Fernfoot, Herbology Greenhouse • Master Herbalist • Head of House Oriens
Cross-Class Connections

Potions · Unit II, Lesson 12 — Flowers, Leaves & Fragile Petals
Apprentices, the leaves you have just learned to read arrive at my laboratory door in baskets, and I judge every one of them — sight, touch, fragrance, moisture — before it may join a preparation. Bring Fernfoot's eyes with you: a scholar who can read a leaf in the Greenhouse can judge one at the intake bench. You are welcome at the door whenever you are ready.

Creative Arts · Unit V, Lesson 21 — Building the Plant Press
Set the bench by the window when you come, scholars. Your Greenhouse lesson promises that a pressed leaf's veins stay legible for years — my workshop builds the press that keeps that promise: level boards, even straps, pressure the same at every corner. Build it with me, prove it on plain paper first, and it will press your archive leaves honestly.
Further Reading & Sources
- Montana State University Extension: Plant Identification Basics — Leaf shapes, margins, and arrangement with clear diagrams, written for beginners learning weed and plant ID. - University of New Hampshire Extension: Leaf Characteristics Guide — Illustrated reference for leaf shapes and margin types. - Colorado State Extension: Leaf Identification Characteristics Worksheet — A hands-on worksheet for practicing leaf type, arrangement, venation, and margin vocabulary. - Australian National Botanic Gardens: Leaf Shape Character Notes — Precise botanical definitions of leaf shape terms from a national herbarium. - Missouri Botanical Garden: Plant Finder — Searchable plant database where you can look up your Scholar's Familiar and compare its described features with your observations. Browse the Herbology shelf in the school Library for readable editions of these works.
School of Evershade · Herbology Greenhouse · For personal educational use
Plants from this lesson stand in the Materia Botanica, the school's shared archive — each kept with its lessons, its keepings, and its cautions. This lesson's company:
LavenderOakOreganoRosemarySage The whole Materia BotanicaPROFESSOR BERYL FERNFOOT · HERBOLOGY GREENHOUSE
Submit your work for this lesson using the form below.
CONTINUE IN THE HERBOLOGY GREENHOUSE
← Previous · Lesson 1: The Scholar's Familiar Next · Lesson 3: Anatomical Architecture: Root Vaults →
Unit I — Morphology, Taxonomy & the Ancient Lore Herbology Greenhouse — All 37 Lessons
The rest of Unit I: Lesson 1 · Scholar's Familiar · Lesson 3 · Root Vaults · Lesson 4 · Binomial Classification · Lesson 5 · Historian's Herbarium · Lesson 6 · Baneful Greenhouse · Lesson 7 · Threshold Examination