

HERBOLOGY
Unit V · Lesson 37THE MASTER HERBOLOGIST'S GARDEN DESIGN
PROFESSOR BERYL FERNFOOT
Herbology Greenhouse
Master Herbalist
Herbology Greenhouse • Unit V: The Master Herbologist's Craft • Lesson 37
Professor's Introduction

My dear scholars,
Thirty-six lessons ago, you chose a single plant and learned to watch it. Since then you have learned what roots need, what leaves drink, how seeds wake, how cuttings root, when to prune, when to harvest, and how to keep what you have grown. Every one of those skills lives in your hands now.
This lesson asks you to gather them all into one drawing. A garden design is not a prettier way to plant. It is the decision, made on paper, to put the right plant in the right place at the right time, and to give every plant neighbors that help it thrive. Drawing first is the master's habit. Digging first is the beginner's, and you are beginners no longer.
What you draw in this lesson is the garden you will defend in the Master Herbologist Defense. Take it seriously, and take it slowly. The paper is patient. Be patient with it.
— Professor Beryl Fernfoot, Herbology Greenhouse • Master Herbalist • Head of House Oriens

The line beneath the map is our road: every stop a place where the knowledge of plants changed, every lesson a step along it.
Lesson Objectives
By the end of this lesson, you will be able to:
- Read a growing site the way Unit II taught you to read a pot: sun, soil, water, and microclimate, recorded before a single seed is sown.
- Choose plants by purpose and by fit, matching each plant's needs to what your site actually offers.
- Arrange plants using proven layout traditions: the Three Sisters, square foot spacing, honest companion planting, and the plant guild.
- Plan across time with succession sowing and a seasonal calendar, so the garden keeps giving all season.
- Draw a complete Master Garden Plan to scale, the document you will defend in the Master Herbologist Defense.
Reading this lesson: ★ marks the passages to remember. They return on the unit quiz and the class test. Check in questions ask the material back as you go; answer them in your workbook when you meet them.
Working this lesson: Your assignment packet is the first download on this page. Work in it as the lesson moves along, answering each assignment as its subject is taught — or read the lesson through for your notes and take the assignments as homework afterward. Both are proper ways to sit this class. Signposts in the reading tell you where each assignment belongs. Written answers are short answers in your own words; a few honest lines are worth more than a filled page.
Your Assignment Packet
This lesson's assignments live in its packet: the Lexicon Handout (every term, course terms marked ◆), Materials, Guided Practice, the Assignment Manual with its answer key for self-checking, the Reflection Questions, and the Workbook Checklist. Download the packet before you begin and keep it beside you as you read.
Why the Master Plans
There is a moment in every gardener's life when planting stops being a collection of individual acts and becomes a single act. You stop buying a plant because it is lovely and putting it where there is a gap. You start asking, before anything goes into the ground: what is this place like, what is this garden for, and who should live next to whom?
The growing plan you wrote in Lesson 16 was about one plant and its partnership with you. The Master Garden Plan is about many plants and their partnerships with each other. It draws on everything: the soil profile and sunlight study of Unit II, the propagation skills of Unit III, the harvest timing of Unit IV, and the plant knowledge you have gathered all along. Nothing in this course stands alone, and this lesson proves it.
★ A plan is also a kindness to your future self. In April, when every seed packet looks urgent and the nursery smells like possibility, the plan says what goes where. In July, when the basil is bolting and a square sits empty, the succession calendar says what goes in next. In October, when frost is coming, the seasonal calendar says what must be gathered and what may rest. The plan remembers so you do not have to carry it all in your head.
Check in: What three questions replace "there is a gap" when planting becomes a single act — and what does the plan remember for you in April, in July, and in October?
❦ In your workbook: record why the master plans in your own way — the single act, the partnerships between plants, and the plan as a kindness to your future self — copy, sketch, or note what matters.
Step One: Read the Site
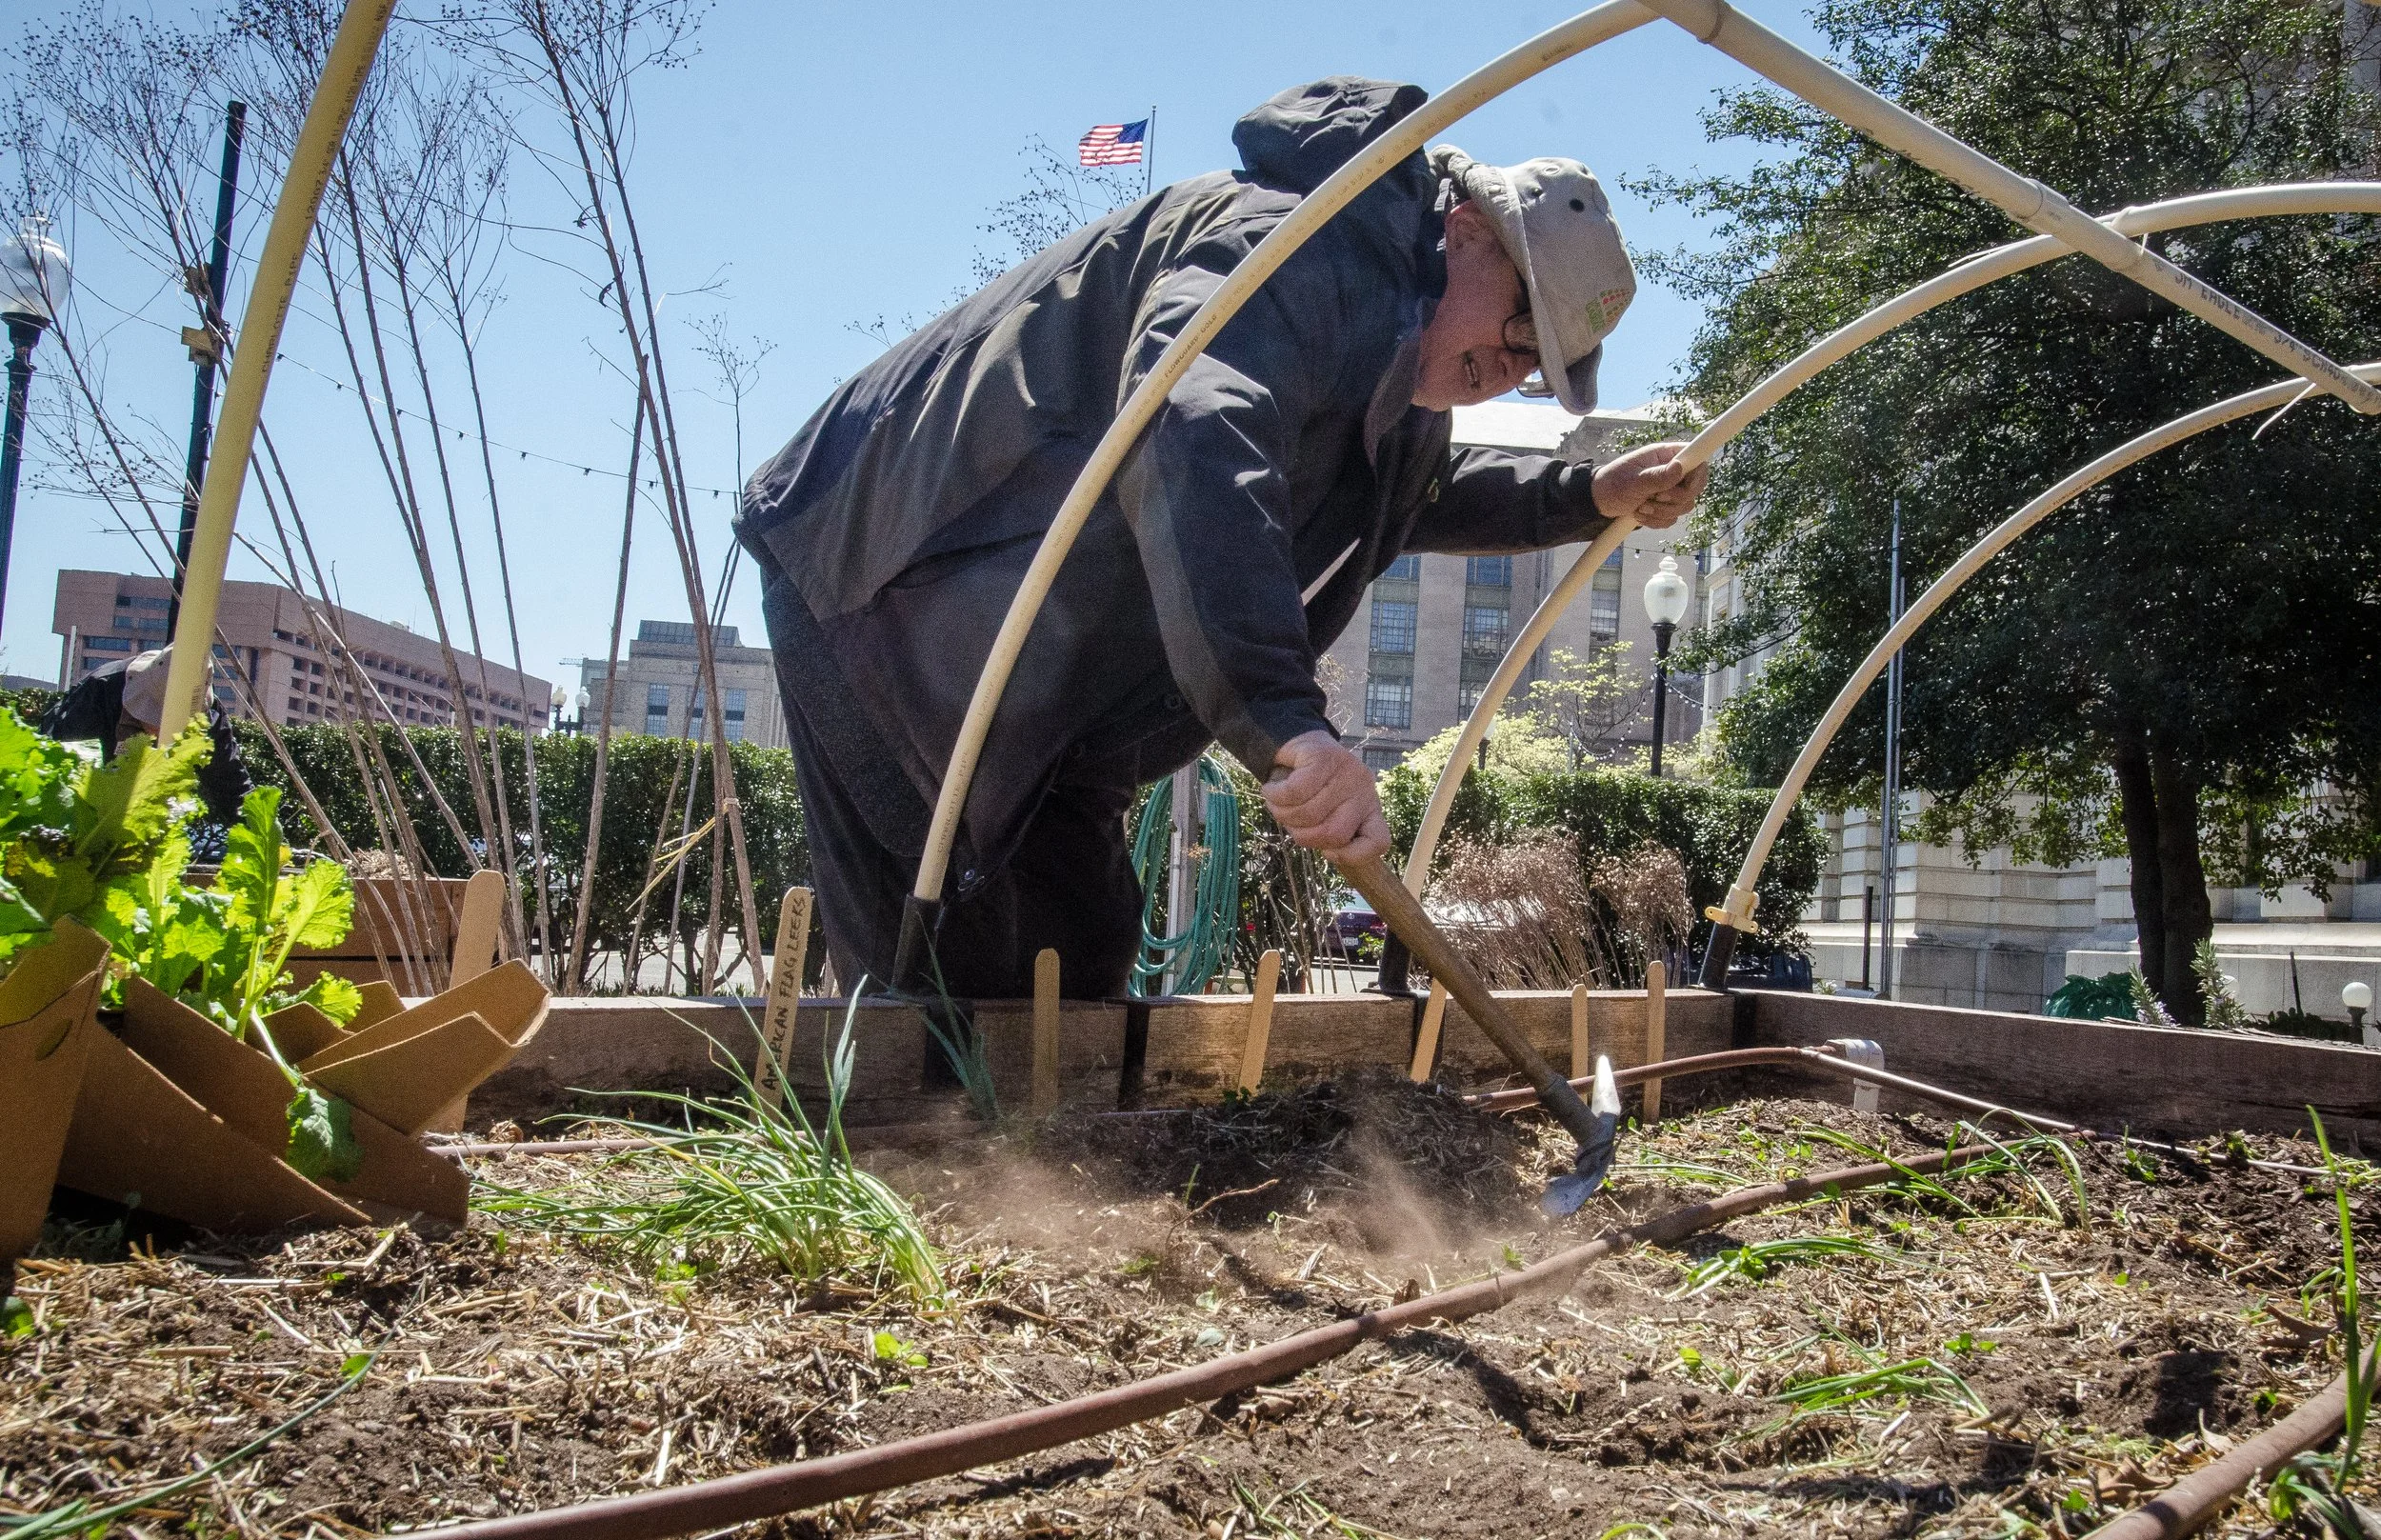
Preparing a raised bed at the USDA People's Garden, Washington, D.C., April 2016. A designed garden begins as this lesson teaches: a bed no wider than the gardener can reach, its water laid to hand, its labels ready — the site read before a single plant goes in.
U.S. Department of Agriculture photograph, 2016 People's Garden Planting (20160405-AMS-SLS-0273). Public domain (U.S. government work).
Every design begins with reading, not drawing. You have spent this whole course learning to read plants. Now read a place.
Walk it with the sun. Revisit your sun mapping from Lesson 12, but this time for the whole garden area rather than one windowsill. Stand in the space at morning, midday, and late afternoon. Note where buildings, fences, and trees throw shade, and at what hours. The sunniest patch belongs to the plants that hunger for light: most culinary herbs, tomatoes, and flowers. The shadier corners belong to the shade-tolerant: mint, parsley, and chives will all accept partial shade gracefully. If you are designing for containers on a balcony, map the balcony the same way. The scale changes; the method does not.
Know the ground. You know how to read soil by now: texture, drainage, pH, and nutrition, the four investigations of Unit II's first half. Test the garden soil as you tested your Familiar's mix. A garden bed is simply a very large pot, and the same truths apply. If the ground is poor, you are not stuck with it. Raised beds filled with good mix, the compost you learned to make in Lesson 11, and mulch are all ways to build the soil you need rather than inherit the soil you have.
Find the microclimates. Lesson 14 taught you that a south-facing wall and the north side of the same fence are different countries. Map them. The warm wall is where you plant the tender basil and the rosemary that dislikes wet winters. The low dip where cold air settles is where you plant the hardy and the forgiving. The windy corner gets a windbreak, even a temporary one, or gets planted with the sturdy and the low.
Trace the water. Where does water come from, and where does it go? Note the outdoor tap, the rain barrel if there is one, and how far each bed sits from water. A bed you must cross the whole yard to water will be watered less often; design accordingly, or accept that truth and plant it with the drought-tolerant. Watch where rain runs off and where it puddles. Plants dislike both extremes.
Measure access. A garden you cannot reach comfortably is a garden you will neglect. Paths must be wide enough for you and your wheelbarrow, your basket, or your wheelchair. The bed should never be wider than you can reach across from one side; four feet is the traditional maximum for a bed worked from both sides, and it comes from the human arm, not from any plant's preference.
★ Draw all of this on your first sketch: the outline of the space, the sun's path, the shady spots, the water source, the paths, the microclimates. Label everything and date it. This is your site assessment, and it is the foundation everything else stands on.
Check in: Name the five readings a site assessment makes — and say where the four-foot bed width comes from.
❦ In your workbook: record reading the site in your own way — the sun's walk, the ground, the microclimates, the water, and the reach of your own arm — copy, sketch, or note what matters.
In your packet: Exercise I — The Site Assessment Map ⚒ begins here. Work it now, or mark the place and take it as homework — your choice.
Step Two: Choose Plants with a Purpose
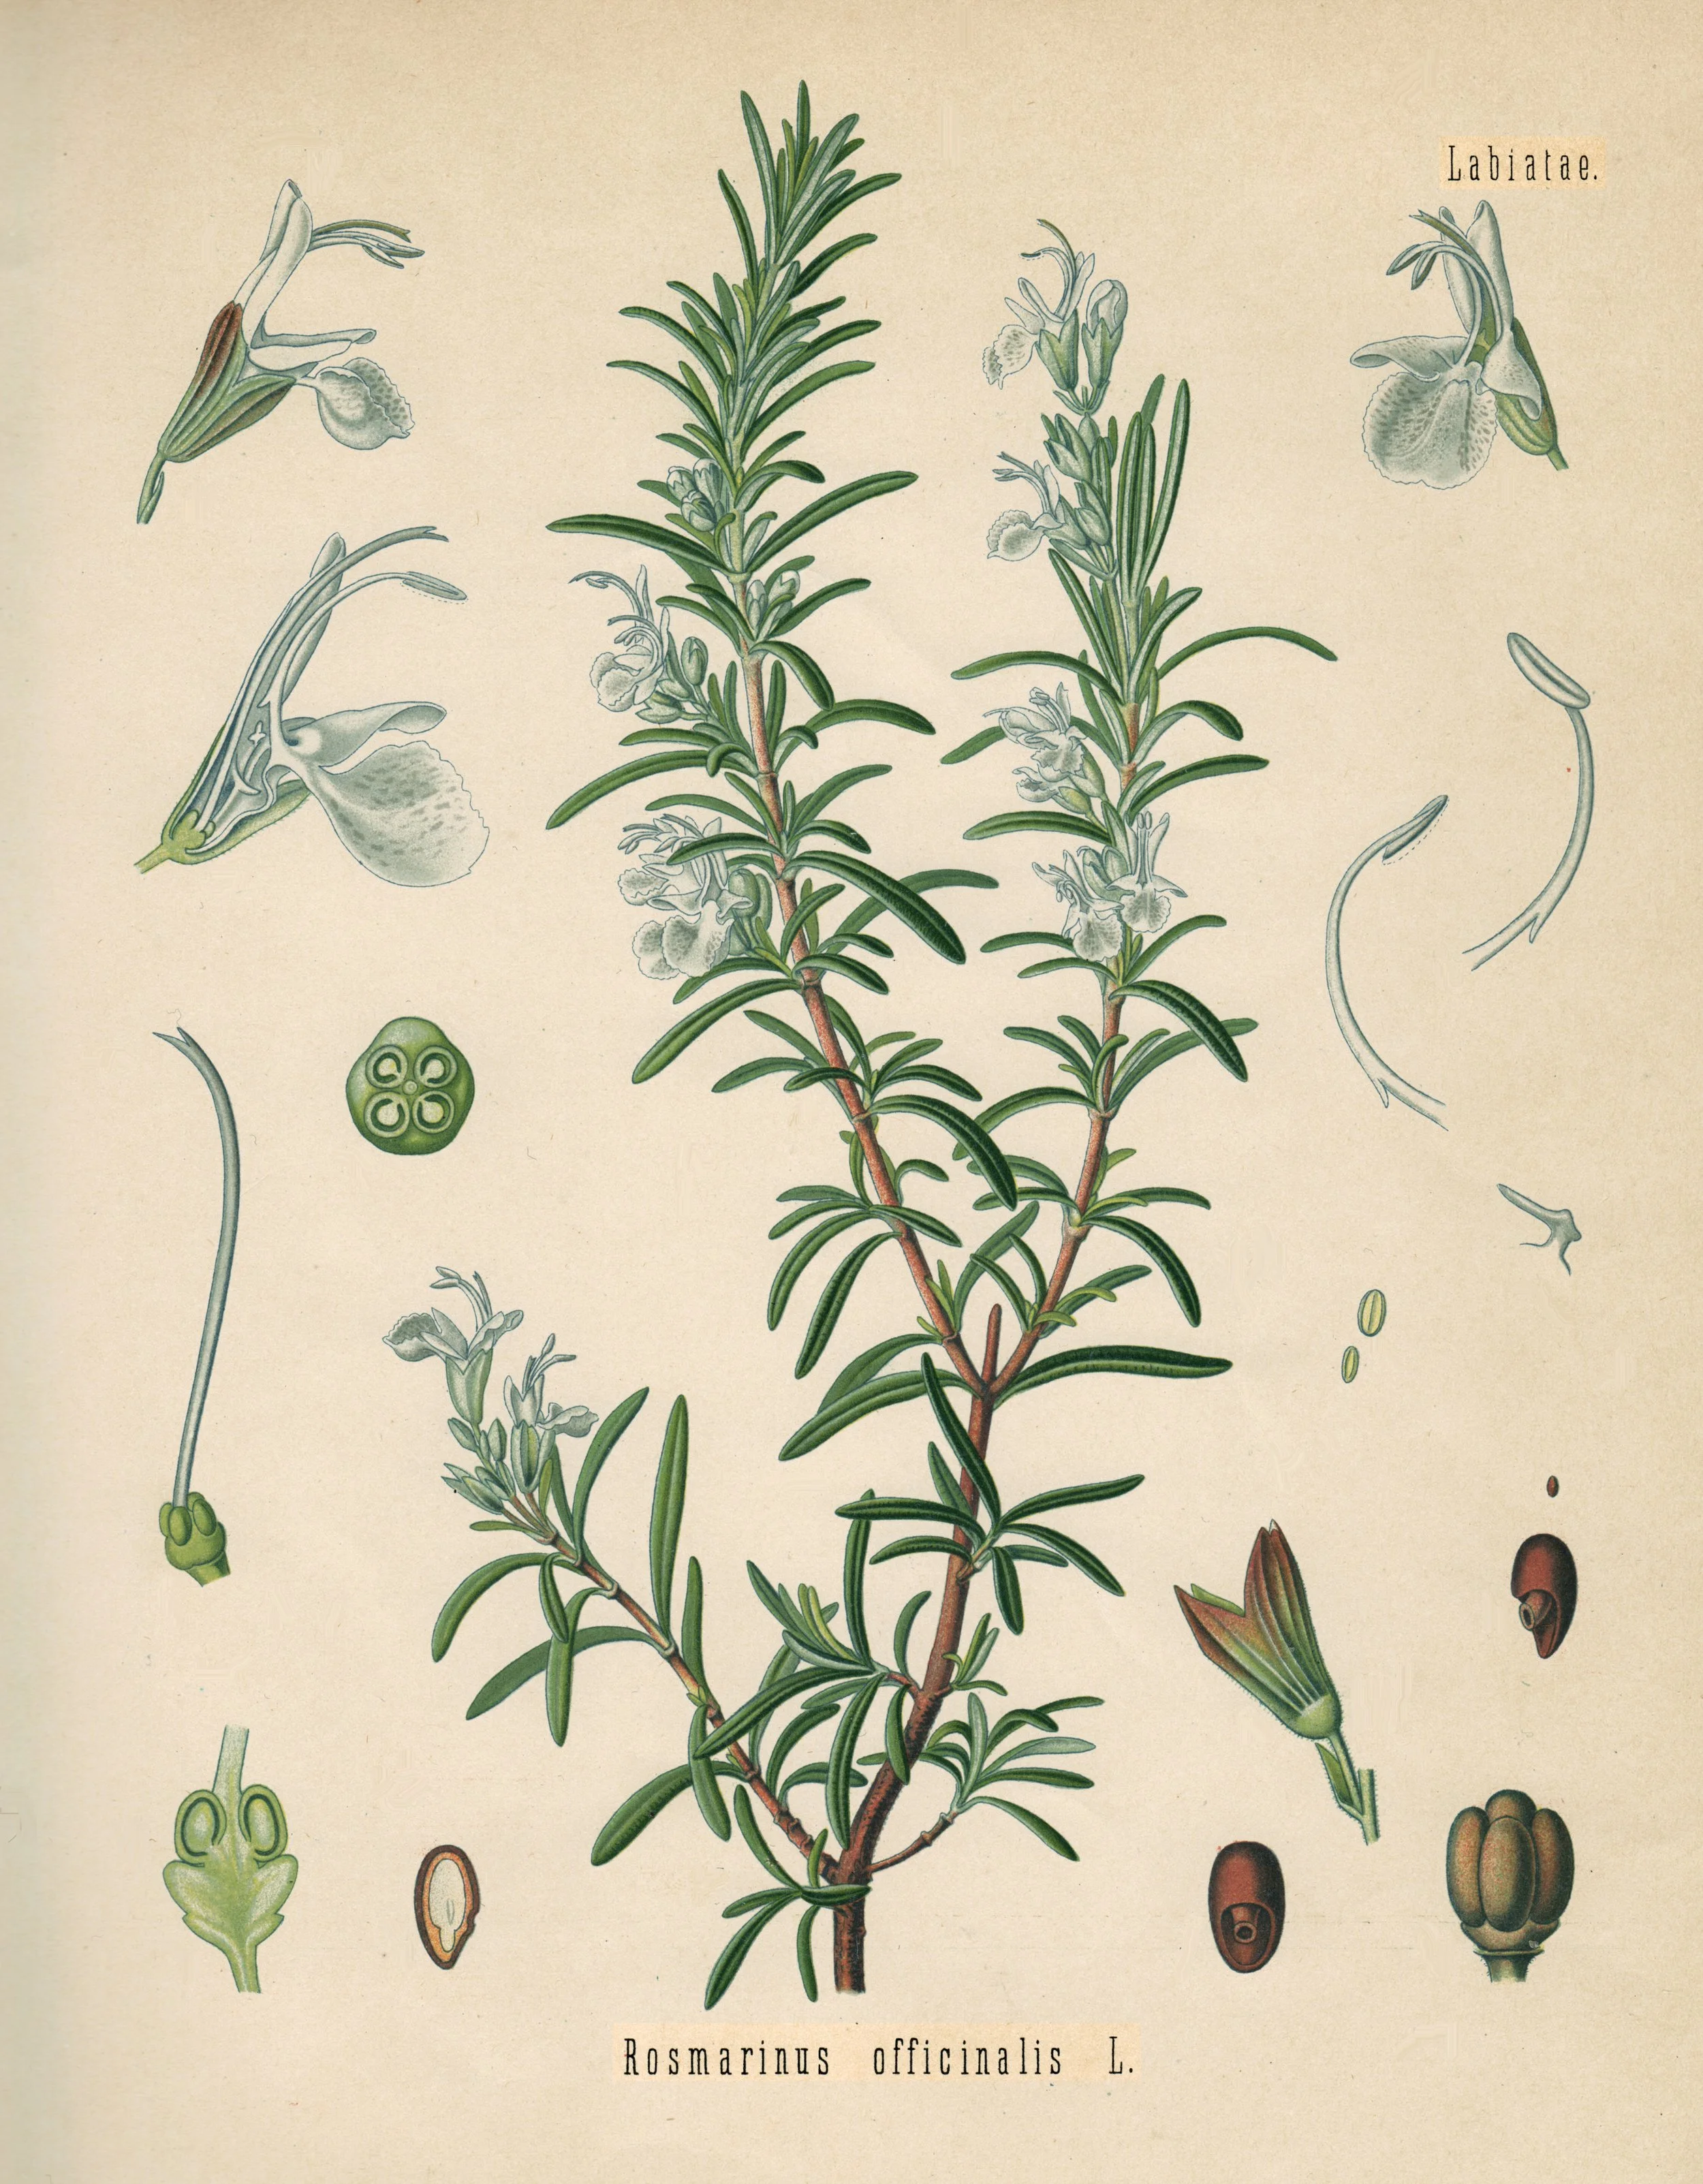
Rosemary (Rosmarinus officinalis), from Köhler's Medizinal-Pflanzen. The lesson's matchmaking example — lean soil, sharp drainage, full sun — and the central plant of its miniature herb guild: a rosemary bush in a large container, with helpers around it.
Plate from Köhler's Medizinal-Pflanzen (Franz Eugen Köhler). Public domain.
A garden designed around a purpose outlasts a garden designed around impulse. Ask yourself what the garden is for, and answer honestly. A kitchen garden is planted with what you actually cook with, not with what looks impressive in a catalog. A pollinator patch is planted for flowers across the whole season. A dye garden is planted for color. A tea garden, a medicine-free pleasure garden of scents and textures for sitting in: all are worthy purposes, and each one chooses different plants.
★ Once the purpose is named, choose plants by fit. This is the oldest rule in the design book, and it deserves its famous phrasing: right plant, right place. A rosemary that wants lean soil and sharp drainage will sulk in rich, wet ground no matter how much you love it. A mint that wants moisture will thrive in the damp corner where the rosemary would drown. The gardener's job is not to force plants into places. It is to matchmake.
Read the mature size of everything you plant, not the size on the nursery tag. That tidy one-gallon lavender is planning to become a two-foot shrub. That innocent mint sprig is planning to conquer the county. Give each plant the room its future self will need. Crowding is the most common design mistake, and it is made with the best intentions.
Check your frost dates and your hardiness zone before you fall in love with a plant list. A perennial in one climate is an annual in another, and your seasonal calendar must know which. Your seed packets and reputable references will tell you the truth. Believe them over your hopes.
(If you are following the adopted-plant path instead of keeping a Familiar, design the garden you would build if you had the ground for it, and note at the top of your plan that it is a design study. The thinking is identical; only the digging is deferred.)
Check in: State the right-plant-right-place rule through the rosemary and the mint — and say why the nursery tag's size is the wrong size to design by.
❦ In your workbook: record choosing plants with a purpose in your own way — your garden's purpose in one sentence, the matchmaking rule, and the mature sizes you must allow for — copy, sketch, or note what matters.
In your packet: Exercise II — The Plant List ✎ begins here. Work it now, or mark the place and take it as homework — your choice.
Step Three: Arrange the Neighborhoods
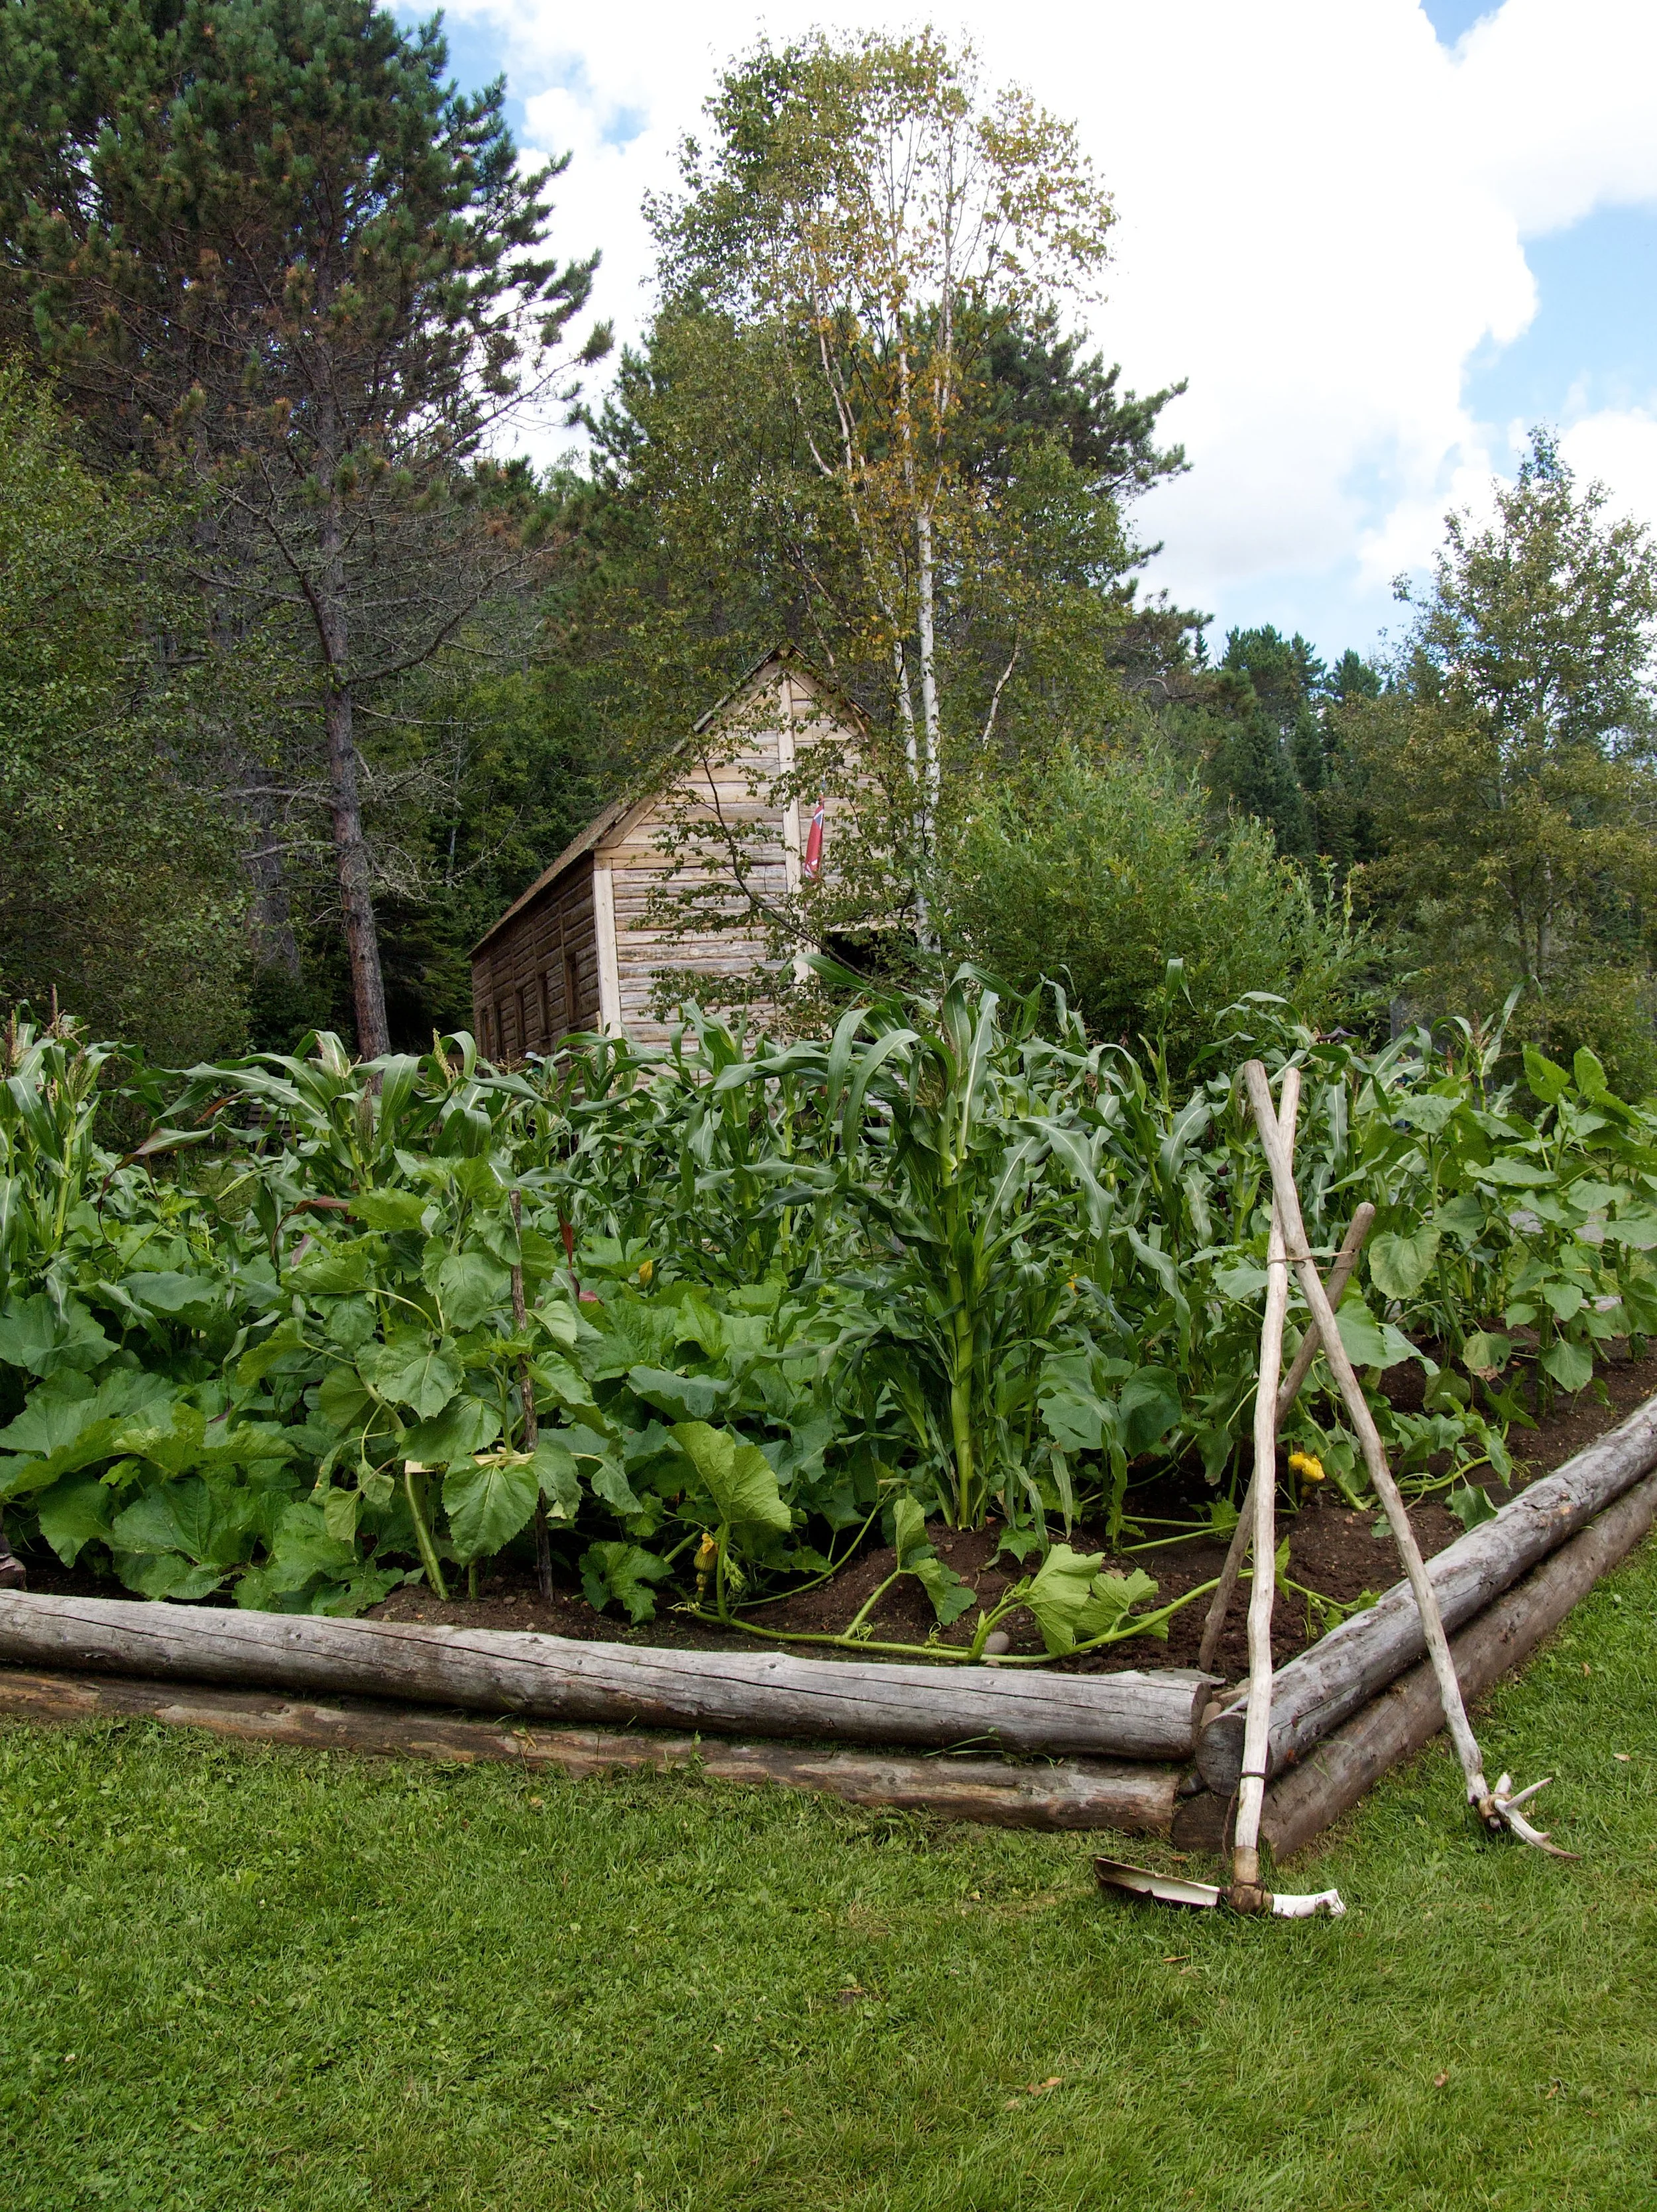
A Three Sisters garden growing at the Ojibwe Village, Grand Portage National Monument. Corn stands tall as the living trellis, beans climb and fix nitrogen, and squash spreads its broad leaves across the soil as living mulch — the oldest companion planting in this course, photographed growing.
National Park Service photograph (NPGallery), Grand Portage National Monument. Public domain (U.S. government work).
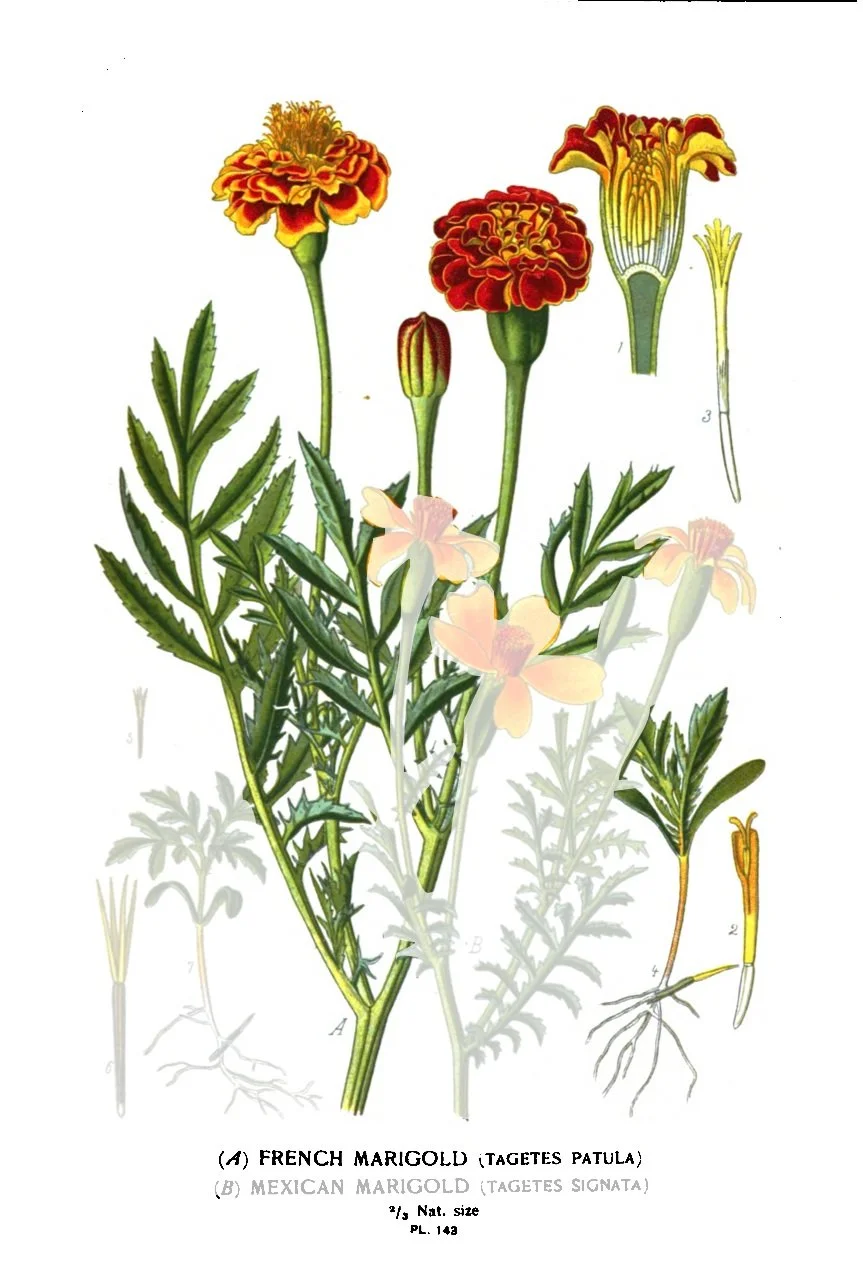
French marigold (Tagetes patula), plate 143 of Favourite Flowers of Garden and Greenhouse (1897). Plant it with tomatoes for the reason the evidence supports — its limonene slows whiteflies — and in the worked example's corners for beauty, which needs no study to justify.
Step, E. & Watson, W., Favourite Flowers of Garden and Greenhouse, Vol. 2 (Frederick Warne & Co., 1897), plate 143A. Public domain.
Plants, like people, do better with good neighbors. How you arrange them is where design becomes craft, and gardeners have developed several great traditions for it. Each one is a tool. Learn them all, and choose among them.
★ The Three Sisters. Long before any gardening book, the Haudenosaunee peoples of North America developed a planting of corn, beans, and squash grown together in mounds, a method already centuries old when Europeans arrived in the 1600s. The corn grows tall and gives the climbing beans a living trellis. The beans, through bacteria in their root nodules, draw nitrogen from the air into the soil. The squash spreads broad leaves across the ground, shading out weeds and holding moisture in the soil like a living mulch. Planted in sequence, corn first, then beans once the stalks stand sturdy, then squash around the mound's edge, the three feed each other and the gardener. It is the oldest companion planting in this course, and the most proven.
★ Companion planting, honestly. Gardeners have paired plants for centuries on the belief that some combinations protect or improve each other. Some of this is now supported by real science, and some of it is not, and a master herbologist should know which is which. The strongest evidence belongs to French marigolds grown with tomatoes: University of Newcastle researchers confirmed in glasshouse trials that marigolds release limonene, a compound that confuses and slows whiteflies, protecting the neighboring tomatoes through the whole season. Basil and marigolds together have reduced thrips in tomato plantings, and marigolds tilled into soil can suppress root-knot nematodes. But many beloved claims, like basil improving tomato flavor or marigold scent repelling aphids, have little evidence behind them, and one study even found tomatoes yielding slightly less beside peppermint. So plant your marigolds with your tomatoes, scholars, and plant them because the evidence is real. But do not promise your garden what the science cannot.
The square foot method. In 1981, an American engineer turned gardener named Mel Bartholomew published a book that changed small-space gardening. His method: build a raised bed four feet by four feet, mark it into sixteen one-foot squares, and plant each square by spacing. One plant per square for large plants like tomatoes or peppers. Four per square for medium plants spaced six inches apart. Nine per square at four-inch spacing. Sixteen per square at three-inch spacing for the small and quick, like radishes and carrots. The grid removes guesswork, ends wasteful thinning, and turns a small bed into a serious garden. It is an excellent skeleton for a first herb garden, and we will use it in our worked example.
Check in: Give each Sister her job and her planting order — then name the one companion pairing whose evidence is strongest, and one beloved claim the evidence does not support.
❦ In your workbook: record arranging the neighborhoods in your own way — the Three Sisters, the honest marigold evidence, and the 1-4-9-16 square foot spacings — copy, sketch, or note what matters.
Professor's Mid-Lesson Note
Scholars, a confession and a warning in one. Every arrangement tradition in this section works best when you remember what each one actually is. The Three Sisters is Indigenous science refined over centuries. Square foot gardening is engineering applied to soil. The plant guild, which we meet next, is a design framework from the permaculture tradition. None of them is magic. All of them are tools, and a master knows her tools by their true names and their true limits.
— Professor Beryl Fernfoot, Herbology Greenhouse • Master Herbalist • Head of House Oriens
Step Four: Plan Across Time
A garden is not a painting. It is a calendar with roots. The finest layout in April is an empty promise by August unless time is part of the design.
★ Succession sowing is the practice of planting small batches of quick crops at intervals rather than all at once, so the harvest arrives in a steady stream instead of a single flood. University extension guidance recommends sowing fast crops like radishes, lettuce, and salad greens at roughly two-week intervals through the growing season. Sow a short row of radishes, and two weeks later sow another. By the time the first row is harvested and finished, the second is ready, the third is growing, and a fourth is just sprouting. When a row is exhausted, work an inch of compost into it and sow again. The bed is never empty and never overwhelming. This is the practical application of the seasonal thinking you learned in Lesson 15.
The seasonal calendar you built for your Familiar in Lesson 16 now expands to the whole garden. For each plant, note when it is sown or planted, when it is harvested, and when it rests or is removed. Anchor the calendar to your local frost dates: last frost in spring, first frost in autumn. Cool-season crops go in early and again in late summer. Warm-season crops wait until the soil has truly warmed. Write it all down. A calendar on paper is a promise to the future; a calendar in your head is a wish.
Interplanting is the quiet art of filling time gaps. Sow radishes between slow-growing carrots; the radishes will be harvested before the carrots need the room. Tuck lettuce under young tomato plants; it will be finished before the tomatoes shade it out. Every empty inch of soil for more than a few weeks is an invitation to weeds. Plant something, or mulch it.
Check in: How does succession sowing turn a single flood into a steady stream — and what anchors the seasonal calendar at both ends?
❦ In your workbook: record planning across time in your own way — the two-week sowings, the frost-anchored calendar, and the gaps interplanting fills — copy, sketch, or note what matters.
The Plant Guild
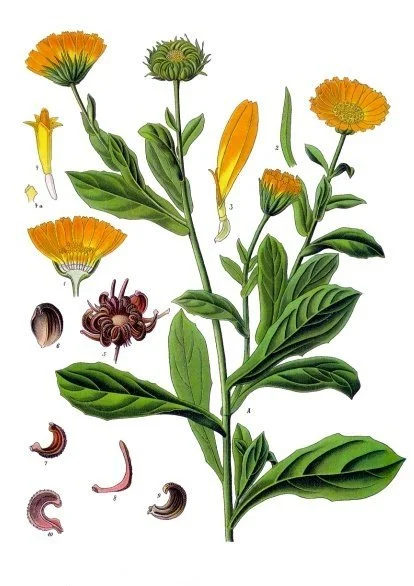
Calendula (Calendula officinalis), from Köhler's Medizinal-Pflanzen. In the guild's classic roles, calendula is a pollinator attractor: its flowers feed the visitors the whole community depends on.
Franz Eugen Köhler, Köhler's Medizinal-Pflanzen, plate 24. Public domain.
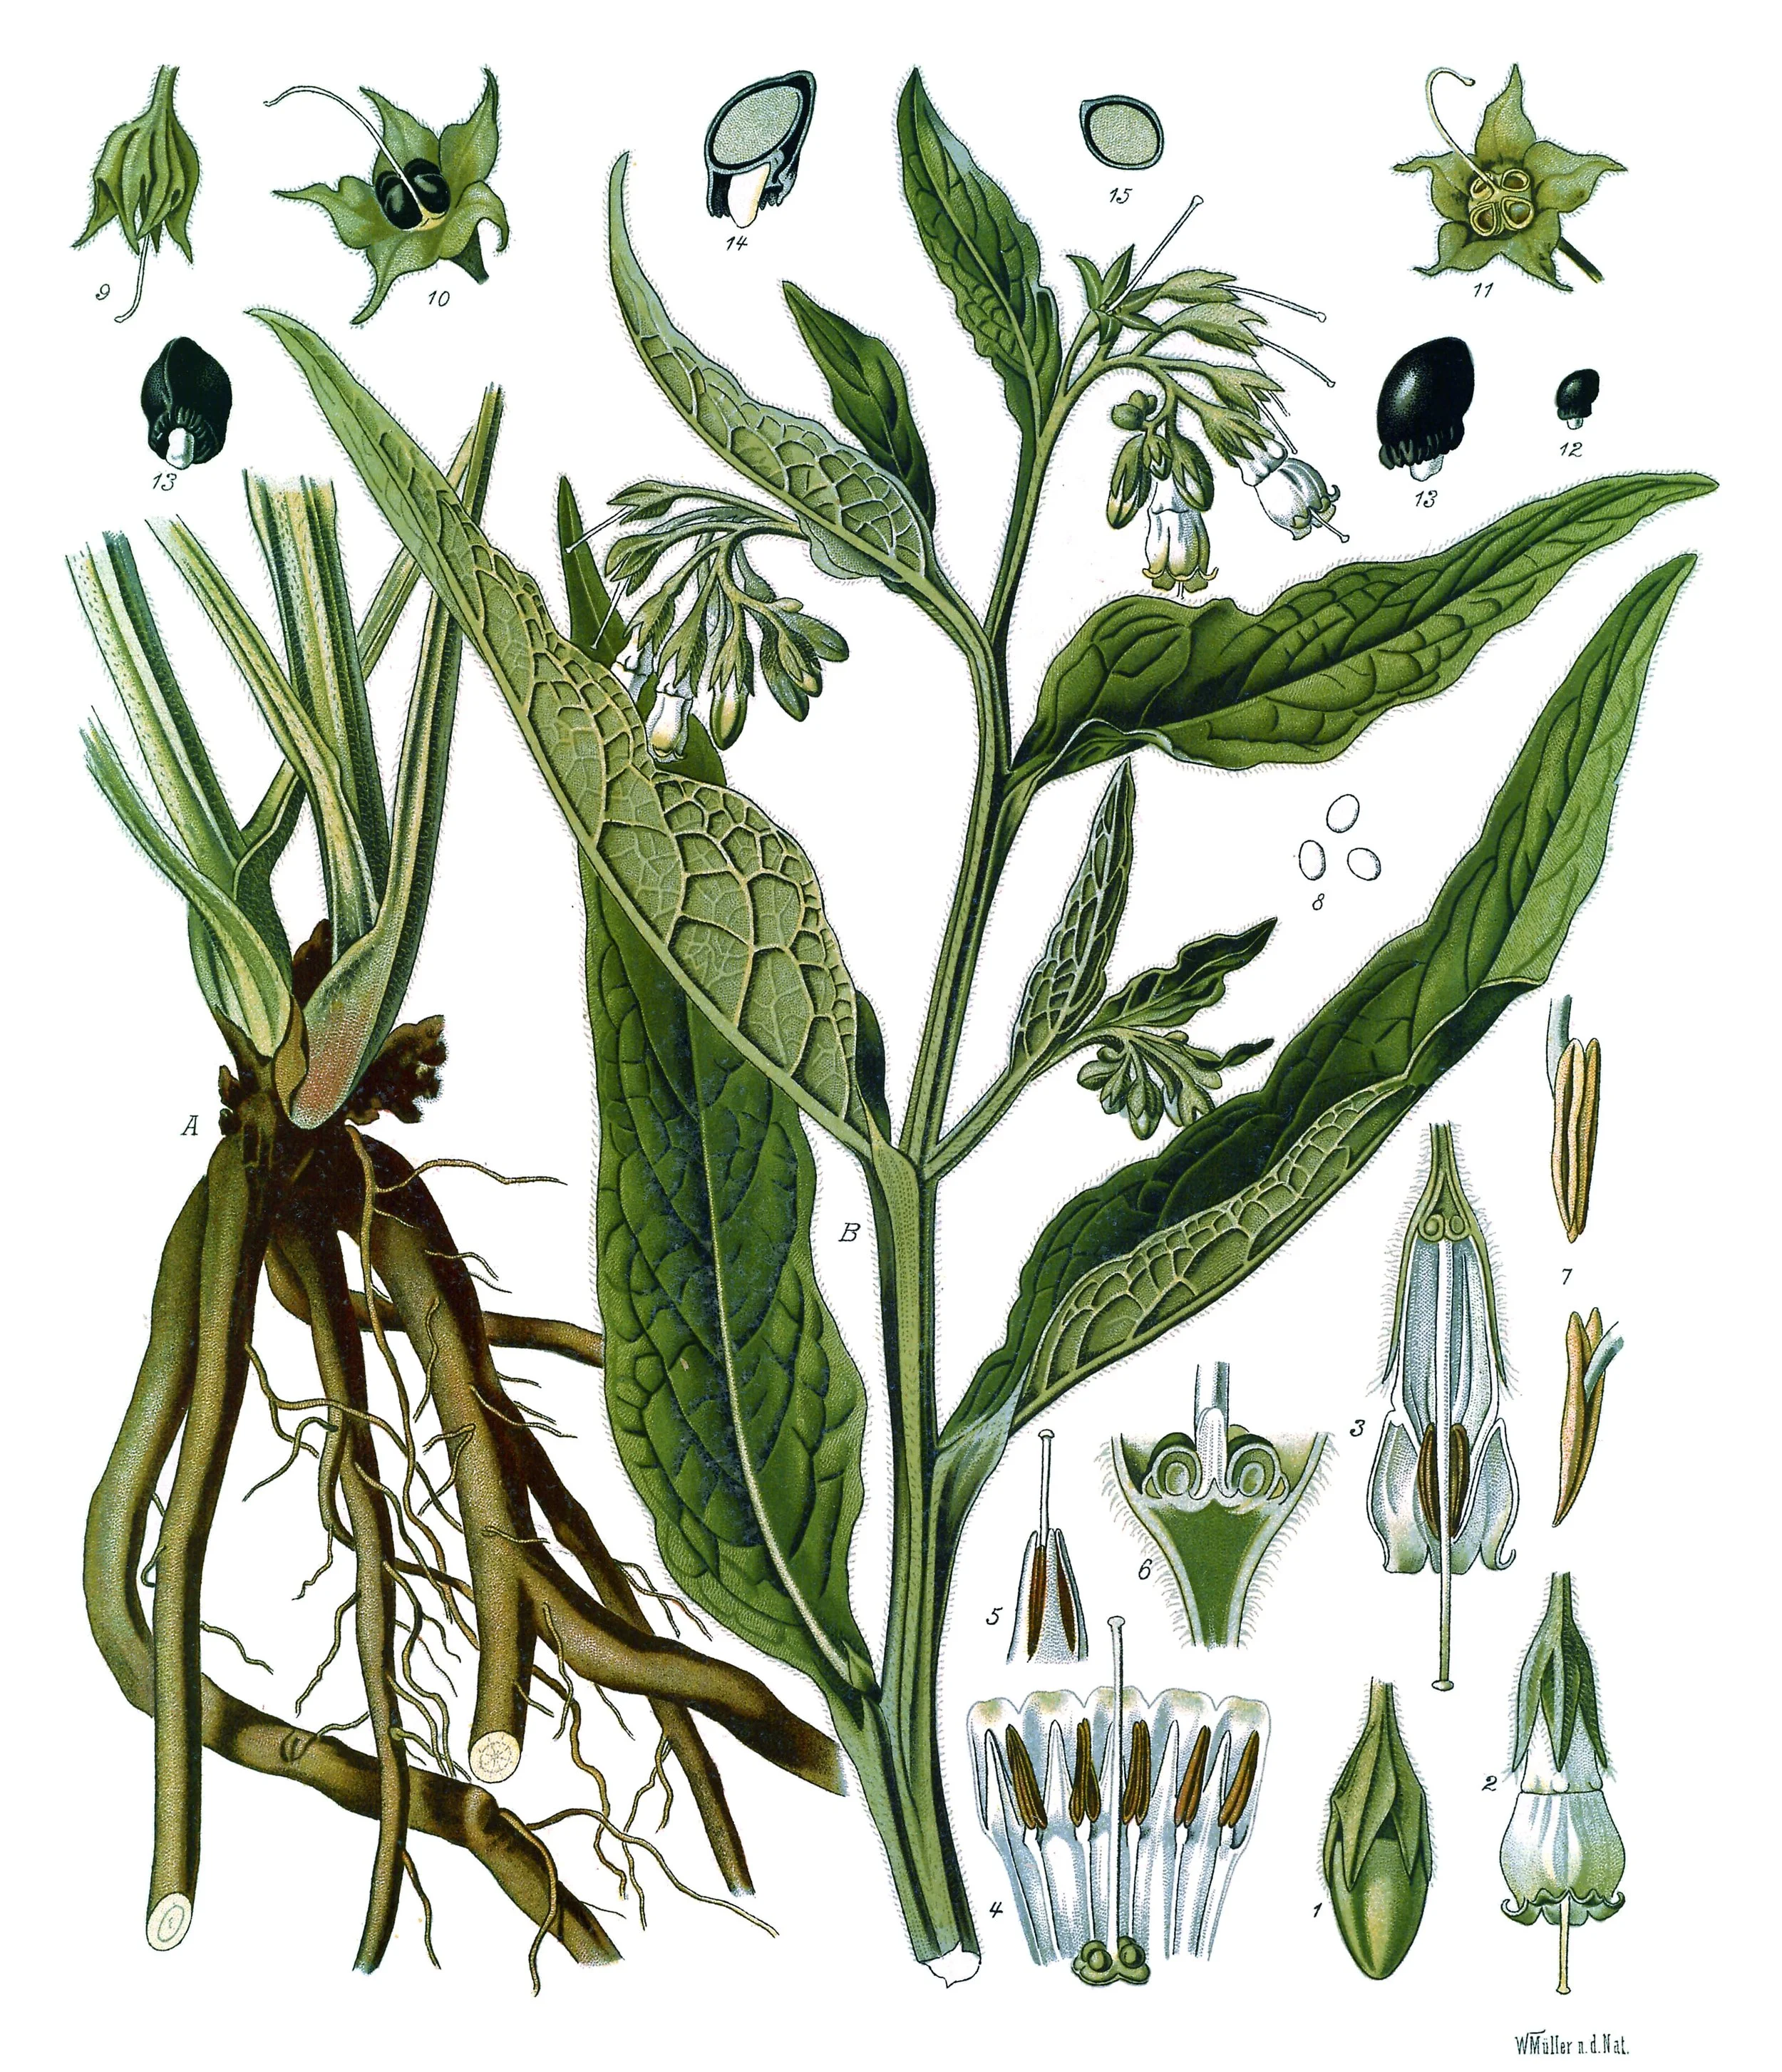
Comfrey (Symphytum officinale), from Köhler's Medizinal-Pflanzen. The guild's classic mulch producer: deep roots draw minerals up from the subsoil, and the cut leaves, left lying around the central plant in chop and drop, feed the soil as they decay.
Walther Otto Müller, plate from Köhler's Medizinal-Pflanzen. Public domain.
There is one more arrangement tradition, and it is the most ambitious. It comes from permaculture, the design tradition that studies how natural ecosystems sustain themselves, and it is called the plant guild.
★ A guild is a small community of plants assembled around one central plant, usually a fruit tree or large shrub, in which every member has a job. The permaculture designer thinks in functions: what does this plant do for the group? The classic roles include nitrogen fixers like clover or beans, which feed nitrogen to the soil; deep-rooted plants like comfrey or dandelion, called dynamic accumulators in the tradition, which draw minerals up from the subsoil; pest-confusing aromatic plants like garlic chives or mint; pollinator attractors like borage or calendula; groundcovers like strawberries or thyme that shade the soil and suppress weeds; and mulch producers, comfrey again, which are cut down and left lying around the central plant in a practice called chop and drop, feeding the soil as they decay.
Be honest about what a guild is and is not. It is a design framework, a way of thinking about relationships rather than a set of guaranteed results. The individual roles are real: clover does fix nitrogen, groundcovers do suppress weeds, flowers do attract pollinators. But a guild is not a machine you assemble once and ignore forever. It needs tending, thinning, and honest observation, like everything else in gardening. Use it as a way to design communities, not as a promise that the community will run itself.
For your Master Garden Plan, you may design a true guild around a fruit tree or large shrub if you have the space, or a miniature herb guild around a central plant like a rosemary bush or a bay tree in a large container. The thinking is the same at any scale: one center, several helpers, every plant earning its place.
Check in: Name the guild's classic functional roles — and say what a guild is not, in the lesson's own honest terms.
❦ In your workbook: record the plant guild in your own way — one center, several helpers, every plant earning its place by a named job — copy, sketch, or note what matters.
A Worked Example: The Four-Foot Herb Square
Let me design a small garden with you, so you can see every step working together. Our site: a sunny corner of a backyard, four feet by four feet, with at least six hours of sun. Our purpose: a kitchen herb garden for one cook.
The site assessment tells us the corner gets morning and midday sun, the soil is average garden loam that drains decently, the outdoor tap is twenty steps away, and a fence to the north means tall plants can go along the north edge without shading anything. The bed will be worked from all sides, so four feet square is the right size.
The plant list, chosen for purpose: basil for summer cooking, flat-leaf parsley, chives, thyme, oregano, and mint. Mint is the troublemaker of this list. It spreads by runners and will swallow a small bed in a season. So the mint does not go in the bed at all. It goes in its own large pot, sunk into one corner square, where its wandering roots are trapped. This is the kind of decision a plan makes easy and impulse makes painful.
The arrangement, by square foot spacing and neighborhood sense: - North row: parsley (four per square, two squares) along the north edge, since it tolerates a little shade and grows upright. - Center squares: basil, one plant per square in four squares, because basil grows large and hungry. - South row: thyme (nine per square) and oregano (four per square) in the sunniest squares, both lovers of heat and sharp drainage. - East edge: chives (nine per square), whose flowers will attract pollinators to the whole bed. - Corners: French marigolds, one per corner square, for the whitefly protection the science supports and for the beauty, which needs no study to justify. - The mint pot sits in its square, labeled and contained.
Tall at the north, short at the south, so nothing shades its neighbor. Aromatic pest-confusion from the chives and marigolds. Pollinator flowers from the chives and marigolds. The nitrogen question is answered by the compost worked in before planting, honest soil care rather than wishful thinking.
Across time: basil is succession-sown, a new square every three weeks from May through July, so there is always young basil coming on. Radishes are interplanted between the slow-starting parsley in spring and harvested before the parsley needs the room. The seasonal calendar reads: sow parsley and chives early, transplant basil after the last frost, harvest all summer, take the last basil before the first frost, mulch the thyme and oregano for winter.
The sketch is drawn to scale on graph paper, one square per inch, with every square labeled, the north arrow marked, and the water source noted. It is dated. Anyone reading it could build this bed.
That is a Master Garden Plan in miniature. Yours will be your own: your site, your purpose, your plants.
Check in: Why does the mint never enter the bed itself — and why do the tall plants stand at the north?
❦ In your workbook: record the worked example in your own way — the contained mint, tall at the north and short at the south, and the sketch anyone could build from — copy, sketch, or note what matters.
In your packet: Exercise III — The Guild and the Drawing ⚒ begins here. Work it now, or mark the place and take it as homework — your choice.
Your Turn: The Master Garden Plan
This is the great work of the lesson, and it is the document you will defend.
If you have ground to design: complete a full site assessment of your real growing space, following Step One. Choose your plants by purpose, following Step Two. Arrange them using at least two of the traditions from Step Three. Plan across time with succession sowing and a seasonal calendar, following Step Four. Draw the plan to scale, label everything, and date it. If you include a guild, name each plant's functional role.
If you are following the adopted-plant path: design the garden you would build, as a design study. Complete the site assessment for a real place you know well, a corner of a park, a community garden plot, a generous balcony. Everything else is the same. Mark the plan clearly as a design study.
If your Familiar is a houseplant: give it its place of honor in the plan. A Master Garden Plan may include containers, windowsills, and indoor growing stations alongside outdoor beds. The course has always been about real growing in real homes.
Include a one-page design journal entry with your plan: why you chose this purpose, which arrangement traditions you used and why, what you are least sure about, and what you will watch for in the first season. Honesty about uncertainty is a master's trait. Certainty without evidence is a beginner's.
★ File the finished plan in your Scholar's Familiar Journal as the closing practical work of the course's lessons. You will present and defend it in the Master Herbologist Defense.
Check in: What four things does the one-page design journal entry record — and where is the finished plan filed, and for what occasion?
❦ In your workbook: record your turn in your own way — which path is yours, the two traditions you will use, and the uncertainty you will honestly name — copy, sketch, or note what matters.
The Design Journal
Keep a design journal from this lesson forward, a notebook or section of your journal devoted to the garden as a whole rather than to single plants. In it, record what you planted where and when, what thrived and what sulked, which neighbors seemed to help and which competed, and what you will change next season. A garden designed once and never revised is a garden that stopped learning. Yours will learn every year.
Gardeners have kept such records for centuries. The great estate gardens of history ran on them. Your four-foot square deserves the same seriousness, and it will repay the attention many times over.
Check in: What does the design journal record that a single-plant journal does not — and what is a garden that is never revised?
❦ In your workbook: record the design journal in your own way — the garden as a whole, season by season, revised as it learns — copy, sketch, or note what matters.
Safety Notes
- Survey your site in sun-safe conditions: hat, water, and sunscreen for extended outdoor work. Never look directly at the sun when mapping light; judge it by shadows and surfaces.
- Watch your step on slopes, wet ground, and uneven terrain while measuring. Take a companion if the site is remote.
- Confirm the identity of every plant before it goes in the ground, and before anything is tasted. Never eat an unidentified plant.
- Wash your hands after handling soil, compost, and amendments. Keep fertilizers and soil test reagents away from children and pets, used exactly as labeled.
- Lift bags of soil, compost, and stone with your legs, not your back. A full bed's worth of material is heavy; move it in loads.
Check in: How do you judge the sun's light without looking at it — and how are heavy bags lifted?
❦ In your workbook: record the safety notes in your own way — sun-safe surveying, sure footing, certain identification, and lifting with your legs — copy, sketch, or note what matters.
Guided Observation: Reading a Place Before You Draw It
This lesson's observation is the site-reader's walk, worked in full before a single plant is chosen: a slow reading of one real place — its sun, its ground, its warm and cold corners, its water, and your own reach across it — because every line of the Master Garden Plan stands on what this walk finds.
You will need:
- the growing space you will design, or the real place chosen for your design study
- graph paper and a pencil
- a ruler or tape measure, or your own steady pace once you know your stride
- a compass, or the compass on a phone, to mark north
Walk it with the sun. Stand in the space at morning, midday, and late afternoon. At each hour, note where buildings, fences, and trees throw shade, and where the sunniest patch lies. Judge the light by shadows and surfaces — never look directly at the sun.
Read the ground. Note the soil as Unit II taught you: its texture in your hand, how it drains after rain, where it puddles and where it runs off. A garden bed is simply a very large pot, and the same truths apply.
Feel the microclimates. Find the warm wall, the cold dip where air settles, and the windy corner. The same fence has two countries on its two sides; mark which is which on your sketch.
Trace the water and the reach. Mark the outdoor tap or rain barrel and count the steps to each part of the space. Then test your own reach: the bed should never be wider than you can reach across from one side — four feet, the measure of the human arm, is the traditional maximum.
Consider:
- Where does the sun fall longest, and which plants in your mind already belong there?
- Which corner did the walk change your mind about — and what did it feel like, not just look like?
- How far is the farthest bed from water, and what will that distance do to your watering in July?
Indoor / window alternative: if you cannot walk a plot this week — or your garden is a windowsill, a balcony, or an indoor growing station — read that place the same way from inside: map the sun's path across the glass at three hours, note which sill is warm and which corner is cold, trace your water from the nearest tap, and measure your reach across the sill or shelf. The scale changes; the method does not.
Workbook path: if no real place is within your reach this week, work the reading on a place you know well from memory and photographs — a corner of a park, a community garden plot, a generous balcony — and draw the site assessment sketch from that evidence, marked as a design study. The reading is the skill; the visit is its next occasion.
Materials
Required (Level One — household items)
- Graph paper and pencil: the designer's first tools. One square per inch makes a four-foot bed four inches across.
- A ruler or tape measure: for measuring the site. A steady pace works too, once you know your stride.
- A compass: a simple hiking compass, or the compass on a phone, to mark north on your plan.
- Your sun-mapping notes: from Lesson 12, or a fresh round of morning, midday, and evening observations.
- Your soil test results: from Unit II, or a fresh jar test of the garden soil.
- Seed catalogs or reputable references: for mature sizes, sun needs, and frost dates. Your seed packets will tell you most of this.
- Your Scholar's Familiar Journal: the Master Garden Plan is filed here as the closing practical work of the course.
Suggested (Level Two — historically closer)
- Drafting paper and a scale ruler: for a finished, presentation-quality plan for the Defense.
- A min-max thermometer: for recording your microclimate's temperature range over several days.
- A rain gauge: for measuring what the sky gives your site before you plan around it.
- A soil test kit: for pH and basic nutrients, dated like every other reading in this course.
Safety notes: Survey your site in sun-safe conditions: hat, water, and sunscreen for extended outdoor work. Judge light by shadows and surfaces, never by looking directly at the sun. Watch your step on slopes, wet ground, and uneven terrain while measuring. Take a companion if the site is remote. Confirm the identity of every plant before it goes in the ground, and before anything is tasted. Never eat an unidentified plant. Wash your hands after handling soil, compost, and amendments. Keep fertilizers and soil test reagents away from children and pets, used exactly as labeled. Lift bags of soil, compost, and stone with your legs, not your back, and move heavy loads in trips.
Reflection Questions
Answer the following questions in your workbook.
- Why must a site assessment come before any plant is chosen, and what goes wrong when the order is reversed?
- Explain the right-plant-right-place rule using a rosemary and a mint as your examples.
- The Three Sisters, square foot gardening, and the plant guild come from very different traditions. What does each one contribute that the others do not?
- A friend plants all her lettuce at once in April and is overwhelmed, then has none in July. Using succession sowing, design her a better lettuce season.
- Companion planting includes both proven pairings and unproven folklore. Why does a master herbologist need to know the difference, and how should she treat an unproven claim?
Workbook Checklist — Lesson 37
In my workbook I have:
- ☐ read my site before choosing any plant — sun at three hours, soil, microclimates, water, and access, drawn and dated as my site assessment
- ☐ named my garden's purpose in one sentence and built a plant list in which every plant passes the right-plant-right-place test, with mature sizes and frost dates noted
- ☐ arranged my plants using at least two traditions from this lesson — the Three Sisters, square foot spacing, honest companion planting, or the plant guild
- ☐ planned across time with succession sowing at roughly two-week intervals and a seasonal calendar anchored to my last and first frost dates
- ☐ if I included a guild, named its anchor plant and every member's functional role
- ☐ drawn my Master Garden Plan to scale — every bed, square, and container labeled, north marked, water source noted, and the drawing dated
- ☐ written my one-page design journal entry — purpose, traditions used and why, what I am least sure about, and what I will watch for in the first season
- ☐ filed the finished plan in my Scholar's Familiar Journal, ready to present and defend in the Master Herbologist Defense
☐ Lesson completed Date: ___ Signature: ___
Cross-Class Connections

Creative Arts · Unit V, Lesson 22 — Garden Structures: Supports, Cold Frames & Garden Models
Benches clear, scholars, and plans to scale — that is where my lesson begins with yours. Professor Fernfoot teaches the garden itself: which plants, matched to which site, in which season. My workshop builds what stands in it — the supports and trellises your climbers will climb, the mini cold frame that shelters your early seedlings — and, at the heart of my lesson, your Master Garden Plan built as a tabletop model, so the drawing confesses its shaded corners and awkward reaches while a mistake still costs a stick of scrap. Bring your finished plan to my bench, and we will rehearse it at scale before a single full-size board is cut.

Celestial Studies · Unit I, Lesson 3 — The Tilted Year: Why We Have Seasons (named, no link — Celestial Studies lesson pages do not yet carry a slug pattern)
Every planting calendar in the Greenhouse runs on the tilt, scholars, whether the gardener knows it or not — and in my tower you will learn the tilt itself. Professor Fernfoot anchors your seasonal calendar to your frost dates and tells you when each crop goes in; my lesson shows you why those dates exist at all: Earth's axis, leaning its steady 23.5 degrees, carrying each hemisphere toward the sun and away again through the year. Come and read the sky your calendar obeys, and your garden's timing will never be a mere list of dates again.
Herbology · Unit V, Lesson 34 — Companion Planting & Guild Design
The Master Herbologist Defense — Part IV: The Master Garden Plan
The Professor's Closing Note
You came to me with a single plant and a willingness to watch. You are leaving this last lesson with a plan for a whole garden and the knowledge to defend it. Look at what stands between those two points: soil you can read with your hands, light you can measure with your eyes, seeds you can wake, cuttings you can root, pruners you can trust yourself with, harvests you can time, and now a design that holds them all.
I am proud of you, scholars, and I do not say it lightly. A garden plan is a promise, and you now know enough to make promises worth keeping.
Bring your plan to the Defense. Bring your journal, your honesty, and your curiosity. I will be there, and I cannot wait to see what you have drawn.
— Professor Beryl Fernfoot, Herbology Greenhouse • Master Herbalist • Head of House Oriens
Further Reading & Sources
- Basics of Succession Planting — WVU Extension — the two-week interval method and the two types of succession, from a university extension service.
- Companion Planting: Myth or Truth? — Mississippi State University Extension — an honest, evidence-sorted review of common companion claims.
- Plant a Three Sisters Garden — The Old Farmer's Almanac — planting method and history of the corn, beans, and squash tradition.
- The Three Sisters — Onondaga Nation — the Haudenosaunee telling of the Three Sisters, from the nation itself.
- What Is Square Foot Gardening? — Small Scale Life — Bartholomew's method: the 4x4 bed, the grid, and the 1-4-9-16 spacing.
- What Are Plant Guilds? — Bite Sized Gardening — the guild roles: nitrogen fixers, dynamic accumulators, pest deterrents, pollinator attractors, and groundcovers.
Browse the Herbology shelf in the school Library for readable editions of these works.
School of Evershade · Herbology Greenhouse · For personal educational use
End of Lesson 37.
Submit your work for this lesson using the form below.
THE UNIT V QUIZ
HERBOLOGY GREENHOUSE · UNIT V: THE MASTER HERBOLOGIST'S CRAFT
Unit V is complete: the toxic plants known and respected, companions planted in guilds, the forager's ethics weighed honestly, your own herbal built entry by entry, and a whole garden designed to scale. This quiz gathers the whole unit into one sitting. Take it from memory first, before you look back at your notes, because it measures what has stayed with you. If you completed the work marked ★ in your lesson packets, you have already practiced most of what it asks.
The quiz packet is a single download. Part I gathers questions from across the unit, Part II matches the unit's vocabulary, and the answer key waits at the back for self-checking. When you have finished, score it honestly, note the result in your workbook, and revisit any lesson whose questions went wrong before you move on to the Defense.
CONTINUE IN THE HERBOLOGY GREENHOUSE
← Previous · Lesson 36: The Materia Botanica: Building Your Herbal Next · The Master Herbologist Defense →
Unit V — The Master Herbologist's Craft Herbology Greenhouse — All 37 Lessons
The rest of Unit V: Lesson 33 · Toxic Plants & Safety · Lesson 34 · Companion Planting · Lesson 35 · Foraging Ethics · Lesson 36 · Materia Botanica · The Master Herbologist Defense
From the Greenhouse Shelf
The printed companions to this lesson, from Professor Fernfoot’s shelf in the shop.

Herbology — Familiar Journal Pages: Unit V & Defense Pages — Lessons 33–37 (15 Pages)
$4.99
View in the Shop