

HERBOLOGY
Unit II · Lesson 11THE COMPOST CRUCIBLE
PROFESSOR BERYL FERNFOOT
Herbology Greenhouse
Master Herbalist
Turning kitchen scraps and fallen leaves into living soil: the gardener's oldest recycling craft.
Professor's Introduction

There is no hurry here, gardeners.
In Lesson 8 you studied the texture of soil, and in Lesson 10 you learned what nitrogen, phosphorus, and potassium do for a growing plant. Today we close the circle. Those nutrients your plant pulled from the soil did not vanish when the leaves fell or the stems were trimmed. They are still there, locked inside the dead material, waiting for someone to set them free.
That someone is you, with the help of about a billion tiny workers you will never see.
Composting is one of the oldest crafts in gardening, and one of the most satisfying. You take what the household and garden discard, you give it air and water and time, and it gives back the darkest, richest, most living soil amendment you will ever hold in your hands. Nothing is wasted. Everything returns. The garden feeds you, and you feed the garden.
There is a quiet patience to this work that suits the Greenhouse well. A compost pile cannot be hurried, only tended. But oh, what it teaches while you wait.
— Professor Beryl Fernfoot, Herbology Greenhouse • Master Herbalist • Head of House Oriens

The line beneath the map is our road: every stop a place where the knowledge of plants changed, every lesson a step along it.
Lesson Objectives
By the end of this lesson, you will be able to:
- Explain what compost is and why gardeners make it
- Distinguish browns from greens and describe the carbon-to-nitrogen balance
- List materials that should and should not go into a home compost system
- Describe the composting process: heat, air, moisture, and time
- Set up a simple small-space compost container and begin tending it
- Recognize finished compost and describe how to use it in growing
Reading this lesson: ★ marks the passages to remember. They return on the unit quiz and the class test. Check in questions ask the material back as you go; answer them in your workbook when you meet them.
Working this lesson: Your assignment packet is the first download on this page. Work in it as the lesson moves along, answering each exercise as its subject is taught — or read the lesson through for your notes and take the exercises as homework afterward. Both are proper ways to sit this class. Signposts in the reading tell you where each exercise belongs. Written answers are short answers in your own words; a few honest lines are worth more than a filled page.
Your Assignment Packet
This lesson's exercises live in its packet: the Lexicon Handout (every term, course terms marked ◆), Materials, Guided Practice, the Assignment Manual with its answer key for self-checking, the Reflection Questions, and the Workbook Checklist. Download the packet before you begin and keep it beside you as you read.
What Compost Is
★ Compost is decomposed organic matter: plant and food material that microorganisms have broken down into a dark, crumbly, earthy-smelling substance gardeners sometimes call black gold. It is not soil, exactly. It is what soil wishes it had more of.
Gardeners make compost for three reasons, and all three matter.
★ First, compost returns nutrients to the soil. When a plant drops its leaves or you trim its stems, the nitrogen, phosphorus, potassium, and trace minerals inside that material are still there. Left on the ground or piled in a bin, decomposers release those nutrients back into a form roots can use. It is the garden feeding itself, with your help.
Second, compost improves soil structure. Mixed into heavy clay, it loosens the texture so water drains and roots breathe. Mixed into sandy soil, it helps the soil hold moisture and nutrients instead of letting them wash through. Whatever your soil's weakness, compost moves it toward the middle.
★ Third, compost feeds the living soil. A teaspoon of healthy soil holds more microorganisms than there are people on Earth, and compost is their favorite food. Those microbes, in turn, protect plant roots, unlock nutrients, and build the crumb structure that makes soil feel alive under your fingers. When you add compost, you are not just feeding plants. You are feeding the whole underground community that feeds the plants.
Check in: Fernfoot gives three reasons gardeners make compost. Name all three — and say which one means you are feeding more than the plant.
This is why the lesson sits here, between nutrients and light. You have learned what plants take from the soil. Now you learn how to give it back.
Nothing in a garden is truly finished. A fallen leaf is just a meal that has not been served yet.
❦ In your workbook: record what compost is in your own way — the definition, and the three reasons gardeners make it — copy, sketch, or note what matters.
The Workers You Cannot See
Composting is a biological process, and the workers are microorganisms: bacteria, fungi, and actinomycetes, the thread-like microbes that give healthy soil and finished compost their distinctive earthy smell. Alongside them work the larger decomposers you can see: earthworms, beetles, mites, and all the small lives of the soil food web.
These microbes need two things from your pile, the same two things every living thing needs from its food: energy and building material. Carbon provides the energy. Nitrogen provides the building material for proteins and reproduction. Get the balance right, and the microbes multiply rapidly, generate heat, and convert raw scraps into finished compost in a matter of months. Get it wrong, and the process stalls or sours.
★ Gardeners talk about this balance as the carbon-to-nitrogen ratio, written C:N. The sweet spot for active composting is roughly 25 to 30 parts carbon to 1 part nitrogen by weight. You do not need a scale or a laboratory. The practical rule, confirmed by university extension services across the country, is simple: aim for about three parts browns to one part greens by volume, and you will land close enough for the microbes to thrive.
Check in: State the C:N sweet spot, and the practical volume rule that lands you close to it without a scale.
★ Watch the pile and it will tell you how you are doing. A balanced pile heats up within a few days of building or turning. Too many greens, and the pile goes slimy and smells sharply of ammonia as excess nitrogen escapes. Too many browns, and the pile just sits there, dry and unchanged, starving for nitrogen. The microbes are honest critics. Listen to them.
Check in: Your pile is slimy and smells sharply of ammonia. What has gone wrong — and what does a dry, unchanged pile tell you instead?
❦ In your workbook: record the workers you cannot see in your own way — what carbon and nitrogen each do for the microbes, and the two warning signs of a pile out of balance — copy, sketch, or note what matters.
Browns and Greens
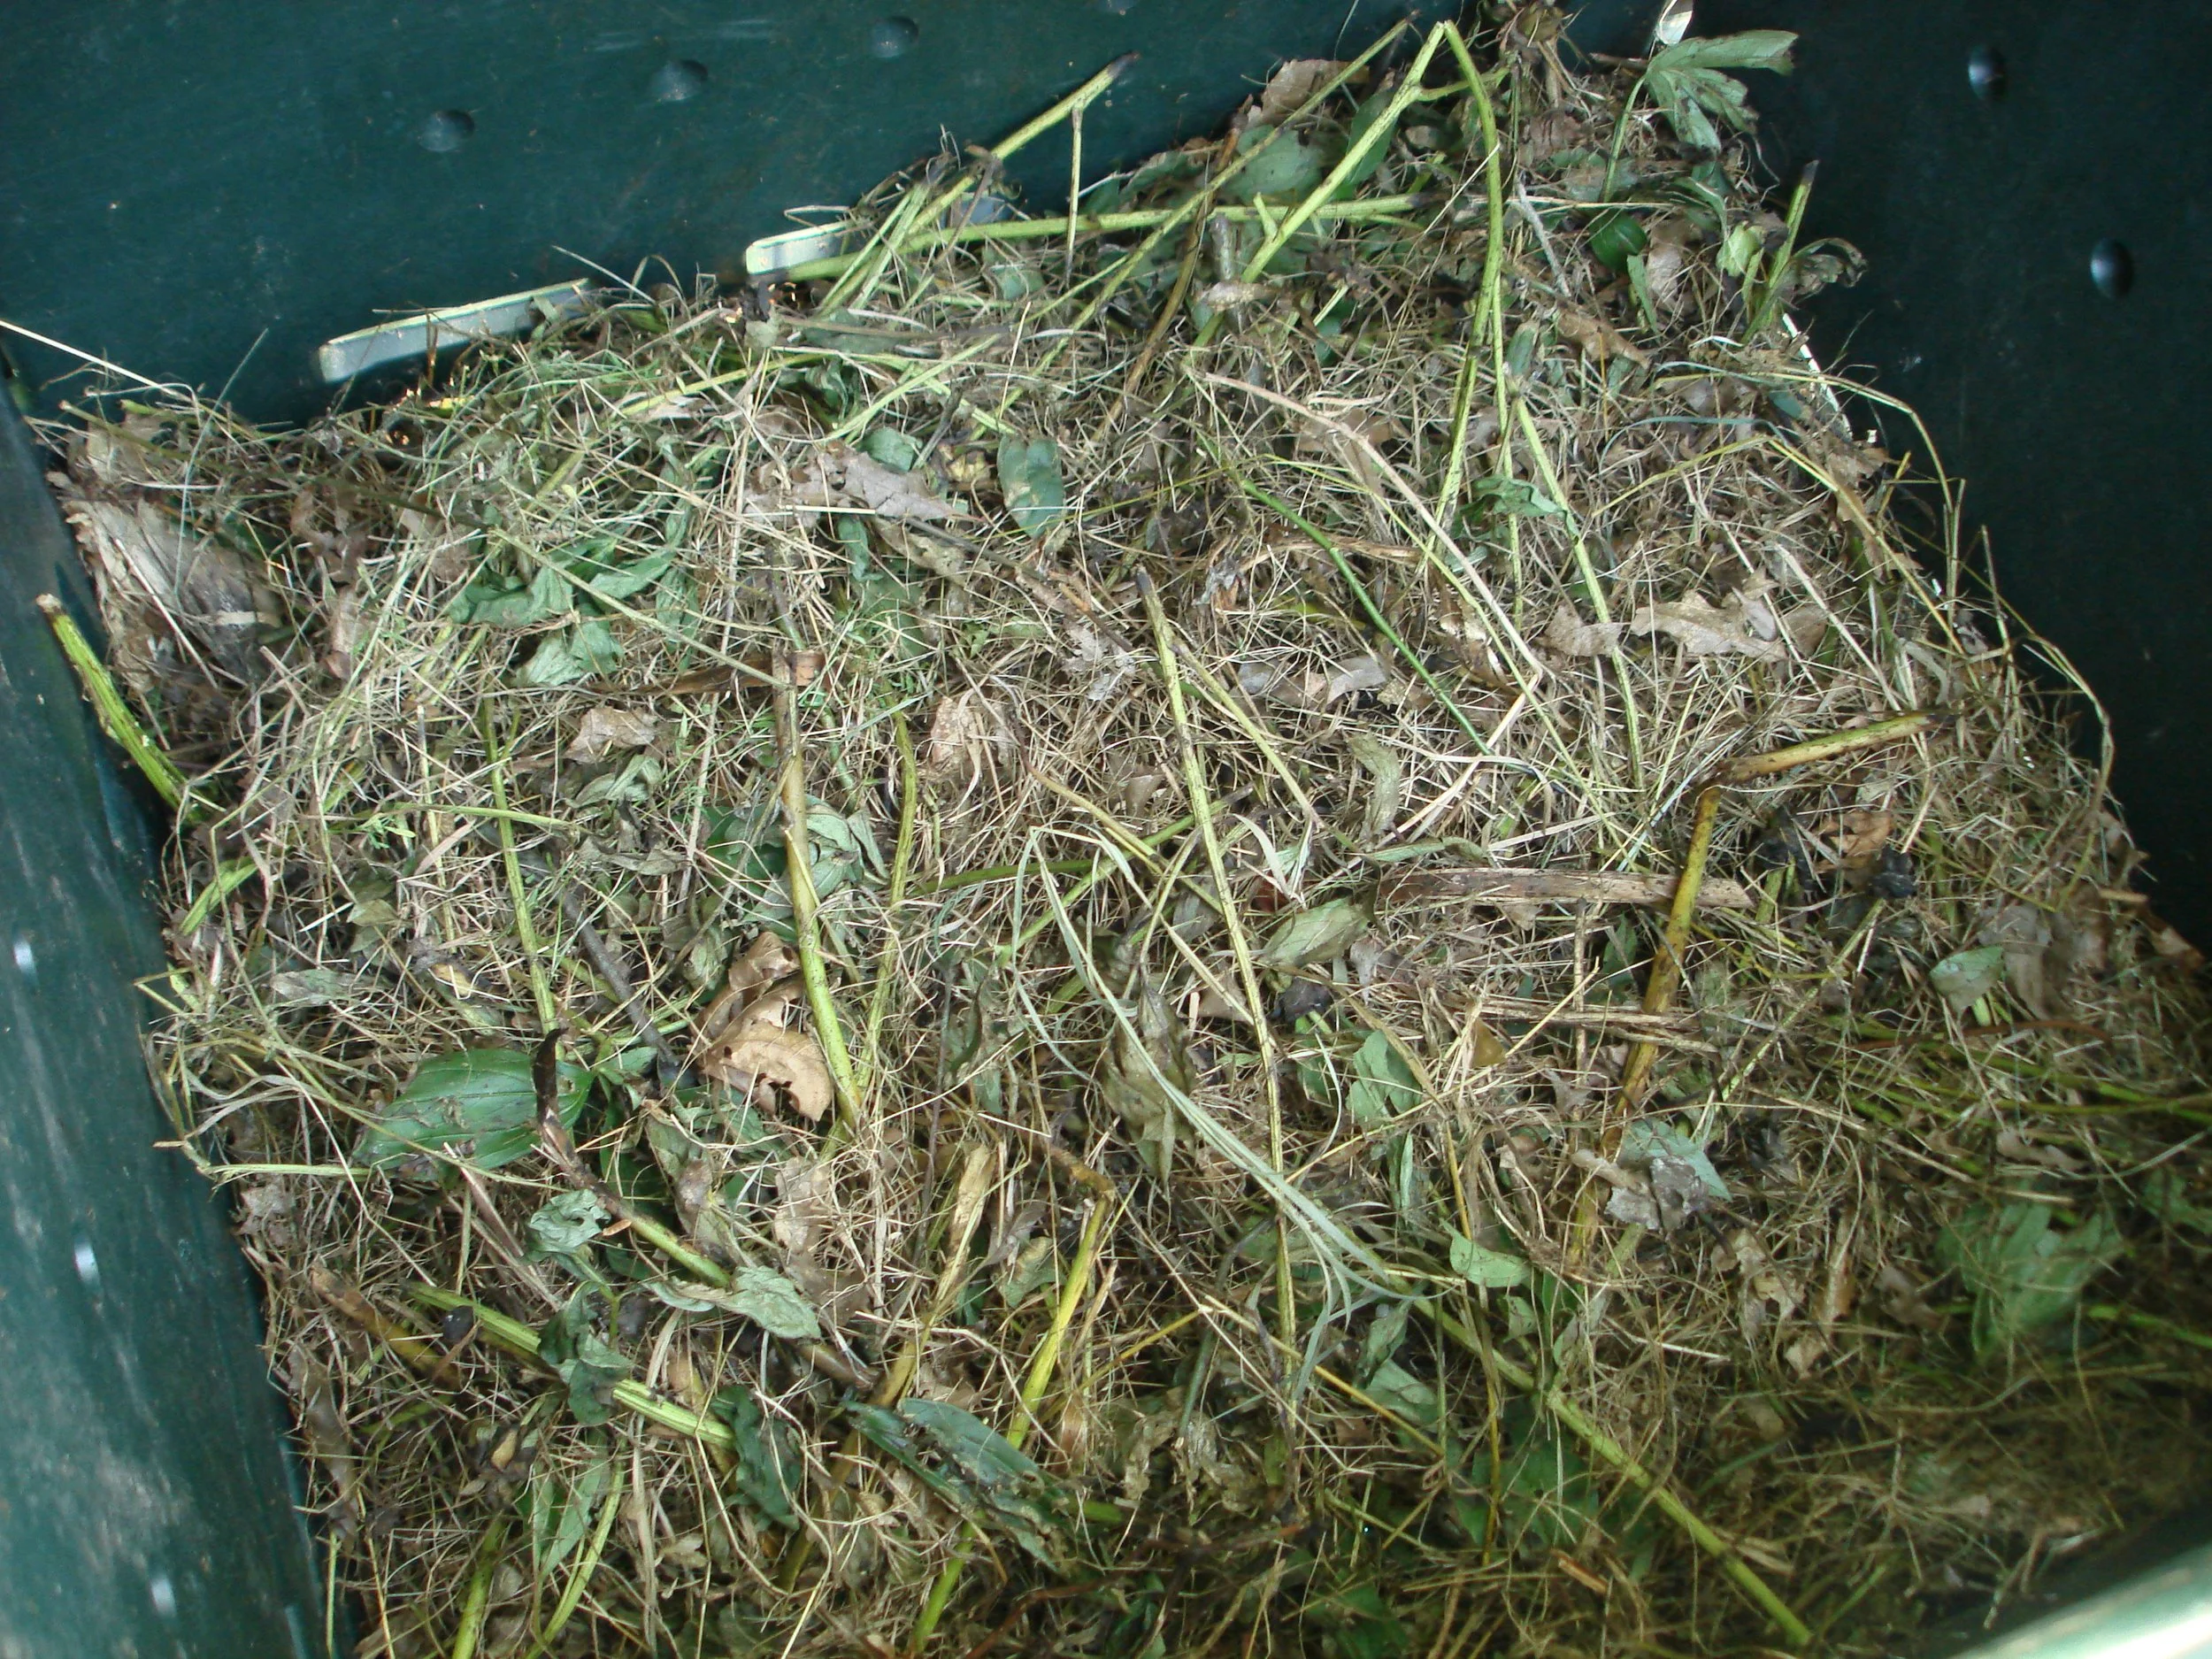
Inside a working bin, before the workers get far: dry grass and straw — the browns — tangled through fresh green trimmings and leaves — the greens — every piece still recognizable. Sorting by character is the first composting skill: fresh and moist means green, dry and woody means brown.
Photograph by Ksd5, released as CC0. Public domain.
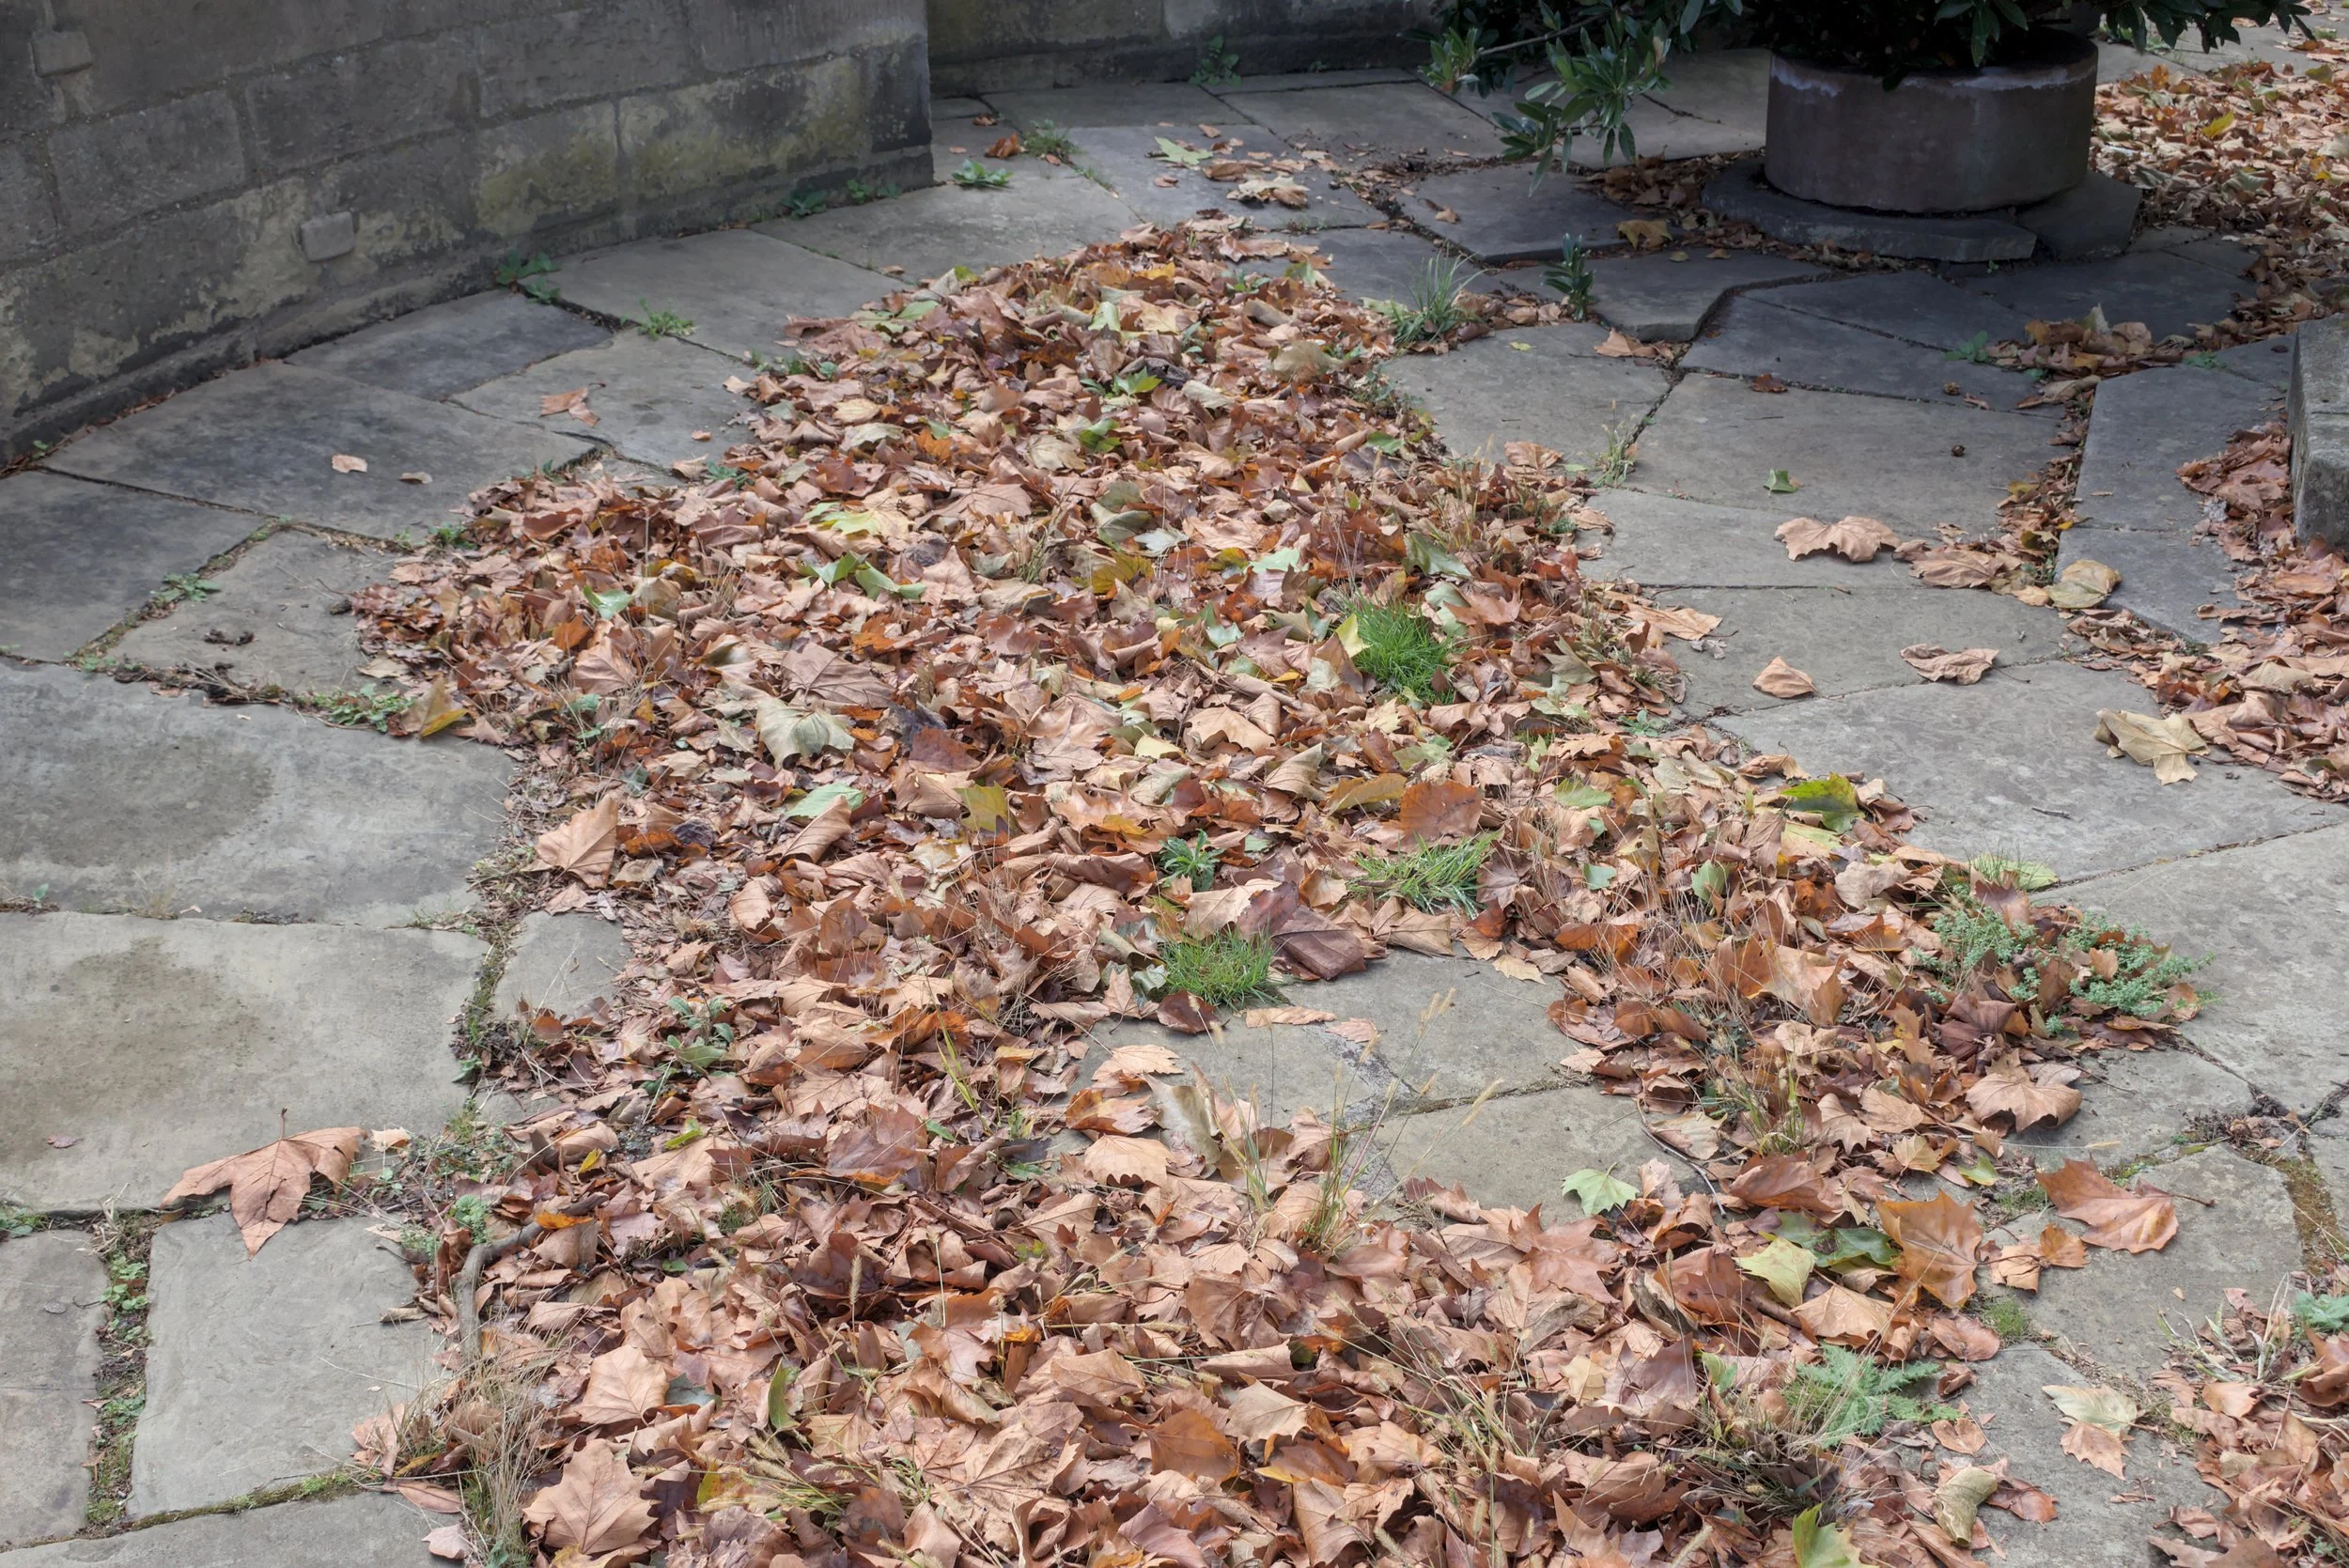
Browns, gathered: fallen autumn leaves, dry and papery and literally brown. Leaves are the composter's standby carbon — the energy food of the pile, and the layer to spread over every batch of greens. Shredded or chopped, they break down far faster than whole.
Photograph by Aethonatic, released as CC0. Public domain.
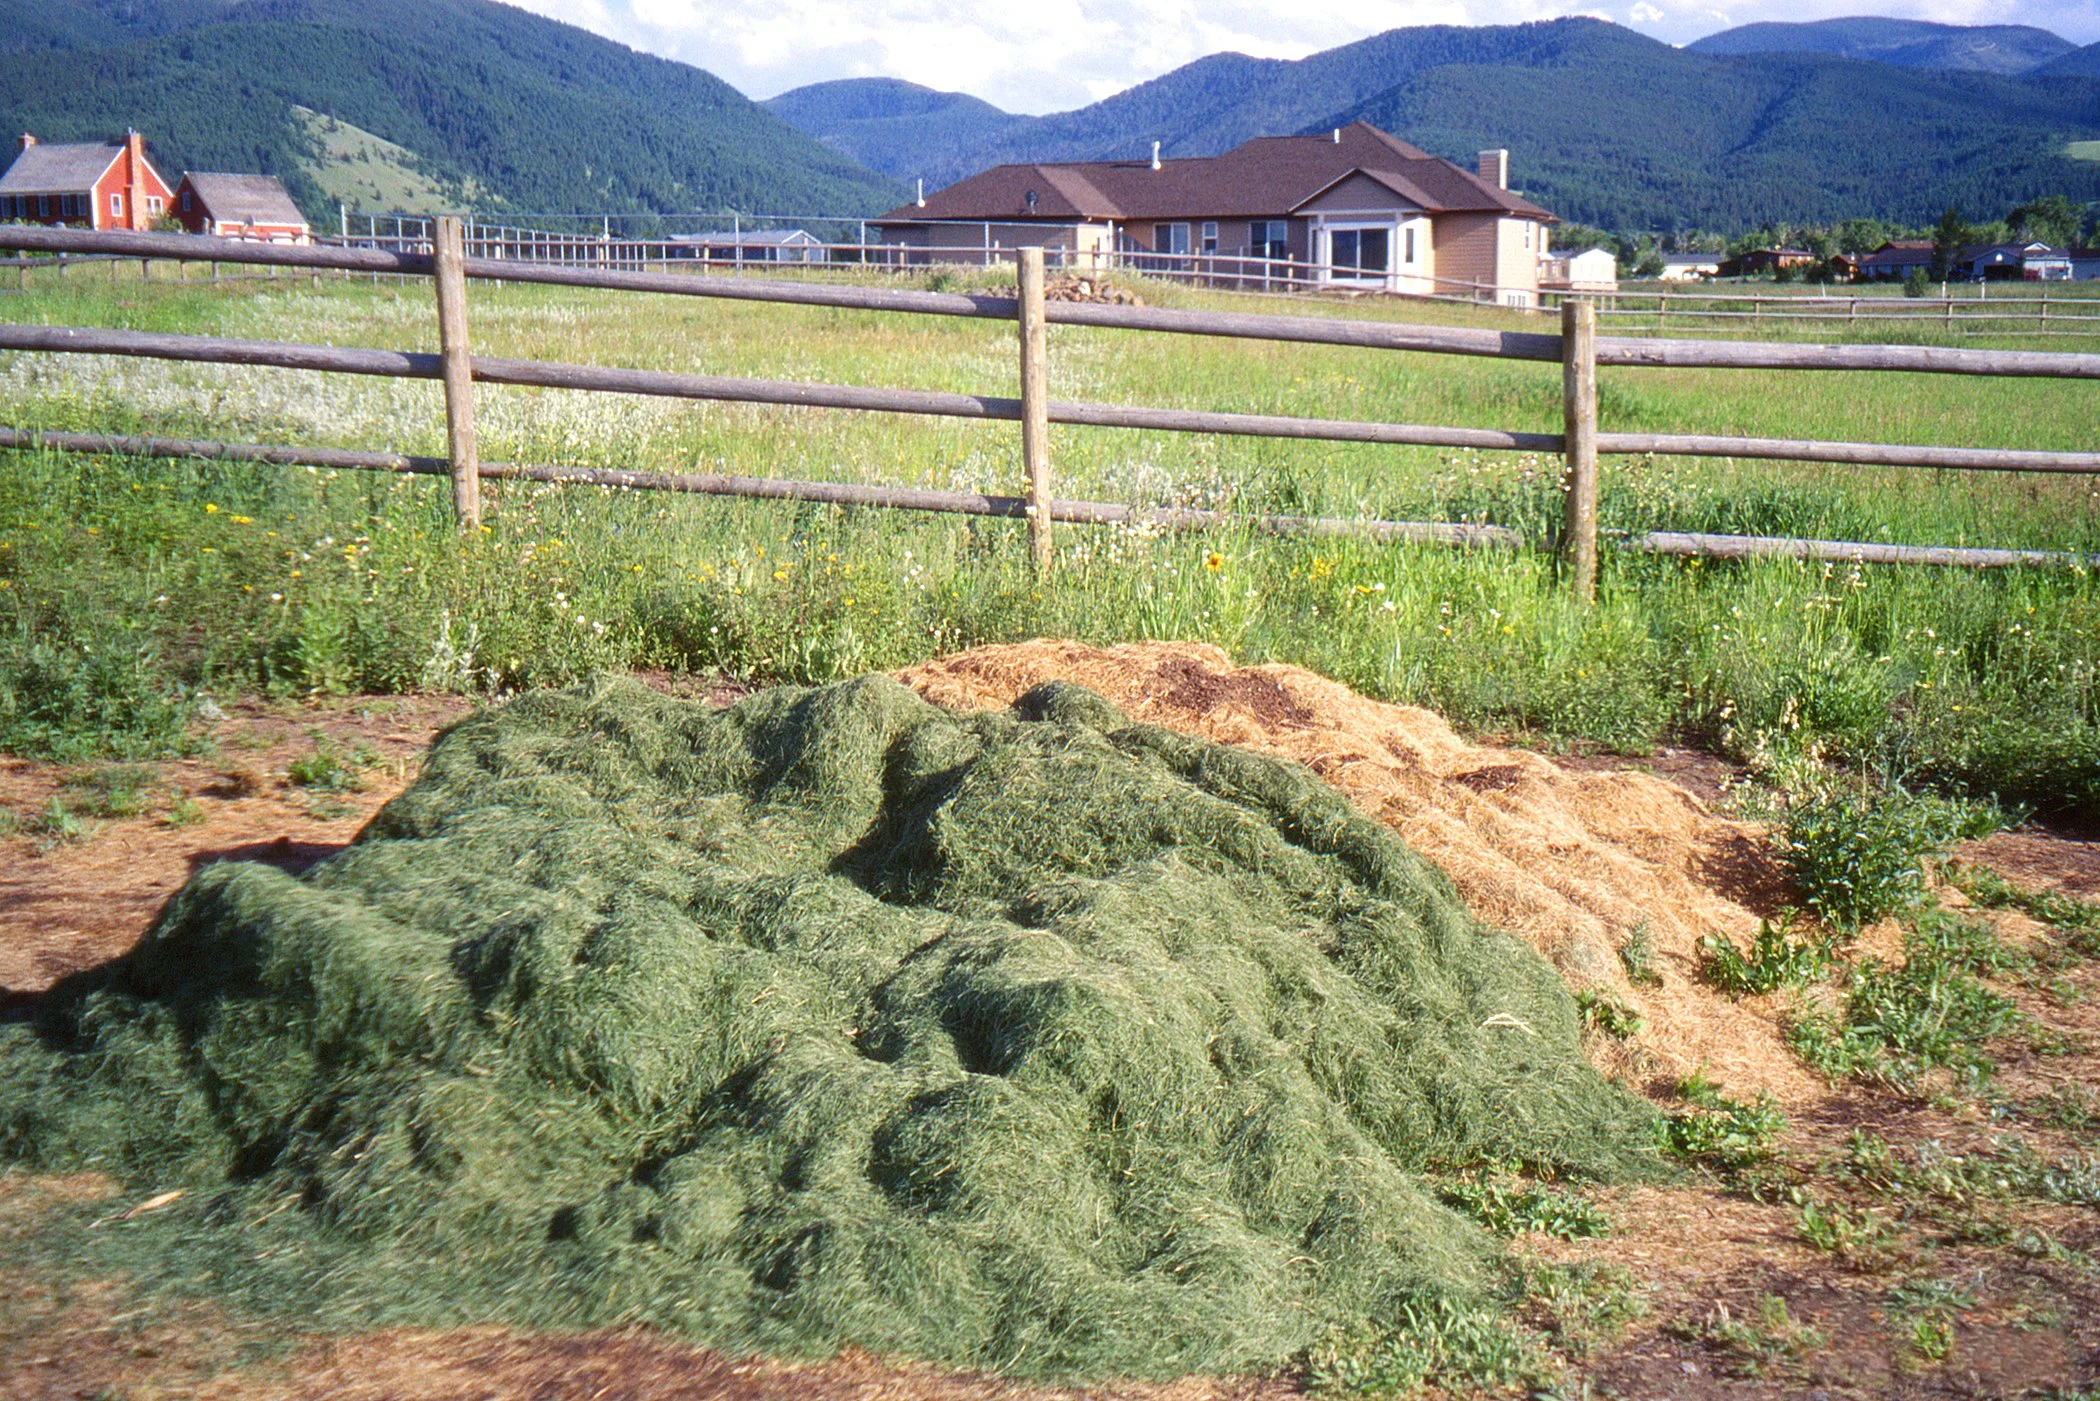
Greens, in bulk: a fresh mound of grass clippings, nitrogen-rich and still bright, with a paler mound of straw — a brown — behind it. Fresh clippings are protein for the microbial workforce; piled alone and thick they mat down, so mix them through browns rather than dumping them in one layer. Build your own pile in open ground, with airflow on all sides — the Safety Notes ask for space between a pile and any wooden fence or wall.
USDA NRCS Montana photograph. Public domain (U.S. government work).
Every material you add to a compost system falls into one of two families. Learning to sort them at a glance is the single most useful composting skill.
★ Browns are the carbon-rich materials. They are usually dry, often literally brown, and they provide energy plus the structure that keeps air moving through the pile. Fallen autumn leaves, shredded newspaper and cardboard, straw, wood chips, twigs, sawdust, and paper towels all belong here. Browns are the fuel and the scaffolding.
★ Greens are the nitrogen-rich materials. They are usually moist and fresh, and they are often green, though not always. Fruit and vegetable scraps, coffee grounds and tea bags, fresh grass clippings, and green garden trimmings belong here. Greens are the protein that lets the microbial workforce grow.
A useful habit: every time you add a batch of greens, cover it with a generous layer of browns. The browns mask odors, absorb excess moisture, keep flies away, and maintain the ratio without any measuring. Three scoops of shredded leaves over every scoop of kitchen scraps, and the pile largely manages itself.
★ Coffee grounds deserve a special mention because they confuse beginners. They are brown in color but count as greens: they are rich in nitrogen. Eggshells are neither, strictly speaking; they add calcium and grit, and they are welcome in small amounts. When in doubt about a material, ask which family it resembles in character, not in color: fresh and moist means green, dry and woody means brown.
Check in: Coffee grounds are brown in color. Which family do they count in, and what question settles any material you are in doubt about?
❦ In your workbook: record browns and greens in your own way — each family's character, three examples of each, and the cover-every-batch-of-greens habit — copy, sketch, or note what matters.
What Goes In, What Stays Out
Before you build anything, learn the boundaries. A compost system is wonderfully forgiving, but a few materials cause real problems, and knowing them now saves you trouble later.
Welcome in the pile: fruit and vegetable scraps, coffee grounds and filters, tea bags (remove staples), eggshells, plain cooked grains and bread in small amounts, fallen leaves, straw, shredded newspaper and cardboard, untreated sawdust, garden trimmings, and herbaceous plant material.
★ Never in a home system: meat, bones, dairy products, fats and cooking oils, and pet waste from dogs or cats. Animal products smell as they break down, attract rats, raccoons, and flies, and can harbor pathogens that a home pile may not get hot enough to destroy. Pet waste can carry diseases transmissible to humans. These rules have no exceptions for beginners.
Check in: Name the never-in-a-home-system list, and give the two kinds of risk — attraction and pathogens — that put those materials on it.
Use caution: diseased plants, weeds that have gone to seed, and glossy or heavily printed paper. A hot, well-managed pile destroys most weed seeds and plant pathogens, but a small home bin may never get hot enough to be sure. When in doubt, leave it out. Herbicide-treated grass clippings should never go in; some herbicides survive composting and can damage your garden later.
Chop or shred large pieces before adding them. A whole corn cob will sit in the pile for a year; chopped into chunks, it breaks down in months. Surface area is everything to a microbe.
❦ In your workbook: record what goes in and what stays out in your own way — the welcome list, the never list, and the caution list, with the rule "when in doubt, leave it out" — copy, sketch, or note what matters.
In your packet: Exercise I — Sort the Scraps ✎ begins here. Work it now, or mark the place and take it as homework — your choice.
The Process: Heat, Air, Water, Time
Four ingredients drive every compost pile, and only one of them is the material itself.
★ Heat is the sign that the microbes are working. A well-built pile warms to between 120 and 150 degrees Fahrenheit within a few days, and a large hot pile can reach 160. You can feel that warmth on a forkful lifted from the center — never push a bare hand into a hot pile: the Safety Notes below are strict about this, and they are right. That heat is doing useful work: it speeds decomposition and destroys many weed seeds and plant diseases. Small bins may never get truly hot, and that is fine; they simply take longer. Heat is a bonus, not a requirement.
★ Air keeps the right microbes in charge. The decomposers you want breathe oxygen. Without it, anaerobic microbes take over, and they produce the sour, rotten smells of a failed pile. Turning the pile with a fork or shovel every week or two folds fresh air into the center. If turning a whole pile sounds like too much, even poking deep holes with a stick helps. A pile that smells like a forest floor is breathing well. A pile that smells like ammonia or rot needs air and browns.
Check in: A pile smells like ammonia or rot. In this lesson's terms, what has taken over, and what two things does the pile need?
★ Water keeps the microbes alive. The classic guidance is to keep the pile as damp as a wrung-out sponge: moist to the touch, with no water dripping out when you squeeze a handful. Too dry, and decomposition stalls. Too wet, and air is squeezed out and the pile sours. In dry weather, water the pile when you turn it. In wet weather, cover it with a tarp or lid.
Check in: State the wrung-out sponge test exactly — and what too dry and too wet each do to the pile.
Time does the rest. A hot, well-tended pile can finish in two to three months. A small bin, turned occasionally, typically takes four to six months. A neglected pile still composts, eventually; nature is patient even when gardeners are not. Your job is not to rush the process but to keep conditions favorable and let the workers work.
❦ In your workbook: record the process in your own way — heat, air, water, and time, and what each one contributes — copy, sketch, or note what matters.
In your packet: Exercise III — The Compost Journal ◐ begins here. Work it now, or mark the place and take it as homework — your choice.
Methods: From Pile to Windowsill
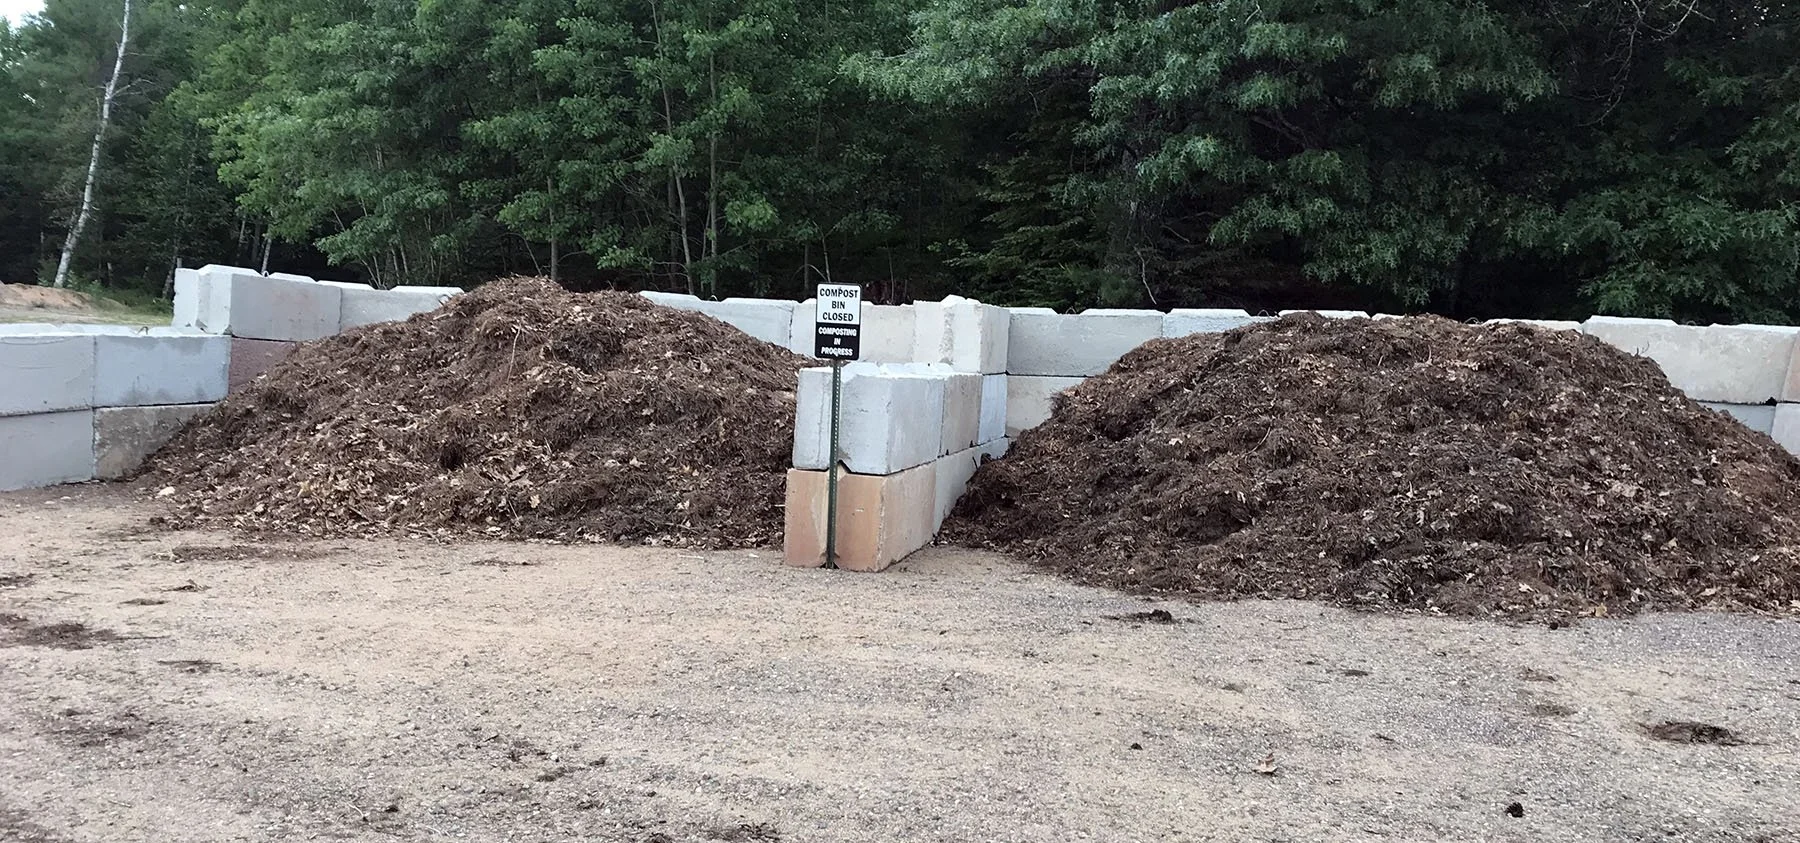
The bin at full size: bays built of stacked concrete blocks, one of the builds this lesson names. A bin keeps the same process tidier than an open heap — browns and greens, water, turning, patience — and holds moisture while it works. The darker, finer pile on the right is further along than its neighbor.
U.S. Forest Service, Eastern Region photograph. Public domain (U.S. government work).
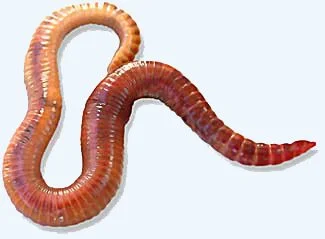
The one worker you can see: a red wiggler, Eisenia fetida, the worm of the worm bin. Know it by the banded red-brown body. In a bin under a sink or on a balcony, red wigglers turn food scraps into worm castings, one of the finest soil amendments there is.
Photograph by Mihai Duguleana, released to the public domain.
Choose the method that fits your space. All of them follow the same principles.
The open pile is the simplest: a heap at least three feet on each side, in a shady or partly shady spot with good drainage, near a water source. Piles smaller than this struggle to hold heat. Layer or mix browns and greens, water as you build, and turn every week or two. Keep it off wooden fences and walls, which trap moisture and rot.
The bin contains the same process in tidier form. Bins can be bought or built from wire, wood pallets, or cinder blocks. A bin keeps the pile neat, deters animals, and holds moisture better than an open heap. Everything else is the same: browns and greens, water, turning, patience.
★ The small-space container is where most students will begin. A lidded bucket or storage tote with drainage holes drilled in the bottom and air holes around the sides makes a perfectly good compost bin for a balcony, patio, or even a garage corner. Layer kitchen scraps with shredded newspaper or dried leaves, keep it moist, and stir it with a trowel every week. It will not get hot, but it will steadily turn scraps into usable compost over several months. Keep the lid on to deter fruit flies, and bury each fresh addition under browns.
The worm bin deserves its own mention. Vermicomposting uses red wriggler worms, Eisenia fetida, to process food scraps into worm castings, one of the finest soil amendments in existence. A worm bin fits under a sink or on a balcony, works year-round indoors, and produces no odor when managed well. It is a whole craft of its own; what matters for this lesson is knowing it exists as the small-space composter's best friend.
Start where you are, with what you have. A bucket on a balcony, tended with attention, teaches everything a three-bin palace teaches. The principles do not change with the container.
Workshop Note: The composter as built here is household-simple. A durable wooden composter is built under Creative Arts Lessons 22 and 23 for scholars who want one.
❦ In your workbook: record the methods in your own way — the pile, the bin, the small-space container, and the worm bin, and which one fits your space — copy, sketch, or note what matters.
In your packet: Exercise II — Build a Small-Space Composter ⚒ begins here. Work it now, or mark the place and take it as homework — your choice.
When It Is Finished
★ Finished compost announces itself clearly. It is dark brown or black, crumbly, and smells like a forest floor after rain. The original materials are unrecognizable; you cannot tell a leaf from a coffee ground anymore. The pile has shrunk to roughly half its original volume, and it no longer heats up when turned.
Check in: Name the signs of finished compost — color, texture, smell, and what has happened to the original materials and the pile's volume.
Two simple tests confirm readiness. Seal a cup of the material in a plastic bag for a week, then open it: if it smells sour or like ammonia, it needs more time. Or plant a few radish seeds in a pot of the compost: if they sprout and grow normally within a week, it is ready.
Use finished compost by mixing two to three inches of it into the top six to eight inches of garden soil, or by top-dressing containers and beds with a one-to-two-inch layer. For your Scholar's Familiar, a thin top-dressing worked gently into the surface of the pot is plenty. If you are following the adopted-plant path instead of keeping your own familiar, offer the top-dressing to the keeper of your adopted plant, or simply record how and where you would apply it and why. You made this, from scraps, and your plant will taste the difference in the only way plants can: by thriving.
Unfinished compost, still hot or still recognizable, should go back for another round, not onto plants. Patience at the end is as important as patience at the beginning.
❦ In your workbook: record when it is finished in your own way — the signs, the two readiness tests, and how finished compost is used — copy, sketch, or note what matters.
Safety Notes
Composting is safe, everyday work, and a few steady habits keep it that way.
Wear gloves when turning or handling compost, and wash your hands thoroughly afterward. Compost is full of living microorganisms, which is exactly the point, but they belong in the pile and the garden, not on your lunch. This is simple hygiene, and it should become automatic.
★ Hot piles can burn. The center of an active pile can exceed 140 degrees Fahrenheit, which scalds skin on contact. Turn hot piles with a fork or shovel, never with bare hands, and keep children and pets from climbing on or digging into an active heap.
Keep compost bins and piles away from wooden structures, fences, and the walls of your home. A damp pile held against wood invites rot and insects. Give the pile its own space with airflow on all sides.
★ Never compost pet waste from dogs or cats, and never add it to compost you plan to use on food plants. Some pathogens survive home composting temperatures. This rule protects you and everyone who eats from the garden.
Younger students should have adult supervision when building bins, drilling containers, or turning large piles. There is no part of this lesson that requires risk.
❦ In your workbook: record the safety notes in your own way — gloves and handwashing, hot-pile handling, siting, the pet-waste rule, and adult supervision — copy, sketch, or note what matters.
Guided Observation: Reading a Pile — and Sorting What Feeds It
Before you build anything of your own, train your eye the way this lesson teaches: sort the materials first, then read a pile's behavior from its signs. This observation works with your own container if you have one, with any compost pile you may visit with permission, or entirely on paper, from the lists and descriptions in this lesson.
You will need:
- your workbook and a pencil
- a handful of household and garden materials to sort — or their names written on slips of paper
- gloves, and soap and water for washing up afterward, if you handle real compost
Sort first. Lay out your materials, or your slips, and sort every item into browns, greens, or never compost, using character, not color: fresh and moist means green, dry and woody means brown. Say each choice aloud with its reason before you set the item down.
Read the signs. If a real pile or container is in front of you, read it without digging into it with your hands. Note its smell — a pile that smells like a forest floor is breathing well; a pile that smells like ammonia or rot needs air and browns. Lift a small sample with a trowel or fork and run the moisture check: the pile should feel as damp as a wrung-out sponge, moist to the touch, with no water dripping out when you squeeze a handful — with gloves on, and only from the cool outer material, never from a hot center. Note whether the materials are still recognizable, and how far the pile has shrunk.
Consider:
- Which item was hardest to sort, and did character or color mislead you first?
- From smell and moisture alone, is the pile you read balanced, too green, or too brown — and what in the lesson tells you so?
- What would you adjust first, and why that one?
Safety: gloves on for any handling, hands washed thoroughly afterward, and never bare hands in a hot pile — turn hot piles with a fork or shovel. This observation asks for your eyes and nose, not your skin.
Materials
Required (Level One — household items)
- A lidded bucket or storage tote (1 to 5 gallons): any clean container with a lid becomes a small-space composter.
- Holes for air and drainage: drilled or punched in the sides and bottom. Ask an adult for help with drilling.
- Browns: shredded newspaper, junk mail (non-glossy), cardboard, or dried leaves.
- Greens: fruit and vegetable scraps, coffee grounds, tea bags (staples removed).
- A trowel or large spoon: for weekly stirring.
- Gloves and soap: for handling the pile and washing up afterward.
- A grow ledger or workbook: for the composter's start record and the four-week Compost Journal.
Suggested (Level Two — historically closer)
- A slatted wooden bin or wire-mesh enclosure: about three feet on each side, sited on bare ground, the classic garden compost bay.
- A garden fork: for turning the pile, the traditional tool for the job.
- Stockpiled browns: bagged autumn leaves and straw, kept dry for year-round layering.
- A compost thermometer: modern, but in the spirit of the careful observation this craft rewards.
Safety notes (from the original packet):
- Wear gloves when turning or handling compost, and wash your hands thoroughly afterward.
- Hot pile centers can exceed 140°F. Turn with a fork or shovel, never with bare hands. Keep children and pets off active heaps.
- Site bins away from wooden fences, walls, and the house; a damp pile held against wood invites rot.
- Never compost dog or cat waste, and never apply it to food plants.
- Younger students: ask an adult for help drilling containers and turning large piles.
Reflection Questions
Answer the following questions in your workbook.
- Why does composting sit between the nutrient lesson and the light lessons in this unit? What circle does it close?
- Explain the browns-to-greens rule in your own words. What goes wrong with too many greens? With too many browns?
- Why are meat, dairy, and pet waste excluded from home compost systems? What are the specific risks?
- How do heat, air, water, and time each contribute to the composting process? What happens when one is missing?
- How does compost serve both the plant and the soil community? Why does Fernfoot say you are feeding more than the plant?
Workbook Checklist — Lesson 11
In my workbook I have:
- ☐ explained what compost is, and the three reasons gardeners make it
- ☐ sorted browns from greens, and stated the practical rule — about three parts browns to one part greens by volume, for a C:N ratio of roughly 25 to 30 to 1
- ☐ listed what is welcome in a home pile, what never goes in, and what takes caution — and said why meat, dairy, and pet waste are excluded
- ☐ described heat, air, water, and time, including the wrung-out sponge moisture test and what a pile's smell reports
- ☐ set up a small-space composter — or built it fully on paper by the workbook path — and recorded its start: date, container, first materials, browns-to-greens estimate
- ☐ kept the four-week Compost Journal and read my pile's behavior in it: heating, holding steady, or stalled, and what I will adjust
- ☐ recognized finished compost by its signs and the two readiness tests, and stated how to use it — and kept the safety habits: gloves, handwashing, no bare hands in a hot pile, no pet waste
☐ Lesson completed Date: ___ Signature: ___
The Professor's Closing Note
You began this unit by studying the ground beneath your plant. You learned what soil is made of, how its chemistry feeds roots, and what those three letters, N, P, and K, actually do. Today you learned the oldest trick in the gardener's book: nothing leaves the garden. It only changes form.
Start your container this week, even if it is only a bucket with holes in it. Add your kitchen scraps. Cover them with browns. Write the date on the lid. Then tend it the way you tend your familiar: with regular attention and without fuss. In a few months, you will hold in your hands something you made from nothing anyone wanted, and your plants will be the better for it.
Record your composting in your grow ledger alongside your familiar's progress. The two projects belong together. One is the plant you are raising. The other is the soil that will raise the next one.
The circle is closed, scholars. Nothing is wasted.
— Professor Beryl Fernfoot, Herbology Greenhouse • Master Herbalist • Head of House Oriens
Cross-Class Connections

Creative Arts · Unit V, Lesson 22 — Garden Structures: Supports, Cold Frames & Garden Models
Fernfoot's composter is built and run inside her own lesson at household scale, scholars, and that is the right place to start it. For those of you who want the durable wooden composter, the build path runs through this lesson and Lesson 23 together: the structures and the scale discipline here, the wood and joinery tickets there. Build small first, learn what the small one teaches, and the large one will stand true.
Creative Arts · Unit VI, Lesson 23 — Wood, Grain & Safe Hand Tools
Set up your bench, scholars. This is the wood ticket, the lesson every wooden build after it depends on, and the second half of the durable build path for Herbology's composter: with Lesson 22, it serves the wooden composter of the Compost Crucible for scholars who want it built to last rather than assembled for a season. Read the grain before you cut, keep your hands safe on every tool, and the frame you make here will serve the Greenhouse for years.
Further Reading & Sources
- Composting At Home — U.S. Environmental Protection Agency — the EPA's step-by-step guide to backyard composting, worm bins, and what to compost.
- Good Compost Starts with the Right Ingredients — University of Georgia Extension — extension guidance on the 3:1 browns-to-greens rule and what never to add.
- Brown vs Green Compost Materials: Getting the Ratio Right — GrowPerma — a clear explanation of the C:N ratio and how the volume rule approximates it.
- Understanding the Carbon to Nitrogen Ratio in Composting — Farmstand — practical detail on pile temperatures, seasonal adjustment, and troubleshooting the ratio.
- Composting Is Easy — Sierra Club, Montgomery County — a printable handout covering readiness tests, hot composting temperatures, and application rates.
Browse the Herbology shelf in the school Library for readable editions of these works.
Plants from this lesson stand in the Materia Botanica, the school's shared archive — each kept with its lessons, its keepings, and its cautions. This lesson's company:
CornRadishTeaCoffeeStrawberry The whole Materia BotanicaPROFESSOR BERYL FERNFOOT · HERBOLOGY GREENHOUSE
Submit your work for this lesson using the form below.
CONTINUE IN THE HERBOLOGY GREENHOUSE
← Previous · Lesson 10: The Nitrogen, Phosphorus & Potassium Matrix Next · Lesson 12: Photoperiod Dynamics: Understanding Sunlight →
Unit II — Soils, Sunlight & Growing Environments Herbology Greenhouse — All 37 Lessons
The rest of Unit II: Lesson 8 · Substrate Profile · Lesson 9 · Soil Chemistry: pH · Lesson 10 · The N-P-K Matrix · Lesson 12 · Photoperiod Dynamics · Lesson 13 · Watering Matrix · Lesson 14 · Microclimate Calibration · Lesson 15 · Seasonal Growing Cycles · Lesson 16 · The Growing Plan