

HERBOLOGY
Unit II · Lesson 16The Unit II Practical Project: The Growing Plan
HERBOLOGY GREENHOUSE • UNIT II • LESSON 16
PROFESSOR BERYL FERNFOOT
Herbology Greenhouse
Master Herbalist
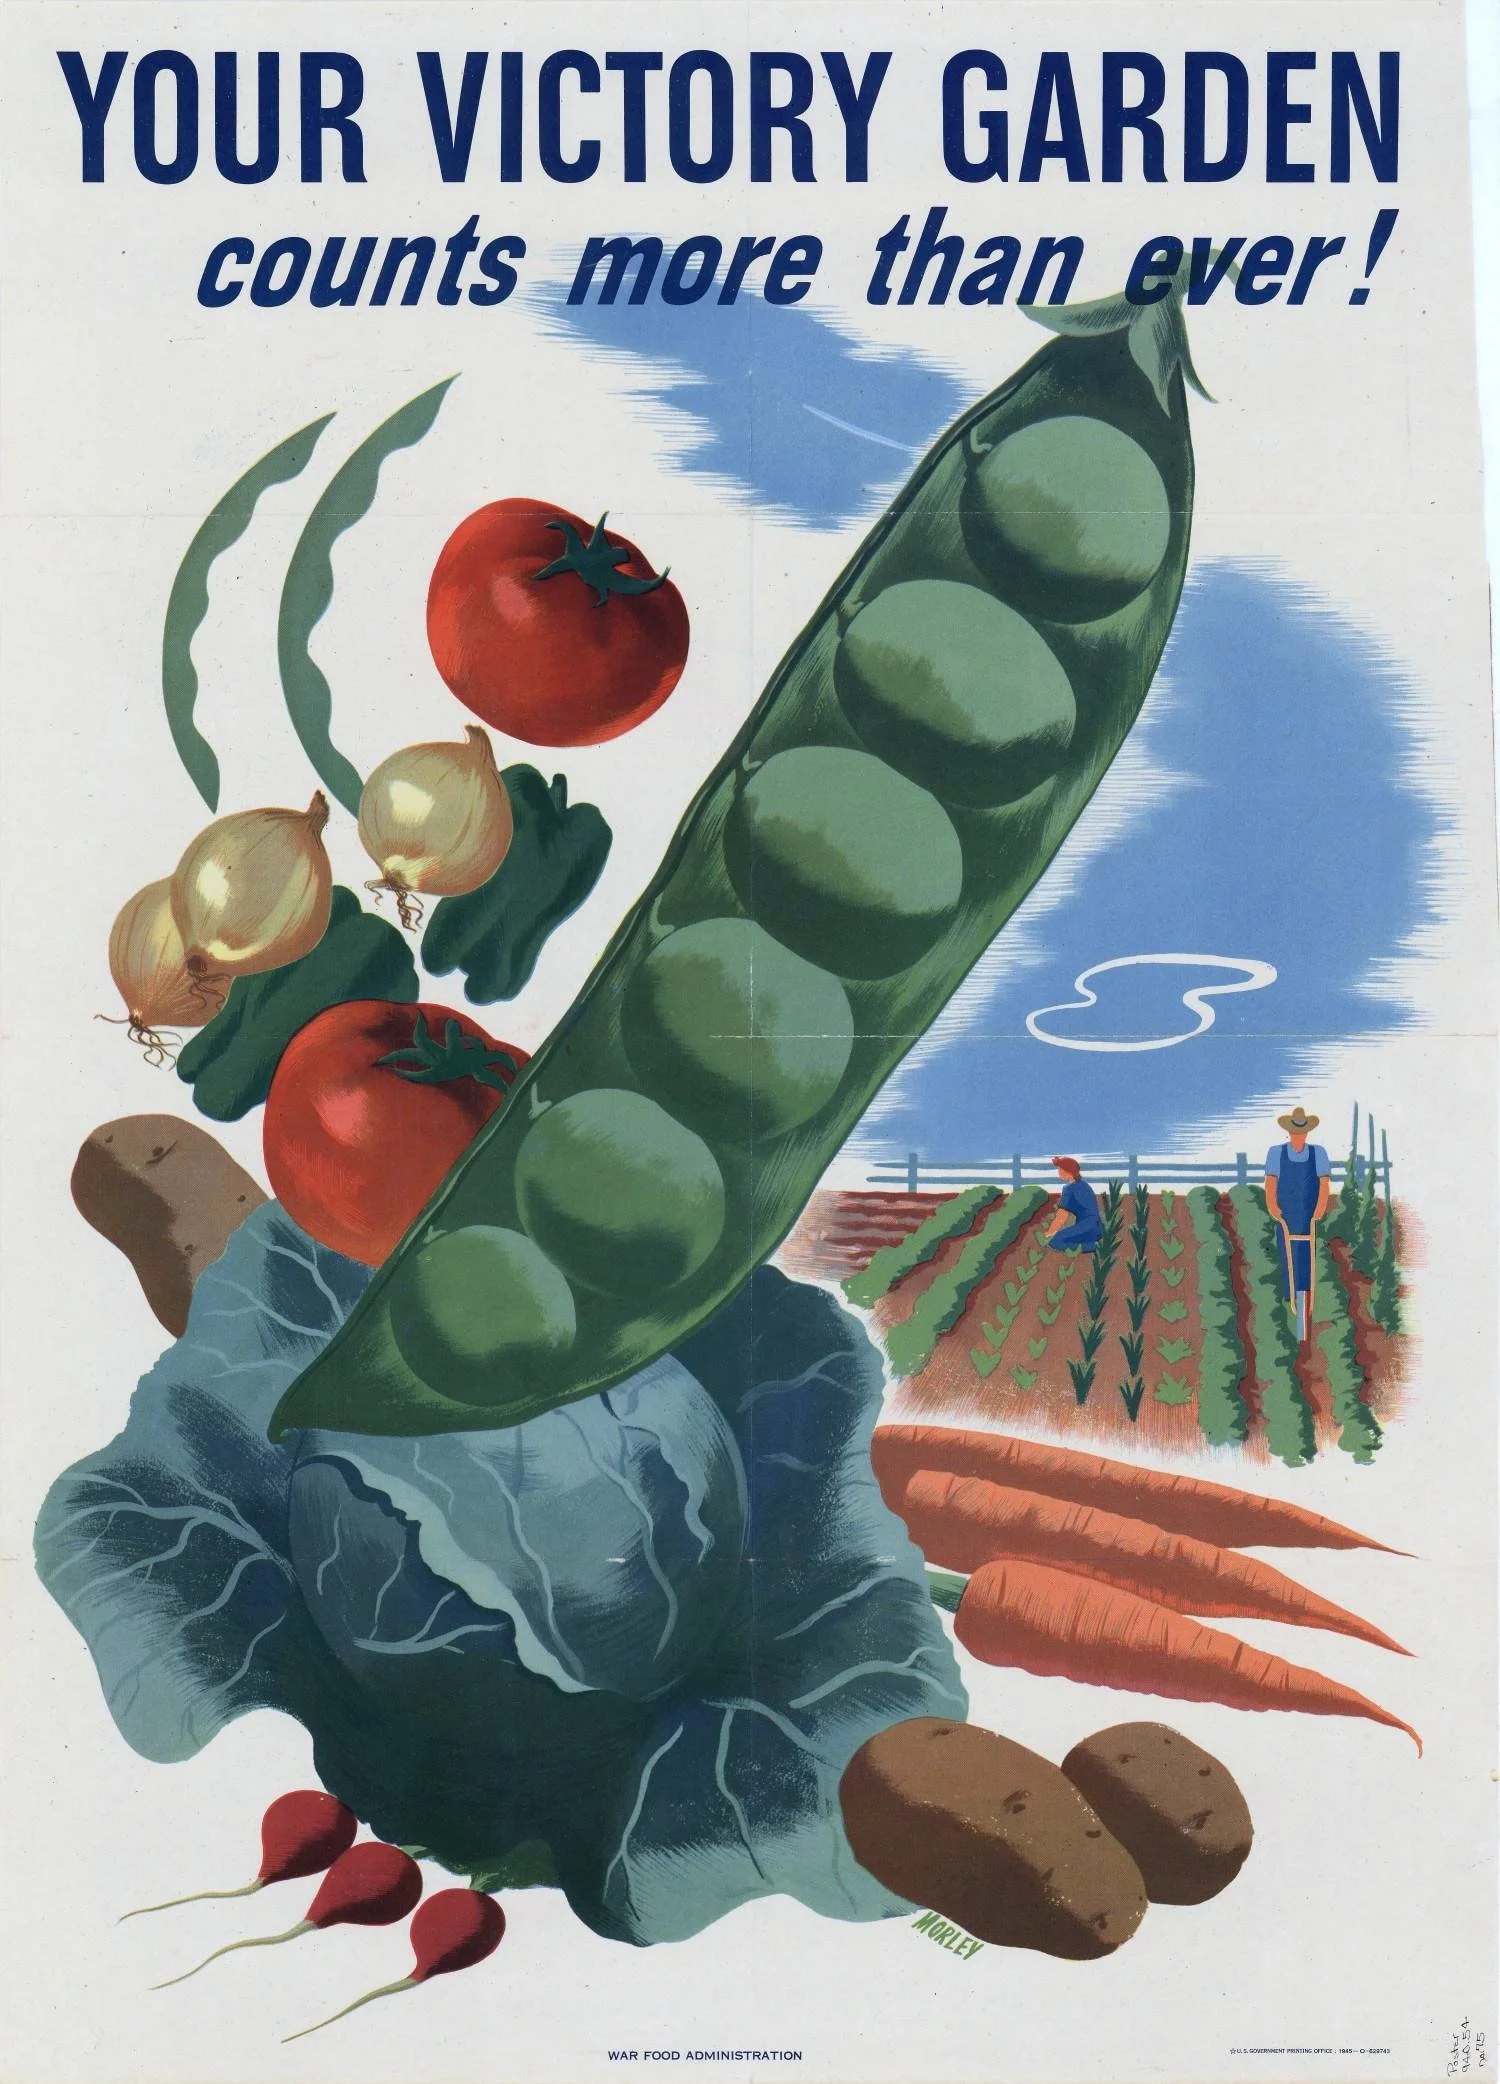
Your Victory Garden Counts More Than Ever!" — U.S. War Food Administration poster, 1945. In the war years the United States asked every household to garden to a plan: the right-hand scene's straight, staked, measured rows are what a growing plan looks like once it reaches the ground. Your project writes the document those rows began as.
Poster by Morley for the U.S. War Food Administration, printed by the U.S. Government Printing Office, 1945. Public domain (U.S. government work).
Professor's Introduction

Scholars, Unit II has taken you underground and out into the light. You have squeezed soil between your fingers, watched water climb through a paper towel, tested the sourness and sweetness of earth with the pH scale, fed your understanding with nitrogen, phosphorus, and potassium, followed the sun across your windowsill, and learned that a drafty hallway and a sunny shelf can be two different countries for a plant.
Now all of that comes together in one piece of work. A growing plan is what a thoughtful gardener writes before the season turns, and what a wise one revisits after. It says: this is my plant, this is my soil, this is my light, and here is how we will go forward together.
I will build one first, using basil as our companion, so you can see the whole shape of it. Then the plan is yours to write, for your own Familiar.
The greenhouse doors stand open. Bring your observations with you.
— Professor Beryl Fernfoot, Herbology Greenhouse • Master Herbalist • Head of House Oriens

The line beneath the map is our road: every stop a place where the knowledge of plants changed, every lesson a step along it.
Lesson Objectives
By completing this lesson, you will be able to:
- Assemble a complete environmental profile for your Scholar's Familiar, drawing on every skill from Unit II.
- Record soil texture, drainage, pH, and nutrition findings in one organized soil profile.
- Track and interpret your plant's sunlight exposure across several days.
- Write a watering plan matched to your plant, your soil, and your container.
- Note microclimate conditions and seasonal timing that affect your plant's future.
- Produce a finished growing plan: a practical document that tells you, and anyone who reads it, exactly how this plant should be cared for where you live.
Reading this lesson: ★ marks the passages to remember. They return on the unit quiz and the class test. Check in questions ask the material back as you go; answer them in your workbook when you meet them.
Working this lesson: Your project packet is the first download on this page. Work in it as the lesson moves along, working each part of the project as its subject is taught — or read the lesson through for your notes and take the project afterward. Both are proper ways to sit this class. Signposts in the reading tell you where each part of the project belongs. Written answers are short answers in your own words; a few honest lines are worth more than a filled page.
Your Assignment Packet
This lesson's work lives in its project packet: the Lexicon Handout (every term, course terms marked ◆), Materials, Guided Practice (the project's five-part structure and the shape of the basil example, so you can plan your own growing plan before you begin), the Assignment Manual with the project itself — its five parts and their checklists, printed as sheets you can work from — the Reflection Questions, which here are the project's Overall Self-Assessment, and the Workbook Checklist. There is no answer key in this packet, and that is by design: this project is self-assessed against its own checklists. Download the packet before you begin and keep it beside you as you read.
What Is the Growing Plan?
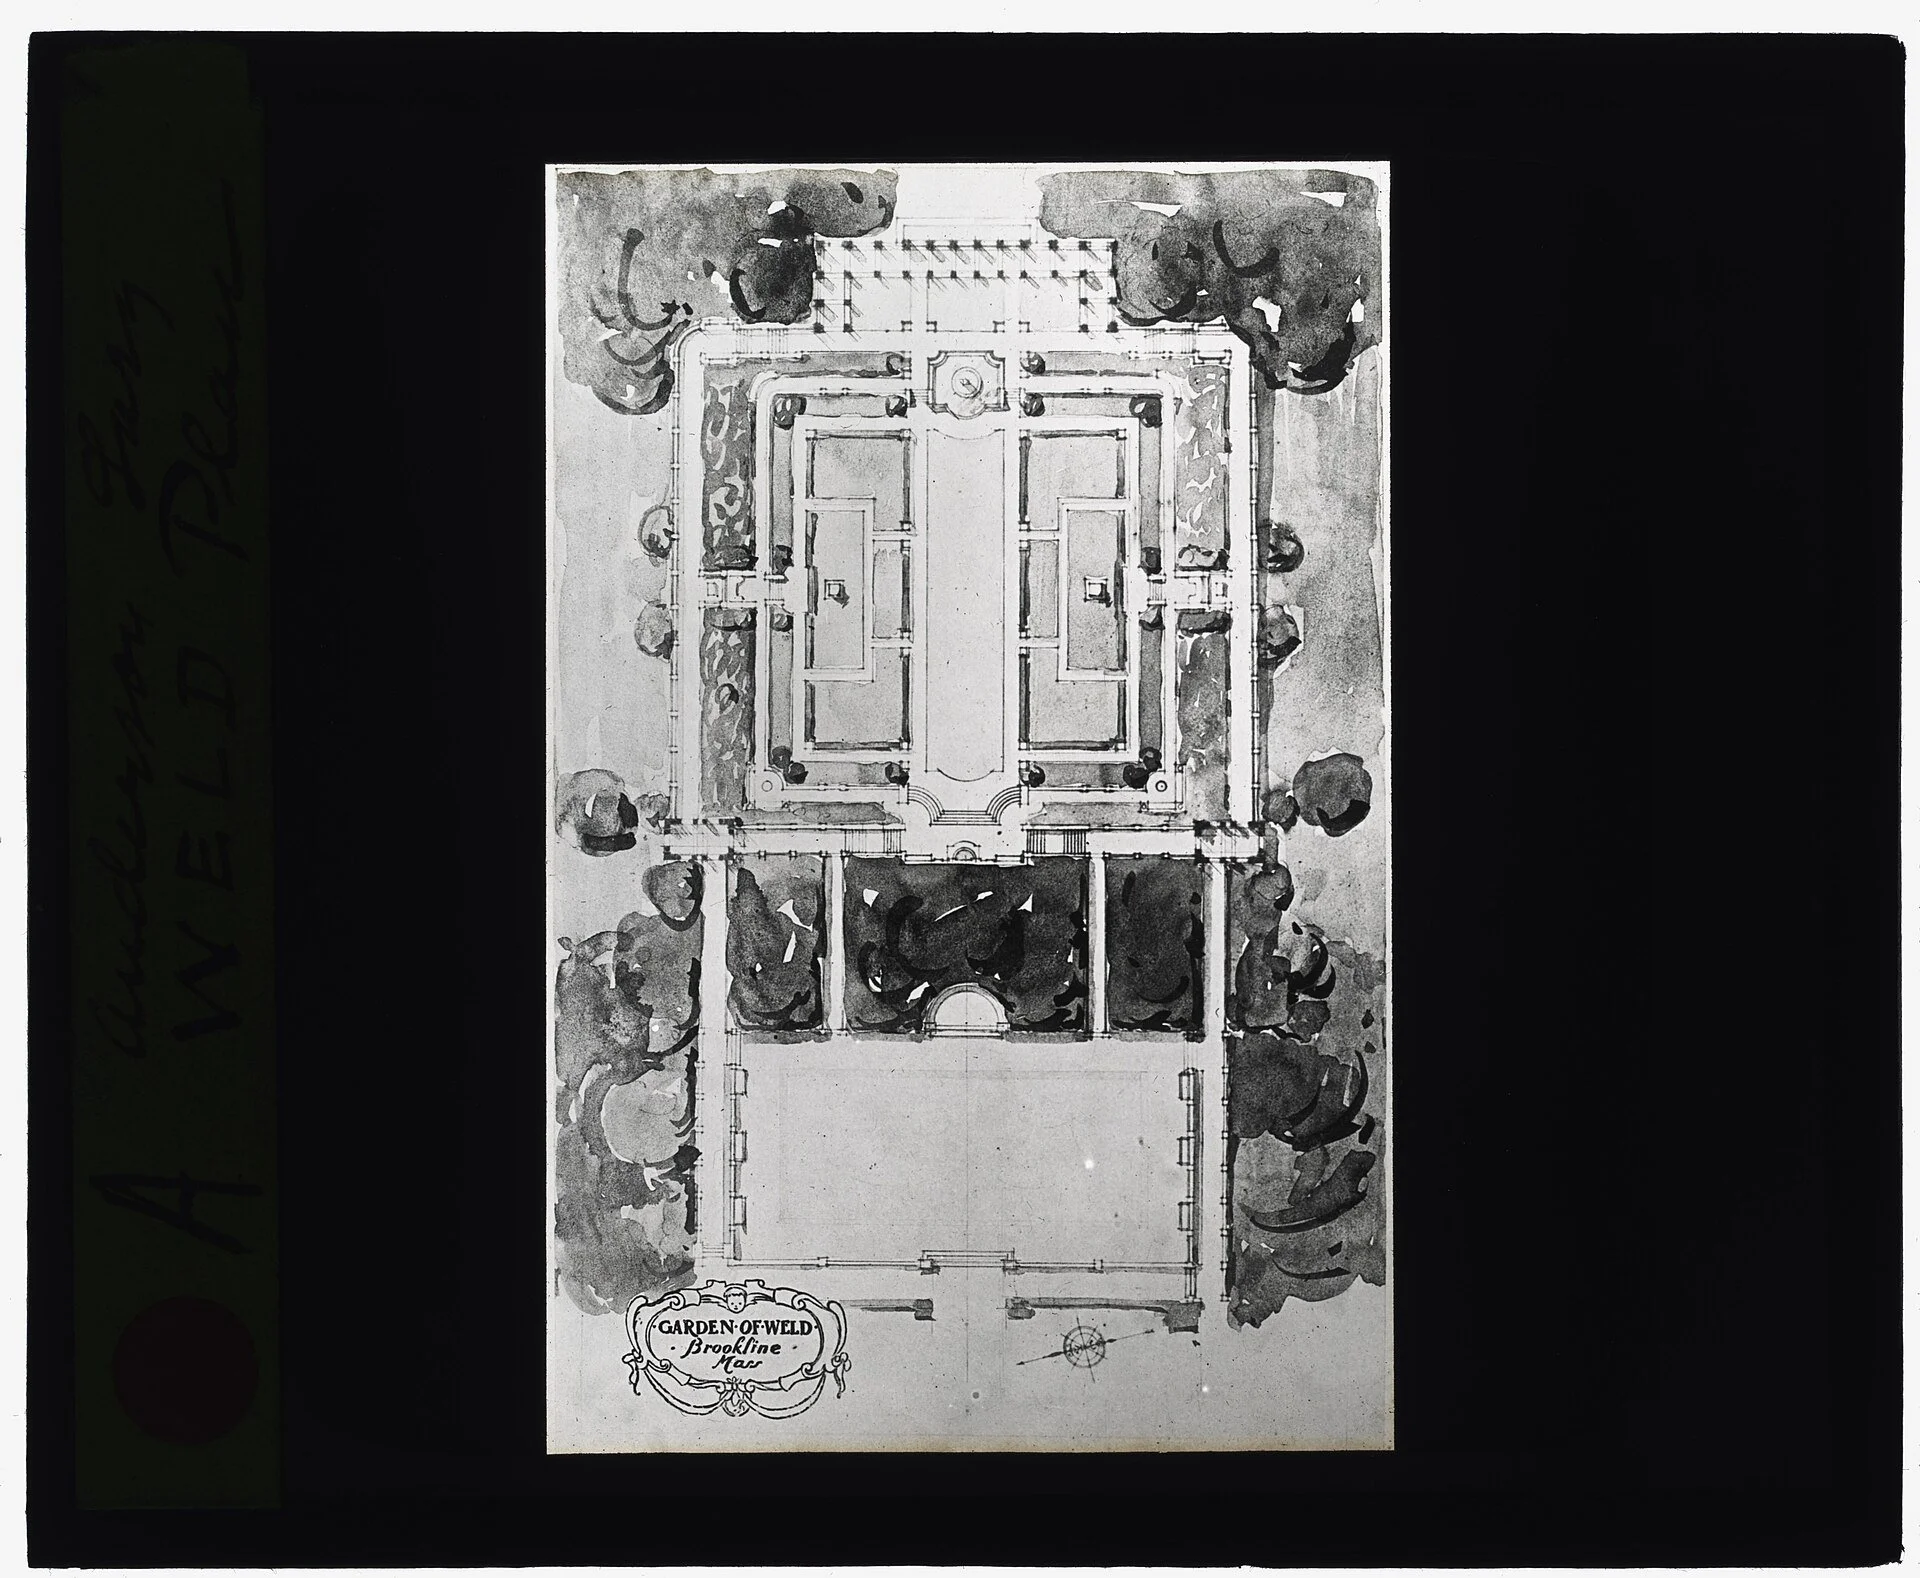
A garden plan as a document: the Garden of Weld, Brookline, Massachusetts, drawn to be worked from and kept — beds, walks, and plantings settled on paper, signed in its cartouche, and oriented by its compass rose. A growing plan is smaller and more personal than this, but it is the same kind of thing: observations distilled into instructions another person could follow.
Lantern slide after the garden plan, from the Frances Benjamin Johnston lectures collection; Library of Congress (LCCN 2008675613), c. 1915. Public domain.
Unit I ended with a botanical profile: a record of what a plant is. Unit II ends with a growing plan: a record of what a plant needs, in your specific place, written so clearly that you could hand it to a friend and they could keep your plant alive.
The two documents belong side by side in your journal. The profile says "this is peppermint." The growing plan says "this is how peppermint thrives on my south-facing windowsill in a terracotta pot." One is about the plant. The other is about the partnership between the plant and its keeper.
★ Your growing plan has five parts, matching the five investigations of this unit:
- Soil profile. What your soil is made of, how it drains, how acidic or alkaline it is, and what nutrition it offers. (Lessons 8 through 11.)
- Sunlight study. How much light your plant's spot actually receives, measured over several days, not guessed in one glance. (Lesson 12.)
- Watering plan. How water moves through your soil and container, and the schedule and method you will use. (Lesson 13.)
- Microclimate and seasonal notes. The small climate of your growing spot and where your plant sits in the year's cycle. (Lessons 14 and 15.)
- The plan itself. Everything above, distilled into clear care instructions and a seasonal calendar.
Check in: The botanical profile and the growing plan sit side by side in your journal. What does each one record, and how do they differ?
★ There is no quiz in this lesson and no time limit. Your project is the growing plan itself, checked against the lists in the assignment packet, and filed in your Scholar's Familiar Journal as the closing record of Unit II.
❦ In your workbook: record the growing plan in your own way — what it is, how it differs from the Unit I profile, and the five parts it is built from — copy, sketch, or note what matters.
In your packet: The Unit II Practical Project: The Growing Plan ◐ begins here. Work it now, or mark the place and take it as homework — your choice.
A Worked Example: Basil
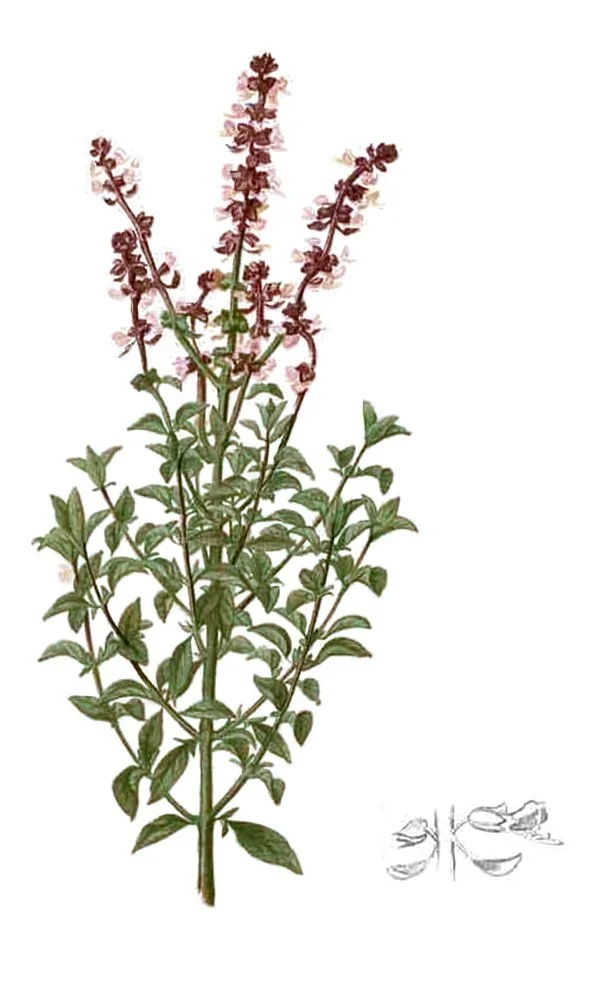
Basil (Ocimum basilicum), the worked example's plant. Everything in Fernfoot's plan is read off a living plant like this one: drooping leaves say "water," blackened edges say "too cold," leggy pale stems say "not enough light." A plant that complains clearly is a gift to a learning gardener.
From the illustrated posthumous edition of Flora de Filipinas by Francisco Manuel Blanco (1880–1883), plate 407 (cropped file). Public domain.
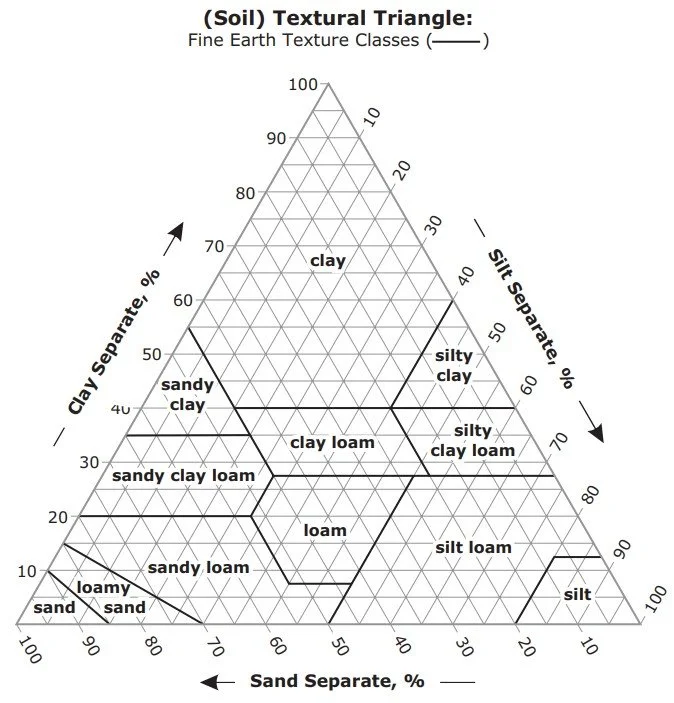
The soil textural triangle (USDA). Fernfoot's jar test settled at roughly 50 percent sand, 30 percent silt, and 20 percent clay; plotted on this triangle, those three numbers land in sandy loam — the one-line soil verdict ("sandy loam, pH 6.5, drains freely, compost-enriched") is earned here, where the layer measurements become a name.
USDA Natural Resources Conservation Service, from the Field Book for Describing and Sampling Soils (2012). Public domain (U.S. government work).
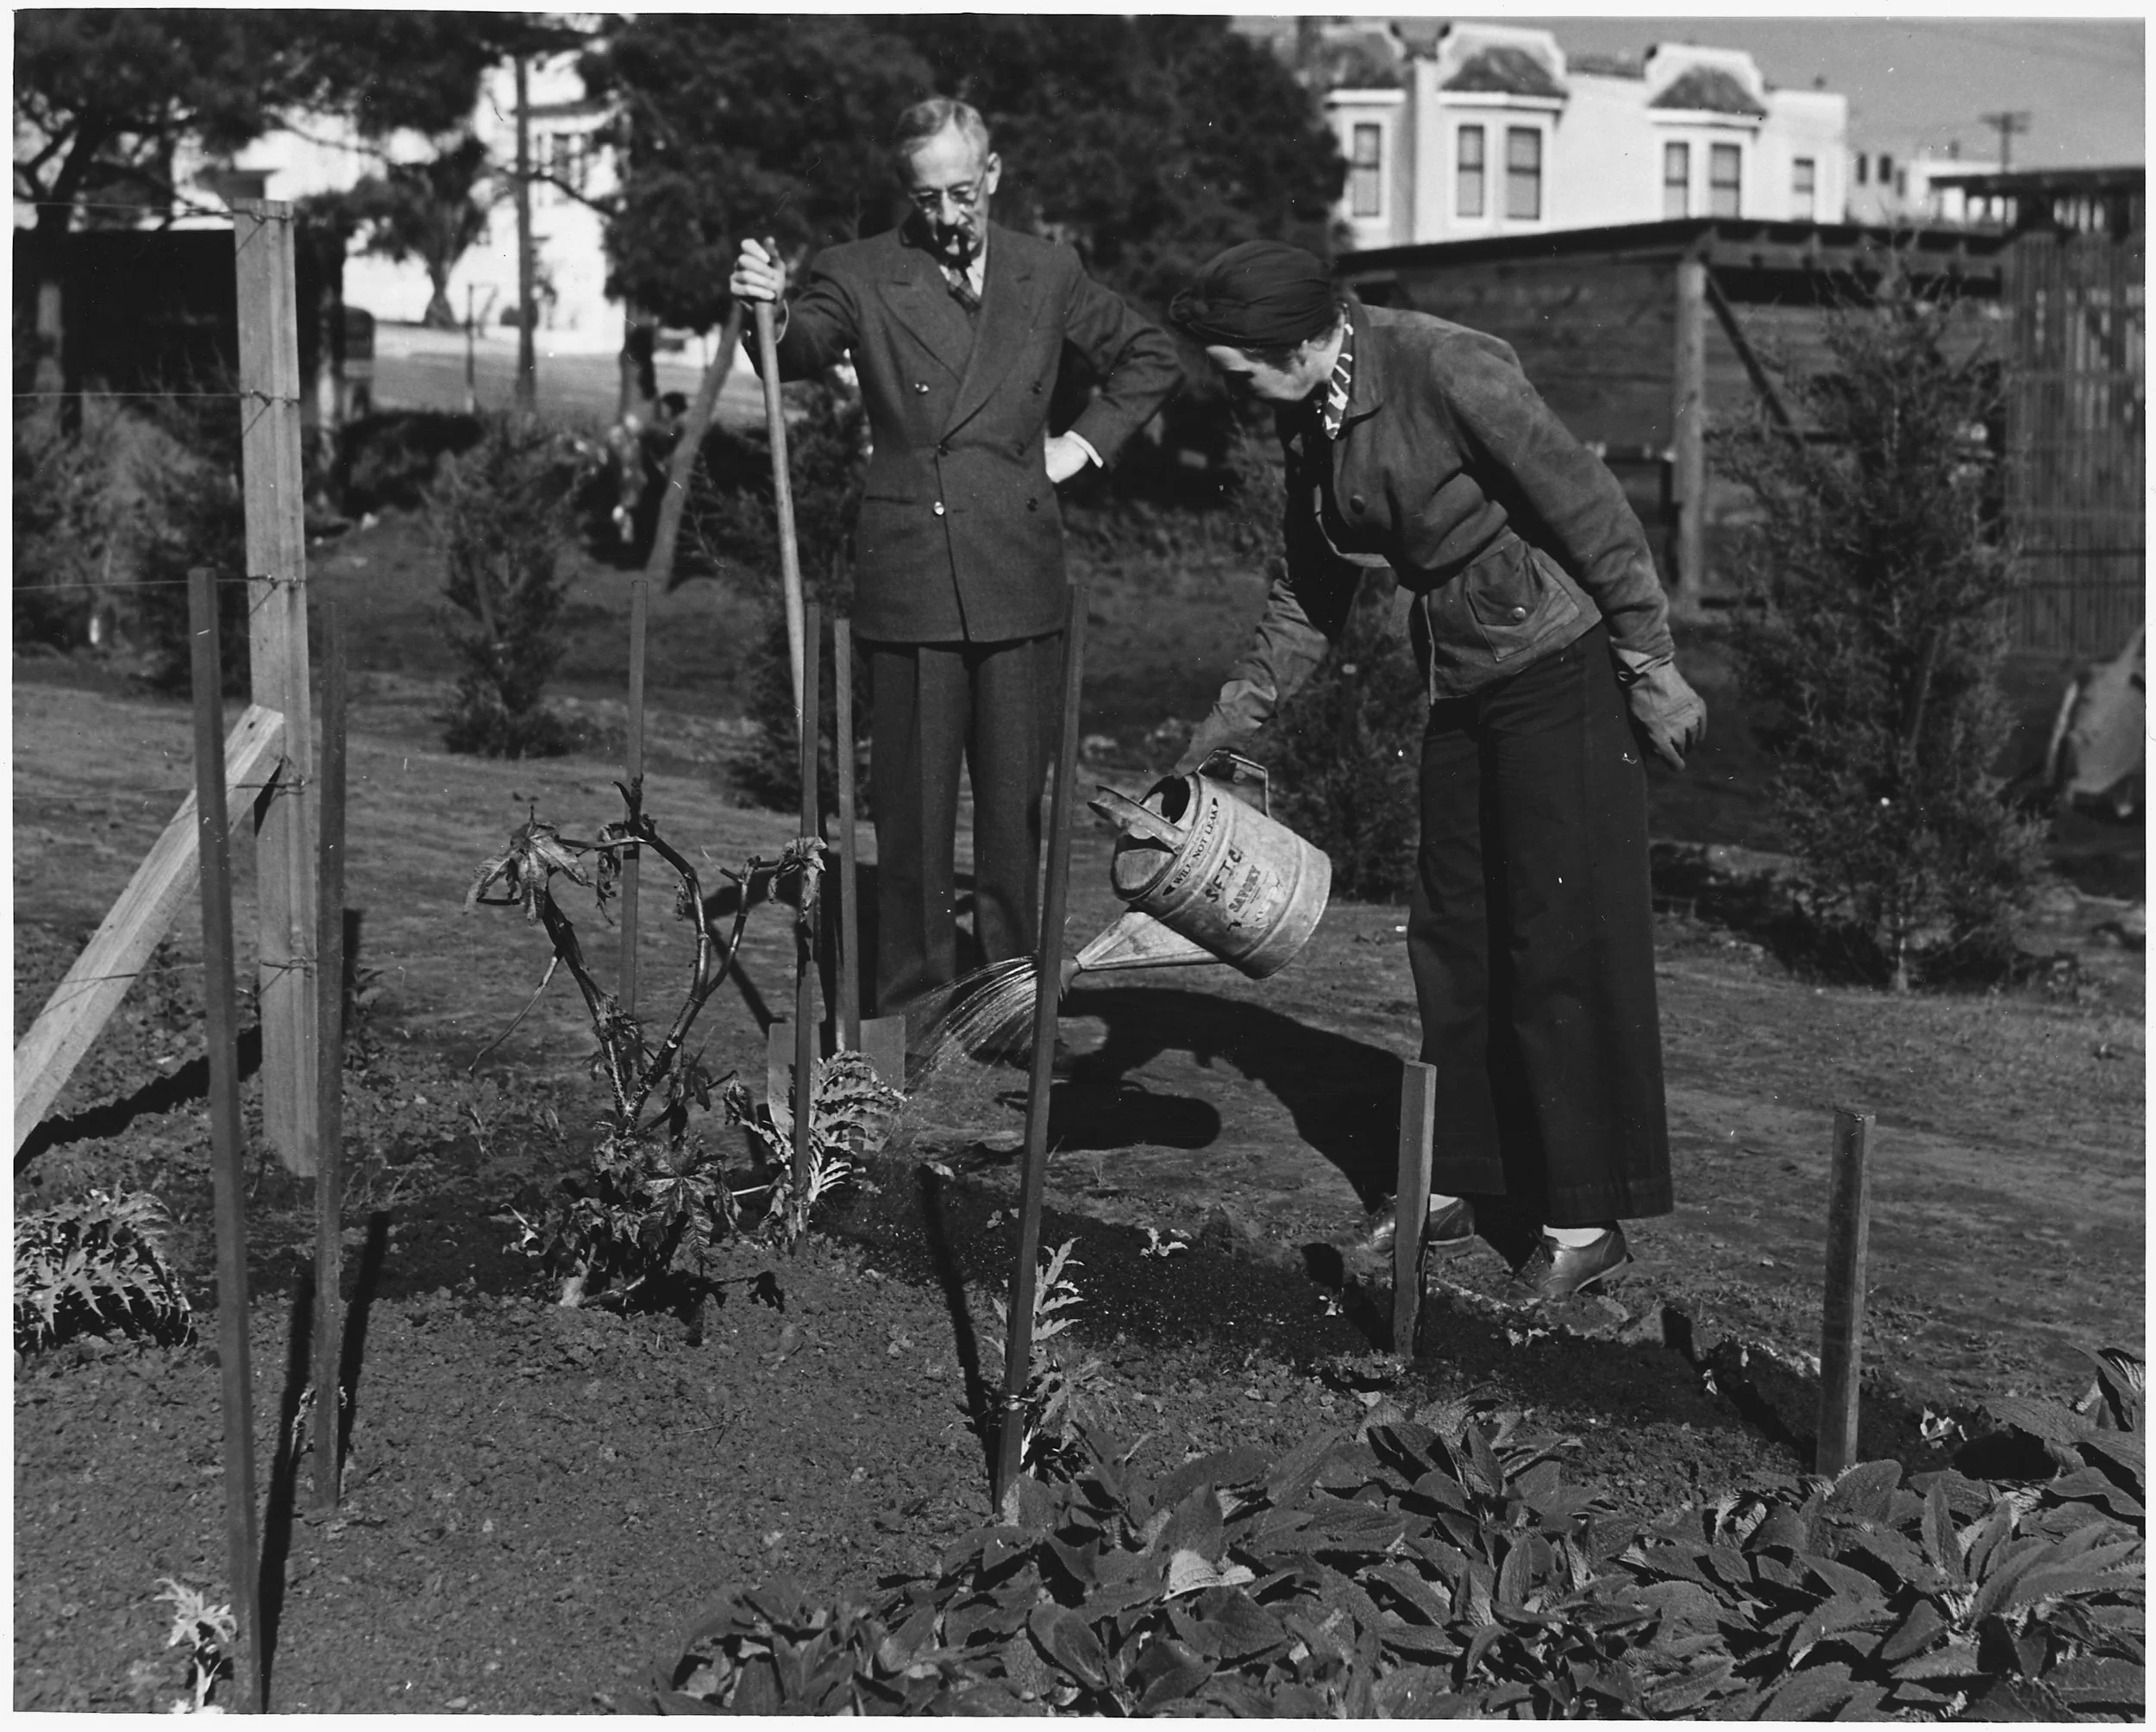
Watering a young victory garden, February 1943. The watering plan's rule is older than any calendar: water thoroughly, then wait — and water again when the soil itself, tested a knuckle deep, says dry. A schedule is a starting expectation, not a law; the plant and the soil keep the real timetable.
Photograph by Ann Rosener for the U.S. Office of War Information, c. February 1943; U.S. National Archives (NARA 196478). Public domain (U.S. government work).
Before you build your own plan, walk through a complete one with me. I have chosen basil, Ocimum basilicum, a plant many of you are already growing as your Familiar. Basil is an excellent teacher for this project because it is honest: it tells you quickly when something is wrong. Drooping leaves say "water." Blackened leaf edges say "too cold." Leggy, pale stems say "not enough light." A plant that complains clearly is a gift to a learning gardener.
Part 1: The Soil Profile
Begin with the ground beneath the plant, because everything else in the plan depends on it.
Texture. I tested my potting mix with the jar test from Lesson 8: half a jar of soil, water nearly to the top, a vigorous shake, then patience. Sand settled within a minute, silt within two to four hours, clay over the next day. Measuring the layers against the total, my mix came out roughly 50 percent sand, 30 percent silt, and 20 percent clay, with a thin dark band of organic matter floating at the surface. On the texture triangle, that lands near sandy loam. The ribbon test agreed: a moist ball formed a weak ribbon about two centimeters long before breaking, which points to a loam with modest clay, not a heavy clay soil.
★ Drainage. Basil hates wet feet. I ran the simple drainage check: I watered the pot thoroughly and watched. Water flowed from the drainage holes within a minute, and the top centimeter of mix was merely damp, not soggy, an hour later. That is the behavior basil wants. A pot that stays soggy for hours would need a grittier mix or a container with better drainage.
pH. Using a simple test kit from Lesson 9, my mix tested at pH 6.5. Published growing guidance for basil places its preferred range at about pH 6.0 to 7.5, so 6.5 sits comfortably inside it. I recorded the date of the test, because pH drifts over time and a future test will mean more beside this one.
Nutrition. From Lesson 10, I know basil is a leafy grower, which means nitrogen matters most to it, with phosphorus and potassium supporting roots and overall vigor. My mix contains compost (Lesson 11), which releases nutrients slowly as it breaks down. I noted in the plan: no additional fertilizer for the first six weeks, then a half-strength balanced feed only if growth looks pale or slow. Feeding a plant that does not need it is like shouting at someone who is already listening.
Soil verdict, in one line. Sandy loam, pH 6.5, drains freely, compost-enriched: a mix basil can thrive in.
Check in: Fernfoot's soil profile records four things before it dares a verdict. Name them — and say why the pH reading carries its date with it.
❦ In your workbook: record the soil profile in your own way — the jar test's settling order, what the ribbon test agreed with, and how a one-line verdict is earned — copy, sketch, or note what matters.
In your packet: The Unit II Practical Project: The Growing Plan ◐ — Part 1 — Soil Profile ◐ begins here. Work it now, or mark the place and take it as homework — your choice.
Part 2: The Sunlight Study
★ Guessing at light is the most common mistake in indoor gardening. "Bright" to a human eye and "bright" to a plant are different things. So I measured.
For five days, I noted when direct sun first struck my basil's shelf and when it left, and I described the light in between. The pattern: direct sun from roughly 9 in the morning until 3 in the afternoon, about six hours, on a south-facing windowsill, with bright indirect light for the rest of the day. Published guidance calls for six to eight hours of sun for basil, so six hours meets the need, at the lower end. I noted that in winter this same sill will receive less, and the plan will need revisiting.
★ I also recorded what the plant itself reported. The stems are stocky, not stretched. The leaves are deep green and closely spaced. No leaning toward the glass. The plant agrees with my measurements: the light is sufficient.
Sunlight verdict, in one line. Six hours of direct sun on a south sill, adequate now, to be rechecked in winter.
Check in: Fernfoot's sill gives six hours of direct sun, and published guidance asks for six to eight. Why does her verdict still carry the words "to be rechecked in winter"?
❦ In your workbook: record the sunlight study in your own way — how the light was measured over five days, and how the plant's own growth confirmed the measurement — copy, sketch, or note what matters.
In your packet: The Unit II Practical Project: The Growing Plan ◐ — Part 2 — Sunlight Study ✎ begins here. Work it now, or mark the place and take it as homework — your choice.
Part 3: The Watering Plan
Water is where most beginners go wrong in both directions, so the plan must be specific.
How water moves here. My terracotta pot is porous, which means it breathes and dries faster than plastic. The sandy loam drains freely. Together, those two facts mean this pot will need water more often than a plastic pot of heavy soil would, but it will almost never drown the roots. Capillary action (Lesson 13) pulls water upward through the mix evenly when I water from the top, and the drainage holes let excess escape.
★ The method. Water thoroughly until it runs from the drainage holes, then wait. Check by pushing a finger a knuckle deep into the mix: water only when it feels dry at that depth, not merely dry on the surface. This is the finger test, and it is more reliable than any calendar.
The schedule. In current conditions, that means watering roughly every two to three days. But the plan does not say "water every Tuesday." It says "water when the finger test says dry," because heat waves, rainy weeks, and growth spurts all change the rhythm. The schedule is a starting expectation, not a law.
Watering verdict, in one line. Water deeply when the top knuckle of soil is dry; expect every two to three days in summer, less often in cool or cloudy weather.
Check in: Why does the plan refuse to say "water every Tuesday"? What does it put in the calendar's place?
❦ In your workbook: record the watering plan in your own way — how the pot and the mix together set the rhythm, the finger test, and a schedule written as an expectation — copy, sketch, or note what matters.
In your packet: The Unit II Practical Project: The Growing Plan ◐ — Part 3 — Watering Plan ◐ begins here. Work it now, or mark the place and take it as homework — your choice.
Part 4: Microclimate and Seasonal Notes
A plant does not live in "your house." It lives in one particular spot, with its own small climate.
Microclimate. My basil sits on a south-facing sill in the kitchen. Warm air rises from the room, so the sill runs a few degrees warmer than the hallway. It is well away from the back door, so no cold drafts strike it. In summer this spot is ideal. I noted one risk: in winter, the glass itself becomes cold, and leaves touching cold glass can be damaged. The plan includes moving the pot two inches back from the pane when nights turn cold.
★ Seasonal timing. Basil is a tender annual in most climates. It dies at the first frost and even suffers when nights stay in the 40s, with leaves blackening in chilling temperatures. So the seasonal calendar in my plan reads: start seeds indoors four to six weeks before the last frost; move outdoors only after nights stay above 50 degrees and the soil has warmed; harvest through summer, pinching flower buds to keep leaves coming; take a final full harvest before the first expected frost, or bring a cutting indoors to overwinter on the sill.
Microclimate and seasonal verdict, in one line. Warm south sill, draft-free, pulled back from cold glass in winter; grown as a summer annual with indoor seed-starting in spring.
Check in: The basil plan guards against two different cold dangers. What are they, and what does the plan do about each?
❦ In your workbook: record the microclimate and seasonal notes in your own way — the sill's small climate and its one risk, and the year basil is planned around — copy, sketch, or note what matters.
In your packet: The Unit II Practical Project: The Growing Plan ◐ — Part 4 — Microclimate and Seasonal Notes ✎ begins here. Work it now, or mark the place and take it as homework — your choice.
Part 5: The Growing Plan
Now distill everything above into the document itself: clear, short, and usable.
Basil growing plan, south kitchen sill:
- Container: Terracotta pot, at least 15 centimeters across, with drainage holes. Terracotta dries faster than plastic; that suits basil.
- Soil mix: Sandy loam potting mix with compost, pH near 6.5, free-draining.
- Placement: South-facing sill, six hours direct sun minimum. Move two inches back from glass in winter.
- Watering: Finger test at one knuckle; water deeply when dry. Roughly every two to three days in summer.
- Feeding: None for the first six weeks in fresh compost-enriched mix; half-strength balanced feed after that only if growth pales.
- Seasonal calendar: Sow indoors 4 to 6 weeks before last frost; transplant after nights stay above 50 degrees; pinch flower buds all summer; final harvest before first frost.
- Watch for: Drooping means thirsty. Blackened edges mean too cold. Pale, stretched stems mean too little light. Yellow lower leaves may mean overwatering; check drainage before adding water.
★ That is a growing plan. Anyone reading it could keep this basil alive. That is the standard yours must meet.
❦ In your workbook: record the distilled plan in your own way — its seven lines, and the standard the finished document must meet — copy, sketch, or note what matters.
In your packet: The Unit II Practical Project: The Growing Plan ◐ — Part 5 — The Growing Plan begins here. Work it now, or mark the place and take it as homework — your choice.
The Familiar Check-In
Before you file your growing plan, return to your Scholar's Familiar with everything you have learned in this unit. When you chose your plant in Lesson 1, you chose with love but without knowledge. Now you have the knowledge. Ask the honest questions.
Is your Familiar in the right soil? You know its texture now, and whether it drains. Is it getting the light it needs? You have tracked your sunlight and you know what full sun truly means. Is your watering right? You know the finger test and the difference between thirst and drowning. Is it sitting in a kind microclimate, or pressed against cold glass above a hot radiator?
If something needs to change, change it now: move the pot, adjust the watering rhythm, top-dress with compost. Record what you changed and why in your grow ledger, dated. This is not a correction of a mistake. It is the first time you have cared for your plant with understanding instead of hope, and that is worth marking.
(If you are following the adopted-plant path instead of keeping a Familiar, write what you would change about your adopted plant's situation as if you were its gardener. The thinking is the same.)
❦ In your workbook: record the Familiar check-in in your own way — the honest questions you asked your plant, and anything you changed, with its date — copy, sketch, or note what matters.
Professor Fernfoot
You have just watched five investigations fold into one document, and I want you to notice something: nothing in that plan required a laboratory. A jar, a finger, five days of attention, and honest writing. The tools of this unit are humble. That is their virtue. A gardener who can read soil with her hands and light with her eyes will never be helpless, whatever she grows.
One more thing before your own project begins. Your Familiar may not be basil. It may be mint, or rosemary, or a spider plant, or something I have never grown. That is exactly as it should be. The worked example shows you the shape of the work, not its contents. Your plant's needs are its own. Trust your measurements more than your memory of mine.
Work the five parts in order. Date everything. And be as honest in your plan as your plant has been with you.
— Professor Beryl Fernfoot, Herbology Greenhouse • Master Herbalist • Head of House Oriens
Your Turn: The Project
Choose your Scholar's Familiar, the same plant you have been tending since Lesson 1. If your Familiar did not survive the unit, choose the plant you learned the most from tending, and note honestly what happened; a plan written from a failure is still a plan, and sometimes the most instructive one.
Work through the five parts exactly as demonstrated above, recording everything in your Scholar's Familiar Journal or on the project sheets provided.
If you have no plant of your own: adopt one you can visit regularly, a park tree, a neighbor's garden plant with permission, a sturdy store display, even a sidewalk weed. All five parts work the same; only Part 3 changes shape. Instead of writing a watering schedule you will follow, assess how the plant is currently watered (by its keeper, by rain, by no one) and write what you would recommend. The skills are identical; only the ownership differs.
Part 1: Soil profile. Test your soil's texture with the jar test or ribbon test. Check its drainage by watering and watching. Test pH if you have a kit, and note the result with the date. Record what you know about its nutrition, including any compost or amendments. End with a one-line soil verdict.
Part 2: Sunlight study. Track direct sun on your plant's spot for at least five days. Note when it arrives, when it leaves, and what the light is like between. Compare your findings with what your plant's growth tells you. End with a one-line sunlight verdict.
Part 3: Watering plan. Describe how water moves through your soil and container. Choose your method (the finger test is recommended). Write a starting schedule as an expectation, not a law. End with a one-line watering verdict.
Part 4: Microclimate and seasonal notes. Describe your spot's small climate: warmth, drafts, humidity, nearby heat or cold sources. Place your plant in the year's cycle using Lesson 15: is it annual, biennial, or perennial where you live? When does its season start and end? End with a one-line verdict.
Part 5: The growing plan. Distill the four investigations into clear care instructions and a seasonal calendar, following the shape of the basil example. Include a "watch for" list of what your plant's signals mean.
When all five parts are complete, work through the self-assessment checklists in the assignment packet. Then file the finished plan in your journal as the closing record of Unit II, beside your Unit I archive entry. These two documents, the profile and the plan, are the foundation everything else in this course will build on.
❦ In your workbook: record your turn in your own way — the plant you have chosen, the five parts in their order, and where the finished plan will be filed — copy, sketch, or note what matters.
Filing Your Environmental Record
Arrange your project in this order: soil profile with test results, sunlight study with the five-day log, watering plan, microclimate and seasonal notes, then the distilled growing plan with its seasonal calendar. Date every test and observation. Sign the finished document. Give it an entry number following your Unit I archive entry.
★ A useful habit from professional practice: leave the last page of the plan blank, titled "Revisions." When winter comes and the light changes, when you repot into a larger container, when a heat wave rewrites your watering schedule, record the change there with a date. A growing plan that never changes is a plan that stopped being honest. Yours will stay honest, and it will grow more valuable every season you keep it.
❦ In your workbook: record the filing in your own way — the order the five parts are arranged in, and how the blank Revisions page keeps the plan honest — copy, sketch, or note what matters.
In your packet: The Unit II Practical Project: The Growing Plan ◐ — Filing Your Environmental Record begins here. Work it now, or mark the place and take it as homework — your choice.
Guided Observation: The Basil Plan, Walked Through Once More
Before you build your own plan, walk through a complete one with me. The worked example above is this lesson's guided practice: Fernfoot builds a whole growing plan on basil, part by part, so that you can watch the method before the plan is yours. Walk it once more with these questions beside you:
- In Part 1, what four findings does the soil profile record, and what does its verdict line say?
- In Part 2, how was the light measured, and what did the plant itself report?
- In Part 3, what test replaces the calendar, and how is the schedule written?
- In Part 4, what is the sill's one microclimate risk, and what seasonal calendar does basil's tenderness produce?
- In Part 5, what seven lines does the distilled plan carry, and what standard must it meet?
Work the five parts in order. Date everything. And be as honest in your plan as your plant has been with you.
Materials
Required (Level One — household items)
- Your Scholar's Familiar Journal or a notebook
- Pencil and eraser
- A clear jar with a lid for the texture test
- A ruler
- A finger for the moisture test
- Access to a reference on your plant's needs (book, reputable website, or seed packet)
Suggested (Level Two — historically closer)
- A bound blank book for your environmental records
- A soil pH test kit
- A rain gauge or simple measuring cup for tracking water
- A min-max thermometer for recording your microclimate's temperature range
Safety: Wash your hands after handling soil; garden soil can carry bacteria. Do not taste soil or unknown amendments. If using a pH test kit, read its instructions and keep reagents away from children and pets. Never stare directly at the sun when tracking light; judge brightness by the shadows and the plant, not by looking skyward. Keep electrical items such as grow lights away from water.
Reflection Questions
This project's reflection is its Overall Self-Assessment: there are no separate questions to answer, because the examiner is you. Read your finished plan once through, slowly, as if a friend had written it for you, and answer honestly:
- ☐ Every instruction in the plan can be traced to an observation or test in the five parts.
- ☐ Nothing is copied from the basil example without being re-tested on your own plant and spot.
- ☐ The language is plain and specific; vague words ("sometimes," "a bit") have been replaced with measurements or tests.
- ☐ You could hand this plan to a friend and they could keep your plant alive.
- ☐ You are honestly satisfied that each checklist above is complete. If any box is unchecked, return to that part before filing.
Workbook Checklist — Lesson 16
In my workbook I have:
- ☐ The five parts are arranged in order: soil profile, sunlight study, watering plan, microclimate and seasonal notes, growing plan.
- ☐ Every test and observation is dated.
- ☐ The document is signed and numbered, following your Unit I archive entry.
- ☐ A blank "Revisions" page follows the plan, titled and dated.
- ☐ Every instruction in the plan can be traced to an observation or test in the five parts.
- ☐ Nothing is copied from the basil example without being re-tested on your own plant and spot.
- ☐ The language is plain and specific; vague words ("sometimes," "a bit") have been replaced with measurements or tests.
- ☐ You could hand this plan to a friend and they could keep your plant alive.
- ☐ You are honestly satisfied that each checklist above is complete. If any box is unchecked, return to that part before filing.
☐ Lesson completed Date: ___ Signature: ___
Professor's Closing Note
You began Unit II by squeezing a handful of soil. You end it holding a complete understanding of one small environment: the ground, the light, the water, the air, and the turning year, all as they touch a single plant you chose and tended.
Unit III will teach you to multiply and shape what you grow: seeds waking, cuttings rooting, pruners in careful hands. Everything you learned about soil and light and water goes with you, because a cutting roots in a medium, and a medium is soil, and now you know soil.
I am proud of the observer you have become. Walk gently into the next unit, scholars. Your Familiar is in good hands: yours.
— Professor Beryl Fernfoot, Herbology Greenhouse • Master Herbalist • Head of House Oriens
PROFESSOR BERYL FERNFOOT
Herbology Greenhouse
Master Herbalist
Cross-Class Connections

Creative Arts · Unit V, Lesson 22 — Garden Structures: Supports, Cold Frames & Garden Models
Set up, scholars, and mind the glass. When your growing plan's calendar says "protect from frost," this workshop teaches your hands what that sentence means in wood and clear sheet: a bottomless box with a sloping glazed lid, sited where the lid meets the sun and the back meets the wind's shelter, its prop stick notched for venting — because a frame shut tight on a warm day cooks what it was built to save. Build it true at small size first, and it will grow up honest.
Creative Arts · Unit II, Lesson 11 — Case Binding & Archival Boxes
Your Level Two materials ask for a bound blank book for your environmental records, and I will tell you plainly: a record kept for seasons deserves a binding built to be opened daily and still be sound in fifty years. In this workshop we case a text block into boards built to fit it, and build the archival box its most precious records will rest in — Fernfoot's own plant records among them, when their day comes. Case your record book with me, patiently and square, before Unit II's plan goes into it.

Celestial Studies · Unit I, Lesson 3 — The Tilted Year: Why We Have Seasons
Scholars, a confession from the Tower: your seasonal calendar is my lesson wearing gardener's boots. The tilt of Earth's axis — about 23.5 degrees, leaning steadily toward the same star all year — is what shortens your basil's winter light, moves your frost dates, and turns the year your plan is written around. Come and learn why the seasons happen, and your calendar will never again be a list of dates you merely obey.
Further Reading & Sources
- UMass Extension: Basil Culture and Harvest — university growing guidance for our worked example, including its preferred pH range of 6.0 to 7.5 and harvest timing.
- The Herb Prof: How to Grow Basil — a thorough home-gardening guide covering sun, soil warmth, watering, and seasonal timing for basil.
- Gardening Know How: Basil Cold Tolerance — why basil blackens in cold and how temperature thresholds shape its seasonal calendar.
- Kansas State Extension: Texture Analysis of Soils (video transcript) — a clear walkthrough of the home jar test for soil texture from a university extension program.
- WSU Extension: Evaluating Your Soil Texture (PDF) — step-by-step jar test instructions with layer timing and the organic matter layer explained.
Browse the Herbology shelf in the school Library for readable editions of these works.
School of Evershade · Herbology Greenhouse · For personal educational use
Submit your work for this lesson using the form below.
THE UNIT II QUIZ
HERBOLOGY GREENHOUSE · UNIT II: SOILS, SUNLIGHT & GROWING ENVIRONMENTS
Unit II is complete: texture and drainage, the quiet chemistry of pH, the three great nutrients, the compost crucible, sunlight through the seasons, water and air in balance, microclimates, and the turning year. This quiz gathers the whole unit into one sitting. Take it from memory first, before you look back at your notes, because it measures what has stayed with you. If you completed the work marked ★ in your lesson packets, you have already practiced most of what it asks.
It stands beside this lesson's own Growing Plan: the plan is one complete piece of work, the quiz is the unit remembered. Two different kinds of proof, both worth having.
The quiz packet is a single download. Part I gathers questions from across the unit, Part II matches the unit's vocabulary, and the answer key waits at the back for self-checking. When you have finished, score it honestly, note the result in your workbook, and revisit any lesson whose questions went wrong before you move on to Unit III.
Download the Unit II Quiz packet
Plants from this lesson stand in the Materia Botanica, the school's shared archive — each kept with its lessons, its keepings, and its cautions. This lesson's company:
RosemarySpider Plant The whole Materia BotanicaPROFESSOR BERYL FERNFOOT · HERBOLOGY GREENHOUSE
CONTINUE IN THE HERBOLOGY GREENHOUSE
← Previous · Lesson 15: Seasonal Growing Cycles Next · Lesson 17: Seed Starting Basics →
Unit II — Soils, Sunlight & Growing Environments Herbology Greenhouse — All 37 Lessons
The rest of Unit II: Lesson 8 · Substrate Profile · Lesson 9 · Soil Chemistry: pH · Lesson 10 · The N-P-K Matrix · Lesson 11 · Compost Crucible · Lesson 12 · Photoperiod Dynamics · Lesson 13 · Watering Matrix · Lesson 14 · Microclimate Calibration · Lesson 15 · Seasonal Growing Cycles
From the Greenhouse Shelf
The printed companions to this lesson, from Professor Fernfoot’s shelf in the shop.

Herbology — Familiar Journal Pages: Unit II Lesson Pages — Lessons 8–16 (27 Pages)
$4.99
View in the Shop