

POTIONS
Unit II · Lesson 12FLOWERS, LEAVES & FRAGILE PETALS
Professor Crimblebrew Muddlenook
Master Apothecary • Potions
Head of House Meridies • School of Evershade
Professor's Introduction

Sealed with the mark of Professor Crimblebrew Muddlenook, Master Apothecary of the Potions Laboratory, Head of House Meridies.
Apprentices,
Every preparation we will ever brew begins the same way: not at the cauldron, but at the laboratory door, with a basket of plant material and a single question. Is this material worthy of the work ahead? The apothecary who cannot answer that question will pour good solvents — liquids able to dissolve or draw out other materials — over spoiled stock and blame the recipe when the preparation fails. The apothecary who can answer it will rarely be surprised.
Flowers and leaves are the most honest materials you will ever handle, and the most fragile. A root will wait patiently upon the shelf. A petal will not. Delicate structures bruise, fade, wilt, and shatter, and they do all of it quickly. That is why the receiving inspection is where the laboratory's standards are truly kept: not in the brewing, but in the judging.
Today you become the judge at the door. Bring order, bring your ledger, and bring your eyes. We begin.
— Professor Crimblebrew Muddlenook, Potions Laboratory • Master Apothecary • Head of House Meridies

Potions map — the class base map, unmarked for this lesson.
Lesson Objectives
By the end of this lesson, you will be able to:
- Explain why flowers, leaves, and petals demand faster and gentler handling than dense materials such as roots and bark.
- Describe bruising, color instability, moisture loss, and petal shatter, and recognize each one during a receiving inspection.
- Perform a four-point intake inspection, covering sight, touch, fragrance, and moisture, on a sample of delicate botanical material.
- Grade incoming material as prime, acceptable, or rejected, and record the decision in your intake ledger with written reasons.
- Explain how enzymatic browning and volatile oil release change a material after it has been bruised.
- State the safety rules for handling unknown or irritating plant material.
Reading this lesson: ★ marks the passages to remember. They return on the unit quiz and the class test. Check in questions ask the material back as you go; answer them in your workbook when you meet them.
Working this lesson: Your assignment packet is the first download on this page. Work in it as the lesson moves along, answering each exercise as its subject is taught — or read the lesson through for your notes and take the exercises as homework afterward. Both are proper ways to sit this class. Signposts in the reading tell you where each exercise belongs. Written answers are short answers in your own words; a few honest lines are worth more than a filled page.
Your Assignment Packet
This lesson's exercises live in its packet: the Lexicon Handout (every term, course terms marked ◆), Materials, Guided Practice, the Assignment Manual with its answer key for self-checking, the Reflection Questions, and the Workbook Checklist. Download the packet before you begin and keep it beside you as you read.
Safety Briefing: The Intake Bench Rules
Before a single basket is opened, the rules of the intake bench are spoken aloud and written at the top of the ledger page. Professor Muddlenook insists upon this order of things. Safety first, curiosity second, and never the reverse.
Rule one: nothing enters the mouth. Never taste, chew, or press unknown plant material against your skin to test it. Identification is done with the eyes, with careful wafting toward the nose, and with reference books. The mouth is not an instrument of inspection.
Rule two: gloves for strangers. Some leaves and petals cause skin irritation, and many more stain the fingers for days. Wear gloves whenever you handle material you have not handled before, and wash your hands when the inspection is done.
Rule three: waft, do not inhale. Hold the material at arm's length and wave a little air toward your nose. Never press a flower to your face and breathe deeply. Strong fragrance in a concentrated breath can overwhelm you, and some spoiled material releases unpleasant compounds you do not want in your lungs.
Rule four: blades need witnesses. If trimming requires scissors or a knife, younger students work alongside an adult. Cut away from the body, on a stable surface, with the material held firmly.
Rule five: label immediately. An unlabeled sample is a failed sample. Every dish gets a name before the next dish is filled.
Rule six: fresh air for strong scents. Work in a ventilated space when handling strongly fragrant material, and step away if your head begins to feel heavy.
These rules are not suggestions. They are the conditions under which the laboratory permits you to touch its incoming stock.
The rules in brief
- Nothing enters the mouth. Never taste, chew, or test unknown plant material on your skin. Identify with eyes, careful wafting, and references only.
- Gloves for unfamiliar material. Some leaves and petals irritate skin or stain strongly. Wear gloves for anything you have not handled before, and wash your hands afterward.
- Waft, do not inhale. Hold material at arm's length and wave air toward the nose. Never press flowers to your face for a deep breath.
- Blades need supervision. Younger students trim or cut only alongside an adult, cutting away from the body on a stable surface.
- Ventilate strong scents. Work in fresh air with strongly fragrant material, and step away if you feel lightheaded.
- Rejects stay separate. Moldy or slimy material goes directly to the waste bowl, never back into a basket of sound stock, and the bench is cleaned before the next inspection.
Check in: A scholar wants to test an unknown leaf by pressing it against the skin, and to smell a flower by pressing it to the face and breathing deeply. Which two rules answer those two plans — in the bench's own words?
❦ In your workbook: record the intake bench rules in your own way — the six rules, spoken aloud and written at the top of the ledger page before a single basket is opened — copy, sketch, or note what matters.
Mise en Place: Assembling the Intake Bench
Mise en place means everything in its place, and at the intake bench it means the bench is fully prepared before the first basket arrives. A judge who must hunt for a pencil mid-inspection is a judge already behind.
Lay out the following, in this order, left to right:
- A clean, dry work surface covered with fresh paper.
- Your intake ledger or notebook, opened to a fresh page, with a pencil.
- Small dishes or saucers, one for each sample you expect to receive.
- Gloves, within reach.
- Labels and a pen.
- A waste bowl for rejected material, set apart from the clean dishes so the two can never be confused.
- A magnifying lens, if you have one.
Level One: Saucers or small bowls from the kitchen, any notebook, kitchen gloves or disposable gloves, and a phone camera for recording what you see.
Level Two: Ceramic dishes, a bound ledger kept only for intake records, a hand lens or loupe, and pre-cut paper labels.
When the bench is ready, the bench is photographed or sketched into the ledger as the starting state. Order is visible. Disorder, later, will be equally visible, and that is the point.
Check in: Which vessel is set apart from the clean dishes so the two can never be confused — and what is it for?
❦ In your workbook: record the intake bench in your own way — the order of the layout, left to right, and the photograph or sketch of the bench as its starting state — copy, sketch, or note what matters.
What Arrives at the Laboratory Door
Herbology grows the plants. The laboratory receives them. That division of labor is worth stating plainly, because it tells you exactly what your job is today. You are not judging anyone's gardening. You are judging what crossed the threshold: the condition of the material in this basket, on this day, in your hands.
The judging eye is one of the oldest tools in the apothecary's keeping. Nearly two thousand years ago, Dioscorides, a Greek physician traveling with the Roman armies, compiled De Materia Medica, a vast survey of medicinal materials. Throughout it he instructs his readers to gather each plant in its proper season and to choose sound, whole specimens. The technology has changed since his century. The principle has not: the preparation is only as sound as the ingredients that enter it.
Historical apothecaries rejected stock that was moldy, insect-eaten, or adulterated with other materials, because they had learned what happened when they did not. Spoiled stock wasted expensive solvents. It wasted weeks of steeping time. Worse, it could spoil an entire batch and fill a shelf with jars nobody trusted. The inspection at the door was not fussiness. It was economy, and it was safety.
Delicate materials need this judgment most urgently, because they change fastest. A root is built to endure: dense, low in water, armored in bark. A petal is built for a single season: thin, water-rich, and exposed. Leaves stand between the two, sturdier than petals but still thin-skinned compared to roots. High surface area and thin protective cuticles mean delicate tissues lose moisture quickly, bruise under light pressure, and show every hour of poor storage in their color and texture. The basket that would be perfectly fine for roots must be judged far more strictly for flowers.
Sealed with the mark of Professor Crimblebrew Muddlenook, Master Apothecary of the Potions Laboratory, Head of House Meridies.
Apprentices, a word about rejecting material, because some of you will hesitate at the waste bowl, and I want you to understand what is happening there.
Throwing away spoiled stock is not wastefulness. Brewing with spoiled stock is wastefulness. The first costs you a handful of petals. The second costs you the solvent (a liquid able to dissolve or draw out other materials), the jar, the shelf space, the weeks of waiting, and the trust you place in every other jar from that batch. The waste bowl is the cheapest vessel in the laboratory. Use it freely.
Order now, regret never. That is the whole of today's philosophy.
— Professor Crimblebrew Muddlenook, Potions Laboratory • Master Apothecary • Head of House Meridies
Check in: Why must the basket that would be perfectly fine for roots be judged far more strictly for flowers?
❦ In your workbook: record what arrives at the laboratory door in your own way — the division of labor, Dioscorides and the judging eye, and why the waste bowl is the cheapest vessel in the laboratory — copy, sketch, or note what matters.
Reading the Material: The Four-Point Inspection
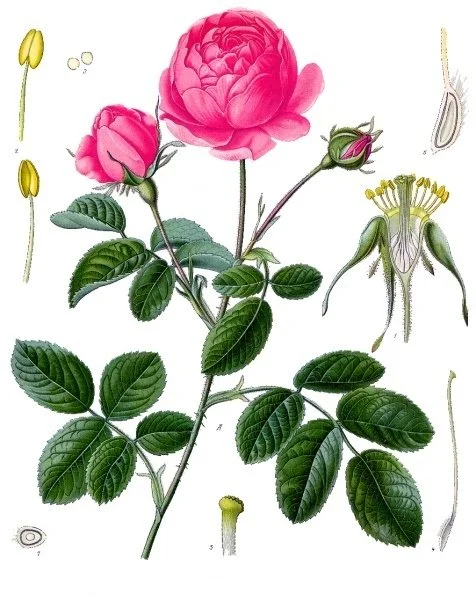
Study portrait: Rosa centifolia, the cabbage rose, plate 122 of Köhler's Medizinal-Pflanzen. Read it as the sight point teaches: even, vivid color, whole petal edges, firm buds — the portrait of material that would grade prime at the door. A study portrait, not a field identification.
Public domain, Wikimedia Commons, "Rosa centifolia - Köhler–s Medizinal-Pflanzen-122.jpg" (Köhler's Medizinal-Pflanzen, 1887–1914).
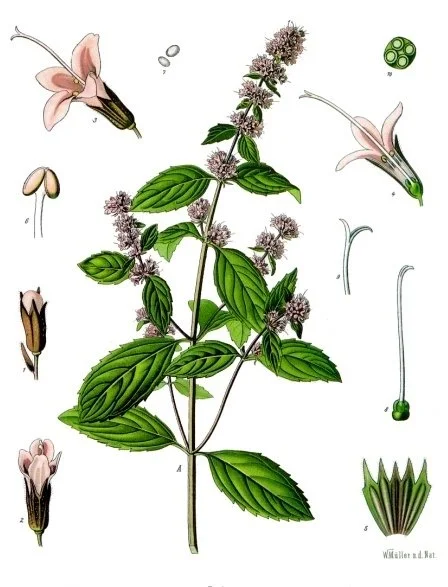
Study portrait: Mentha × piperita, peppermint, plate 095 of Köhler's Medizinal-Pflanzen — one of the fresh herbs this lesson sends you to inspect. The plate shows the plant as the herbarium keeps it; your bench work is the four points, on the living-smelling material itself. A study portrait, not a field identification.
Public domain, Wikimedia Commons, "Mentha × piperita - Köhler–s Medizinal-Pflanzen-095.jpg" (Köhler's Medizinal-Pflanzen, 1887–1914).
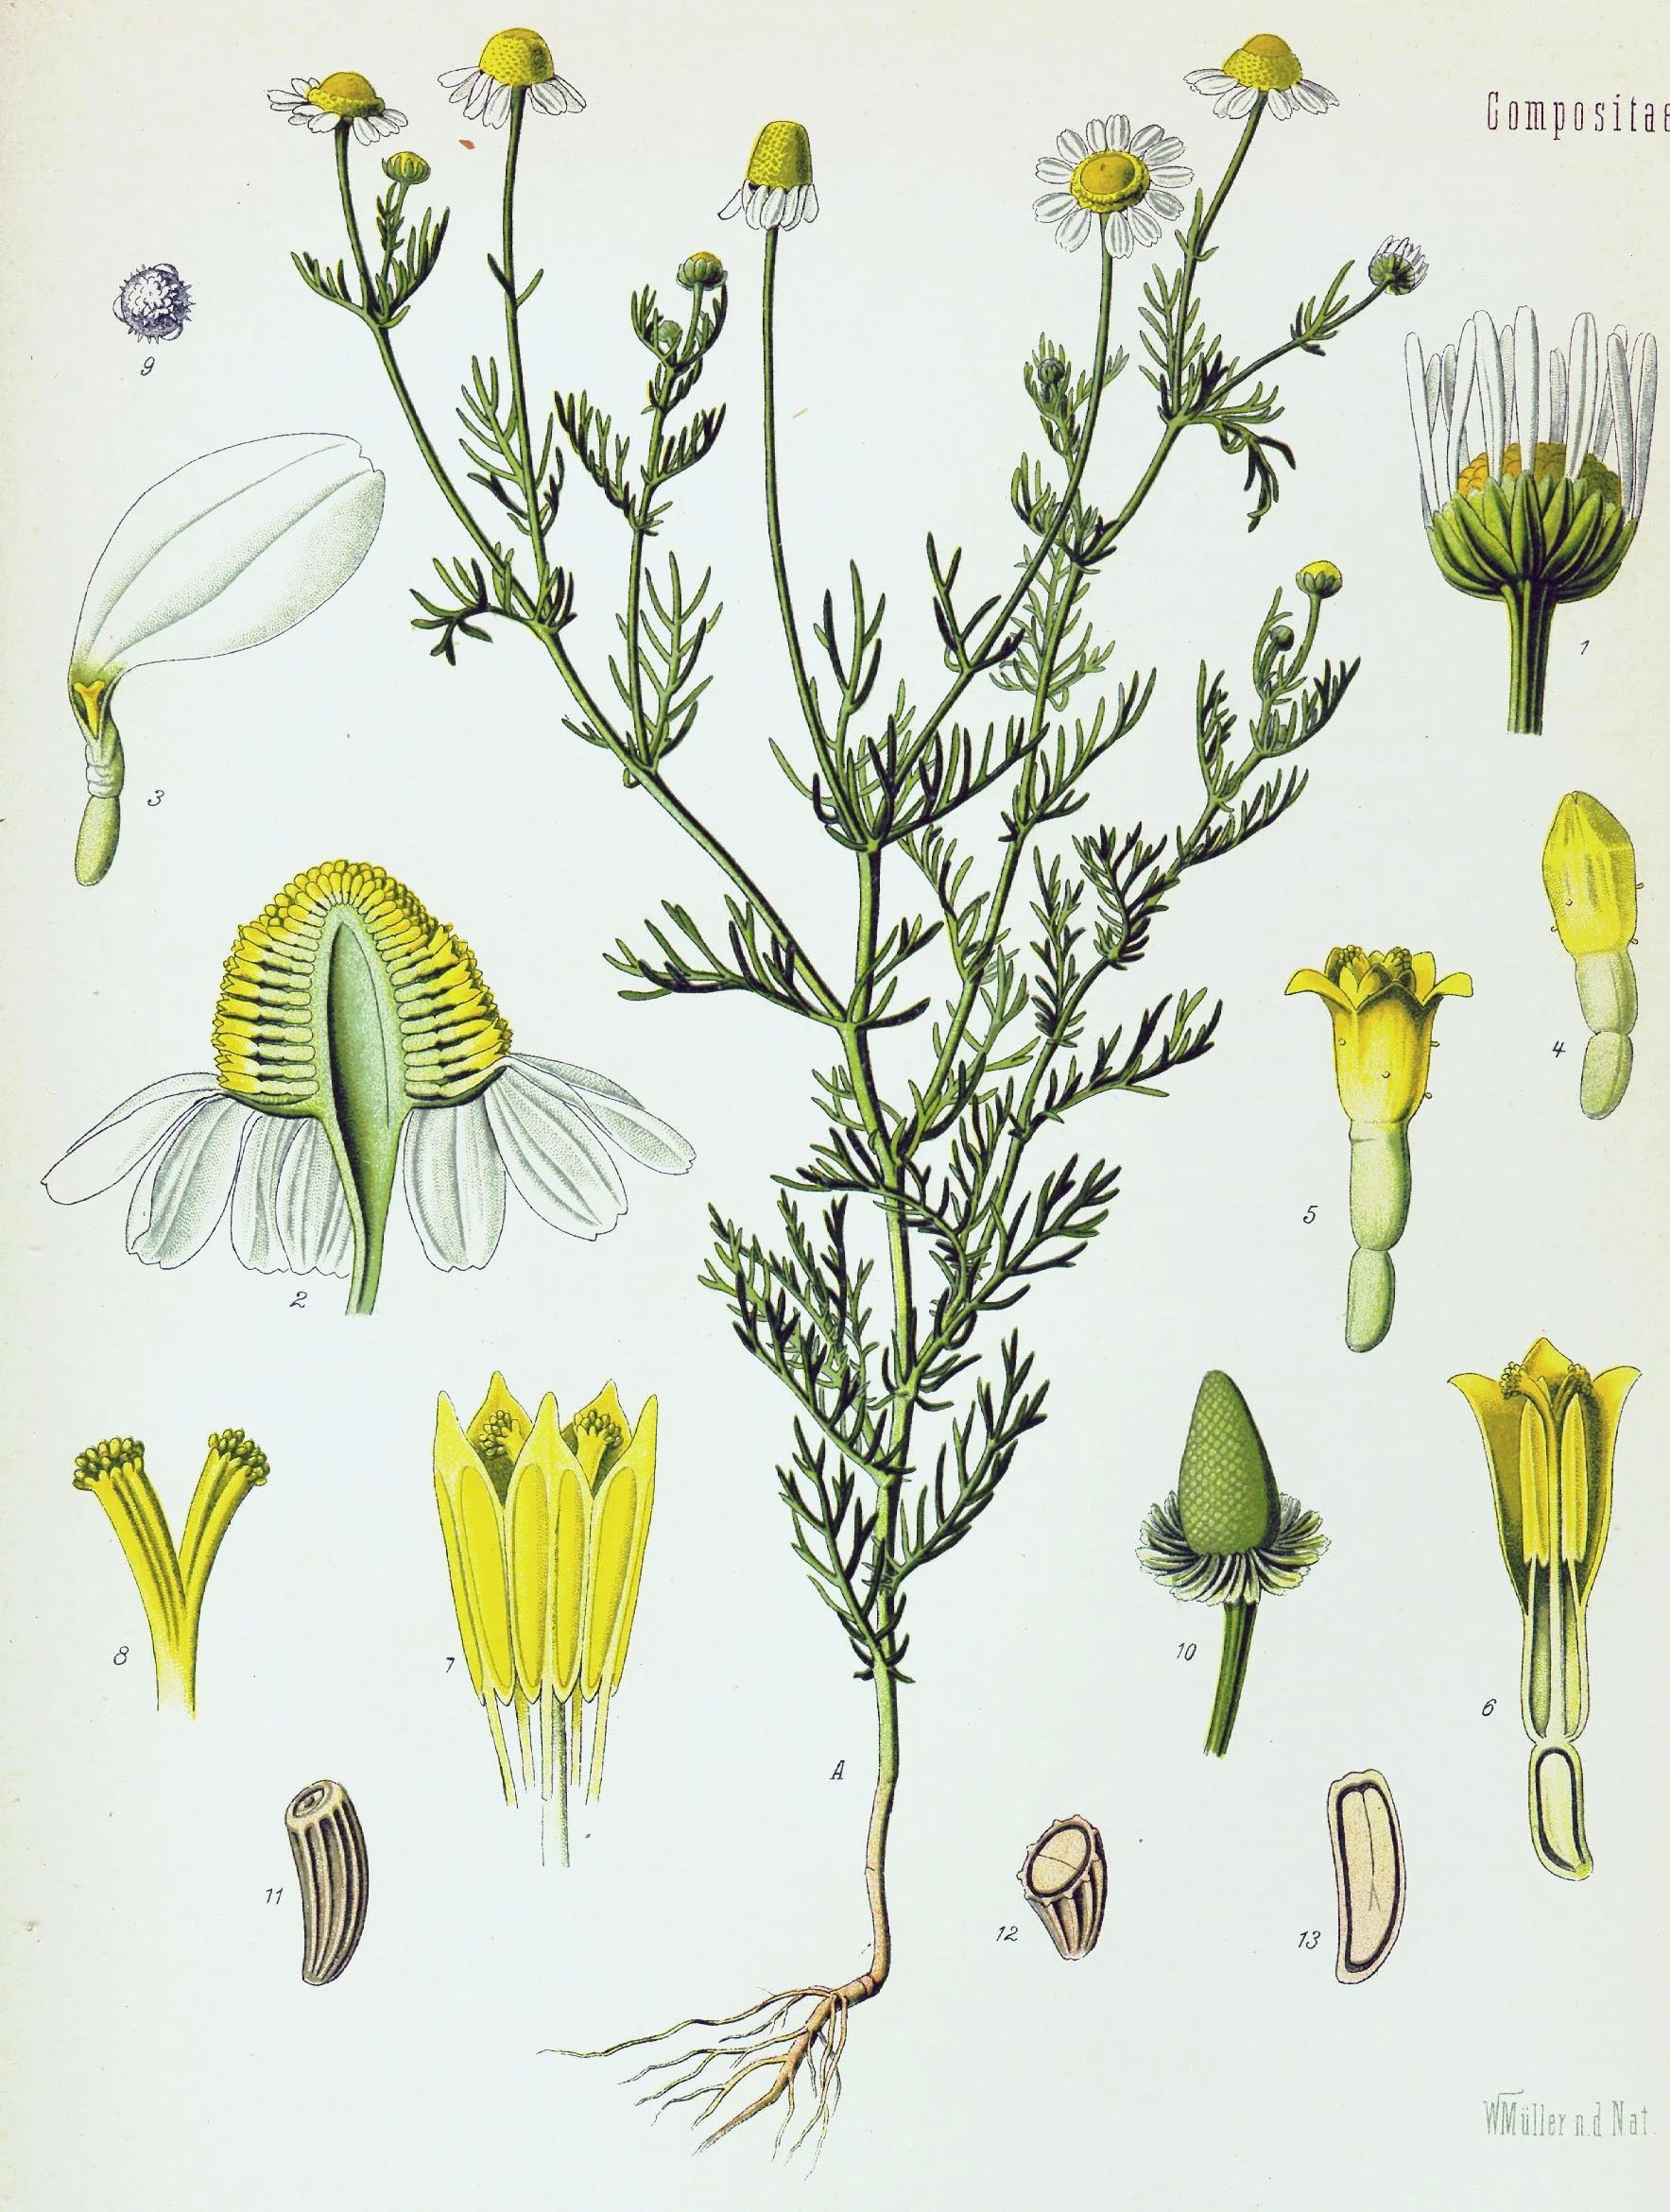
Study portrait: Matricaria recutita, chamomile, plate 091 of Köhler's Medizinal-Pflanzen. The lesson inspects chamomile as it arrives — whole flower heads in a tea bag, judged by sight, touch, fragrance, and moisture — and this plate is the flower's portrait at its prime. A study portrait, not a field identification.
Public domain, Wikimedia Commons, "Matricaria recutita - Köhler–s Medizinal-Pflanzen-091.jpg" (Köhler's Medizinal-Pflanzen, 1887–1914).
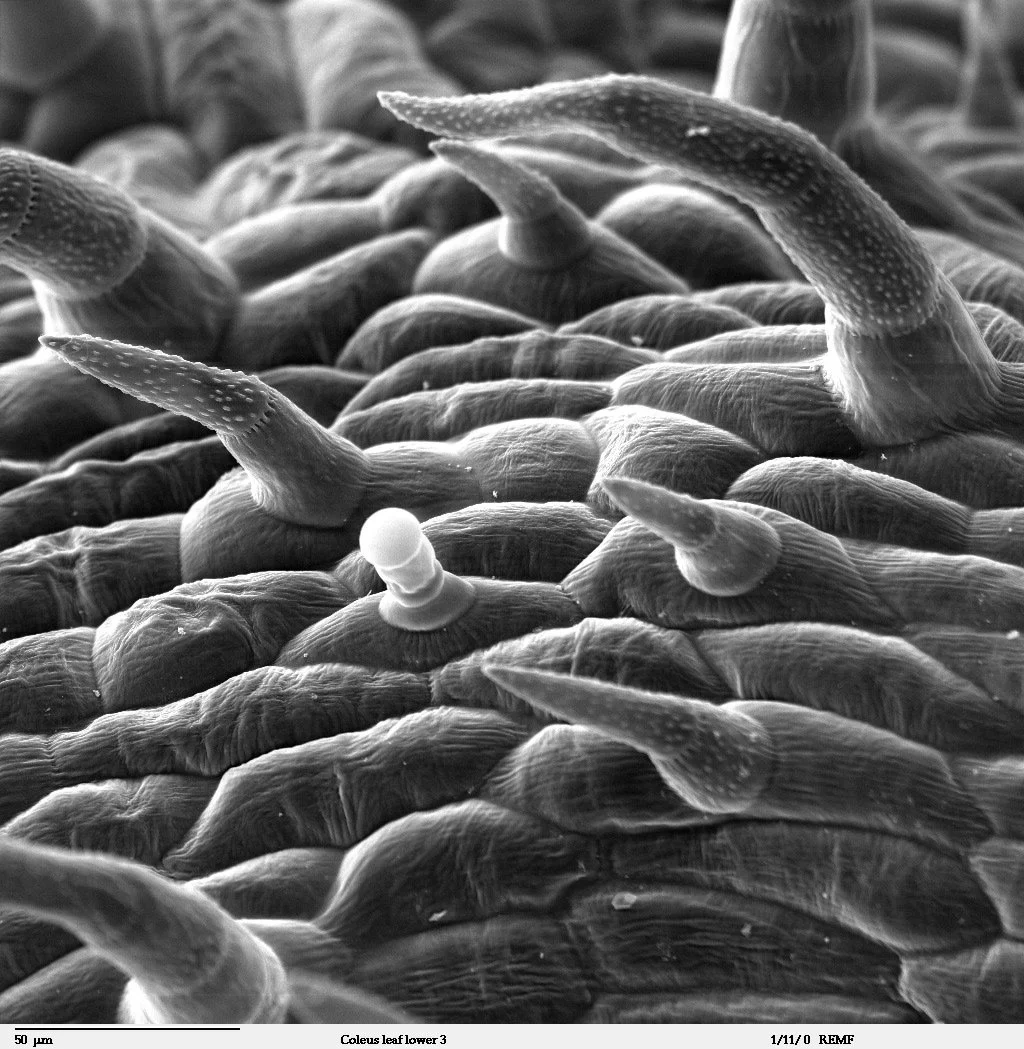
Study portrait under the electron microscope: a coleus leaf's lower surface, its trichomes standing among the epidermal cells — the tiny surface structures this lesson teaches. On aromatic leaves and flower parts, glandular trichomes like these store the volatile oils; pressure ruptures them, and the sudden strong smell is damage, translated into scent.
Public domain, Wikimedia Commons, "Coleus leaf trichomes SEM.jpg."
With the bench prepared and the rules spoken, the inspection itself follows a fixed procedure. Fixed procedures exist so that nothing is skipped when you are tired, rushed, or charmed by a beautiful basket. Perform the four points in order, every time.
Point one: sight. Look before you touch. Note the color: is it even and vivid, or faded and patchy? Look at the edges of petals and leaves, where damage shows first. Look for brown or black spots, for fuzzy growth that signals mold, for holes or ragged margins that signal insects, and for any material in the basket that does not match the rest, which may signal adulteration. Hold a leaf to the light if you can: thin spots and translucency reveal bruising you might otherwise miss.
Point two: touch, gloved. Feel for turgor, the firm plumpness of healthy tissue full of water. Limp, papery, or slimy textures each tell a different story. Sliminess is the worst of the three: it means bacterial breakdown has begun, and the material is rejected without further discussion. Brittleness in a supposedly fresh sample means the material dried out in transit. Note what you feel in the ledger using plain words. "Limp at edges, slimy at stem ends" is a better record than "poor condition."
Point three: fragrance, by wafting. Hold the sample at arm's length and wave air toward your nose. Fresh material smells like itself: clean, characteristic, recognizable. Sour, fermented, or musty odors mean spoilage, and the sample is rejected. Note this carefully: a sudden burst of strong fragrance when you handle a leaf or flower often means you have just bruised it. Many aromatic plants store their volatile oils in tiny glandular trichomes on the surface, and pressure ruptures those structures and releases the oils all at once. The stronger smell is not a sign of quality. It is the sound of damage, translated into scent.
Point four: moisture. Delicate tissues continue to lose water after harvest through their surfaces, while no roots remain to replace it. Check for condensation inside the bag or container, which means the material is sweating and mold risk is high. Check whether the material feels damp, properly fresh, or already drying at the edges. Record the storage condition it arrived in, because how material was kept before it reached you explains half of what you observe.
Grade each sample when all four points are complete. Prime means vivid, firm, fragrant, and clean: shelve it with confidence. Acceptable means sound but imperfect, perhaps slightly wilted at the edges or past its showiest hour: use it soon, and note the limitation. Rejected means mold, sliminess, heavy insect damage, sour odor, or adulteration: it goes to the waste bowl, and the reason is written in the ledger in full. A grade without a reason is gossip. A grade with a reason is a record.
★ ---
Check in: At the touch point you find a sample slimy at the stem ends. What is the verdict — and does the inspection continue to the remaining points before the grade is written?
❦ In your workbook: record the four-point inspection in your own way — sight, touch, fragrance, and moisture, in their fixed order, and the three grades with what each one means — copy, sketch, or note what matters.
In your packet: Exercise I — The Intake Inspection ⚒ begins here. Work it now, or mark the place and take it as homework — your choice.
Reading the Damage: Bruising, Color, and Moisture
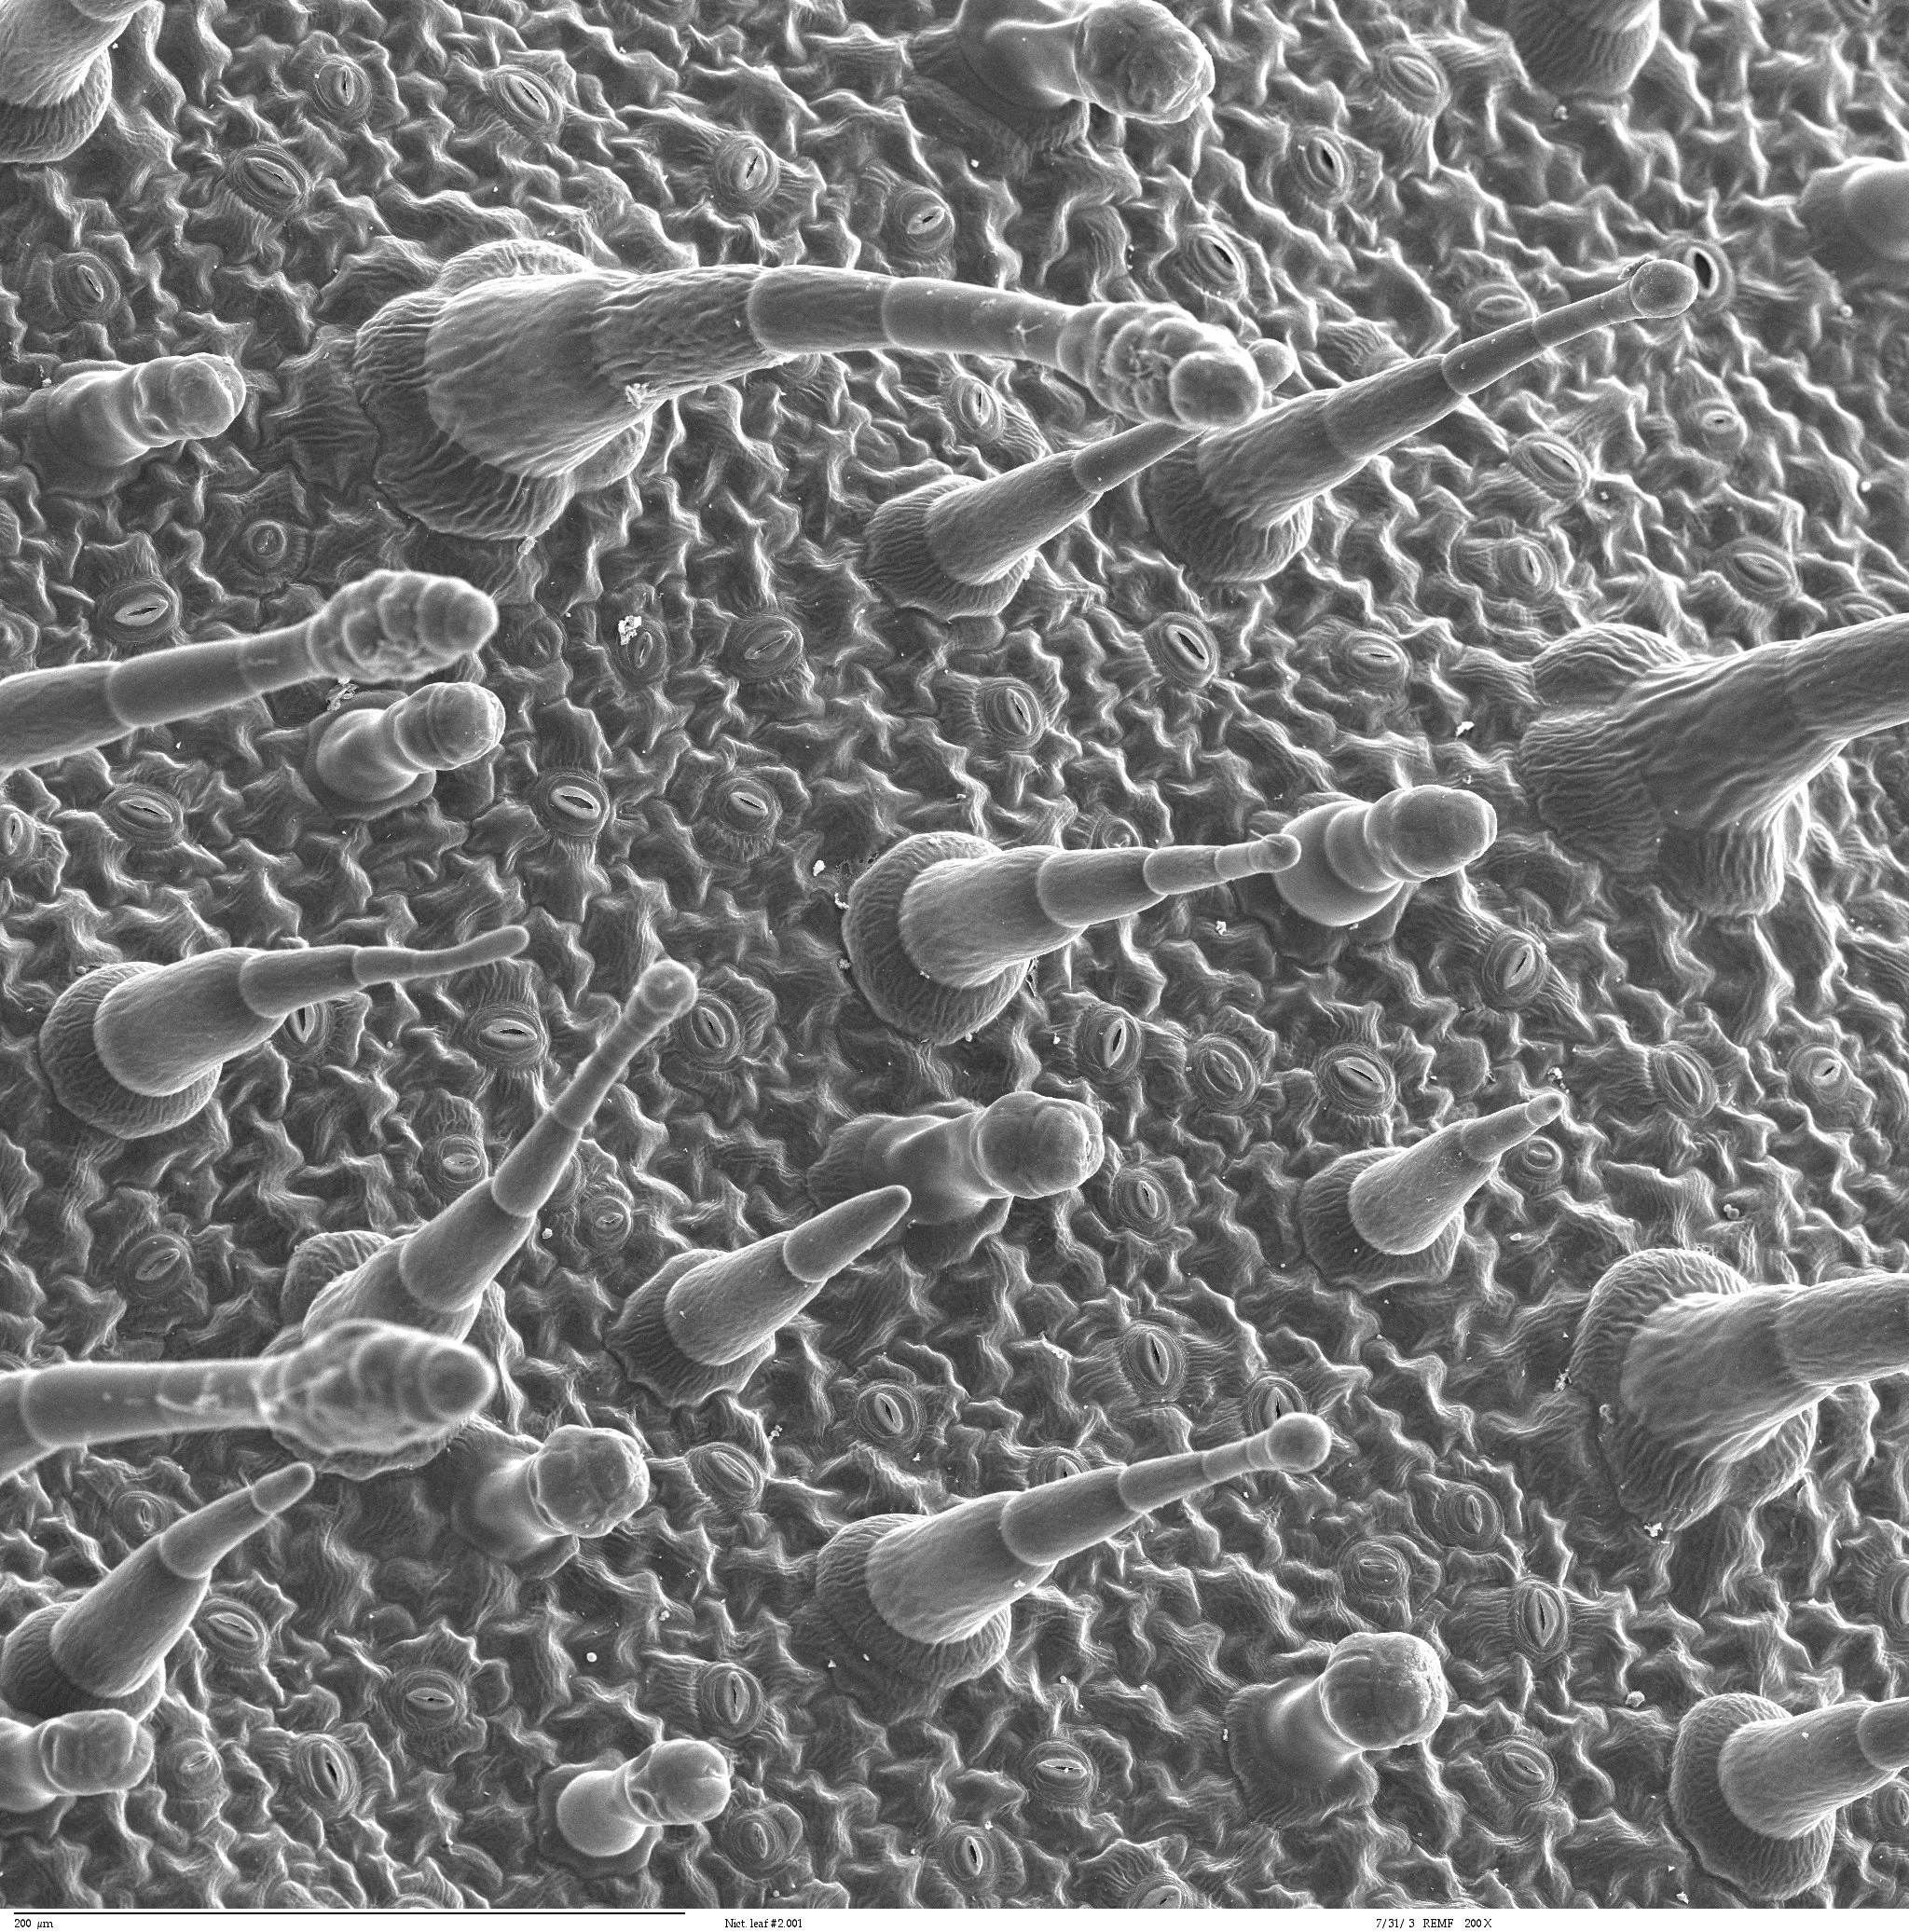
Study portrait under the electron microscope: a tobacco leaf's epidermis, its stomata scattered across the surface. Transpiration — the water loss that continues after harvest, with no roots to replace it — moves out through surfaces like this one, which is why thin, large-surfaced tissues wilt first.
Public domain, Wikimedia Commons, "Leaf Epidermis.jpg."
The four-point inspection tells you what is wrong. This section tells you why it happens, because a judge who understands the causes grades faster and argues better.
★ Bruising begins the moment cells are crushed. The browning that follows is enzymatic browning. Inside intact plant cells, enzymes and their target compounds are kept carefully apart. Crush the tissue and the compartments break: the enzyme polyphenol oxidase meets phenolic compounds in the presence of air, and the result is a chain of reactions that ends in brown melanin pigments. It is the same chemistry that browns a sliced apple left on the counter. Bruised tissue does not merely look worse. The ruptured cells leak, admit microbes, and begin breaking down faster than intact tissue. This is why careful handlers insist that only non-bruised, unsoiled leaves are worth drying or storing: the bruise is where the spoilage starts.
★ Color instability is the fading, patching, or shifting of color in petals and leaves. Much of the red, purple, and blue in flowers comes from anthocyanins, water-soluble pigments whose color shifts with acidity and which degrade under light exposure. A petal that arrived crimson and sits rose-pink a week later has lost pigment to light and air, and with the pigment goes much of what made the material worth keeping. Yellowing in leaves often means chlorophyll breaking down as the tissue ages or suffers. Color is not decoration on the intake bench. It is evidence.
★ Moisture loss is the quietest change and the hardest to reverse. Leaves and petals lose water continuously through transpiration, the same process that moved water through them while they lived, now with no roots to replace it. Thin cuticles, the waxy protective layers, slow the loss but cannot stop it, and petals have the thinnest cuticles of all. Wilting is the visible stage: cells lose their internal water pressure, tissues go limp, and no amount of careful storage will fully restore the original texture. A wilted sample may still be usable if it is otherwise sound, but it is never prime, and the ledger should say so.
Petal shatter, the detaching of petals from aging flowers, is the final signal. When petals fall at a touch, the flower is past its prime no matter how vivid the remaining color. Grade accordingly.
Check in: A leaf smells suddenly much stronger the moment you handle it. Is that a sign of quality? Name what has happened, in the lesson's terms.
❦ In your workbook: record reading the damage in your own way — bruising and enzymatic browning, color as evidence, moisture loss and wilting, and petal shatter as the final signal — copy, sketch, or note what matters.
In your packet: Exercise II — The Bruise and Browning Watch ◐ begins here, and Exercise III — The Moisture Watch ◐ follows from this section's moisture teaching. Work them now, or mark the places and take them as homework — your choice.
The Intake Ledger: Grading and the Archive Entry
Every inspection ends in the ledger, because an inspection that lives only in memory never happened as far as the laboratory is concerned. Professor Muddlenook's required entry format is fixed:
- Date and source: when the material arrived and from whom or where.
- Material name: the common name and, when known, the botanical name.
- The four points: sight, touch, fragrance, and moisture, each in plain words.
- Grade: prime, acceptable, or rejected.
- Disposition: shelved, set aside for prompt use, or rejected to the waste bowl.
- Inspector's mark: your initials. You stand behind the grade.
Write the entry before moving on to the next sample. The discipline of immediate recording is what separates an archive from a pile of memories. Future you, reaching for that jar six months from now, will trust the grade on the label because the ledger explains it.
Check in: "A grade without a reason is gossip." What turns a grade into a record — and which part of the required entry carries it?
❦ In your workbook: record the intake ledger in your own way — the six parts of the required entry, and the discipline of writing it before moving on to the next sample — copy, sketch, or note what matters.
Cleanup and Care of Samples
The inspection is not complete until the bench is restored. Accepted material moves promptly to proper storage: cool, dark, and ventilated, away from moisture and strong light. The full science of drying and long-term storage belongs to later lessons; today's duty is simply not to leave good material sitting on the bench while you admire your ledger.
Rejected material goes to the compost or waste, never back into a basket of sound stock. Wash the dishes, wipe the bench, replace the paper covering, wash your hands, and close the ledger. The bench should look as it did in your opening sketch. Tomorrow's inspection begins from order, not from yesterday's leavings.
❦ In your workbook: record the cleanup in your own way — accepted material promptly to cool, dark, ventilated storage, rejects to compost or waste, and the bench restored to its opening sketch — copy, sketch, or note what matters.
Guided Observation: Your First Intake Ledger Entry
Before the bench is cleared, observe. Take one sample through the four points once more, slowly, and write its full ledger entry in Professor Muddlenook's required format — the entry this lesson's archive keeps:
- Date and source: when the material arrived and from whom or where.
- Material name: the common name and, when known, the botanical name.
- The four points: sight, touch, fragrance, and moisture, each in plain words.
- Grade: prime, acceptable, or rejected.
- Disposition: shelved, set aside for prompt use, or rejected to the waste bowl.
- Inspector's mark: your initials. You stand behind the grade.
Write the entry before moving on to the next sample. The discipline of immediate recording is what separates an archive from a pile of memories. Future you, reaching for that jar six months from now, will trust the grade on the label because the ledger explains it.
❦ In your workbook: record the guided observation in your own way — one complete ledger entry, written while the sample is still in front of you — copy, sketch, or note what matters.
Materials
Required (Level One — household items)
- A clean, dry work surface covered with fresh paper.
- Your intake ledger or notebook, opened to a fresh page, with a pencil.
- Small dishes or saucers, one for each sample you expect to receive.
- Gloves, within reach.
- Labels and a pen.
- A waste bowl for rejected material, set apart from the clean dishes so the two can never be confused.
- A magnifying lens, if you have one.
- Saucers or small bowls from the kitchen, any notebook, kitchen gloves or disposable gloves, and a phone camera for recording what you see.
Suggested (Level Two — historically closer)
- Ceramic dishes, a bound ledger kept only for intake records, a hand lens or loupe, and pre-cut paper labels.
Reflection Questions
Answer the following questions in your workbook.
- Professor Muddlenook says that rejecting spoiled stock is discipline, not wastefulness. In your own words, explain what brewing with poor stock would actually cost the laboratory.
- A basket of rose petals arrives: the edges are browned, several petals detach at a touch, and there is a faint sour smell. Walk through your grading decision the way the lesson teaches: what do you observe at each inspection point, what grade do you give, and what is the disposition?
- Why does a bruised aromatic leaf smell stronger immediately after the bruise than it did before? Name the structures involved.
- A supplier tells you a bunch of herbs is "just a little wilted, still fine." Using this lesson, explain how you would answer, and what grade the material could honestly receive.
Workbook Checklist — Lesson 12
In my workbook I have:
- ☐ spoken the six intake bench rules aloud and written them at the top of my ledger page, before opening a single basket
- ☐ laid out the intake bench in its order, left to right, and photographed or sketched it as the starting state
- ☐ performed the four-point inspection in order — sight, touch, fragrance, moisture — and graded each sample prime, acceptable, or rejected, with written reasons
- ☐ explained bruising and enzymatic browning, the burst of fragrance from ruptured glandular trichomes, and why wilting cannot be fully reversed
- ☐ written a full intake ledger entry for each sample — date and source, material name, the four points, grade, disposition, and my initials — before moving on
- ☐ watched a bruised sample brown against its control at three time points, and a moisture watch through two observation rounds, and written my own storage rule
- ☐ restored the bench to its opening order: accepted material stored cool, dark, and ventilated, rejects to the waste bowl, dishes washed, hands washed, ledger closed
☐ Lesson completed Date: ___ Signature: ___
The Professor's Closing Note
Sealed with the mark of Professor Crimblebrew Muddlenook, Master Apothecary of the Potions Laboratory, Head of House Meridies.
Well done, apprentices. You have done the least glamorous work in the laboratory today, and I tell you plainly that it is among the most important.
Remember what the door taught you. Dense materials forgive; delicate materials do not. The bruise you prevent at receiving is a spoilage you never have to explain later. The grade you write honestly today is the trust you will feel when you open that jar in six months and know exactly what is inside it.
In our next lesson we turn from judging flowers to judging the seeds, spices, and culinary botanicals that cross between the kitchen and the laboratory. Bring the same eyes. They are getting sharper already.
— Professor Crimblebrew Muddlenook, Potions Laboratory • Master Apothecary • Head of House Meridies
Cross-Class Connections

Herbology · Unit I, Lesson 2 — Anatomical Architecture: Foliage & Stems
Scholars, when botanists meet an unfamiliar plant, we begin with the leaves — their shape, edge, arrangement, and vein pattern together form a signature nearly as distinctive as a fingerprint. Come to the Greenhouse and learn to read that signature, and the leaf in Professor Muddlenook's basket will tell you its story before his other three points are even needed. Mint and basil confuse no one who has learned their leaves.
Herbology · Unit IV, Lesson 28 — Drying Herbs the Traditional Way
What his bench accepts, my screens and bundles keep. In the Greenhouse we screen-dry the leaves and petals too delicate to hang, hang the woody herbs in small bundles in dark, moving air, and judge the work by the crispness test — and we dry only sound material, for a bruise carried into drying is a fault kept, not cured. Bring me the stock his grade has passed, and I will teach you the keeping.
Further Reading & Sources
- Enzymatic Browning — Wikipedia — The polyphenol oxidase chemistry behind browning in bruised plant tissue, the same reaction that browns a sliced apple.
- Trichome — Wikipedia — Glandular trichomes and the volatile oils they store on leaf and flower surfaces.
- Transpiration — Wikipedia — How water moves through plants and evaporates from leaf surfaces, and why cut material wilts.
- Anthocyanin — Wikipedia — The water-soluble pigments behind red, purple, and blue petals, their sensitivity to acidity, and their fading under light.
- Preserving Herbs by Drying — Penn State Extension — Harvest timing, the rule to dry only non-bruised and unsoiled leaves, and cool, dark, dry storage guidance.
Browse the Potions shelf in the school Library for readable editions of these works.
Submit your work for this lesson using the form below.
CONTINUE IN THE POTIONS LABORATORY
← Previous · Lesson 11: Mapping the Sensory Profile Next · Lesson 13: Seeds, Spices & Culinary Botanicals →
Unit II — Materia Botanica, Delicate Structures Potions Laboratory — All 52 Lessons
The rest of Unit II: Lesson 10 · Surface Matrix · Lesson 11 · Sensory Profile · Lesson 13 · Seeds & Spices · Lesson 14 · Fragrant Botanicals · Lesson 15 · Receiving & Judging · Lesson 16 · Stability & Storage · Lesson 17 · Consolidating the Journal