

POTIONS
Unit III · Lesson 20SALTS, CLAYS & MINERAL MATERIALS
Professor Crimblebrew Muddlenook
Master Apothecary • Potions
Head of House Meridies • School of Evershade
Professor's Introduction

Sealed with the teal wax of Professor Crimblebrew Muddlenook, Master Apothecary of the Potions Laboratory, Head of House Meridies.
Come in, scholars,
So far in this unit you have studied the dense materials that once lived: roots, bark, resins, oils, waxes. Today we turn to the dense materials that never lived at all. Salts, clays, and mineral earths sat on the apothecary's shelves beside the botanicals, and they demanded a different kind of respect. A root can be judged by smell. A salt must be judged by structure. A clay cannot be hurried. A pigment must be purified before it earns its place on the shelf.
Minerals reward the orderly mind. They behave the same way every time, which makes them excellent teachers and unforgiving examiners. If your crystals grow crooked, the fault is in your method, not in the salt. If your suspension — a mixture in which solid particles are spread through a liquid without dissolving — settles unevenly, the fault is in your grinding, not in the clay. This lesson will teach you to read these materials the way you learned to read botanicals: by patient observation, careful procedure, and honest records.
Work slowly. Label everything. I will be checking.
— Professor Crimblebrew Muddlenook, Potions Laboratory • Master Apothecary • Head of House Meridies

Potions map — the class base map, unmarked for this lesson.
Lesson Objectives
By the end of this lesson, you will be able to:
- Distinguish salts, clays, and earth pigments by grain structure and behavior, not just by name.
- Grow salt crystals from solution and read crystal habit as a diagnostic of identity and purity.
- Compare a true solution with a suspension using clay and water, and record settling behavior over time.
- Purify a gritty mineral sample using washing, levigation, and decanting, the apothecary's oldest refinement system.
- Describe absorbency and moisture interaction in storage terms, and file every observation in your archive.
Reading this lesson: ★ marks the passages to remember. They return on the unit quiz and the class test. Check in questions ask the material back as you go; answer them in your workbook when you meet them.
Working this lesson: Your assignment packet is the first download on this page. Work in it as the lesson moves along, answering each exercise as its subject is taught — or read the lesson through for your notes and take the exercises as homework afterward. Both are proper ways to sit this class. Signposts in the reading tell you where each exercise belongs. Written answers are short answers in your own words; a few honest lines are worth more than a filled page.
Your Assignment Packet
This lesson's exercises live in its packet: the Lexicon Handout (every term, course terms marked ◆), Materials, Guided Practice, the Assignment Manual with its answer key for self-checking, the Reflection Questions, and the Workbook Checklist. Download the packet before you begin and keep it beside you as you read.
The Mineral Shelf
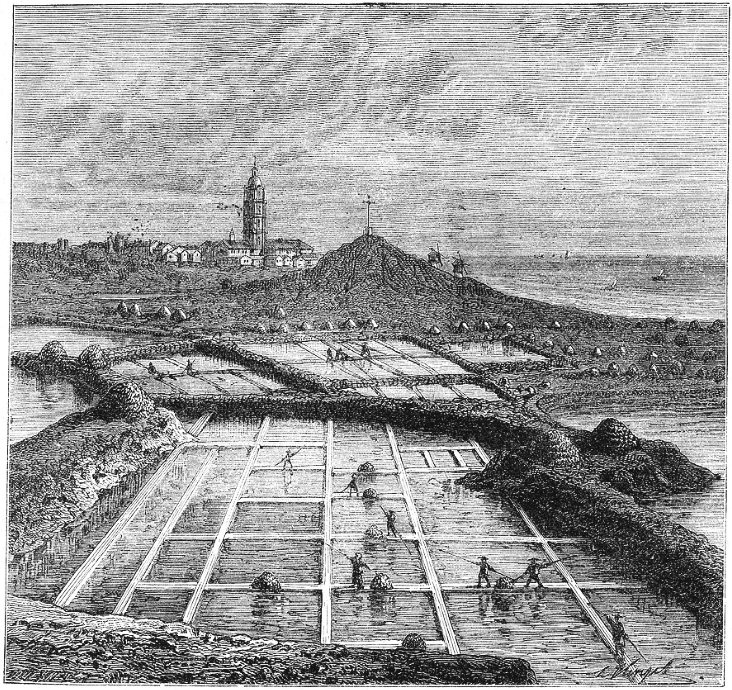
Salt made the old way: seawater held in shallow pans and left to the sun and wind until the crystals come — the crystallized end of the mineral shelf, drawn when the pans of Brittany were still worked by hand.
"Salt evaporation ponds on the coast of Brittany," historical engraving, unknown author, via Wikimedia Commons. Public domain.
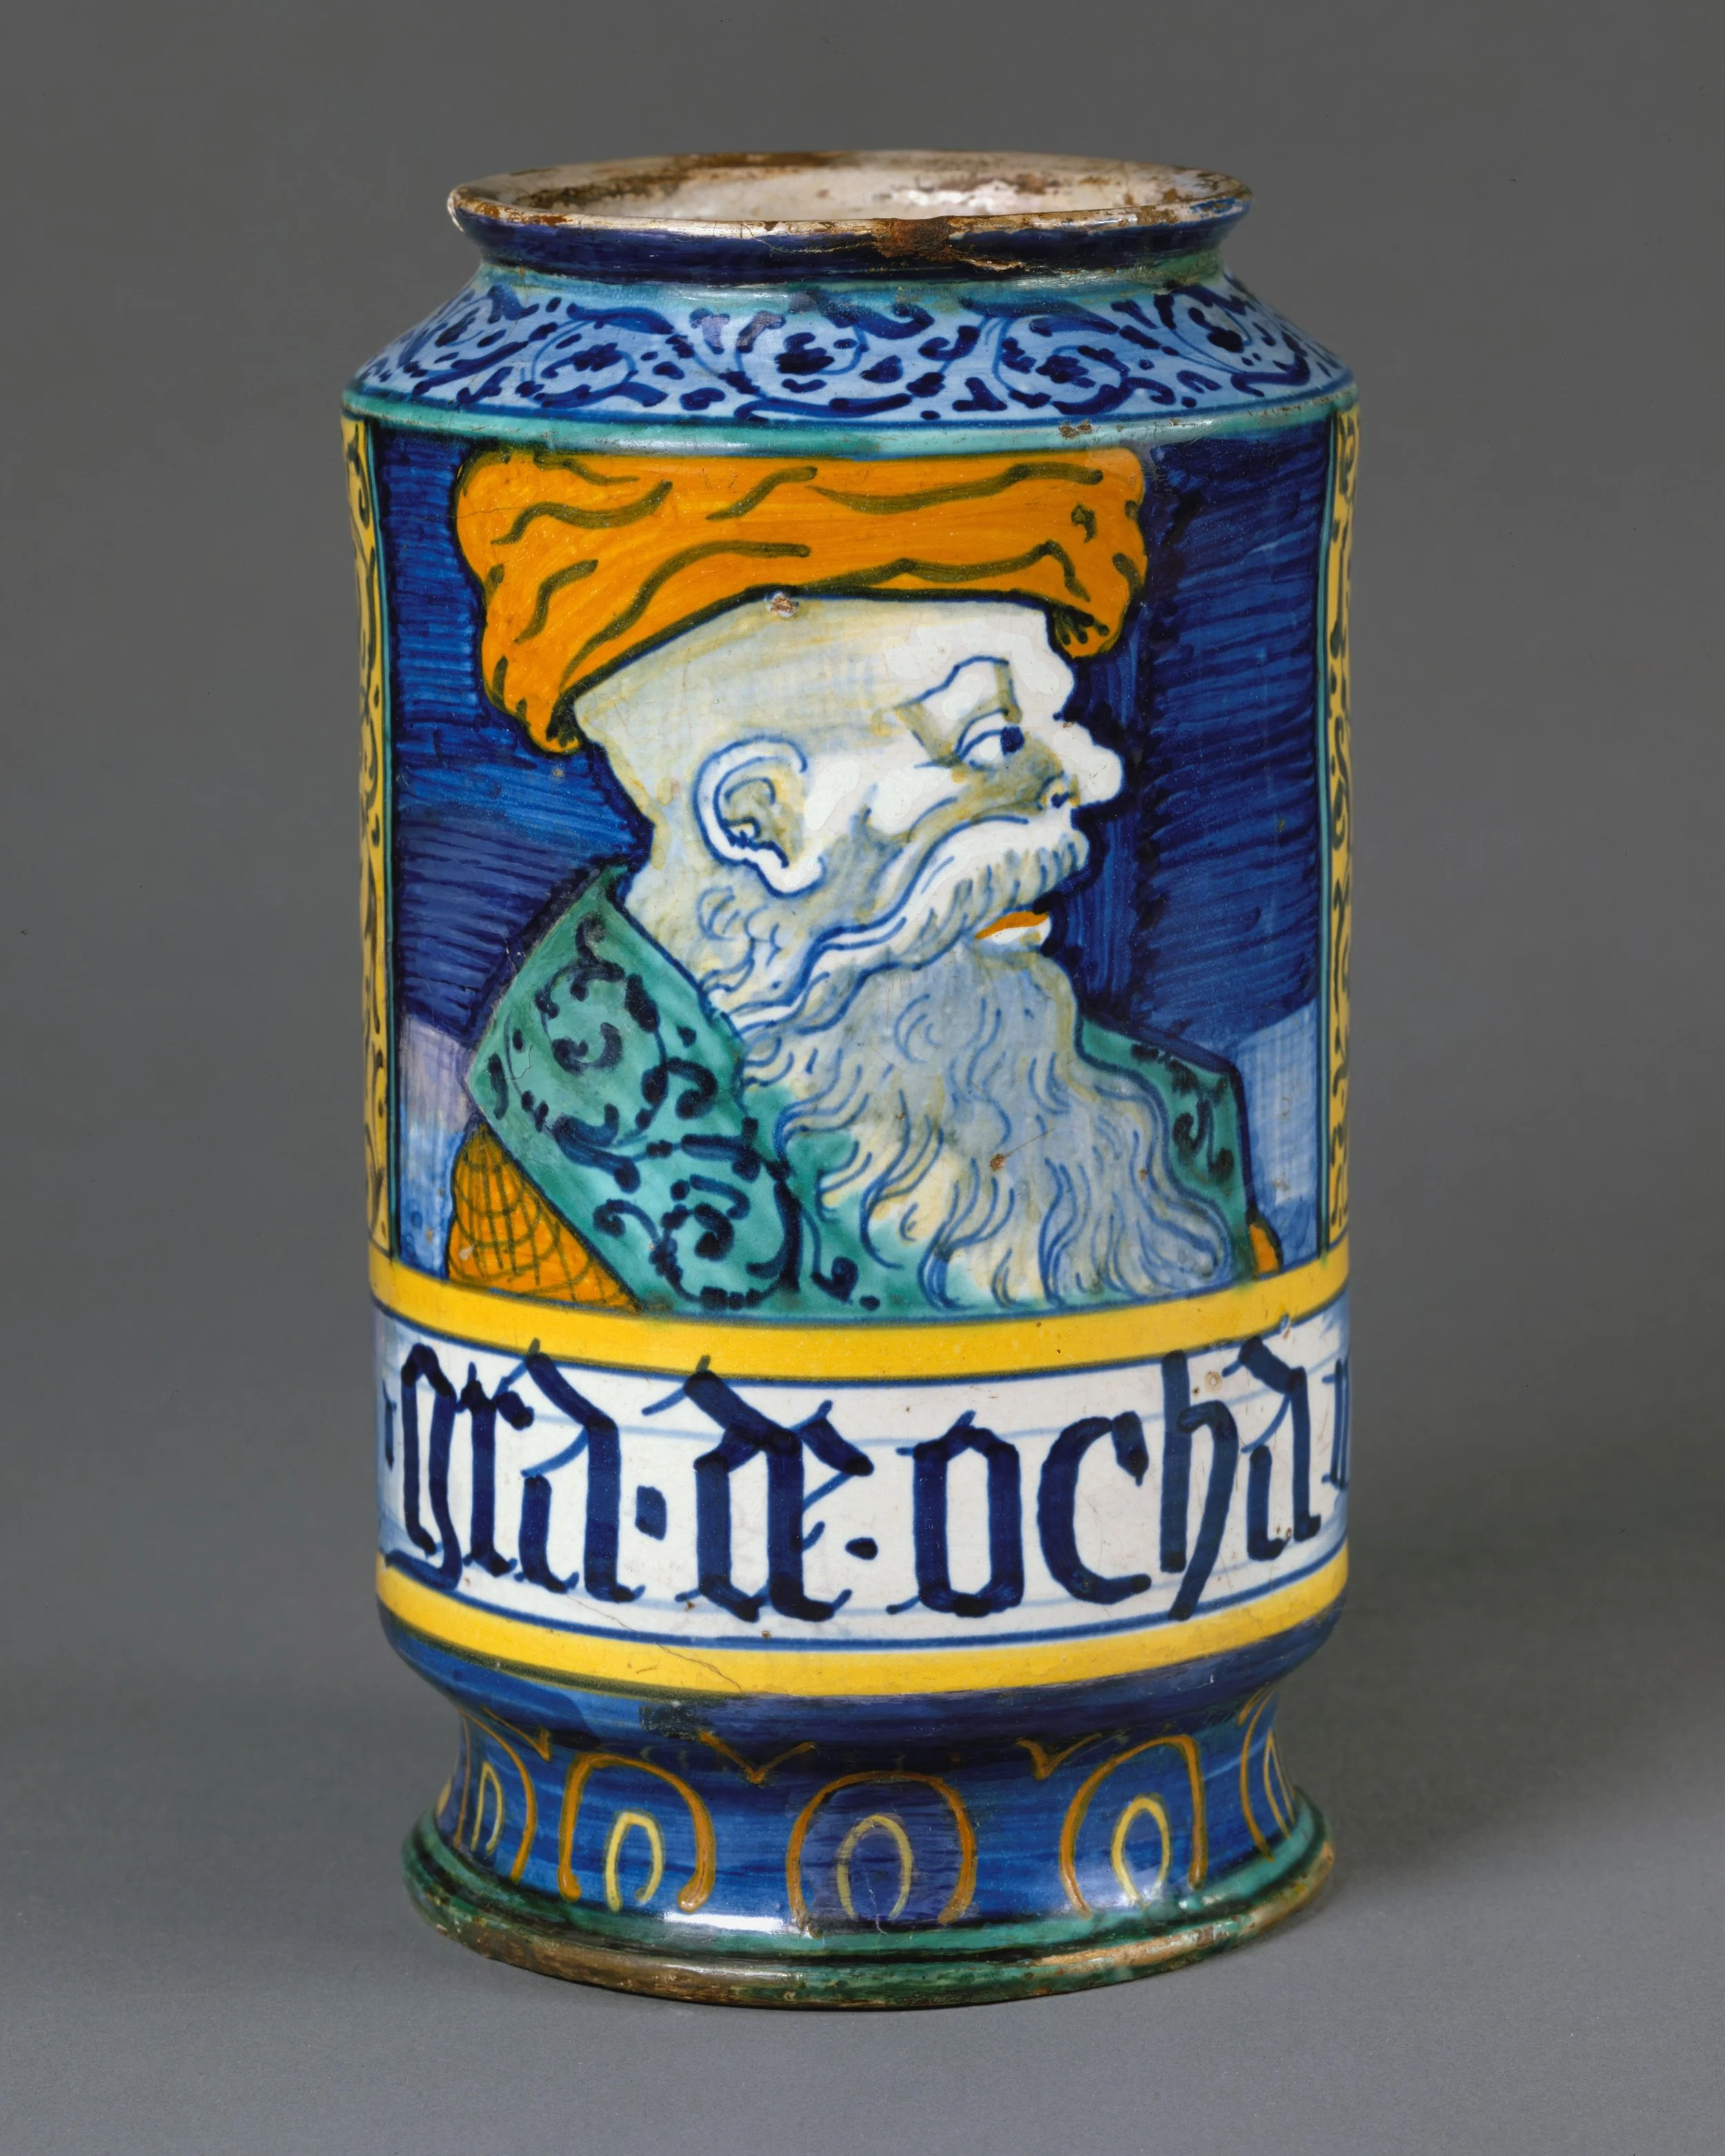
An apothecary's albarello: the shelf's own furniture — a vessel made to be labeled, kept, and trusted. The painted band carries the jar's contents name, as the laboratory's labels still do; no quantity or directions are shown, and none belong on a storage jar's portrait.
Apothecary jar (albarello), The Metropolitan Museum of Art (Open Access), via Wikimedia Commons. CC0.
Walk into any historical apothecary and you would find two kinds of shelves. One held things that had grown: dried herbs, roots, barks, resins. The other held things that had been dug, dried, or crystallized: salts in stoppered jars, clays in crocks, ochres in little paper twists, each labeled in a careful hand. The mineral shelf was the quieter of the two, but no laboratory ran without it.
Minerals served the workshop in ways botanicals could not. Salts preserved. They drew moisture out of their surroundings, kept other materials dry, and in some traditions served as the base for crystalline preparations. Clays absorbed. Their fine particles could carry other materials in suspension, settle gently out of water, and form smooth pastes that held a shape. Earth pigments like ochre gave color: to inks, to seals, to the labels and marks by which the whole laboratory stayed organized. None of these are medicines in our work, and this lesson makes no claims about them beyond their laboratory behavior. They are materials, and materials have properties, and properties can be measured.
What makes minerals different from botanicals, for our purposes, is predictability. A dried leaf varies from plant to plant and season to season. A salt crystal does not. Sodium chloride grows in cubes whether it crystallized in a Roman salt pan or in your kitchen this afternoon. That predictability is why the old apothecaries trusted mineral materials for their most exacting work, and it is why you will find this lesson's practicals so satisfying. When you do the work correctly, the results look correct. When they do not, you will know exactly where to look.
Check in: What makes minerals different from botanicals, for this lesson's purposes — and what does a salt crystal do the same, in a Roman salt pan or in your kitchen?
❦ In your workbook: record the mineral shelf in your own way — the two kinds of shelves, what salts, clays, and pigments each did for the workshop, and predictability as the mineral difference — copy, sketch, or note what matters.
Salts: The Honest Crystal
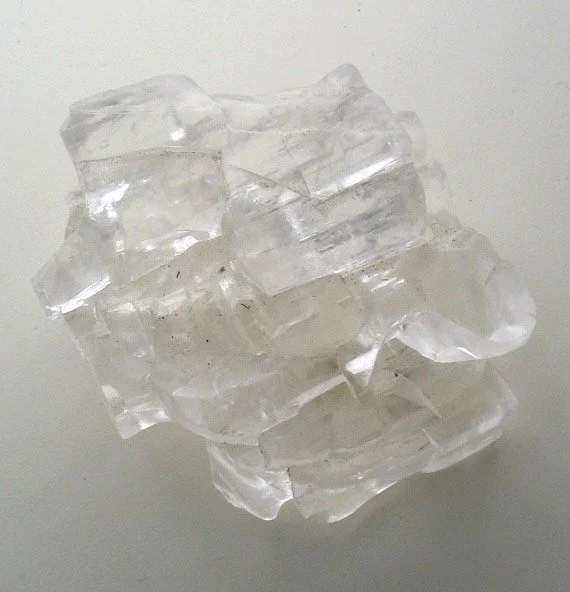
Halite — table salt as the ground grows it. The cubes are not roughly cubic; they are cubic, and that honest habit is how the apothecary knew the salt at the door.
Halite crystal, photograph by Aram Dulyan, via Wikimedia Commons. Public domain.
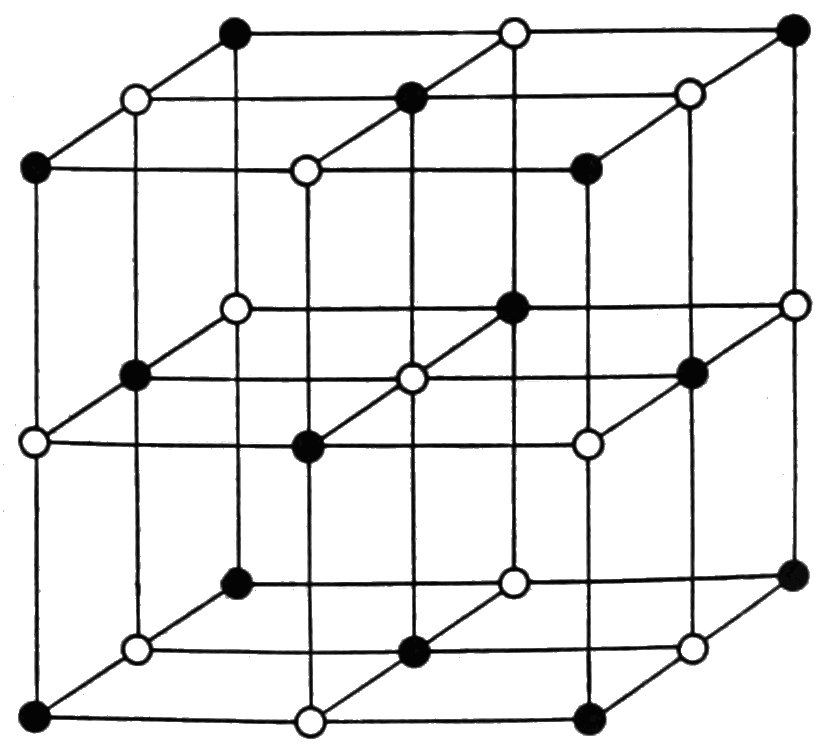
The pattern inside the cube: sodium and chloride set in a regular, repeating lattice — the arrangement the quiz asks about, and the reason the crystal that grows from it keeps the cube's shape. From Popular Science Monthly, vol. 87 (1915).
"Arrangement of atoms in a rock salt crystal," Popular Science Monthly vol. 87 (1915), unknown author, via Wikimedia Commons. Public domain.
Salt is the mineral every scholar already knows, and the one most worth studying properly. The salt on your table is sodium chloride, the same compound geologists call halite when they find it in the ground. Dissolve it in water and it vanishes completely, breaking into particles far too small to see. Let the water evaporate and it returns, every time, in the same shape: cubes. Not roughly cubic. Cubic. The crystal habit of table salt is one of the most reliable facts in the laboratory.
★ Crystal habit is the characteristic shape a substance takes when it crystallizes, and it is a diagnostic tool. Table salt grows cubes. Epsom salt, which is magnesium sulfate and a different substance entirely, grows in long needles. If you grow both and compare them under a magnifier, you will never confuse them again. The old apothecaries knew this without knowing the chemistry. They bought salts by appearance and by habit, and a salt that crystallized wrong was a salt that got rejected at the door.
Salts also teach us about solutions. When salt dissolves in water, it forms a true solution: the particles are distributed evenly, they do not settle, they do not scatter light, and no filter will separate them again. There is a limit to how much salt water can hold. Add salt past that limit and the excess simply sits at the bottom, undissolved. A solution holding all it can is called saturated. Warm the water and it can hold more; cool it again and the extra salt must come out somewhere, which is exactly how crystals grow. This is the whole science behind the first practical of this lesson, and it is worth understanding before you begin.
★ One more property of salts deserves your respect: they are hygroscopic, meaning they pull moisture from the air. Leave a dish of salt uncovered in a damp room and it will cake and clump. The apothecaries kept their salts stoppered for this reason, and you will store yours the same way. A material that drinks the air must be kept from drinking it.
Check in: A salt that crystallized wrong was rejected at the door. What two habits must you be able to tell apart under the magnifier — and which salt grows which?
❦ In your workbook: record salts, the honest crystal in your own way — cubes and needles, the true solution and its saturation limit, and the hygroscopic rule for storage — copy, sketch, or note what matters.
Safety Briefing
Before any practical begins, the laboratory rules for mineral work:
- Do not inhale fine powders. Grinding salt, clay, or pigment makes dust, and dust belongs in the air of the room, not in your lungs. Work with ventilation, a window open or a fan moving air, and consider a simple dust mask when grinding dry material. Dampen powders before handling when the procedure allows it.
- Label every vessel the moment it is filled. A jar of white powder is a mystery; a labeled jar is an archive entry. Muddlenook's first rule of the laboratory: no unlabeled vessels, ever.
- Wash your hands after handling mineral materials, and keep them away from eyes and mouth. These are laboratory specimens, not food, even when the substance is familiar.
- Young scholars: ask an adult for help with grinding, with carrying vessels of water, and with any heating. There is no heating in this lesson's practicals, which is one reason they are excellent first mineral work.
- Clean as you go. Spilled salt on the bench becomes every future observation's contamination. Wipe, sweep, and wash vessels promptly.
Scholars, I am called a stickler for laboratory safety, and I accept the title with pride. The scholars who follow the briefing never have accidents. The scholars who skip it always tell me about it afterward, which is how I know. Read the briefing. Follow the briefing. Then begin.
— Professor Crimblebrew Muddlenook, Potions Laboratory • Master Apothecary • Head of House Meridies
Check in: Why does dust belong in the air of the room and not in your lungs — and what is Muddlenook's first rule of the laboratory, in its own words?
❦ In your workbook: record the first safety briefing in your own way — dust and ventilation, the labeled vessel, washed hands, adult help for the young, and cleaning as you go — copy, sketch, or note what matters.
Practical I: The Crystal Garden
This is the heart of the lesson. You will grow salt crystals, observe them over several days, and record crystal habit as a laboratory diagnostic.
Mise en Place
Level One (household items):
- Table salt (plain, without anti-caking additives if you can find it; check the label)
- Epsom salt (magnesium sulfate, from the pharmacy section; optional but strongly recommended for the comparison)
- Two clean glass jars or beakers
- Warm water
- A spoon for stirring
- String or yarn, and two pencils or sticks to suspend it
- A magnifying glass or loupe
- Your laboratory journal
Level Two (historically closer):
- Coarse sea salt or rock salt (halite, the mineral as the apothecaries bought it)
- A ceramic mortar and pestle for any grinding the procedure requires
- Glass stirring rod in place of the spoon
- Labeled specimen jars for the finished crystals
Procedure
- Label both jars before you begin: one "NaCl" and one "MgSO4" (or "table salt" and "Epsom salt" if you prefer plain words; the label matters, not the language).
- Fill each jar about two-thirds full with warm water. Warm water holds more dissolved salt than cold, which gives your crystals more material to grow from.
- Stir table salt into the first jar, a spoonful at a time, until no more will dissolve and a little remains undissolved at the bottom. You have made a saturated solution. Note how many spoonfuls it took; that number is data.
- Repeat with Epsom salt in the second jar.
- Tie a length of string to each pencil, and lay the pencils across the jar mouths so the strings hang into the solutions without touching the sides or bottom.
- Set both jars somewhere they will not be disturbed: a shelf, not a windowsill in direct sun. Date your journal entry.
Observation
Check the jars daily for five to seven days. Record: when the first crystals appear, where they form (on the string? on the jar walls? at the surface?), and, once they are large enough, their shape under the magnifier. Table salt should show its honest cubes. Epsom salt should show needles, long and sharp. Sketch what you see. If your crystals grow cloudy or irregular, record that too, and consider what differed: was the solution truly saturated? Was the jar disturbed? The failed crystal teaches as much as the perfect one.
Cleanup
Pour off the remaining liquid, rinse the jars, and dry them. Keep your best crystals in a small labeled jar or envelope as a reference specimen. Sweep any spilled salt from the bench; contamination is the enemy of the next observation.
Archive Entry
File in your potions journal: the date, the salts used, spoonful counts to saturation, daily observations, sketches of crystal habit, and your conclusion. One line should state the diagnostic rule you can now use: cubic habit suggests table salt; needle habit suggests Epsom salt. That line is the whole point of the exercise.
Check in: Your crystals grow cloudy or irregular. Name the two questions the observation itself tells you to ask — about the solution, and about the jar.
❦ In your workbook: record the crystal garden in your own way — the saturated solutions, the suspended strings, the daily watch, and the diagnostic line your archive entry ends with — copy, sketch, or note what matters.
In your packet: Exercise I — The Crystal Observation Log ◐ begins here. Work it now, or mark the place and take it as homework — your choice.
Clays: The Patient Suspension
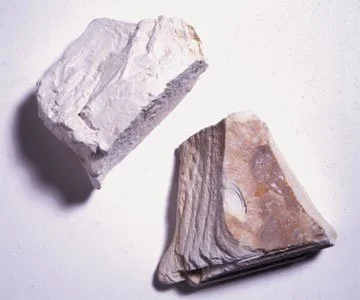
Kaolinite, the clay mineral of Practical II's Level Two bench: a pale, earthy lump — and, at the second specimen's edge, the fine layered plates that make clay cloud water, settle slowly, and drink moisture so stubbornly.
Kaolinite specimens, U.S. Geological Survey, via Wikimedia Commons. Public domain.
If salt is the honest crystal, clay is the patient suspension. Clay is the finest of all mineral particles, less than two thousandths of a millimeter across, made of flat plate-shaped grains. You met clay in Herbology as a soil, where its tiny plates hold water and nutrients fiercely. In the laboratory, those same plates give clay its signature behavior: stirred into water, clay does not dissolve. It suspends.
★ A suspension is not a solution, and the difference is one of the most useful distinctions in the laboratory. In a true solution, like salt water, the particles are so small they never settle, scatter no light, and cannot be filtered out. In a suspension, like clay in water, the particles are larger: they scatter light (the water looks cloudy), they can be separated by settling or filtration, and given time they will sink. Stir clay into water and watch: cloudy at first, then slowly, patiently, the water clears from the top down as the plates settle. That settling is not a failure. It is the material telling you what it is.
Clays also teach absorbency. Those flat plates have enormous surface area for their size, which is why clay holds water so stubbornly and why it was used historically to carry other materials: pigments ground into clay stayed distributed; pastes made with clay held their shape. In our work, clay's absorbency is a storage fact. Clay specimens must be kept dry and sealed, because a clay that has drunk the damp of the room is a clay whose weight and behavior have changed without your permission.
Scholars, the clay practical below looks simple, and it is. Its simplicity is the point. You will watch water clear from the top down, and in that slow clearing you will see, with your own eyes, the difference between dissolved and suspended. No textbook sentence ever taught this as well as one jar of muddy water. Set it up, leave it alone, and let the clay do the teaching.
— Professor Crimblebrew Muddlenook, Potions Laboratory • Master Apothecary • Head of House Meridies
Check in: The water in the clay jar clears from the top down. Is that settling a failure — and what is the material telling you?
❦ In your workbook: record clays, the patient suspension in your own way — the flat plates, dissolved against suspended, and absorbency as a storage fact — copy, sketch, or note what matters.
Practical II: The Suspension Trial
Mise en Place
Level One (household items):
- A spoonful of clay soil from the garden, or powdered clay from a craft store (undyed, unfired)
- A spoonful of table salt, for comparison
- Two tall clear glasses or jars
- Water
- A spoon for stirring
- A strip of paper or a ruler, to mark settling levels
- Your laboratory journal and a watch or timer
Level Two (historically closer):
- Kaolin or bentonite clay powder, as sold for pottery or traditional preparations
- Glass beakers in place of drinking glasses
- A glass stirring rod
Procedure
- Label the glasses: "CLAY" and "SALT."
- Fill both two-thirds full with water. Stir one spoonful of clay into the first and one spoonful of salt into the second. Stir each for a slow count of thirty.
- Set both down side by side where they will not be disturbed. Start your timer. Record the time.
Observation
Watch both glasses for one hour, checking every ten minutes. The salt glass should clear almost at once: a true solution, particles too small to see, nothing settling. The clay glass will stay cloudy, then clear gradually from the top downward as the plates settle. Mark the settling line on the glass or the paper strip at each check. Note the final sediment: its color, its depth, how firmly it has packed. Now stir the clay glass again and time how long the cloud takes to return to the same state. The material is consistent. That is the lesson.
Cleanup
Pour off the clear water from the clay glass carefully, this is decanting in miniature, and discard the sediment in the rubbish, not down the sink in quantity. Rinse and dry the glasses. Wipe the bench.
Archive Entry
Record the full settling table: time against clarity for both glasses. State the rule in your own words: dissolved particles do not settle; suspended particles do. Note the absorbency observation if your clay clumped or held water in the spoon. This entry will be referenced again in Unit IV, when solvents meet these same behaviors.
Check in: State the archive entry's rule in the lesson's own terms — which particles settle, and which do not?
❦ In your workbook: record the suspension trial in your own way — the two labeled glasses, the ten-minute checks, the settling line, and the final sediment — copy, sketch, or note what matters.
In your packet: Exercise II — Suspension Against Solution ◐ begins here. Work it now, or mark the place and take it as homework — your choice.
Ochres and Earth Pigments
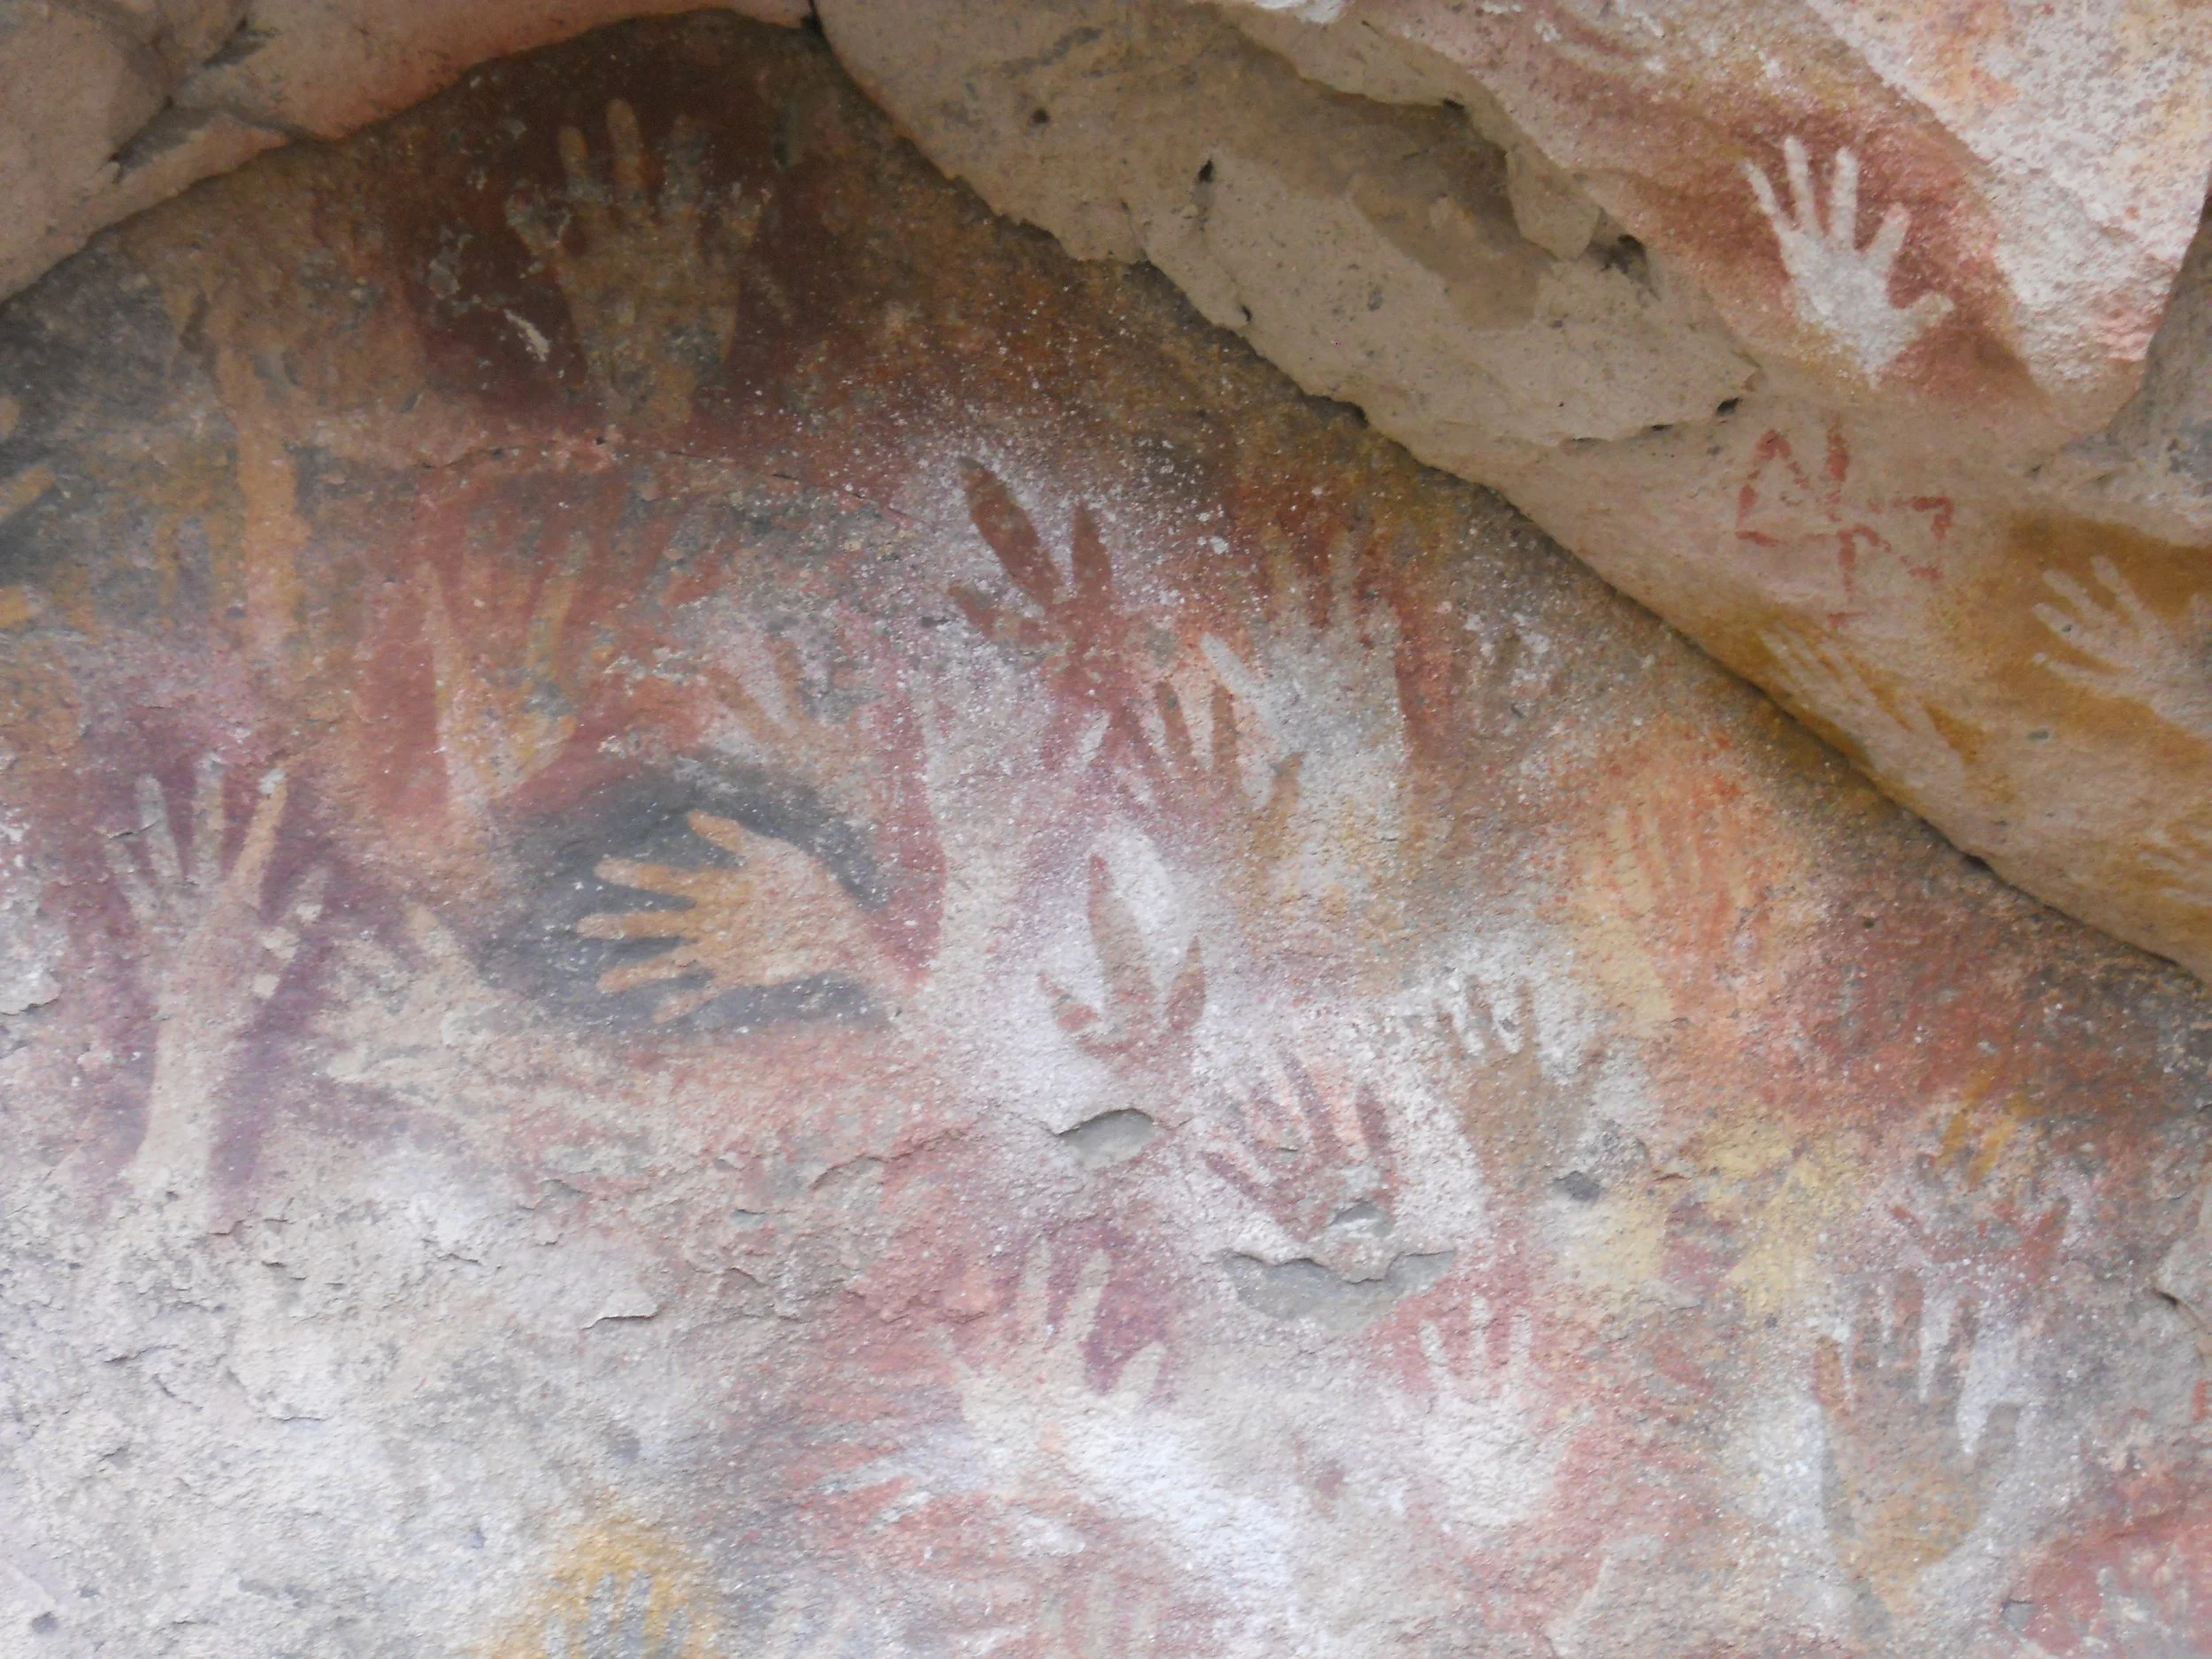
Hand stencils in earth pigment at the Cueva de las Manos, Argentina — the same ochre tradition the lesson names in the caves of France: ground earth, blown or pressed around a hand, still legible after thousands of years. The pigment outlasts everything else about the makers.
Cueva de las Manos hand stencils, photograph by Maclemo, via Wikimedia Commons. Public domain.
There is one more family on the mineral shelf, and it is the most beautiful: the earth pigments. Ochre is a natural mixture of iron oxide with clay and sand. Yellow ochre gets its color from goethite, a hydrated iron oxide; red ochre gets its from hematite, the same mineral that makes rust red. People have used these pigments since before history: red ochre handprints survive in caves in France from tens of thousands of years ago, and ground ochre was washed, dried, and sometimes heated to deepen its color long before any paint tube existed.
In the laboratory, ochre teaches purification. Dug ochre is full of sand and grit. The old method of refining it is one you will practice in the next section: wash it in water, let the heavy sand settle first, pour off the cloudy liquid carrying the fine pigment, and let that settle in its turn. This is levigation, and it is one of the oldest material sciences in the world. The pigment that results is smoother, stronger in color, and worthy of the shelf.
A word on boundaries, because scholars ask. Scrollwork studies inks and pigments as writing materials; that class owns the pen's side of ochre. We own the laboratory side: what ochre is, how it is purified, how it behaves as a material. The classes connect here. They do not repeat each other. Your archive entry for ochre should note the connection and move on.
Check in: Yellow ochre and red ochre: name the mineral that colors each — and say which side of ochre this laboratory owns, and which side is Scrollwork's.
❦ In your workbook: record ochres and earth pigments in your own way — goethite's yellow and hematite's red, the cave handprints, and levigation as the old refining — copy, sketch, or note what matters.
Purification Systems: Washing, Levigation, Decanting
Every mineral that enters the laboratory arrives impure, and the apothecary's job begins with making it clean enough to trust. Three systems do most of this work, and all three are older than any textbook.
Washing is the simplest: stir the material in water, let the soluble impurities dissolve, and pour the dirty water away. The material that remains is cleaner than what you started with. Salt is purified this way at industrial scale; you will use the same logic on a bench scale.
★ Levigation is wet grinding plus patient settling. Grind the material with a little water in the mortar, flood it with more water, stir, and let it stand. The coarse, heavy particles settle first. Pour the still-cloudy liquid, which carries the fine particles, into a second vessel. Let that settle, pour off the clear water, and what remains is the fine fraction. Repeat until the fineness satisfies you. No dust, no loss to the air, and every soluble impurity washed away in the pourings. The pharmacists of history used this for ointment bases and fine powders, and the pigment makers used it for ochre.
Decanting is the pour itself, done with a steady hand: tilt the vessel and pour off the liquid without disturbing the sediment. It is a skill, not a step. Practice it in this lesson's practicals and it will serve you in every extraction in Unit IV.
Your Turn: Purify a Gritty Sample
Take a spoonful of garden soil or coarse sand mixed with a little powdered clay. Wash it: stir in water, let settle briefly, decant the cloudy water into a second jar. Repeat the wash twice. Now let the second jar stand undisturbed for an hour. Decant the clear water, and examine what settled: the finest fraction, separated by nothing but water and patience. Label it, date it, and file the observation. You have performed levigation. The apothecaries of three hundred years ago would recognize your bench.
Check in: In levigation, what settles first, what is poured off, and what remains at the end?
❦ In your workbook: record the purification systems in your own way — washing, levigation's coarse-first settling, and decanting as a skill, not a step — copy, sketch, or note what matters.
In your packet: Exercise III — The Purification Record ◐ begins here. Work it now, or mark the place and take it as homework — your choice.
Safety Briefing
- Fine powders are the principal hazard of this lesson. Grind gently, keep dust down, ventilate the room, and wear a simple dust mask if you are sensitive. Dampening a powder before handling is the oldest dust control in the book.
- Label every vessel the moment it is filled. Unlabeled white powders are how mistakes happen.
- Wash hands after handling mineral materials. Keep specimens away from eyes and mouth.
- Young scholars: grinding and carrying water vessels are adult-supervised tasks.
- Dispose of sediments in the rubbish, not down the drain in quantity. Clay settles in pipes exactly the way it settles in jars.
- Store all mineral specimens sealed, dry, and labeled. Salts and clays both drink moisture from the air.
Check in: Why must sediments go in the rubbish and not down the drain in quantity — in the briefing's own comparison?
❦ In your workbook: record the second safety briefing in your own way — fine powders as the principal hazard, the unlabeled-powder warning, sediments to the rubbish, and sealed, dry, labeled storage — copy, sketch, or note what matters.
Guided Observation: Two Jars, Watched Slowly
This lesson's observation is the watch itself, done at the bench with both practicals' jars in front of you: the crystal jars of Practical I, checked daily, and the two glasses of Practical II, checked every ten minutes — because this lesson's teaching happens in the waiting, and the record is made while the materials change.
Work through it in order.
Watch the crystals grow. Check the jars daily for five to seven days. Record: when the first crystals appear, where they form (on the string? on the jar walls? at the surface?), and, once they are large enough, their shape under the magnifier. Table salt should show its honest cubes. Epsom salt should show needles, long and sharp. Sketch what you see.
Watch the glasses settle. Watch both glasses for one hour, checking every ten minutes. The salt glass should clear almost at once: a true solution, particles too small to see, nothing settling. The clay glass will stay cloudy, then clear gradually from the top downward as the plates settle. Mark the settling line on the glass or the paper strip at each check.
Consider:
- Where did your first crystals form — and what did the cloudy or irregular growth, if any, make you ask about the solution and the jar?
- At which ten-minute check did the clay glass's clearing become unmistakable — and how deep, what color, and how firmly packed was the final sediment?
- State both rules the two watches taught, side by side: cubic habit suggests table salt; needle habit suggests Epsom salt — and dissolved particles do not settle; suspended particles do.
❦ In your workbook: record the guided observation in your own way — the daily crystal watch, the hourly settling watch, and the two rules stated side by side — copy, sketch, or note what matters.
Materials
Required (Level One — household items)
- Table salt (plain, without anti-caking additives if you can find it; check the label)
- Epsom salt (magnesium sulfate, from the pharmacy section; optional but strongly recommended for the comparison)
- Two clean glass jars or beakers, for the crystal garden
- Warm water
- A spoon for stirring
- String or yarn, and two pencils or sticks to suspend it
- A magnifying glass or loupe
- Your laboratory journal
- A spoonful of clay soil from the garden, or powdered clay from a craft store (undyed, unfired)
- A spoonful of table salt, for comparison
- Two tall clear glasses or jars, for the suspension trial
- A strip of paper or a ruler, to mark settling levels
- A watch or timer
Suggested (Level Two — historically closer)
- Coarse sea salt or rock salt (halite, the mineral as the apothecaries bought it)
- A ceramic mortar and pestle for any grinding the procedure requires
- Glass stirring rod in place of the spoon
- Labeled specimen jars for the finished crystals
- Kaolin or bentonite clay powder, as sold for pottery or traditional preparations
- Glass beakers in place of drinking glasses
Reflection Questions
Answer the following questions in your workbook.
- Table salt always crystallizes in cubes and Epsom salt in needles. Why does this make crystal habit a useful diagnostic for the apothecary receiving unlabeled material?
- Explain the difference between a solution and a suspension using the two glasses from Practical II. Name the three observable differences.
- Why must salts and clays be stored sealed and dry? What goes wrong, in laboratory terms, if they are left open in a damp room?
- Describe levigation in your own words: what goes in, what settles first, what is poured off, and what remains at the end?
- Ochre connects this lesson to Scrollwork's study of inks and pigments. Where does Potions' study of ochre end and Scrollwork's begin, and why does the distinction matter?
Workbook Checklist — Lesson 20
In my workbook I have:
- ☐ distinguished salts, clays, and earth pigments by grain structure and behavior, not just by name
- ☐ grown salt crystals from solution and read crystal habit as a diagnostic: cubes for table salt, needles for Epsom salt
- ☐ compared a true solution with a suspension using clay and water, and recorded the settling behavior over time
- ☐ purified a gritty mineral sample using washing, levigation, and decanting
- ☐ described absorbency and moisture interaction in storage terms: salts and clays hygroscopic, stored sealed, dry, and labeled
- ☐ kept both safety briefings: dust kept down and ventilated, every vessel labeled the moment it is filled, hands washed, sediments to the rubbish
- ☐ filed every observation in my archive: the crystal log, the settling table, and the purification record
☐ Lesson completed Date: ___ Signature: ___
The Professor's Closing Note
Sealed with the teal wax of Professor Crimblebrew Muddlenook, Master Apothecary of the Potions Laboratory, Head of House Meridies.
You have now met the mineral shelf properly: the honest salt, the patient clay, the beautiful ochre, and the three old purifications. Notice what this lesson asked of you. Not speed. Not inspiration. Care. The crystals grew because you made the solution correctly and then left it alone. The suspension — a mixture in which solid particles are spread through a liquid without dissolving — settled because you watched instead of hurrying. The pigment purified because you poured steadily.
This is the temperament the laboratory rewards, and it is the same temperament every future lesson will assume you have. Keep your labels legible, your bench clean, and your journal honest. The materials will do the rest.
— Professor Crimblebrew Muddlenook, Potions Laboratory • Master Apothecary • Head of House Meridies
Cross-Class Connections

Herbology · Unit II, Lesson 8 — The Substrate Profile: Texture & Drainage
Come down to the Greenhouse, laboratory scholars, and meet clay where it lives. In my soil lesson the same flat plates you watch cloud and settle a jar are read by hand — ribboned between thumb and forefinger, settled in a jar of garden soil — and my definition of clay is the one Professor Muddlenook's own lexicon sends you to. Read the ground first, and his suspension will make sense in your fingers as well as your eyes.
Herbology · Unit II, Lesson 10 — The Nitrogen, Phosphorus & Potassium Matrix
In the Greenhouse we read the three numbers on a fertilizer bag, and we learn the hard way that fertilizers are salts — and that salts in excess pull the water out of a plant's roots. Professor Muddlenook keeps those same salts stoppered on his mineral shelf, because a salt drinks moisture from the air. Come and see the pantry side of his crystals: what they feed, in what measure, and why more is never better.
PROFESSOR BERYL FERNFOOT
Herbology Greenhouse • Master Herbalist • Head of House Oriens

Scrollwork · Unit II, Lesson 7 — Red Inks & Rubrication
The red that governs my pages has a laboratory name in Professor Muddlenook's lesson, scholars: rubrica, red ochre, the earth pigment itself. He teaches what ochre is and how levigation refines it; I teach what the refined red does on the page — the heading, the initial, the direction — and where the word rubric comes from. Bring his purified pigment to my desk, and I will show you the pen's side of the same earth.
PROFESSOR QUILLBERRY NOCTURNE
Scrollwork Library

Creative Arts · Unit IV, Lesson 15 — Pigments, Paints & Color Charts
Professor Muddlenook purifies ochre by water and patience, scholars. In my workshop we take the purified earth the next step: ground and mulled on the stone, bound into paint, and laid out on a labeled color chart another scholar could reproduce exactly. Ochre at a hundred thousand years is where my lesson begins. Bring a steady hand and respect the grinding stone's own safety record, as I teach it.
Creative Arts · Unit V, Lesson 19 — Clay I: Pinch, Coil & Slab
Aprons on, scholars. The clay Professor Muddlenook suspends in water and Professor Fernfoot reads in the soil is the clay my bench wedges and shapes — pinch, coil, and slab, the three hand-building methods behind flower pots, plant markers, and name tiles. Learn its behavior in his jar first; then come and learn its character in your hands.
PROFESSOR COGBRANCH TIMBERCLANK
Creative Arts Workshop
Further Reading & Sources
- Salt Crystals — Wikipedia — the cubic habit of halite and how salt crystallizes from solution.
- Ochre — Wikipedia — the ochre family: yellow, red, and brown earth pigments, their composition, and their history.
- Goethite — Encyclopaedia Britannica — the hydrated iron oxide behind yellow ochre and its conversion to hematite.
- Where Does Salt Come From? — UCSB ScienceLine — salt's chemistry, its cubic crystals from evaporating solution, and where salt is found.
- What Is Levigation? — Chemistry Notes — wet grinding, settling, and decanting as a purification method, with the mortar-and-pestle procedure.
Browse the Potions shelf in the school Library for readable editions of these works.
Submit your work for this lesson using the form below.
CONTINUE IN THE POTIONS LABORATORY
← Previous · Lesson 19: Oils, Waxes & Botanical Bases Next · Lesson 21: Grinding, Crushing & Botanical Processing →
Unit III — Dense Materials & Preparation Potions Laboratory — All 52 Lessons
The rest of Unit III: Lesson 18 · Roots & Bark · Lesson 19 · Oils & Waxes · Lesson 21 · Grinding & Processing · Lesson 22 · Filtration · Lesson 23 · Preparing for Extraction · Lesson 24 · Master Portfolio · Lesson 25 · Preparation Manifest