

POTIONS
Unit III · Lesson 21GRINDING, CRUSHING & BOTANICAL PROCESSING
Professor Crimblebrew Muddlenook
Master Apothecary • Potions
Head of House Meridies • School of Evershade
Professor's Introduction

Order first. Grinding second.
Every preparation you will ever make in this laboratory depends on a step most students rush past without a second thought: the reduction of whole materials to workable powder. Roots, bark, seeds, resins (hardened plant secretions, sticky when fresh, that harden on exposure to air), dried petals, mineral earths. All of them must be broken down before a solvent — a liquid able to dissolve or draw out other materials — can do its work. The manner of that breaking decides the quality of everything that follows.
In Unit I you learned the foundations of grinding, the basic handling of mortar and pestle, and the habit of a clean, organized grinding station. This lesson is the advanced study. We go deeper into the motions, the tools, the grades of powder, and the one great principle that governs them all: surface area. Understand surface area and you understand why a coarse handful and a fine powder of the same root behave like two different materials.
We will also grind color itself. A small lump of ochre, iron-rich earth used as pigment since the earliest human art, will teach your eyes what your fingers are learning. Finer grinding makes stronger color. There is no opinion in this. There is only observation.
Set your station in order. Tie back anything that dangles. And grind with patience, scholars. The mortar rewards the steady hand and punishes the hurried one.
— Professor Crimblebrew Muddlenook, Potions Laboratory • Master Apothecary • Head of House Meridies
Potions map — the class base map, unmarked for this lesson.
Lesson Objectives
By the end of this lesson, you will be able to:
- Explain why particle size controls extraction speed and completeness.
- Choose the right mortar and pestle for a given material.
- Use the four grinding motions: cracking, pounding, circular grinding, and bruising.
- Produce and identify three grades of powder: coarse, fine, and impalpable.
- Sift, assess, and regrind for a uniform, predictable powder.
- Grind an ochre pigment and observe how particle size changes color intensity.
- Record a grinding trial in your laboratory archive with full observations.
Reading this lesson: ★ marks the passages to remember. They return on the unit quiz and the class test. Check in questions ask the material back as you go; answer them in your workbook when you meet them.
Working this lesson: Your assignment packet is the first download on this page. Work in it as the lesson moves along, answering each exercise as its subject is taught — or read the lesson through for your notes and take the exercises as homework afterward. Both are proper ways to sit this class. Signposts in the reading tell you where each exercise belongs. Written answers are short answers in your own words; a few honest lines are worth more than a filled page.
Your Assignment Packet
This lesson's exercises live in its packet: the Lexicon Handout (every term, course terms marked ◆), Materials, Guided Practice, the Assignment Manual with its answer key for self-checking, the Reflection Questions, and the Workbook Checklist. Download the packet before you begin and keep it beside you as you read.
Safety Briefing: Dust Is the Enemy You Cannot See
Before any tool is lifted, the safety briefing. In Muddlenook's laboratory, no procedure begins until every scholar can state the hazards aloud.
Dust. Grinding makes dust. Fine mineral and botanical dust irritates eyes, noses, and lungs, and some materials are far worse than others. Work in a ventilated space. Wear a simple dust mask when grinding anything dry and powdery. Never blow across your work to clear dust; you will only launch it into the air you are breathing. If a material is extremely dusty, add a few drops of water and grind it damp. Wet grinding keeps the dust down and is an old apothecary's trick worth knowing.
The wandering mortar. A mortar that slides across the table will spill, chip, or take your fingers with it. Set your mortar on a folded damp cloth. It will sit still. A heavy stone mortar dropped on a foot is a genuine injury, so lift with both hands and keep it well back from the table's edge.
Know your material. Ochre is iron oxide, an earth pigment. It is safe to handle with bare hands, but do not inhale its dust and wash your hands when you are done. Never grind anything you cannot identify. Never grind materials from the Deadly Apothecary list you studied in your safety readings. When in doubt, the material stays whole and you ask.
Separation of laboratory and kitchen. Powders made in this lesson are laboratory specimens for observation and archive, not food and not medicine. Keep them labeled, lidded, and away from anything anyone might eat. Younger scholars: an adult's supervision for this lesson is not optional. It is required.
State the four rules back to yourself before you begin: ventilate, mask, secure the mortar, label everything.
Check in: State the four rules back to yourself, as the briefing closes by asking: what are they — and what does the briefing say to do instead of blowing across your work to clear dust?
❦ In your workbook: record the safety briefing in your own way — dust and the damp-grinding trick, the wandering mortar on its folded damp cloth, knowing your material, and the separation of laboratory and kitchen — copy, sketch, or note what matters.
Why Particle Size Rules the Laboratory
Take a dried root and drop it whole into warm oil. A week later, the oil will have taken on only a whisper of the root's character.
Now grind that same root to a fine powder, stir it into the same amount of oil, and within a day the oil is deeply colored and fragrant. Same root. Same oil. Different particle size. Different result entirely.
The reason is surface area. Extraction happens where the solvent touches the material, at the surface.
A whole root offers the solvent only its outer skin. Break it into a thousand pieces and you have exposed a thousand new surfaces, all of them working at once.
The finer the powder, the more surface is exposed, and the faster and more completely the extraction runs.
★ This is the single most useful principle in all of preparation science, and it is pure geometry, not magic. Double the fineness and you roughly double the available surface. Historical apothecaries knew this long before anyone measured it. They ground fine when they wanted swift, strong extractions and ground coarse when they wanted slow, gentle ones, or when a fine powder would clog a filter or cloud a preparation past saving.
Particle size is therefore not a detail. It is a decision. Every time you set pestle to mortar, you are deciding how your material will behave in every lesson that follows, from the infusions of Unit IV to the formulations of Unit V. Grind with intention.
Check in: Same root, same oil, two results a week apart and a day apart. What single thing differed — and what is the geometry the lesson gives for why it matters?
❦ In your workbook: record why particle size rules the laboratory in your own way — the whole root and the fine powder in the same oil, surface area as pure geometry, and particle size as a decision, not a detail — copy, sketch, or note what matters.
In your packet: Exercise III — The Extraction Readiness Comparison ◐ grows out of this section's principle; its full trial is worked at the Procedure below. Mark the place — the principle is stated here, the proof is poured there.
The Tools of the Trade: Mortars and Pestles
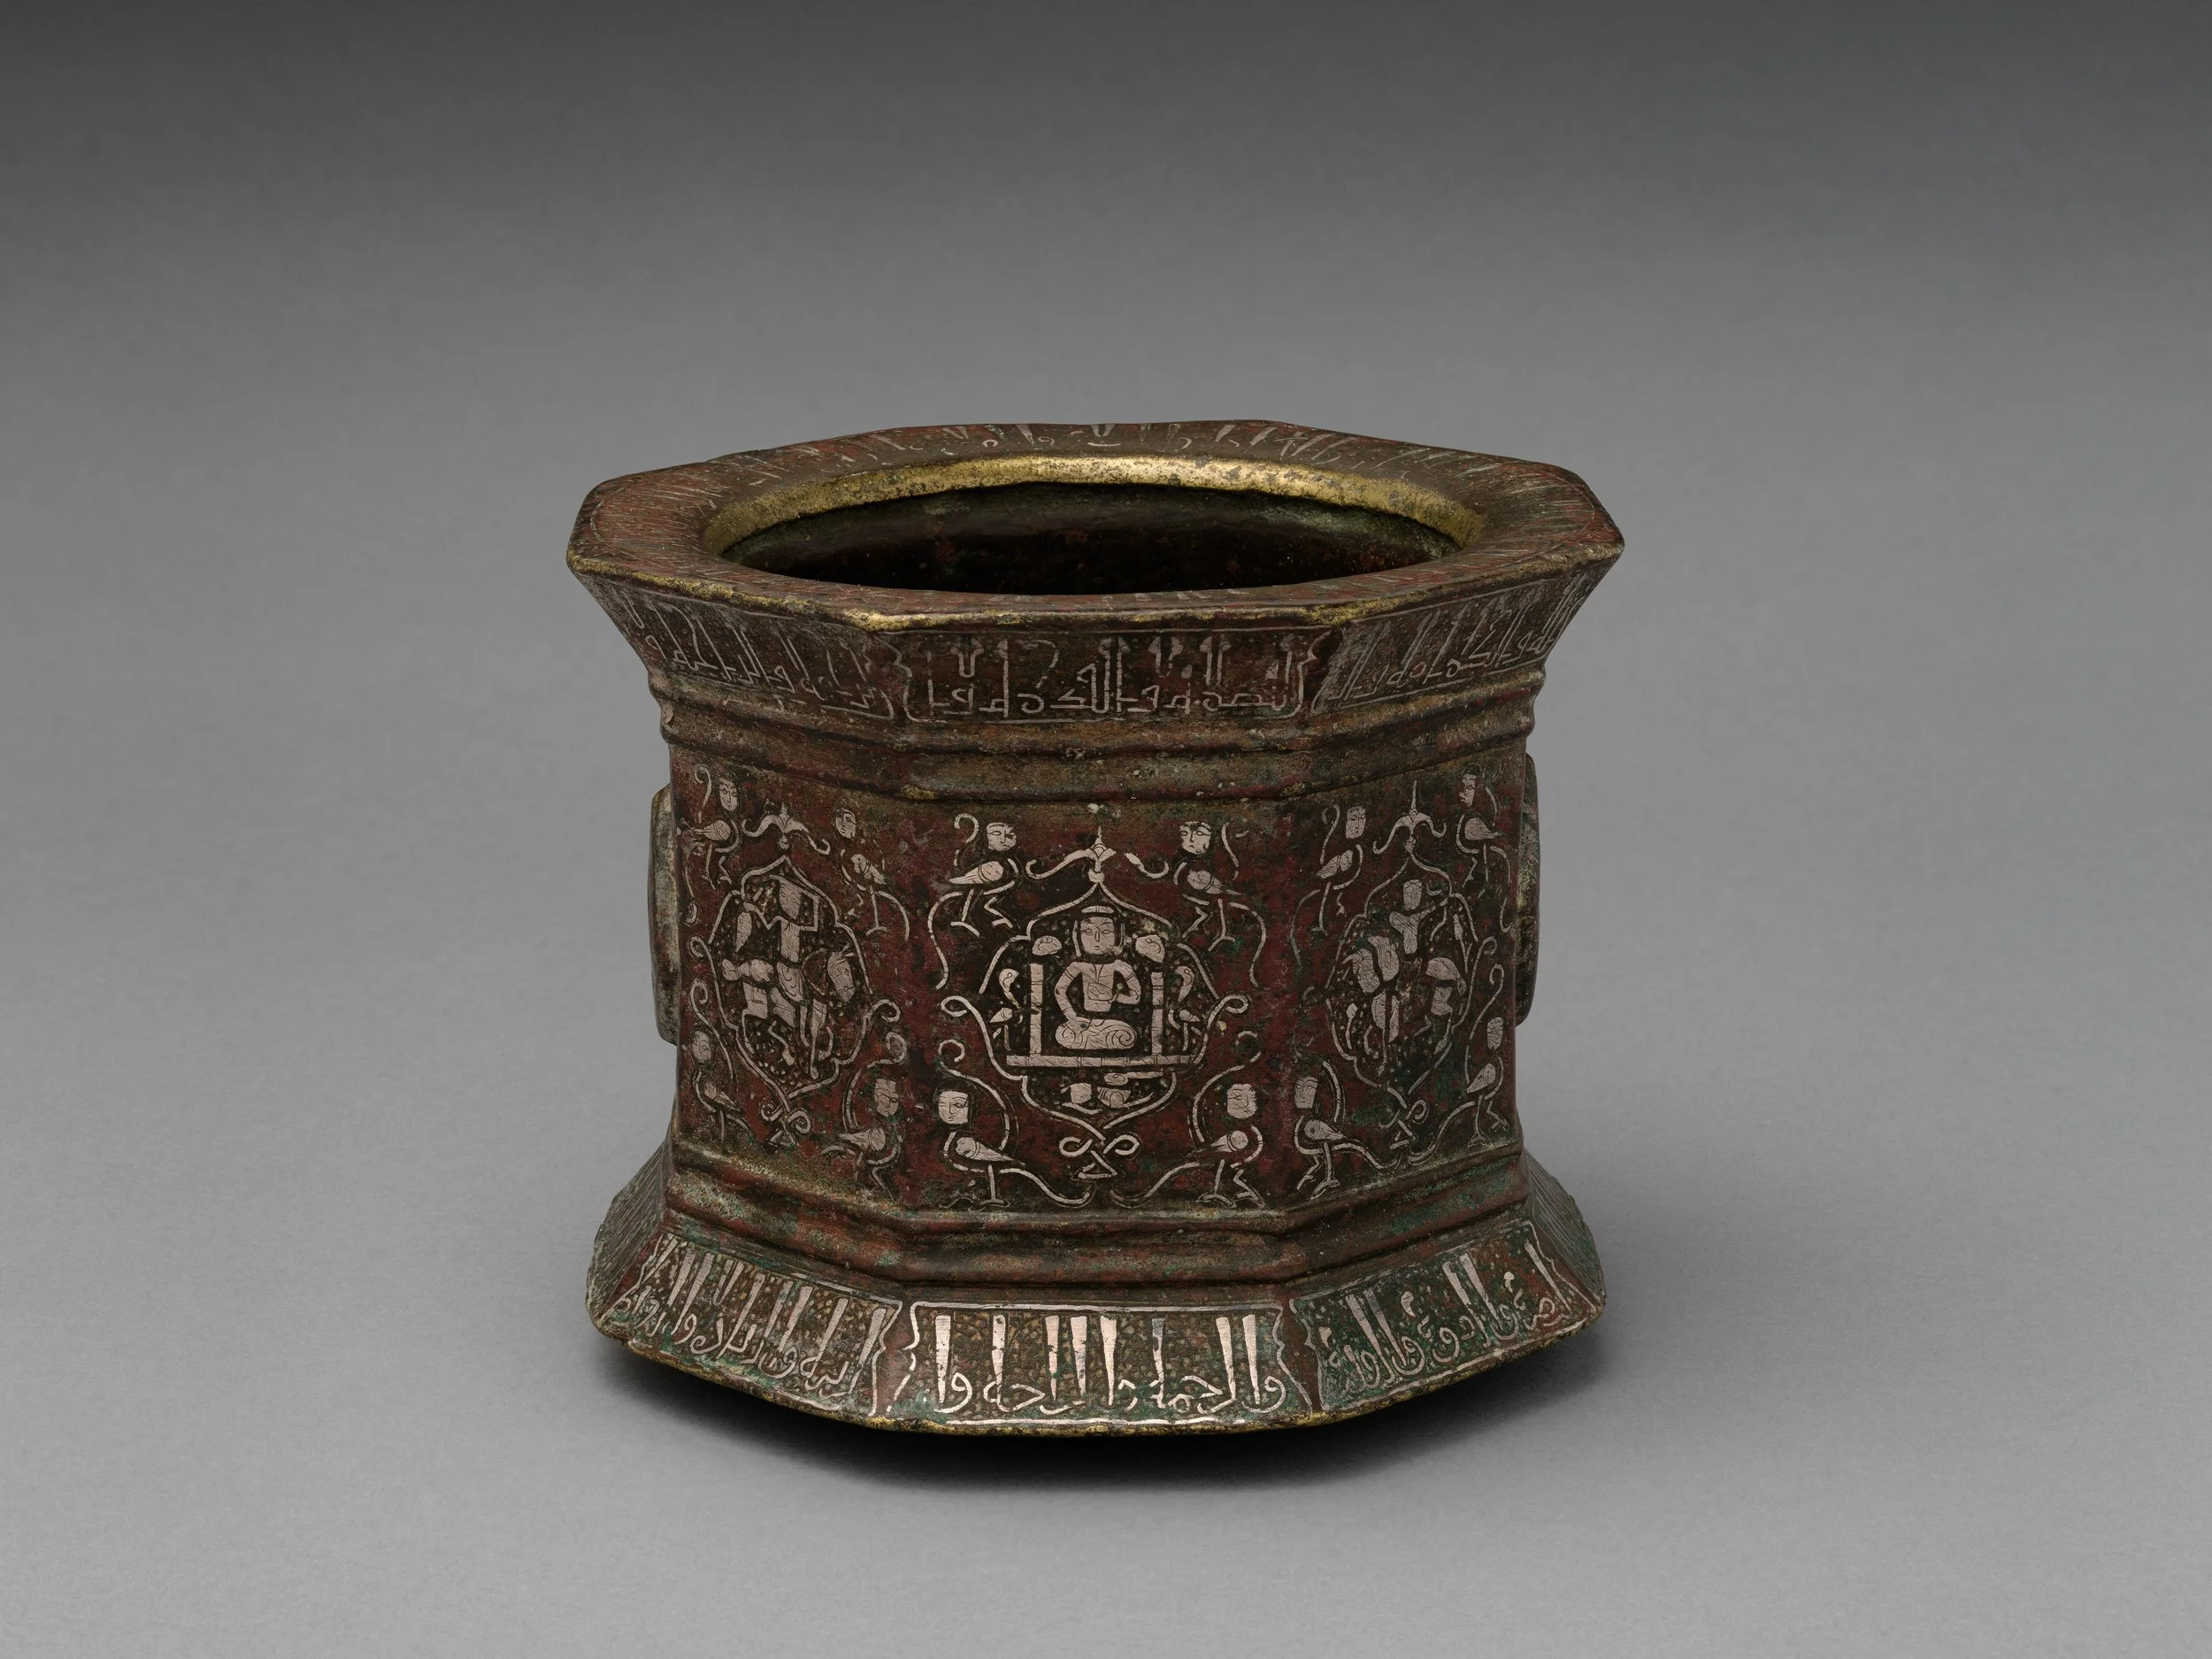
A bronze mortar inlaid with silver, made for Abu Bakr 'Ali Malikzad al-Tabrizi, late 12th–early 13th century — the classic apothecary's metal mortar at its most beautiful: heavy, durable, and (the lesson's absolute caution) never for strongly acidic materials, which attack the metal and contaminate the powder.
The Metropolitan Museum of Art, Open Access (CC0). Object 444529, "Mortar and Pestle made for Abu Bakr 'Ali Malikzad al-Tabrizi," accession 91.1.527a, b.
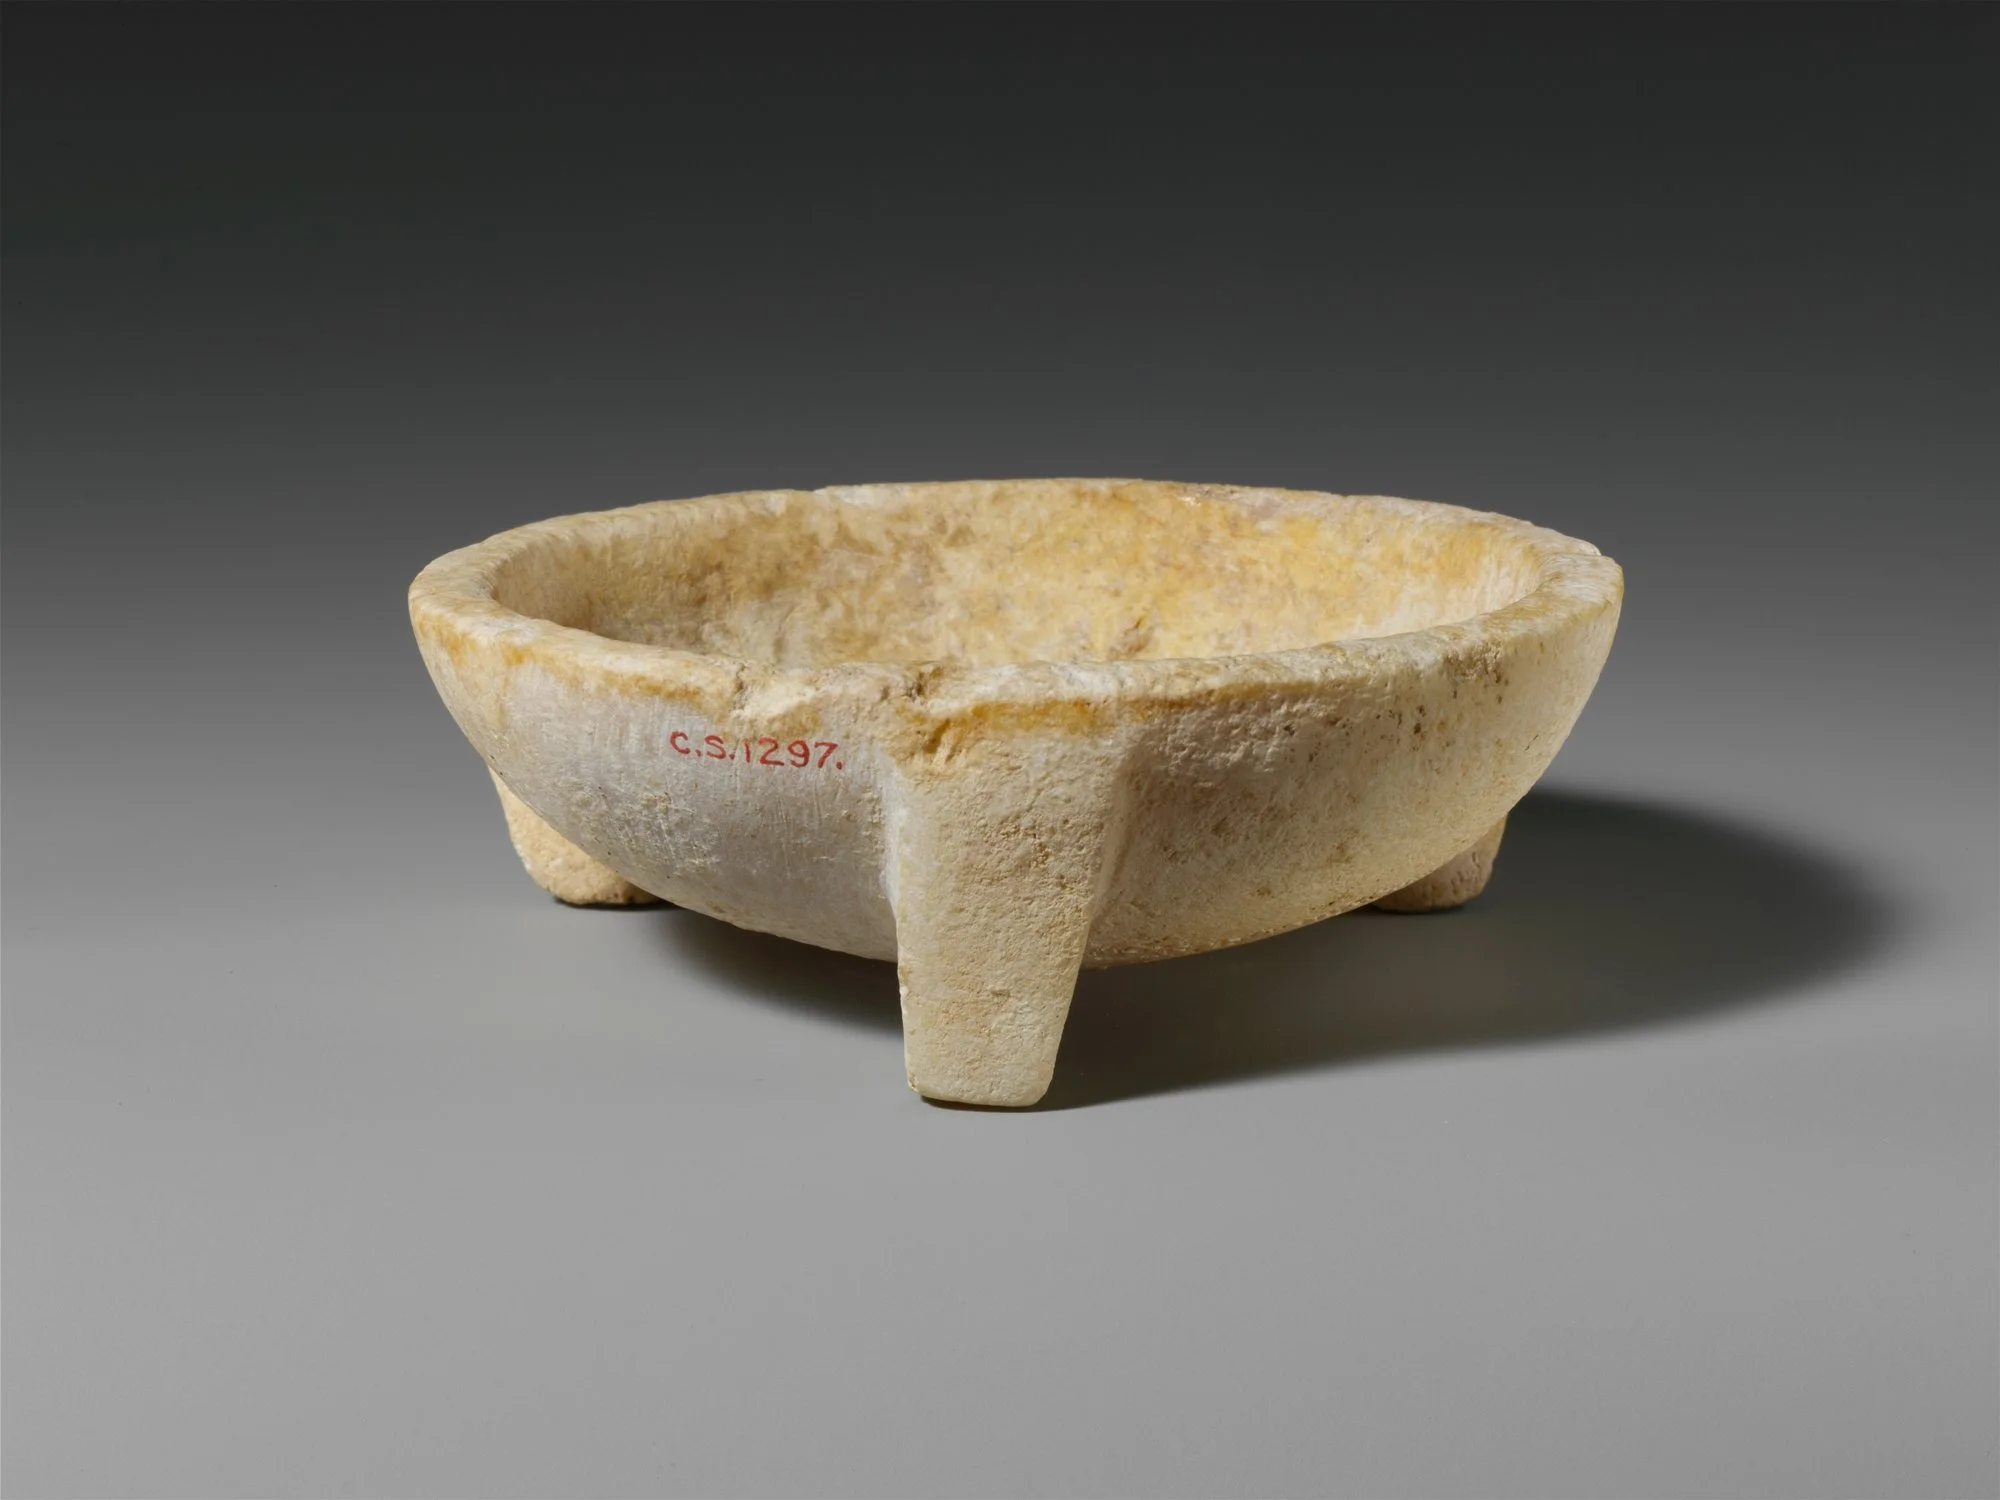
An alabaster mortar, Cyprus, ca. 1200–1050 BCE. Three thousand years before the modern pharmacy, the workshop's center was already a heavy bowl: the design has barely changed because it barely needs to.
The Metropolitan Museum of Art, Open Access (CC0). Object 244019, "Alabaster mortar," accession 74.51.5139.
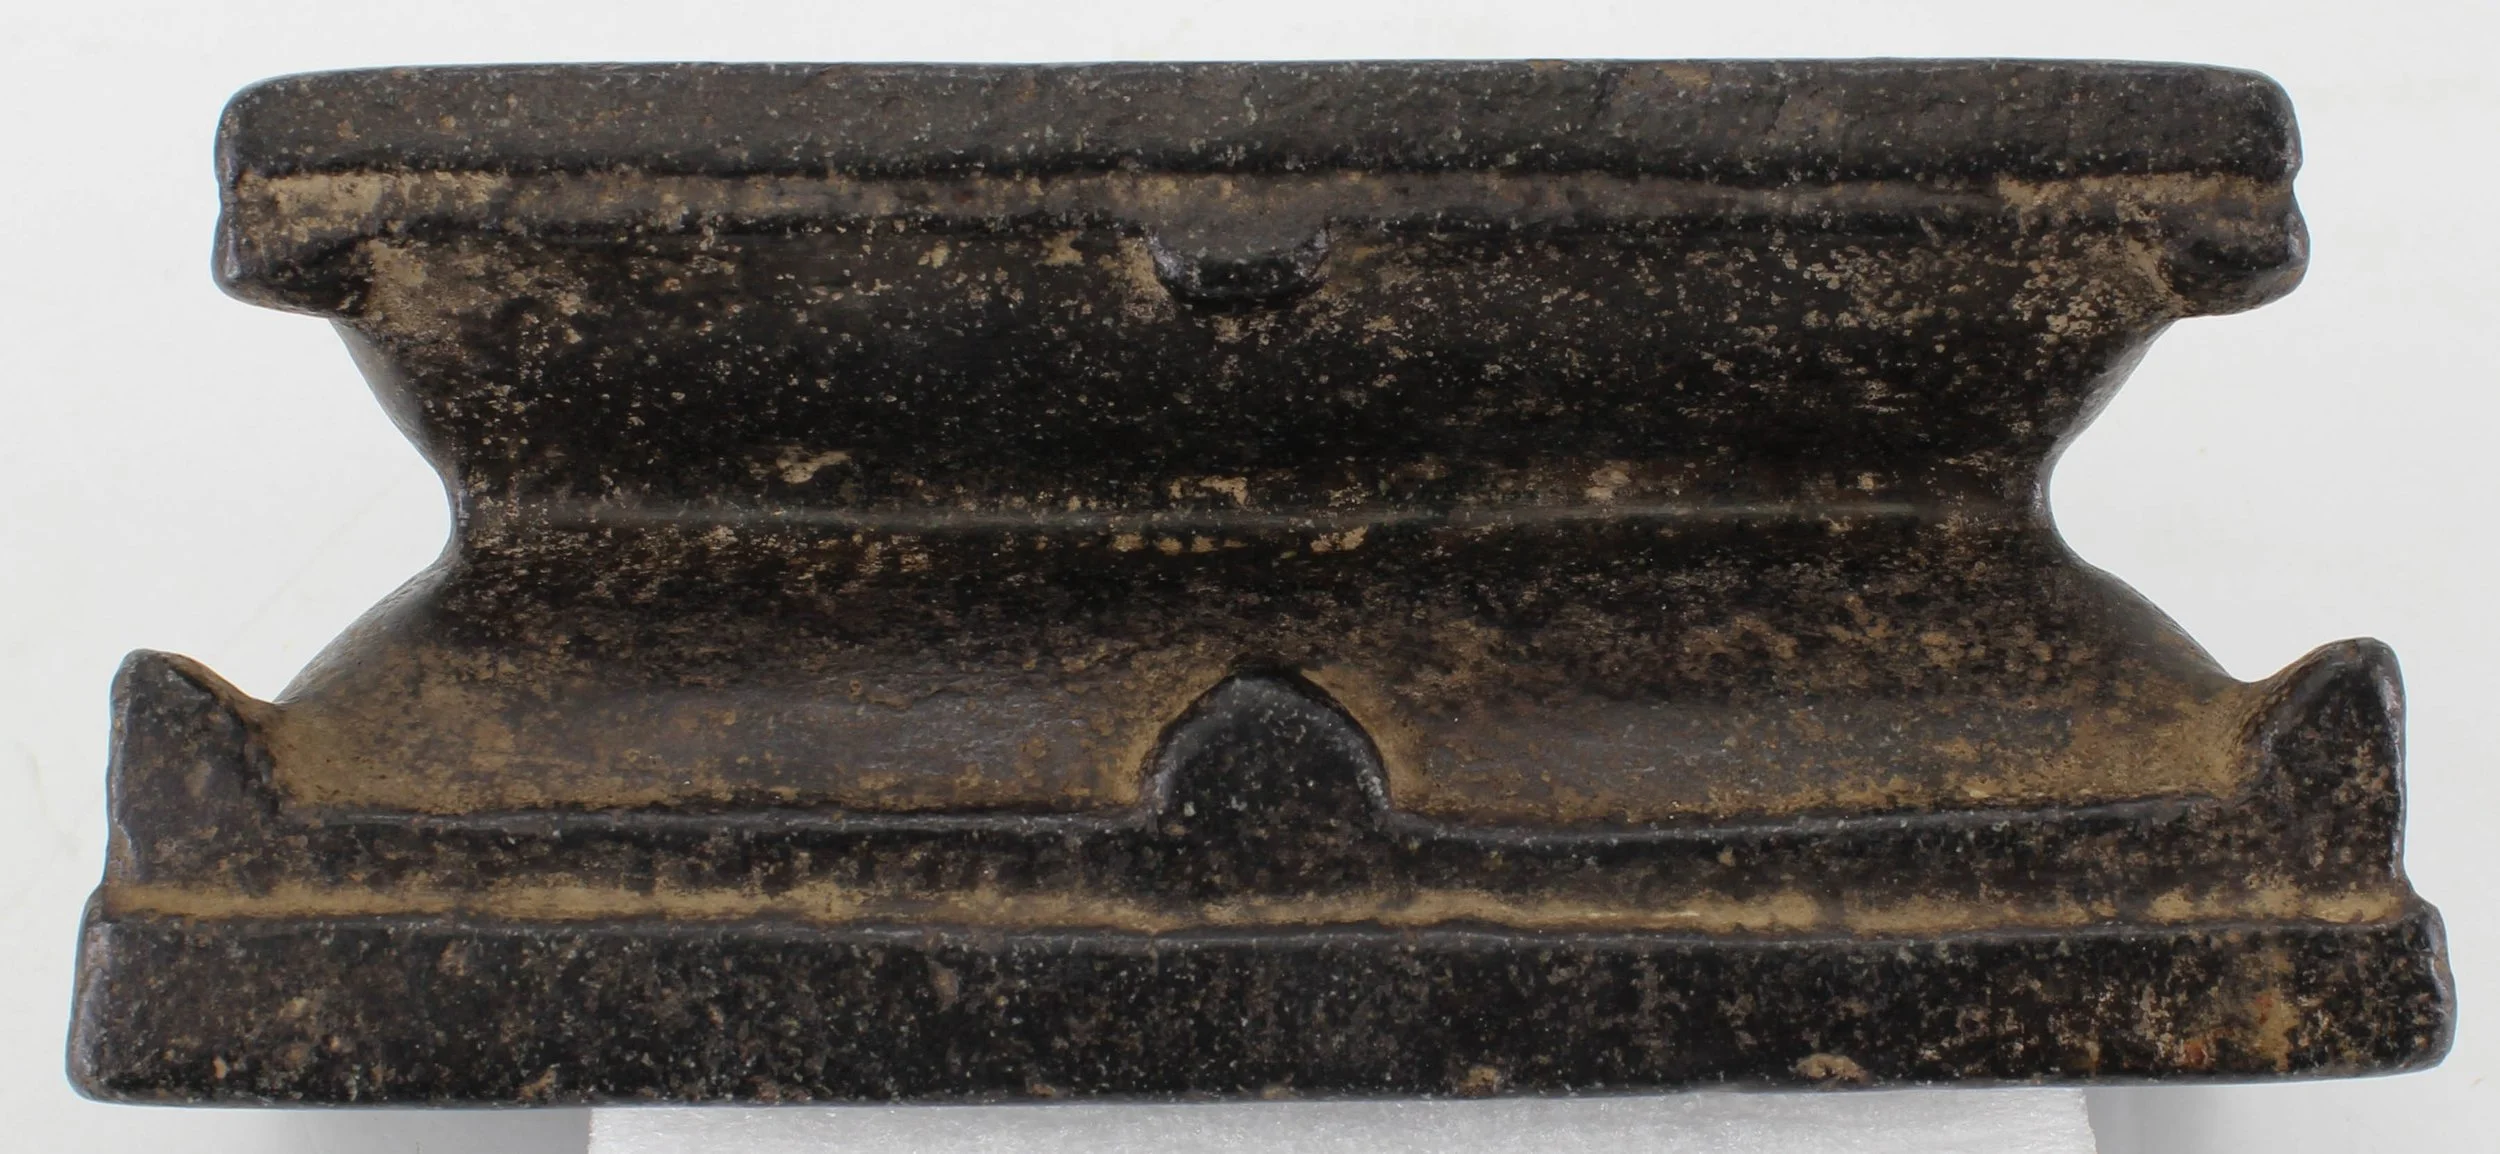
A double-sided stone mortar, 17th century, seen in profile. Stone — heavy, rough inside, nearly indestructible — is the lesson's best all-purpose choice for hard seeds, roots, bark, and resins; its weight is its virtue and its hazard both.
The Metropolitan Museum of Art, Open Access (CC0). Object 817378, "Double-Sided Mortar and Pestle," accession 2018.858a, b.
The mortar and pestle is among the oldest tools in human hands. Archaeologists have found grinding stones in use tens of thousands of years ago, and every apothecary tradition on record, Egyptian, Greek, Roman, Arabic, and early modern European, kept mortars at the center of the workshop.
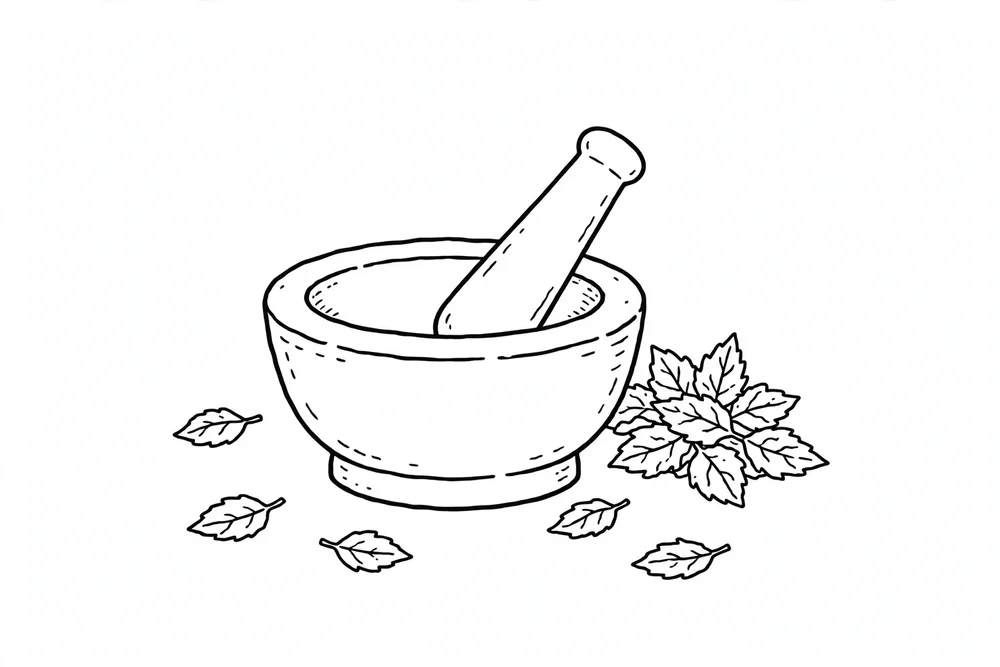
The design has barely changed because it barely needs to: a heavy bowl, a blunt club, and the force of your arm.
Choose your mortar the way you would choose any tool, by matching it to the work.
Stone, especially granite. Heavy, rough inside, and nearly indestructible. The roughness grips the material instead of letting it skate around the bowl, which makes stone the best all-purpose choice for hard seeds, roots, bark, and resins. Its weight is its virtue and its hazard both. Secure it well.
Ceramic or porcelain. Smooth, nonporous, and easy to clean. Excellent for soft materials, dried petals, and anything where you want no flavor or residue carried over from the last grinding. Too smooth for the hardest materials, which will skate rather than crush.
★ Brass or bronze. The classic apothecary's mortar, beautiful and heavy, good for general work. One caution, and it is absolute: never grind strongly acidic materials in a metal mortar. Acids attack metal, and you will contaminate your powder with dissolved metal salts. For vinegar-steeped or acidic preparations, use stone or ceramic.
Wood. Traditional for soft, oily materials and for bruising fresh herbs, but porous. It absorbs oils and odors and is difficult to truly clean. Keep a wooden mortar for one kind of work and do not mix uses.
Match the pestle to the mortar. A pestle too small for its bowl wastes your effort. A pestle too large cannot move.
The head should be heavy enough to do the work with gravity's help, because your arm will tire long before the material surrenders, and tired arms make careless mistakes.
My second note to you, sealed with the usual insistence on order. You have now met the principle and the tools. What follows is the technique, and technique is where most scholars fail, not for lack of strength but for lack of patience. Read the four motions twice before you attempt them once. Your first grinding should be slow enough to feel foolish. Speed comes later, and only after control.
— Professor Crimblebrew Muddlenook, Potions Laboratory • Master Apothecary • Head of House Meridies
Check in: A vinegar-steeped, acidic preparation needs grinding. Which mortars does the lesson send you to — and which does its absolute caution forbid, and why?
❦ In your workbook: record the tools of the trade in your own way — stone, ceramic or porcelain, brass or bronze with its acid rule, and wood, each matched to its work, and the pestle matched to its bowl — copy, sketch, or note what matters.
The Four Motions
There are four motions in grinding, and each has its proper use. Using the wrong motion for the material is the most common beginner's error, and it is entirely avoidable.
Work them in this order:
- Cracking. Short, sharp, downward taps with the head of the pestle, like a tiny hammer. Use it to break hard seeds, dried berries, and brittle resins into pieces small enough to grind. Do not strike with full force; you want controlled breaks, not shrapnel. Cover the mortar loosely with your free hand or a cloth to keep fragments in the bowl.
- Pounding. Heavier vertical blows for dense, stubborn materials: thick bark chips, hard roots, resin lumps. Work in the center of the bowl. Pause between blows to let fragments settle back down. Pounding is for reduction, not for fineness. Once the material is in small pieces, switch motions.
- Circular grinding. The classic motion. Press the pestle firmly against the material and work it around the inside of the bowl in slow circles, using your shoulder rather than your wrist. This is the motion that actually makes powder. Steady pressure, steady circles, steady patience. This is where fineness is born.
- Bruising. A gentle pressing and rolling motion for soft, volatile materials: fresh or dried petals, aromatic leaves, anything whose fragrance you want to release without destroying. Bruising opens the plant's oil cells with minimal heat and minimal dust. It is the gentlest motion and the one most students underuse.
A proper grinding session moves through the motions in order: crack or pound the material down to manageable pieces, then grind in circles to the desired fineness, bruising only when the material calls for gentleness. One material, one sequence, full attention.
Check in: Your material is a spoonful of hard seeds. Which motion begins the work, which motion makes the powder — and which motion do you reach for instead when the material is a dried petal whose fragrance you want to keep?
❦ In your workbook: record the four motions in your own way — cracking, pounding, circular grinding, and bruising, in their order, with the material each one serves — copy, sketch, or note what matters.
In your packet: Exercise I — The Grinding Grades Trial ⚒ begins here. Work it now, or mark the place and take it as homework — your choice.
Grades of Powder: From Coarse to Impalpable
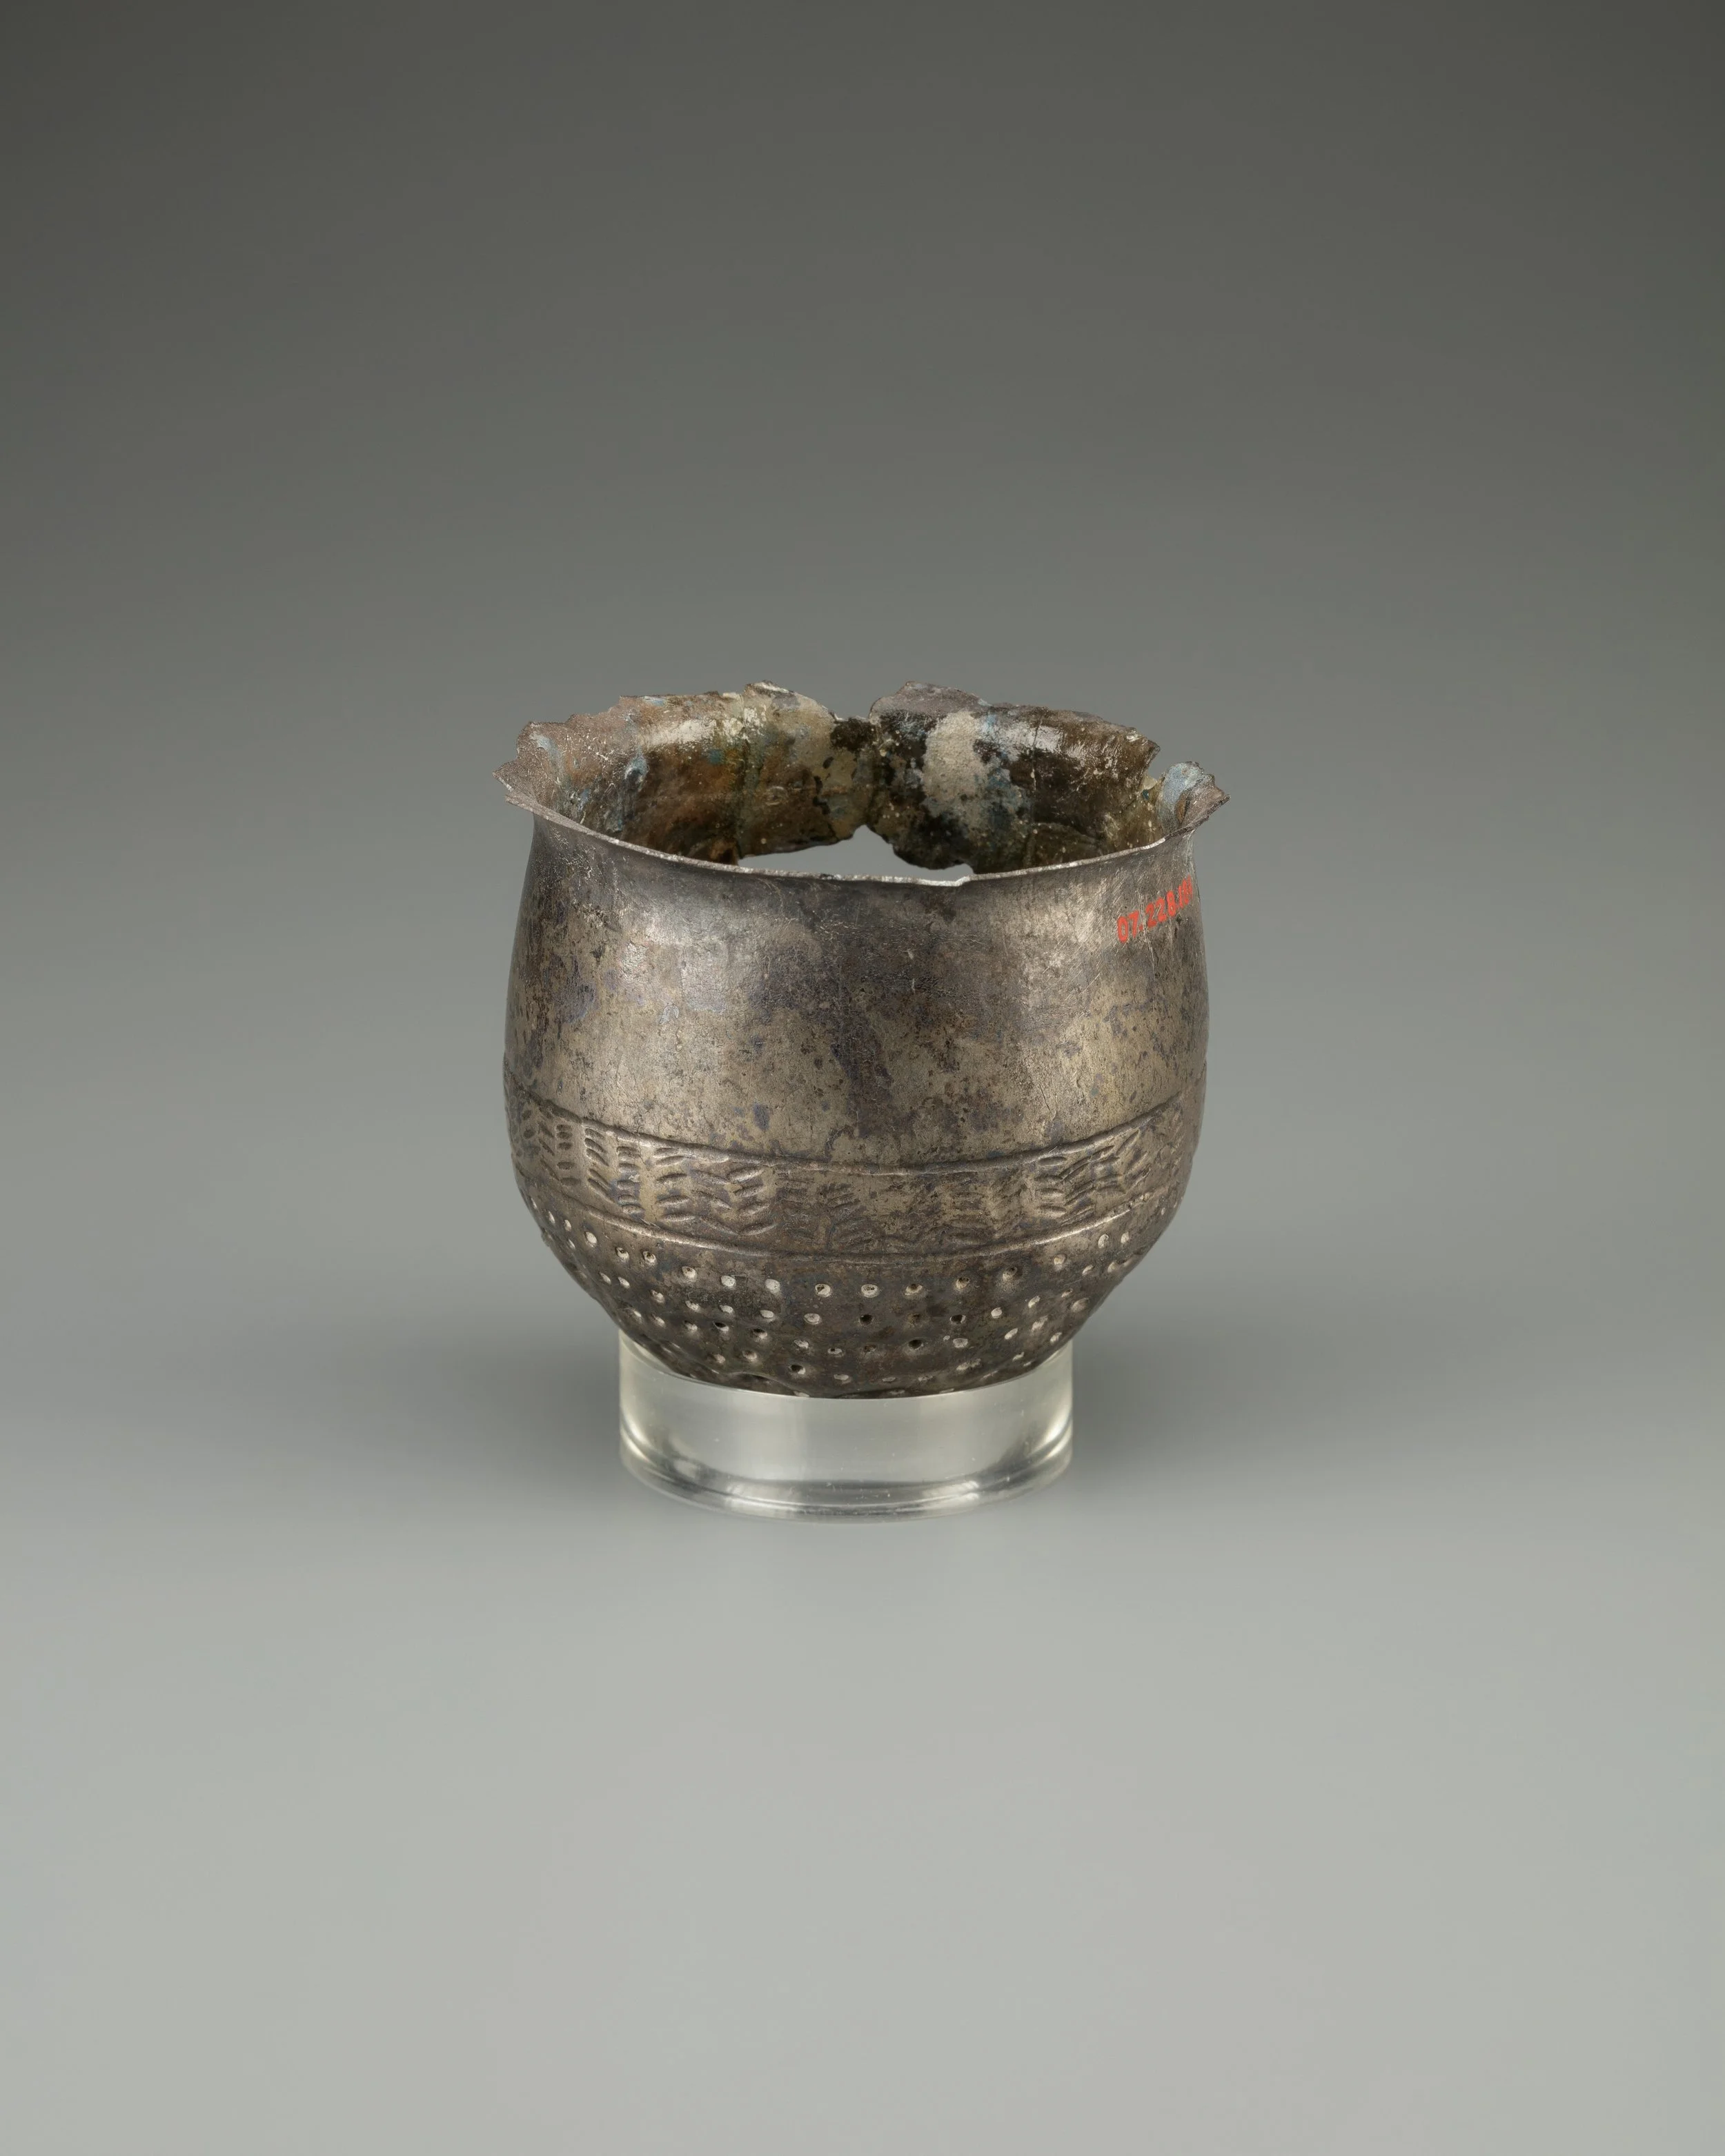
A silver strainer, Egypt, ca. 1290–1224 BCE. Sifting is not fussiness, and it is not new: what passes through is the uniform grade, and what stays behind goes back — a separation workshops were already making in metal three thousand years ago.
The Metropolitan Museum of Art, Open Access (CC0). Object 571446, "Strainer," accession 07.228.184.
Apothecaries historically described powders by grade, and you will learn to produce and recognize three.
- Coarse. Pieces roughly the size of coarse sand or small breadcrumbs. You can see individual fragments clearly. Coarse grinds suit slow infusions and any preparation where the powder must be strained out cleanly afterward. A coarse powder will not clog a cloth filter.
- Fine. Uniform powder about the texture of granulated sugar or cornmeal. No visible chunks. This is the workhorse grade for most extractions: fast enough to be efficient, coarse enough to filter.
- Impalpable. From the Latin for "cannot be felt." Rub it between your fingertips and you feel no grit at all, only smoothness, like flour or cornstarch. Impalpable powders are for pigments, for dusting, and for preparations where texture must vanish entirely. They take the longest to produce and they make the most dust, so mask up.
Learn the pinch test. Take a small amount between thumb and forefinger and rub gently. Your fingertips are more honest than your eyes.
Coarse crunches. Fine feels sandy. Impalpable feels like nothing at all.
★ After grinding, always sift. Pour your powder through a fine sieve or tea strainer. What passes through is your uniform grade. What stays behind goes back into the mortar for regrinding. Sifting is not fussiness. It is how you guarantee that every spoonful of powder behaves the same way in extraction. An unsifted powder is a mixture of grades, and a mixture of grades gives unpredictable results. Muddlenook does not tolerate unpredictable results where order can prevent them.
Check in: Between your fingertips, one powder crunches, one feels sandy, and one feels like nothing at all. Name the three grades in that order — and say what happens to whatever stays behind in the sieve.
❦ In your workbook: record the grades of powder in your own way — coarse, fine, and impalpable, the pinch test that tells them apart, and the sift-and-regrind rule — copy, sketch, or note what matters.
In your packet: Exercise I — The Grinding Grades Trial ⚒ is graded by this section's three grades and its pinch test. Work it now, or mark the place and take it as homework — your choice.
An Interlude in Color: Grinding Ochre
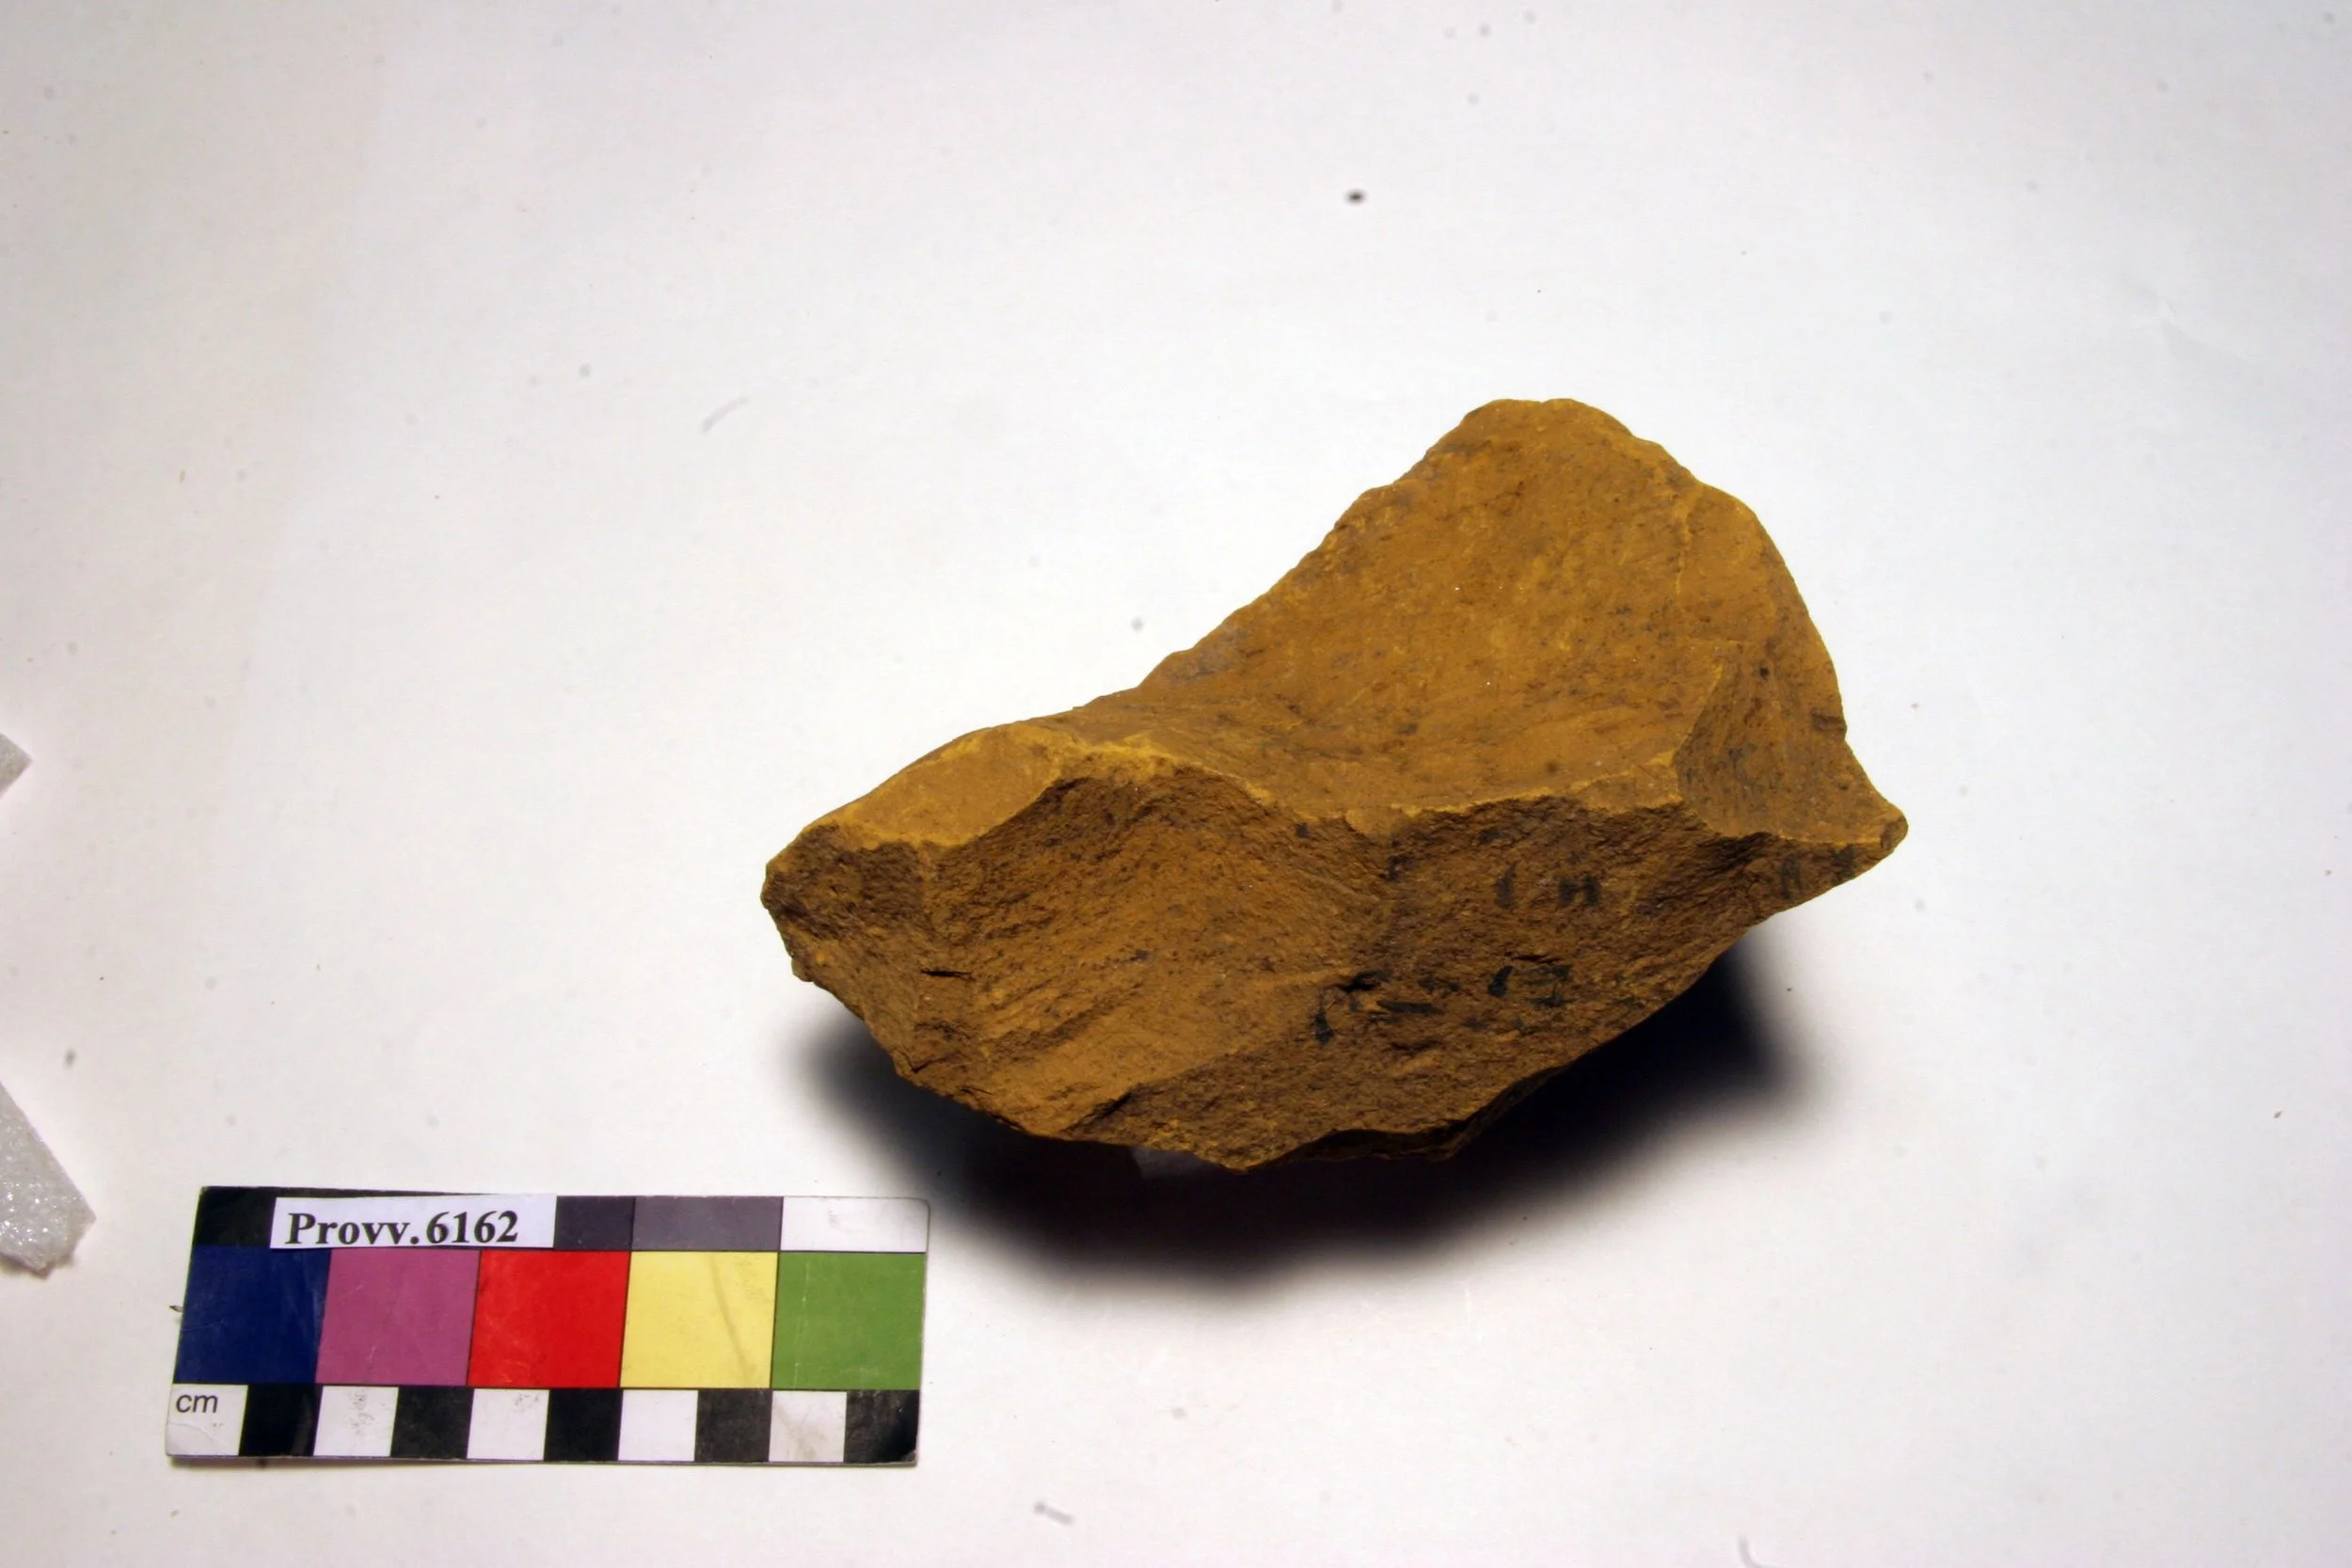
A lump of ochre pigment, Museo Egizio, Turin — "a small lump of ochre," as the lesson asks you to take up: iron-rich earth that asks only to be ground, its color waiting on particle size.
Fragment of ochre pigment, Museo Egizio (Turin), Provv. 6162, via Wikimedia Commons. CC0.
Now we grind color itself, and in doing so we connect this lesson to the pigment work waiting in Unit VI.
Ochre is earth colored by iron oxide, the same chemistry that rusts an old nail and reddens desert stone. Humans have ground ochre for at least seventy thousand years.
Ground ochre colored the walls of ancient caves, the bodies in the earliest burials archaeologists have found, and the manuscripts of medieval scribes. It is one of the most permanent pigments known, and it asks only to be ground.
Take a small lump of ochre, or if you have none, a stick of natural earth-tone chalk or a spoonful of paprika as a stand-in for observation purposes. Grind a pinch coarsely and smear it on paper. Grind another pinch to fine powder and smear it beside the first. Grind a third pinch to impalpable fineness and add it to the row.
Look at what your eyes tell you. The coarse smear is speckled and weak, its color broken by visible grains. The fine smear is stronger and more even. The impalpable smear is the richest of all, smooth and saturated.
Same earth. Same amount. The only difference is particle size, and the difference in color is unmistakable.
This is the same principle as extraction, wearing different clothes. Finer particles expose more surface, and more surface means more color released onto the page, just as it means more character released into a solvent. When you reach Unit VI and grind pigments for inks and stains, you will already understand the physics. The mortar taught you early.
Handle ochre with the respect due any dry pigment. It is safe on the skin, but its dust does not belong in your lungs. Mask on. Ventilation open. Hands washed when you finish.
Check in: Three smears, same earth, same amount — speckled and weak, stronger and more even, richest of all. Which grade made which smear, and what one principle explains the row?
❦ In your workbook: record the ochre interlude in your own way — the three smears in their row, and color as the surface-area principle wearing different clothes — copy, sketch, or note what matters.
In your packet: Exercise II — The Ochre Color Test ⚒ begins here. Work it now, or mark the place and take it as homework — your choice.
Mise en Place
Lay out your station before you begin. Everything within reach. Nothing you must hunt for mid-procedure.
Level One, household items:
- A mortar and pestle, any kitchen one. If you have none, a heavy ceramic mug and the handle-end of a wooden spoon will serve for soft materials, or seal the material in a sturdy zip bag and crush with a rolling pin for the coarse stage only.
- Two or three dry materials of different hardness: dried rosemary or oregano (soft), whole black peppercorns or coriander seed (medium), coarse sea salt or dry rice (hard).
- A small lump of ochre, or a stick of natural earth-tone chalk, or one spoonful of paprika as a color stand-in. Keep it strictly separate from anything edible.
- A fine mesh sieve, tea strainer, or small kitchen strainer.
- Clean paper sheets or a tray to catch and examine powders.
- A simple dust mask.
- Three small jars or folded paper packets, with labels and a pen.
- Your laboratory notebook.
Level Two, historically closer:
- A granite mortar and pestle, the apothecary's workhorse.
- A brass mortar for general work, remembering the acid rule.
- A proper set of sieves or a length of bolting cloth for grading.
- Whole dried botanicals: juniper berries, dried rosehips, or allspice berries.
Check your list twice. A missing tool discovered mid-grinding is how powders end up in places powders should never be.
Check in: You have no mortar and pestle in the house. What does Level One offer you for soft materials — and for the coarse stage only?
❦ In your workbook: record the mise en place in your own way — the Level One station and the Level Two bench, checked twice before a tool is lifted — copy, sketch, or note what matters.
The Procedure: Three Materials, Three Grades
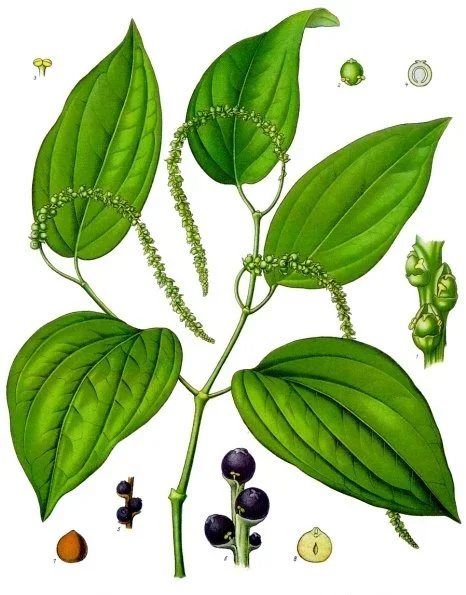
Black pepper (Piper nigrum), plate 107 of Köhler's Medizinal-Pflanzen — the lesson's hard seed drawn whole: vine, unripe spikes, and ripe berries, one of which is what your spoonful of peppercorns is. A study portrait of the tradition, not an identification guide.
Franz Eugen Köhler, Köhler's Medizinal-Pflanzen (1887–1914), plate 107, via Wikimedia Commons. Public domain.
Work one material at a time. Clean the mortar between materials with a dry brush or cloth; wash and dry it fully if any residue clings.
Material One, the soft herb. Place a spoonful of dried rosemary or oregano in the mortar. Use the bruising motion first, pressing and rolling to release fragrance, then shift to gentle circular grinding. Grind for two full minutes by the clock. Sift. Note how little effort a soft material needs, and how quickly fragrance fills the air around you. This is your baseline.
Material Two, the hard seed. Place a spoonful of peppercorns or coriander seed in the mortar. Cover loosely with your hand. Crack with short taps until no whole seed remains, then pound the larger fragments, then settle into circular grinding. Grind for three full minutes. Sift. Return the coarse remainder to the mortar and grind again. Compare the effort to Material One. Hard materials demand the full sequence of motions.
Material Three, the mineral. Place a spoonful of coarse salt or dry rice in the mortar. This is your hard, inedible practice material. Pound, then grind in circles for three minutes. Sift into grades. Take a pinch of each grade between your fingers and perform the pinch test. Label them: coarse, fine, impalpable.
The ochre trial. Last, and with your mask secure, grind your ochre or stand-in through all three grades. Smear each grade on paper in a labeled row. Observe and record the color difference exactly as described in the interlude above.
Time yourself honestly. Note which motion you used for each stage. Note where your arm tired and whether your technique slipped when it did. The archive wants the truth, not the ideal.
Check in: Which material is your baseline, which demands the full sequence of motions, and which is ground last, with your mask secure?
❦ In your workbook: record the procedure in your own way — three materials in their order, the motions and minutes for each, and the ochre trial last — copy, sketch, or note what matters.
In your packet: Exercise I — The Grinding Grades Trial ⚒, Exercise II — The Ochre Color Test ⚒, and Exercise III — The Extraction Readiness Comparison ◐ are all worked from this procedure. Work them now, or mark the places and take them as homework — your choice.
Cleanup and the Archive Entry
Cleanup is part of the procedure, not an afterthought. Brush all powders into their labeled jars or packets. Wash the mortar and pestle, dry them completely (stone left damp grows musty; metal left damp rusts), and return them to their place. Wipe the station. Wash your hands and face. A clean station is a safe station, and tomorrow's scholar, who is you, deserves to begin in order.
Your archive entry for this lesson records:
- The three materials you ground, and the motions used for each.
- Grinding times and your honest observations of effort and technique.
- The three grades produced, with pinch-test notes for each.
- The ochre color trial: describe the three smears and what they taught you.
- The warm-water preview: timed observations of coarse versus fine.
- One thing you would do differently next time.
❦ In your workbook: record the cleanup and the archive entry in your own way — the six things this lesson's entry records, and the mortar washed, dried completely, and returned to its place — copy, sketch, or note what matters.
Guided Observation: Reading Your Powders
This lesson's observation is bench work, done with the powders in front of you: you read what your grinding actually made — grade by grade, on dark paper and on light — and then you watch surface area work in warm water, the preview of the extraction testing Unit IV will do in full.
Work through it in order.
Read the grades. Spread a pinch of each grade on dark paper and a pinch on light paper. Under good light, examine them.
A good coarse grind looks like even gravel, no whole pieces, no dust cloud. A good fine grind looks like sand, uniform, no visible chunks. A good impalpable powder looks like flour and feels like nothing between the fingers. An unsifted grind looks like all three at once, which is exactly the problem sifting solves.
Watch surface area work. Now the extraction connection, which you will test fully in Unit IV but can preview now. Place an equal spoonful of your coarse grind and your fine grind of the same material into two separate cups of warm water. Stir each once. Watch for ten minutes. The fine powder clouds and colors the water faster and more deeply. The coarse pieces sit largely unchanged. You have just watched surface area at work with your own eyes. Write down exactly what you see, with times.
Consider:
- On which paper — dark or light — did each grade show itself most honestly?
- At what minute did the fine grind's cup pull visibly ahead of the coarse one's?
- Which of your three grades came closest to its description above — and which one sends you back to the mortar?
❦ In your workbook: record the guided observation in your own way — each grade read on dark paper and on light, and the warm-water preview written down exactly as you saw it, with times — copy, sketch, or note what matters.
Materials
Required (Level One — household items)
- A mortar and pestle, any kitchen one. If you have none, a heavy ceramic mug and the handle-end of a wooden spoon will serve for soft materials, or seal the material in a sturdy zip bag and crush with a rolling pin for the coarse stage only.
- Two or three dry materials of different hardness: dried rosemary or oregano (soft), whole black peppercorns or coriander seed (medium), coarse sea salt or dry rice (hard).
- A small lump of ochre, or a stick of natural earth-tone chalk, or one spoonful of paprika as a color stand-in. Keep it strictly separate from anything edible.
- A fine mesh sieve, tea strainer, or small kitchen strainer.
- Clean paper sheets or a tray to catch and examine powders.
- A simple dust mask.
- Three small jars or folded paper packets, with labels and a pen.
- Your laboratory notebook.
Suggested (Level Two — historically closer)
- A granite mortar and pestle, the apothecary's workhorse.
- A brass mortar for general work, remembering the acid rule.
- A proper set of sieves or a length of bolting cloth for grading.
- Whole dried botanicals: juniper berries, dried rosehips, or allspice berries.
Reflection Questions
Answer the following questions in your workbook.
- Why does a fine powder extract faster than coarse pieces of the same material?
- Describe a situation where you would deliberately choose a coarse grind over a fine one.
- What did the ochre trial teach you about the relationship between particle size and color?
- Why does Professor Muddlenook insist on sifting and regrinding instead of accepting an unsifted powder?
- How does grinding change the way a material must be stored?
Workbook Checklist — Lesson 21
In my workbook I have:
- ☐ stated the safety briefing's four rules back to myself before beginning: ventilate, mask, secure the mortar, label everything
- ☐ explained why particle size rules the laboratory: extraction happens at the surface, and finer grinding exposes more surface at once
- ☐ matched the four mortar materials to their work — stone, ceramic or porcelain, brass or bronze with its absolute acid rule, and wood — and the pestle to its bowl
- ☐ worked the four motions in their order — cracking, pounding, circular grinding, bruising — and recorded which material each stage served
- ☐ produced and proved the three grades — coarse, fine, impalpable — by the pinch test, and sifted and reground for a uniform powder
- ☐ ground the ochre trial through all three grades and recorded the three smears and what the row taught my eyes
- ☐ written the full archive entry: the three materials and their motions, grinding times, pinch-test notes for each grade, the ochre trial, the warm-water preview with times, and one thing I would do differently next time
- ☐ cleaned the station as part of the procedure: powders into labeled jars or packets, mortar and pestle washed and dried completely, hands and face washed
☐ Lesson completed Date: ___ Signature: ___
The Professor's Closing Note
My final sealed note for this lesson, and it is the one I want you to carry into every laboratory you ever enter. Anyone can smash a thing to pieces. The apothecary's skill is in breaking things down with intention: the right tool, the right motion, the right grade, every time, on purpose. Uniform powder gives predictable extraction (drawing compounds out of a material with a liquid). Predictable extraction gives trustworthy preparations. And trust, scholars, is the entire foundation this laboratory stands on.
In Unit IV you will put these powders to work in oils, waters, and spirits, and you will be grateful for every minute you spent at the mortar. Until then, keep your station ordered and your labels honest.
— Professor Crimblebrew Muddlenook, Potions Laboratory • Master Apothecary • Head of House Meridies
Cross-Class Connections

Creative Arts · Unit IV, Lesson 15 — Pigments, Paints & Color Charts
Bench set, scholars. You have ground ochre at Professor Muddlenook's mortar until your fingertips could no longer feel it, and you have watched the finest smear carry the strongest color. Bring that powder to my slab. Here we mull it into its binder in slow circles until every grain is wetted, paint it out thick and thin, and label the swatch with pigment, binder, and date — because a color you cannot make again is a color you only borrowed. Same dust discipline as his bench: ground damp or under a mask, bench wiped damp, hands washed. We stop, we make it safe, then we begin again.
PROFESSOR COGBRANCH TIMBERCLANK
Creative Arts Workshop • Master Artisan • Head of House Occidens
Further Reading & Sources
- Mortar and pestle — overview of the tool's history and forms across cultures.
- Ochre — the iron-oxide earth pigment and its prehistoric use.
- Mortar and pestle, Science Museum Group Collection — historical apothecary mortars with photographs and descriptions.
- Apothecary objects, Metropolitan Museum of Art — mortars and pharmaceutical vessels in the Met's collection.
- Mortar and pestle, Wellcome Collection — medical-history holdings including apothecary grinding tools.
Browse the Potions shelf in the school Library for readable editions of these works.
Submit your work for this lesson using the form below.
CONTINUE IN THE POTIONS LABORATORY
← Previous · Lesson 20: Salts, Clays & Mineral Materials Next · Lesson 22: Filtration & Separation Mechanics →
Unit III — Dense Materials & Preparation Potions Laboratory — All 52 Lessons
The rest of Unit III: Lesson 18 · Roots & Bark · Lesson 19 · Oils & Waxes · Lesson 20 · Salts & Clays · Lesson 22 · Filtration · Lesson 23 · Preparing for Extraction · Lesson 24 · Master Portfolio · Lesson 25 · Preparation Manifest