
POTIONS
Unit IV · Lesson 33DISTILLATION & HYDROSOLS
Professor Crimblebrew Muddlenook
Master Apothecary • Potions
Head of House Meridies • School of Evershade
Professor's Introduction

Scholars, until now every extraction we have studied has worked by soaking. The botanical sits in the solvent (a liquid able to dissolve or draw out other materials), and the solvent — a liquid able to dissolve or draw out other materials — does the visiting. Distillation — separating a liquid by evaporation and condensation — reverses the journey. The botanical stays behind. Its lightest, most volatile companions rise as vapor, travel, cool, and fall again as water. What you collect never touched the plant the way an infusion touches it. It met the plant in the air.
This is the most powerful technique in the apothecary's repertoire, and therefore the most dangerous. Steam burns faster than flame, and a sealed vessel under heat is a small bomb. I am a toad who believes in order, and I tell you plainly: the safety briefing in this lesson is not decoration. Read it twice. Then read it again.
Measure twice. Pour once. Label everything.
— Professor Crimblebrew Muddlenook, Potions Laboratory • Master Apothecary • Head of House Meridies
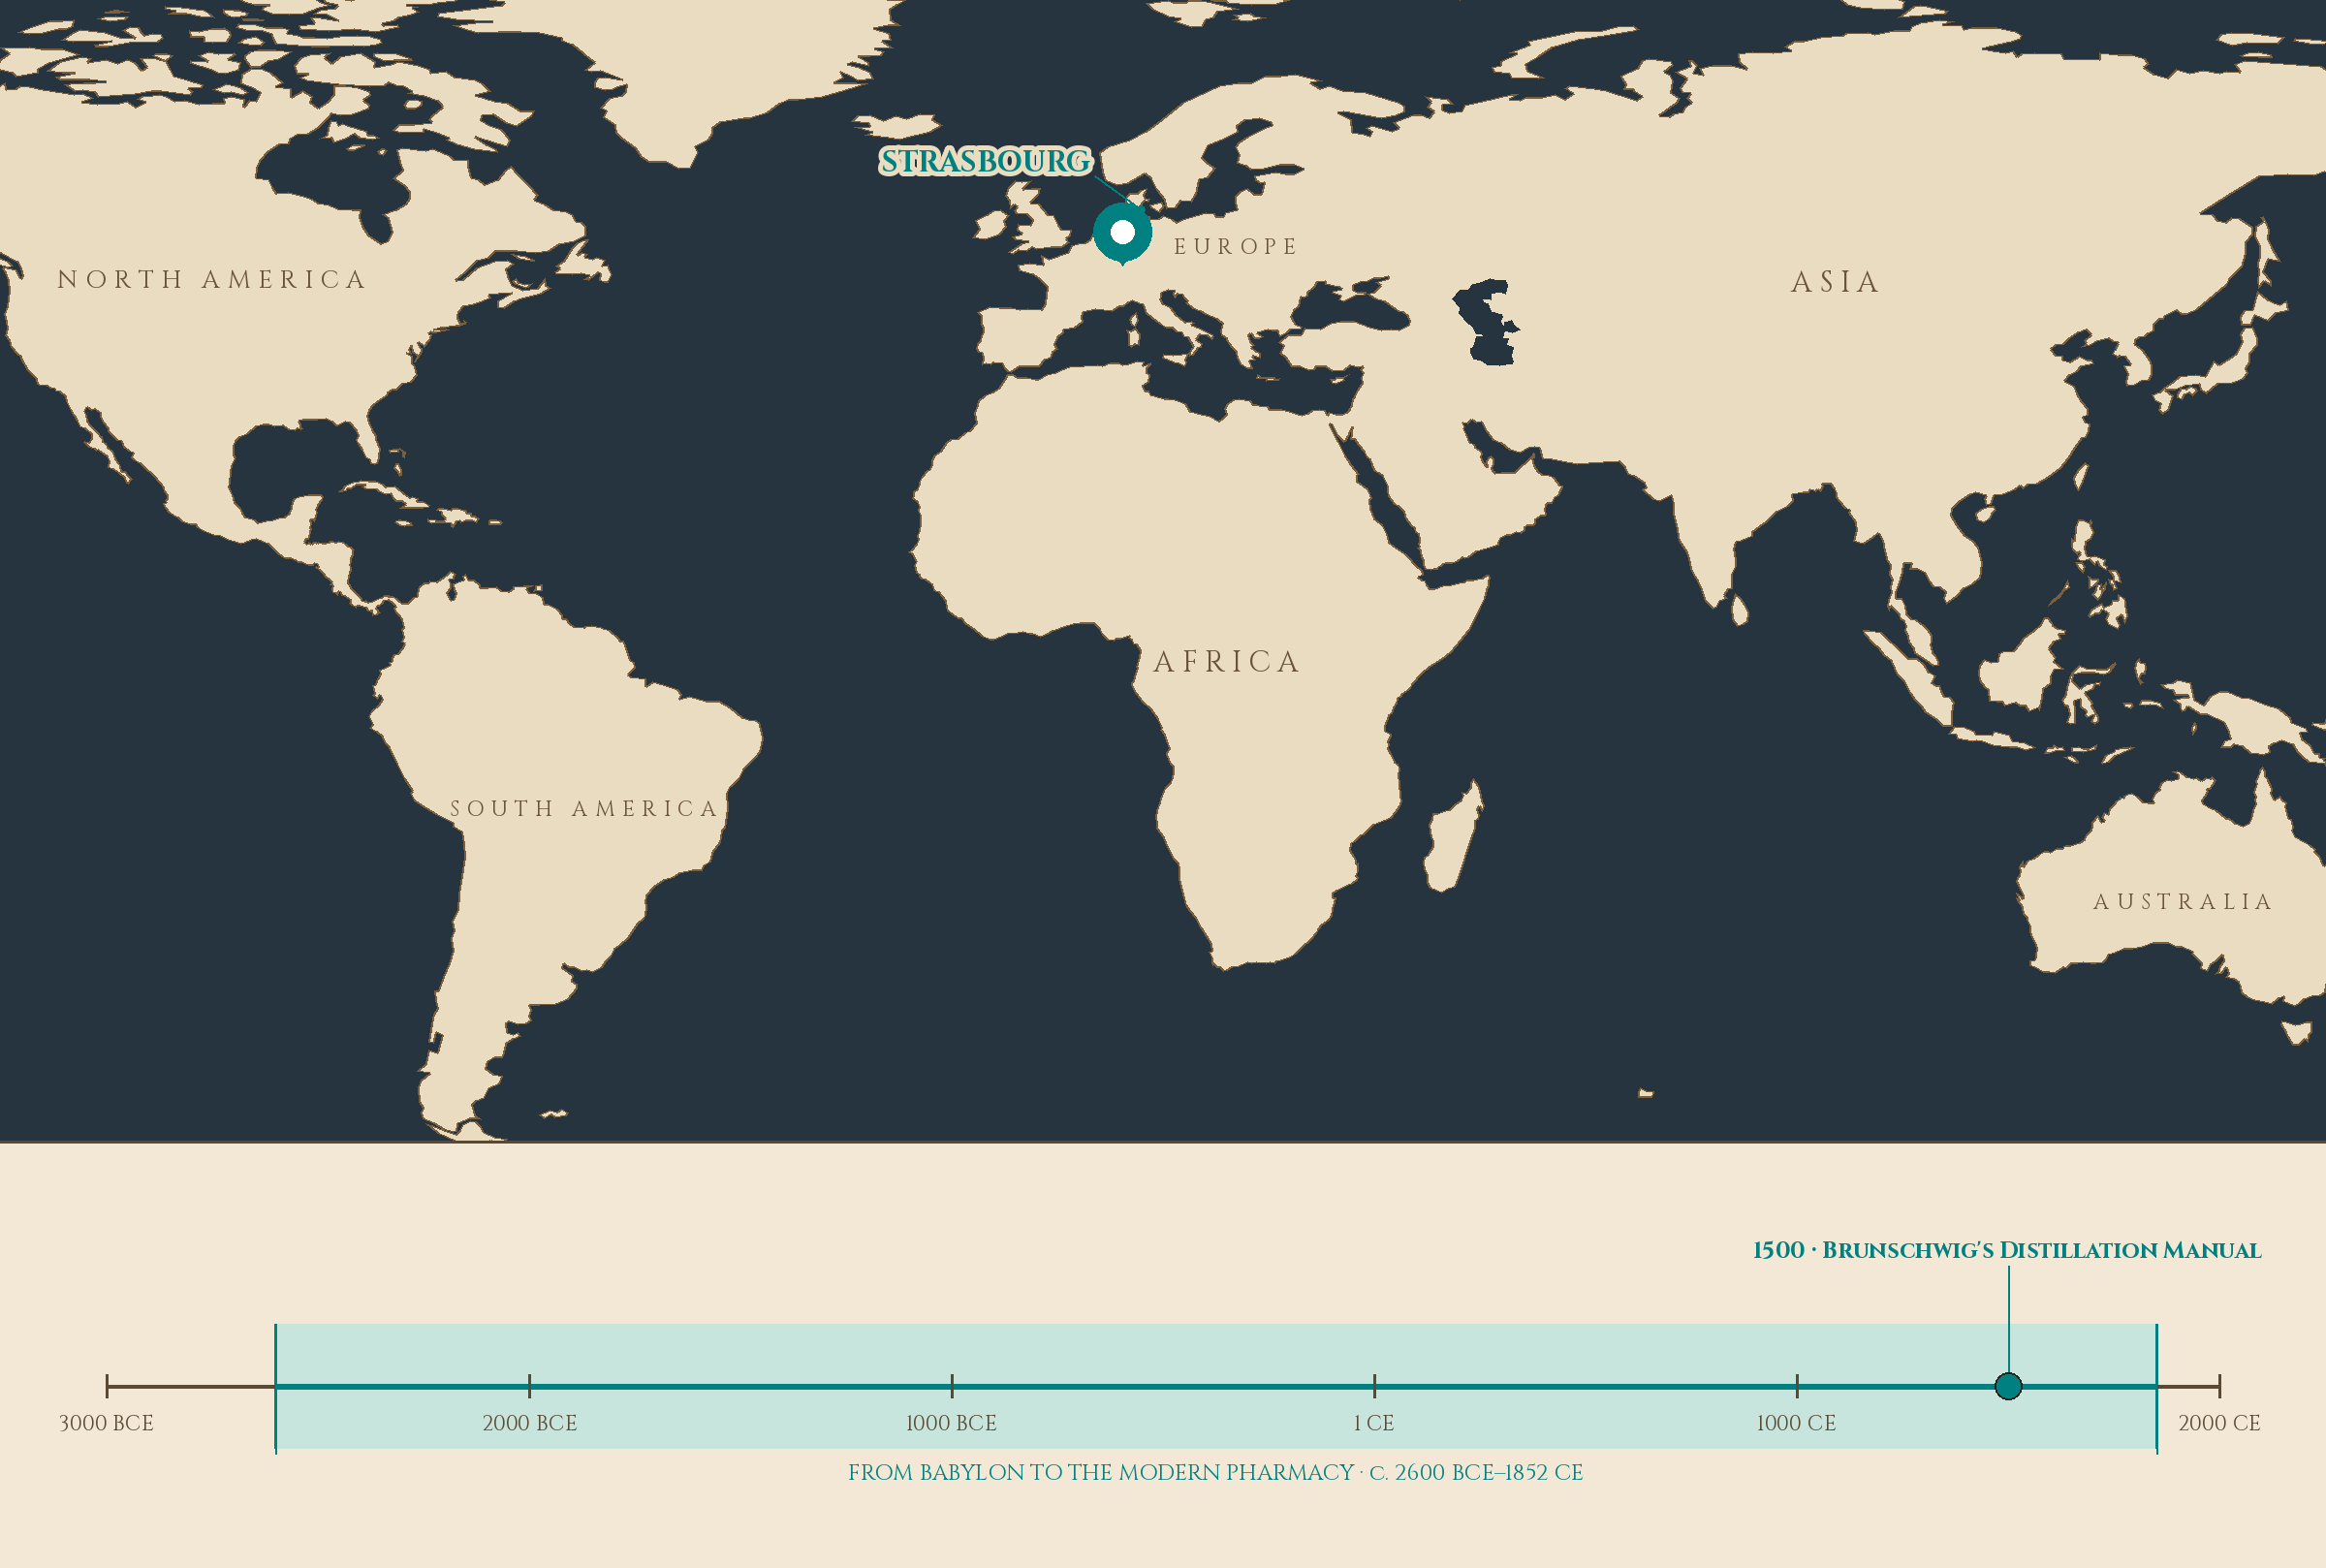
Pin: Strasbourg. Timeline stop: 1500 · Brunschwig's Distillation Manual.
Lesson Objectives
By the end of this lesson, you will be able to:
- Explain the evaporation and condensation cycle that makes distillation possible.
- Name and describe the three parts of the classical alembic.
- Trace the history of distillation from Alexandria through the medieval Islamic world to Brunschwig's printed manual of 1500.
- Distinguish a hydrosol from an infusion and explain why each exists.
- Build and operate a safe stovetop still model and collect an herbal distillate for observation.
- Record a distillation run in your extraction ledger with the discipline this work demands.
Reading this lesson: ★ marks the passages to remember. They return in the Unit IV Quiz and at the capstone. Check in questions ask the material back as you go; answer them in your workbook when you meet them.
Working this lesson: Your assignment packet is the first download on this page. Work in it as the lesson moves along, answering each exercise as its subject is taught — or read the lesson through for your notes and take the exercises as homework afterward. Both are proper ways to sit this class. Signposts in the reading tell you where each exercise belongs. Written answers are short answers in your own words; a few honest lines are worth more than a filled page.
Your Assignment Packet
This lesson's exercises live in its packet: the Lexicon Handout (every term, course terms marked ◆), Materials, Guided Practice — the stovetop still procedure and the distillate observation, printed in full so you can work at your own stove with your adult supervisor — the Assignment Manual with its self-check, the Reflection Questions, and the Workbook Checklist. Download the packet before you begin and keep it beside you as you read.
Safety Briefing
Read this section completely before touching a single vessel. There will be a quiz question on it, and more importantly there will be steam in your kitchen.
- Steam is the first danger. Steam at the temperature of boiling water burns skin faster and deeper than dry heat at the same temperature, because it condenses on your skin and releases its energy there. Keep hands, face, and arms clear of rising steam. Use dry oven mitts or a folded towel, never a damp cloth, when handling hot lids.
- Never seal a heating vessel airtight. A pot with its lid clamped or sealed and heat beneath it builds pressure. Pressure finds a way out, violently. Your still must always have an open path for vapor: the lid sits loose, the spout runs free. If anything blocks the vapor path, remove the pot from heat immediately and let it cool before touching it.
- Use heat-safe vessels only. Ordinary thin glass can crack under thermal shock. Use a heavy pot, a heat-safe bowl, and a metal or tempered-glass lid. Inspect everything for cracks before you begin.
- An adult must supervise. This is non-negotiable for this lesson. An adult stays in the kitchen for the entire run, handles the stove controls, and lifts the hot lid.
- Cool-down protocol. When the run ends, turn off the heat and leave everything in place for at least fifteen minutes. Do not move the pot, do not lift the lid, do not touch the receiver until it is cool enough to hold comfortably.
- Water and steam only. This lesson uses water and steam distillation exclusively. Alcohol distillation is forbidden in this course, without exception, for reasons of fire, legality, and sense.
- Label your distillate. Contents, botanical, and date, before the receiver leaves the bench.
Check in: Which safety rule governs what must happen the moment anything blocks the vapor path — and what three things does the adult supervisor do for the entire run?
❦ In your workbook: record the safety briefing in your own way — steam as the first danger, the open vapor path, heat-safe vessels inspected, the adult present throughout, the fifteen-minute cool-down, water and steam only, and the labeled distillate — copy, sketch, or note what matters.
The Cycle: Evaporation and Condensation
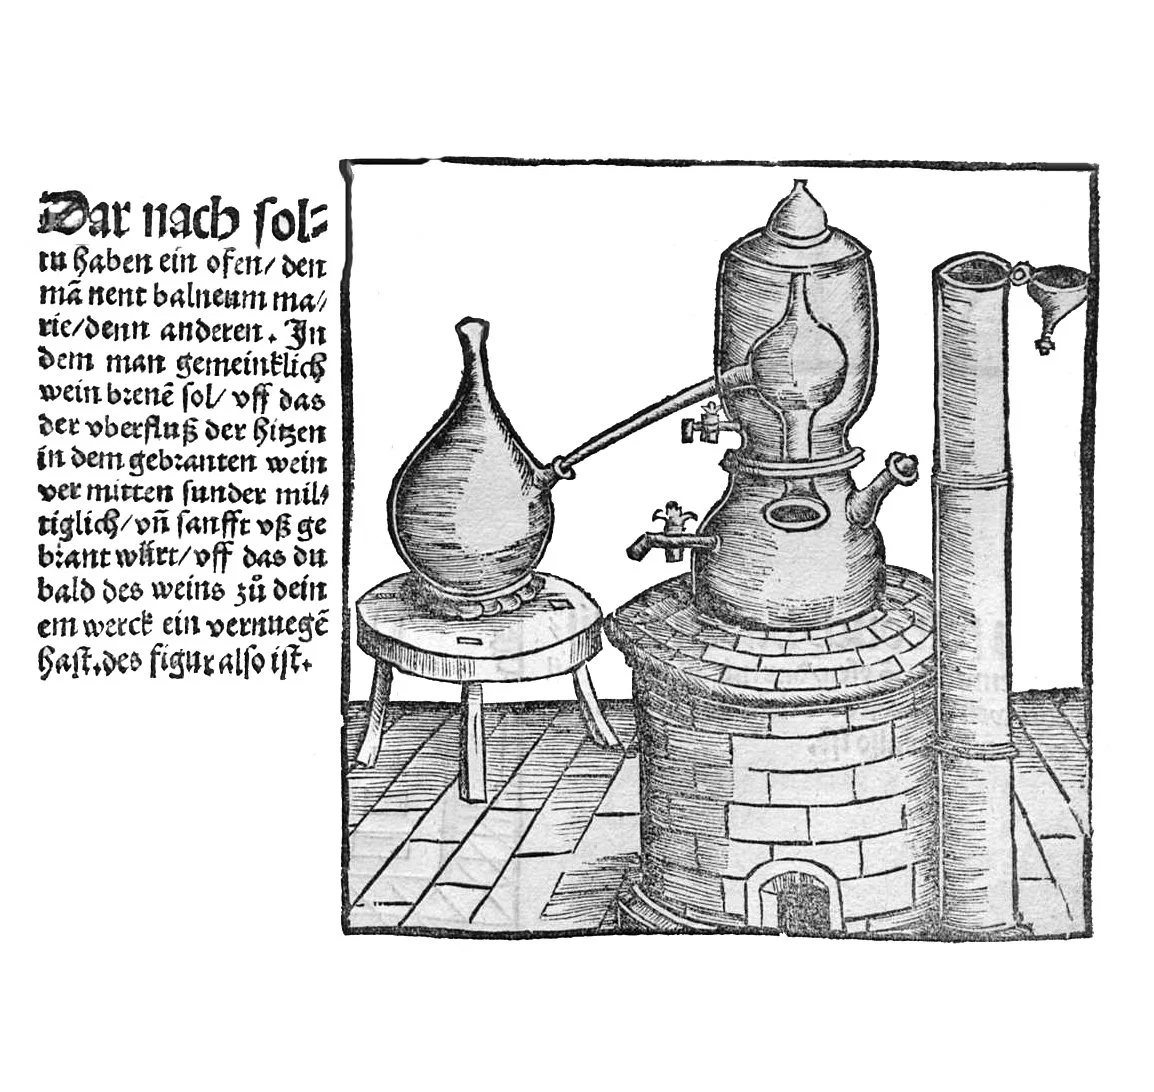
The bain-marie at work: Brunschwig's woodcut of a still heated in Maria's water bath — the furnace is lettered, in the prose beside it, a balneum marie. One woman, two of the laboratory's most enduring tools: the tribikos this lesson draws, and the gentle bath your Lesson 23 menstruum was warmed in.
Hieronymus Brunschwig, distillation furnace woodcut (1512), via Wikimedia Commons. Public domain.
Every distillation, from a copper alembic in a Persian rose garden to the pot on your stove today, runs on one cycle with two halves.
First, evaporation. Warm a liquid and its most energetic molecules escape the surface as vapor. Warm a botanical sitting in water and the volatile compounds, the light aromatic molecules we studied in Unit II, escape with the steam.
Second, condensation. Vapor that meets a cooler surface gives up its energy and becomes liquid again. (You met condensation in Lesson 16 as the enemy of dry storage; here it is the whole point of the exercise.)
Rain is nature's distillation: the sea evaporates, clouds cool, water falls. Aristotle described this cycle in his Meteorologica in the fourth century BCE, and Pliny the Elder, writing in the first century CE, described sailors freshening seawater by catching condensation on fibers held in the lid of a covered vessel. The apothecary's still is that covered vessel, refined over two thousand years.
Check in: What are the two halves of the distillation cycle — and what did Pliny's sailors catch on fibers in a covered vessel's lid?
❦ In your workbook: record the cycle in your own way — evaporation first, condensation second, rain as nature's distillation, and the covered vessel refined over two thousand years — copy, sketch, or note what matters.
The Alembic: Three Parts, One Machine
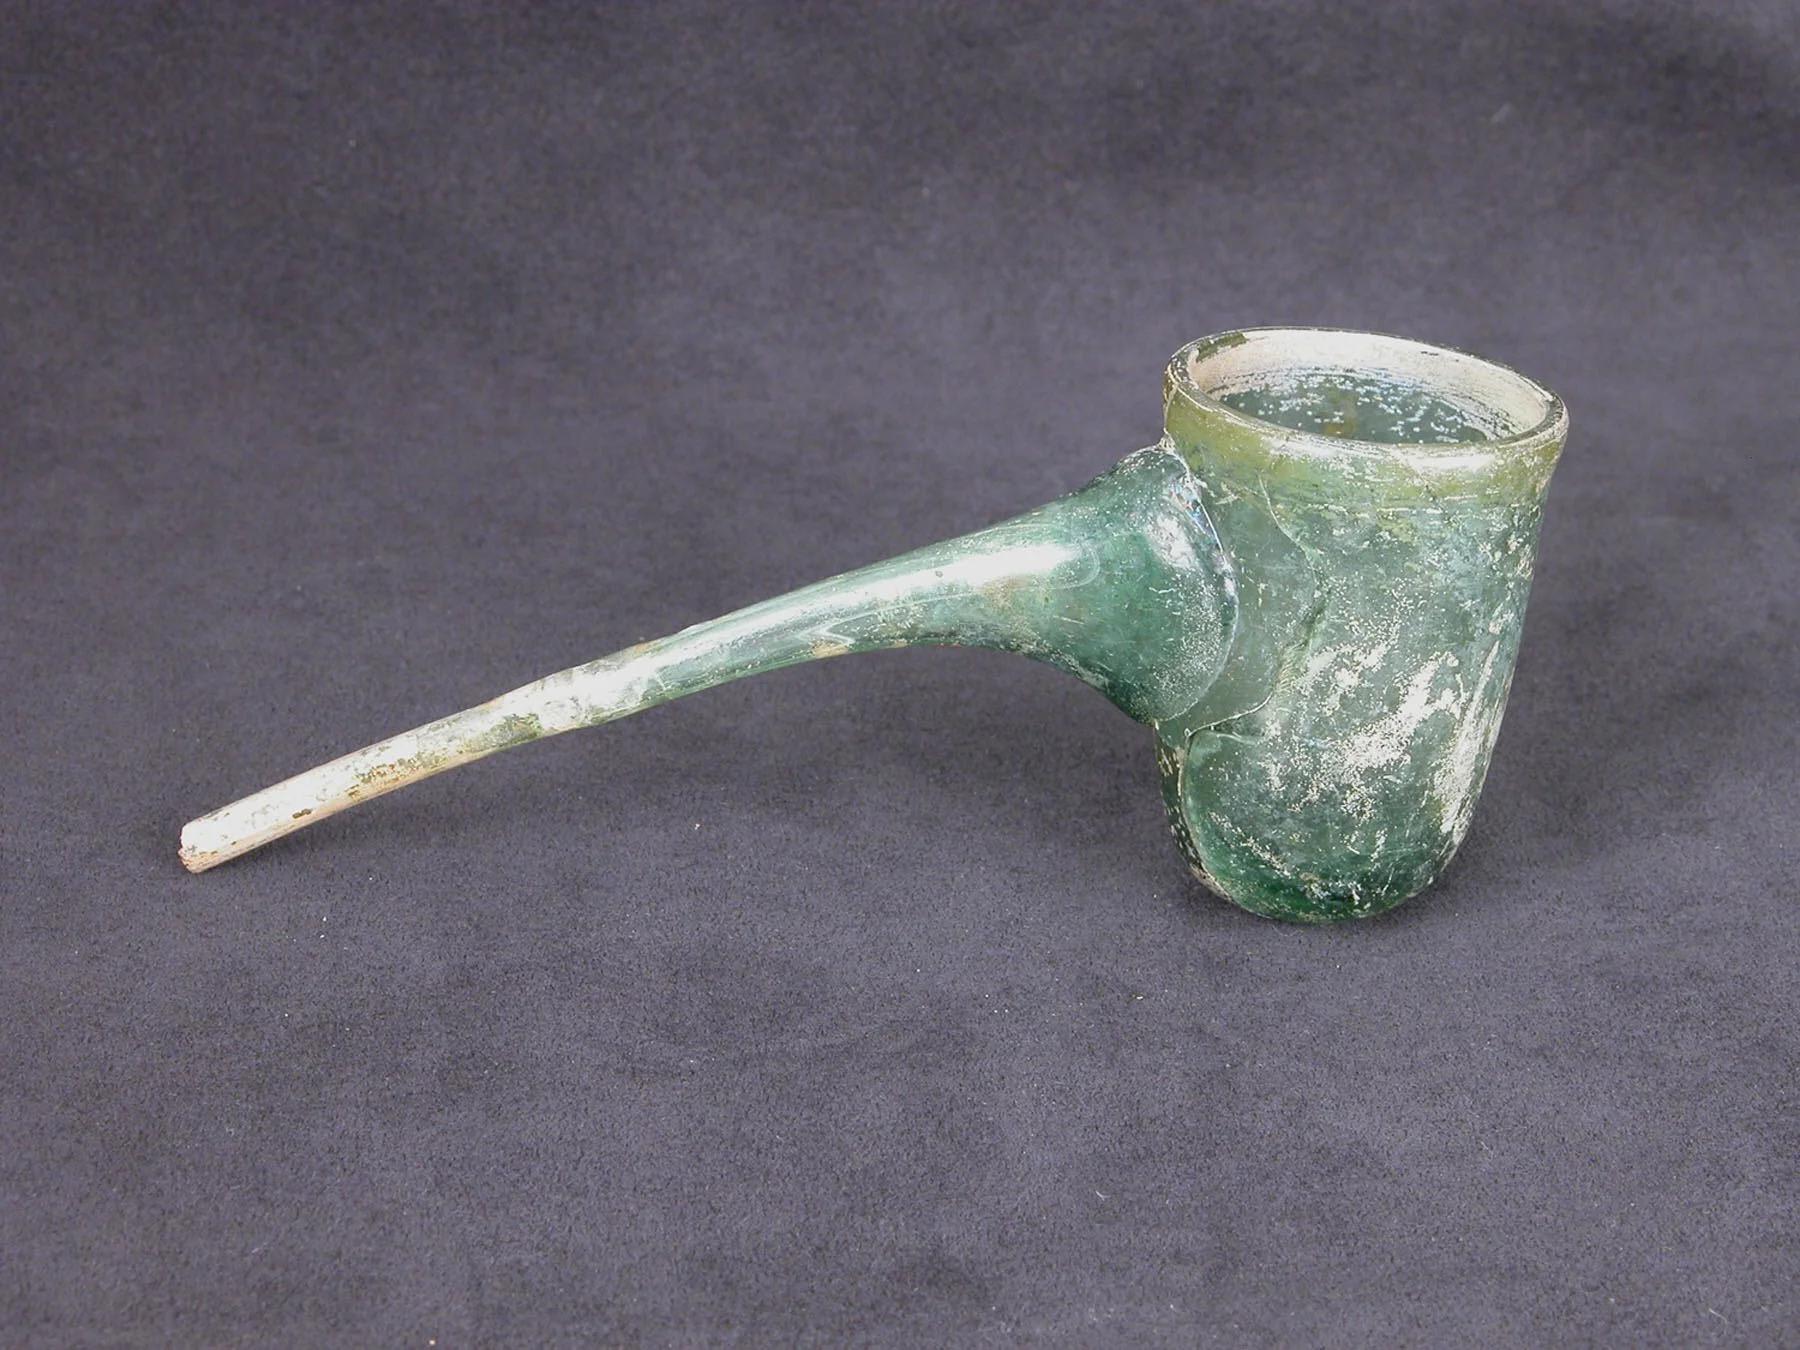
The alembic as an object: a green-glass still vessel in the Metropolitan Museum of Art, its body and single long spout worn cloudy with age. The lesson's three parts — cucurbit, head, receiver — are a teaching model refined over two thousand years; this is the kind of fragile survivor that model descends from.
Alembic, The Metropolitan Museum of Art, via Wikimedia Commons. CC0.
The classical distillation apparatus is the alembic, and it has three parts. Learn their names, because they have not changed in any essential way since Alexandria.
The cucurbit. The pot or gourd-shaped vessel that holds the botanical and the water. Its name comes from the Latin for gourd, because early versions were shaped like one. This is where the heat goes in and the vapor is born.
The head, or cap. The domed lid that sits on the cucurbit, narrowing to a spout or beak. Vapor rises into the head, and the head is kept cool, historically with wet sponges or cloths, so condensation begins on its inner surface.
The receiver. The vessel that catches what flows from the spout. What drips into the receiver is the distillate.
★ Heat below, cool above, collection at the side. Every still you will ever see, from a rosewater copper in Iran to a laboratory condenser, is a variation on these three parts.
The old books also picture the retort, the alembic's single-vessel cousin, in which pot and condenser are one blown piece of glass with no joints to seal. It is the same machine wearing a simpler coat.
Students, I seal this note mid-lesson because the next section contains names and dates, and I want you to treat them as what they are: the lineage of your craft. You are not the first to watch steam rise through rose petals. You are the latest in a very long line. Act like it.
— Professor Crimblebrew Muddlenook, Potions Laboratory • Master Apothecary • Head of House Meridies
Check in: Name the alembic's three parts in order — and in one phrase each, what happens in each?
❦ In your workbook: record the alembic in your own way — cucurbit, head, and receiver, heat below, cool above, collection at the side — copy, sketch, or note what matters.
In your packet: Exercise III — The Alembic Study ⚒ begins here. Work it now, or mark the place and take it as homework — your choice.
A Short History of the Still
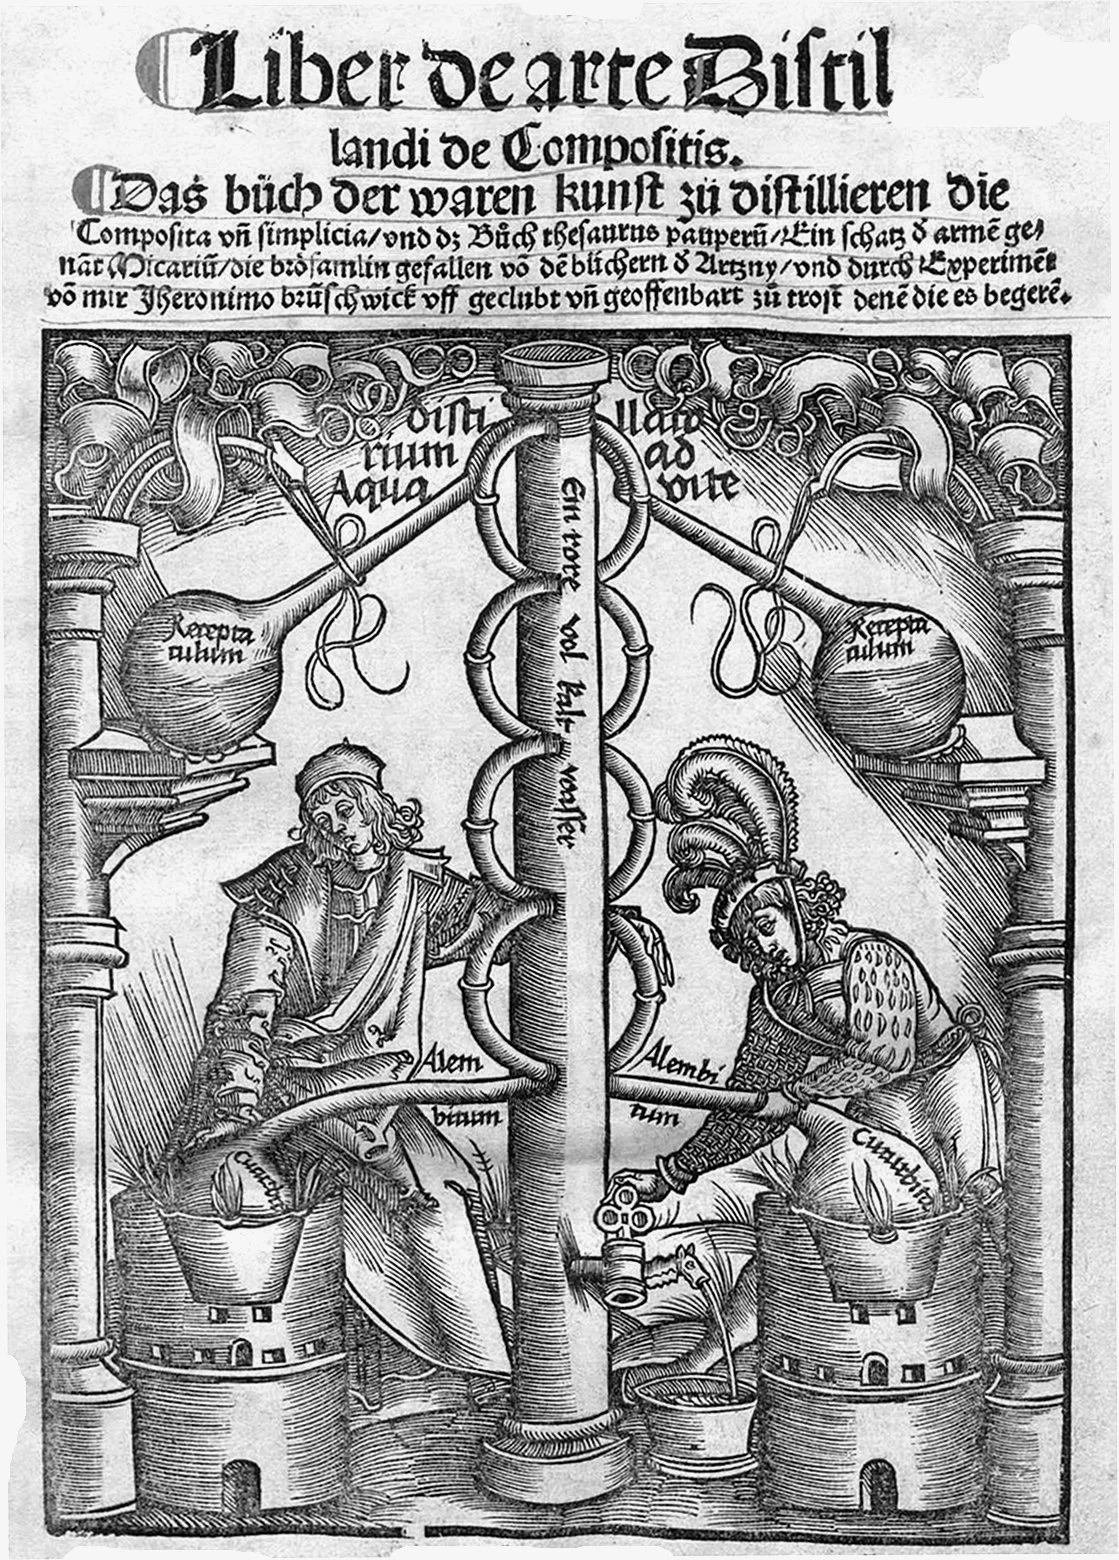
Brunschwig in print: the title woodcut of the Liber de arte distillandi de compositis (1512, the great companion to the 1500 manual), its two stills lettered with the lesson's own words — Aqua, Alembicum, Cucurbita, Receptaculum. When you follow a printed procedure step by step, you are working in this tradition.
Hieronymus Brunschwig, Liber de arte distillandi de compositis title woodcut (1512), via Wikimedia Commons. Public domain.
Alexandria. The earliest written description of a true distillation apparatus is credited to Maria Prophetissa, called Mary the Jewess, an alchemist of Alexandria who lived sometime between the first and third centuries CE. We know her through Zosimos of Panopolis, a fourth-century alchemist who quotes her at length. Zosimos credits her with the first description of the tribikos, an alembic with three arms for collecting distillate. Whether she invented it or described it, her name stands at the head of the lineage. She also gave her name to the bain-marie, the gentle water bath you used in Lesson 23. One woman, two of the laboratory's most enduring tools.
The Islamic Golden Age. Distillation matured in the medieval Islamic world. Jabir ibn Hayyan, known in Latin as Geber (c. 721 to 815), refined distillation apparatus and technique. Al-Kindi (c. 801 to 873) wrote the Book of the Chemistry of Perfume and Distillations, which includes recipes for distilled rosewater. Avicenna, Ibn Sina (980 to 1037), described steam distillation in his Canon of Medicine, and the Persian rosewater tradition, centered on the town of Ghamsar, grew into a craft that continues today: damask rose petals simmered in copper stills, the steam cooled back into fragrant water, sometimes distilled a second time over fresh petals for greater strength.
Europe, 1500. Hieronymus Brunschwig, a surgeon and apothecary of Strasbourg, published the Liber de arte distillandi de simplicibus on 8 May 1500. Though its title is Latin, the book was written in German, and it was the first printed manual devoted to the techniques of distillation, full of instructions and woodcut illustrations of apparatus. Brunschwig treated distillation as a way of drawing a stable quintessence from perishable matter. His book was reprinted and studied for a century. When you read a printed procedure and follow it step by step, you are working in Brunschwig's tradition.
Check in: Who credits Maria Prophetissa with the first description of the tribikos — and on what date, and in what language, did Brunschwig publish his manual?
❦ In your workbook: record the lineage in your own way — Alexandria and the tribikos, Geber, Al-Kindi, and Avicenna, Ghamsar's rosewater, and Strasbourg, 8 May 1500 — copy, sketch, or note what matters.
Hydrosols: The Water That Remembers
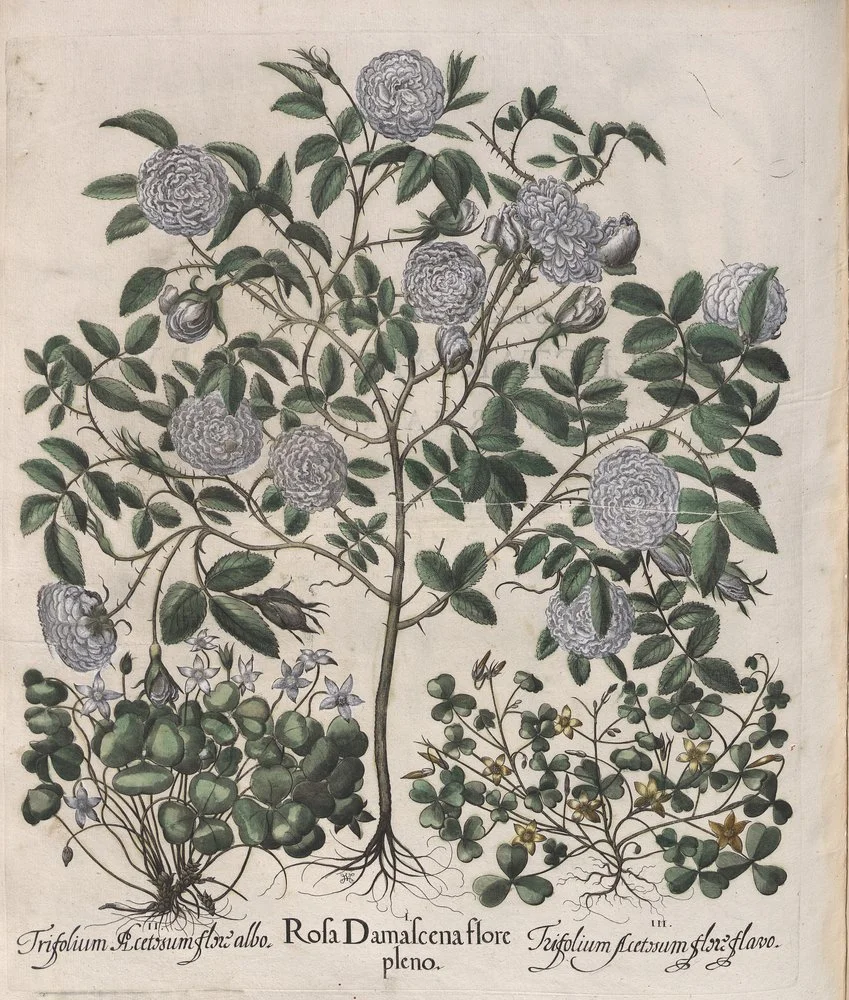
The rose of the rosewater: Rosa damascena, the damask rose, as the Hortus Eystettensis pictured it in 1613. At Ghamsar its petals are simmered in copper stills and the steam cooled back into fragrant water — sometimes distilled a second time over fresh petals for greater strength.
Basilius Besler, Hortus Eystettensis (1613), via Wikimedia Commons. Public domain.
When steam passes through aromatic plant material and is then cooled and collected, the result separates into two products. The oil-soluble fraction floats to the top as essential oil. The water that remains below it is the hydrosol, also called a hydrolat, a distillate water, or, when it comes from flowers, a floral water.
A hydrosol carries the water-soluble compounds of the plant and traces of its volatile aromatics. It is far more dilute than the essential oil, typically a fraction of a percent of aromatic material, and its scent is softer and rounder than the oil's. Rosewater and orange flower water are the great historical hydrosols: rosewater perfuming the sweets and drinks of Persia and the Middle East for a thousand years, orange flower water scenting the kitchens and stillrooms of the Mediterranean.
★ Note the name carefully. A true hydrosol is the condensed product of distillation. Water with fragrance stirred into it is not a hydrosol, whatever the label claims. Muddlenook's rule: the name must describe the making.
Check in: A steam distillation separates into two products. Which floats, which remains below — and what makes the one below a true hydrosol rather than scented water?
❦ In your workbook: record the hydrosol in your own way — the two products of the separation, the dilute and softer scent, rosewater and orange flower water, and the rule that the name must describe the making — copy, sketch, or note what matters.
How a Hydrosol Differs from an Infusion
You studied infusions in Lesson 27, and the distinction matters here, because this lesson's practical asks you to compare the two side by side.
An infusion steeps the botanical directly in hot water. Compounds pass from the material into the water by contact. Everything water-soluble comes along: volatile aromatics, yes, but also tannins, pigments, and heavier compounds. The water touches the plant.
★ A hydrosol never lets the collected water touch the plant. The plant's volatile companions rise as vapor, travel through the head, cool, and fall into the receiver. Only what can ride the steam makes the journey. Heavier compounds stay behind in the cucurbit.
So an infusion is broader and a hydrosol is more selective. The infusion of rosemary is greener, sharper, more bitter; the hydrosol of rosemary is rounder, cleaner, purely aromatic. Neither is better. They are different tools, and the apothecary chooses the tool that fits the work.
Maceration, which you defined in Lesson 23, is the family's other method: soaking at room temperature over time, without heat at all. Three methods, three characters: maceration is patient, infusion is direct, distillation is selective. Your extraction ledger will eventually hold all three.
Check in: Why is the infusion of rosemary greener and more bitter than its hydrosol — what travels in each, and what stays behind?
❦ In your workbook: record the distinction in your own way — the infusion's contact and breadth, the hydrosol's selectivity, and the three characters: maceration patient, infusion direct, distillation selective — copy, sketch, or note what matters.
In your packet: Exercise II — The Infusion Comparison ◐ begins here. Work it now, or mark the place and take it as homework — your choice.
Procedure: The Stovetop Still
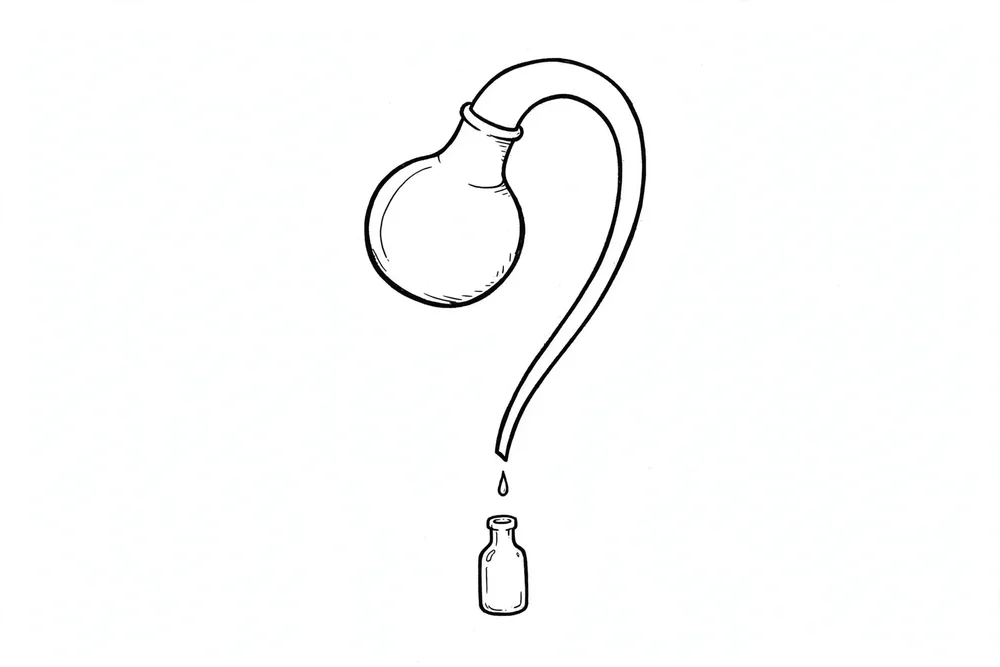
Your adult supervisor handles the stove. You handle the observation and the record.
- Place the trivet or upturned dish in the pot. Set the small bowl on it; this is the receiver, and it must sit above the water line.
- Add water to the pot until it comes about a third of the way up the sides, below the rim of the receiver bowl. Add your botanical material to the water around the bowl, not inside the bowl.
- Set the pot over medium heat. When the water reaches a bare simmer, small bubbles breaking steadily, place the lid on the pot upside down, so it domes downward into the pot. The low point of the inverted lid should sit roughly above the receiver bowl.
- Place a handful of ice cubes on top of the inverted lid. The cold lid is your stillhead: vapor will condense on its underside.
- Maintain the barest simmer for twenty to thirty minutes. Replenish the ice as it melts, spooning off meltwater so the lid stays cold. Watch the underside of the lid: droplets form, gather, and fall. Most should fall into the receiver bowl.
- Do not let the pot boil dry. If the water level drops near the botanical, add hot water carefully, keeping clear of the steam.
- At the end of the run, turn off the heat. Follow the cool-down protocol: fifteen minutes, nothing touched.
- Remove the lid with dry mitts, lifting away from your face. Lift out the receiver bowl. You should have a small quantity of clear, fragrant liquid: your hydrosol.
Check in: In this stovetop model, what serves as the stillhead — and where must the receiver sit in relation to the water line?
❦ In your workbook: record the procedure in your own way — the receiver raised above the water, the botanical around the bowl and never in it, the inverted ice-cooled lid, the bare simmer, and the fifteen minutes untouched — copy, sketch, or note what matters.
In your packet: Exercise I — Build and Run the Stovetop Still ⚒ begins here. Work it now, with your adult supervisor, or mark the place and take it as homework — your choice.
Observation: Reading Your Distillate
Hold the bowl to the light. Note the clarity. Waft, do not sniff directly, and note the aroma. Now make an infusion of the same botanical: a spoonful in a cup of hot water, steeped five minutes, strained. Compare the two side by side.
You will likely find the hydrosol cleaner and rounder in scent, and the infusion greener and more bitter. Write down exactly what you perceive, in your own words. "Smells nice" is not an observation. "Smells like rosemary but softer, with the pine note forward and none of the bitter green of the infusion" is an observation.
Taste nothing. This lesson is about aroma and process, and the distillate is for the ledger and the nose only.
Check in: What makes "Smells like rosemary but softer, with the pine note forward" an observation, where "Smells nice" is not?
❦ In your workbook: record the observation in your own way — clarity held to the light, aroma wafted and named exactly, and the side-by-side comparison in your own words — copy, sketch, or note what matters.
Cleanup
Strain the spent botanical from the pot water and compost it or discard it. Wash every vessel in hot soapy water; rinse the receiver bowl especially well, since it will hold future distillates. Dry everything completely before storing. Wipe the stove area. Return the ice bowl and mitts to their places.
Check in: Which vessel gets the especially careful rinse — and why?
❦ In your workbook: record the cleanup in your own way — the spent botanical strained and composted, the receiver rinsed especially well, everything dried completely before storing — copy, sketch, or note what matters.
Archive Entry
Open your extraction ledger and record the run: date, botanical (common and Latin names if known), quantity of material, volume of water, simmer duration, approximate volume of distillate collected, and your side-by-side comparison notes. Note anything that went wrong: ice melted too fast, lid not centered, boil too vigorous. A failed run recorded honestly teaches more than a perfect run recorded vaguely.
Check in: Name the eight facts the ledger entry records — and why does an honest failed run teach more than a vague perfect one?
❦ In your workbook: record the archive discipline in your own way — the eight facts of the run, the faults named plainly, and the honest record over the vague one — copy, sketch, or note what matters.
Guided Observation: Reading Your Distillate
This lesson's observation is the comparison itself, done slowly: you hold two preparations of one botanical side by side — the water that met the plant in the air and the water that touched it — and you read the difference with your eyes and your nose before you explain it.
Work through it in order.
Hold the bowl to the light. Note the clarity. Waft, do not sniff directly, and note the aroma.
Make the infusion. A spoonful in a cup of hot water, steeped five minutes, strained. Compare the two side by side.
Write exactly what you perceive. You will likely find the hydrosol cleaner and rounder in scent, and the infusion greener and more bitter. Write down exactly what you perceive, in your own words. "Smells nice" is not an observation. "Smells like rosemary but softer, with the pine note forward and none of the bitter green of the infusion" is an observation.
Consider:
- Which compounds made the journey into your receiver, and which stayed behind in the pot — and how does the aroma of each cup prove it?
- Where in the run did you see condensation doing its work, and what was the cold surface it needed?
- Taste nothing. This lesson is about aroma and process, and the distillate is for the ledger and the nose only. What does your ledger gain from a nose-only record honestly written?
❦ In your workbook: record the guided observation in your own way — the clarity, the wafted aroma named exactly, and the side-by-side difference in your own words — copy, sketch, or note what matters.
Materials
Everything in its place, before we begin. For this distillation lesson you will need:
Level One — household items
- A heavy pot with a lid, large enough to hold everything below. The lid should be domed or flat metal; glass lids work if they are tempered and heat-safe.
- A small heat-safe bowl (ceramic or metal) that fits inside the pot on a trivet or an upturned small heat-safe dish. This is your receiver.
- Water, enough to come a third of the way up the pot.
- Botanical material: a generous handful of fresh rosemary sprigs, a handful of rose petals (unsprayed), or several strips of citrus peel. One botanical only.
- Ice cubes in a bowl, for cooling the lid.
- Dry oven mitts or folded dry towels.
- Labels and a pen, plus your extraction ledger and pencil.
- An adult supervisor, present in the kitchen for the entire run.
Level Two — historically closer
- A copper or heavy stainless pot with a well-fitting domed lid.
- A glass receiver bowl so you can watch the distillate gather drop by drop.
- A kitchen thermometer to hold the water at a bare simmer, around 90 to 95 degrees Celsius, rather than a rolling boil.
- Cheesecloth for straining the spent botanical afterward.
Safety Notes
- Steam is the first danger: keep hands, face, and arms clear of rising steam. Lift lids away from your face.
- Never seal a heating vessel airtight. The vapor path must stay open; if anything blocks it, remove from heat and cool before touching.
- Use heat-safe vessels only, inspected for cracks before you begin. Handle hot lids with dry mitts, never a damp cloth.
- An adult supervises the entire run and handles the stove controls and the hot lid.
- Cool-down protocol: fifteen minutes, nothing touched, after the heat goes off.
- Water and steam distillation only. Alcohol distillation is forbidden in this course, without exception.
- Label the distillate: contents, botanical, and date. Taste nothing.
Reflection Questions
Answer the following questions in your workbook.
- Why must a still always have an open path for vapor? What happens if the path is blocked?
- In your own words, why does steam burn skin more severely than dry air at the same temperature?
- An infusion of rosemary tastes bitter and green, while its hydrosol does not. Using what you learned about selectivity, explain why.
- Brunschwig's 1500 manual was written in German rather than Latin. Why would that choice matter for who could learn distillation?
- You distill lavender and collect two layers in the receiver: a thin fragrant oil floating on water. Which layer is the hydrosol, and which is the essential oil? How would you separate them?
Workbook Checklist — Lesson 33
In my workbook I have:
- ☐ explained the evaporation and condensation cycle that makes distillation possible, and named rain as nature's distillation
- ☐ named and described the three parts of the classical alembic — cucurbit, head, and receiver — heat below, cool above, collection at the side
- ☐ traced the history of distillation from Alexandria through the medieval Islamic world to Brunschwig's printed manual of 1500
- ☐ distinguished a hydrosol from an infusion and explained why each exists — the name must describe the making
- ☐ built and operated a safe stovetop still model with my adult supervisor and collected an herbal distillate for observation — or traced the run in full as a workbook study
- ☐ recorded the distillation run in my extraction ledger with the discipline this work demands — date, botanical, quantities, duration, yield, comparison notes, and faults named honestly
- ☐ read the Safety Briefing completely before touching a single vessel, and kept the vapor path open, the cool-down whole, and the distillate labeled and untasted
☐ Lesson completed Date: ___ Signature: ___
The Professor's Closing Note
Scholars, you have now performed the operation that Mary of Alexandria described, that Avicenna refined, and that Brunschwig printed. The equipment was a pot and a lid, but the operation was the real thing: vapor rose, cooled, and fell, and you caught it. That is distillation (separating a liquid by evaporation and condensation), and no copper alembic — the classical still, in three parts: pot, cooling head, and receiver — in Persia ever did it more truly.
File your ledger entry. Wash your vessels. The archive grows.
— Professor Crimblebrew Muddlenook, Potions Laboratory • Master Apothecary • Head of House Meridies
PROFESSOR CRIMBLEBREW MUDDLENOOK
Potions Laboratory
Master Apothecary • Head of House Meridies
Cross-Class Connections

Herbology · Unit IV, Lesson 28 — Drying Herbs the Traditional Way
Come to the Greenhouse before you go to the still, scholars. Professor Muddlenook's rosemary and rose petals reach his bench sound because someone dried them soundly: woody herbs hung in small bundles in dark, moving air, leaves and petals screen-dried, every bundle judged by the crispness test. Bring me your fresh harvest, and I will teach you the keeping that makes his distilling possible.
PROFESSOR BERYL FERNFOOT
Herbology Greenhouse • Master Herbalist • Head of House Oriens

Scrollwork · Unit II, Lesson 6 — Oak Gall Ink
You carry a plant's lightest companions upward on steam and catch them as they fall. In my Scriptorium we take the opposite road into the same chemistry: oak galls ground and steeped, their tannins drawn out by water until the liquid can bite into a page and hold for seven hundred years. Come and make the ink that darkens in the air, scholars — and bring your stillman's patience. You will recognize it here.
PROFESSOR QUILLBERRY NOCTURNE
Scrollwork Library
Further Reading & Sources
- Herbal distillate — Wikipedia — hydrosols, production, and the oil/water separation.
- Mary the Jewess — Wikipedia — Maria Prophetissa, the tribikos, and Zosimos's account.
- Liber de arte distillandi de simplicibus — Wikipedia — Brunschwig's 1500 manual, the first printed book on distillation.
- Distillation — Wikipedia — the general principles and history of the technique.
- The World's Best Rosewater Comes From Iran — Saveur — the Ghamsar rosewater tradition and double distillation.
Browse the Potions shelf in the school Library for readable editions of these works.
LESSON 33 · DISTILLATION & HYDROSOLS
Try It in the Laboratory
The lesson taught the stovetop rig — the pot, the ice, the bowl. The Experiment builds your own hydrosol: choose your plant, and it writes the rig and the keeping for you.
— Professor Crimblebrew Muddlenook, Potions Laboratory
Submit your work for this lesson using the form below.
CONTINUE IN THE POTIONS LABORATORY
← Previous · Lesson 32: Tinctures & Spirit Macerations Next · Lesson 34: The Extraction Ledger →
Unit IV — Botanical Extractions Potions Laboratory — All 52 Lessons
The rest of Unit IV: Lesson 26 · Infused Lipids · Lesson 27 · Hydro-Infusions · Lesson 28 · Glycerites & Syrups · Lesson 29 · Decoctions · Lesson 30 · Herbal Acetums · Lesson 31 · Resin Fusion · Lesson 32 · Tinctures · Lesson 34 · Extraction Ledger