

HERBOLOGY
Unit III · Lesson 23SELECTIVE PRUNING FOR PLANT HEALTH & GROWTH
PROFESSOR BERYL FERNFOOT
Herbology Greenhouse
Master Herbalist
Identifying what to remove, where to cut, and when to leave the shears in the shed.
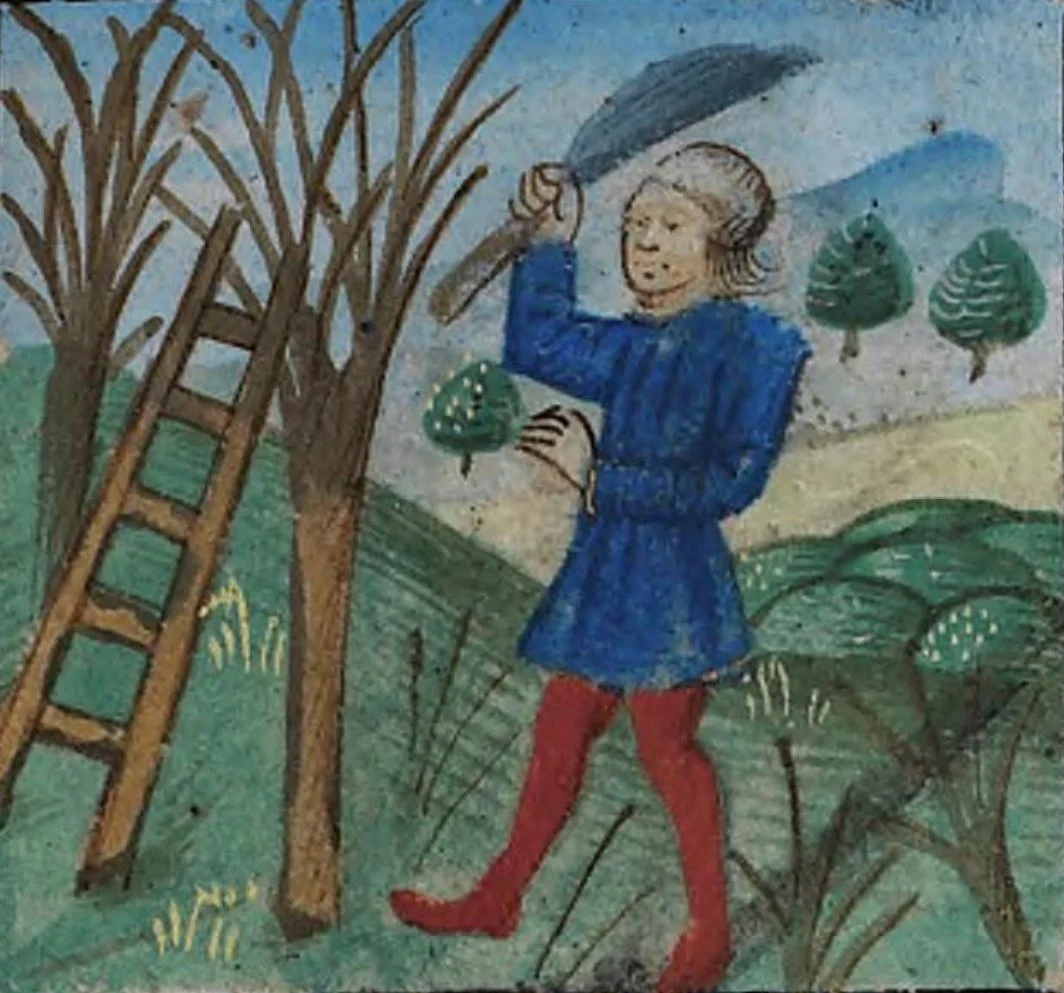
February work, c. 1390: a gardener pruning a leafless tree in the De Grey Hours, ladder set and blade in hand, a second hooked blade at his belt. Pruning is older than any tool in this lesson — gardeners were already cutting dormant wood with care six centuries ago, in the season when the plant's structure stands bare to be read.
De Grey Hours (c. 1390), National Library of Wales, via Wikimedia Commons. CC0.
Professor's Introduction

Hello, my scholars.
I know that many of you have been dreading this lesson. You have spent weeks learning to keep your plants alive, and now I am handing you sharp tools and telling you to cut pieces off. It feels wrong. I understand.
Here is what I want you to hold in mind: pruning is not destruction. It is stewardship. In nature, plants shed what they cannot support. A shaded lower branch dies back on its own. A storm snaps a weak limb and the tree seals the wound and grows on. When you prune with care and knowledge, you are not injuring your plant. You are doing, thoughtfully, what the plant already does for itself.
The fear you feel is actually a good sign. It means you respect the living thing in front of you. We will turn that respect into skill today, one careful cut at a time.
— Professor Beryl Fernfoot, Herbology Greenhouse • Master Herbalist • Head of House Oriens

The line beneath the map is our road: every stop a place where the knowledge of plants changed, every lesson a step along it.
Lesson Objectives
By the end of this lesson, you will be able to:
- Identify the three D's of pruning (dead, damaged, diseased) and explain why they are always removed first.
- Demonstrate proper cut placement: above a node, angled away, outside the branch collar.
- Select appropriate pruning tools and sterilize them between plants.
- Explain the one-third rule and describe three situations when pruning should wait.
- Perform a careful pruning assessment on your Scholar's Familiar.
Reading this lesson: ★ marks the passages to remember. They return on the unit quiz and the class test. Check in questions ask the material back as you go; answer them in your workbook when you meet them.
Working this lesson: Your assignment packet is the first download on this page. Work in it as the lesson moves along, answering each assignment as its subject is taught — or read the lesson through for your notes and take the assignments as homework afterward. Both are proper ways to sit this class. Signposts in the reading tell you where each assignment belongs. Written answers are short answers in your own words; a few honest lines are worth more than a filled page.
Your Assignment Packet
This lesson's assignments live in its packet: the Lexicon Handout (every term, course terms marked ◆), Materials, Guided Practice, the Assignment Manual with its answer key for self-checking, the Reflection Questions, and the Workbook Checklist. Download the packet before you begin and keep it beside you as you read.
Pruning Is Stewardship, Not Destruction
Before we touch any tool, let us settle the question that troubles every beginner: am I hurting my plant?
A plant is not a sculpture, and you are not carving it. A plant is a living system that constantly adjusts itself. It abandons leaves that no longer earn their keep. It seals off branches that storms have broken. Gardeners have a word for this natural shedding, but you do not need the vocabulary yet. You only need the understanding: removal is part of how plants live.
★ Your work as a pruner follows the same logic. You remove what the plant cannot use, what threatens its health, or what blocks its growth, and you leave everything else alone. The best pruning is the least pruning that still serves the plant.
There is a second reason to set your worry aside. Plants respond to careful pruning with vigor. When you remove a dead stem, the plant redirects energy to living tissue. When you thin a crowded center, light and air reach leaves that were struggling in shade, and the whole plant grows stronger. You will see this happen with your own Familiar, and once you have seen it, the fear fades.
Keep one more thought close: every cut is a decision, and decisions can be unmade only by time. So we plan before we cut, we cut less than we think we should, and we step back often to look at the whole plant. Patience is a pruning tool too.
Check in: Pruning imitates something the plant already does for itself. What is it — and why is the best pruning the least pruning that still serves the plant?
❦ In your workbook: record pruning as stewardship in your own way — what the plant sheds for itself, and the least-pruning rule — copy, sketch, or note what matters.
The Three D's: Dead, Damaged, Diseased
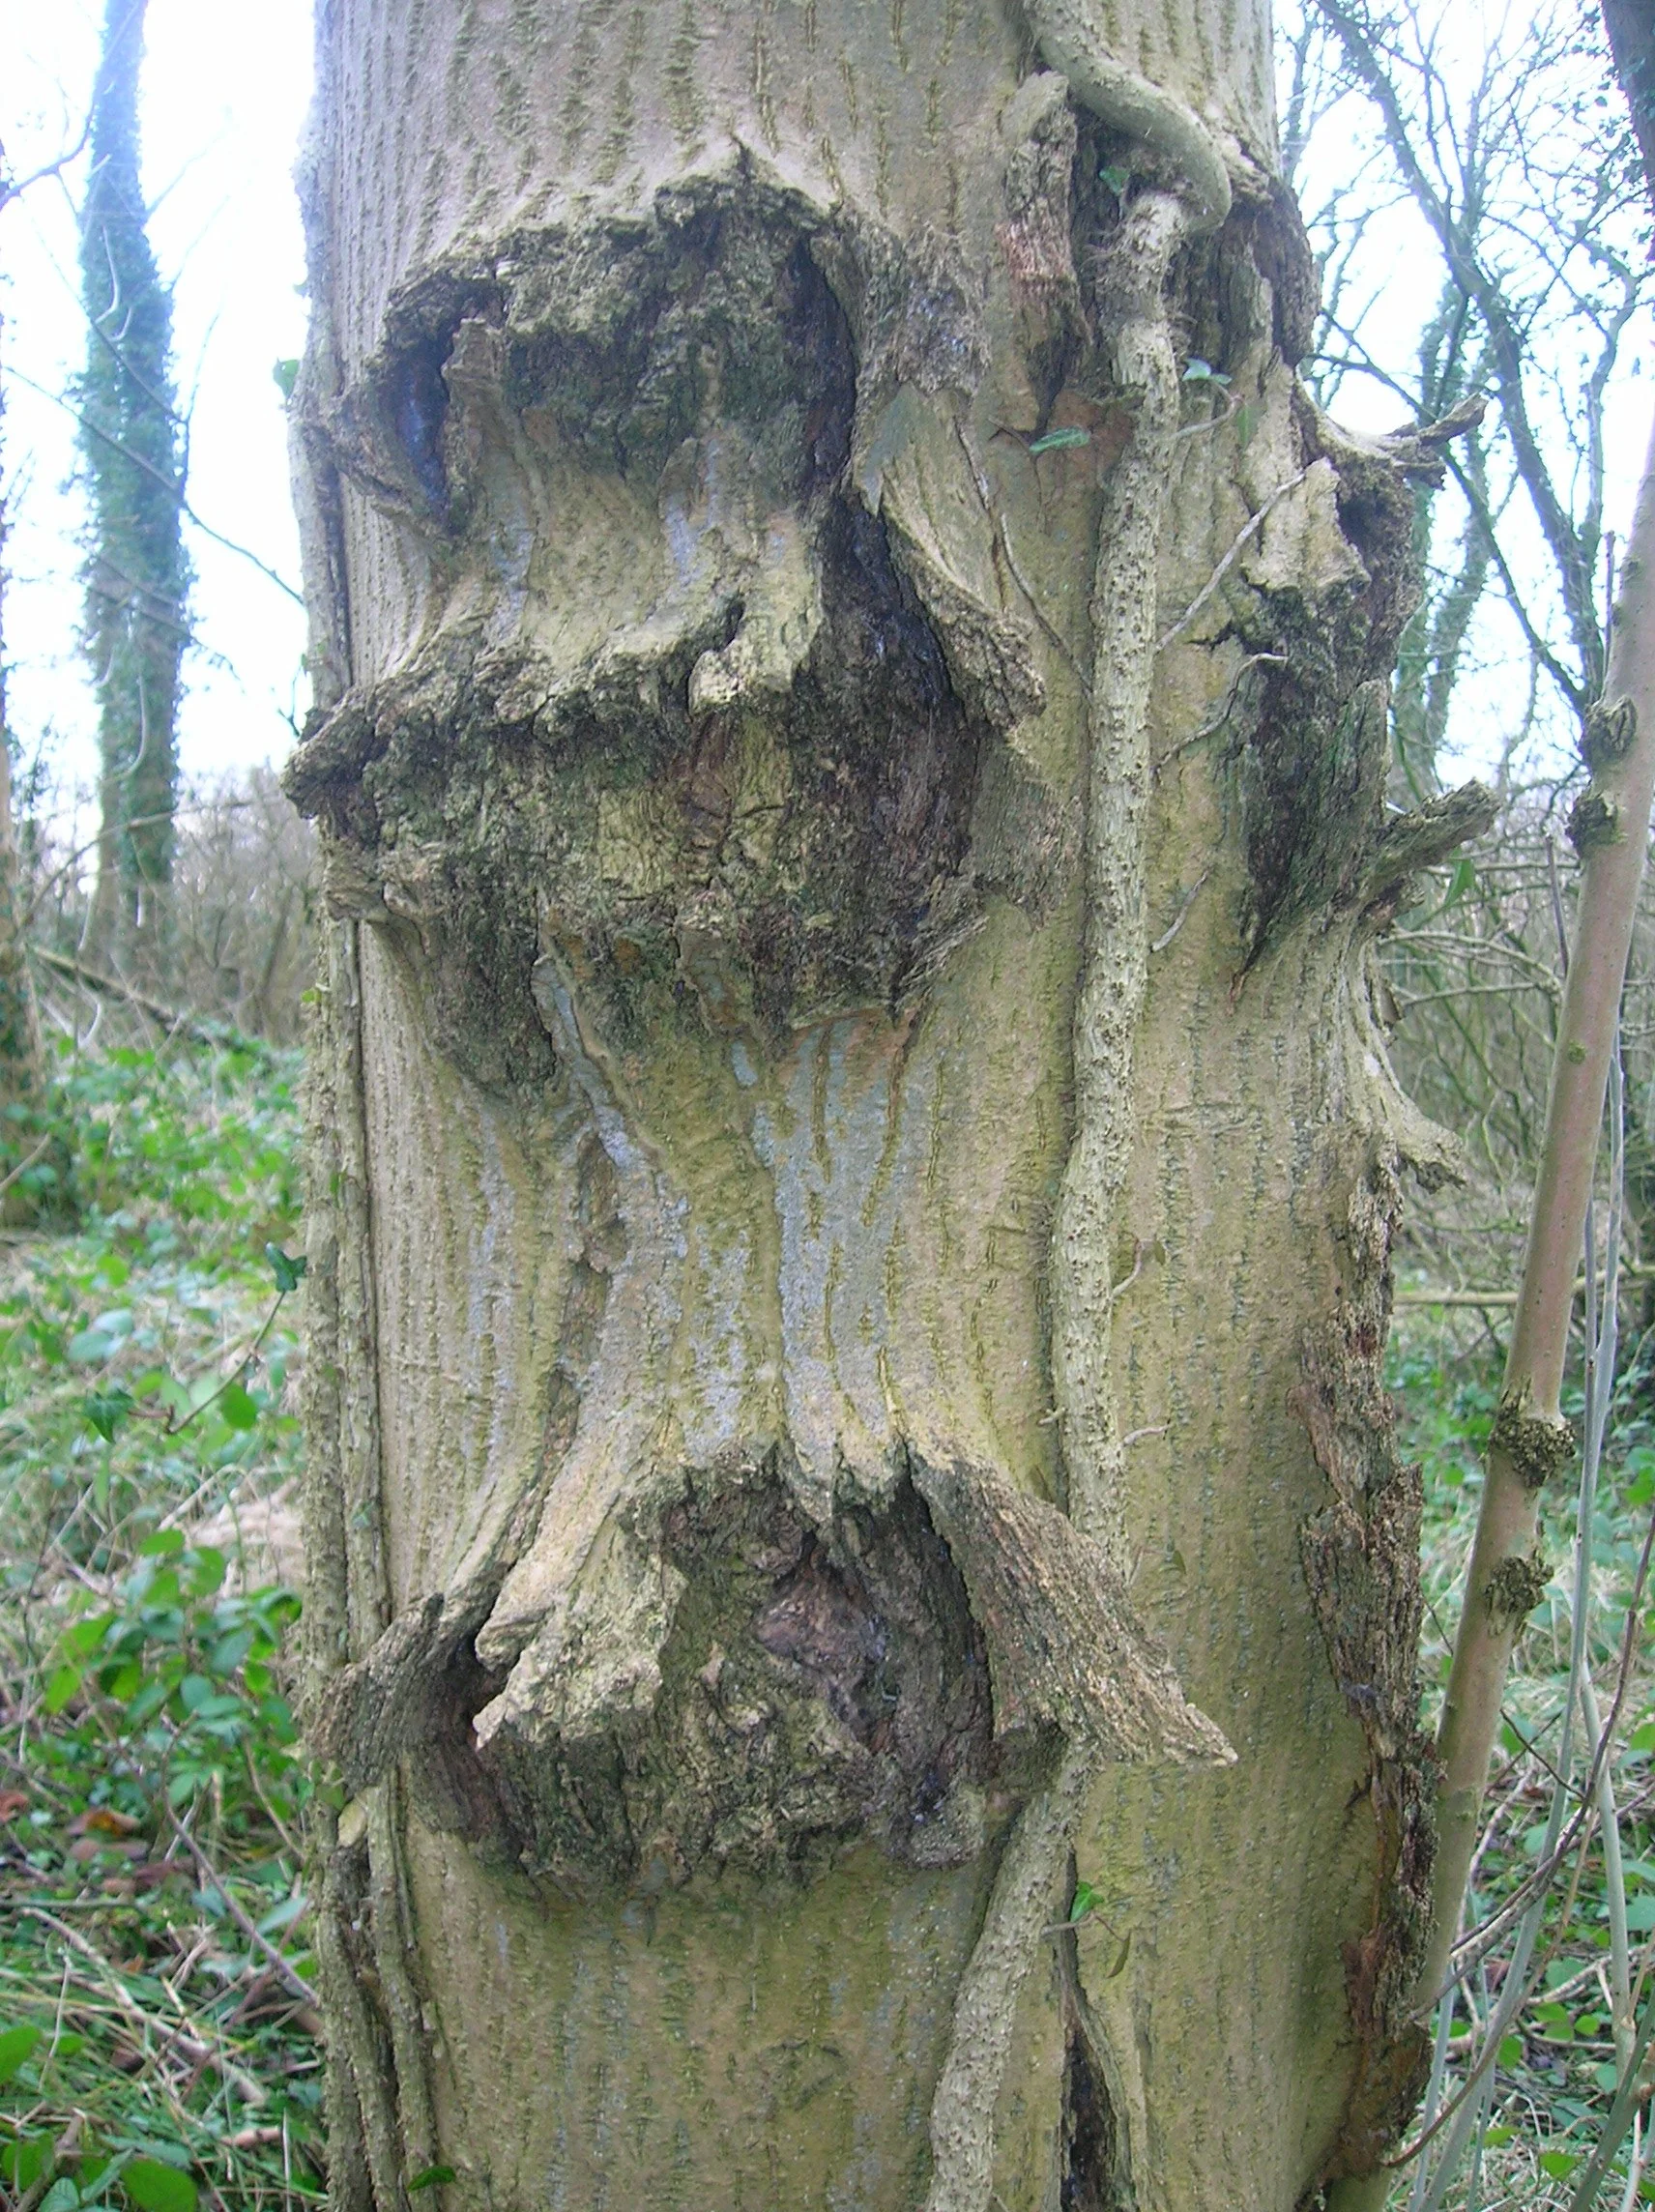
The third D, written in bark: cankers on an ash trunk — areas of dead bark that never heal, sunken and dark inside their rough margins. Diseased wood like this is cut well back into healthy tissue, and the rule that follows it has no exceptions: sterilize the blades after every diseased cut, before any other branch or plant is touched, and bag the prunings for the trash, never the compost.
Photograph by Roger Griffith (Rosser1954), released to the public domain.
★ Whenever you approach a plant with pruners in hand, begin with the three D's. Remove dead, damaged, and diseased growth first, before anything else. This order matters. The three D's are unambiguous: they are the cuts every gardener agrees on, and clearing them first often reveals what else, if anything, truly needs attention.
Dead. Dead wood is gray, brittle, and leafless when the rest of the plant is growing. It will not recover, and leaving it invites decay and pests. Test a doubtful stem two ways. First, bend it gently: dead stems snap, living stems flex. Second, scratch a small patch of bark with your thumbnail: green beneath means alive, brown and dry beneath means dead. Remove dead stems back to living tissue, cutting just above a healthy node or to the point where the stem joins a larger living branch.
Damaged. Storms, accidents, and rubbing branches wound stems. A cracked or partially broken branch cannot heal the way skin heals; the plant will seal around the wound, but a jagged tear seals slowly and invites infection. Remove damaged branches with a clean cut below the damage, into sound wood. If two branches cross and rub, their bark wears away at the contact point and disease enters. Choose the weaker or worse-placed of the two and remove it.
★ Diseased. This is the one that demands the most care. Signs include discolored or sunken bark, cankers (areas of dead bark that never heal), wilting confined to one branch, and unusual growths. Cut diseased wood well back into healthy tissue, beyond any visible discoloration, because infection often extends further than it appears. And here is the rule students forget: sterilize your tools after every diseased cut, before touching another branch or another plant. A pruner that has touched disease becomes a carrier. We will cover sterilization properly below.
Check in: A stem is doubtful. Name the two tests for whether it is dead — and say what each result tells you. Then: why must the tools be sterilized after a diseased cut, before any other branch is touched?
Dispose of diseased prunings in the trash or by municipal green waste, never in your home compost. Home compost piles rarely get hot enough to kill pathogens, and you would simply be spreading the problem back into your garden next season.
You have just learned the single most useful pruning rule there is. Many gardeners prune nothing but the three D's for years and their plants thrive. If you take nothing else from this lesson, take this: dead, damaged, diseased, in that order, every time.
❦ In your workbook: record the three D's in your own way — dead, damaged, diseased, in that order, with the bend test, the scratch test, and the sterilization rule — copy, sketch, or note what matters.
In your packet: Exercise I — The Three D's Hunt ◐ begins here. Work it now, or mark the place and take it as homework — your choice.
Reading the Plant: What Else Comes Off
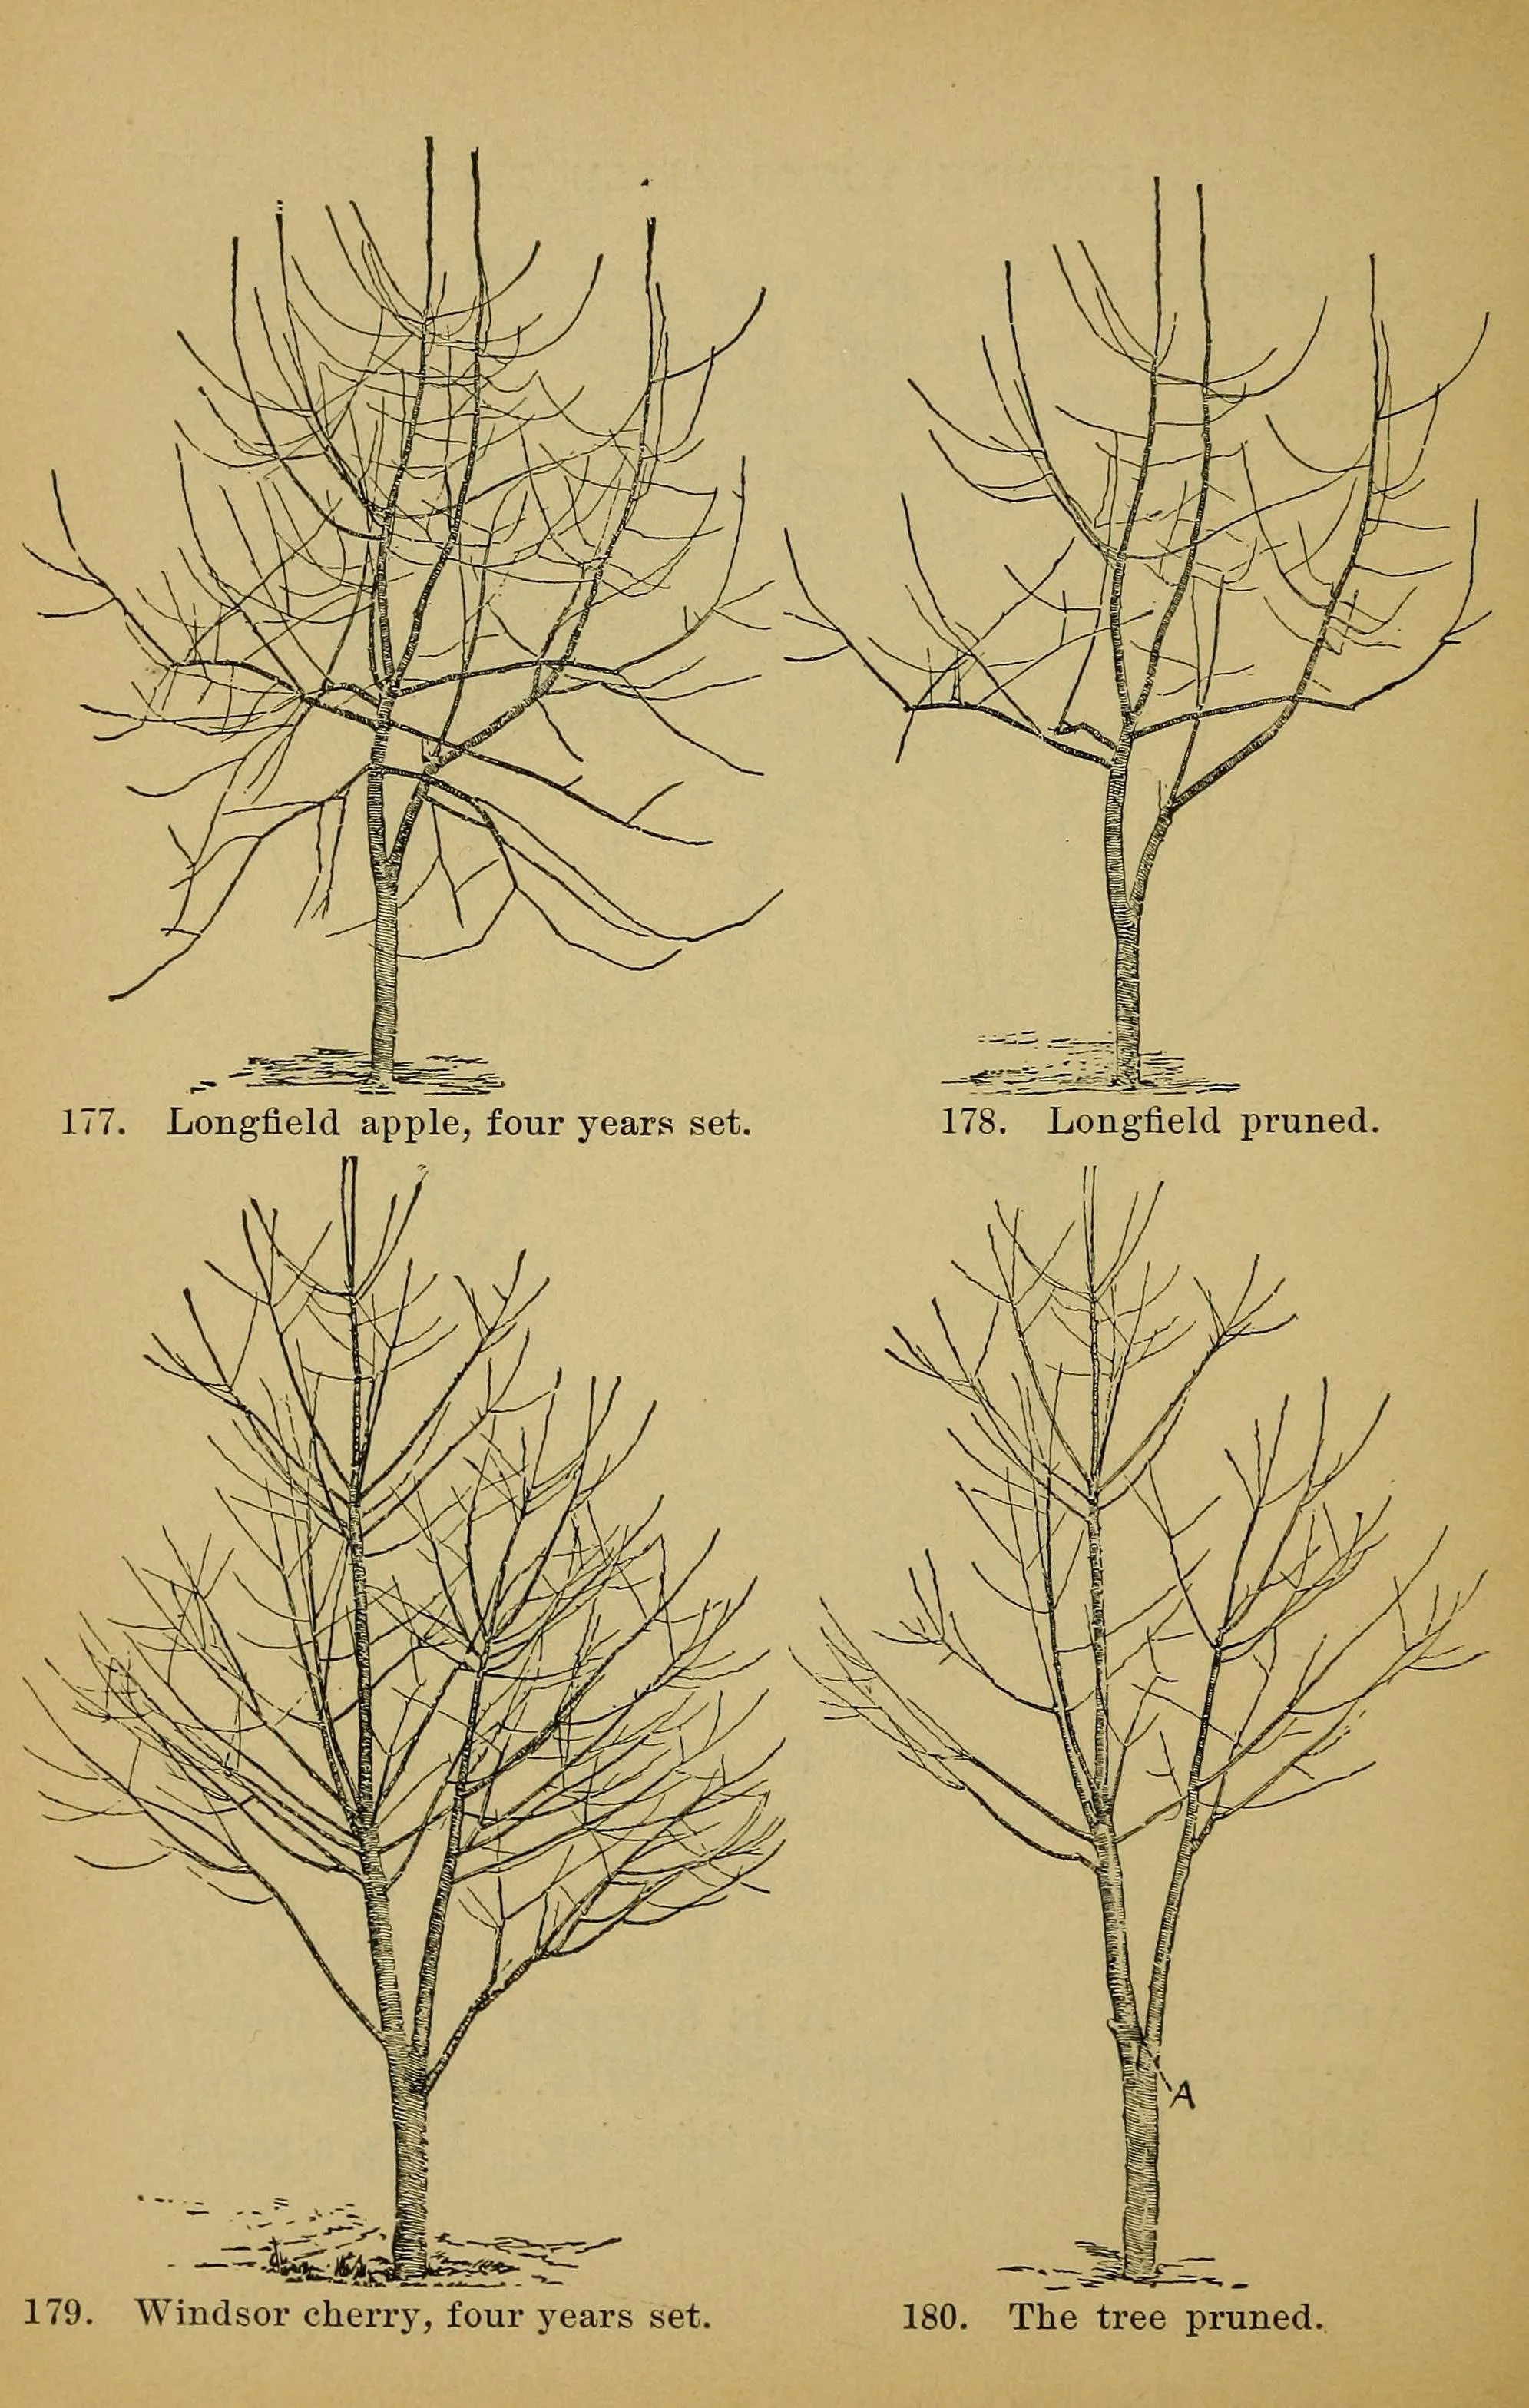
Before and after, twice over, from Bailey's Pruning-Book (1898): a Longfield apple and a Windsor cherry, each drawn unpruned, then pruned. Note what the pruned trees keep — the whole framework — and what they lose: the crossing, crowding, inward growth. That is thinning, and it is the least pruning that still serves the plant: opened to light and air, not cut down.
L. H. Bailey, The Pruning-Book (1898), Figs. 177–180, via the Biodiversity Heritage Library / Internet Archive Book Images. No known copyright restrictions.
Once the three D's are cleared, look at the plant with fresh eyes. Often you will find it needs nothing more. When it does, here is what to look for.
Crossing and rubbing branches. As above, remove the weaker of the pair. Rubbing wounds are slow-motion damage.
★ Inward-growing branches. Branches that grow toward the center of the plant create crowding. Removing a few opens the interior to light and air, which matters more than most beginners realize: still, humid air inside a dense canopy is where fungal diseases take hold. Thinning for airflow is preventive medicine.
Suckers. These are vigorous shoots that arise from the base of the plant or from its roots. Many plants produce them, and left alone they divert energy from the main growth and crowd the base. Remove suckers by pulling or cutting them at their point of origin.
Water sprouts. Similar to suckers, but they arise from aboveground limbs, usually shooting straight upward. They often appear in large numbers after heavy pruning, which is one reason we prune lightly: aggressive cutting triggers an aggressive response. Remove water sprouts while they are small.
Notice what all of these have in common. Each removal serves the plant's health or structure. "It looks untidy" is not, by itself, a reason to cut. Train your eye to see function first, and tidiness will follow on its own.
Check in: A sucker and a water sprout look alike at a glance. Where does each one arise — and why does heavy pruning bring water sprouts on?
❦ In your workbook: record what else comes off in your own way — crossing branches, inward growth, suckers, and water sprouts, and the function-first rule — copy, sketch, or note what matters.
Where and How to Cut
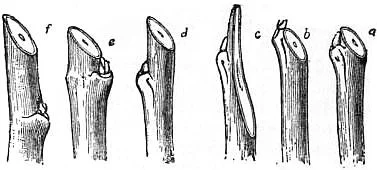
Cuts, good and bad (1911): six stem tips cut at six distances from the bud. The lesson's measure sits among them — about one quarter inch above an outward-facing bud, angled away so water sheds off the cut. Too close damages the bud; too far leaves a stub that dies back and decays. Print small and look closely: the differences are the whole teaching.
Encyclopædia Britannica, 11th edition (1911), vol. 13, "Horticulture," Fig. 36. Public domain.
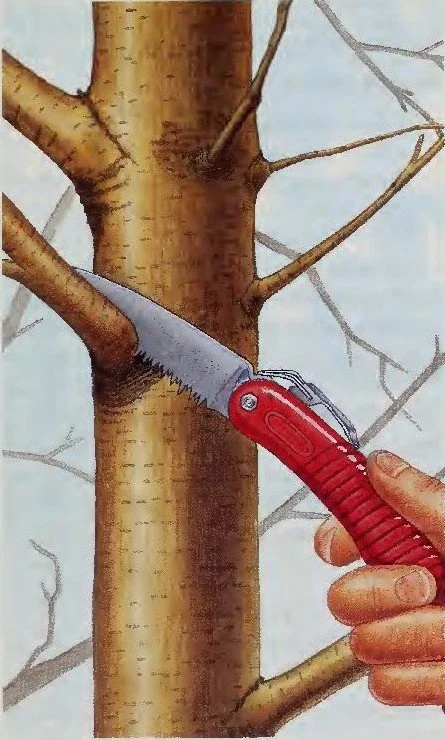
The larger branch, from the U.S. Forest Service's How to Prune Trees: a folding saw set at the branch's base. The finished cut goes just outside the branch collar — never flush with the trunk, which destroys the collar, and never leaving a long stub, which cannot seal. Heavy branches are first relieved with the three-cut method in the text, so their weight cannot tear the bark; cut away from your body, free hand clear of the blade's path.
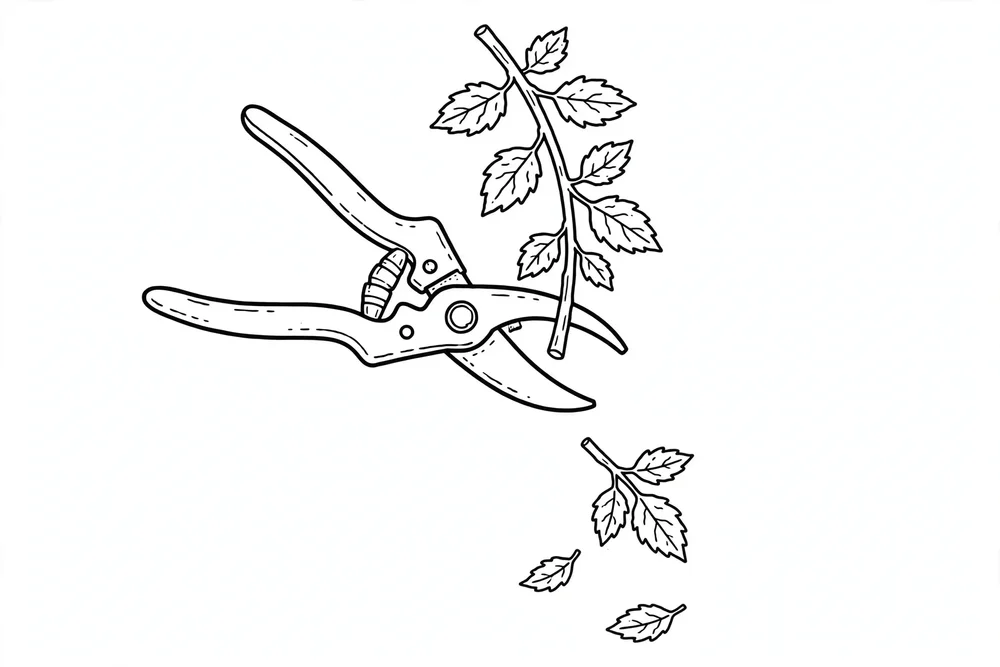
Illustration by Julie Janke for the USDA Forest Service, How to Prune Trees (via Internet Archive, CAT10819651). Public domain.
A correct cut heals quickly. An incorrect cut lingers, and lingering wounds invite trouble. The mechanics are simple and worth practicing until they feel natural.
★ Small stems: the node rule. Make your cut about one quarter inch above an outward-facing node or bud, angled so the high side of the slant sits just above the bud and the cut slopes away from it. The angle sheds water so it does not pool on the cut surface and rot the bud. Cutting too close damages the bud; cutting too far leaves a stub of stem that dies back and decays. One quarter inch is the measure to remember.
Choose a bud that faces outward, away from the plant's center. The new growth will follow that direction, which keeps the plant open and balanced. This small choice, repeated over many cuts, shapes the whole plant.
★ Larger branches: respect the collar. Where a branch joins a trunk or a larger limb, you will find a slightly swollen ring of tissue called the branch collar. This collar contains the plant's own wound-sealing machinery. Your cut goes just outside the collar, never flush with the trunk and never leaving a long stub. A flush cut removes the collar and destroys the plant's ability to seal the wound. A stub cannot be sealed either, and it rots. Just outside the collar is the only correct place.
For branches too heavy to hold with one hand, use the three-cut method so the falling weight does not tear bark down the trunk. First, cut upward from beneath the branch about a foot from the trunk, going one third of the way through. Second, cut downward from the top a few inches farther out; the branch will break off between the two cuts. Third, remove the remaining stub with a clean finishing cut just outside the branch collar.
Two cuts to understand by name. A thinning cut removes an entire branch back to its point of origin, opening the plant up. A heading cut shortens a branch to a bud, directing future growth. Thinning opens; heading directs. Beginners should favor thinning, which is harder to get wrong.
★ One cut to never make. Do not top your plants. Topping means cutting a stem or trunk straight across with no regard for nodes or structure. The plant responds with a flush of weakly attached shoots, and the large wounds invite decay. Topping shortens a plant's life. If a plant is too large for its place, thin it over time or choose a smaller plant, but do not top it.
Deadheading. For flowering herbs and ornamentals, removing spent flowers before they set seed is called deadheading. It often encourages a second flush of blooms and keeps the plant's energy in its leaves and roots rather than in seed production. Snip the flower stem back to the first set of healthy leaves.
Check in: Your cut on a small stem goes one quarter inch above the bud, angled away. What goes wrong if you cut too close — and what goes wrong if you cut too far? And on a large branch, why is a flush cut exactly as wrong as a long stub?
❦ In your workbook: record where and how to cut in your own way — the node rule, the collar, the three-cut method, thinning against heading, and the cut never to make — copy, sketch, or note what matters.
Tools: Choose Well, Keep Them Sharp
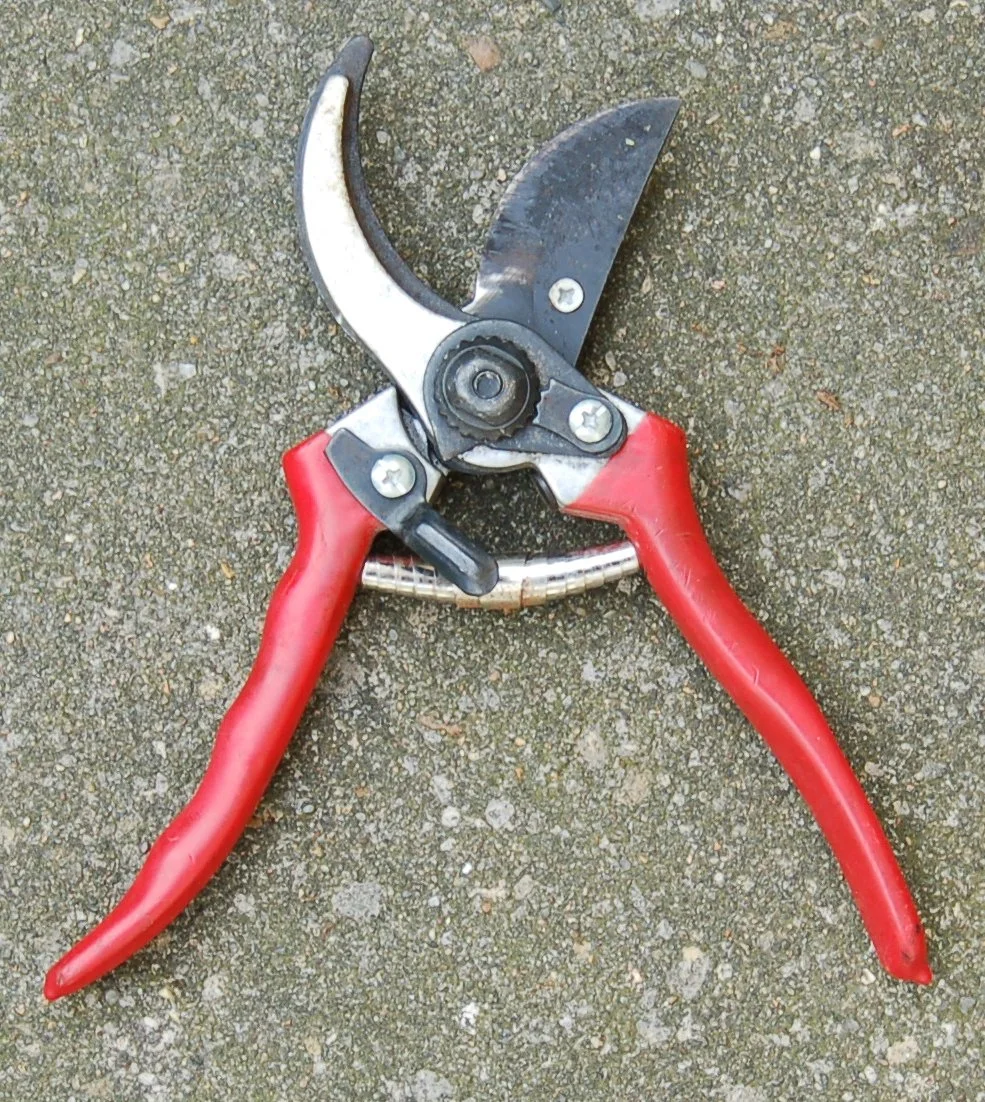
The everyday tool, open: a bypass pruner. Two curved blades pass each other like scissors — that passing action is what makes the cut clean on living stems, up to about three quarters of an inch thick. Keep it sharp, lightly oiled at the pivot, and sterilized before you begin, between plants, and after any diseased cut: a blade wiped with rubbing alcohol takes seconds, and it is the cheapest disease prevention in all of gardening.
Photograph by KoS, released to the public domain.
You need fewer tools than you think, but the ones you have must be sharp. A sharp cut heals; a crushed, ragged cut does not.
Bypass pruners are the everyday tool. Two curved blades pass each other like scissors, making a clean cut on living stems up to about three quarters of an inch thick. For the scale of this course, bypass pruners handle nearly everything.
Anvil pruners have a single straight blade that closes onto a flat surface. They are fine for dead, dry wood but they crush living stems, so keep them away from green growth.
Keep your tools clean, sharp, and lightly oiled at the pivot. A drop of oil after use prevents rust and keeps the action smooth. If a blade is nicked or dull, sharpen or replace it before your next pruning session. Pruning with a dull tool is like writing with a broken pen: the work suffers and so do you.
★ Sterilization. This is the habit that separates careful gardeners from careless ones. Diseases travel on blades. Sterilize your pruners before you begin, between plants, and immediately after any cut into diseased wood. Wipe the blades with rubbing alcohol or a diluted bleach solution (one part household bleach to nine parts water), then let them air dry or wipe clean. It takes seconds, and it is the cheapest disease prevention in all of gardening.
Check in: Name the three moments tool sterilization is required — and the two solutions the lesson allows for it.
❦ In your workbook: record the tools in your own way — bypass against anvil, the sharpness rule, and the sterilization habit — copy, sketch, or note what matters.
In your packet: Exercise III — Tool Care and Sterilization ⚒ begins here. Work it now, or mark the place and take it as homework — your choice.
When NOT to Prune
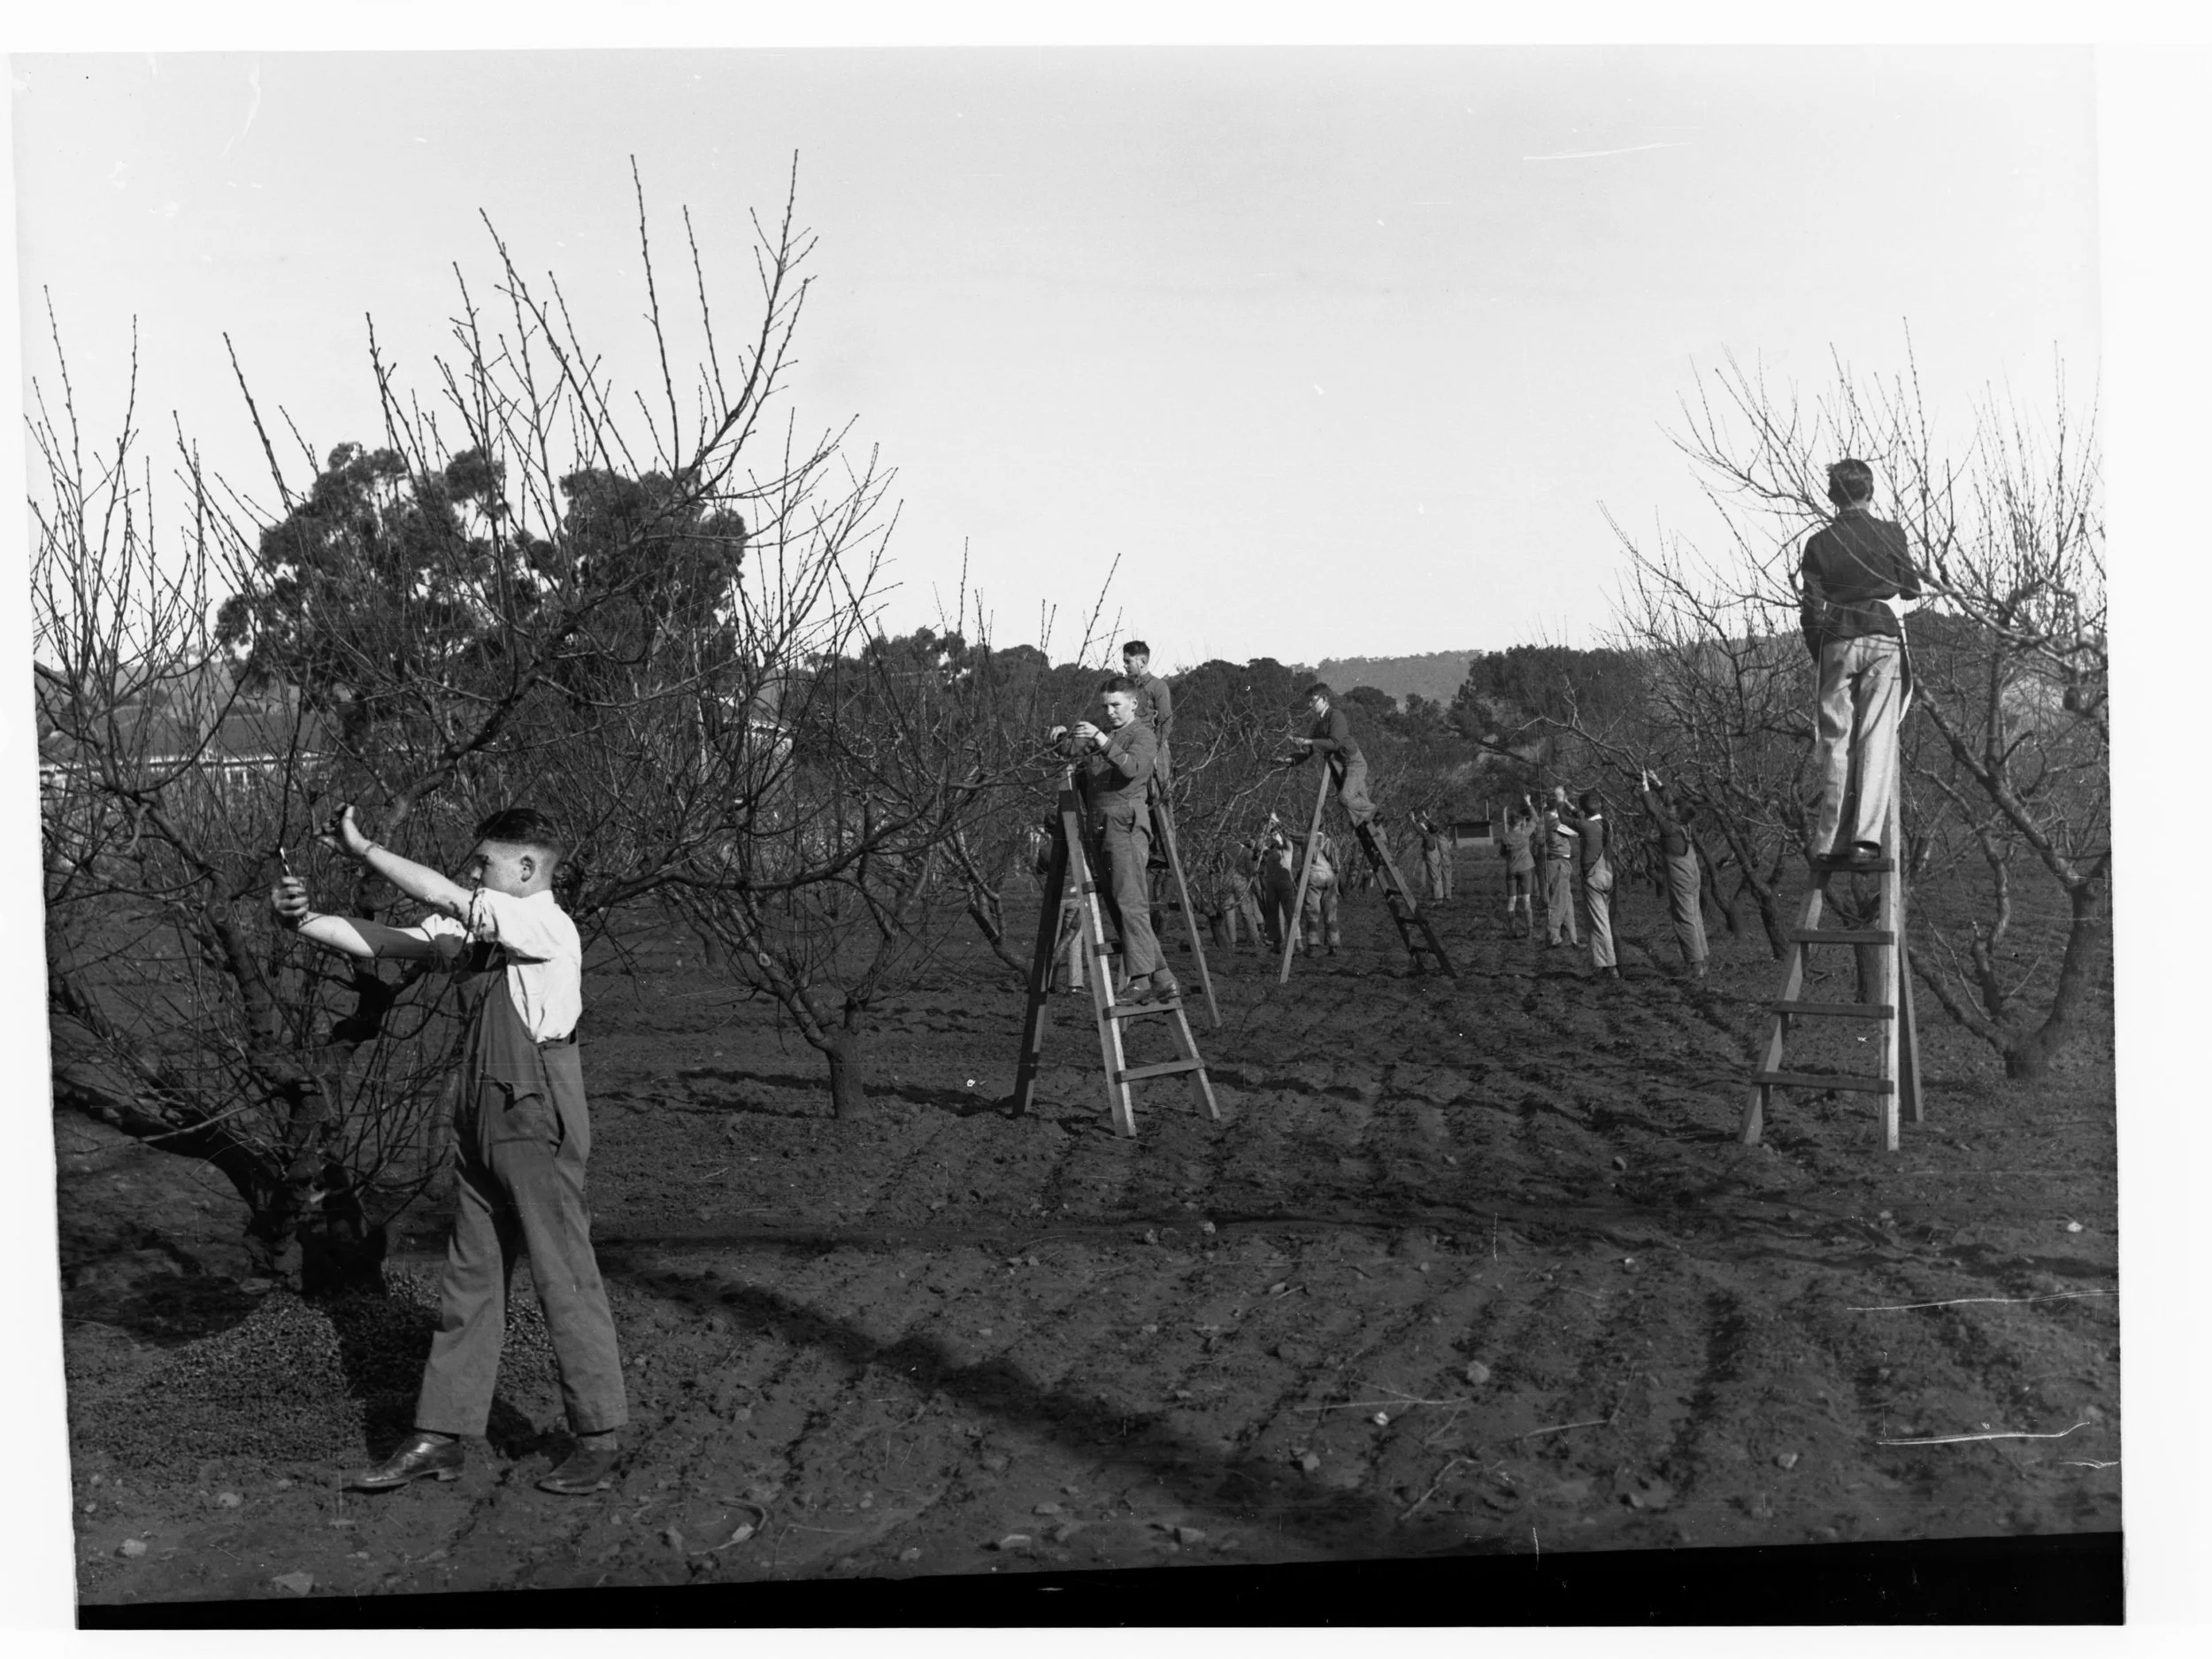
Dormant-season work: students pruning leafless fruit trees at Urrbrae Agricultural College, South Australia. Leafless branches reveal the structure, which is why many woody plants are pruned while dormant — and why the assessment comes first: walk around the plant, read the whole framework, and plan every cut before a blade is opened. Spring-flowering shrubs are the standing exception — prune those right after they bloom, or the winter's cuts take the coming flowers with them.
State Government Photographer, History Trust of South Australia, via Wikimedia Commons. CC0.
Knowing when to leave the shears in the shed is as important as knowing how to use them. Do not prune in these situations:
A stressed plant. If your plant is suffering from drought, recent transplanting, pest damage, or disease throughout its system, pruning adds stress to stress. Help it recover first. Pruning is for healthy plants, with the exception of removing the three D's, which should be done whenever you find them.
The wrong season for the goal. Many woody plants are best pruned while dormant, when leafless branches reveal the structure and the plant's energy is stored in its roots. But spring-flowering shrubs bloom on wood grown the previous year, so pruning them in winter removes the coming flowers; prune those right after they finish blooming instead. Herbs grown for leaves, like the mint and basil many of you chose as Familiars, are pruned by harvesting throughout the growing season. When in doubt about timing for a particular plant, look it up before you cut. The plant will wait.
★ When you are unsure. This is the beginner's guardrail, and there is no shame in it. If you cannot name your reason for a cut, do not make it. Observe for another week. Read about your plant's habits. Ask. The three D's are always safe to remove; everything else can wait until you are certain.
Check in: A plant was transplanted last week and looks stressed, but you can see one dead stem. What do you prune, what do you leave, and why?
❦ In your workbook: record when not to prune in your own way — the stressed plant, the wrong season, and the unsure scholar — copy, sketch, or note what matters.
The One-Third Rule
★ Here is your numerical guardrail: never remove more than one third of a plant's living growth in a single session. The plant needs its leaves; leaves are how it feeds itself, and stripping too many at once starves it. Some careful sources say one quarter, which is even safer. For a beginner, one third is the absolute ceiling, and less is usually better.
This rule has a corollary worth remembering: if a plant needs more than a third removed, spread the work across seasons. Prune a third now, let the plant recover and respond, then reassess next season. The plant sets the pace, not your impatience.
Check in: A plant genuinely needs half its living growth removed. How does the one-third rule tell you to proceed?
❦ In your workbook: record the one-third rule in your own way — the ceiling, the leaves that feed the plant, and the work spread across seasons — copy, sketch, or note what matters.
In your packet: Exercise II — The Pruning Plan ✎ begins here. Work it now, or mark the place and take it as homework — your choice.
Safety Notes
Pruning tools are sharp by design, so treat them with the respect sharp things deserve.
- Always cut away from your body, never toward it. Keep your free hand clear of the cutting path.
- Younger students should prune only with an adult present, and adults should make the larger cuts.
- Wear gloves. Thorns, splinters, and blistering sap are all common, and gloves also protect small cuts on your hands from soil contact.
- Sterilize blades as described above, and wipe them dry before storage so they do not rust.
- Wash your hands after pruning, especially if you handled diseased material.
- Never prune near overhead utility lines. If a branch is anywhere near a power line, call the utility company. This rule has no exceptions.
❦ In your workbook: record the safety notes in your own way — cut away from the body, gloves on, blades sterilized and dried, hands washed, and the power-line rule with no exceptions — copy, sketch, or note what matters.
Guided Observation: The Pruning Assessment, Before Any Cut
This lesson's observation is the assessment the Professor's closing note sets: a slow walk around your own plant, shears still in the shed, looking before any blade is opened. It is built from the lesson's own tests and categories, in the order the lesson teaches them.
You will need:
- your Scholar's Familiar (or a plant you can visit regularly — see the alternative path below)
- your grow ledger and a pencil
- clean bypass pruners, only if dead material is found and you are confident (see the final step)
- gloves
Begin with the three D's. Walk slowly around your plant and inspect it stem by stem, from base to tip. Test a doubtful stem two ways: bend it gently — dead stems snap, living stems flex — and scratch a small patch of bark with your thumbnail: green beneath means alive, brown and dry beneath means dead. Look for damaged stems: cracks, tears, rubbing points. Look for diseased wood: discoloration, cankers, branch-confined wilting.
Read the rest of the plant. Look for crossing branches, for suckers at the base, for water sprouts shooting straight upward, for anything that serves the plant poorly. For each find, name what you would remove, and why.
Check the proportion. Estimate the total proportion of living growth your finds would remove, and check it against the one-third rule. If it passes a third, the work spreads across seasons — the plant sets the pace.
Cut nothing yet — with one exception. If there is dead material and you are confident, remove only that, with clean tools and a steady hand, sterilizing the blades as the lesson teaches. Everything else waits until your plan is sound.
Consider:
- Which of the three D's did you find, and how did the bend test and the scratch test agree?
- Did clearing the three D's in your mind reveal anything else that truly needs attention — or did the plant need nothing more?
- What did you decide to leave alone, and what was your reason for leaving it?
If you do not keep a Scholar's Familiar, adopt a plant you can visit regularly, a garden shrub, a park planting, a neighbor's rose, and perform the same assessment as an observer. The skill of seeing is identical; only the shears stay in the shed.
Materials
Required (Level One — household items)
- Scissors or kitchen shears: clean and sharp; sufficient for soft herb stems and deadheading.
- Rubbing alcohol or diluted bleach (1:9 with water): for sterilizing blades. A small jar for dipping or a cloth for wiping.
- Gloves: any garden or work gloves to protect against thorns, splinters, and sap.
- Notebook and pencil: for the pruning assessment and the written pruning plan.
- A trash bag: for collecting diseased prunings, which must not go in home compost.
Suggested (Level Two — historically closer)
- Bypass hand pruners: the classic gardener's tool; the scissor-action design dates to early 19th-century France.
- A whetstone or sharpening tool: historical gardeners maintained edges constantly; a sharp blade is the older tradition.
- Linseed oil: a traditional protectant for wooden handles and a light rust preventative for blades.
Safety notes: Always cut away from your body. Keep your free hand clear of the cutting path. Younger students: prune only with an adult present; adults make the larger cuts. Wear gloves against thorns, splinters, and irritating sap. Sterilize blades before beginning, between plants, and after any diseased cut. Wipe dry before storage. Wash your hands after pruning, especially after handling diseased material. Never prune near overhead utility lines. If a branch is near a power line, call the utility company.
Reflection Questions
Answer the following questions in your workbook.
- Why is "pruning is stewardship, not destruction" more than a comforting phrase? What does the plant itself do that pruning imitates?
- The three D's are removed in a specific order: dead, damaged, diseased. Why does the order matter, and what changes if you prune diseased wood with unsterilized tools?
- A friend proudly shows you a tree they "topped" to keep it small. Explain, kindly, what will happen to that tree and what they should have done instead.
- Why does the lesson insist on a written plan before cutting? What does the twenty-four-hour review add?
- Thinning and heading cuts serve different purposes. Describe a situation on your own Familiar where each would be the right choice.
- How does the one-third rule connect to what you learned about leaves and photosynthesis in Unit I?
- Fernfoot says "patience is a pruning tool too." What did she mean, and where else in your gardening has patience been the right tool?
Workbook Checklist — Lesson 23
In my workbook I have:
- ☐ named the three D's in order, and the bend test and scratch test that tell dead wood from living
- ☐ stated the node rule — one quarter inch above an outward-facing bud, angled away — and why too close and too far both fail
- ☐ explained the branch collar, and why the cut goes just outside it, never flush and never a stub
- ☐ told thinning from heading, and said why topping is the one cut never to make
- ☐ told bypass pruners from anvil pruners, and named the three moments tool sterilization is required
- ☐ stated the one-third rule, and the three situations when pruning should wait
- ☐ kept the safety notes: cut away from the body, gloves on, blades sterilized and dried, hands washed, no pruning near power lines
- ☐ completed the Three D's Hunt, the Pruning Plan, and Tool Care and Sterilization — or their adopted-plant and household-tool paths
☐ Lesson completed Date: ___ Signature: ___
The Professor's Closing Note
You came to this lesson afraid of hurting your plant, and you are leaving it with the knowledge to help it. That is no small thing.
This week, I ask you to perform a pruning assessment on your Scholar's Familiar. Not a pruning, mind you, an assessment. Walk around your plant slowly. Look for the three D's. Look for crossing branches, for suckers at the base, for anything that serves the plant poorly. Write down what you find and what you would remove, and why. Then, if there is dead material and you are confident, remove only that, with clean tools and a steady hand. Everything else waits until your plan is sound.
If you do not keep a Scholar's Familiar, adopt a plant you can visit regularly, a garden shrub, a park planting, a neighbor's rose, and perform the same assessment as an observer. The skill of seeing is identical; only the shears stay in the shed.
Bring your assessment to your grow ledger. Next lesson, we take up pests and disease, and you will be glad your plant is already tidy.
— Professor Beryl Fernfoot, Herbology Greenhouse • Master Herbalist • Head of House Oriens
Cross-Class Connections

Creative Arts · Unit V, Lesson 18 — Outdoor & Garden Tools: Handling, Cleaning & Care
Boots by the door, scholars. Fernfoot has taught you when and where a plant should be cut, and her word governs every living thing in the garden — my bench teaches the tool itself. Bring your pruners to the Workshop and I will show you how to carry them latched and points down, how to clean a blade before you disinfect it, and why a blade that has cut a sick plant touches nothing else until it is clean: a minute at the bucket is cheaper than a row of lost plants.
Further Reading & Sources
- Trees and Threes — Cornell Cooperative Extension
- Pruning Guide — Portland Nursery
- Chapter 14: Pruning — Virginia Cooperative Extension Gardener Handbook
- Facts about Pruning — West Virginia University Extension
- Practice 3 D's of Pruning — Farm Progress
Browse the Herbology shelf in the school Library for readable editions of these works.
Submit your work for this lesson using the form below.
CONTINUE IN THE HERBOLOGY GREENHOUSE
← Previous · Lesson 22: Pruning Geometry: Apical Dominance Next · Lesson 24: Pests & Disease: The Garden Watch →
Unit III — Propagation, Pruning & Plant Stewardship Herbology Greenhouse — All 37 Lessons
The rest of Unit III: Lesson 17 · Seed Starting · Lesson 18 · Seed Scarification · Lesson 19 · Stem Cuttings · Lesson 20 · Root Division · Lesson 21 · Layering & Runners · Lesson 22 · Pruning Geometry · Lesson 24 · Pests & Disease · Lesson 25 · Repotting & Root Bound · Lesson 26 · Stewardship Project