

HERBOLOGY
Unit III · Lesson 18The Mechanics of Seed Scarification
HERBOLOGY GREENHOUSE • UNIT III • LESSON 18
PROFESSOR BERYL FERNFOOT
Herbology Greenhouse
Master Herbalist
Professor's Introduction

Welcome back, scholars.
In our last lesson we learned to start seeds: the trays, the soil, the light, the patience. Most seeds ask for nothing more than that. But some seeds are locked. They wear armor so tough that water cannot reach the living spark inside, or they carry an inner clock that refuses to tick until winter has come and gone.
These seeds are not being difficult. They are being careful. A seed that sprouts at the wrong moment dies, and the plant's whole future rides on that one small gamble. So the seed waits for proof that the moment is right: the scraping of weather, the cold of winter, the long soak of spring rain. Our work in this lesson is to provide that proof ourselves, gently and on purpose.
We will learn to nick a seed coat without harming the life inside. We will learn to give seeds a winter in the refrigerator. And we will meet four particular seeds, morning glory, sweet pea, lavender, and parsley, each with its own reason for sleeping in.
Sharp tools and hot water appear in this lesson, so read the safety notes with care before you begin. There is no hurry here. A seed that has waited all winter can wait for you to be ready.
— Professor Beryl Fernfoot, Herbology Greenhouse • Master Herbalist • Head of House Oriens
The line beneath the map is our road: every stop a place where the knowledge of plants changed, every lesson a step along it.
Lesson Objectives
By the end of this lesson, you will be able to:
- Explain why some seeds remain dormant and name the two main types of seed dormancy.
- Describe three scarification methods and match each to the seeds it suits.
- Scarify hard-coated seeds safely using nicking, sandpaper, or hot-water treatment.
- Perform cold stratification in a refrigerator, with correct temperature, moisture, and timing.
- Identify which common garden seeds need scarification, stratification, or simple soaking, and why.
- Record a seed-treatment experiment in your grow ledger with clear before-and-after observations.
Reading this lesson: ★ marks the passages to remember. They return on the unit quiz and the class test. Check in questions ask the material back as you go; answer them in your workbook when you meet them.
Working this lesson: Your assignment packet is the first download on this page. Work in it as the lesson moves along, answering each assignment as its subject is taught — or read the lesson through for your notes and take the assignments as homework afterward. Both are proper ways to sit this class. Signposts in the reading tell you where each assignment belongs. Written answers are short answers in your own words; a few honest lines are worth more than a filled page.
Your Assignment Packet
This lesson's assignments live in its packet: the Lexicon Handout (every term, course terms marked ◆), Materials, Guided Practice, the Assignment Manual with its answer key for self-checking, the Reflection Questions, and the Workbook Checklist. Download the packet before you begin and keep it beside you as you read.
Why Some Seeds Sleep
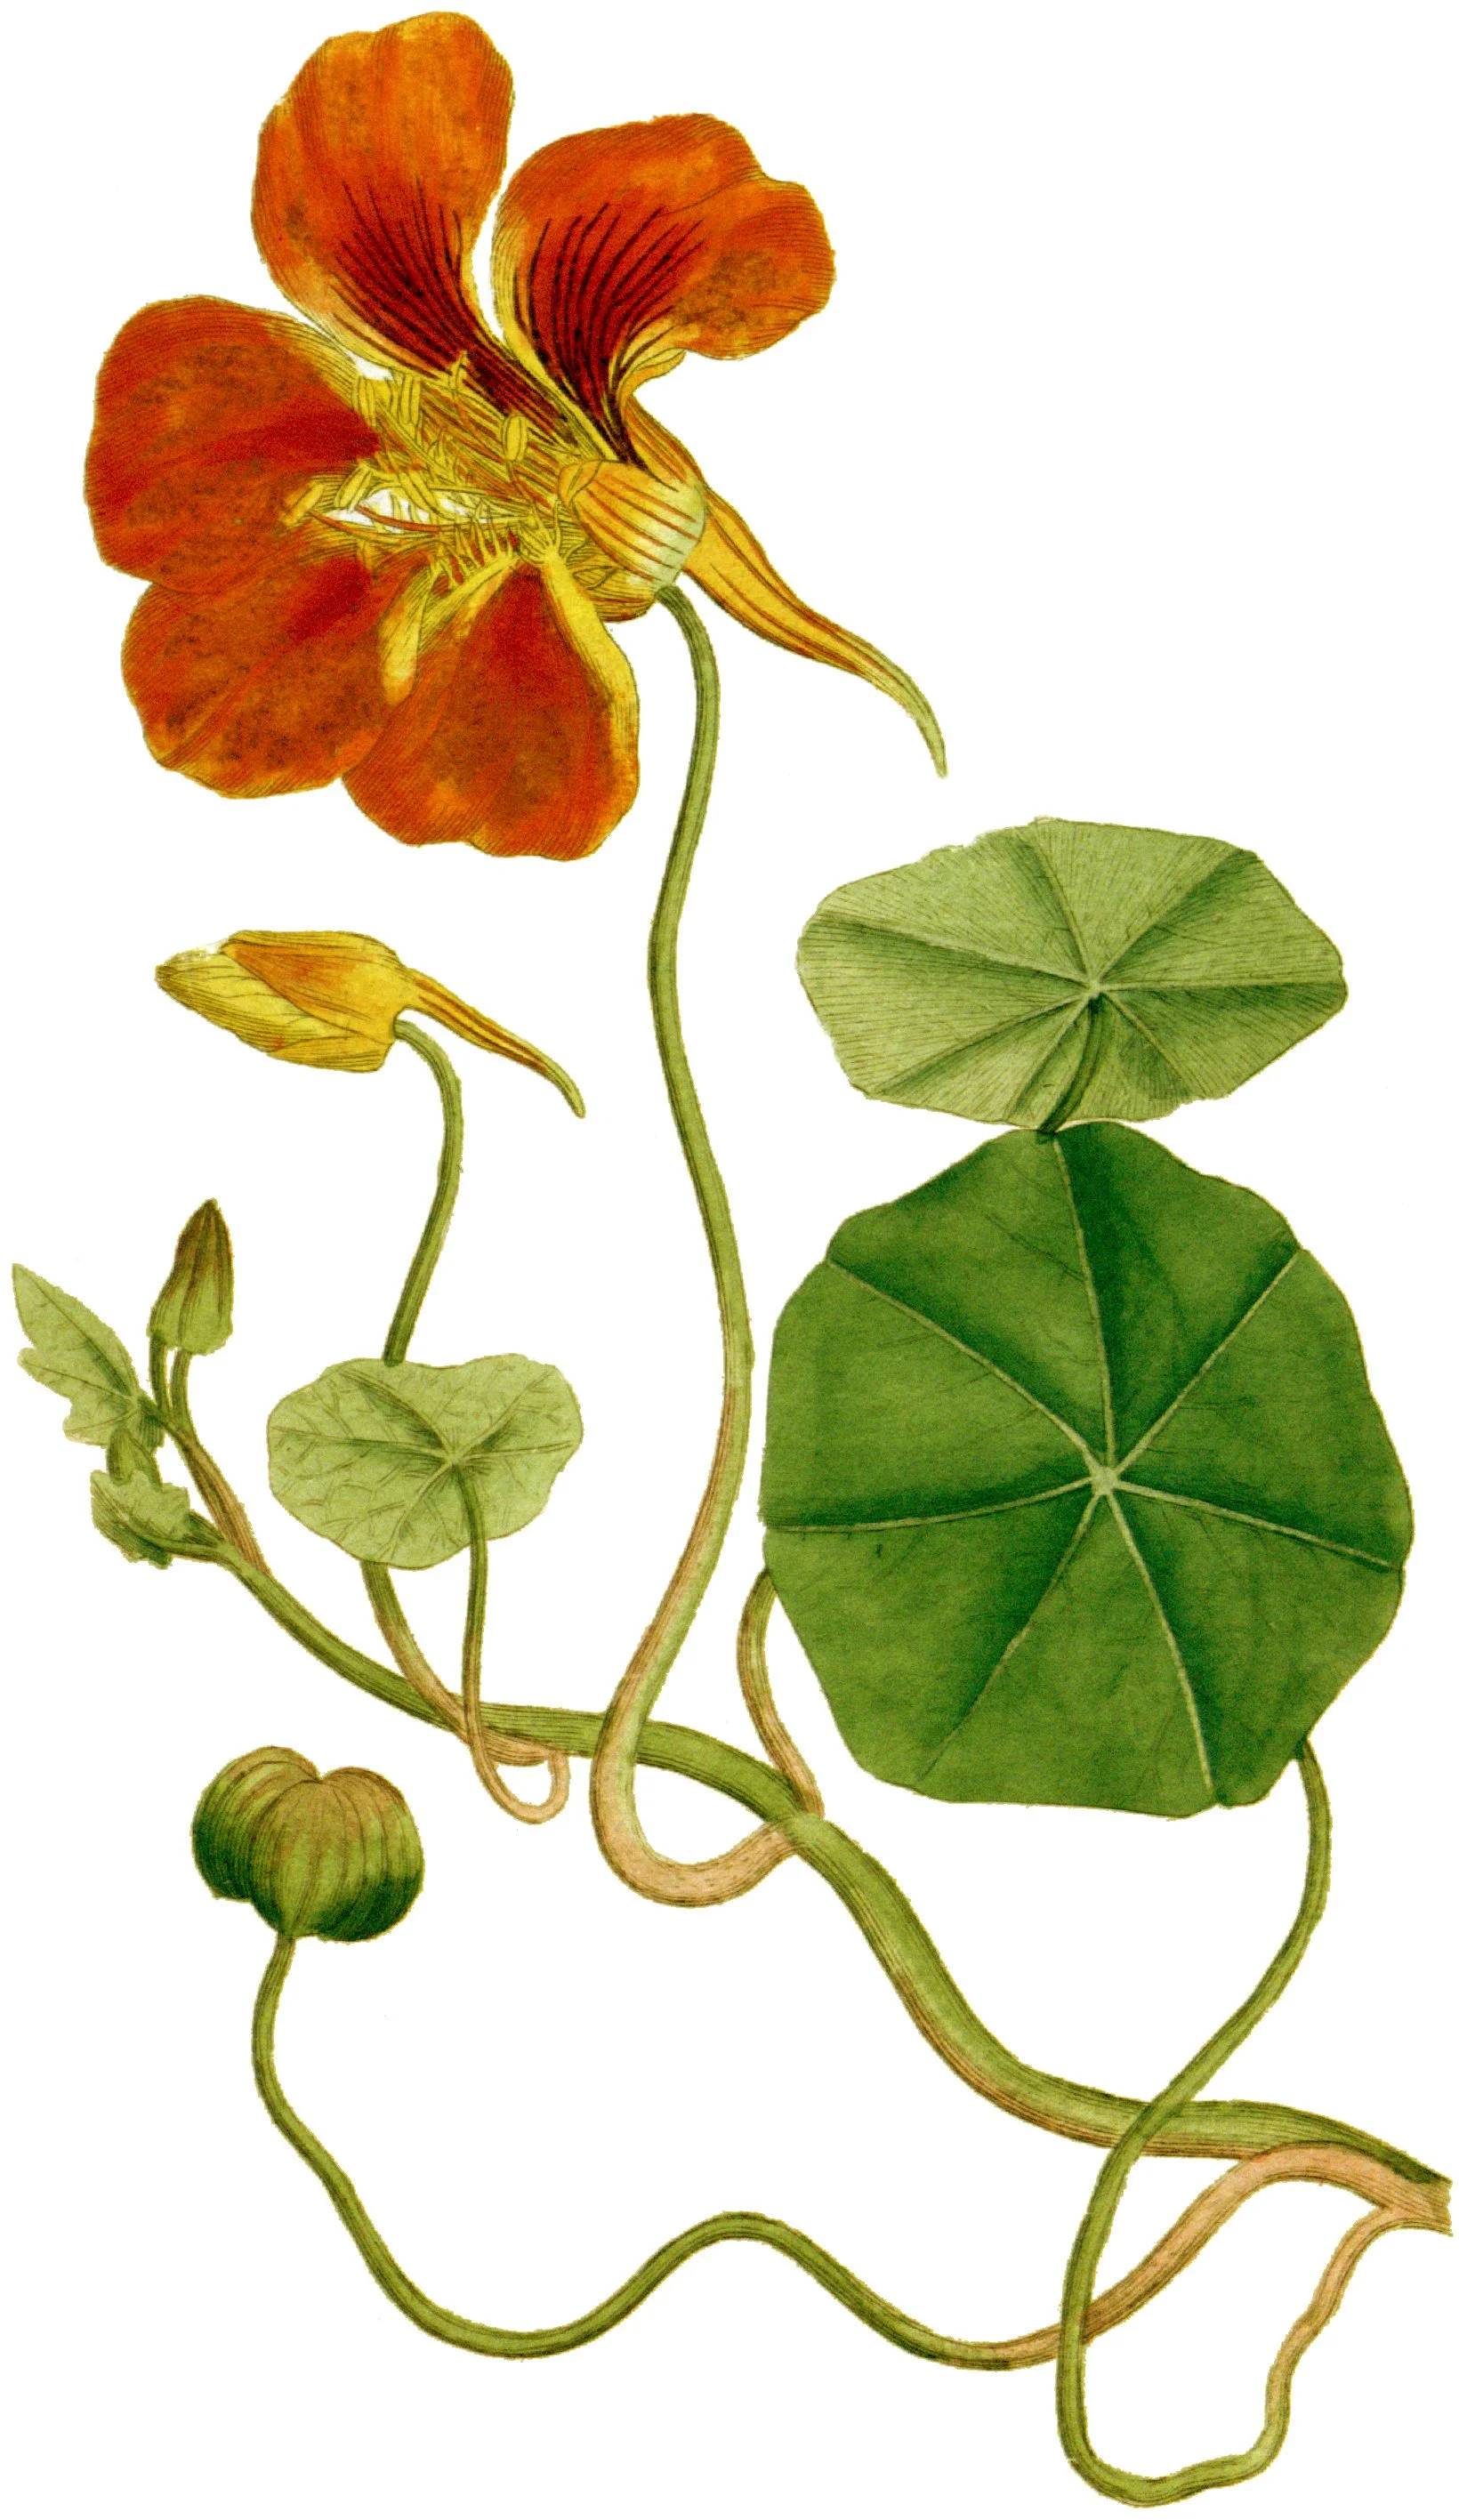
Nasturtium (Tropaeolum majus), Curtis's Botanical Magazine, plate 23, 1787. The lesson names the nasturtium among its armor-wearers: the wrinkled green fruit at the lower left ripens into a hard-coated seed that water cannot easily enter. Its treatment matches its lock — hot water to soften the coat, then the long soak, then sowing while the doorway is still open.
Plate by Sydenham Edwards for William Curtis, The Botanical Magazine, Vol. 1, plate 23 (1787), via the Biodiversity Heritage Library / Internet Archive. Public domain.
A seed is a plant waiting for its moment. Inside every seed sits an embryo, a tiny pre-formed plant, packed with enough stored food to begin growing. But beginning is the most dangerous thing a plant ever does. A seedling cannot run from frost or drought. So many seeds have evolved locks, and they only open when conditions prove themselves safe.
Gardeners group these locks into two kinds of dormancy.
★ Physical dormancy lives in the seed coat. The coat is hard, waterproof, and nearly airtight. Water cannot get in, gases cannot get in, and the embryo sits dry and waiting no matter how warm or wet the soil becomes. In nature, this armor is worn down slowly: by seasons of rain and frost, by tumbling in soil, by passing through the digestive tract of a bird or animal. Morning glories wear this kind of armor. So do sweet peas, lupines, and nasturtiums.
Check in: A morning glory seed sits in warm, wet soil and does nothing. Which lock is holding it, and what is the coat keeping out?
★ Physiological dormancy lives inside the seed. The coat may let water through perfectly well, but chemical signals inside the embryo say "not yet." These seeds are waiting for a season, not a scratch. Most commonly they are waiting for winter: a long stretch of cold, damp conditions that tells them the freezing months have passed and spring is truly coming. Lavender carries this kind of sleepiness. So do many native wildflowers, columbine, milkweed, and echinacea.
Check in: Lavender's coat lets water through, yet the seed still will not sprout. What is it waiting for instead of a scratch?
Some seeds carry both locks at once. They need their coat weakened first, then their cold winter. Gardeners call this double dormancy, and it is a good reminder to always read the seed packet. The packet will usually tell you what a seed needs. When it does not, a quick search for the plant's name plus "seed treatment" will.
Neither kind of dormancy is a flaw. It is timing. Our job is to give the seed the signal it is waiting for.
❦ In your workbook: record why some seeds sleep in your own way — the two locks, physical and physiological, and the seeds that wear each — copy, sketch, or note what matters.
Reading the Seed Packet
Before you reach for any tool, read the packet. Seed companies print the essentials on the back: sowing depth, spacing, days to germination, and any special treatment. Look for words like "scarify," "nick," "soak," "stratify," or "chill." These are instructions, not suggestions.
Three habits will serve you well for the rest of your gardening life:
- Read before you sow. A seed that needs six weeks of cold will not forgive being planted the week you bought it.
- Plan backward from planting day. If lavender needs four weeks in the refrigerator, count back four weeks from your last frost date and start there.
- When the packet is silent, research. A packet that says nothing about treatment usually means none is needed. But for unfamiliar or wild-collected seeds, look the species up before assuming.
Your grow ledger deserves a seed page for every variety you start: the name, the source, the date, the treatment given, and later, the germination results. Over the years this becomes one of the most valuable records a gardener owns.
❦ In your workbook: record reading the seed packet in your own way — the treatment words to watch for, and the three habits — copy, sketch, or note what matters.
Scarification: Breaking the Armor
★ Scarification means weakening the seed coat just enough to let water in. The key word is enough. You are making a doorway, not demolishing the house. Every method below shares one rule: open the coat without injuring the embryo inside. A damaged embryo will not grow.
Check in: Scarification makes a doorway, not a demolition. What exactly must the opening let in, and what must it never injure?
Nicking. For medium to large hard-coated seeds, take a nail file, an emery board, or a pair of nail clippers and make a small nick or scratch in the coat. Morning glory seeds respond beautifully to this: file one spot until you see a hint of the paler inner layer, then stop. Work on the rounded side of the seed, away from any visible hilum (the scar where the seed attached to its pod), because the embryo's root tip sits near that end. A tiny opening is all that is needed.
Sandpaper. Rub larger seeds lightly against medium-grit sandpaper until the coat dulls and thins in one spot. For small hard-coated seeds, tuck several between two sheets of sandpaper and rub the sheets gently together. Stop as soon as the surface looks scuffed. You are aiming for dull, not deeply pitted.
Hot-water treatment. Place the seeds in a cup or bowl. Have an adult pour hot water over them, water that has been heated but is no longer boiling, and let the seeds soak as the water cools to room temperature, usually overnight. The heat softens the coat; the long soak lets water begin its work. This method suits sweet peas, lupines, nasturtiums, and beans. After the soak, sow the seeds promptly.
★ Two warnings belong with every method. First, scarified seeds must be sown right away. Once the coat is opened, the seed begins to dry out and lose viability quickly. Scarify only what you are ready to plant. Second, morning glory seeds are toxic. Keep seed packets, soaking seeds, and planted trays away from children and pets, and wash your hands after handling them.
Check in: You have nicked more seeds than you can plant today. What does this lesson say to do — and why can the extras not simply wait in a jar?
Scarification is not always required. Many hard-coated seeds will eventually sprout without it, but germination will be slower and far less even. If your growing season is short, scarification is the difference between a full stand of seedlings and a half-empty tray.
❦ In your workbook: record scarification in your own way — nicking, sandpaper, and hot water, and the two warnings that belong with every method — copy, sketch, or note what matters.
In your packet: Exercise I — The Scarify-and-Sow Experiment ⚒ begins here. Work it now, or mark the place and take it as homework — your choice.
Stratification: Faking Winter
Stratification means giving seeds the seasonal treatment they are waiting for. Cold stratification, the common kind, recreates winter: a long stretch of cold, damp conditions that tells a physiologically dormant seed that spring has come.
The refrigerator method is simple and reliable:
- Dampen a paper towel or coffee filter. It should be moist, not dripping.
- Spread the seeds on one half, fold the towel over them, and slide it into a zip-top bag.
- Label the bag with the seed name and the date. Include the date you plan to remove them.
- Place the bag in the refrigerator, not the freezer. Aim for 35 to 40 degrees Fahrenheit (1 to 4 degrees Celsius).
- Check weekly. If the towel is drying, mist it lightly. Watch for mold; if a few seeds mold, remove them and continue.
- Leave the seeds for the recommended time, usually 4 to 12 weeks depending on the species. Lavender, for example, wakes well after about 30 days.
- Sow immediately after chilling, while the seeds are still hydrated. Do not let them dry out first.
★ Never use the freezer. Freezing temperatures damage most seeds rather than stratifying them. And never stratify dry seeds; the moisture is part of the signal. Cold alone, without dampness, does not break physiological dormancy.
Check in: A friend puts dry lavender seeds in the freezer to "stratify them faster." Name the two mistakes, from this lesson.
Warm stratification exists too: some seeds need a stretch of warm, moist conditions before their cold period, mimicking a summer followed by winter. Black cohosh is a classic example. Your seed packet or a quick reference search will tell you if a seed needs this two-season treatment.
A note on language: you met vernalization in Lesson 15, the process by which prolonged cold enables a whole plant to flower. Cold stratification is its seed-level cousin. Both are plants using winter as information. The difference is only a matter of scale: one chills a bulb or a biennial, the other chills a seed.
❦ In your workbook: record stratification in your own way — the refrigerator method step by step, and why the freezer and the dry seed both fail — copy, sketch, or note what matters.
In your packet: Exercise II — Winter in the Refrigerator ◐ begins here. Work it now, or mark the place and take it as homework — your choice.
Four Seeds, Four Stories
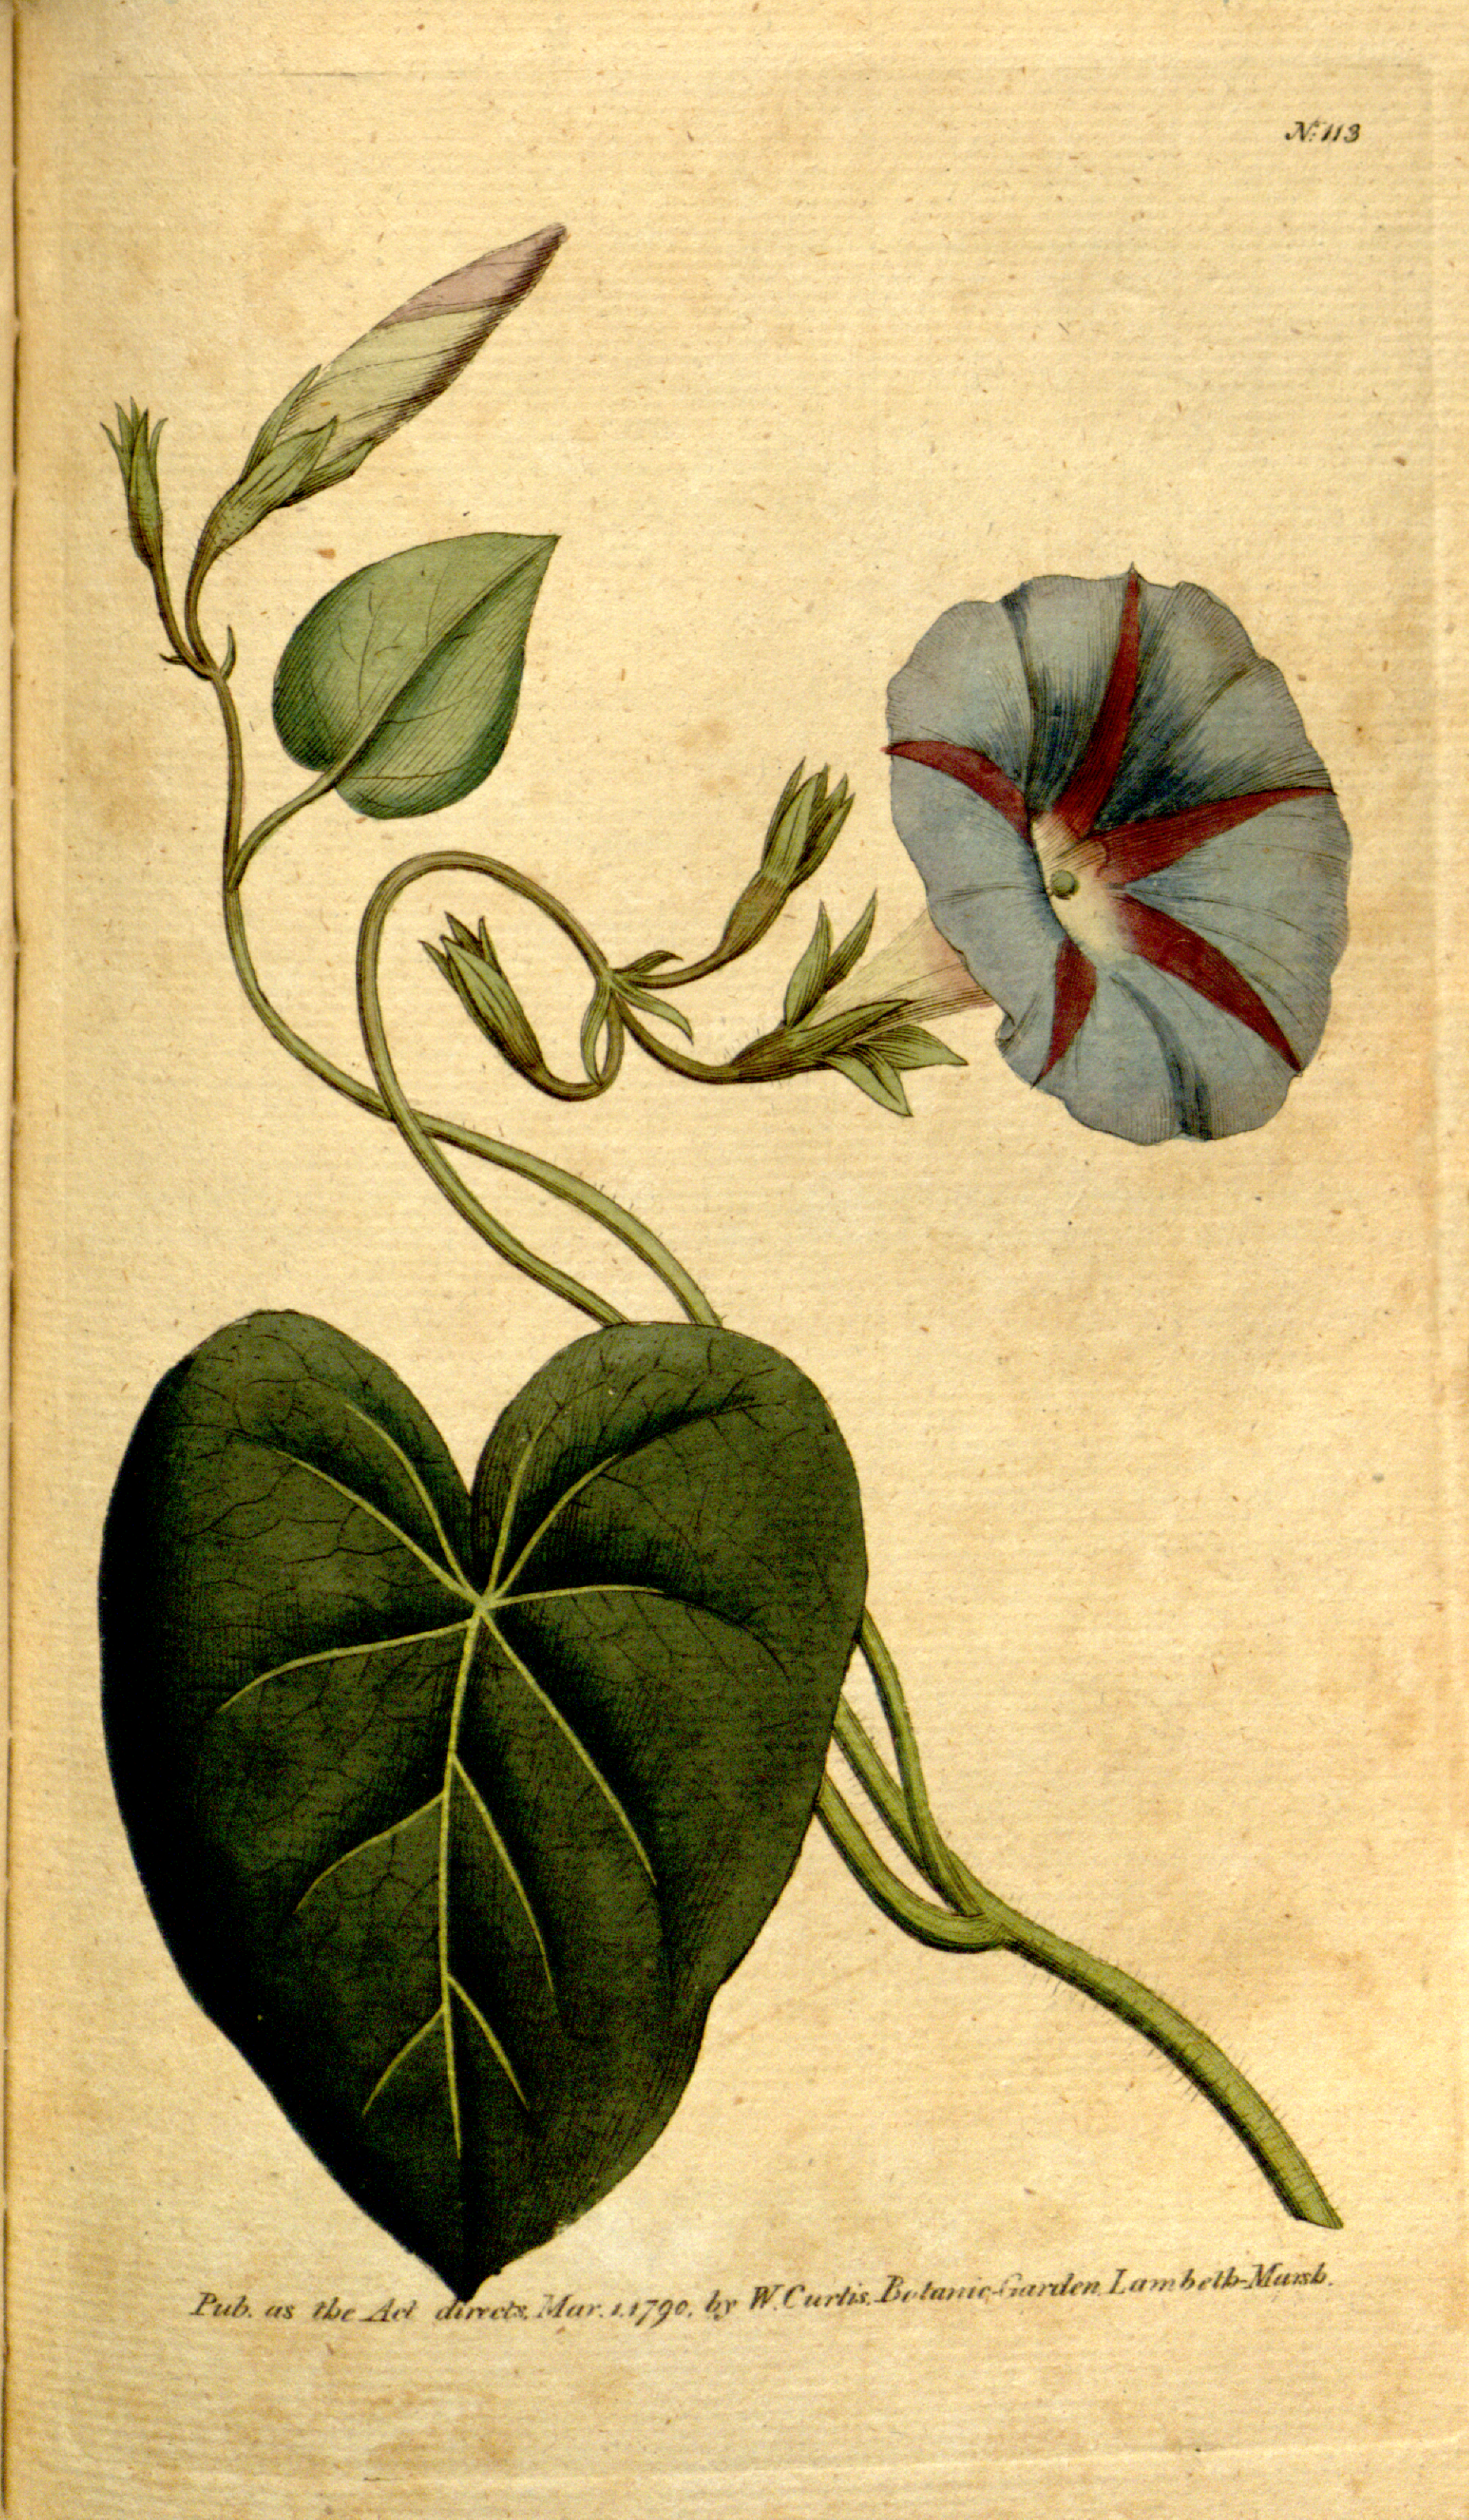
Morning glory (Ipomoea purpurea, published by Curtis as Convolvulus purpureus), Botanical Magazine plate 113, 1790. The classic scarification student: the flower is famous, but the lesson is about its seed — a coat so hard that warm, wet soil alone will not open it. Nick one spot on the rounded side, away from the hilum, soak overnight, and sow. And remember the lesson's warning that rides with this plant everywhere: the seeds are toxic — packets, soakings, and trays stay away from children and pets, and hands are washed after handling.
William Curtis, The Botanical Magazine, Vol. 4, plate 113 (1790), via the Biodiversity Heritage Library. Public domain.
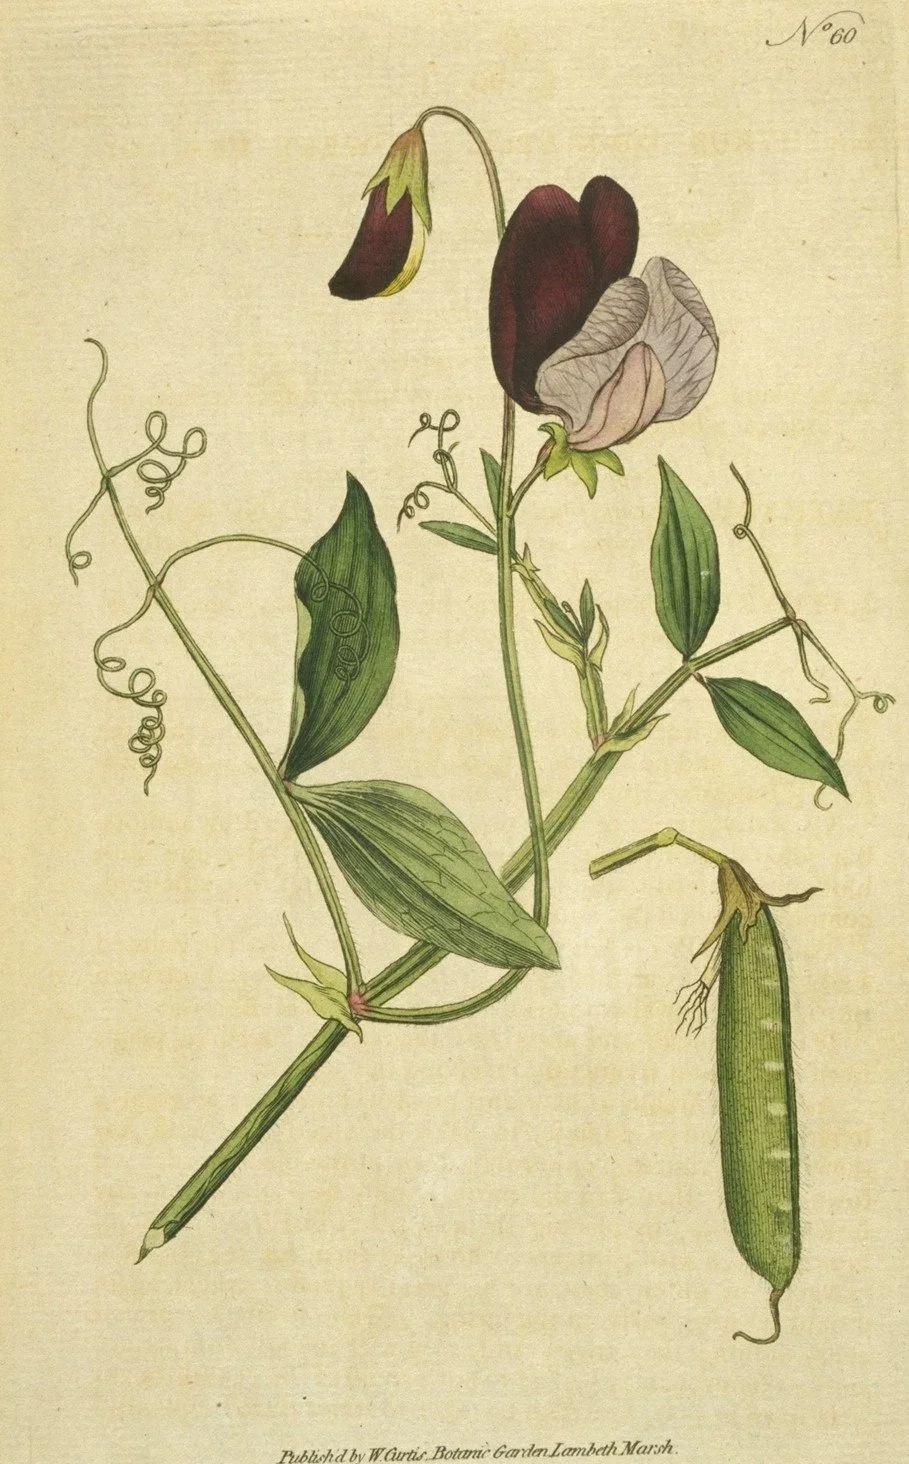
Sweet pea (Lathyrus odoratus), Botanical Magazine plate 60, 1788 — flower above, and at the lower right the pod that holds its firm-coated seeds. The lesson's treatment is the soak: twenty-four hours in warm water, or the hot-water treatment, before sowing — and early, because sweet peas dislike heat and are a spring flower, not a summer one.
William Curtis, The Botanical Magazine, plate 60 (1788). Public domain.
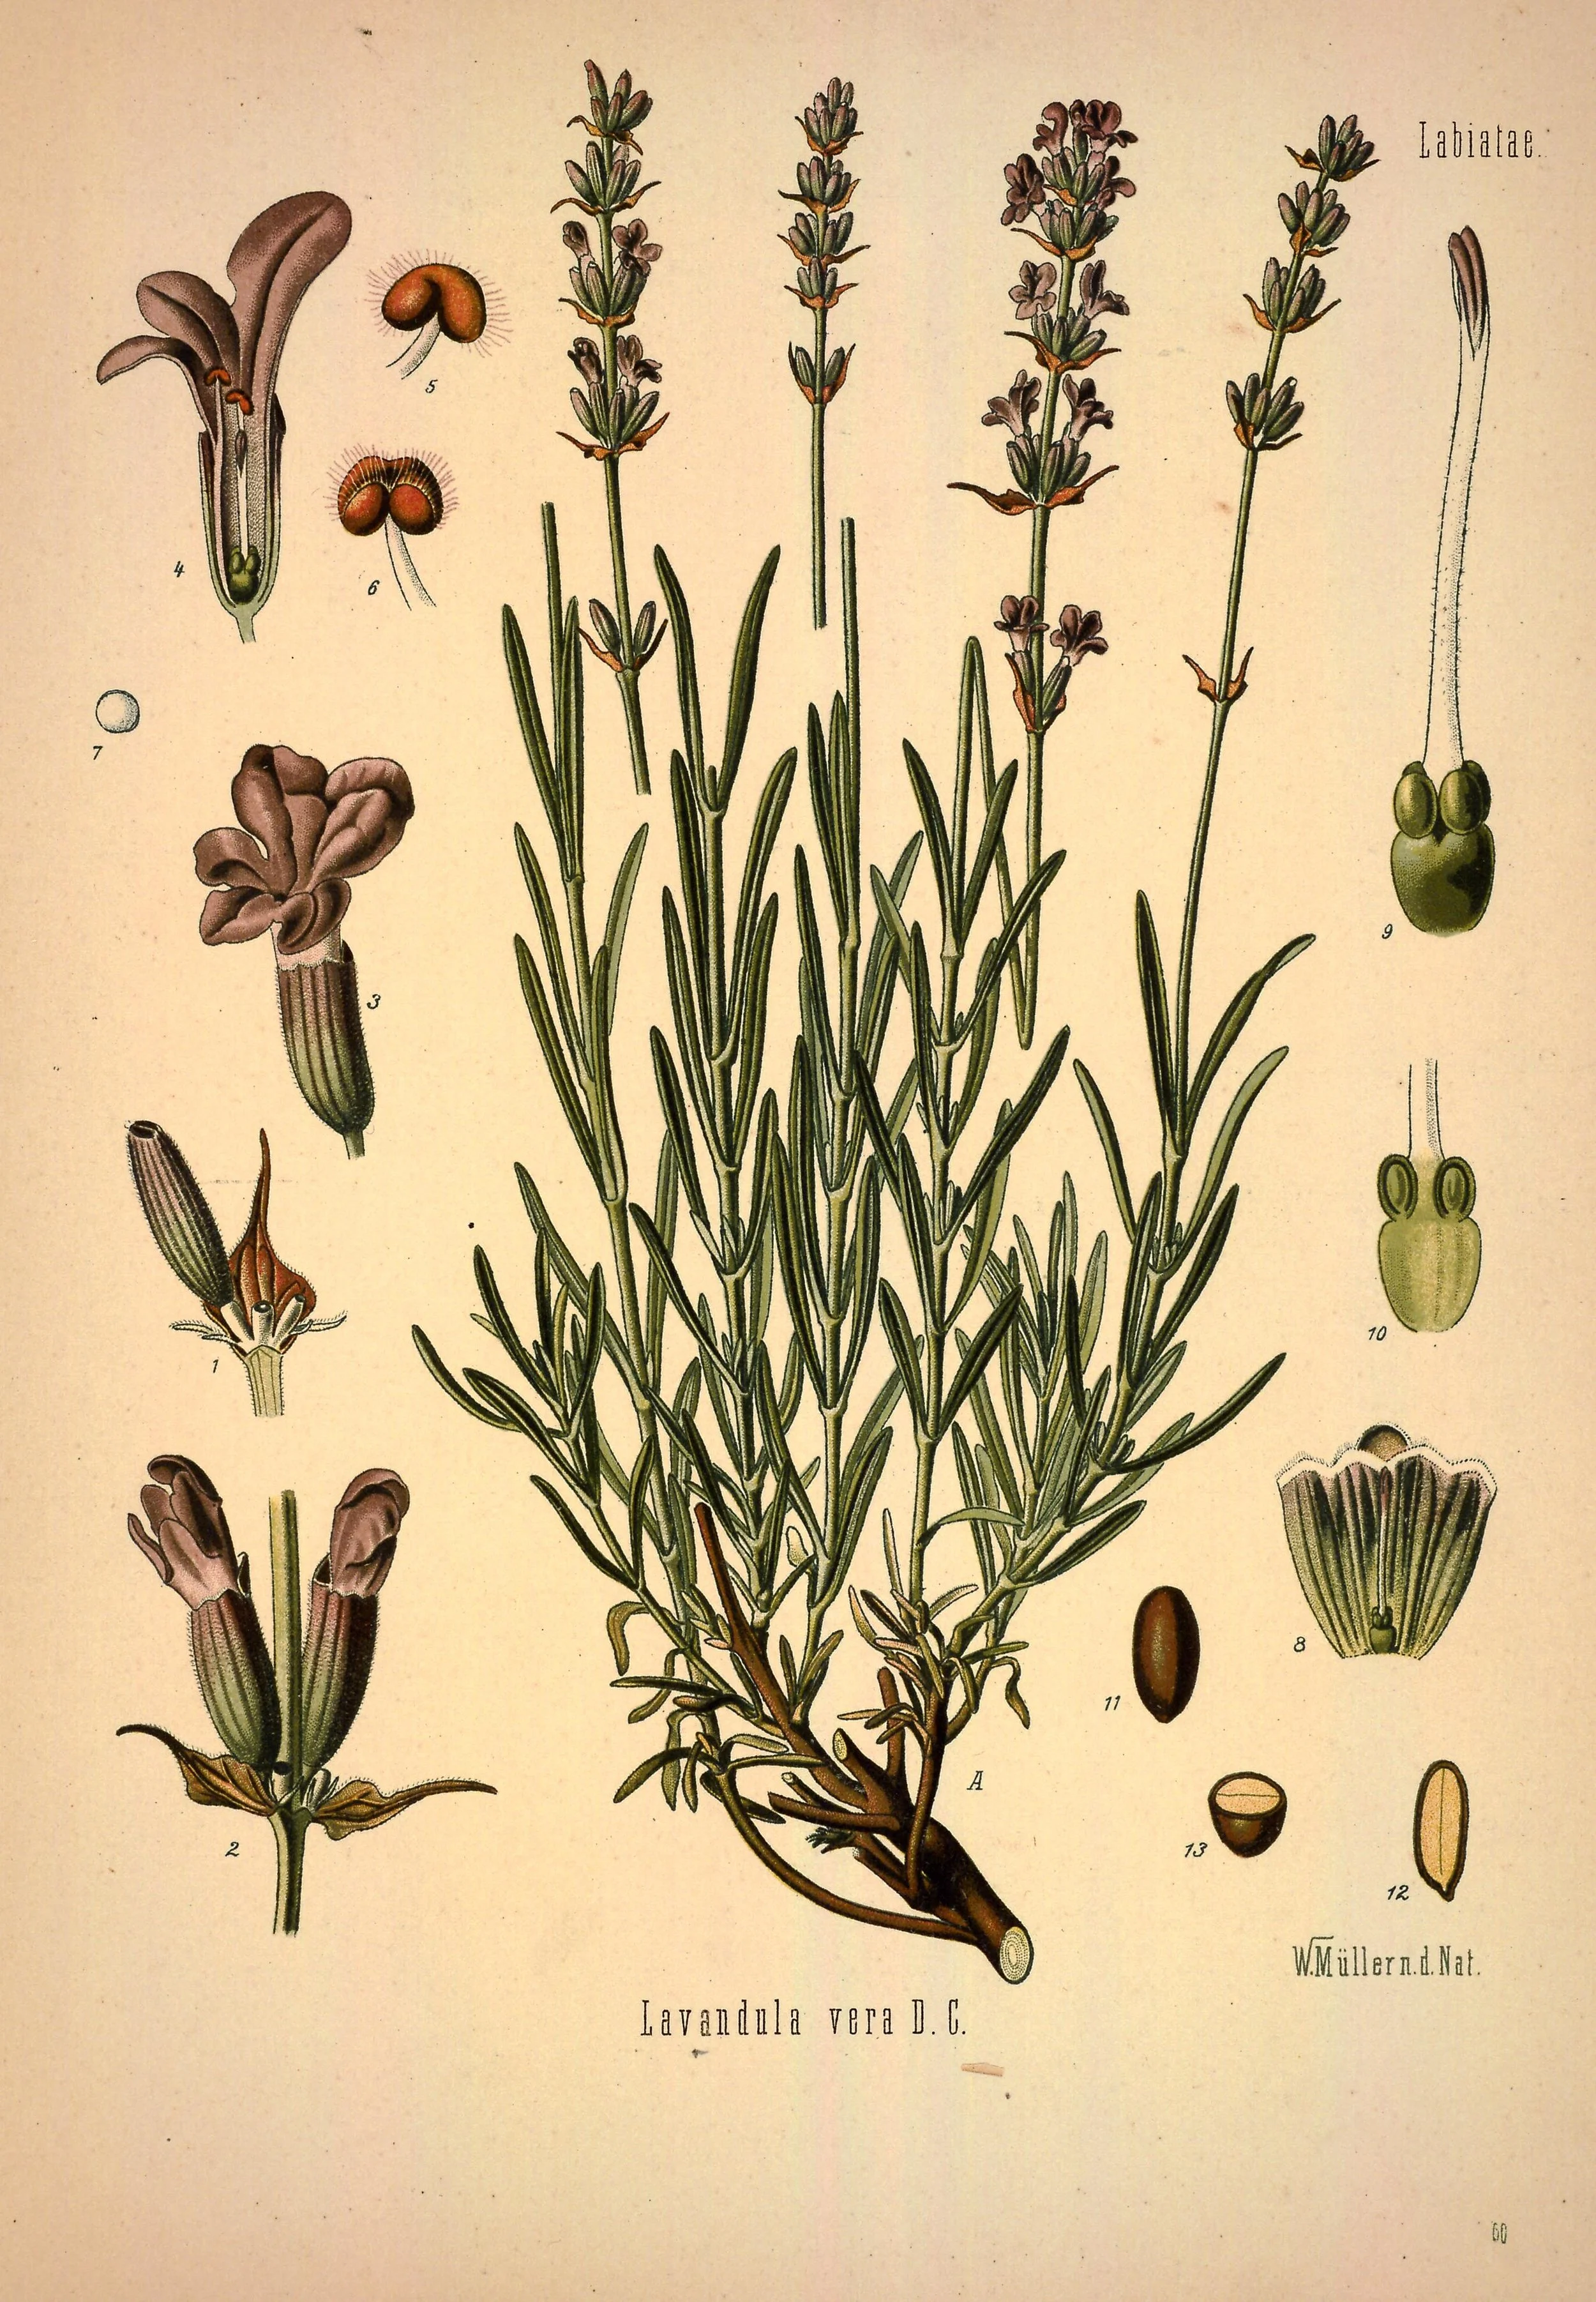
Lavender, Köhler's Medizinal-Pflanzen, plate 60 — printed with its period name, Lavandula vera, a synonym of Lavandula angustifolia. At the lower right the plate does what this lesson needs: it draws the seed itself, whole (11) and cut lengthwise (12) and across (13). Lavender's lock is not in that coat — water passes it freely. The lock is inside, a chemical "not yet" that only a winter answers: about thirty days damp in the refrigerator, then surface-sown, because lavender also needs light to germinate.
From Köhler's Medizinal-Pflanzen (1887), plate 60, via the Biodiversity Heritage Library. Public domain.
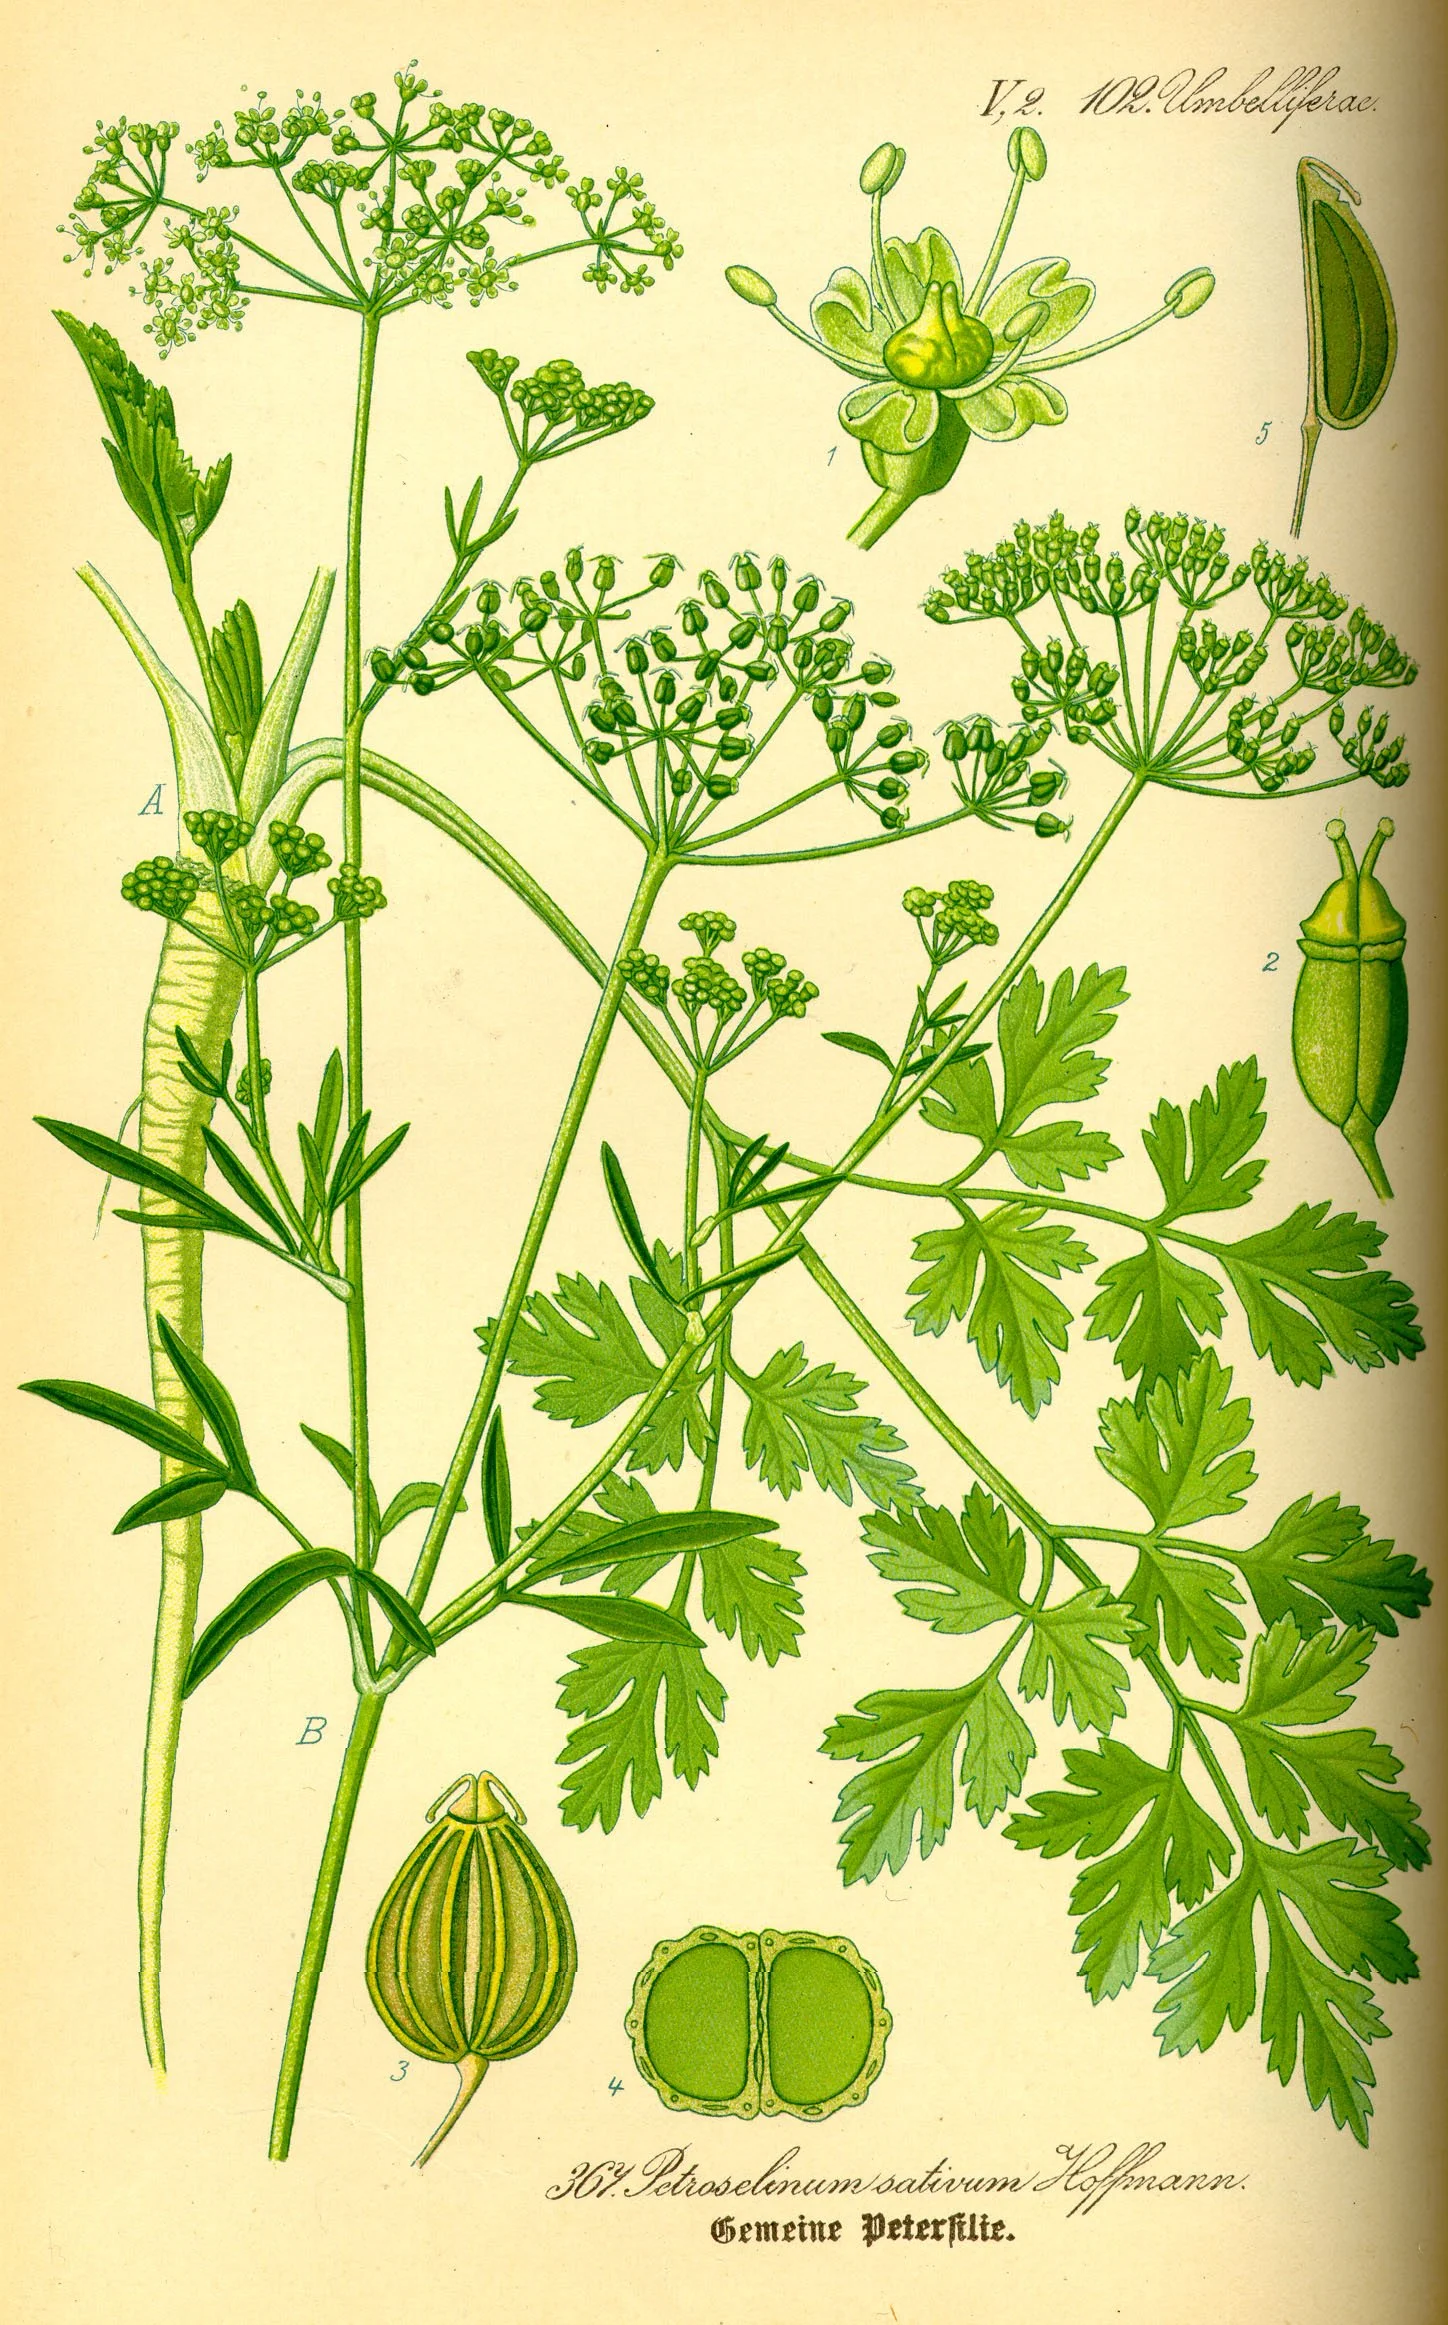
Parsley, Thomé plate 367 — printed, like the lavender, under its period name, Petroselinum sativum, a synonym of Petroselinum crispum. The "seed" a gardener sows is the ribbed fruit drawn at the foot (fig. 3), shown cut across in fig. 4. Parsley wears no lock at all: its coat carries germination inhibitors that wash away, which is why an overnight soak in warm water shortens its famous fourteen-to-twenty-eight-day wait.
Prof. Dr. Otto Wilhelm Thomé, Flora von Deutschland, Österreich und der Schweiz (1885), plate 367, via biolib.de. Public domain.
Morning glory. The classic scarification student. Its seed coat is famously hard, built to survive seasons of weather. Nick each seed with a nail file, soak overnight in room-temperature water, and sow a quarter inch deep. Expect sprouts in 4 to 7 days at 65 to 85 degrees Fahrenheit. Remember: the seeds are toxic, so this is an adult-supervised project from start to finish.
Sweet pea. A cool-season annual with a firm coat. Soak the seeds for 24 hours in warm water before sowing, or use the hot-water treatment described above. Some gardeners nick them as well. Sweet peas dislike heat, so start them early; they are a spring flower, not a summer one.
Lavender. The stratification student. Lavender seed germinates slowly and erratically, often taking two to four weeks even under good conditions, and a month of cold stratification in the refrigerator markedly improves both speed and evenness. Surface-sow the tiny seeds afterward: lavender needs light to germinate, so press them gently onto the soil surface and do not cover them.
Parsley. The soaker. Parsley is not truly dormant, just famously slow, often taking 14 to 28 days to appear. Its seed coat carries compounds that inhibit germination until they wash away. An overnight soak in warm water dissolves them and noticeably shortens the wait. Sow shallowly and keep the soil evenly moist; impatience is the only real enemy here.
★ Notice what each story teaches: the treatment always matches the lock. Armor gets nicked. Winter-sleepers get winter. Slow coats get soaked. When you meet a new seed, ask which lock it wears, and the treatment follows.
Check in: Four seeds, four stories. Match each one — morning glory, sweet pea, lavender, parsley — to its treatment, and say which lock (or no lock at all) explains it.
❦ In your workbook: record the four seeds in your own way — each seed's lock and the treatment that matches it — copy, sketch, or note what matters.
The Scarify-and-Sow Experiment
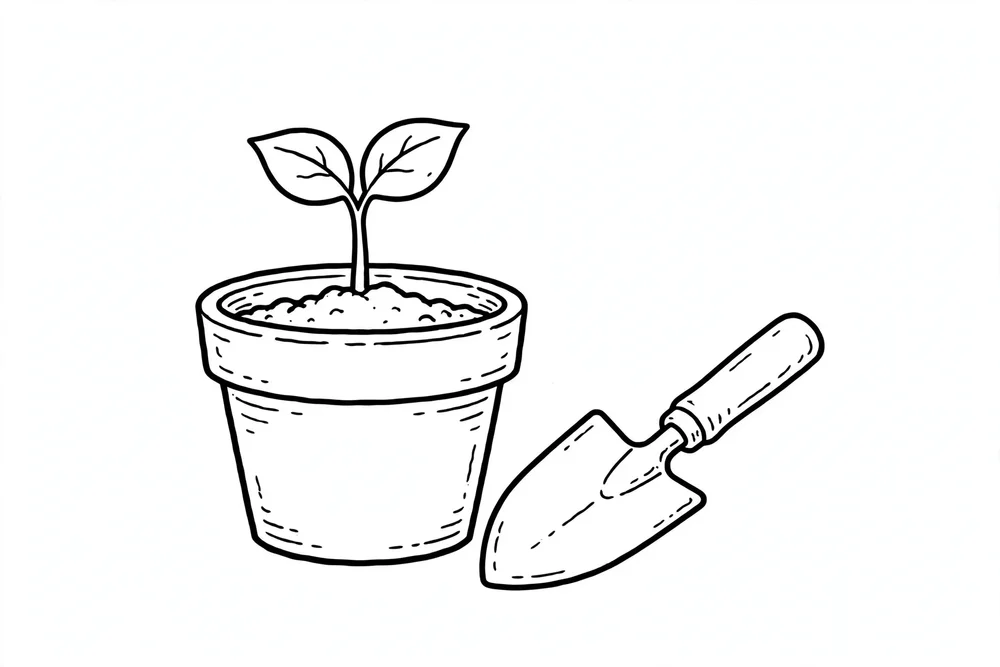
Here is where the lesson becomes a laboratory. Choose one hard-coated seed, morning glory or sweet pea are ideal, and divide your seeds into two groups. Scarify one group using the method that suits it. Leave the other group untreated. Sow both groups side by side, in the same soil, on the same day, and label them clearly.
★ Then watch. Record the date each seedling emerges. Count how many of each group germinate within two weeks. Note the difference in speed and in total success. This is a genuine experiment: one variable changed, everything else held constant, results recorded honestly.
Check in: In this experiment, what is the one variable changed — and name three things that must stay the same for both groups.
Gardeners have run versions of this trial for generations, which is how we know scarification works. Running it yourself moves the knowledge from something you read to something you have seen with your own eyes. That is the difference between information and understanding, and it is the whole reason the Greenhouse teaches by doing.
❦ In your workbook: record the scarify-and-sow experiment in your own way — the two groups, the one variable, and how the results will be counted — copy, sketch, or note what matters.
Your Familiar's Seed Trials
If your Scholar's Familiar produces seeds, or if you have started seeds for it this season, record this lesson's experiment in your grow ledger's seed pages: the variety, the treatment, the dates, and the results. Your ledger is becoming a multi-year record, and next spring you will thank yourself for today's notes.
If you do not have a Scholar's Familiar, collect a few seeds on a walk, a park seed head, a garden flower gone to seed, or a packet from a shop, and run the same scarify-and-sow comparison with those.
❦ In your workbook: record your familiar's seed trials in your own way — the variety, the treatment, the dates, and where the results will live in your ledger — copy, sketch, or note what matters.
Safety Notes
Sharp tools demand respect. When nicking seeds with a knife, file, or clippers, always cut away from your body and keep your fingers clear of the cutting edge. Hold small seeds with tweezers rather than fingertips. Younger students should have an adult do all nicking and cutting.
Hot water scalds. An adult should pour the water, and it should be hot, not boiling. Never carry a full container of hot water across the room; bring the seeds to the water instead. If skin is scalded, run cool water over it at once.
★ Morning glory seeds are toxic if eaten. Store packets out of reach of children and pets, keep soaking seeds where they cannot be mistaken for food or drink, and wash your hands after handling them. Never taste any seed you cannot positively identify.
Work in a tidy space, label everything, and file your seed-treatment notes in your grow ledger the same day. Good records are part of good safety: they tell future-you exactly what was done and when.
❦ In your workbook: record the safety notes in your own way — cutting away, tweezers not fingertips, adult-poured hot water, and the toxic morning glory — copy, sketch, or note what matters.
Guided Observation: Reading the Lock Before You Touch the Seed
This lesson's observation asks nothing of a blade or a kettle. Before any seed is nicked or chilled, the Greenhouse reads it: the packet first, the coat second, the lock third. Work through the four seeds of this lesson on paper and in the hand, and let the treatments choose themselves.
You will need:
- the back of a seed packet (any packet you own, or the four seed stories in this lesson worked from the page)
- a few hard-coated seeds to look at closely, if you have them — morning glory or sweet pea are ideal (wash your hands after handling morning glory seeds)
- your grow ledger and a pencil
Read the packet first. Seed companies print the essentials on the back: sowing depth, spacing, days to germination, and any special treatment. Look for words like "scarify," "nick," "soak," "stratify," or "chill." These are instructions, not suggestions.
Examine the coat. Hold a hard-coated seed and look for the hilum, the scar where the seed attached to its pod. The embryo's root tip sits near that end, which is why nicking is done on the rounded side, away from the hilum. Note how hard and unyielding the coat feels: that armor is the physical lock itself.
Name each seed's lock. From this lesson's four stories, decide for each seed which lock it wears — armor, winter-sleep, slow coat, or no lock at all — and write the treatment that matches it beside the name: morning glory, sweet pea, lavender, parsley.
Plan backward. If a seed needs four weeks in the refrigerator, count back four weeks from your last frost date and start there. Write both dates — the day the chilling starts and the day it ends — on the seed page of your grow ledger.
Consider:
- Which of the four seeds is not truly dormant at all, and what is it waiting for instead?
- Why does the nick belong on the rounded side of the seed, away from the hilum?
- A packet says nothing about treatment. What do you assume, and when would you research instead of assuming?
No seeds of your own? Work the whole observation from this lesson's pages: the four stories carry every fact the observation asks for, and a shop packet's back — read in the shop, with the packet returned to its rack — serves for the packet step. The reading skill is identical; only the ownership differs.
Materials
Required (Level One — household items)
- Seeds: one packet of morning glory or sweet pea seeds for scarification; one packet of lavender seeds for stratification; one packet of parsley seeds for soaking.
- A nail file, emery board, or nail clippers: for nicking hard seed coats. Medium-grit sandpaper also works.
- Tweezers: for holding small seeds steady while nicking.
- A cup or small bowl: for the hot-water soak and overnight soaking.
- Paper towels or coffee filters and zip-top bags: for cold stratification in the refrigerator.
- A marker: for labeling bags and pots with seed names and dates.
- Small pots and seed-starting mix: for sowing treated seeds.
- Your grow ledger: for the seed-treatment log.
Suggested (Level Two — historically closer)
- A triangular file: the traditional tool for nicking hard seed coats by hand.
- Clay pots and a garden journal: dated entries in the style of a nineteenth-century seed trial log.
- A small glass jar with a loose lid: for stratification in damp sand, the older method before zip-top bags.
Safety notes: Sharp tools: always cut away from your body; hold small seeds with tweezers, not fingertips. Younger students: an adult does all nicking and cutting. Hot water: an adult pours; water should be hot, not boiling. Bring the seeds to the water, never carry hot water across the room. Cool running water at once for any scald. Morning glory seeds are toxic if eaten. Keep packets, soaking seeds, and trays away from children and pets; wash hands after handling. Never taste any seed you cannot positively identify.
Reflection Questions
Answer the following questions in your workbook.
- Why is seed dormancy useful to the plant? What would happen to a morning glory population if every seed sprouted the moment it hit the ground in autumn?
- Scarification and stratification both "wake" seeds, but they address different locks. Explain the difference in your own words, using one example plant for each.
- Why must scarified seeds be sown promptly? What is happening inside the seed once the coat is opened?
- A friend soaks morning glory seeds in boiling water "to really soften them." What has gone wrong, and what would you advise instead?
- How does keeping a seed-treatment log change the way you garden next year?
Workbook Checklist — Lesson 18
In my workbook I have:
- ☐ explained the two kinds of dormancy — physical armor and physiological winter-waiting — and named double dormancy
- ☐ described the three scarification methods — nicking, sandpaper, and hot water — and matched each to the seeds it suits
- ☐ kept the safety notes: cut away from the body, tweezers not fingertips, an adult pours hot (not boiling) water, morning glory seeds are toxic and hands are washed
- ☐ run the Scarify-and-Sow Experiment: two groups, one variable changed, emergence dates and the two-week count recorded honestly
- ☐ set up cold stratification correctly: seeds damp not dry, refrigerator not freezer, 35 to 40 degrees Fahrenheit, bag labeled with both dates
- ☐ matched the four seeds to their treatments: morning glory nicked, sweet pea soaked, lavender chilled and surface-sown, parsley soaked
- ☐ recorded the seed-treatment experiment in my grow ledger with clear before-and-after observations
☐ Lesson completed Date: ___ Signature: ___
The Professor's Closing Note
You now hold two of the gardener's oldest keys. Scarification opens the armor. Stratification delivers the winter. Between them, they wake nearly every sleeping seed a home gardener will meet.
Use them thoughtfully. Not every seed needs a key, and a seed that wakes on its own was never locked at all. The skill is not in the nicking or the chilling. The skill is in knowing which seed needs what, and that knowledge comes from reading, from asking, and from the patient record-keeping you are building in your ledger.
Next we turn from seeds to stems: vegetative propagation, the art of making new plants without seeds at all. But that is another lesson. For now, sow what you have scarified, tuck your lavender into the refrigerator, and let winter do its quiet work.
The greenhouse doors stand open. Wake them gently.
— Professor Beryl Fernfoot, Herbology Greenhouse • Master Herbalist • Head of House Oriens
Cross-Class Connections

Celestial Studies · Unit I, Lesson 3 — The Tilted Year: Why We Have Seasons
Come up to the tower when your seeds are tucked into their pretend winter, scholars, and I will show you the real one. The cold your refrigerator imitates is the Earth's own tilt at work — the same turning year your lavender evolved to wait for. Learn to fake the season in the Greenhouse; then come and learn why there is a season to fake.
Further Reading & Sources
- How to Scarify Seeds: Pro Techniques to Speed Up Germination — Gardening Know How. Mechanical and hot-water methods with plant-specific notes.
- Ways to Prepare Hard-Coated Seeds for Planting — Horticulture Magazine. Mechanical vs. hot-water scarification compared.
- Persnickety Seeds — Garden.org (National Gardening Association). Soaking, scarifying, and the cold treatment in one practical guide.
- Morning Glory Seed Propagation — Gardening Know How. Nicking, soaking, sowing depth, and the toxicity warning.
- Understanding Cold Stratification: Why Some Native Seeds Need Winter — Native Seed Victoria. DIY fridge method with species timing examples.
- Cold Stratification & the Seeds That Love It — The Art of Doing Stuff. A friendly table of plants and chill times, lavender included.
Browse the Herbology shelf in the school Library for readable editions of these works.
Plants from this lesson stand in the Materia Botanica, the school's shared archive — each kept with its lessons, its keepings, and its cautions. This lesson's company:
Morning gloryBlack CohoshColumbineEchinaceaLupine The whole Materia BotanicaPROFESSOR BERYL FERNFOOT · HERBOLOGY GREENHOUSE
Submit your work for this lesson using the form below.
CONTINUE IN THE HERBOLOGY GREENHOUSE
← Previous · Lesson 17: Seed Starting Basics Next · Lesson 19: Vegetative Propagation: Stem Cuttings →
Unit III — Propagation, Pruning & Plant Stewardship Herbology Greenhouse — All 37 Lessons
The rest of Unit III: Lesson 17 · Seed Starting · Lesson 19 · Stem Cuttings · Lesson 20 · Root Division · Lesson 21 · Layering & Runners · Lesson 22 · Pruning Geometry · Lesson 23 · Selective Pruning · Lesson 24 · Pests & Disease · Lesson 25 · Repotting & Root Bound · Lesson 26 · Stewardship Project