

HERBOLOGY
Unit III · Lesson 19VEGETATIVE PROPAGATION: STEM CUTTINGS
PROFESSOR BERYL FERNFOOT
Herbology Greenhouse · Master Herbalist
Herbology · Unit III: Propagation, Pruning & Plant Stewardship · Lesson 19
Professor's Introduction

There is no hurry here, scholars,
There is a quiet miracle waiting in this lesson, and I do not use that word lightly. Take a stem from a plant you love. Place it in water, or in a pot of damp perlite, and wait. Weeks later, white threads appear where there were none. A new root system, built from nothing but stem tissue and patience. You have not planted a seed. You have persuaded a piece of a plant to become a whole plant.
Gardeners have done this for thousands of years, long before anyone knew the word auxin or understood what a meristem was. They knew it worked because they watched it work. Today you will learn both the doing and the understanding, and the understanding will make your doing better.
Choose a healthy plant for this lesson, and be gentle with it. We take cuttings as an act of multiplication, not of harm. A pruned plant, cut cleanly, grows back stronger. That is one of the kindest truths in the Greenhouse.
— Professor Beryl Fernfoot, Herbology Greenhouse • Master Herbalist • Head of House Oriens
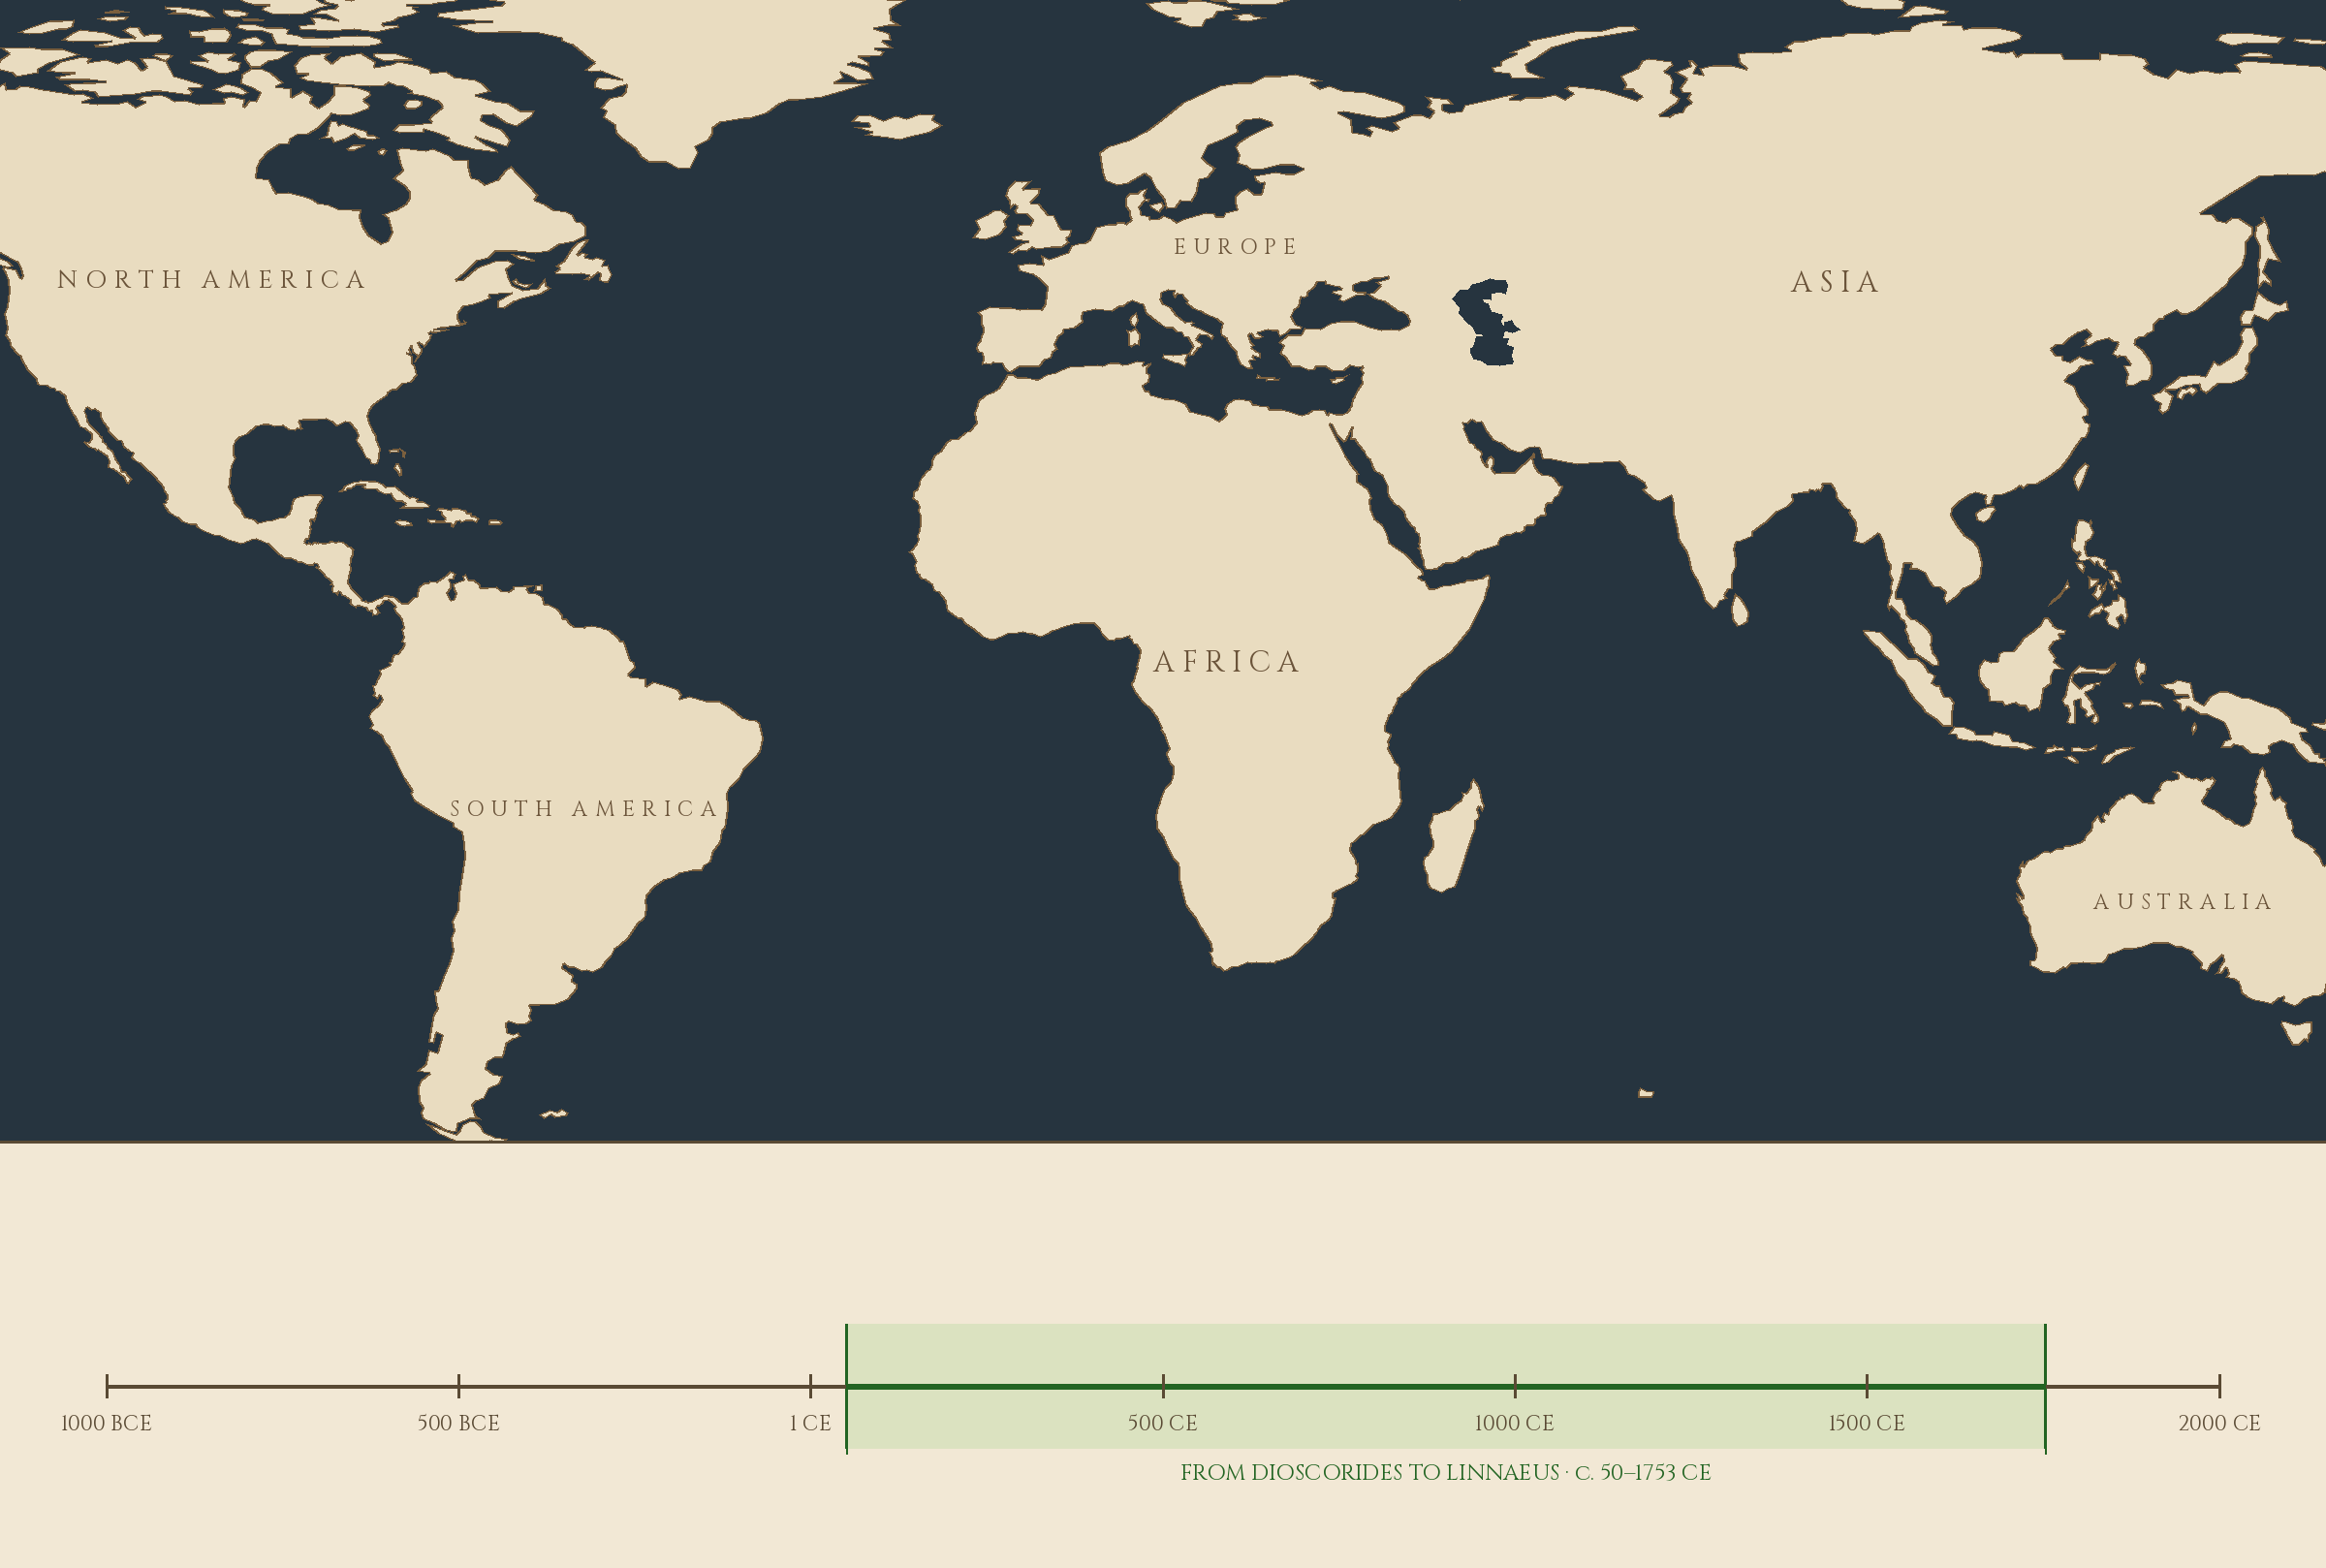
The line beneath the map is our road: every stop a place where the knowledge of plants changed, every lesson a step along it.
Lesson Objectives
By the end of this lesson, you will be able to:
- Explain how a stem cutting grows new roots, in your own words.
- Locate the nodes on a living stem and explain why cuttings are taken just below them.
- Make a clean, sharp cutting with a sterilized blade.
- Compare water propagation with propagation in a growing medium, and choose the right method for the plant.
- Set up a simple humidity dome and explain what it does for a cutting.
- Describe when a rooted cutting is ready to transplant, and how to move it safely.
- Take, tend, and transplant your own stem cuttings from your Scholar's Familiar or another plant.
Reading this lesson: ★ marks the passages to remember. They return on the unit quiz and the class test. Check in questions ask the material back as you go; answer them in your workbook when you meet them.
Working this lesson: Your assignment packet is the first download on this page. Work in it as the lesson moves along, answering each assignment as its subject is taught — or read the lesson through for your notes and take the assignments as homework afterward. Both are proper ways to sit this class. Signposts in the reading tell you where each assignment belongs. Written answers are short answers in your own words; a few honest lines are worth more than a filled page.
Your Assignment Packet
This lesson's assignments live in its packet: the Lexicon Handout (every term, course terms marked ◆), Materials, Guided Practice, the Assignment Manual with its answer key for self-checking, the Reflection Questions, and the Workbook Checklist. Download the packet before you begin and keep it beside you as you read.
The Blueprint in a Stem
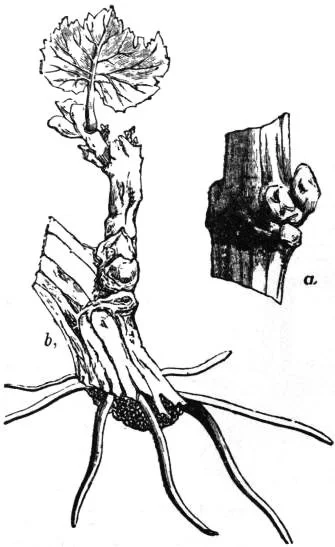
A cutting that has done the lesson's whole work: a single-eye cutting, rooted. The eye is the bud at the node (inset, enlarged); the roots spreading from the base are adventitious roots — roots that never existed before, built from stem tissue after the wound. No seed was involved, so the new plant is the parent's clone.
Encyclopaedia Britannica, 11th edition (1911), vol. 13, "Horticulture," Fig. 25. Public domain.
A single stem holds everything needed to build an entirely new plant. This is not poetry; it is anatomy. Along every stem sit small clusters of undifferentiated cells called meristems, packed into the nodes, the buds, and the growing tips. These cells have not yet decided what they will become. Given the right signals, meristem tissue near a wound can organize itself into brand-new roots, roots that never existed before, growing from stem instead of seed.
★ Botanists call these adventitious roots: roots arising from somewhere other than the seed's first root. When you take a stem cutting, you are deliberately wounding the plant in a way that triggers this ancient repair program. The cut end seals itself, a cushion of soft dividing cells called callus forms over the wound, and within that callus, in the neighborhood of the vascular tissue where hormones and sugars flow, new root initials organize and push outward. The plant is healing itself, and the healing takes the form of roots.
Check in: A cutting is wounded on purpose. What forms over the wound, and what organizes inside it?
★ This is why propagation by cuttings produces a clone. The new plant is genetically identical to the parent, because no seed and no pollination were involved. Every cutting from your mint plant is the same mint, down to the last leaf hair. Gardeners have used this fidelity for centuries to preserve the exact qualities of a beloved variety: the sweetest basil, the most vigorous coleus, the rose with the perfect scent.
See Lesson 3 for the canonical definition of Adventitious Root. Here, adventitious roots are the whole point of the lesson: the new roots your cutting must grow to survive on its own.
See Lesson 2 for the canonical definition of Node. In this lesson, the node is where you aim your blade: cut just below it, and rooting concentrates there.
❦ In your workbook: record the blueprint in a stem in your own way — meristems, callus, and roots that never existed before — copy, sketch, or note what matters.
Finding the Node
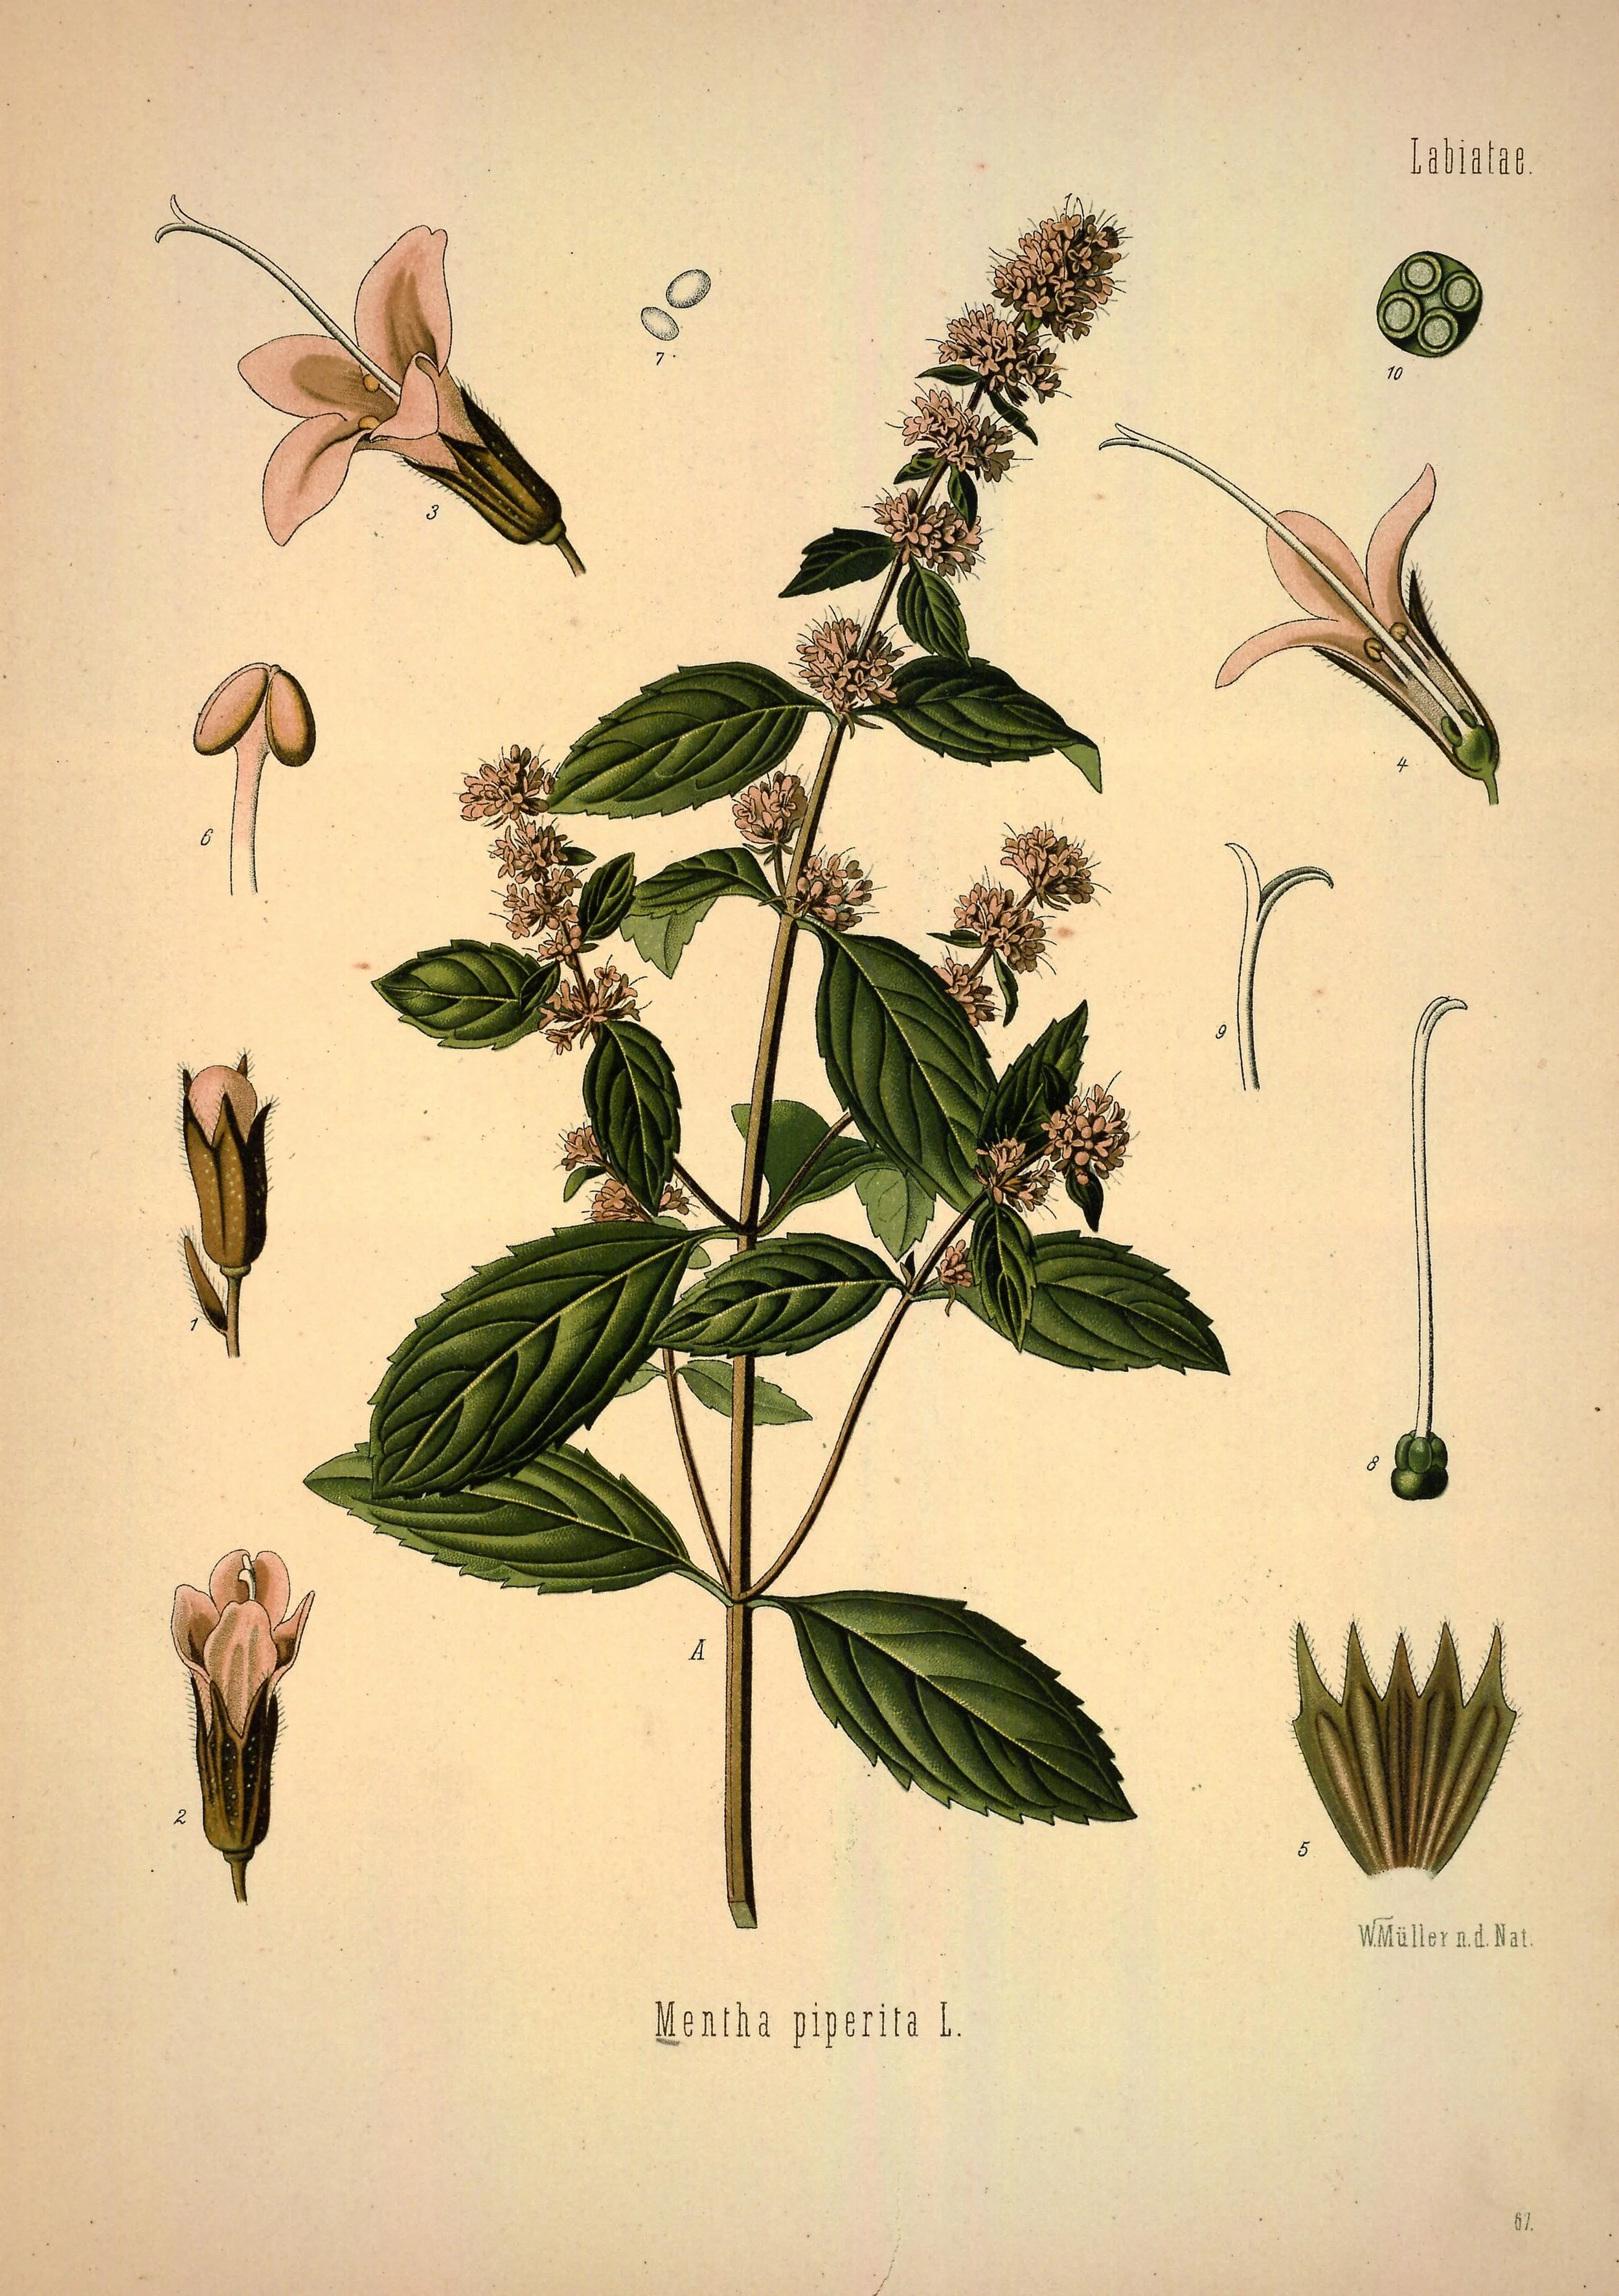
Peppermint, the lesson's practice plant, drawn node by node: every pair of opposite leaves springs from a node, and the smooth stretch between pairs is the internode. Run a finger down a living mint stem and the plate's pattern is what your finger finds — a slight swelling at each leaf pair. That node is where the blade aims. (The plate shows a flowering stem for identification; cutting material itself is taken from young, non-flowering growth, as the lesson directs.)
Franz Eugen Köhler, Köhler's Medizinal-Pflanzen (1887–1914), plate 67, via the Biodiversity Heritage Library. Public domain.
Before you cut anything, learn to find the nodes. Run your finger slowly along a stem of mint, basil, or pothos. You will feel slight swellings or joints at regular intervals, and at each one a leaf, a bud, or a leaf scar attaches. That is the node. The smooth stretch between two nodes is the internode.
★ Nodes matter for cuttings because they are where the plant concentrates its rooting machinery. The natural auxin, the plant's own rooting hormone, accumulates near nodes. Buds sit at nodes, ready to grow. When a cutting is wounded just below a node, the callus forms in exactly the tissue best equipped to turn into roots. Cuttings taken from the smooth internode between nodes can still root, but they do it more slowly and less reliably. Aim for the node.
Check in: Why does a cutting taken just below a node root more reliably than one cut from the middle of an internode?
Choose your cutting material in the cool of the morning, when stems are full of water and firm. Take cuttings from young, healthy growth, not from old woody stems and not from flowering shoots. If the only available shoot carries flower buds, pinch them off; flowers demand energy the cutting cannot spare, and they rot easily in humid propagation conditions. A good stem cutting is typically three to six inches long, with at least two or three nodes and a few healthy leaves at the top.
If you don't have a Scholar's Familiar, take your cuttings from any healthy houseplant, garden plant (with the owner's permission), or a willing neighbor's plant. The techniques are identical.
❦ In your workbook: record finding the node in your own way — the swelling, the leaf scar, and the smooth internode between — copy, sketch, or note what matters.
Professor's Mid-Lesson Note
Pause here, scholars, before you pick up any blade. I want you to understand what your hands are about to do.
You will make a wound, on purpose, in a living thing you care about. That deserves a moment of respect, and it deserves a sharp blade. A dull blade crushes and tears; a sharp blade parts the stem cleanly, and a clean wound heals faster and invites less disease. Sterilize your blade between plants. What lives harmlessly on one plant can sicken another, and cleanliness is one of the quietest forms of kindness in the Greenhouse.
Cut just below a node, at a slight angle. The angle is an old gardener's habit: it marks which end is down, so you never plant a cutting upside down, and it gives the wound a slightly larger face from which callus can form. Then remove the lower leaves, leaving two or three small leaves at the top. Every leaf you leave behind is a mouth the cutting must feed with water it cannot yet drink, so be sparing.
Work calmly. The plant is not afraid. Neither should you be.
— Professor Beryl Fernfoot, Herbology Greenhouse • Master Herbalist • Head of House Oriens
The Cut
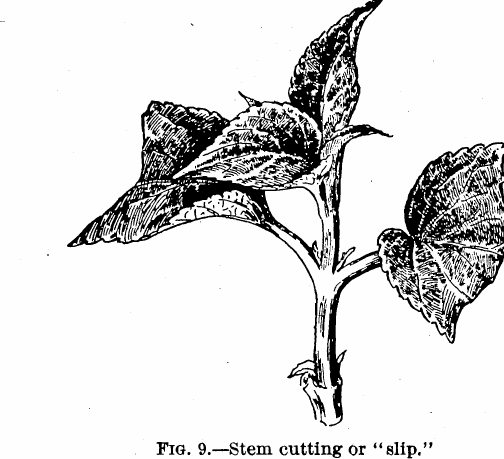
The fundamental unit of this lesson, as the USDA drew it in 1902: a stem cutting, or "slip" — a portion of stem containing nodes, with leaves kept at the top and the lower stem left bare so no leaf sits buried in water or medium to rot. The bulletin's own rule stands beside it in the lesson: reduce the leaf area, because every leaf left behind is a mouth the rootless cutting must feed.
L. C. Corbett, The Propagation of Plants, USDA Farmers' Bulletin No. 157 (1902), Fig. 9 — figure cropped from the scanned bulletin page. Public domain (U.S. Government work).
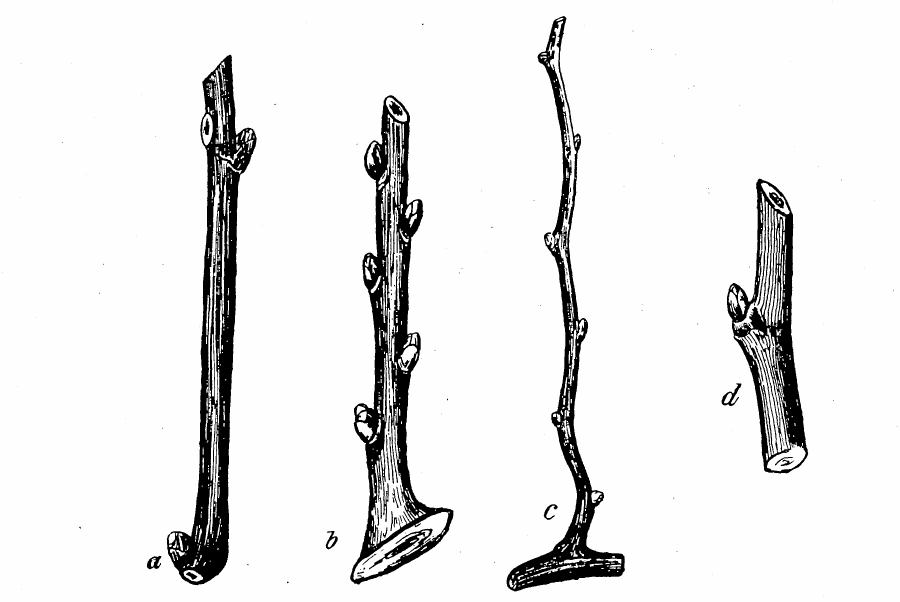
Four forms of cutting, one rule underneath them all: the simple cutting (a) is "usually cut off just below a bud, because roots develop most readily from the joints" — the bulletin's 1902 wording for what this lesson teaches about nodes and auxin. The heel (b), mallet (c), and single-eye (d) forms are the older gardener's variations for woody stock; the slanting top cut on (d) is the same angle the lesson uses to mark which end is down.
L. C. Corbett, The Propagation of Plants, USDA Farmers' Bulletin No. 157 (1902), Fig. 5 — figure cropped from the scanned bulletin page. Public domain (U.S. Government work).
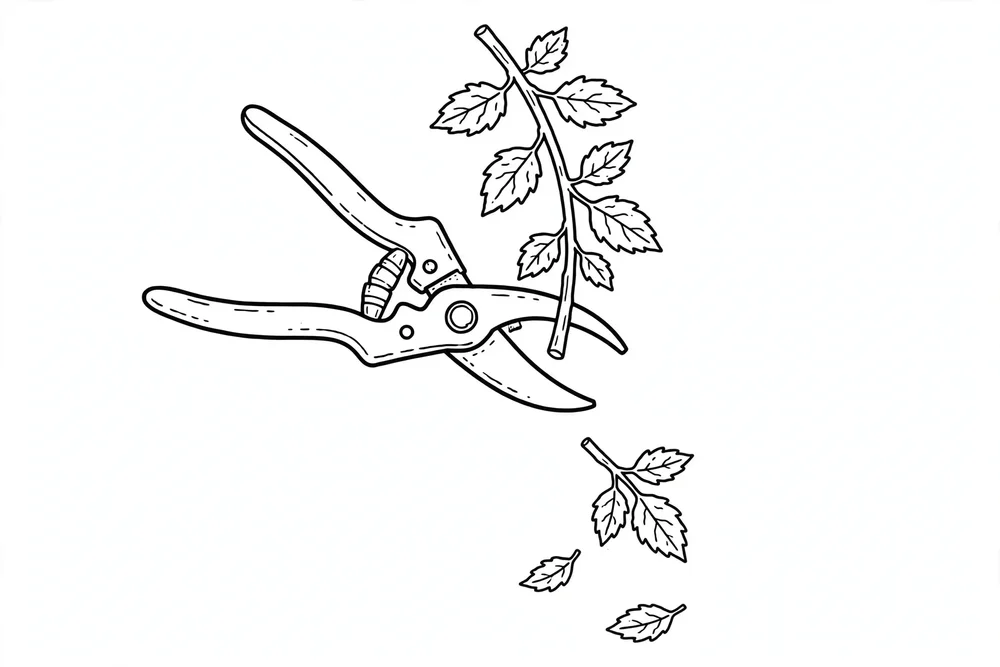
★ Use a clean, sharp blade: a craft knife, clean scissors, or hand pruners. Sterilize it before you begin and between plants, with rubbing alcohol or a brief soak in a diluted bleach solution, then rinse. This single habit prevents more propagation failures than any other.
Check in: What do you do to the blade before you begin, and again between plants — and why does that one habit matter so much?
Make your cut about a quarter inch below a node, at a slight angle. Strip away the lower leaves so that no leaf will sit buried in water or medium, where it would rot. If the remaining leaves are large, you may cut each in half across the blade; this reduces water loss while keeping enough leaf to feed the cutting through photosynthesis. Keep two or three leaves at the top, no more.
If you are using rooting hormone, now is the moment. Tap a small amount of powder into a separate dish, never into the original container, because a used cutting can carry contamination back into your supply. Dip the cut end, tap off the excess, and plant promptly. Rooting hormone is optional for easy rooters like mint and pothos, which carry enough natural auxin to manage on their own. For woodier or more reluctant plants, such as rosemary and thyme, it meaningfully improves success. Rosemary and thyme, in fact, are unlikely to root in water alone; they want hormone and a dryish medium. Follow the product label exactly, keep it away from children and pets, and wash your hands after handling it.
To plant in medium, poke a hole first with a pencil or skewer, then slip the cutting in so the lowest node sits buried. Making the hole first keeps the hormone powder on the stem instead of scraped off at the surface. Firm the medium gently around the cutting so stem and medium touch everywhere; air pockets are dead space where roots cannot reach.
Workshop Note: Tool handling, cleaning, and sterilizing for this work are taught in Creative Arts Lesson 18, 'Outdoor & Garden Tools: Handling, Cleaning & Care.' When and where to cut stays with Professor Fernfoot.
❦ In your workbook: record the cut in your own way — a quarter inch below the node, at an angle, lower leaves stripped — copy, sketch, or note what matters.
In your packet: Exercise I — The First Cuttings ⚒ begins here. Work it now, or mark the place and take it as homework — your choice.
Water or Medium
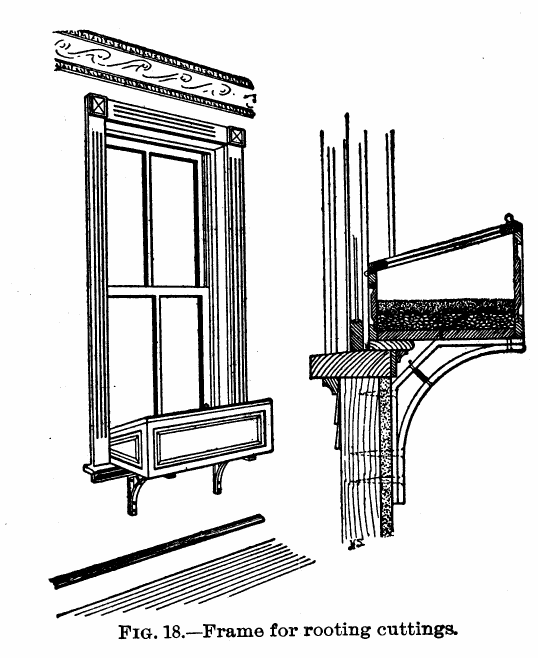
The humidity dome, 1922 schoolroom pattern: a window box of clean sand under panes of glass, "so as to make a close but well-lighted chamber within the frame" for rooting coleus, geranium, and rose cuttings. The bulletin's instructions are this lesson's dome rules in older dress — a confined, moist atmosphere over the cuttings, and ventilation "by the partial removal of the glass as necessity requires." Today's plastic bag tented on sticks does the same work.
L. C. Corbett, The School Garden, USDA Farmers' Bulletin No. 218 (revised 1922), Fig. 18 — figure cropped from the scanned bulletin page. Public domain (U.S. Government work).
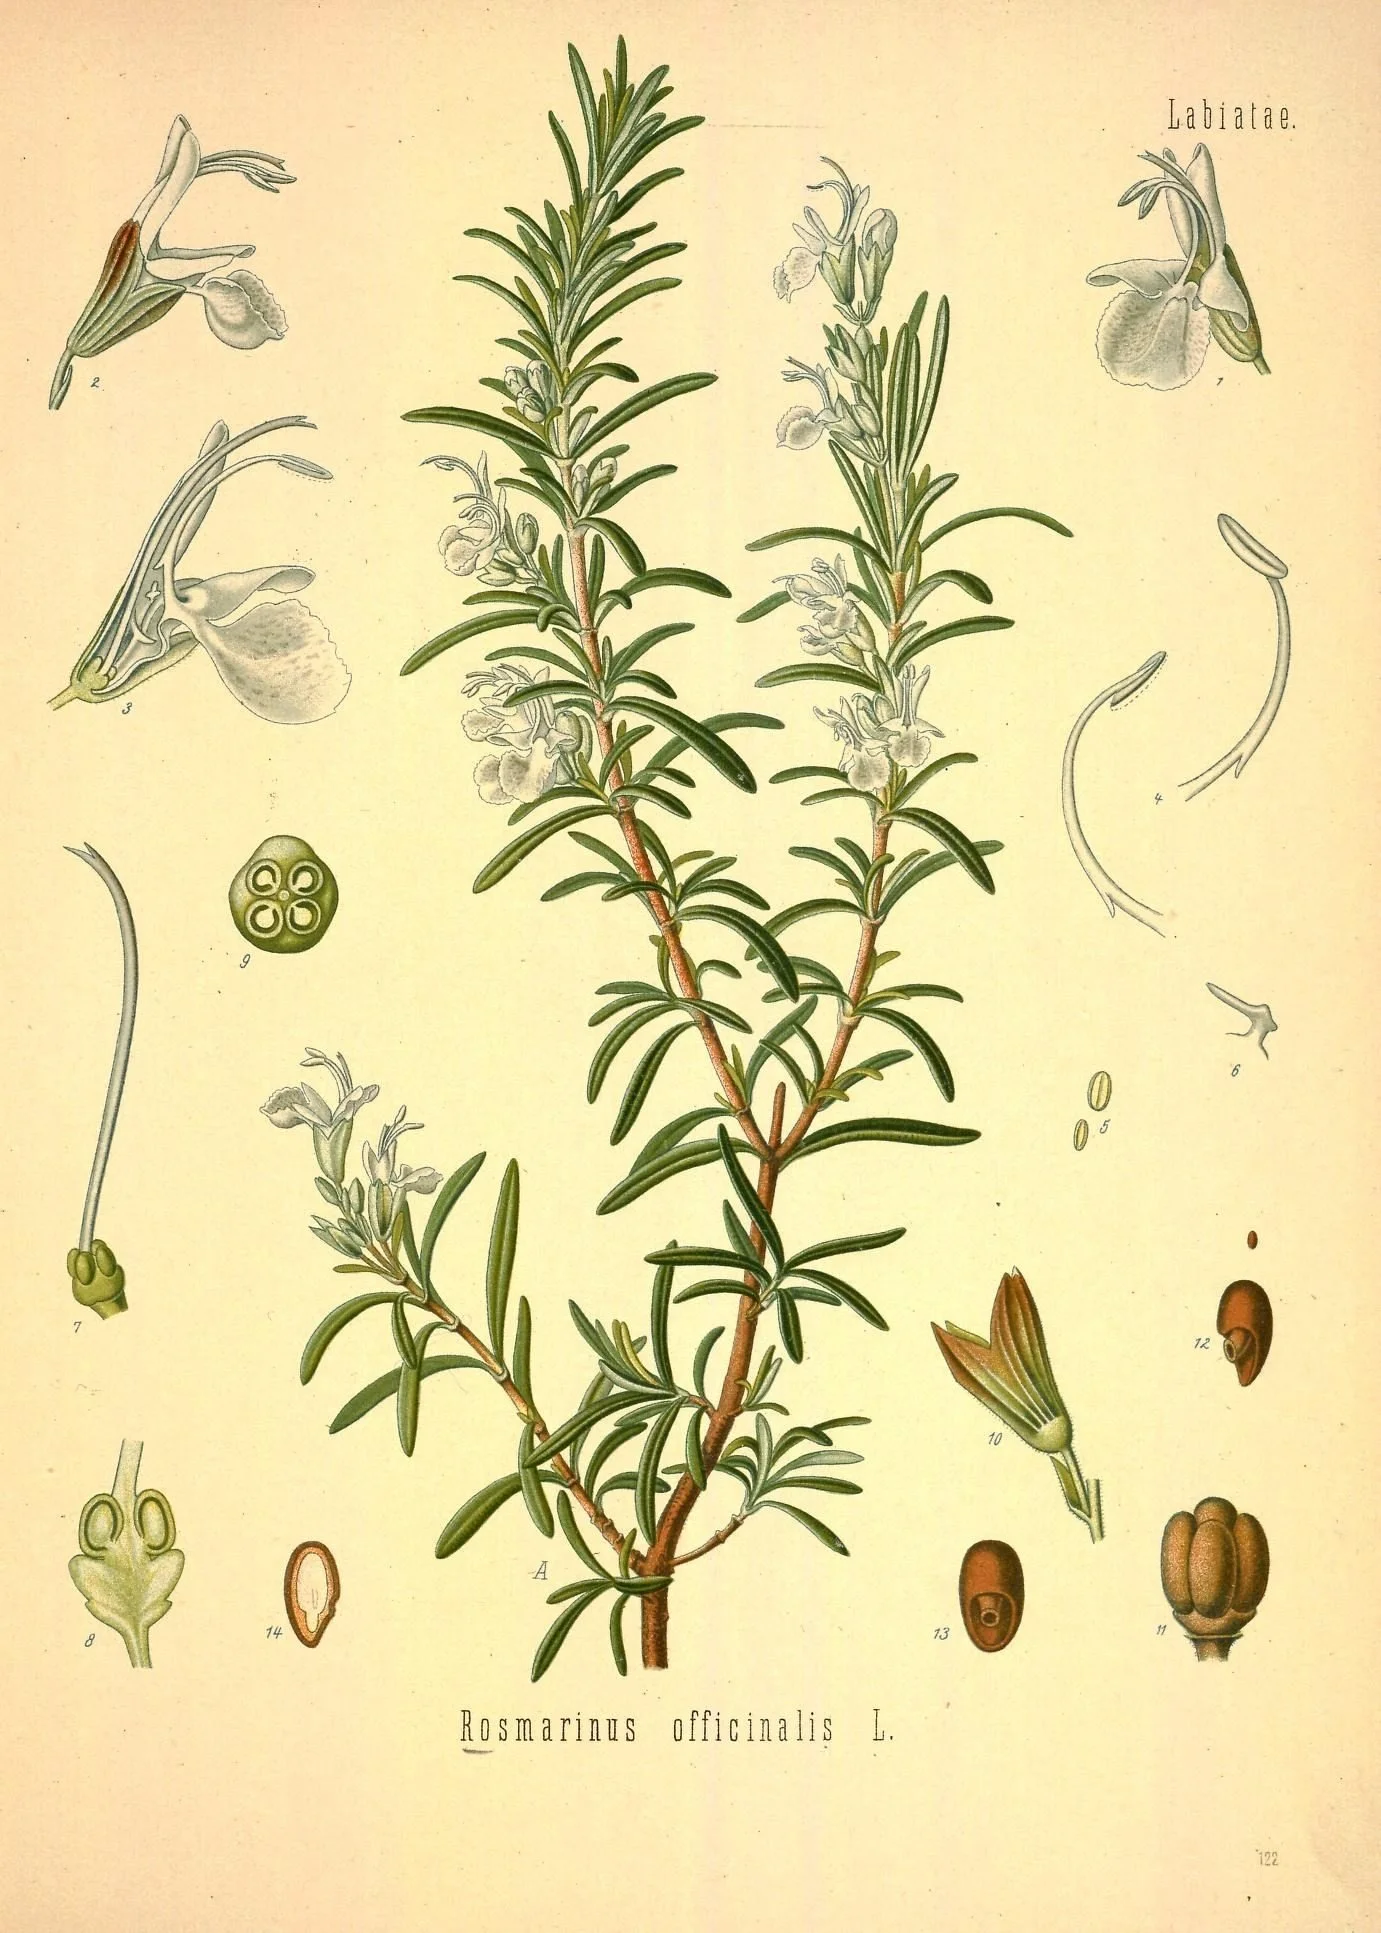
Rosemary, the lesson's reluctant rooter: the plate shows why. Its stems turn woody at the base and its leaves are needles built to lose little water — a plant equipped for dry hillsides, not for a glass of water. The lesson's verdict follows from the anatomy: rosemary (and thyme with it) is unlikely to root in water alone; give it rooting hormone and a dryish medium, and patience measured in months.
Franz Eugen Köhler, Köhler's Medizinal-Pflanzen (1887–1914), plate 122, via the Biodiversity Heritage Library. Public domain.
Both methods work, and each suits different plants and different temperaments.
★ Water propagation is the simplest: place the cutting in a clean glass of room-temperature water, with the lowest node submerged and the leaves above the surface. Change the water every few days to keep it fresh and oxygenated. Mint, basil, pothos, and coleus root eagerly in water, often within one to three weeks. The pleasure of watching white roots thread through clear glass is real, and for beginners it is the most encouraging method. Its weakness is the transplant: roots grown in water are fine and fragile, adapted to liquid, and they must adjust to the very different world of soil.
Check in: Water propagation is the most encouraging method for a beginner. What is its one weakness, and when does it arrive?
★ Medium propagation uses a soilless mix: perlite, vermiculite, coarse sand, or a seed-starting mix lightened with perlite. Never use garden soil or compost for cuttings; both teem with fungi and organisms that are harmless to established plants but deadly to a fresh wound. Moisten the medium until it is damp like a wrung-out sponge, not soggy. Cuttings in medium root more slowly than in water, typically four to six weeks for soft growth, but they transplant with far less shock because their roots already know soil.
Choose water for easy, fast rooters when you want to watch the process. Choose medium for woodier plants, for rosemary and thyme, and whenever you want the sturdiest possible transplant.
❦ In your workbook: record water or medium in your own way — the eager rooters, the slow sturdy ones, and which plants belong to each — copy, sketch, or note what matters.
In your packet: Exercise II — The Method Comparison ◐ begins here. Work it now, or mark the place and take it as homework — your choice.
The Humid Tent
★ A fresh cutting has leaves but no roots, which means it loses water through its leaves faster than it can replace it. Until roots form, your job is to slow that loss. The classic solution is a humidity dome: a clear plastic bag tented over the pot, or a transparent plastic cover, creating a small greenhouse around the cutting.
Check in: A fresh cutting loses water faster than it can replace it. What does the humidity dome do about that — and what must you do to the dome every day?
Support the bag so it does not rest on the leaves; a few sticks or straws pushed into the medium around the edges will hold it up like tent poles. Place the whole arrangement in bright, indirect light. Never in direct sun: a sealed bag in sunshine becomes an oven, and cooked cuttings do not root.
Vent the dome for a few minutes each day, or cut a small corner off the bag, to let fresh air circulate. Stale, constantly wet air invites powdery mildew and damping off, the fungal collapse that turns a healthy-looking cutting brown and limp at the base overnight. If you see fuzzy growth or a cutting suddenly wilts at the soil line, remove it promptly so the trouble does not spread to its neighbors.
Bottom warmth speeds everything. Cuttings root fastest when the medium is warm, roughly room temperature or a little above, even while the air stays cool. A seedling heat mat is the Level Two answer; the top of a refrigerator or near (never on) a radiator is the Level One version. The warmer the base, the faster the roots.
❦ In your workbook: record the humid tent in your own way — tent poles, bright indirect light, and the daily venting — copy, sketch, or note what matters.
Patience, Then Transplanting
Rooting takes weeks, not days. Softwood cuttings — cuttings from the current season's young, flexible growth, like soft cuttings of mint or basil — may show roots in two to three weeks; most houseplants take four to six; woody plants can take months. Resist the urge to tug the cutting upward to check. In water, you can watch without disturbing. In medium, wait until you see new leaf growth, or until gentle resistance tells you roots have anchored.
★ Transplant when water roots are one to two inches long, or when medium cuttings show vigorous new growth. Move the young plant into a small pot of regular potting mix, water it in well, and keep it in bright indirect light for the first week. Water-rooted cuttings appreciate an especially gentle transition: keep their first potting mix extra moist for several days while the fine water-roots adjust.
Check in: Name the readiness sign for a water-rooted cutting, and the readiness sign for one rooted in medium.
See Lesson 12 for the canonical definition of Hardening Off. Young transplants, like seedlings, benefit from gradual introduction to stronger light and drier air before joining the wider Greenhouse.
Then begin the grow ledger entry for your new plant, just as you did for your Familiar in Lesson 1. Note the parent plant, the date, the method, and the day the first roots appeared. In a year, when that cutting is a full plant of its own, you will be glad you wrote it down.
❦ In your workbook: record patience, then transplanting in your own way — the readiness signs, the gentle first week, and the ledger entry that starts a new plant's story — copy, sketch, or note what matters.
In your packet: Exercise III — The Transplant ⚒ begins here. Work it now, or mark the place and take it as homework — your choice.
Safety Notes
- Use sharp blades with care and attention. Cut away from your body and fingers. Younger students should have an adult present for all cutting work.
- Sterilize blades with rubbing alcohol or diluted bleach between plants, then rinse. Keep sterilizing solutions away from children and pets, and work in a ventilated area.
- Wash your hands after handling cuttings, medium, and especially rooting hormone.
- Use rooting hormone exactly as the label directs. Store it sealed, labeled, and out of reach of children and pets.
- Plastic bags used as humidity domes are a suffocation hazard for small children and pets; never leave them where they can be played with.
- If propagating a plant you have not positively identified, treat it with the caution of Lesson 6: observe, do not taste.
❦ In your workbook: record the safety notes in your own way — the sharp blade, the sterilizing, and the bag kept from small hands — copy, sketch, or note what matters.
Guided Observation: Finding the Node Before You Cut
This lesson's observation asks for no blade at all: you are learning to read a stem with your fingers before any cutting begins. Work it on your Scholar's Familiar or on any healthy stem you may touch, in the cool of the morning if you can.
You will need:
- a healthy stem of mint, basil, pothos, or another plant you may handle
- your grow ledger and a pencil
Run your finger slowly along the stem. You will feel slight swellings or joints at regular intervals, and at each one a leaf, a bud, or a leaf scar attaches. That is the node. The smooth stretch between two nodes is the internode.
Count and measure. Count the nodes on one good shoot. A good stem cutting is typically three to six inches long, with at least two or three nodes and a few healthy leaves at the top: check whether your shoot would give you that, and mark — in your ledger, not on the plant — where the cut would fall: about a quarter inch below a node, at a slight angle.
Judge the material. Take cuttings from young, healthy growth, not from old woody stems and not from flowering shoots. If the only available shoot carries flower buds, pinch them off; flowers demand energy the cutting cannot spare, and they rot easily in humid propagation conditions.
Consider:
- Where exactly did your finger find each node — what did you feel, and what was attached there?
- Why is the node, and not the smooth internode, where you aim the blade?
- Is your shoot young, healthy growth, or would you wait for a better one? What tells you?
No plant of your own to handle? Read a stem you can visit — a neighbor's herb with permission, a garden plant, a houseplant in a shop or a friend's windowsill. Node-finding cuts nothing and harms nothing; the reading is the skill, and it is identical wherever the stem grows.
Materials
Required (Level One — household items)
- Kitchen scissors or a craft knife: wiped with rubbing alcohol before use. Sharp matters more than fancy.
- Drinking glasses or jars: for water propagation; one cutting per glass is tidiest.
- Small pots with drainage holes: for medium propagation.
- Perlite or a bag of seed-starting mix: from any garden center; never garden soil for cuttings.
- Clear plastic bags and a few sticks or straws: to tent humidity domes over the pots.
- Labels and a pen: plant name, date, and method on every cutting.
- A healthy plant to take cuttings from: your Scholar's Familiar, a houseplant, or a garden plant with permission.
Suggested (Level Two — historically closer)
- Hand pruners: bypass-style, kept sharp and sterilized between plants.
- Rooting hormone (IBA or NAA): for woodier or reluctant species like rosemary.
- Vermiculite and a propagation tray with dome: the nursery-standard setup for larger batches.
- A seedling heat mat: gentle bottom warmth measurably speeds rooting.
Safety notes (from the original packet):
- Cut away from your body and fingers; younger students should have an adult present for all blade work.
- Sterilize blades between plants with rubbing alcohol or diluted bleach, then rinse; work in a ventilated area.
- Use rooting hormone exactly as the label directs; store sealed, labeled, and out of reach of children and pets.
- Plastic-bag humidity domes are a suffocation hazard for small children and pets; never leave them where they can be played with.
- Wash your hands after handling cuttings, medium, and rooting hormone.
Reflection Questions
Answer the following questions in your workbook.
- Why does a cutting taken just below a node root more reliably than one cut from the middle of an internode?
- What is the cutting trading away, and what is it gaining, in the weeks between the cut and the first roots?
- Why do you think gardeners have passed cuttings hand to hand for centuries instead of always starting from seed? What does a cutting preserve that a seed does not?
Workbook Checklist — Lesson 19
In my workbook I have:
- ☐ explained how a stem cutting grows new roots — meristem tissue near the wound organizing into adventitious roots within the callus
- ☐ located the nodes on a living stem and stated why cuttings are taken just below them — auxin accumulates there and rooting concentrates at nodes
- ☐ described the clean cut: sterilized sharp blade, a quarter inch below a node at a slight angle, lower leaves removed, large leaves halved
- ☐ compared water propagation with medium propagation and chosen the right method for rosemary and thyme — hormone and a dryish medium, not water alone
- ☐ explained what a humidity dome does — it slows water loss from the leaves until roots form — and why it is vented daily
- ☐ stated when a rooted cutting is ready to transplant — water roots one to two inches long, or vigorous new growth in medium — and how it is moved safely
- ☐ kept the safety notes: blades used with care and sterilized between plants, rooting hormone used exactly as the label directs, plastic bags kept from small children and pets
- ☐ completed the First Cuttings, the Method Comparison, and the Transplant — or their workbook paths
☐ Lesson completed Date: ___ Signature: ___
The Professor's Closing Note
My scholars,
You began this course by choosing a single plant and promising to pay attention to it. Today you learned to make two plants from one, and to give the second one away, or keep it, or trade it with a friend. This is how gardens have always grown: not only from seeds bought in packets, but from cuttings passed hand to hand, neighbor to neighbor, generation to generation.
Somewhere, in some garden you will never see, there is a rosemary bush that began as a cutting taken from a cutting taken from a cutting, stretching back a hundred years. Every plant in that chain was once somebody's careful work with a sharp blade on a cool morning. Yours can be the next link.
Record what you did. Tend what you made. And when your cutting roots, take a moment to feel pleased with yourself. You earned it.
— Professor Beryl Fernfoot, Herbology Greenhouse • Master Herbalist • Head of House Oriens
Cross-Class Connections

Creative Arts · Unit V, Lesson 18 — Outdoor & Garden Tools: Handling, Cleaning & Care
Latch your pruners and bring them to my bench, scholars. A blade that has cut one plant does not touch the next until it has been cleaned and disinfected — that rule has no exceptions in my workshop, and it is the same rule Professor Fernfoot keeps in her Greenhouse. Come and learn the whole care of the tool: carry it closed and points down, scrub the sap away before you disinfect, dry it, oil it, and store it in its place. She decides when and where a plant is cut; I will see that the blade in your hand is worthy of the cut.
Further Reading & Sources
- Virginia Tech Extension: Tips for Beginners, Success with Rooted Cuttings — Detailed university extension guide to preparing cuttings, hormone use, and medium, including the advice to dip from a separate dish rather than the original container.
- The Duchess of Dirt: How to Propagate Stem Cuttings — Clear step-by-step for softwood cuttings with soilless medium guidance and the warning against garden soil for cuttings.
- NC State Extension: Plant Propagation by Stem Cuttings — The standard extension guide to rooting stem cuttings: the four cutting types and their seasons, leaf reduction, humidity, sterile medium, and rooting hormone.
- Penn State Extension: Propagating by Cutting or Layering — Extension brochure with a plant-by-plant table of propagation timing and methods.
- Urban Leaf: How to Use Rooting Hormones to Keep Herb Cuttings Alive — Herb-focused guide noting that rosemary and thyme are unlikely to root in water alone and do best with hormone and medium.
Browse the Herbology shelf in the school Library for readable editions of these works.
Plants from this lesson stand in the Materia Botanica, the school's shared archive — each kept with its lessons, its keepings, and its cautions. This lesson's company:
Pothos, devil's ivyRoseRosemaryThymeColeus The whole Materia BotanicaPROFESSOR BERYL FERNFOOT · HERBOLOGY GREENHOUSE
Submit your work for this lesson using the form below.
CONTINUE IN THE HERBOLOGY GREENHOUSE
← Previous · Lesson 18: The Mechanics of Seed Scarification Next · Lesson 20: Vegetative Propagation: Root Division →
Unit III — Propagation, Pruning & Plant Stewardship Herbology Greenhouse — All 37 Lessons
The rest of Unit III: Lesson 17 · Seed Starting · Lesson 18 · Seed Scarification · Lesson 20 · Root Division · Lesson 21 · Layering & Runners · Lesson 22 · Pruning Geometry · Lesson 23 · Selective Pruning · Lesson 24 · Pests & Disease · Lesson 25 · Repotting & Root Bound · Lesson 26 · Stewardship Project