

HERBOLOGY
Unit III · Lesson 20VEGETATIVE PROPAGATION: ROOT DIVISION
PROFESSOR BERYL FERNFOOT
Herbology Greenhouse
Master Herbalist
Splitting one strong plant into two or more, and giving each piece a fresh start.
Professor's Introduction

Welcome, gardeners.
In our last lesson, you learned to start new plants from stems. Today we work at the other end of the plant, down in the dark where the roots live. Division is one of the oldest skills in the gardener's hands, and it asks something a little different of you. A cutting is a small beginning, almost weightless. A division is heavier work. You lift a whole living thing from the ground, take it apart with your own hands, and set each piece down as a plant in its own right. It feels bold the first time. It is also one of the kindest things you can do for a crowded perennial.
Go slowly today. The plant will not mind your caution. Nothing in this lesson needs to be hurried.
— Professor Beryl Fernfoot, Herbology Greenhouse • Master Herbalist • Head of House Oriens

The line beneath the map is our road: every stop a place where the knowledge of plants changed, every lesson a step along it.
Lesson Objectives
By the end of this lesson, you will be able to:
- Explain what root division is and why gardeners divide perennials.
- Recognize the signs that a plant is ready to be divided.
- Name plants that divide well and plants that should be left alone.
- Describe the four main root systems and how each one is divided.
- Carry out a division safely, from lifting to aftercare.
- Keep divided roots moist and protected throughout the process.
Reading this lesson: ★ marks the passages to remember. They return on the unit quiz and the class test. Check in questions ask the material back as you go; answer them in your workbook when you meet them.
Working this lesson: Your assignment packet is the first download on this page. Work in it as the lesson moves along, answering each exercise as its subject is taught — or read the lesson through for your notes and take the exercises as homework afterward. Both are proper ways to sit this class. Signposts in the reading tell you where each exercise belongs. Written answers are short answers in your own words; a few honest lines are worth more than a filled page.
Your Assignment Packet
This lesson's exercises live in its packet: the Lexicon Handout (every term, course terms marked ◆), Materials, Guided Practice, the Assignment Manual with its answer key for self-checking, the Reflection Questions, and the Workbook Checklist. Download the packet before you begin and keep it beside you as you read.
Why Divide?
Every gardener who keeps perennials eventually meets the same quiet problem. A plant that was once a neat clump grows wider every year. Its center begins to thin. The flowers come smaller, or fewer, or both. The whole plant looks tired, though nothing is exactly wrong with it.
★ What has happened is simple. The crown, the busy knot at the base where shoots and roots meet, has grown so large that the plant is competing with itself for light, water, and nutrients. The oldest growth sits in the middle, where it is shaded and crowded, and it begins to die back. Gardeners call this the dead center, and it is one of the clearest signals a plant can give you.
Check in: What has gone wrong inside a clump whose center is thinning — and what do gardeners call that middle?
Division answers all of this at once. You lift the clump, separate it into pieces, discard the exhausted middle, and replant the vigorous outer sections. Each piece keeps shoots and roots, so each piece becomes a complete plant. The parent is renewed. The new plants are young again. And you have multiplied your garden without buying a thing.
There is a saying among gardeners that if a thing is not broken, you should not fix it. Division follows that wisdom. Most perennials are divided every three to five years, and only when they show you they are ready. A plant that is flowering beautifully and holding a full, even shape is telling you to leave it alone.
★ The signs that division time has come are easy to learn:
- The center of the clump is dying out or thinning
- Flowers are smaller or fewer than in past seasons
- Growth is crowded, with stems pressing against each other
- The clump has grown far beyond its original space
When you see these, the plant is not failing. It is asking for room.
❦ In your workbook: record why we divide in your own way — the competing crown, the dead center, and the four signs — copy, sketch, or note what matters.
Which Plants Divide Well
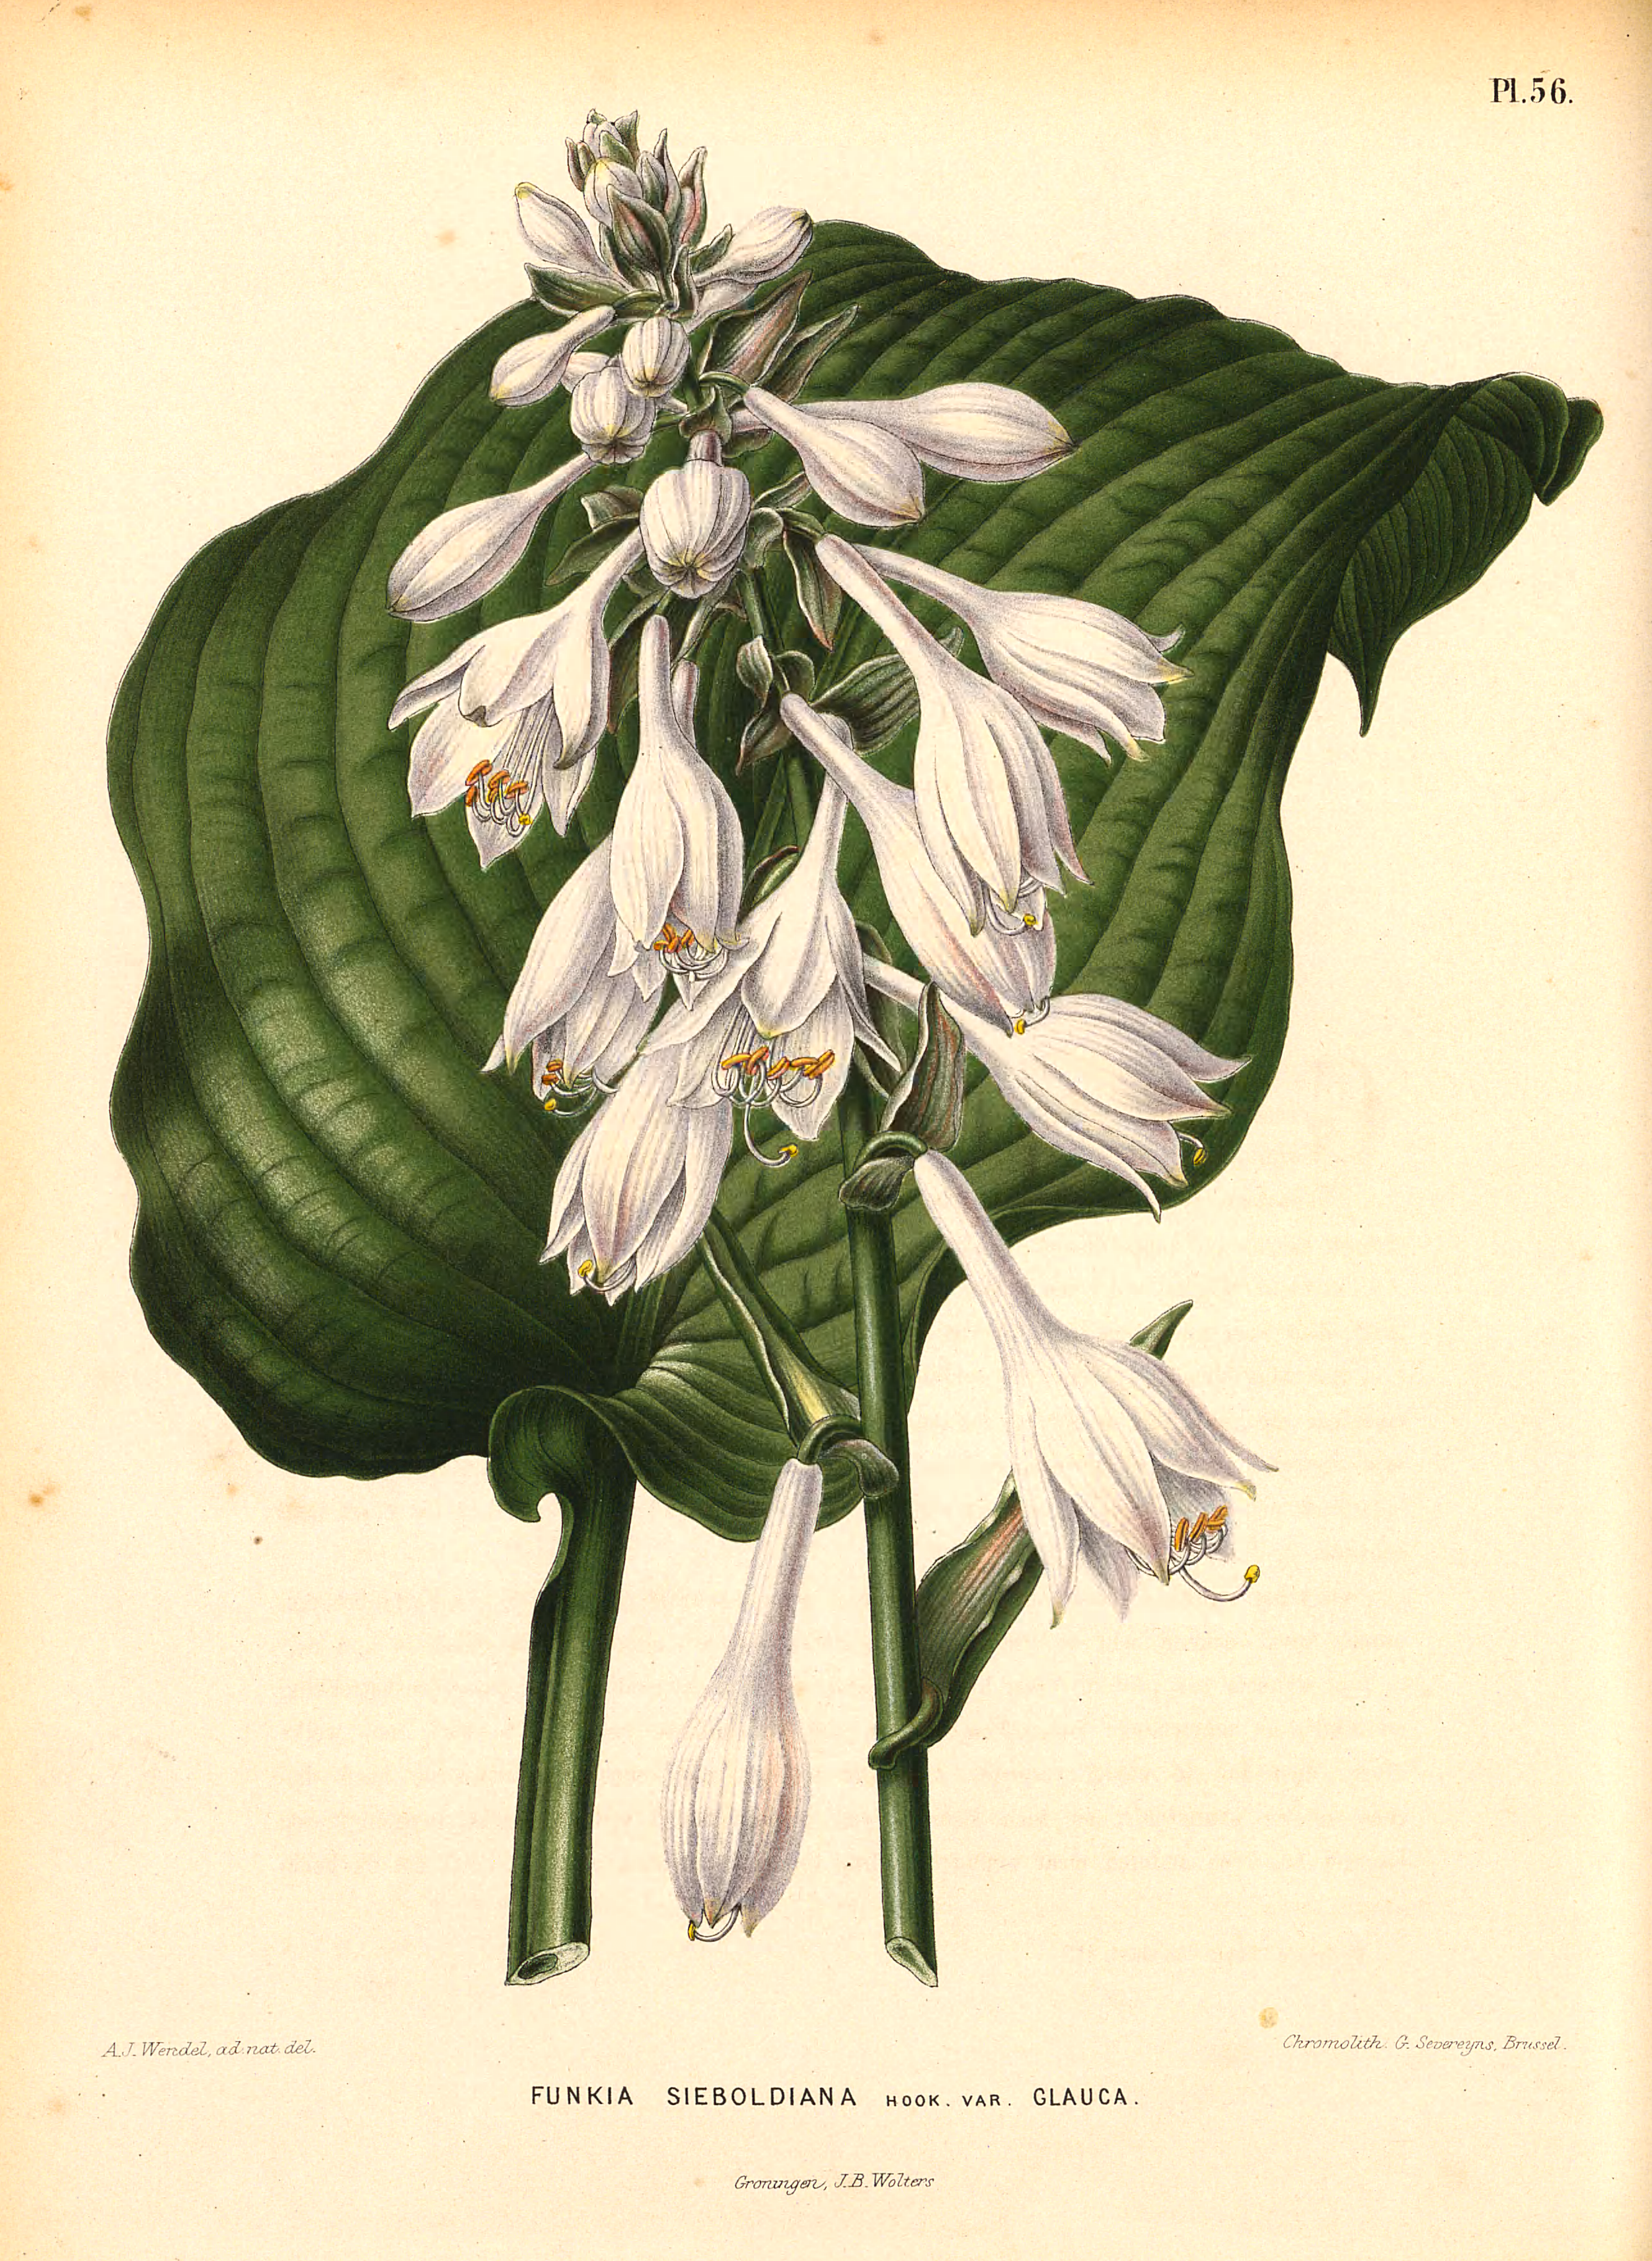
A hosta, the lesson's named clumping plant, in its summer dress: the great ribbed leaf and the flower stalk are what the steward reads from above ground. The part that matters for division is out of the plate's sight, below it — a central crown crowded with growing points, which is cut cleanly through with a sharp knife or spade, every piece keeping at least one eye. A clump whose centre has begun to thin is asking for exactly that.
Abraham Jacobus Wendel, in H. Witte, Flora: afbeeldingen en beschrijvingen… (Groningen, 1868), plate 56. Public domain.
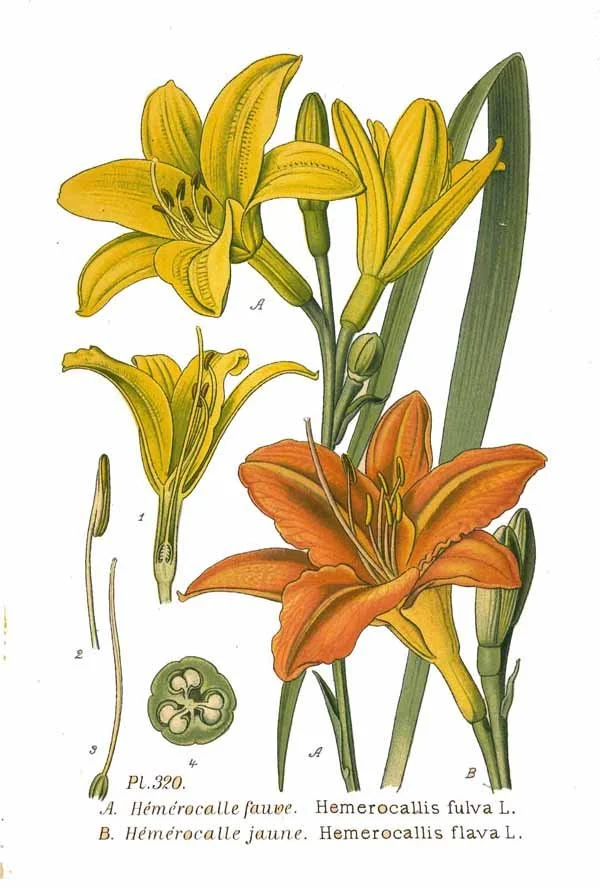
Daylilies, tawny and yellow: the second of the lesson's clumping pair. All that colour is carried on a crown below ground that adds growing points year after year until the clump crowds itself — the dead centre and the smaller, fewer flowers are the steward's signal. Divided by cutting through the crown, each piece with its own eye, a daylily clump becomes several young plants. (The plate's lettering is the 1891 original; the two species are told apart here by their flowers, as a gardener tells them.)
Amédée Masclef, Atlas des plantes de France (1891), plate 320. Public domain.
Not every plant takes kindly to being divided, so the first skill is choosing the right candidates.
Herbs and perennials that divide happily include mint, chives, bee balm, daylilies, hostas, black-eyed Susans, coneflowers, yarrow, and ornamental grasses. Mint is the classic beginner's plant for this lesson. It spreads by underground stems, pulls apart easily, and forgives almost any mistake. If your Scholar's Familiar is a mint, you are holding the perfect practice plant.
Some plants should be left in peace. Peonies famously dislike being disturbed and may sulk for a season or more after division. Plants with deep taproots, like butterfly weed or baptisia, resent having their roots broken and are better multiplied by seed. Bleeding hearts and oriental poppies also prefer to be left alone. When in doubt, check a reliable reference for your particular plant before you dig.
❦ In your workbook: record which plants divide well in your own way — the happy dividers, mint first among them, and the plants to leave in peace — copy, sketch, or note what matters.
When to Divide
Timing matters more in this lesson than in almost any other this term. A division is a plant with wounded roots, and it needs the kindest possible conditions while it heals.
★ Spring and autumn are the recommended seasons. In spring, divide just as new growth begins, before the plant has spent its energy on flowers. In autumn, divide four to six weeks before the ground freezes, which gives roots time to settle while the soil is still warm. Roots keep growing in warm soil long after the leaves above have slowed down, so autumn divisions often establish quietly and well.
★ Follow the bloom rule. Divide spring-blooming perennials in the autumn, after they have finished flowering. Divide autumn-blooming perennials in the spring, so they can recover through the summer before their season comes. Above all, do not divide when the plant is in full bloom. A flowering plant is pouring its energy upward, and asking it to heal its roots at the same time is more than it should have to manage.
Check in: Your perennial blooms in autumn. When do you divide it — and why does the bloom rule send you to that season?
Avoid the heat of summer. Hot sun and dry air pull moisture from exposed roots faster than anything else in this lesson, and a division made in July is a division made uphill. Choose an overcast day if you can. If the week has been dry, water the plant thoroughly a day or two before you plan to divide it, so it goes into the work well hydrated.
You have learned the why, the who, and the when. Before we put our hands in the soil, let us make sure we understand what we will find down there.
Every root system has its own logic, and the division follows the logic of the roots. A plant with spreading, matted roots pulls apart like tangled yarn. A plant with a tight central crown must be cut cleanly, the way you would slice a cake. Rhizomes are cut with a knife, each piece keeping its fan of leaves. Learn which kind of underground world you are working in before you lift the spade, and the plant will practically tell you how it wants to be divided.
— Professor Beryl Fernfoot, Herbology Greenhouse • Master Herbalist • Head of House Oriens
❦ In your workbook: record when to divide in your own way — spring and autumn, the bloom rule, and the overcast day — copy, sketch, or note what matters.
Reading the Root System
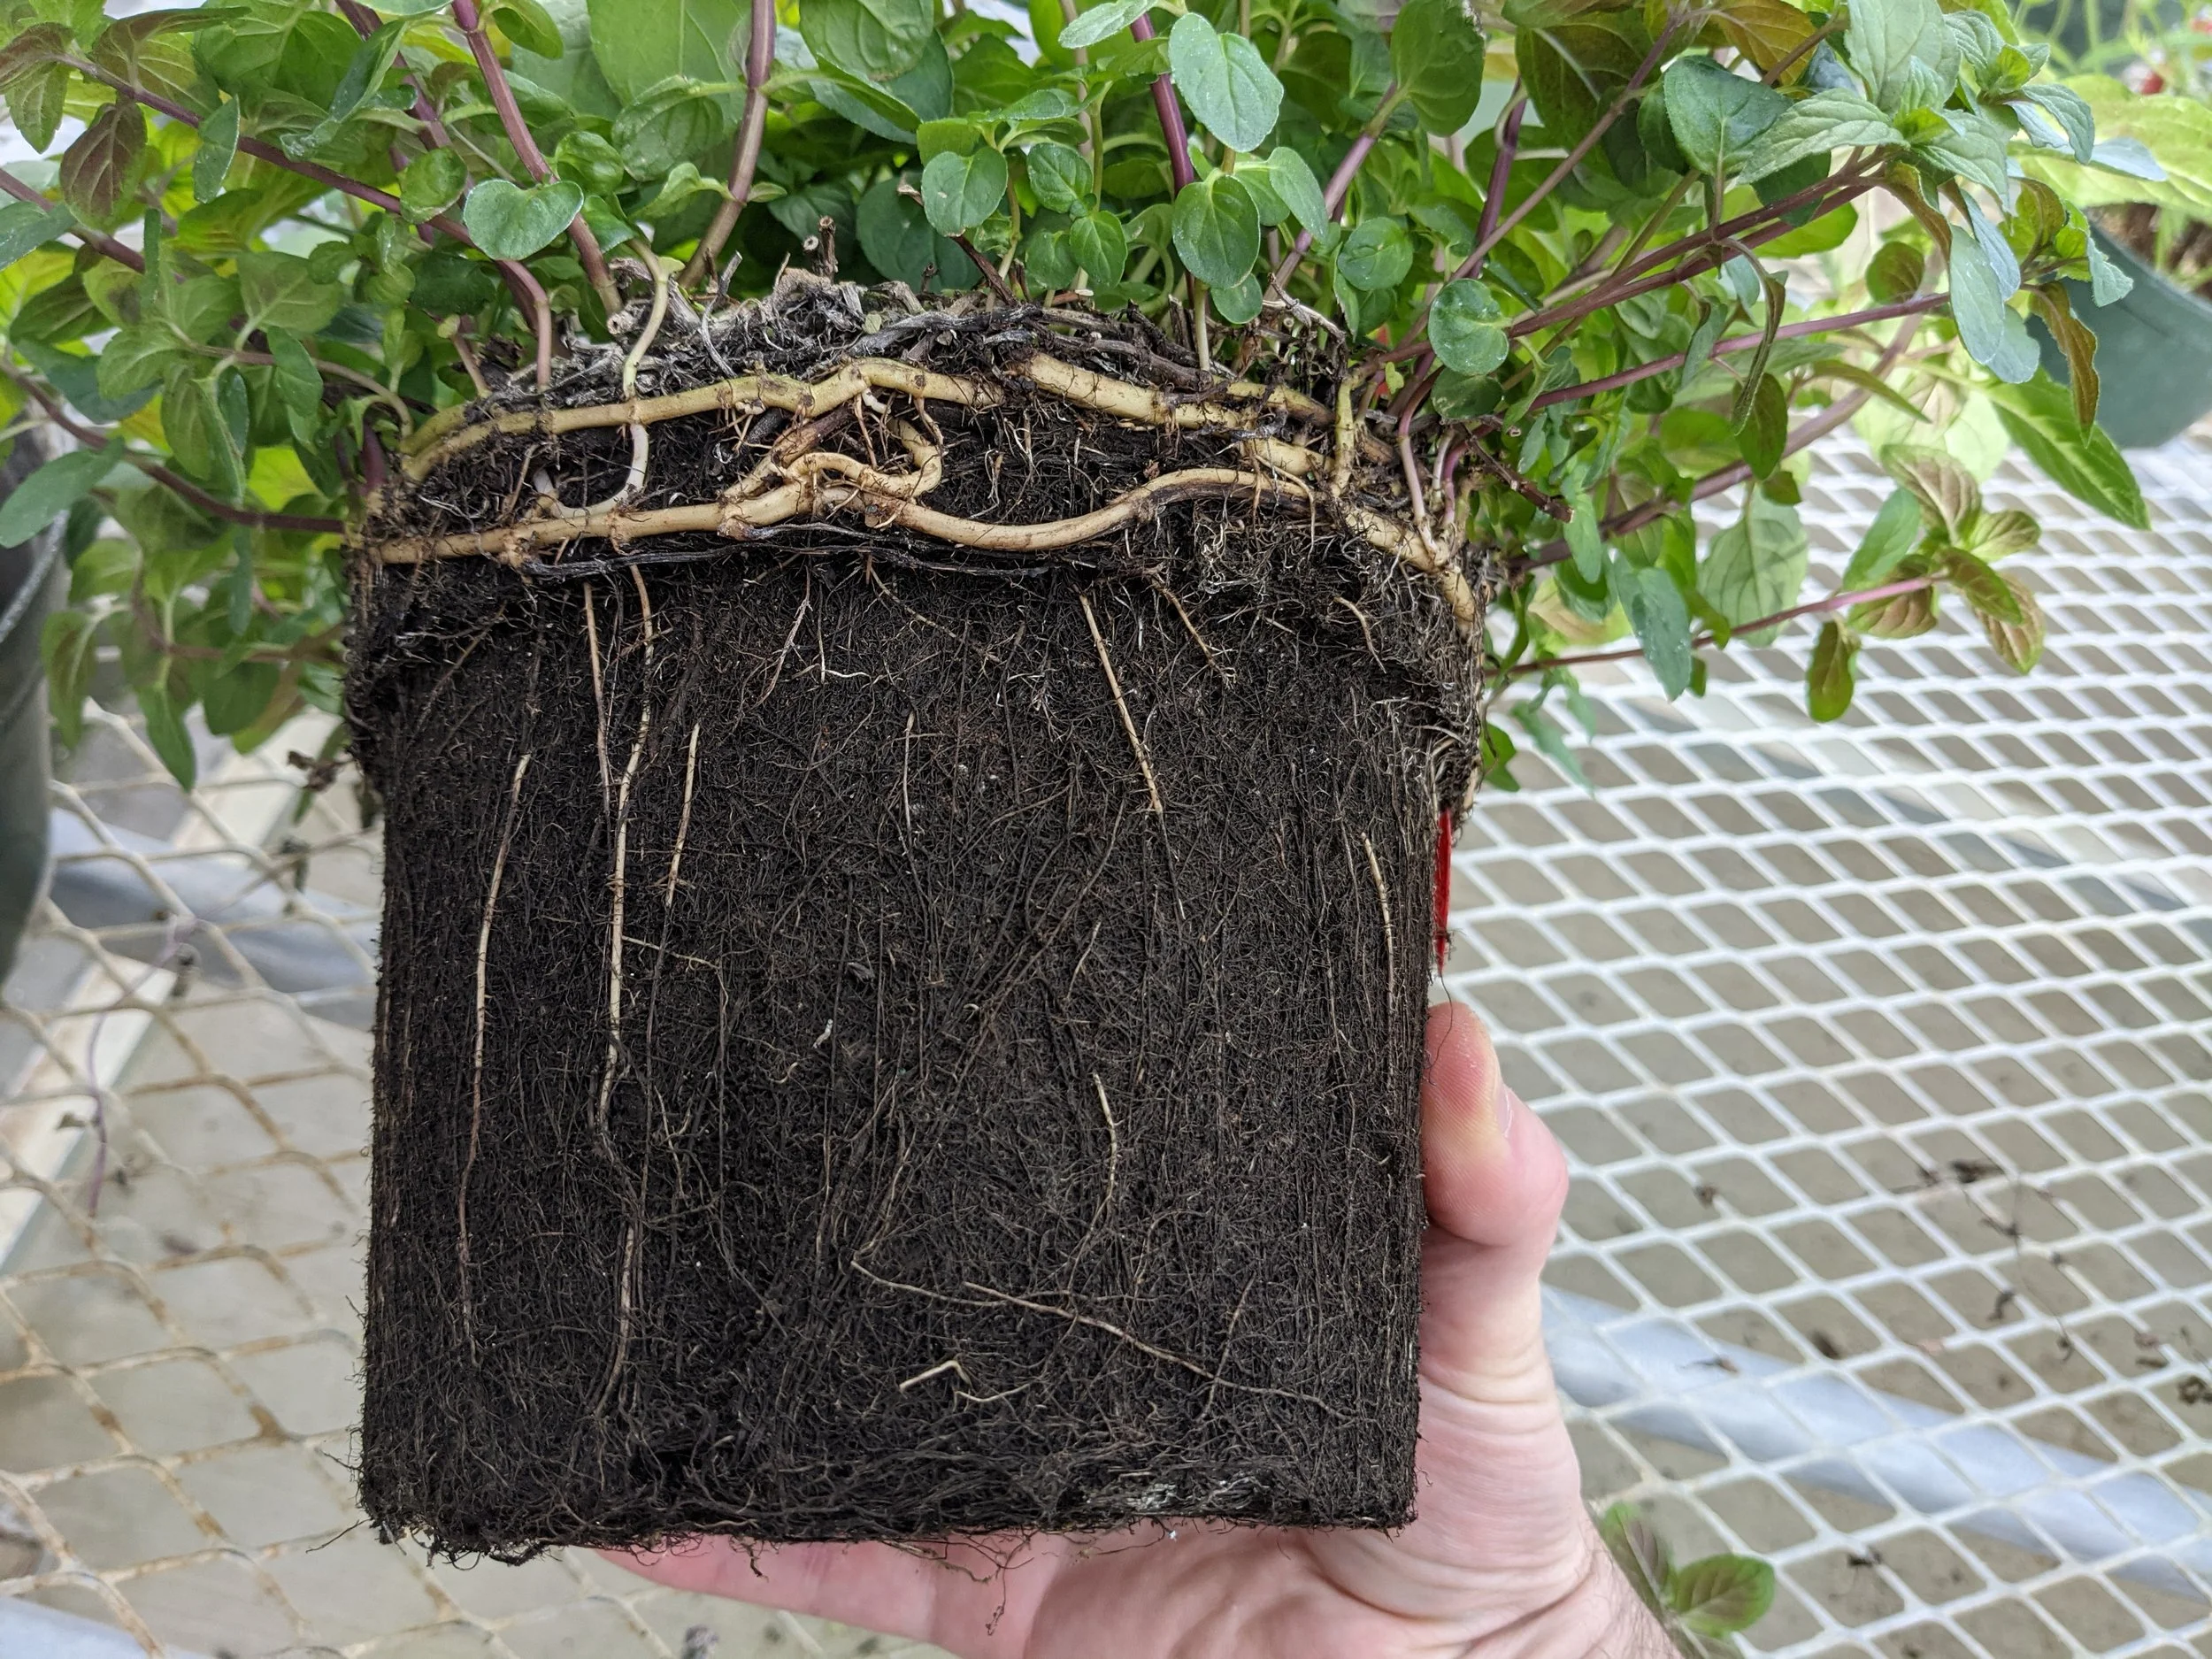
Mint, lifted: the spreading root system in the hand. The thick pale ropes looping over the root ball are rhizomes — underground stems running outward and matting together, which is why mint is the lesson's forgiving practice plant: sections tease apart by hand, and every piece with shoots and roots is already a plant. Keep three to five vigorous shoots in each division, and keep the whole mass shaded and damp while you work — exposed roots lose moisture from the moment they meet the air.
Photograph by Joshua T. Polito, dedicated to the public domain (CC0).
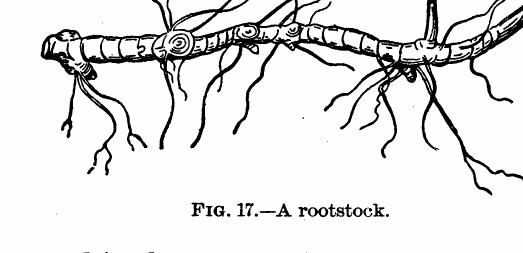
A rootstock, which is to say a rhizome, as the USDA drew it for school gardeners in 1922: not a root at all, but a stem travelling sideways underground — joints, bud scars, and roots descending from its underside, and the growing point at its tip. That anatomy is the whole method of rhizome division: cut the stem into sections, and see that every section keeps a growing point and its own roots. A section without a bud is a stem without a future.
L. C. Corbett, The School Garden, USDA Farmers' Bulletin No. 218 (revised 1922), Fig. 17 — figure cropped from the scanned bulletin page. Public domain (U.S. Government work).
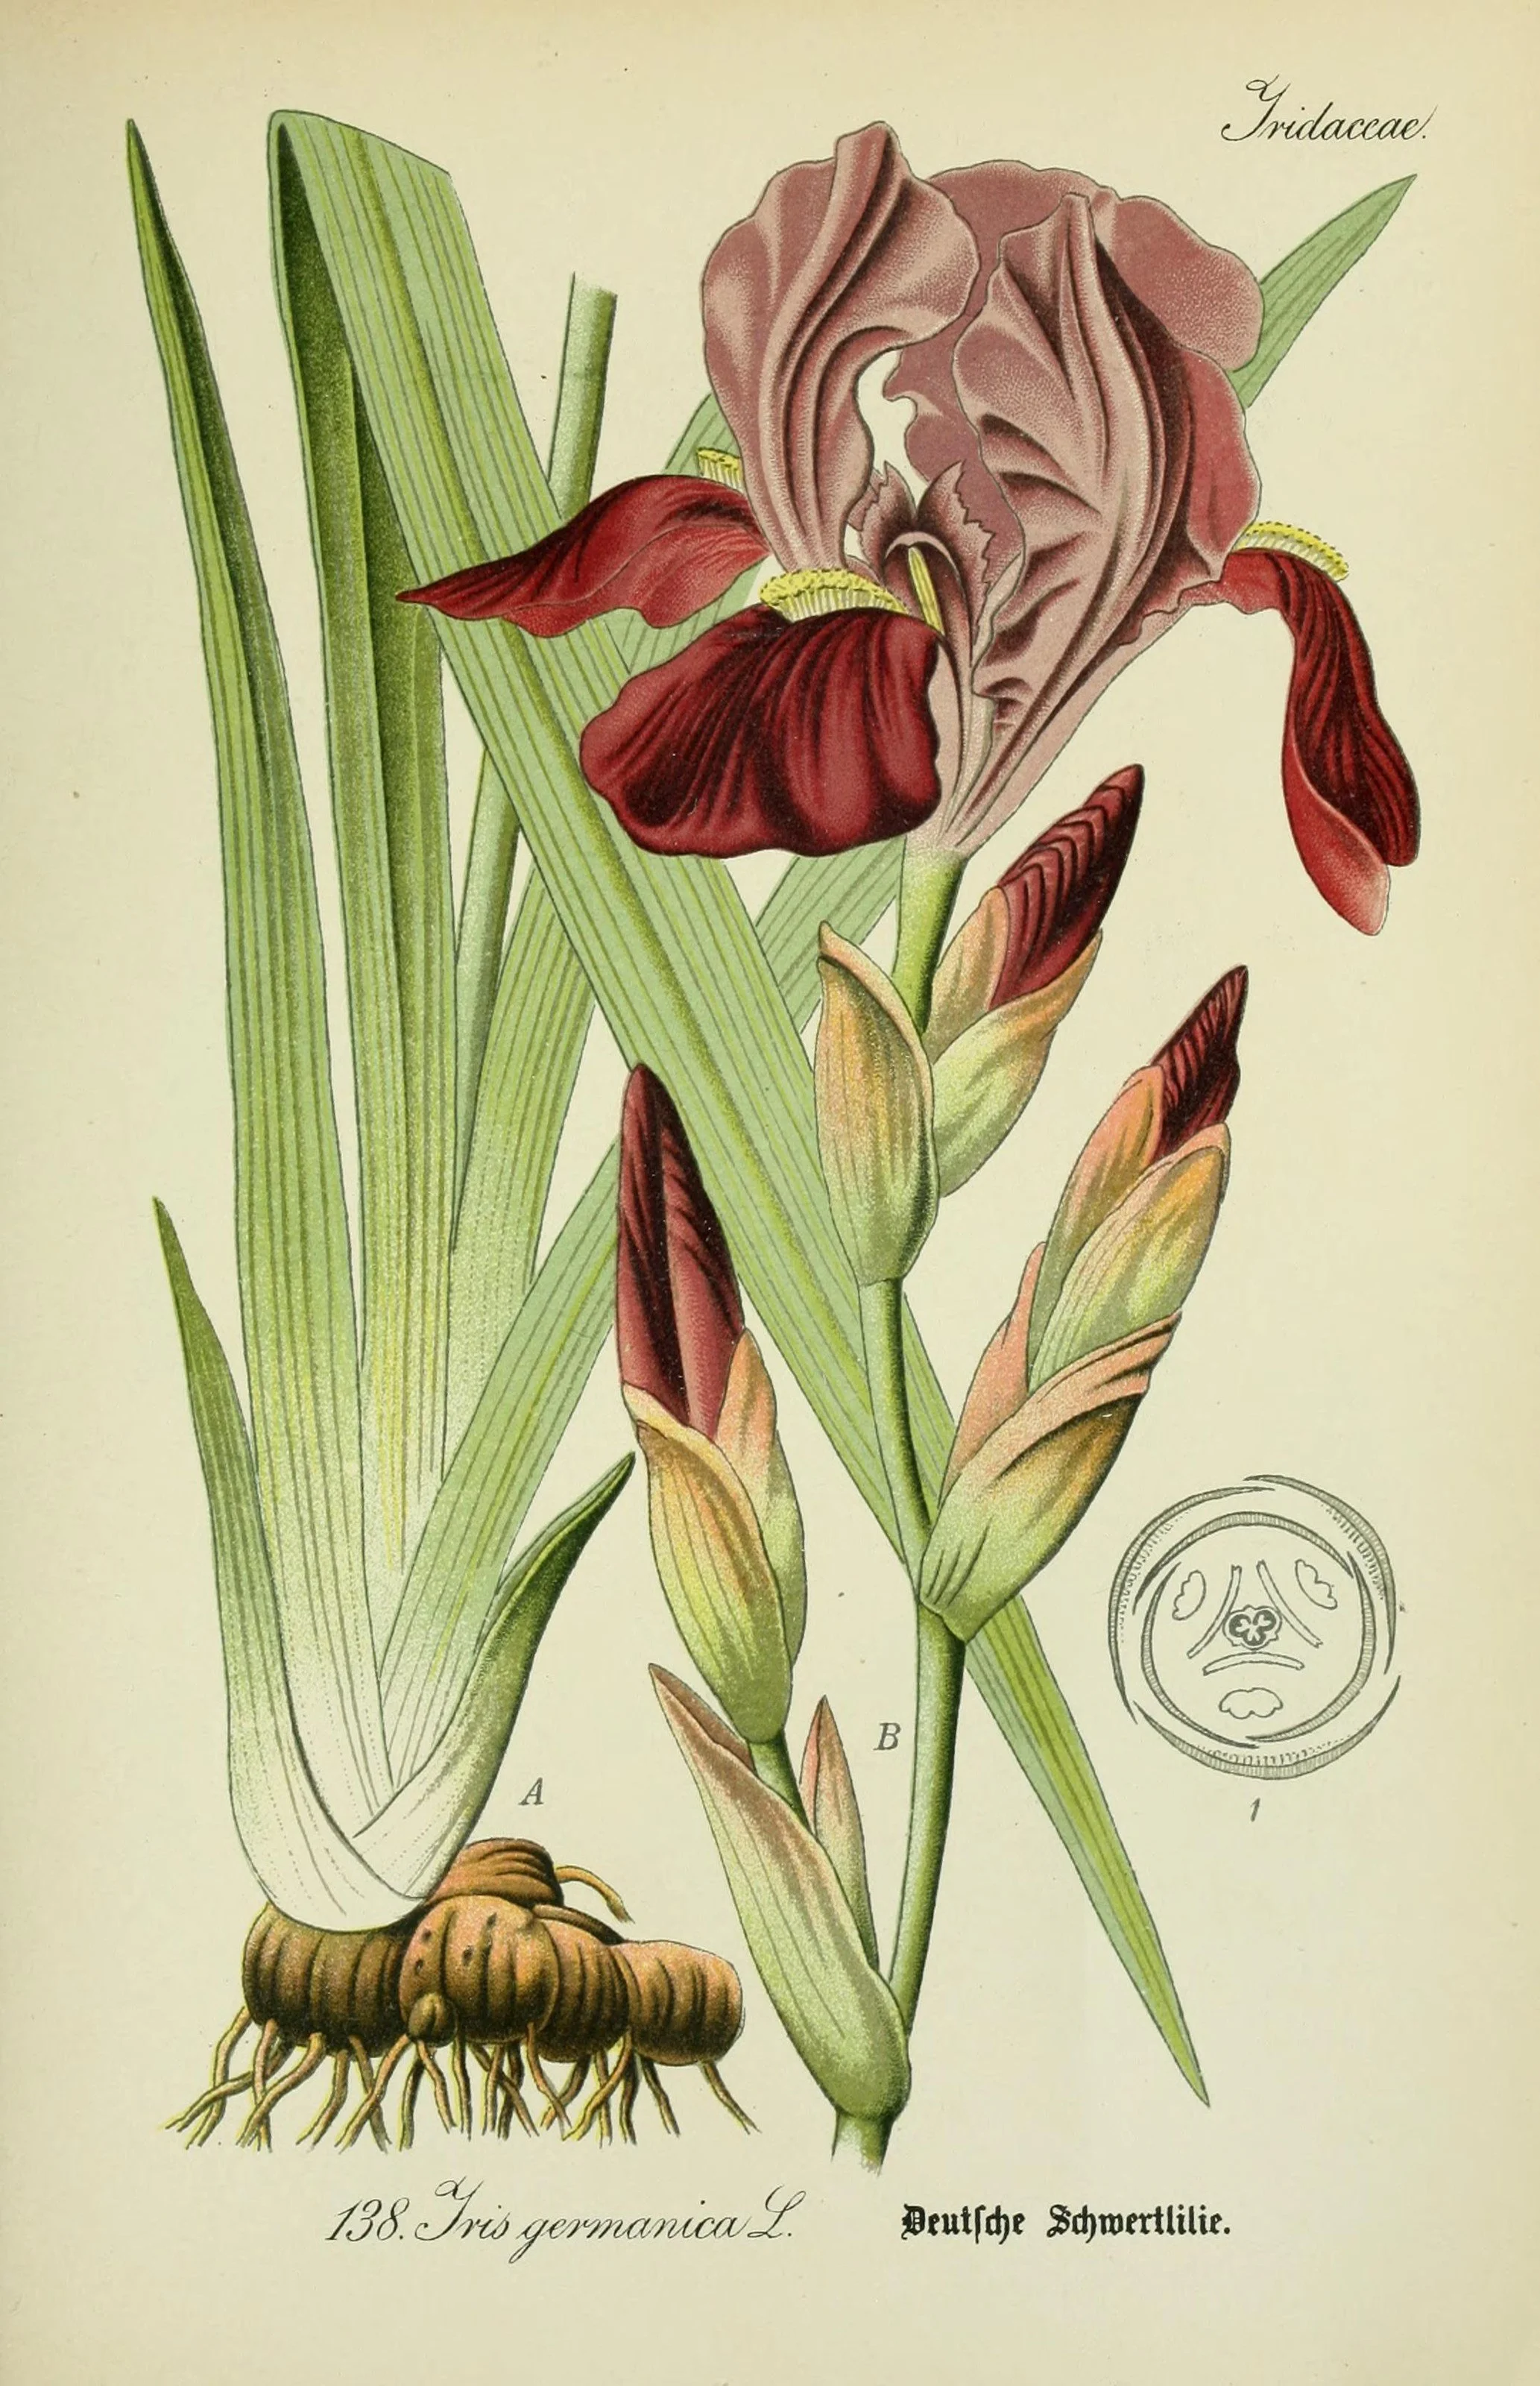
The rhizome, on the plant: at the foot of the leaf fan sits the thick, creeping stem the lesson teaches you to divide — segmented, rooted underneath, and carrying the fan at its growing end. Iris division follows the drawing exactly: lift the rhizomes, cut them into sections with a sharp knife, discard any part damaged by insects or disease, and keep for each section a few inches of rhizome and one fan of leaves, trimmed back by about half.
Otto Wilhelm Thomé, Flora von Deutschland, Österreich und der Schweiz, plate 138, via the Biodiversity Heritage Library. Public domain.
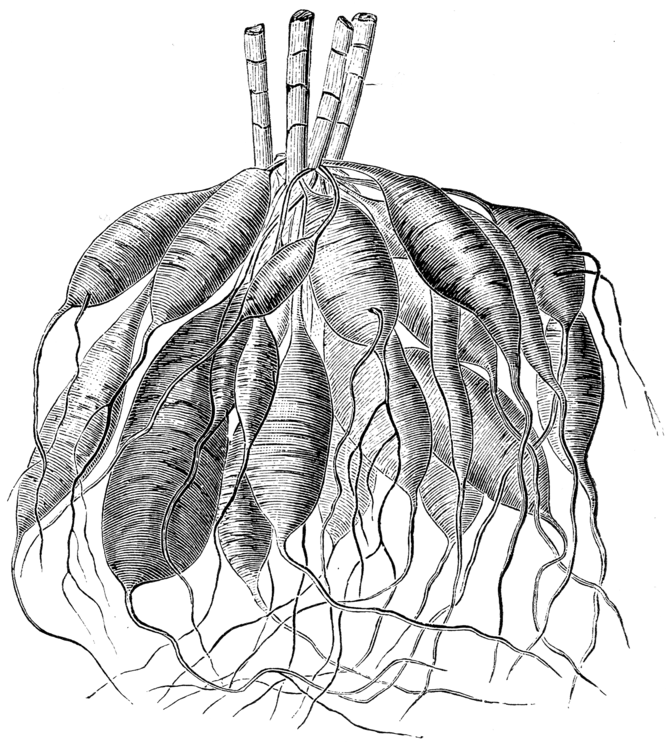
A dahlia's storehouse, lifted: every plump spindle is a tuberous root, a thickened root packed with food — and every one of them hangs from the one crown at the top, where the buds live. That is why the lesson's rule for slicing this root mass is absolute: each section must carry at least one bud from the crown. A tuber cut away without crown tissue is food with no growing point — a root without a future.
Strasburger, Noll, Schenck & Schimper, Lehrbuch der Botanik für Hochschulen, 4th edition (Jena, 1900). Public domain.
Before you divide, you need to know what kind of root system you are working with. Each type asks for a different touch.
Spreading root systems belong to plants like bee balm, mint, asters, and lamb's ear. Their roots run outward and mat together underground. These are the friendliest plants to divide. Small sections can often be teased apart by hand. Larger clumps can be cut with shears or a sharp knife, or separated by pushing two garden forks back-to-back into the center of the root ball and levering the handles apart. Keep three to five vigorous shoots in each division.
★ Clumping root systems belong to plants like daylilies, hostas, and astilbe. These grow from a central crown with many growing points. Lift the whole clump, then cut straight through the crown with a sharp knife or spade. Every division must carry at least one growing point, a bud or eye from which new shoots will rise. If the center of the clump has died out, cut that woody middle away entirely and divide only the healthy outer ring.
Check in: A hosta clump's center has died out. What do you cut away, what do you divide — and what must every piece carry?
Rhizomes are thickened underground stems, and bearded iris is the classic example. (See Lesson 3 for the canonical definition of a rhizome.) To divide, lift the rhizomes and cut them into sections with a sharp knife, discarding any parts damaged by insects or disease. Each section should keep a few inches of rhizome and one fan of leaves, trimmed back by about half.
Tuberous roots belong to plants like dahlias and cannas. (See Lesson 3 for the canonical definition of a tuber.) Slice the root mass into sections with a knife or pruners, making sure each section carries at least one bud. A section without a bud is a root without a future.
❦ In your workbook: record the root systems in your own way — spreading, clumping, rhizome, and tuberous, and the touch each one asks for — copy, sketch, or note what matters.
The Division, Step by Step
Here is the whole practice, in order. Read it through before you touch a spade.
1. Prepare. Water the plant thoroughly a day or two beforehand. Choose an overcast day. Lay out everything you will need: a spade or garden fork, a sharp knife, a bucket of water, and a shaded spot to hold your divisions. If you are working in autumn, prepare the new planting holes first, so no division waits longer than it must.
2. Cut back. Trim the stems and foliage to about six inches from the ground. This is not cruelty. The plant is about to lose a good portion of its roots, and less foliage means less water lost while those roots regrow.
3. Lift. Dig around the clump with a spade or fork, working well outside the visible growth so you keep as much of the root system as possible. Lever underneath and lift the entire clump free in one piece.
4. Clean. Shake off the loose soil, or rinse it away with a hose. You need to see what you are working with. Identify the growing points, the buds and shoots where new growth will come from.
★ 5. Divide. Follow the logic of the root system. Tease spreading roots apart by hand where you can. Cut clumping crowns cleanly with a knife. Saw through the toughest clumps with a sharp spade. Every division must have shoots and roots together. Discard the dead center and any weak, woody, or diseased pieces.
★ 6. Protect. From the moment the roots are exposed, they are losing moisture. Keep every division shaded and damp. Set them in the bucket of water or lay them on wet newspaper in the shade. Do not let them sit in the sun while you take a break.
Check in: A division is lying in full sun while you fetch a pot. What is happening to it, and what should you have done instead?
7. Replant. Set each division at the same depth it grew before. The crown should sit level with the soil surface, neither buried nor perched. Fill the hole with good soil, firm it gently, and water immediately and deeply.
Workshop Note: Tool handling, cleaning, and sterilizing for this work are taught in Creative Arts Lesson 18, 'Outdoor & Garden Tools: Handling, Cleaning & Care.' When and where to cut stays with Professor Fernfoot.
❦ In your workbook: record the division, step by step, in your own way — prepare, cut back, lift, clean, divide, protect, replant — copy, sketch, or note what matters.
In your packet: Exercise II — Divide or Demonstrate ⚒ begins here. Work it now, or mark the place and take it as homework — your choice.
Aftercare
A division is a plant in recovery, and recovery has simple rules.
★ Water the new plantings right away, then keep them evenly moist for the first three to four weeks. A two to three inch layer of mulch around each division holds moisture in the soil and keeps the roots cool. Hold off on fertilizer until you see new growth. Feeding a plant that is still healing its roots is like asking someone to run before their ankle has mended.
Check in: Why does a fresh division get water and mulch at once, but no fertilizer until new growth shows?
Watch your divisions over the coming weeks. Wilting in the first day or two is normal and usually passes. Steady new growth is the sign that the roots have taken hold. Most divisions settle within a few weeks and are fully established by the following season.
And here is the gardener's reward. You will almost always end up with more divisions than you can use. Pot the extras, keep them watered, and share them. Few gifts are received as warmly as a plant someone grew themselves.
❦ In your workbook: record the aftercare in your own way — water, mulch, patience with fertilizer, and the extras to share — copy, sketch, or note what matters.
In your packet: Exercise III — The Aftercare Log ◐ begins here. Work it now, or mark the place and take it as homework — your choice.
The Familiar Check-In
If your Scholar's Familiar is a plant that divides well, such as mint or chives, assess it honestly against this lesson's signs. Is the center thinning? Is growth crowded? If so, and if the season is right, you may divide it following the steps above. If the season is wrong or the plant is thriving, record your assessment in your grow ledger and note the season when you will revisit it. Knowing when not to divide is part of the skill.
If you do not have a Scholar's Familiar, adopt any clump-forming plant you can visit regularly, a patch of daylilies in a park or a neighbor's hostas, and carry out the same assessment on it.
❦ In your workbook: record the familiar check-in in your own way — your plant read honestly against the four signs, and the season you will revisit it — copy, sketch, or note what matters.
In your packet: Exercise I — The Division Assessment ◐ begins here. Work it now, or mark the place and take it as homework — your choice.
Safety Notes
Division uses sharp tools, so give them the respect they deserve. Keep the spade and knife sharp, because a sharp tool is safer than a dull one that slips. Wear sturdy gloves. Cut away from your body and keep your free hand clear of the blade. Work on stable ground, and put tools down flat when you are not holding them, never blade-up in the soil where a foot might find them.
Keep divided roots moist and shaded at every stage. Exposed roots dry out faster than you expect, especially on a breezy day. Wash your hands when you finish, and clean your tools before you put them away so disease does not travel from one plant to the next. Younger students should divide alongside an adult.
❦ In your workbook: record the safety notes in your own way — sharp tools respected, roots kept moist and shaded, hands washed and tools cleaned — copy, sketch, or note what matters.
Guided Observation: Reading a Clump the Steward's Way
This lesson's observation asks for no spade and no knife: you read a living clump the way a steward reads it, working the lesson's four signs and its root-system logic on a plant you can look at closely. Nothing is lifted and nothing is cut; the assessment itself is the skill being practiced.
You will need:
- a clump-forming perennial you can observe closely — your Scholar's Familiar if it is a plant that divides well, or any suitable plant in a garden, park, or container
- your grow ledger and a pencil
Read the four signs. Work through them in the lesson's order. Is the center of the clump thinning or dying out? Are the flowers smaller or fewer than in past seasons? Is growth crowded, with stems pressing together? Has the clump grown well beyond its original space?
Name its underground world. From the plant's kind, say which root system you would find below: spreading roots that tease apart by hand, a clumping crown that must be cut cleanly, rhizomes sectioned with a knife, or tuberous roots sliced so each piece keeps a bud. Say how that logic would shape the division, before any spade is lifted.
Give the steward's verdict. Divide this season, divide next season, or leave it alone — with your reasons, and the season you will revisit the plant if today is not its day.
Consider:
- Which of the four signs was hardest to judge from above ground, and what would settle it?
- How did naming the root system change the division you pictured?
- What would this same plant look like if it were asking to be left alone?
No plant of your own to read? Adopt any clump-forming plant you can visit regularly, a patch of daylilies in a park or a neighbor's hostas, and carry out the same assessment on it. The observation skills are identical; only the ownership differs.
Materials
Required (Level One — household items)
- A clump-forming perennial to assess: mint, chives, or any crowded container plant. Any potted plant works for the demonstration exercise.
- Two sturdy dinner forks: for the back-to-back fork separation method on matted root systems.
- A sharp kitchen knife: for cutting through tough crowns. Adult supervision required.
- A bucket or basin of water: to hold divisions and keep roots moist during the work.
- Wet newspaper or old towels: for wrapping divisions that must wait before replanting.
- Mulch: shredded leaves, straw, or bark chips for the aftercare layer.
- Gloves and a notebook: for safe handling and the two-week aftercare log.
Suggested (Level Two — historically closer)
- A garden spade and border fork: the traditional lifting tools for in-ground clumps.
- A hori-hori knife: the Japanese gardener's all-purpose dividing blade.
- Wood-chip mulch: the classic moisture-holding top dressing for new plantings.
Safety notes: Sharp tools demand respect: cut away from your body, keep the free hand clear, and set tools down flat, never blade-up in the soil. Wear sturdy gloves. Wash your hands after handling soil and plants, and clean tools before putting them away so disease does not travel between plants. Keep every exposed root moist and shaded; never leave divisions sitting in sun or wind. Younger students should divide alongside an adult.
Reflection Questions
Answer the following questions in your workbook.
- Division is described in this lesson as one of the kindest things you can do for a crowded perennial. In your own words, why is taking a plant apart an act of care rather than an act of harm?
- Why does the bloom rule exist? What would happen to a plant divided while it was pouring its energy into flowers?
- Each division must have both shoots and roots. Why would a piece with only roots, or only shoots, fail?
- How does knowing the four root systems change the way you would approach an unfamiliar plant? Give an example.
- Fernfoot says that knowing when not to divide is part of the skill. Describe a situation from the lesson, or one you observed, where leaving a plant alone was the right choice.
Workbook Checklist — Lesson 20
In my workbook I have:
- ☐ explained what root division is, and why a crowded crown competes with itself into a dead center
- ☐ named the four signs that a plant is asking to be divided, and the plants that divide well and those to leave alone
- ☐ stated the seasons for division and the bloom rule, and why a plant is never divided in full bloom or summer heat
- ☐ told the root systems apart — spreading, clumping, rhizome, and tuberous — and how each one is divided, every piece keeping a growing point
- ☐ walked the seven steps in order: prepare, cut back, lift, clean, divide, protect, replant — crown level with the soil surface
- ☐ kept the aftercare rules: water at once and keep evenly moist, mulch two to three inches, no fertilizer until new growth
- ☐ kept the safety notes: sharp tools respected and set down flat, roots moist and shaded, hands washed and tools cleaned
- ☐ completed the Division Assessment, Divide or Demonstrate, and the Aftercare Log — or their adopted-plant and workbook paths
☐ Lesson completed Date: ___ Signature: ___
The Professor's Closing Note
You began this unit learning to wake seeds. Then you learned to root a stem. Today you learned to renew a whole plant by taking it apart and beginning again.
There is something quietly profound in division, and I hope you felt it. The plant does not experience it as an ending. Given moisture, shade, and a little patience, each piece simply continues being a plant, as though it had always been separate. Gardeners have been doing this for thousands of years, and the plants have never once objected.
File your aftercare log. Water your divisions. And the next time you walk past a crowded clump in someone's garden, you will see it the way a steward sees it: not as a problem, but as several plants waiting to happen.
— Professor Beryl Fernfoot, Herbology Greenhouse • Master Herbalist • Head of House Oriens
Cross-Class Connections

Creative Arts · Unit V, Lesson 18 — Outdoor & Garden Tools: Handling, Cleaning & Care
Boots by the door, scholars. Professor Fernfoot's own note sends you to my rack, and she is right to: the knife that cuts her crowns and the spade that lifts her clumps are tools before they are garden work, and a blade can carry sickness from one plant to the next the way a shared cup carries a cold through a household. Come and run the full care drill with me — carry, clean, disinfect, oil, store — and learn why disinfecting between plants decides whether her propagation lessons go well or badly. When and where to cut stays with Professor Fernfoot; the tool itself is my teaching, and I will keep you safe with it.
Further Reading & Sources
- A Guide to Dividing Perennials — Penn State Extension: the why, when, and how, with root-system types
- When Should I Divide My Perennials — University of Illinois Extension: technique, timing, and plants that dislike disturbance
- Fall a Good Time to Divide Perennials — University of Nebraska-Lincoln: autumn division, watering, and mulching guidance
- Divide Perennials for the Best Garden Performance — Mississippi State University Extension: lifting, growing points, and replanting depth
- When and How to Divide Perennials — The Old Farmer's Almanac: step-by-step reference with a plant-by-plant timing table
- Less Is More: Time to Divide and Conquer Perennials — University of Missouri Extension horticulturist on rejuvenation and root growth timing
Browse the Herbology shelf in the school Library for readable editions of these works.
Plants from this lesson stand in the Materia Botanica, the school's shared archive — each kept with its lessons, its keepings, and its cautions. This lesson's company:
Bearded irisChivesBaptisiaBee balmBlack-eyed Susan The whole Materia BotanicaPROFESSOR BERYL FERNFOOT · HERBOLOGY GREENHOUSE
Submit your work for this lesson using the form below.
CONTINUE IN THE HERBOLOGY GREENHOUSE
← Previous · Lesson 19: Vegetative Propagation: Stem Cuttings Next · Lesson 21: Vegetative Propagation: Layering & Runners →
Unit III — Propagation, Pruning & Plant Stewardship Herbology Greenhouse — All 37 Lessons
The rest of Unit III: Lesson 17 · Seed Starting · Lesson 18 · Seed Scarification · Lesson 19 · Stem Cuttings · Lesson 21 · Layering & Runners · Lesson 22 · Pruning Geometry · Lesson 23 · Selective Pruning · Lesson 24 · Pests & Disease · Lesson 25 · Repotting & Root Bound · Lesson 26 · Stewardship Project