

POTIONS
Unit I · Lesson 2THE SCRIPTORIUM & WORKSPACE ZONING
Professor Crimblebrew Muddlenook
Master Apothecary • Potions
Head of House Meridies • School of Evershade
Professor's Introduction

Welcome back to the laboratory, scholars. Lesson 1 gave you the rules of the room. This lesson gives you the room itself, ordered the way apothecaries have ordered their workshops for centuries.
Picture the old apothecary's premises. At the front stood the shop: the public room with its rows of labeled jars, its drawers of dried roots and leaves, its polished counter where customers were served and prescriptions handed over. Behind the shop, away from customers' eyes, lay the workrooms. There was a place for grinding and pounding, dusty work kept well away from open jars. There was a stillroom, where waters and spirits were distilled over heat. There was a dispensary corner where prescriptions were compounded, wrapped, and labeled. And there were storerooms, cool and dark, where raw materials waited their turn on the shelves.
Each space had its work, and no work wandered into the wrong space. Raw roots were never stored beside finished syrups. Grinding dust was never raised beside open jars of finished preparations. The records lived at a dry desk, far from steam and spills. This was not fussiness. It was how preparations stayed clean, how mistakes were kept from happening, and how an error could be traced to its source when one happened anyway.
My philosophy fits on a jar label: everything in its place. Today you will give everything in your workspace a place, mark it, and draw the map that proves it.
— Professor Crimblebrew Muddlenook, Potions Laboratory • Master Apothecary • Head of House Meridies
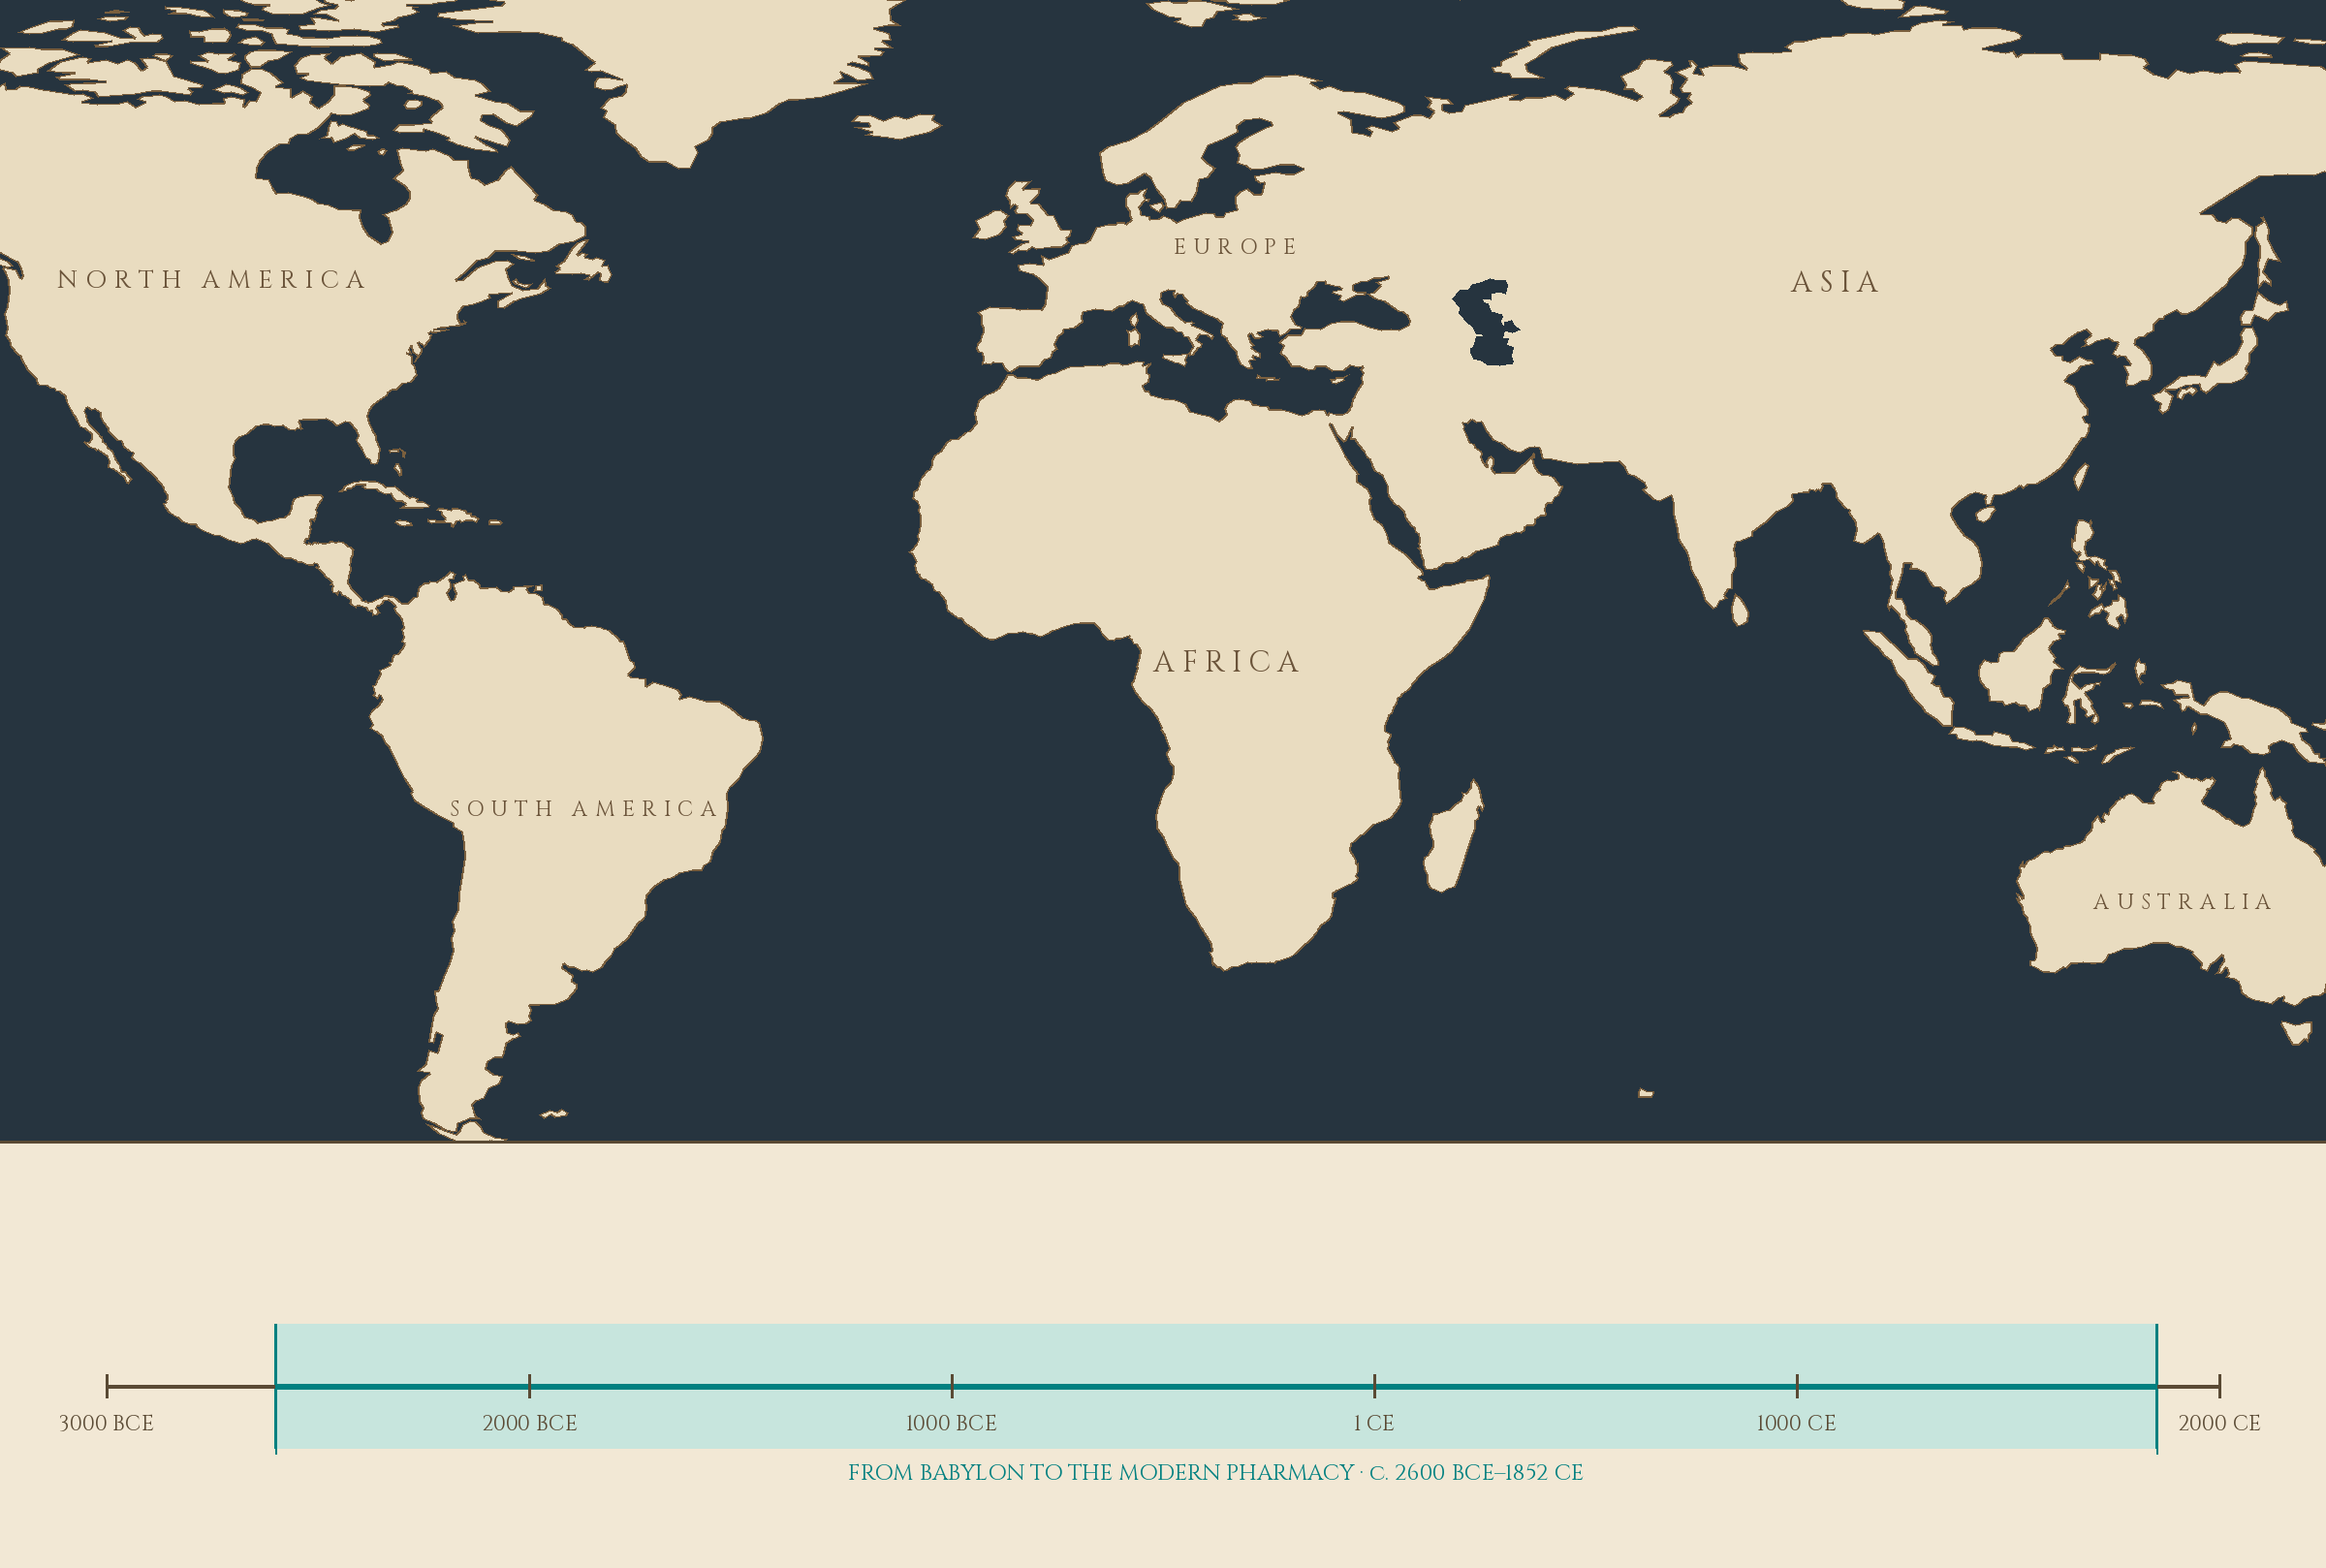
Potions map — the class base map, unmarked for this lesson.
Lesson Objectives
By the end of this lesson, you will be able to:
- Describe how historical apothecary workshops divided their premises into functional areas.
- Explain the zoning principle: separate areas for receiving, preparation, heating, cooling, storage, and records.
- Distinguish wet from dry work areas and clean from dirty workflow, and explain why each distinction matters.
- Zone your own workspace with six marked zones, whatever its size.
- Draw a labeled lab map for your archive and use it to complete a mock task without breaking zone discipline.
Reading this lesson: ★ marks the passages to remember. They return on the unit quiz and the class test. Check in questions ask the material back as you go; answer them in your workbook when you meet them.
Working this lesson: Your assignment packet is the first download on this page. Work in it as the lesson moves along, answering each exercise as its subject is taught — or read the lesson through for your notes and take the exercises as homework afterward. Both are proper ways to sit this class. Signposts in the reading tell you where each exercise belongs. Written answers are short answers in your own words; a few honest lines are worth more than a filled page.
Your Assignment Packet
This lesson's exercises live in its packet: the Lexicon Handout (every term, course terms marked ◆), Materials, Guided Practice, the Assignment Manual with its answer key for self-checking, the Reflection Questions, and the Workbook Checklist. Download the packet before you begin and keep it beside you as you read.
Safety Briefing
Today's hazards are the hazards of the workspace itself. Read them before you move a single object.
- Clutter. The most common laboratory accident begins with a crowded bench. Clear your working surface completely before you begin zoning. Nothing stays on the bench that has no zone.
- Blocked exits. Your path to the door must stay clear at all times. Never place a work zone across a doorway or in the path to one. This rule has no exceptions.
- Ventilation. Fumes, dust, and steam need somewhere safe to go. If your workspace has no window, fan, or range hood, keep dust-raising tasks brief and step out for fresh air between them.
- Fire. Know where the nearest fire extinguisher is before you do anything else. If your home does not have one, learn the location of the nearest one and the route to it. The heating zone is planned today, not used: no heating happens in this lesson.
- Water access. Know where the nearest sink is. Spills are cleaned with water and cloth, promptly, before they travel.
- Adult supervision. Younger scholars zone and work only with an adult aware of what is happening in the laboratory. The adult should know where the extinguisher and the first-aid supplies are, just as you do.
❦ In your workbook: record the safety briefing in your own way — the clear bench, the clear exit, the air, the extinguisher, the sink, and the adult who knows — copy, sketch, or note what matters.
Mise en Place
Gather everything before you begin. Nothing should be fetched mid-zoning.
- A table, counter, desk, or clear corner that will serve as your laboratory workspace
- Paper and pencil for drafting your lab map (a ruler is optional but encouraged)
- Zone markers, at least six: masking tape, index cards, small trays, or folded paper tents
- Adhesive labels or masking tape and a pen for naming the zones
- A small basket, box, or tray to serve as the receiving inbox
- A notebook or binder page for the final lab map, which becomes your archive entry
Level Two scholars may add compartmented wooden or metal trays (one per zone), a floor plan of the workspace drawn to scale, and glass or ceramic ramekins to replace paper markers. The principle is identical; only the materials are handsomer.
The Ordered Workshop
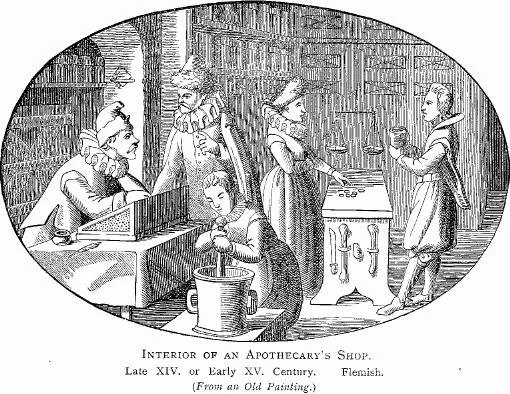
The public face of the trade: an apothecary's shop interior, Flemish, late 14th or early 15th century as the plate captions it — counter in front, work going on behind it.
Engraving after an old Flemish painting, as captioned on the plate. Public domain.
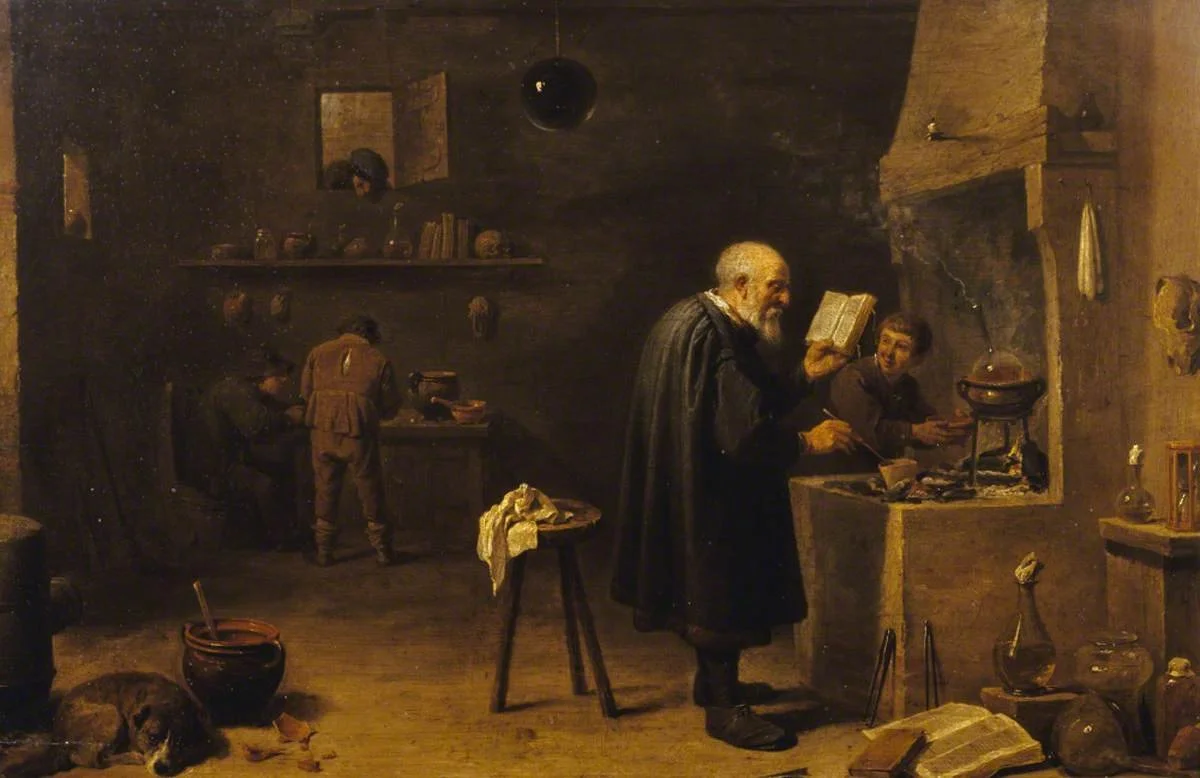
The Alchemist in His Laboratory, David Teniers the Younger (1640s): the fire work stands in its own hearth corner at the right, the bench work apart at the left — separation of heat from everything flammable, exactly as the Heating zone demands.
David Teniers the Younger, The Alchemist in His Laboratory, 1640s, National Trust (Polesden Lacey). Public domain.
The apothecary's trade has always been a trade of separate rooms. The evidence survives in stone, glass, and paper. Museum reconstructions, such as the late-seventeenth-century Swiss shop interior held by the Wellcome Collection and the complete 1834 pharmacy preserved in the Science Museum's galleries, show the public shop fitted out as a room of display: jars in rows, drawers labeled, the counter as a boundary between the customer and the craft. Behind that boundary lay the working rooms, and the working rooms were divided by what happened in them.
The grinding and pounding happened in one place, because dust is a traveler and will settle into every open vessel in the room. Distilling happened in the stillroom, because distillation needs sustained heat and heat needs a hearth, a furnace, or a stove set apart from everything flammable. Glass fragments of fifteenth-century distillation apparatus, excavated at Selborne Priory in Hampshire around 1965 and now in the Science Museum Group collection, show how long English workshops kept a dedicated place for this work.
Compounding happened at the dispensary bench, where prescriptions were mixed, wrapped, and labeled. Raw materials lived in storerooms, cool and dark, because light, heat, and moisture degrade dried botanicals and spoil prepared ones.
★ Notice what the old workshops never did. They never ground powders beside open jars of finished syrups. They never kept the account books beside the still. They never stored the raw roots on the same shelf as the finished preparations, because a raw material and a finished preparation look alike to a tired eye at the end of a long day, and the difference between them matters enormously. Separation was the system. The rooms were the system made visible.
Your laboratory is almost certainly one table, one counter, or one corner. You do not have separate rooms. So you will do what apothecaries with small premises have always done: you will make rooms out of zones.
❦ In your workbook: record the ordered workshop in your own way — the shop in front, the workrooms behind, and separation as the system — copy, sketch, or note what matters.
The Six Zones
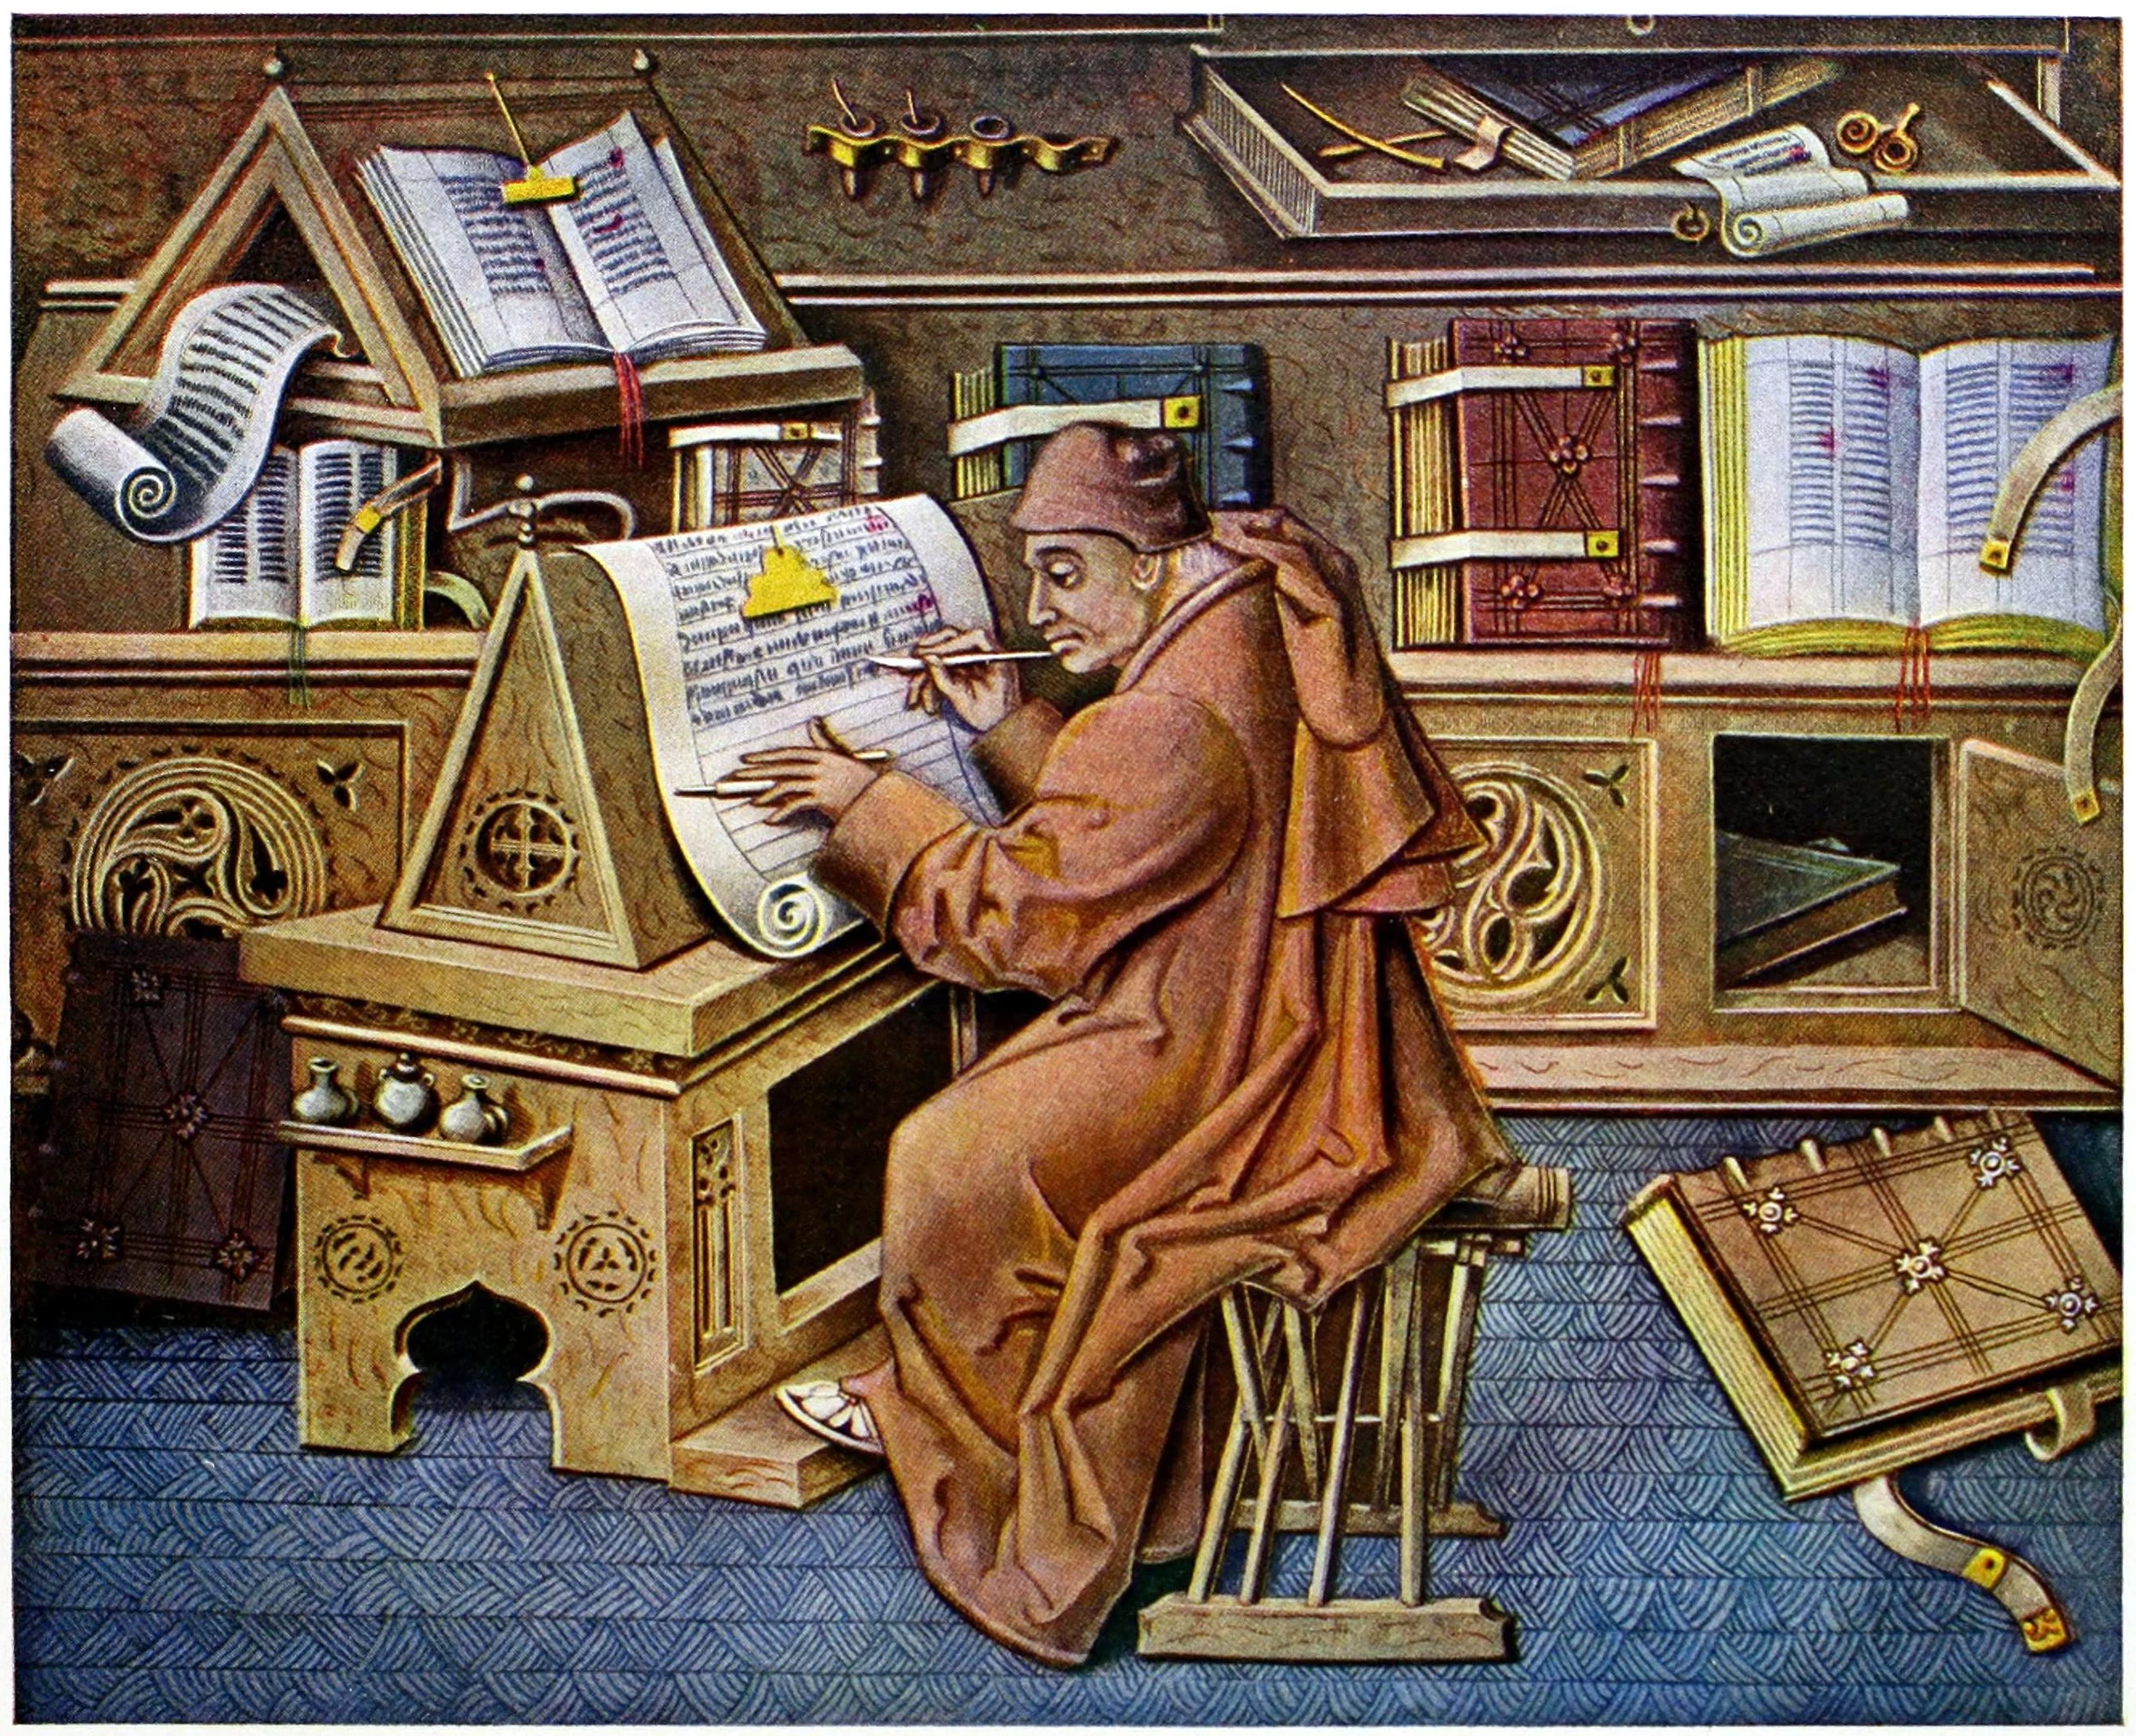
Jean Miélot writing in his scriptorium (miniature by Jean Le Tavernier, after 1456): exemplar on the lectern, tools in their tray, ink in its rack — a Records zone where everything already has its place.
Jean Le Tavernier, miniature from the Miracles de Notre Dame (Bibliothèque nationale de France, MS 9198, f. 19r), after 1456; this file is a later color book reproduction of the miniature. Public domain.
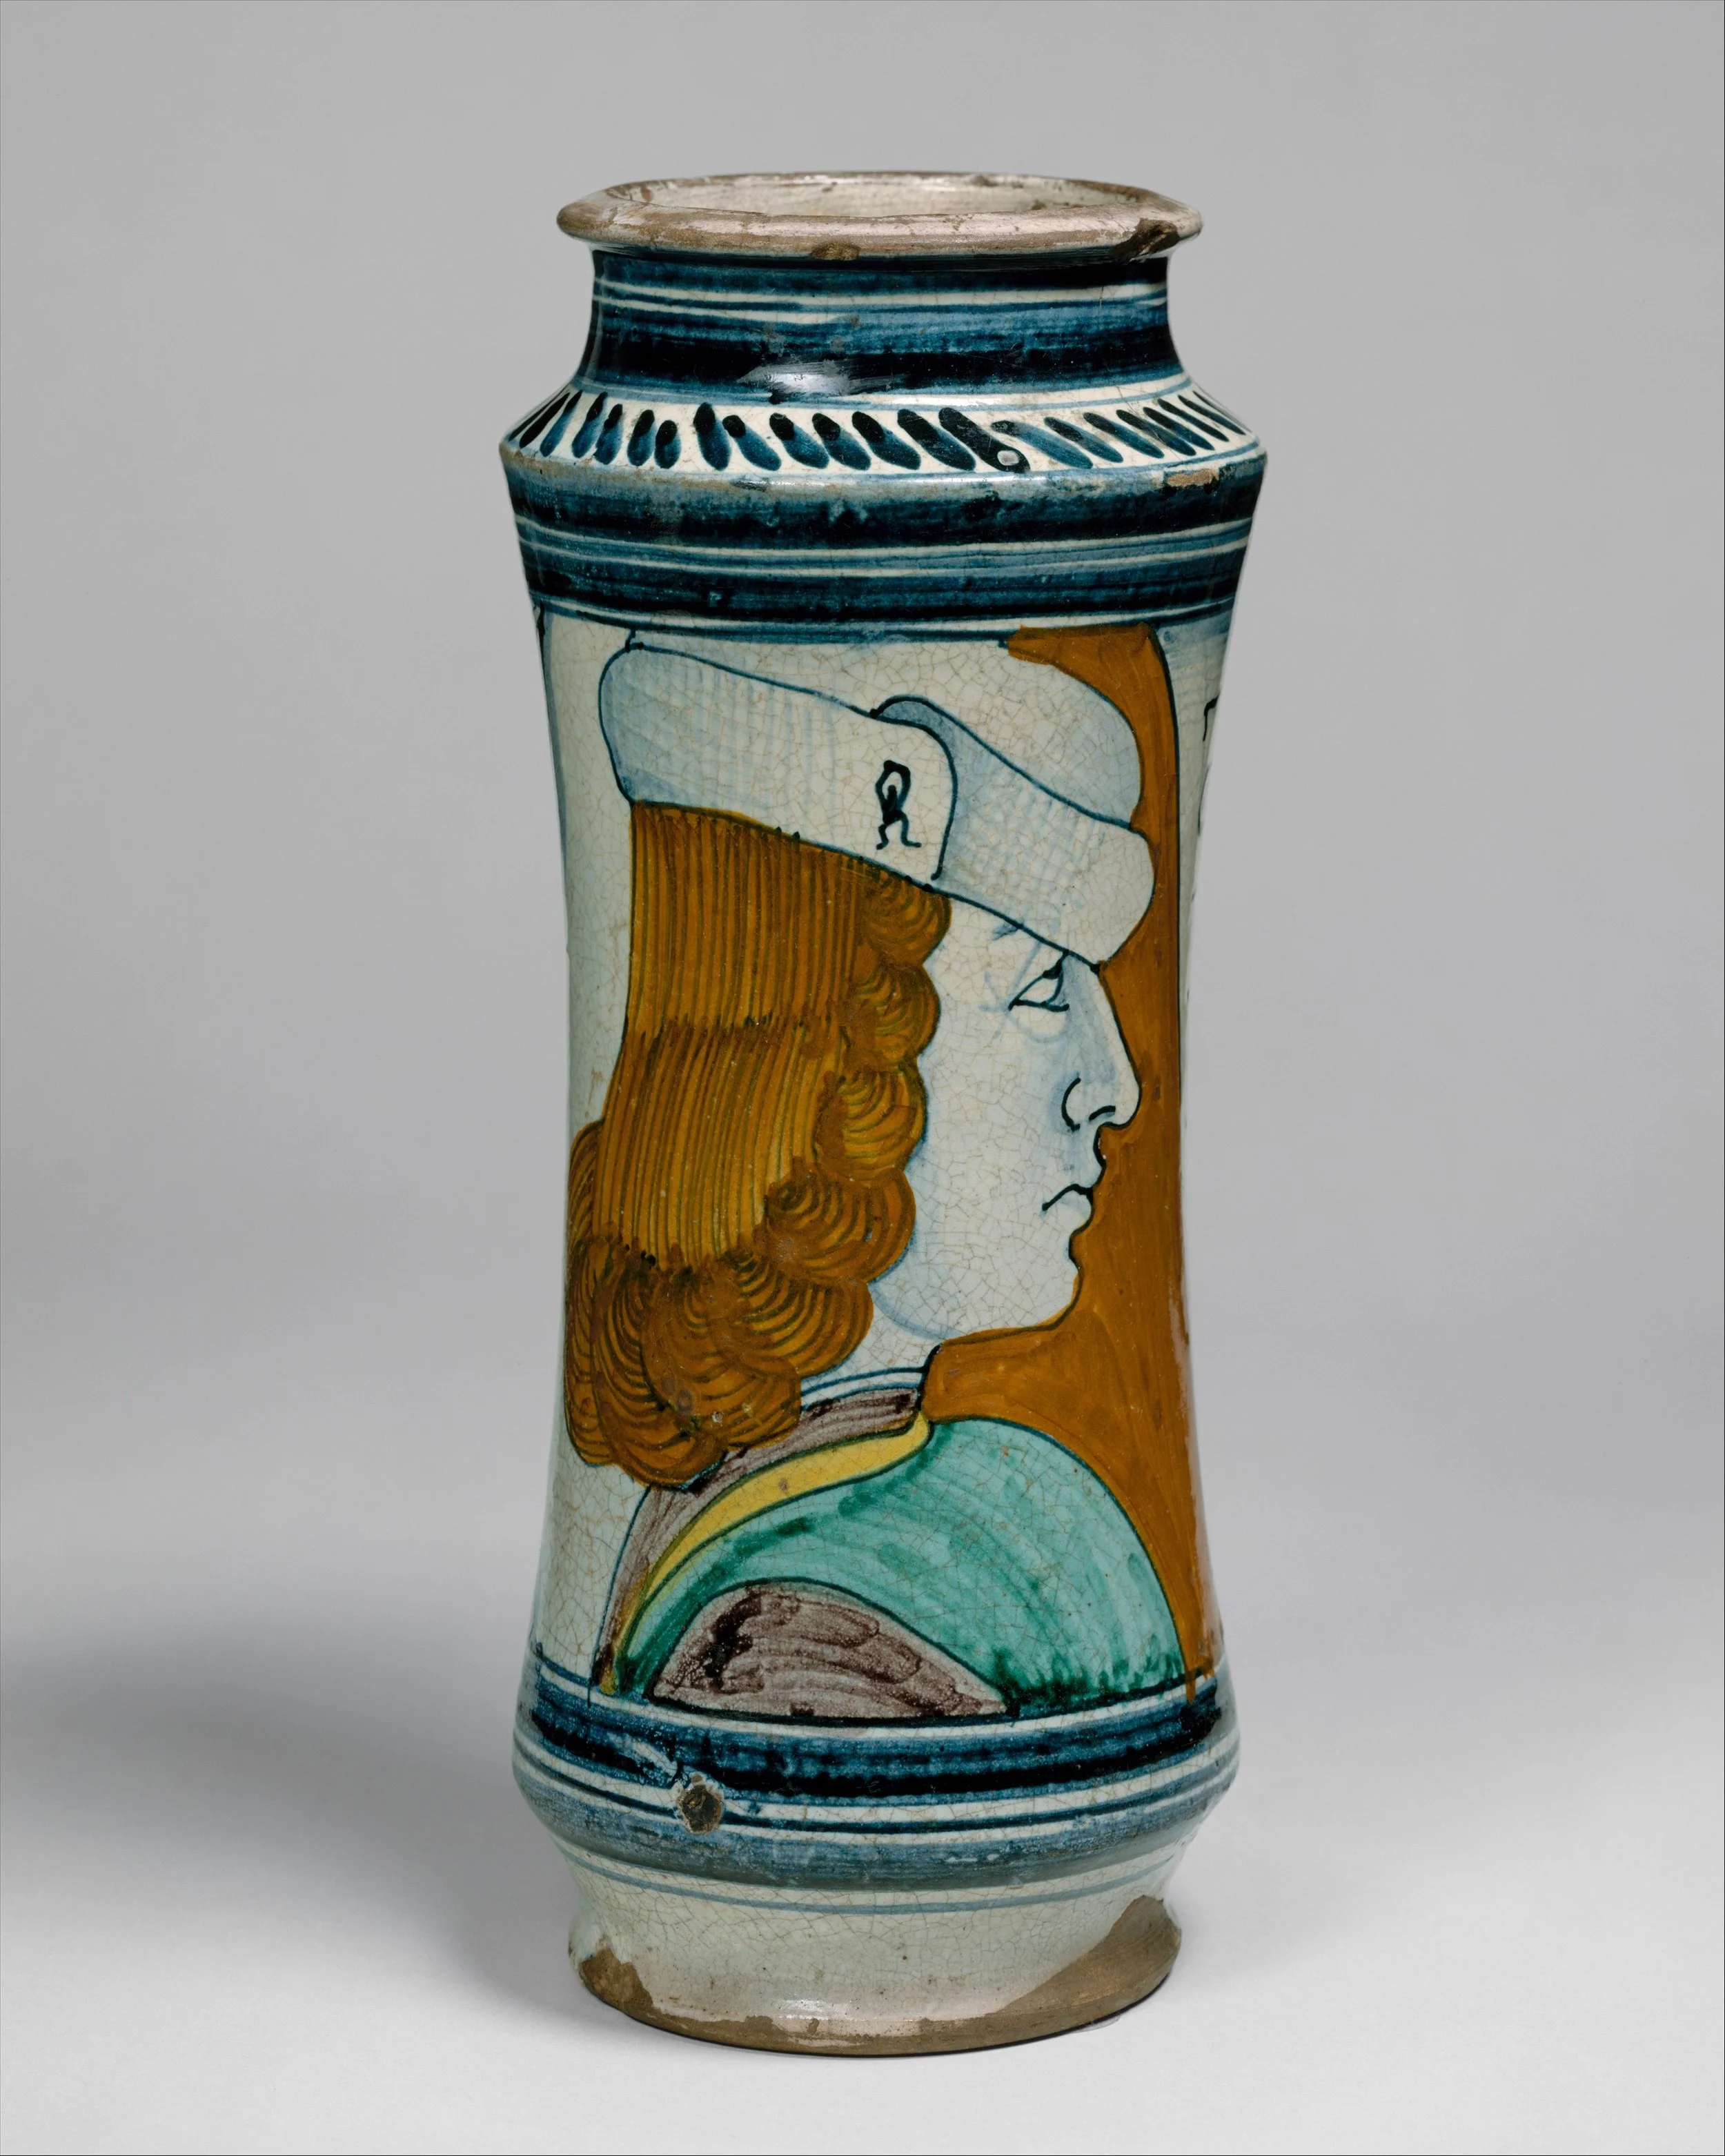
An apothecary jar (albarello), Italian, Naples, 1480–1500: the Storage zone's citizen — a handsome, durable jar made to hold one material, in its place, on the storeroom shelf.
Apothecary jar (albarello), Italian, Naples, 1480–1500, maiolica; The Metropolitan Museum of Art, Open Access. CC0.
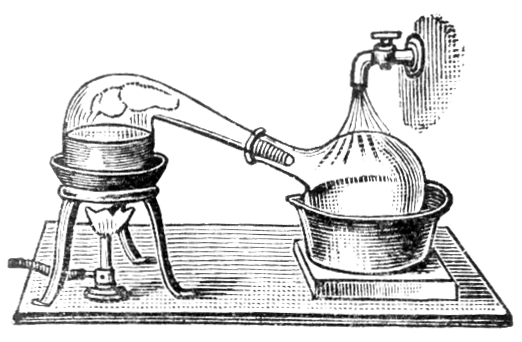
Distillation by retort: the heated vessel apart on its stand, the receiver cooled in its basin — the stillroom's two labors, heating and cooling, side by side and never confused.
Engraved apparatus diagram, source book not named on the file page. Public domain.
★ Zoning is the division of a workspace into defined areas, each with its assigned work and its rules: a zone is a room drawn on a tabletop. Your workspace, whatever its size, will hold six of them. Learn their names and their work.
1. Receiving. The doorway of the laboratory. Every material enters through Receiving, and no material skips it. Here incoming jars, packets, and parcels wait to be inspected, labeled, and recorded before they are allowed any deeper into the laboratory. A small basket or tray marks it. Nothing in Receiving is trusted yet.
2. Preparation. The workbench proper. This is where materials are measured, ground, chopped, and combined. Preparation is the busiest zone and the messiest, which is exactly why its borders are strict: mess made here stays here until cleanup.
3. Heating. The hearth of the laboratory, even when the hearth is a single electric hot plate or a candle warmer. Heating holds everything hot and everything that makes heat. It stands apart from Storage and Records by the widest margin your space allows, and nothing flammable rests in it or leans over it.
4. Cooling. The resting place. Hot vessels cool here, and only here, on a heat-safe surface where they can be seen and avoided until they are safe to handle. Cooling sits near Heating but never inside it: a cooling vessel knocked against a heat source is an accident rehearsing itself.
5. Storage. The storeroom in miniature. Finished preparations, raw materials in their labeled jars, and tools at rest live here, organized and still. Storage is cool, dark, and dry so far as you can manage it, and it is never used as overflow for active work.
★ 6. Records. The scriptorium of your laboratory. This is the dry desk where your notebook, your potions journal pages, your lab map, and your pen live. Nothing wet, dusty, or hot ever enters Records. The monastery scribes who gave us the word scriptorium knew what every apothecary learned after them: writing done beside a spill is writing lost.
Mark each zone with tape, cards, or trays, and label every one by name. A zone without a label is a suggestion. A zone with a label is a rule.
Scholars sometimes ask whether all six zones are truly necessary on a single small table. They are. I have seen a preparation ruined by a jar that only sat in Records for a moment. I have seen a notebook ruined by the same jar on its way back. The zones are not about space. They are about decisions made in advance, so that tired hands do not have to make them in the moment. Mark all six, label all six, and keep them.
— Professor Crimblebrew Muddlenook, Potions Laboratory • Master Apothecary • Head of House Meridies
Check in: A jar sits in Records "only for a moment," and the notebook is ruined on its way back. What does that small story prove about what the zones are really for?
❦ In your workbook: record the six zones in your own way — each zone's name, its work, and its one strict rule — copy, sketch, or note what matters.
In your packet: Exercise III — The Small-Space Defense ✎ begins here. Work it now, or mark the place and take it as homework — your choice.
Wet and Dry, Clean and Dirty
Two distinctions govern where the six zones sit relative to one another.
Wet and dry. Water is the great traveler of the laboratory. It creeps along benches, wicks into paper, and ruins powders and records alike. So the wet work, washing, rinsing, and anything involving liquids in open vessels, stays near the water source and far from Records, Storage of dry goods, and anything paper. Powders are ground and kept dry. Papers are kept dry. When a task is wet, it happens in the wet part of Preparation, on a tray that can catch what escapes.
★ Clean and dirty. Work flows in one direction: from clean zones toward dirty zones, never backward. Receiving is the dirtiest zone, because incoming materials are uninspected and unknown. Preparation is dirty while work is underway and clean again after cleanup. Records is always clean. The rule is simple: tools, hands, and materials move from clean to dirty. A tool that has touched the dirty end never travels back across the clean end without being washed first. This is the same principle that keeps a kitchen safe, and it keeps a laboratory honest.
Why does direction matter? Because contamination is invisible. You cannot see grinding dust on a jar, and you cannot see it when that jar is carried across the records desk. The workflow rule exists so that you do not have to see it. Follow the direction and the invisible stays where it belongs.
Check in: Contamination is invisible — so why does following a direction you cannot watch working still keep the laboratory honest?
❦ In your workbook: record wet and dry, clean and dirty in your own way — where the wet work sits, and the one direction work is allowed to flow — copy, sketch, or note what matters.
Light, Air, Water, and Fire
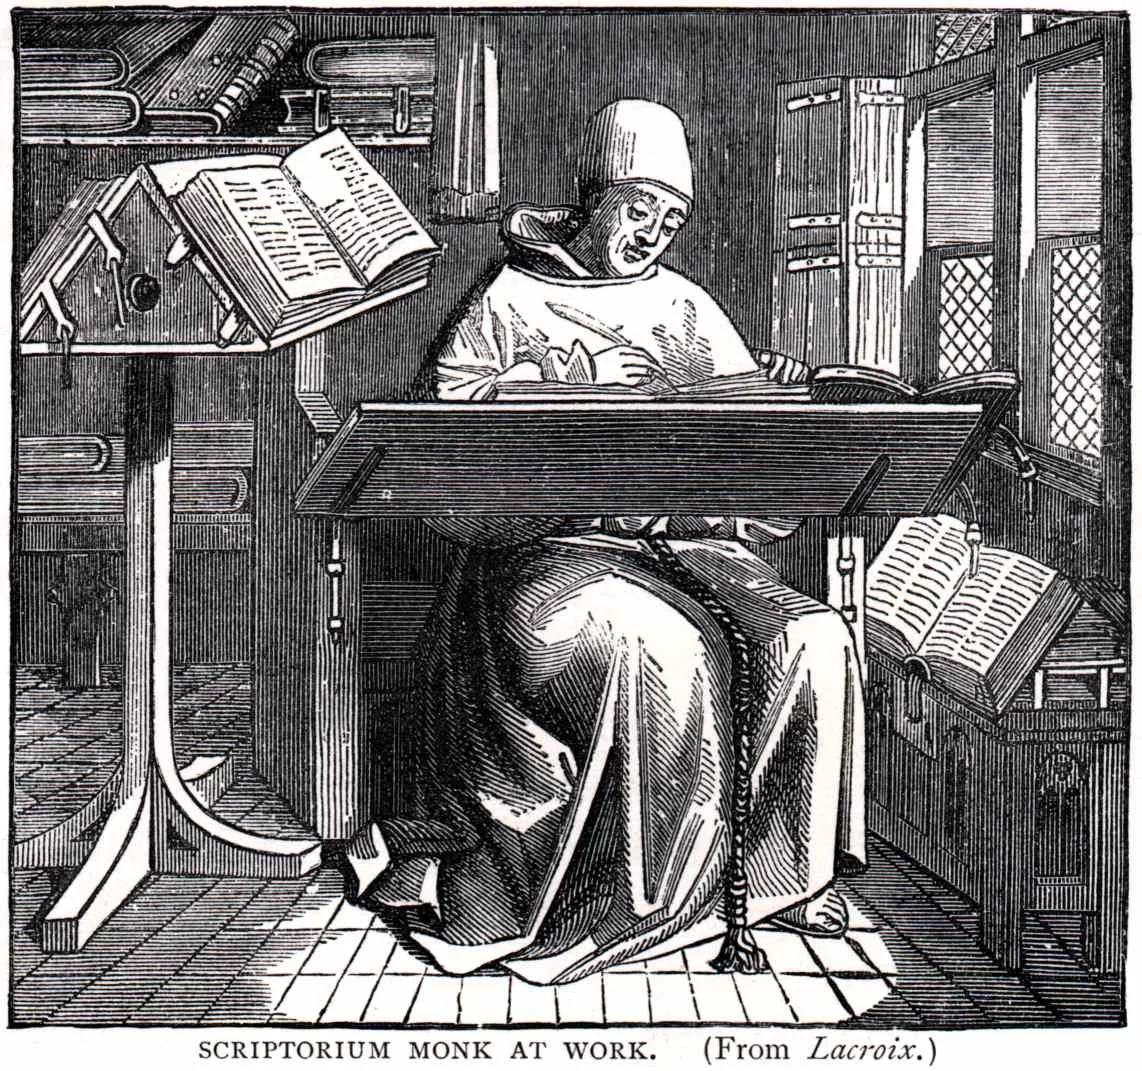
A scriptorium monk at work, from Lacroix: the sloped desk set to the window light, the exemplar apart from the page being written — light placed by rule, as your Preparation and Records zones are.
Engraving after Lacroix, as captioned on the image. Public domain.
Four physical needs shape the placement of your zones.
Light. Fine work needs good light. Place Preparation where the light is best, ideally daylight or a strong lamp. Records needs light too, but dry light: a desk lamp, not a sunny windowsill where rain or condensation can reach.
Air. Ventilation is not a luxury. Dust from grinding, fumes from heated preparations, and steam from hot water all need somewhere safe to go. If your workspace has a window, Preparation sits near it. If it has a range hood or fan, the Heating zone sits under it. Still air plus dust plus an open notebook is how archives get dirty and lungs get irritated.
Water. The wet end of Preparation sits nearest the sink. The walk from sink to bench should be short, clear, and unobstructed, because wet hands carrying a dripping vessel should not be navigating an obstacle course.
★ Fire. The Heating zone is placed with fire in mind: away from Storage, away from Records, away from anything paper or flammable, with the extinguisher within quick reach but not where flames would block your path to it. Know the route from your workspace to the door, and keep it clear. The old stillrooms were built apart from the rest of the premises for exactly this reason, and your heating corner deserves the same respect on a smaller scale.
Check in: The extinguisher stands within quick reach of the Heating zone, but not where flames could block your path to it. Why does its exact position matter as much as its presence?
❦ In your workbook: record light, air, water, and fire in your own way — the four needs, and where each one puts its zones — copy, sketch, or note what matters.
Procedure: Zoning Your Workspace
Work through these steps in order. Do not skip the drafting step; the map comes before the markers.
- Clear the bench. Remove everything from your workspace. Everything. A zone cannot be drawn on a cluttered surface, and clutter is the hazard we are eliminating.
- Draft the map. On paper, sketch your workspace as a rectangle. Mark the fixed facts: where the light comes from, where the nearest water is, where the door is, where the ventilation is. These facts do not move, so the zones must fit around them.
- Place the six zones on paper first. Put Records in the driest, calmest corner. Put Heating where ventilation is best and flammables are fewest, with a clear path to the door. Put Cooling beside Heating but separate from it. Put Preparation in the best light with its wet end toward the water. Put Receiving at the edge nearest where materials arrive. Put Storage in the coolest, darkest available spot. If two zones compete for one corner, Records wins the dry corner and Heating wins the ventilated one; the rest negotiate.
- Mark the zones. Transfer the draft to the real surface with tape, cards, or trays. Label each zone by name, large enough to read at a glance.
- Install the inbox. Place your basket or tray in Receiving. It should be the first thing a new material touches.
- Walk the workflow. Stand at Receiving and trace the path a new material will take: Receiving to Records (to be logged), to Preparation (to be worked), to Heating (if heated), to Cooling (to rest), to Storage (to live), with Records consulted throughout. If the path crosses itself awkwardly, adjust the draft and the markers until it flows.
- Photograph or copy the draft. Keep the working draft; it becomes part of the archive entry.
❦ In your workbook: record the zoning procedure in your own way — map before markers, the six placements, and the workflow walked before any work begins — copy, sketch, or note what matters.
In your packet: Exercise I — Zone and Map ⚒ begins here. Work it now, or mark the place and take it as homework — your choice.
Guided Observation: The Mock Task
A zone system is tested by use, not by looking. Run this mock task exactly as written, moving real objects through your real zones. Use a clean empty jar as your stand-in material.
- A new jar of dried leaves arrives. Place it in Receiving.
- Inspect it: look, sniff from a careful distance, check the seal. Record its arrival in your notebook at the Records zone. Label the jar before it leaves Receiving.
- Carry it to Preparation. Open it there. Measure a spoonful into a bowl (then pour the spoonful back; this is a rehearsal, nothing is consumed or wasted).
- Pretend the preparation requires heat. Carry the bowl to Heating and set it down. Step back along your exit route and confirm it is clear.
- Move the bowl to Cooling. Wait one full minute. Observe: is the cooling surface stable? Is the vessel visible and out of the traffic path?
- Carry the cooled bowl to Storage and shelve it. Return the jar to Storage as well, in its labeled place.
- Return to Records and log the completed mock task with today's date.
Now answer honestly in your notebook: did any object enter the wrong zone? Did your hands or the jar cross Records while dusty or wet? Did anything sit in a zone "just for a moment" that was not its own? Write down every violation, however small. A zone system with known violations can be repaired. A zone system with denied violations cannot.
Check in: Why is the jar labeled before it leaves Receiving, rather than later, when it reaches Storage?
In your packet: Exercise II — The Violation Hunt ◐ begins here. Work it now, or mark the place and take it as homework — your choice.
Cleanup
Cleanup is the daily restoration of the zones, and it follows the workflow direction: clean to dirty, then the dirty zones themselves.
- Return every tool and material to its zone. Storage should look like Storage again.
- Wipe the Preparation surface. Empty and wipe the Receiving inbox.
- Check the Heating zone: cool, clear, nothing resting on or leaning over the heat source.
- Check Records: dry, orderly, pen capped, notebook closed or covered.
- Sweep the floor area of your workspace if anything traveled there.
- Wash your hands.
The zones themselves stay marked. You do not un-zone the laboratory at the end of the day. The markers remain so that tomorrow's work begins in an ordered room.
❦ In your workbook: record cleanup in your own way — the daily restoration, in the workflow's own direction, with the markers left standing — copy, sketch, or note what matters.
Archive Entry: The Lab Map
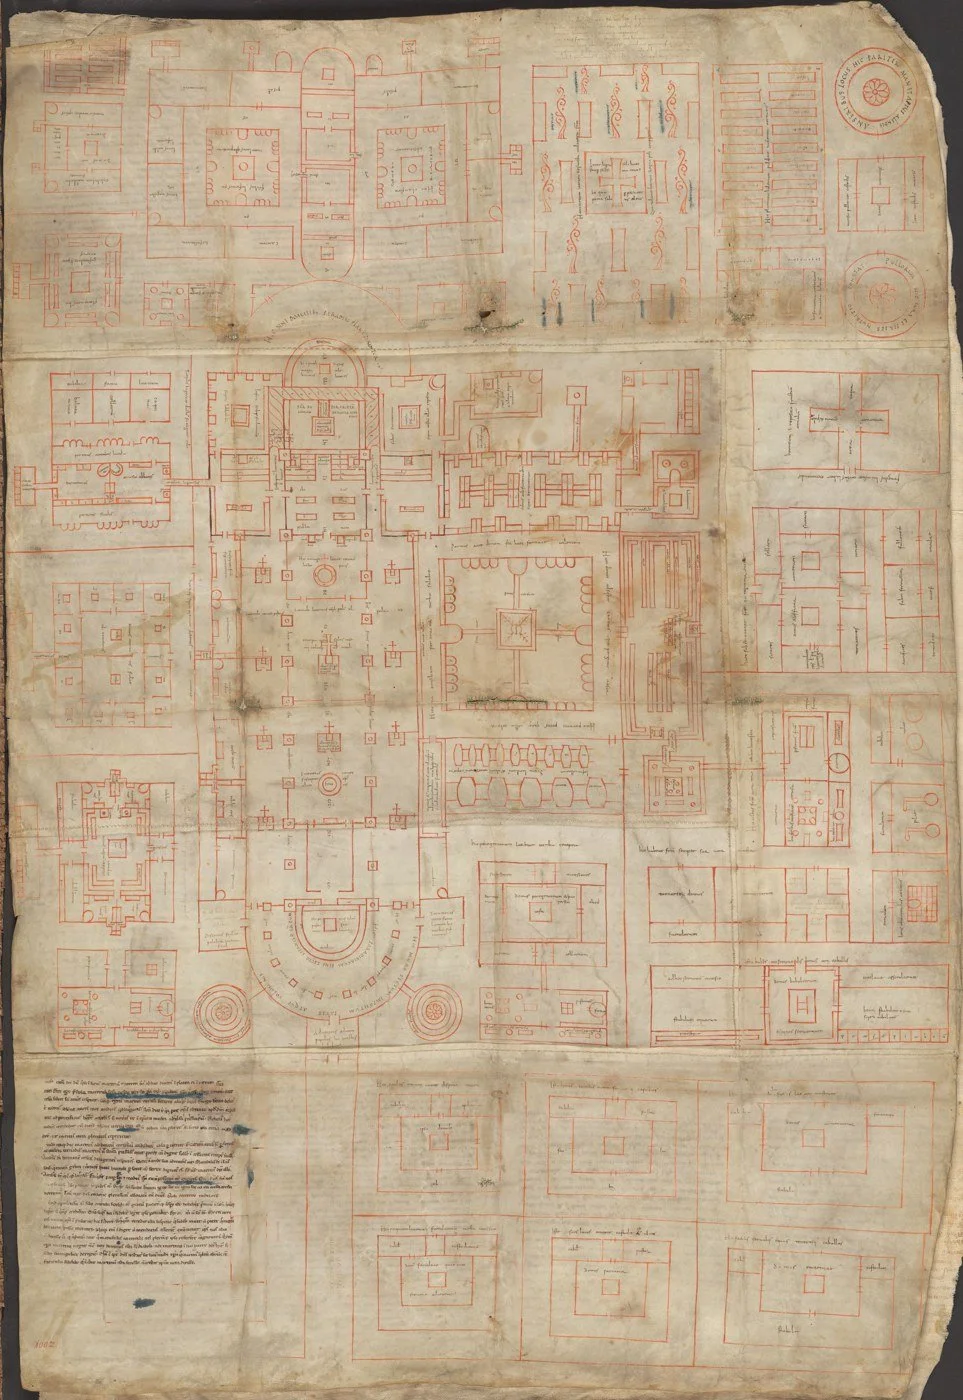
The Plan of Saint Gall (Reichenau, c. 820–830): an entire working community zoned on parchment — every building given its function in writing before a single stone was laid. Your lab map is its descendant.
Unknown author, 9th century; Stiftsbibliothek Sankt Gallen, Codex Sangallensis 1092. Public domain.
★ Your archive entry for this lesson is the finished lab map, and it has required parts. Draw or paste your final zone plan on a fresh notebook or binder page and include all of the following:
- The six zone names, labeled on the plan exactly as they are marked in the workspace
- The fixed facts: light source, water source, door and exit route, ventilation
- A key or legend explaining your markers (what tape, trays, or cards mean)
- The date the map was drawn
- One sentence under the map stating the clean-to-dirty direction in your workspace
File the map where your archive lives. It is the first page of your laboratory's permanent record, and every later lesson will assume it exists.
❦ In your workbook: record the lab map's required parts in your own way — six names, the fixed facts, the key, the date, and the direction sentence — copy, sketch, or note what matters.
Materials
Required (Level One — household items)
- A table, counter, desk, or clear corner that will serve as your laboratory workspace
- Paper and pencil for drafting your lab map (a ruler is optional but encouraged)
- Zone markers, at least six: masking tape, index cards, small trays, or folded paper tents
- Adhesive labels or masking tape and a pen for naming the zones
- A small basket, box, or tray to serve as the receiving inbox
- A notebook or binder page for the final lab map, which becomes your archive entry
- A clean empty jar, a small bowl, and a spoon for the Guided Observation mock task
Suggested (Level Two — historically closer)
Level Two scholars may add compartmented wooden or metal trays (one per zone), a floor plan of the workspace drawn to scale, and glass or ceramic ramekins to replace paper markers. The principle is identical; only the materials are handsomer.
Reflection Questions
Answer the following questions in your workbook.
- Why did the historical apothecary separate the shop from the workrooms? What problems does that separation solve?
- Explain the clean-to-dirty workflow in your own words. What goes wrong when the direction reverses?
- Your workspace may be a single table or corner. How can six zones fit in a small space without breaking the zoning principle?
- Why does the finished lab map belong in the archive rather than only taped to the wall above the bench?
- Muddlenook's rule is "everything in its place." Describe one mistake, from your own experience or imagination, that good zoning would have prevented.
Workbook Checklist — Lesson 2
In my workbook I have:
- ☐ described how historical apothecary workshops divided their premises into functional areas — the shop in front, the workrooms behind it
- ☐ explained the zoning principle and named all six zones: Receiving, Preparation, Heating, Cooling, Storage, and Records
- ☐ distinguished wet from dry work areas and clean from dirty workflow, and said why each distinction matters
- ☐ zoned my own workspace with six marked, labeled zones, whatever its size — or drawn and defended the full plan in my workbook
- ☐ drawn my labeled lab map with the fixed facts and the clean-to-dirty sentence, and filed it as my archive entry
- ☐ run the mock task and logged every zone violation honestly, however small
- ☐ stated the safety briefing in my own words, including the clear exit path, the extinguisher's location, and the rule that no heating happens in this lesson
☐ Lesson completed Date: ___ Signature: ___
The Professor's Closing Note
Closing review, sealed: You now own something most beginners never build: a workspace that enforces good habits when you are too tired to enforce them yourself. Keep the markers up. Keep the inbox empty at the end of the day. Keep Records dry. When a later lesson tempts you to set something down "just for a moment" in the wrong zone, remember the jar in Records and the notebook it ruined. Order is not the enemy of experiment. Order is what makes experiment repeatable, and repeatable is what makes it science. I am proud of this room you have built. Keep it.
— Professor Crimblebrew Muddlenook, Potions Laboratory • Master Apothecary • Head of House Meridies
Cross-Class Connections

Scrollwork · Unit I, Lesson 1 — The Scriptorium Desk
Come in, scholars, and learn where the scribe sits. Before a quill is lifted in my library, the desk itself is arranged: the angle of the board, the direction of the light, the place of every tool decided before the first line is copied. Your Professor Muddlenook calls his dry desk a scriptorium in miniature. Come and see the room his miniature was copied from, and arrange a writing desk of your own.
Scrollwork · Unit I, Lesson 4 — Inkwells, Sand, & Scribal Tools
Tonight we put the pieces together and ask why the desk is arranged this way. A pen and a page do not make a manuscript: between them stands a whole system of small, deliberate choices, each object answering a vulnerability of the work — where the ink waits, how the page is protected from spills. You have zoned a laboratory on the same logic. Come and arrange a workstation whose every position you can justify.

Creative Arts · Unit I, Lesson 1 — Welcome to the Creative Arts Workshop
Come in, scholars, and wipe your feet. In my Workshop every tool has a place, and at the end of work it is in that place — not tidiness for its own sake, but because a tool you can find is a tool you can use. You will learn the bench drill that begins and ends every piece of work in this room: set up, work, put away. Professor Muddlenook's zones and my drill are the same habit wearing two aprons. Keep both.
Further Reading & Sources
- Wellcome Collection: Apothecary's shop, Switzerland (reconstruction of a late-17th-century interior): study the public shop, rows of labeled jars, fitted drawers, the counter as boundary between customer and craft.
- Science Museum Group: Green glass alembic, Western European, 1750-1850: the stillroom's signature vessel. The same collection holds 15th-century distillation glass excavated at Selborne Priory, Hampshire.
- The Pharmaceutical Journal: A Victorian pharmacy recreated at the Science Museum: John Gibson's 1834 Hexham pharmacy, preserved complete, showing shop organization carried from the apothecary tradition into the modern era.
Browse the Potions shelf in the school Library for readable editions of these works.
Submit your work for this lesson using the form below.
CONTINUE IN THE POTIONS LABORATORY
← Previous · Lesson 1: Welcome to the Potions Laboratory Next · Lesson 3: Vessels, Jars & Blown Glasswork →
Unit I — Foundations of the Laboratory Potions Laboratory — All 52 Lessons
The rest of Unit I: Lesson 1 · Welcome to the Laboratory · Lesson 3 · Vessels & Glasswork · Lesson 4 · Labels & Seals · Lesson 5 · Recipe Journals · Lesson 6 · Weights & Measures · Lesson 7 · Grinding · Lesson 8 · Simples Census · Lesson 9 · Hearth Clearance