

POTIONS
Unit I · Lesson 7GRINDING
Professor Crimblebrew Muddlenook
Master Apothecary • Potions
Head of House Meridies • School of Evershade
Professor's Introduction

Scholars, today you meet the oldest tool in this laboratory. Older than the cauldron. Older than the still. Older, indeed, than writing itself. The mortar and pestle: a heavy bowl and a blunt club of stone, and between them every preparation you will ever make in this course.
You have spent six lessons learning where things belong, what they are called, and how they are measured. Today your hands join the work. Grinding is the first true laboratory skill, and it is a skill of the body as much as of the mind. The grip. The stance. The patience to work in small batches and the discipline to clean between materials. These are not details. They are the foundation everything else stands on.
A warning, and I give it gladly: this lesson is about the motion, not the theory. You will learn how to grind today. When you reach Lesson 21, you will learn why particle size governs extraction, what comminution means, and how sieves sort powder into grades. That lesson owns the science. This lesson owns your hands. Learn the motion now. The reasons will come, and they will make more sense for the practice.
Order first, scholars. Set your bench. Steady your mortar. And mind the dust.
— Professor Crimblebrew Muddlenook, Potions Laboratory • Master Apothecary • Head of House Meridies

Pin: STAFFORDSHIRE, ENGLAND. Timeline stop: 1759 · WEDGWOOD'S PORCELAIN MORTARS.
Lesson Objectives
By the end of this lesson, you will be able to:
- Describe the mortar and pestle's place in human craft, from Stone Age grinding stones to the apothecary's bench.
- Choose a suitable mortar for a given material: stone, ceramic, or glass, and know which to reach for and why.
- Demonstrate the correct grip, stance, and two foundational motions: pounding and circular grinding.
- Judge ground texture by eye and touch, and record your observations in orderly form.
- Clean a mortar and pestle between materials to prevent cross-contamination.
- State the dust and ventilation safety rules and follow them without being reminded.
Reading this lesson: ★ marks the passages to remember. They return on the unit quiz and the class test. Check in questions ask the material back as you go; answer them in your workbook when you meet them.
Working this lesson: Your assignment packet is the first download on this page. Work in it as the lesson moves along, answering each exercise as its subject is taught — or read the lesson through for your notes and take the exercises as homework afterward. Both are proper ways to sit this class. Signposts in the reading tell you where each exercise belongs. Written answers are short answers in your own words; a few honest lines are worth more than a filled page.
Your Assignment Packet
This lesson's exercises live in its packet: the Lexicon Handout (every term, course terms marked ◆), Materials, Guided Practice, the Assignment Manual with its answer key for self-checking, the Reflection Questions, and the Workbook Checklist. Download the packet before you begin and keep it beside you as you read.
Safety Briefing
Read every word before you touch the mortar. Muddlenook does not repeat himself about safety, and he notices who was listening.
★ Dust. Grinding makes dust, and dust belongs in the mortar, not in your lungs. Grind gently and steadily. Never blow across the mortar to clear it, never puff at a powder, and never lean close to peer at fine material. Work in a ventilated area: an open window or a running fan nearby, with air moving away from your face. If a material is pungent or makes you cough, stop at once, step away, and let the air clear. A simple dust mask is good practice for any grinding beyond a pinch of kitchen herbs, and younger students should wear one as a matter of course.
Check in: Grinding has made you cough. What do you do — in the lesson's own order?
Stability. A mortar that walks across the bench is a mortar that tips. Set yours on a damp cloth or a folded towel before you begin. It will sit still and respect you for it.
Hands. One hand holds the mortar steady. The other holds the pestle. Fingers stay clear of the bowl's rim and out from under the pestle's path. Some mortars, especially rough stone and unglazed ceramic, have sharp edges at the rim. Handle them with attention, not haste.
★ Nothing enters the mouth. Ground powders are laboratory specimens. They are labeled, dated, and kept as specimens. No tasting, no touching to the tongue, no "just a pinch to check." Your eyes and your fingertips are your instruments today.
Adult supervision. Younger scholars grind alongside an adult, particularly when working with unfamiliar materials or a heavy stone mortar. This is not negotiable.
❦ In your workbook: record the safety briefing in your own way — dust and ventilation, the steady mortar, hands clear, nothing in the mouth, and adult supervision — copy, sketch, or note what matters.
A Tool Older Than Writing
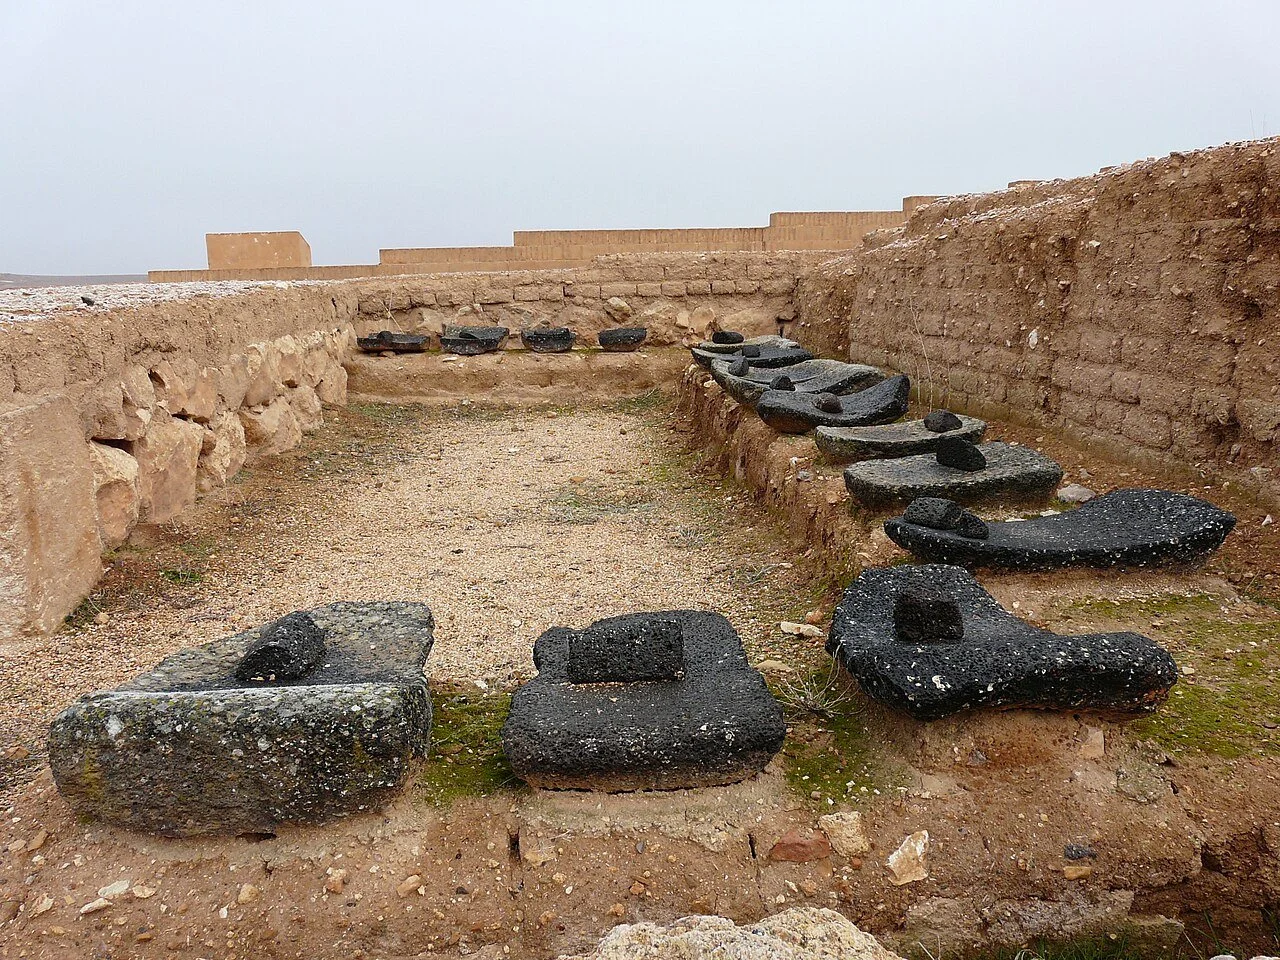
Saddle querns and grinding stones where their owners left them, at Ebla (Syria) — the mortar's great cousin, worked back and forth by hand.
Ancient saddle querns in situ at Ebla, via Wikimedia Commons. CC0.
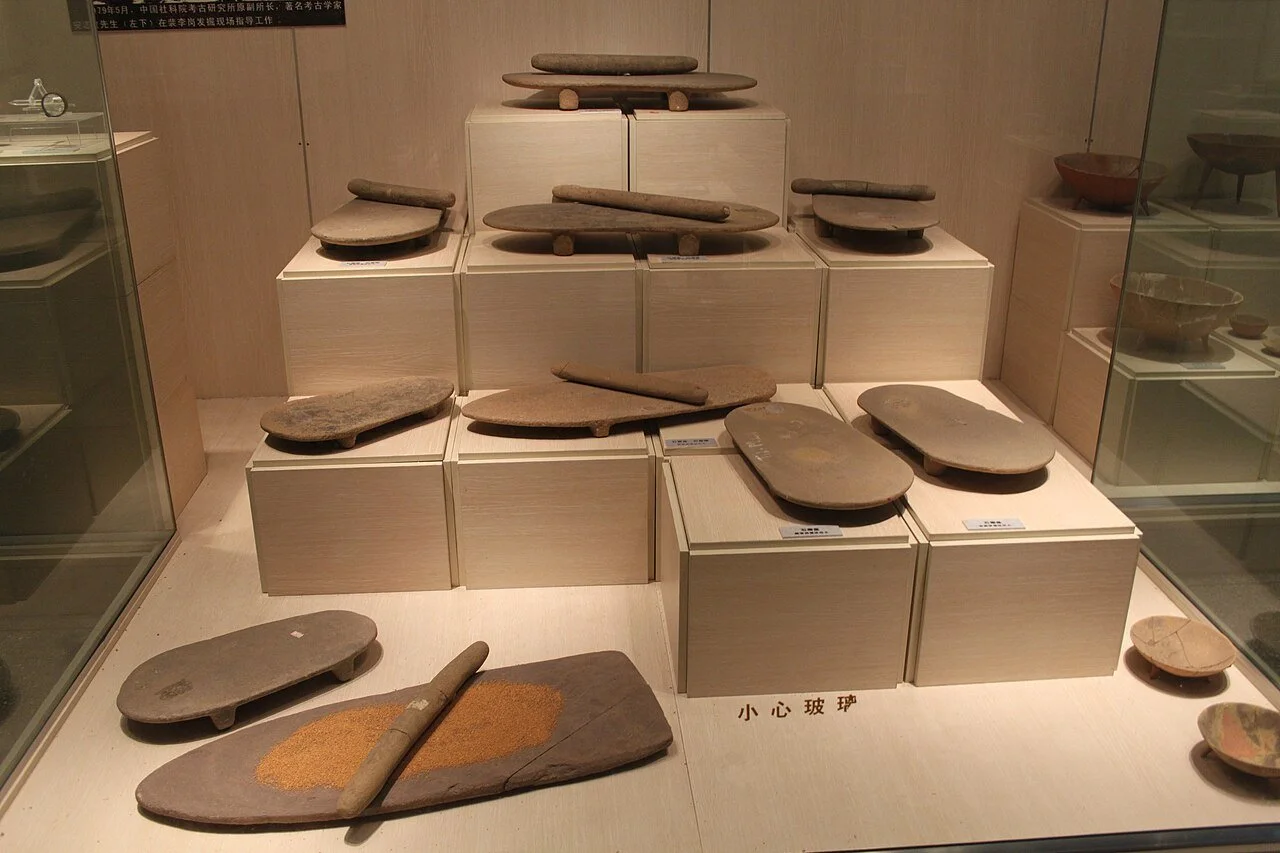
Neolithic querns and rollers of the Peiligang culture — grain ground on a flat stone, the arrangement the foreground stone still demonstrates.
Neolithic stone querns and rollers, Peiligang culture, via Wikimedia Commons. CC0.
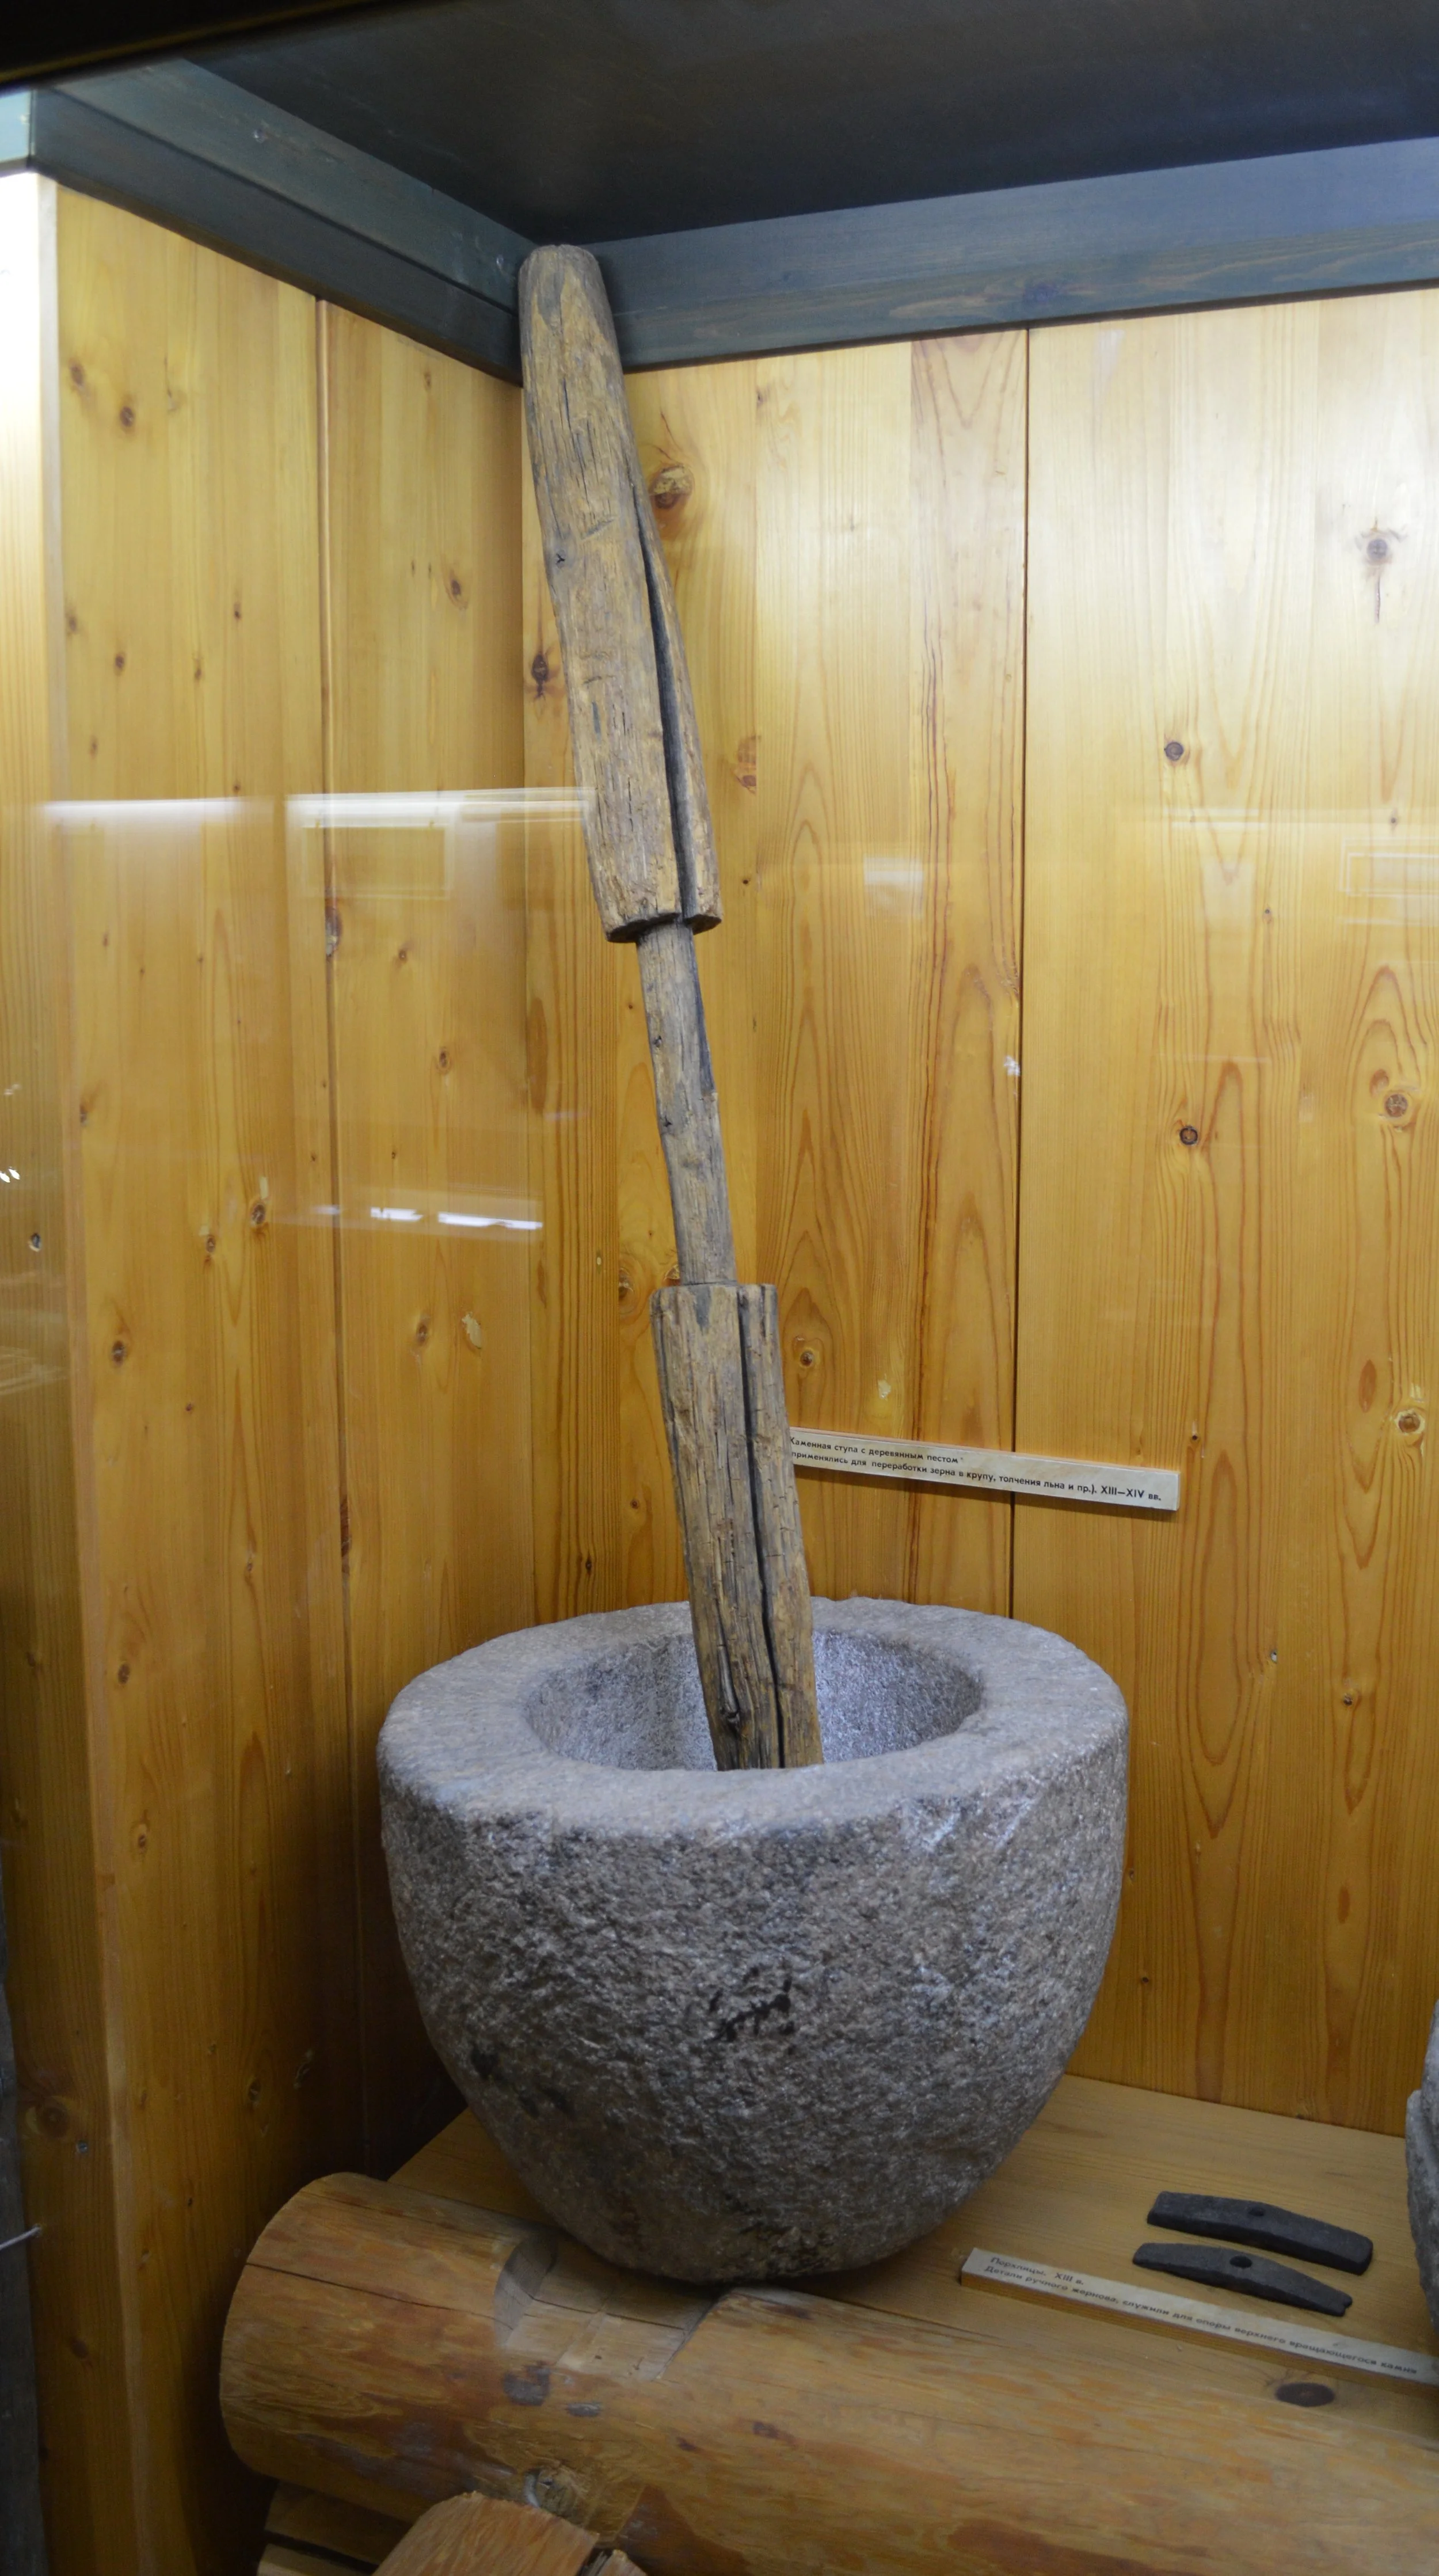
A stone mortar and wooden pestle of the 13th–14th centuries, Novgorod — built at grain-processing scale, and the same two shapes as on your bench.
Stone mortar and wooden pestle, 13th–14th c., Novgorod Kremlin Museum, photograph via Wikimedia Commons. CC0.
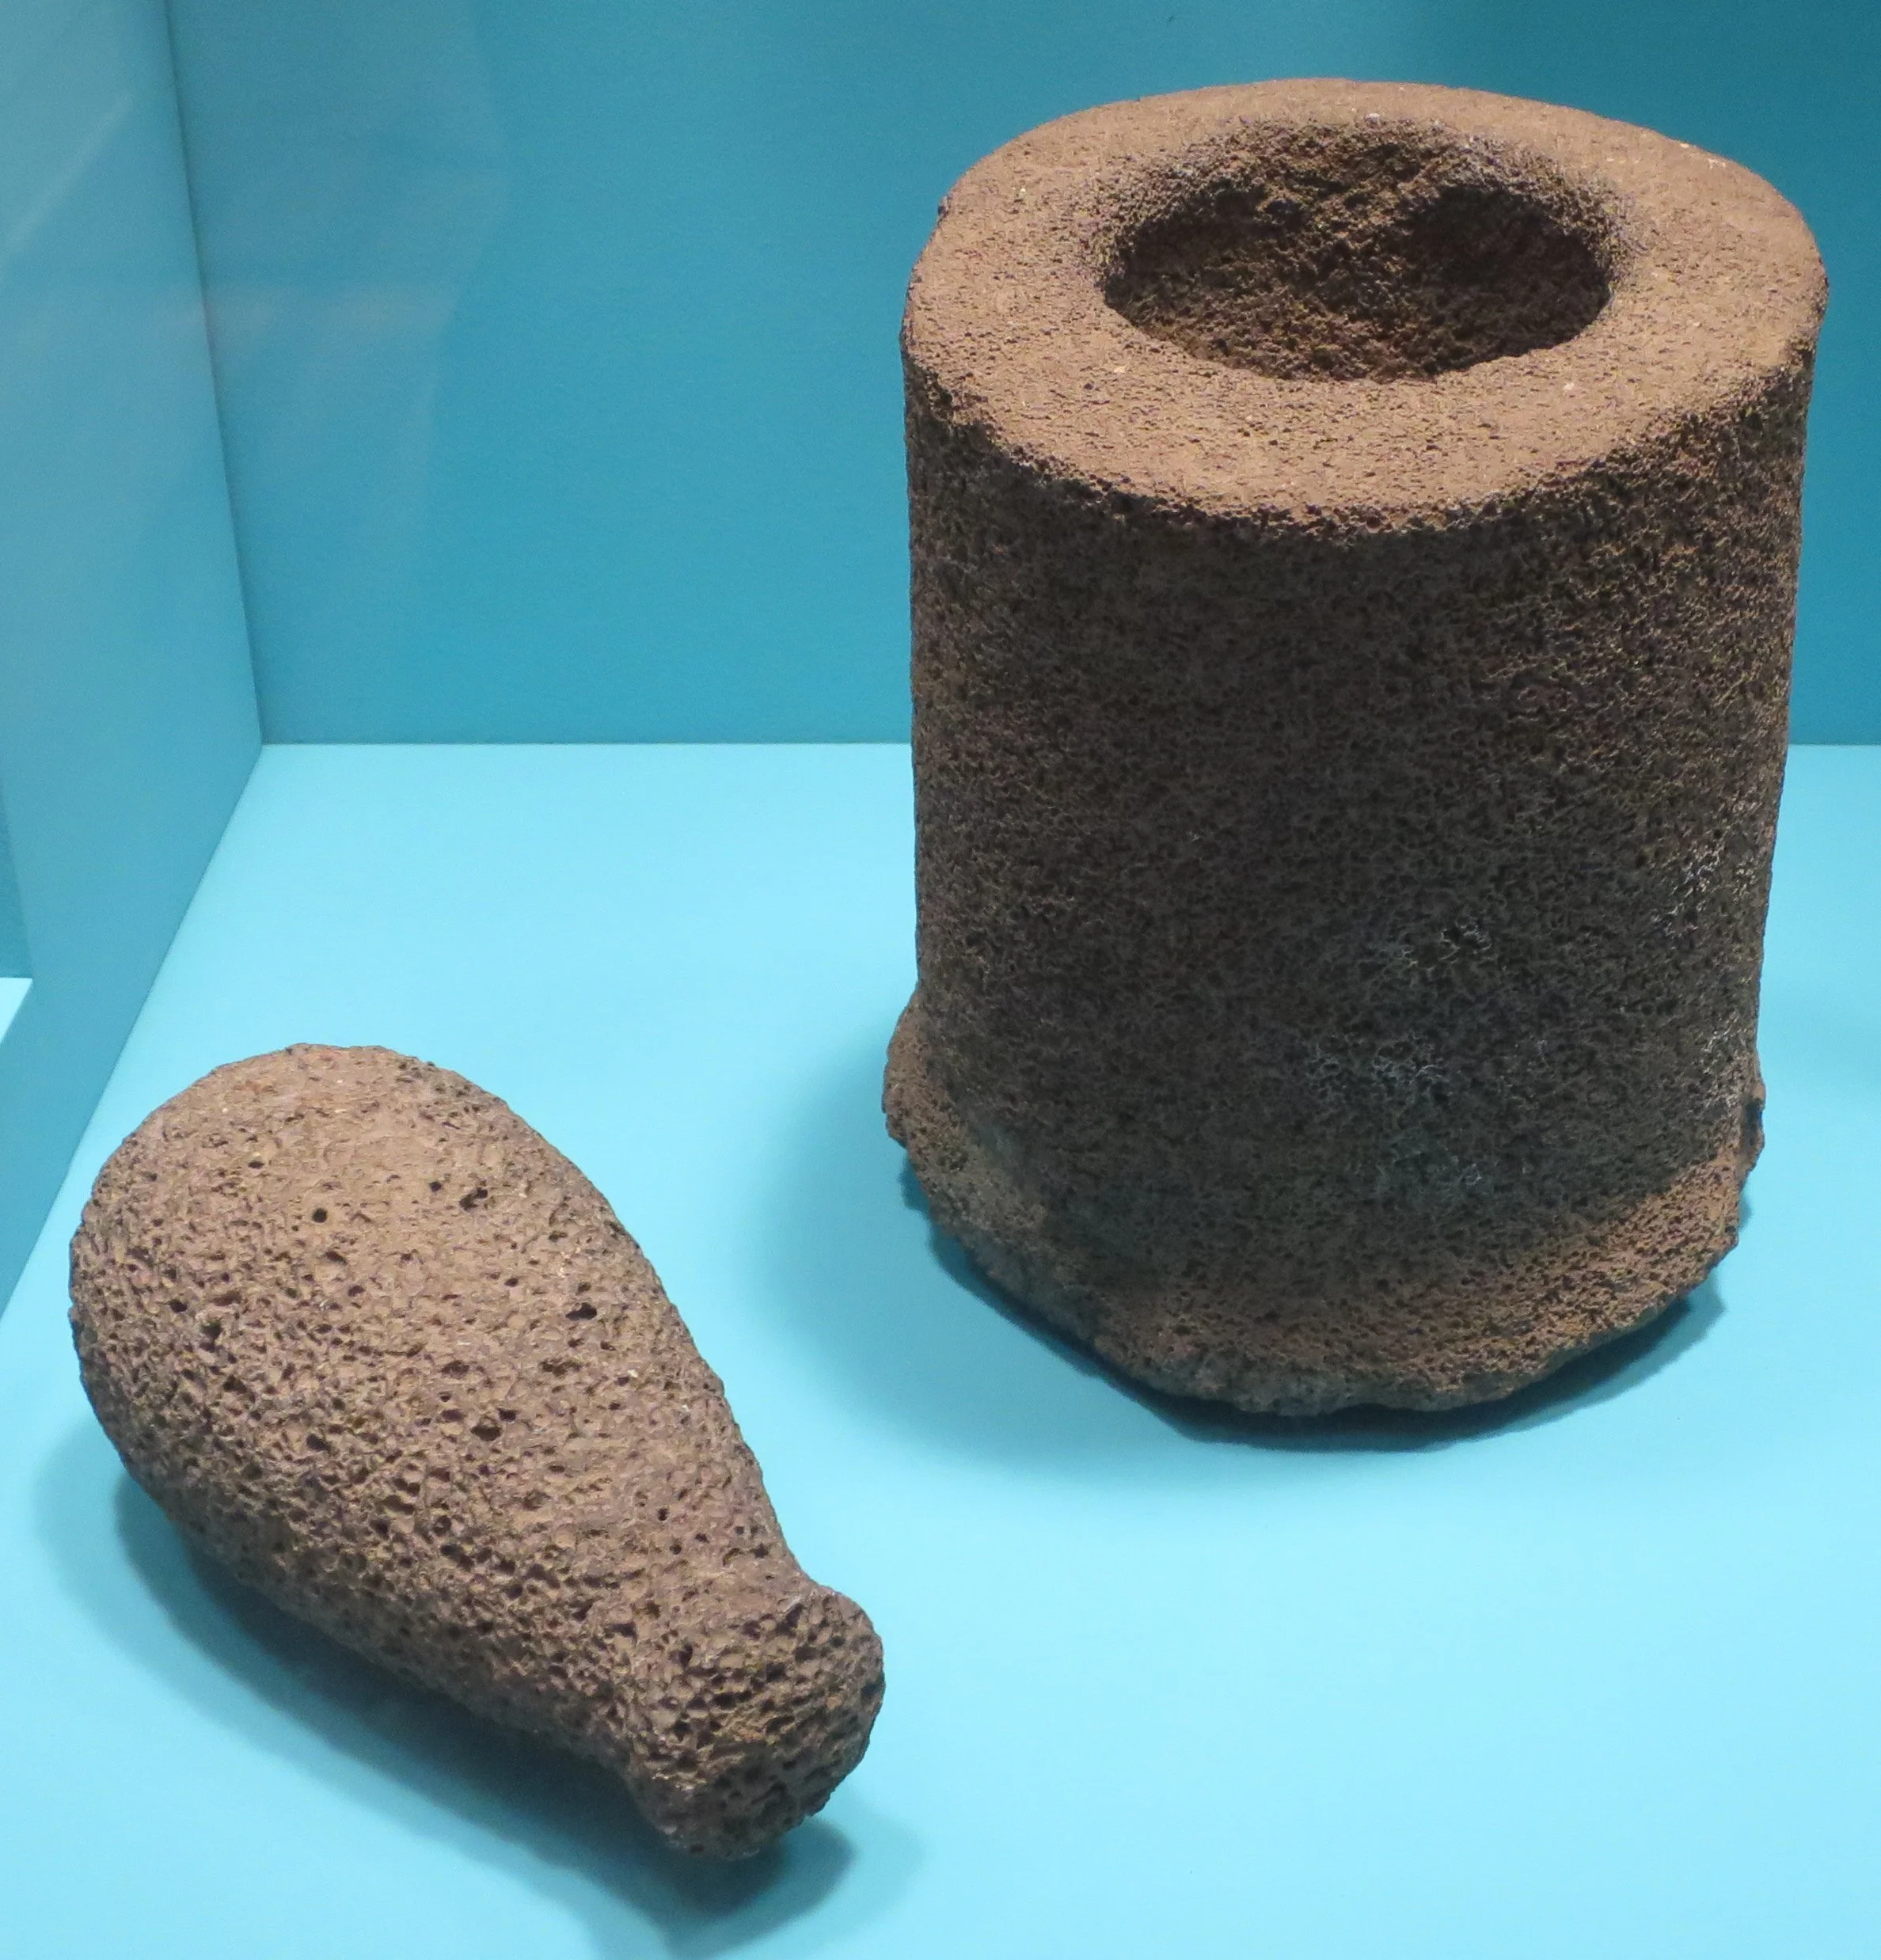
A stone mortar and pestle from Hawaiʻi, 18th century or earlier — porous volcanic stone, the same porosity the lesson warns holds scents.
Stone mortar and pestle from Hawaii, Honolulu Museum of Art (accessions 2437 and 2436), via Wikimedia Commons. CC0.
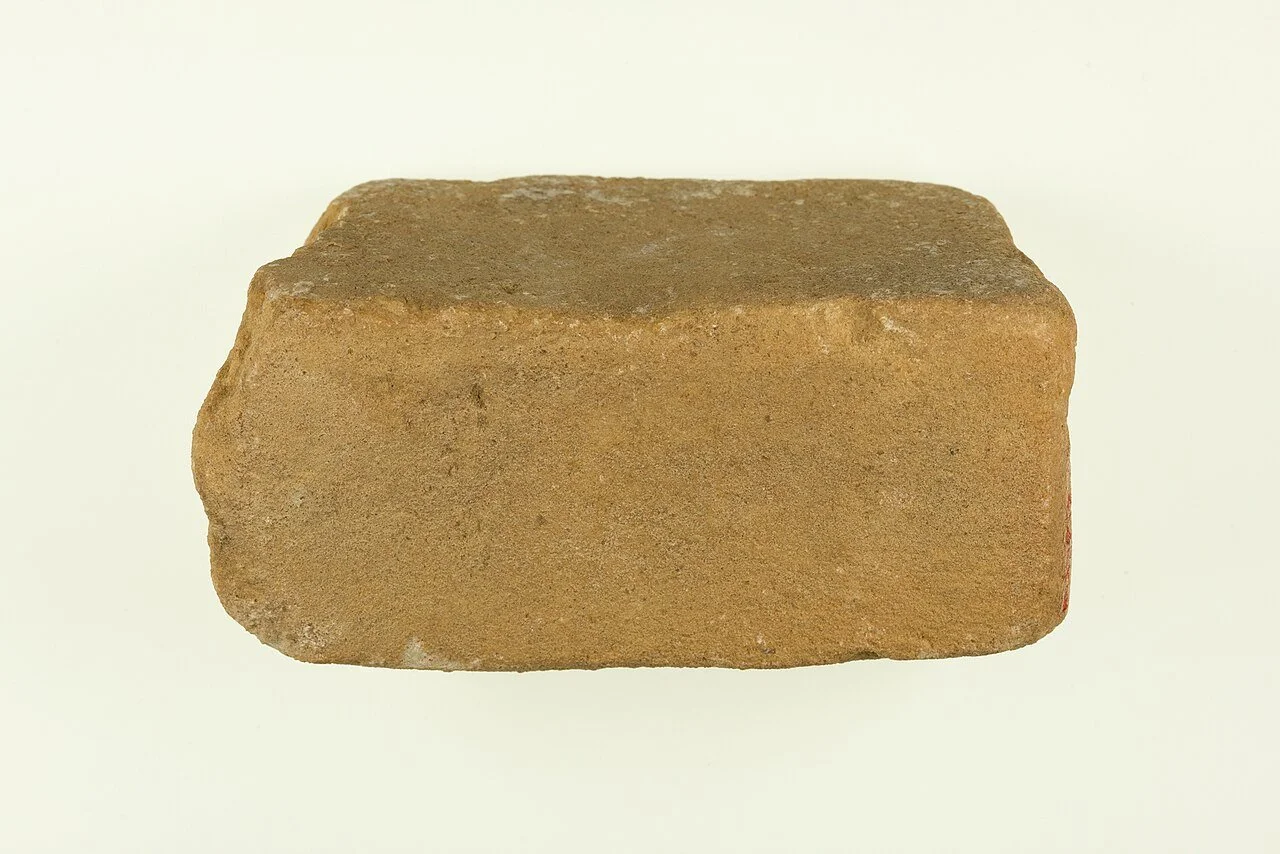
An Egyptian grinding stone (Metropolitan Museum of Art, 15.3.1717) — the wear on its top face is the whole biography of the tool.
Grinding stone, Egypt, Metropolitan Museum of Art. CC0 (Met Open Access).
Long before anyone wrote the word for it, people were grinding. Stone mortars and pestles have been found in contexts reaching back tens of thousands of years, to the Stone Age, when humans learned that hard grains could be cooked and digested more easily if they were ground first. The Natufian people of Southwest Asia ground cereals in hollows worn into bedrock some twelve thousand years ago. The tool is older than farming. It may be older than the settled village.
The quern is the mortar's great cousin. A saddle quern is a stationary lower stone with a handstone worked back and forth across it, and Neolithic villages used them to grind grain into flour. Later came the rotary quern, two round stones turned one upon the other. Different shape, same principle: hard stone, patient motion, material reduced between them.
Every apothecary tradition carried the mortar forward. Egyptian medical recipes, written on papyrus around 1550 BC, assume its use. Greek and Roman physicians ground their simples in mortars of stone and bronze. The Romans gave us the words themselves: mortar from the Latin mortarium, a receptacle for pounding, and pestle from pistillum, a pounder. The great basalt molcajete of Mesoamerica, the Japanese suribachi with its grooved interior, the brass mortars of the medieval Islamic world, the porcelain mortars of the European laboratory: one tool, a hundred workshops, ten thousand years of hands.
★ In 1759, the English potter Josiah Wedgwood began making mortars of fine porcelain for chemists and apothecaries, and the porcelain mortar became the laboratory standard it remains today. When you set your hand to a mortar this lesson, you are joining the longest continuous craft in human history. Behave accordingly.
❦ In your workbook: record a tool older than writing in your own way — Stone Age stones, the quern, the words mortarium and pistillum, and Wedgwood's porcelain of 1759 — copy, sketch, or note what matters.
Choosing Your Mortar
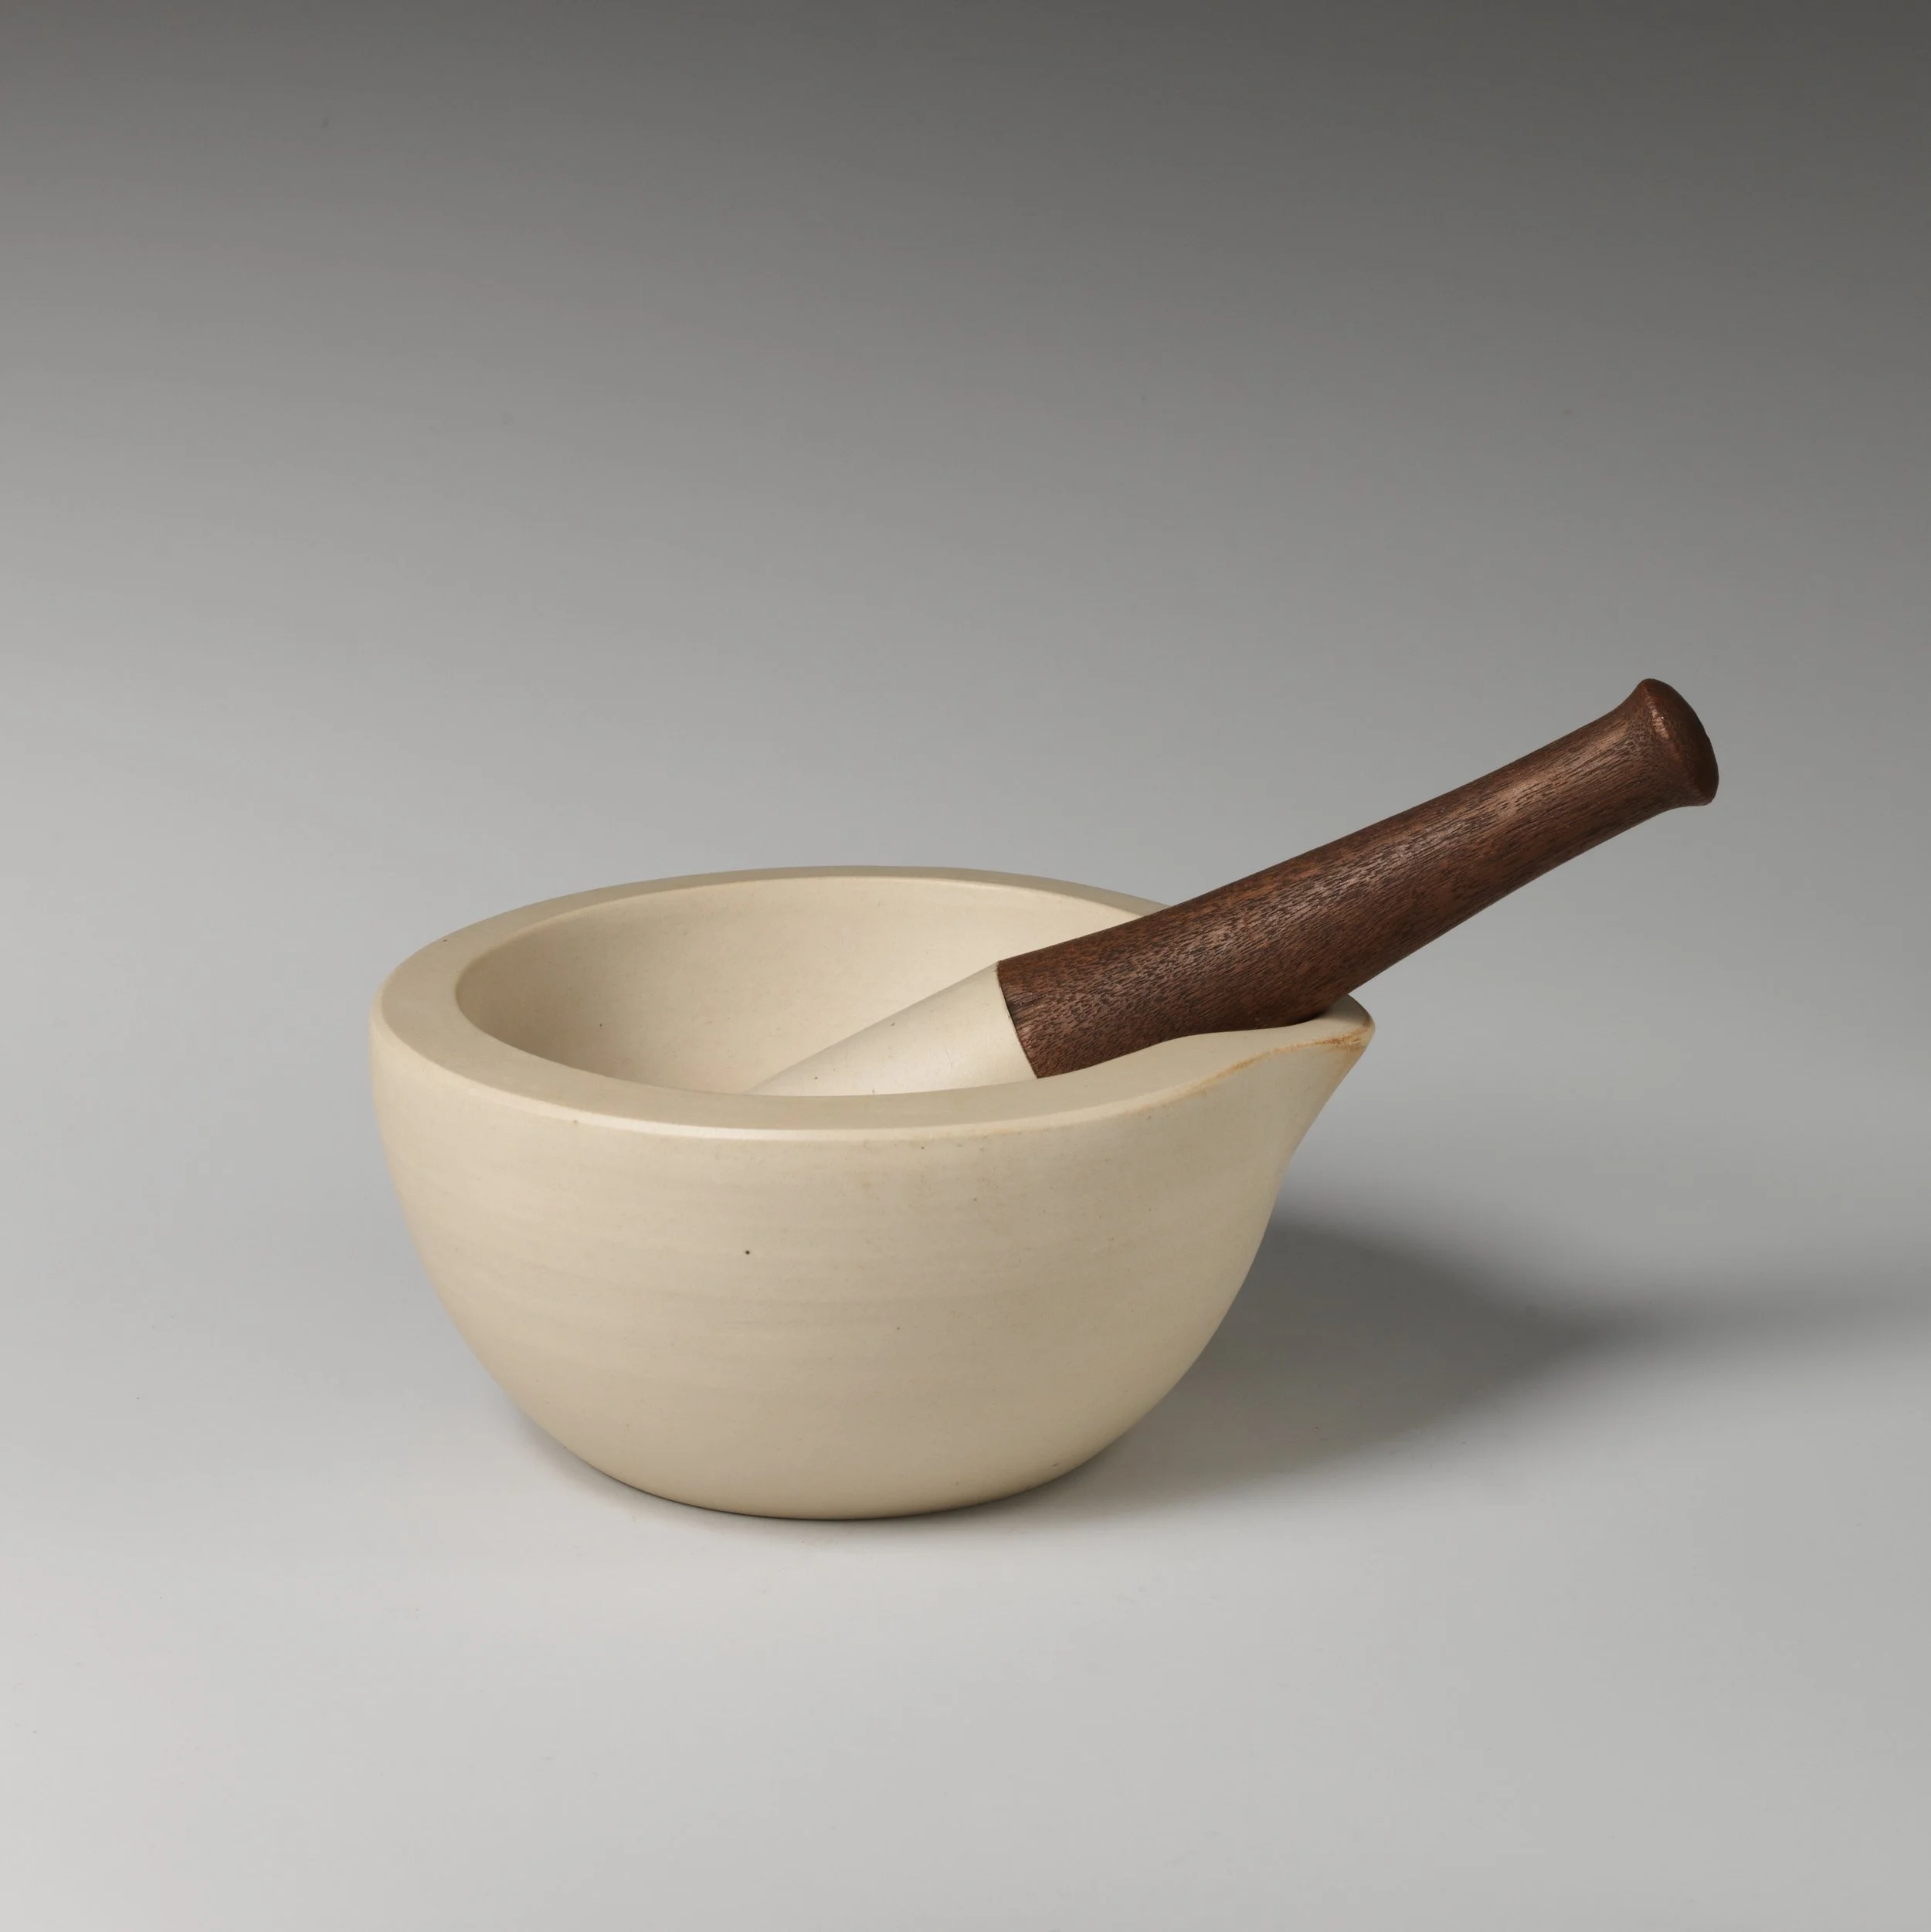
A Wedgwood mortar and pestle (Wedgwood and Bentley, Staffordshire, c. 1780) — of the porcelain tradition Josiah Wedgwood began for chemists and apothecaries in 1759.
Wedgwood and Bentley, mortar and pestle, c. 1780, Metropolitan Museum of Art. CC0 (Met Open Access).
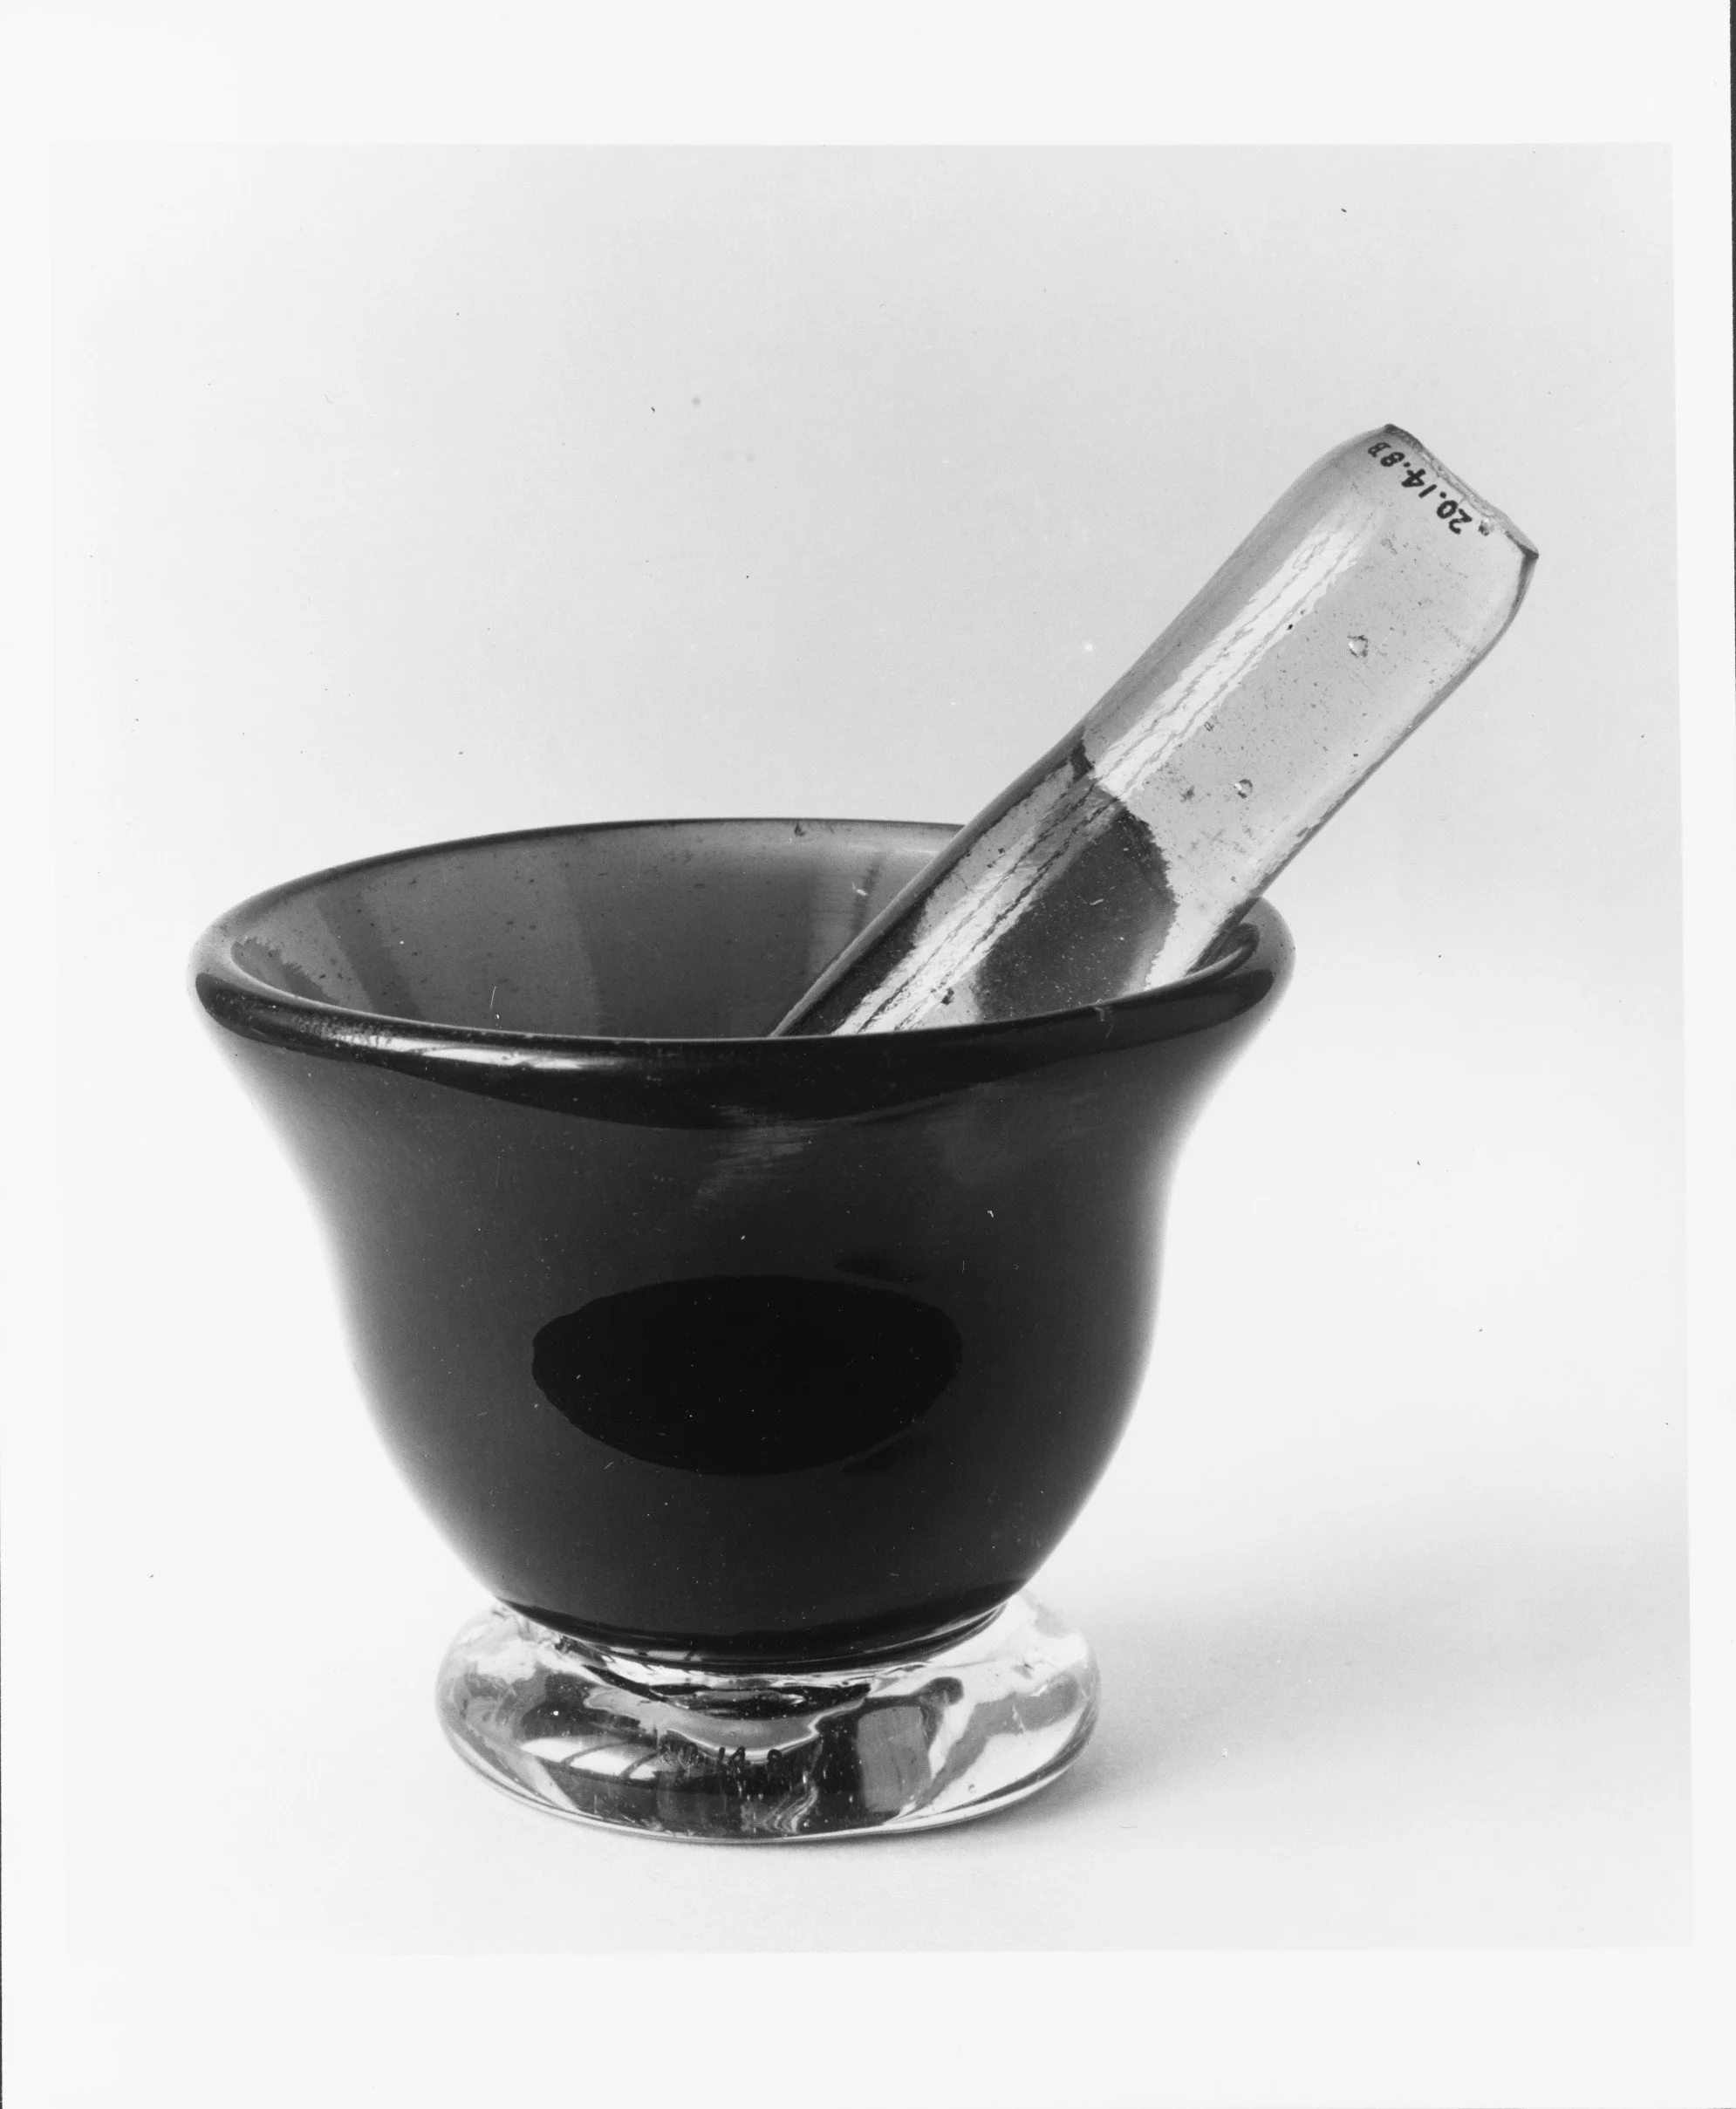
A glass mortar and pestle, American, 1739–80 (Metropolitan Museum of Art) — smooth and stain-resistant, which is both its virtue and its weakness at the bench.
Mortar and pestle, glass, American, 1739–80, Metropolitan Museum of Art. CC0 (Met Open Access).
Not every mortar suits every material. The apothecary chooses with intention, and so will you.
★ Stone mortars, of granite or marble, are the heavyweights. They are hard, durable, and excellent for tough jobs like cracking coarse salt. Their weight steadies the work. Their weakness is porosity: strong scents can linger in the stone, so think before grinding pungent material in your good granite.
★ Ceramic and porcelain mortars are the laboratory's daily choice. A proper laboratory mortar is left unglazed inside, and the roughness is the point: it grips the material and holds it under the pestle instead of letting it slide around the bowl. Unglazed ceramic stains more easily than glazed, so keep your pigment work and your food work in separate mortars.
Glass mortars are smooth, nonporous, and stain resistant, which makes them easy to clean. But the smooth surface that cleans so well also grips poorly, so glass grinds less effectively than rough ceramic. Use glass for clean, light work where staining matters and heavy grinding does not.
★ Wood and metal have their places and their limits. Wood is absorbent and holds flavors, which makes it a poor choice for laboratory work where cross-contamination matters. Metal mortars, of brass or bronze, are handsome and hard, but acids attack copper alloys, so never grind acidic materials in a metal mortar. That rule has no exceptions.
Check in: You must grind a strongly scented, oily material, and separately a clean, light powder you want to keep unstained. Which mortar do you reach for in each case — and why?
Choose a mortar that fits the job and fits your hand. For today's lesson, any small stone or ceramic mortar will serve beautifully.
❦ In your workbook: record choosing your mortar in your own way — stone, unglazed ceramic, glass, wood and metal, and the rule about acids and metal that has no exceptions — copy, sketch, or note what matters.
The Grip and the Stance
Stand or sit so the mortar is at a comfortable height, roughly at your waist or just below. You should be able to look down into the bowl without hunching. Set the mortar on its damp cloth and give it a testing nudge. It should not move.
Hold the pestle the way you would hold a thick marker or a small club: fingers wrapped around the upper part, thumb braced along the side, wrist straight. Do not choke up near the grinding head. Do not hold it like a dagger. The power comes from the weight of the pestle and the steadiness of your arm, not from squeezing.
Your other hand steadies the mortar, fingers curled around its outside wall, well below the rim. This hand does not push or twist. It anchors. If your mortar has a pouring lip or spout, keep your steadying hand away from it so a sudden shift does not pinch your fingers.
Before any material goes in, practice the empty motions. Lift the pestle a finger's width and let it fall. Press and circle. Get the feel of the weight. The tool teaches the hand before the material does.
The grip and the stance, in steps:
- Stand or sit so the mortar is at a comfortable height, roughly at your waist or just below.
- Set the mortar on its damp cloth and give it a testing nudge. It should not move.
- Hold the pestle the way you would hold a thick marker or a small club: fingers wrapped around the upper part, thumb braced along the side, wrist straight.
- Your other hand steadies the mortar, fingers curled around its outside wall, well below the rim.
- Before any material goes in, practice the empty motions. Lift the pestle a finger's width and let it fall. Press and circle.
❦ In your workbook: record the grip and the stance in your own way — height, the damp cloth, the marker grip, and the anchoring hand — copy, sketch, or note what matters.
The Two Motions
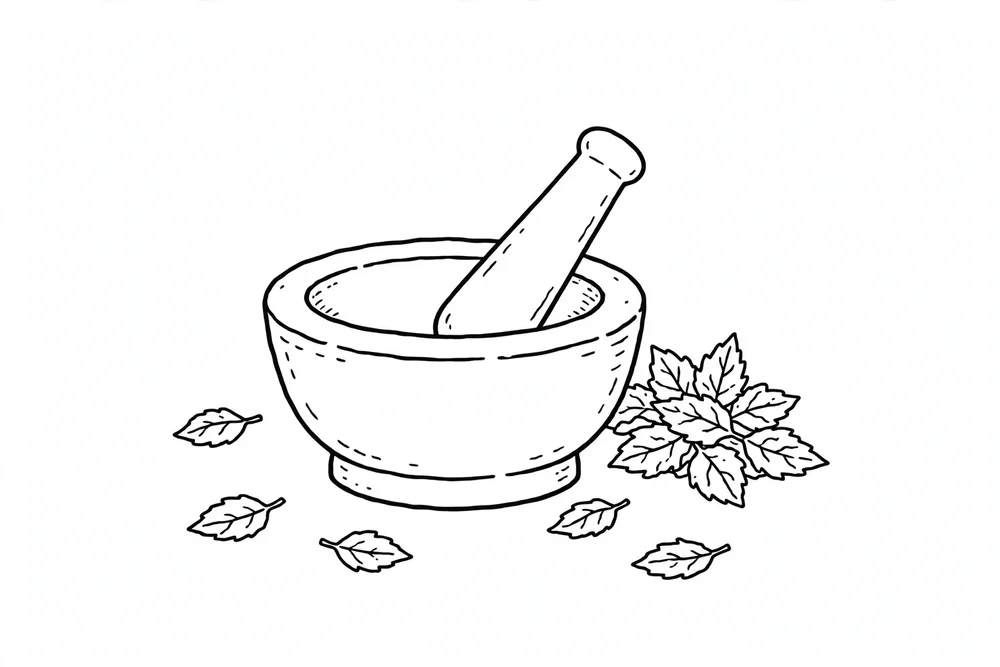
There are two motions in this lesson, and they do different work. Learn to tell them apart by feel.
★ Pounding is the straight motion: lift the pestle and let it fall, or press it down firmly onto the material. Use pounding at the start of the work, to crack hard and coarse pieces into smaller ones. Coarse salt wants pounding first. Lift only a little. Short, controlled drops. You are cracking, not smashing, and the difference is entirely in your restraint.
★ Circular grinding is the working motion: press the pestle's head against the mortar wall and move it in slow circles, dragging the material between the two surfaces. This is shearing, the sliding and rubbing that reduces cracked pieces to powder. Keep the pressure steady and the circles slow. Speed is the enemy of evenness. The powder forms under the pestle's path, and you will feel the texture change beneath your hand as it does.
★ Most real grinding uses both. Pound the coarse pieces down, then circle them into powder. When new coarse bits surface, pound again, then return to the circle. This rhythm, crack then grind, crack then grind, is the heartbeat of the mortar.
Check in: A piece of coarse salt sits whole in your mortar. Which motion do you begin with — and what tells your hands when to change to the other?
❦ In your workbook: record the two motions in your own way — pounding to crack, circular grinding to shear, and the crack-then-grind rhythm — copy, sketch, or note what matters.
In your packet: Exercise II — The Motion Study ◐ begins here. Work it now, or mark the place and take it as homework — your choice.
Small Batches, Honest Results
★ Work in small batches. A tablespoon at a time, no more. This is not timidity. It is control.
A small batch lets you see what is happening: which pieces are still coarse, where the powder is gathering, when the texture turns. A full mortar hides all of this. Material rides up the walls, coarse pieces shelter under fine ones, and you finish with a mixture instead of a powder. Small batches also keep dust down and keep the work within your strength.
If you have more material than one batch, grind it in passes and combine the finished powder at the end. Orderly work in small portions beats hurried work in large ones every time.
You are doing well, scholars. The motion is in your hands now, and it will not leave them. A word of honest framing before you continue: this lesson teaches the hands. Lesson 21 will teach the reasons. When you arrive there, you will learn why particle size governs extraction (drawing compounds out of a material with a liquid), what the formal word comminution — reducing a solid to smaller pieces by crushing, grinding, or pounding — means, and how sieves sort powder into grades. Do not chase those ideas yet. A musician learns the scales before the theory of harmony, and an apothecary learns the pestle before the physics of powder. Trust the order of the course. It was arranged by a toad who has made every mistake you are about to avoid.
— Professor Crimblebrew Muddlenook, Potions Laboratory • Master Apothecary • Head of House Meridies
❦ In your workbook: record small batches, honest results in your own way — a tablespoon at a time, what a full mortar hides, and grinding in passes — copy, sketch, or note what matters.
Judging Texture by Eye and Touch
The mortar gives you two instruments for judging your work, and you were born with both.
Look. Tip a little powder onto a sheet of paper or into a pale dish. Spread it with your fingertip. Are there visible fragments, or is it uniform? Hold it beside the unground material for comparison. Your eyes will tell you quickly whether coarse pieces remain.
Touch. Take the smallest pinch between thumb and forefinger and rub gently. Feel for grit, for sharp bits, for unevenness. A well-ground kitchen powder feels even and consistent. This is not precision measurement. It is honest observation, and it is how apothecaries judged their work for centuries before instruments existed.
Record what you observe in plain words: color, visible texture, feel between the fingers. "Coarse, visible flakes, gritty" is a better entry than a vague "done." The archive entry later in this lesson will show you the form. Precision in words follows precision in looking.
❦ In your workbook: record judging texture in your own way — look, then touch, then plain words — copy, sketch, or note what matters.
In your packet: Exercise I — The Three-Powder Trial ⚒ begins here. Work it now, or mark the place and take it as homework — your choice.
Cleaning Between Materials
★ Between every material, the mortar must be cleaned. Not rinsed casually. Cleaned.
Brush out every trace of powder with your soft brush, getting into the curve where wall meets base. Wipe the interior with a barely damp cloth, then dry it thoroughly. A mortar stored damp will spot and stain, and dampness clings to the next powder.
An old kitchen tradition holds that grinding a spoonful of dry, uncooked rice until it comes out white will pull the last residues and odors from a mortar. It works, and you may use it, but the rice is then discarded. It has done its job and is not an ingredient.
★ Why this rigor? Because whatever remains in the mortar joins the next material. Oregano dust in your salt, salt grit in your thyme: this is cross-contamination, and in a laboratory it is a failure of order. Lesson 16 will teach you the full doctrine of cross-contamination in storage. Here you learn its first application. Clean between everything, every time, and your materials will stay themselves.
Check in: Your salt, spread on white paper, shows green flecks. What happened — and which step of the cleaning standard was skipped?
❦ In your workbook: record cleaning between materials in your own way — brush, wipe, dry, the rice tradition, and why the rigor matters — copy, sketch, or note what matters.
In your packet: Exercise III — The Clean-Between Test ◐ begins here. Work it now, or mark the place and take it as homework — your choice.
The Procedure, Step by Step
- Set your bench in order. Lay the damp cloth, set the mortar upon it, and confirm it sits steady. Arrange your three labeled dishes, your brush, your notebook, and your materials within reach.
- Put on your dust mask if you are using one. Open your grinding log and write the date, the lesson title, and the three materials in the order you will grind them: oregano first, then thyme, then salt.
- Measure one tablespoon of dried oregano into the mortar. Note its appearance before grinding: color, leaf size, visible stems.
- Begin with gentle pounding to break the leaves down, then move to slow circular grinding. Work for two full minutes by the clock. Rest if your wrist tires. There is no prize for speed.
- Judge the texture by eye and touch. Spread a little on paper, rub a pinch between your fingers, and write your observations in plain words.
- Tip the ground oregano into its labeled dish. Clean the mortar completely: brush, wipe, dry. Inspect the interior. It should look and smell like nothing.
- Repeat steps 3 through 6 with the dried thyme. Compare its grinding behavior to the oregano's as you work. Which broke down faster? Which made more dust?
- Repeat with the coarse salt, but begin with firmer pounding: salt is harder than leaves and wants cracking before circling. Notice how the sound changes as the crystals break down.
- When all three powders are ground, labeled, and dished, clean the mortar a final time and set it aside to air dry fully before storage.
- Sit with your three dishes side by side. Look at them. You made these powders. Note which you are proudest of and why.
❦ In your workbook: record the procedure in your own way — bench, log, three materials in order, clean between, and the three dishes side by side — copy, sketch, or note what matters.
Guided Observation: Your Grinding Log
Your grinding log for this lesson should contain, for each of the three materials:
- The material's appearance before grinding.
- The motions you used and for how long.
- The texture judged by eye: what you saw when you spread it.
- The texture judged by touch: what your fingers reported.
- A comparison line: how this material behaved next to the other two.
- Any dust, odor, or difficulty worth remembering next time.
Write it while the memory is fresh. An observation recorded tomorrow is a rumor. An observation recorded today is a record.
Cleanup
Brush out the mortar and pestle one final time. Wash them with warm water and a little soap, rinse well, and dry completely with a clean towel. Stone and unglazed ceramic must be fully dry before they are put away, or they will spot.
Wash your dishes, brush, and cloth. Wipe the bench. Return everything to its place. The laboratory should look as though no one was ever here, except for three small labeled dishes of powder and a notebook full of honest observations.
Store your powders as laboratory specimens: labeled with material, date, and "ground in Lesson 7," kept dry and away from food. They are records of your work, not seasonings.
Archive Entry
Open your recipe journal, the one you began in Lesson 5, and give this lesson a full page. Title it, date it, and enter the following in order:
- The three materials and their pre-grinding appearance.
- Your grinding log observations, condensed but complete.
- Which motion each material wanted most, in your judgment.
- One thing you would do differently next time.
Then add a cross-reference line at the foot of the page: "See Lesson 21 for the science of what my hands did today." When you reach that lesson, you will return to this page and understand it twice: once with your hands, once with your mind. That is what an archive is for.
Materials
Required (Level One — household items)
- A small mortar and pestle. Stone, ceramic, or marble from the kitchen aisle will serve. If you have none, a heavy ramekin and the handle end of a wooden rolling pin will do for this lesson's soft materials.
- A tablespoon measure for the one-tablespoon batches.
- A few sheets of plain white paper for judging texture and the Clean-Between Test.
- Dried oregano, one tablespoon, from the spice shelf.
- Dried thyme, one tablespoon, from the spice shelf.
- Coarse salt, two tablespoons. Sea salt or kosher salt, not fine table salt.
- Three small dishes or saucers, one per material, plus labels and a pen.
- A notebook for your grinding log, and a pencil.
- A damp cloth or folded towel to steady the mortar.
- A soft brush (a clean pastry brush is ideal) for sweeping out powder between materials.
- A dust mask, optional for this lesson's gentle materials, good practice regardless.
Suggested (Level Two — historically closer)
- A porcelain mortar with an unglazed grinding surface, in the laboratory tradition.
- A granite mortar and pestle, heavy and honest, for the salt.
- A proper fitted dust mask, the kind with a nose clip, kept with your laboratory safety supplies.
Reflection Questions
Answer the following questions in your workbook.
- Why does this lesson insist on small batches? Describe what you noticed when your mortar was at its fullest, and what changed when you reduced the amount.
- Describe the difference between pounding and circular grinding as your hands understood it. Which felt more controlled, and why do you think that is?
- In Exercise III you found evidence of the first material in the second. What does that green-flecked salt teach about laboratory order, and where else in the laboratory might the same failure occur?
- A friend says grinding is "just smashing things." How would you correct them, using what your hands learned in this lesson?
- You must grind a strongly scented, oily material, and separately a clean, light powder you want to keep unstained. Which mortar do you choose for each task, and what is your reasoning?
Workbook Checklist — Lesson 7
In my workbook I have:
- ☐ described the mortar and pestle's place in human craft, from Stone Age grinding stones to Wedgwood's porcelain of 1759
- ☐ stated the dust and ventilation safety rules in my own words, including what to do if grinding makes me cough
- ☐ chosen the right mortar for stone, ceramic, and glass work, and stated the rule about acids and metal mortars
- ☐ shown the grip and the stance: mortar steady on its cloth, pestle held like a thick marker, wrist straight, other hand anchoring below the rim
- ☐ ground in small batches, a tablespoon at a time, using pounding to crack and circular grinding to shear
- ☐ judged each powder's texture by eye and by touch, and recorded the observations in plain words in my grinding log
- ☐ cleaned the mortar between every material — brush, wipe, dry — and stored my three powders labeled, dated, and marked "ground in Lesson 7"
☐ Lesson completed Date: ___ Signature: ___
The Professor's Closing Note
Scholars, look at your bench. Three dishes of powder, a clean mortar, a page of honest observations. That is a complete laboratory session, and you ran it in order. Hold onto this feeling. It is the feeling of the whole course, and it only gets deeper from here.
— Professor Crimblebrew Muddlenook, Potions Laboratory • Master Apothecary • Head of House Meridies
Cross-Class Connections

Herbology · Unit IV, Lesson 28 — Drying Herbs the Traditional Way
Your mortar receives what my greenhouse produces, scholars. In the Greenhouse we hang the woody herbs — thyme and oregano among them — in small bundles in dark, moving air until the crispness test says they are dry, and only then do they keep. Grind a herb that was dried carelessly and you grind its failure too. Come and learn the keeping that comes before your grinding.

Scrollwork · Unit II, Lesson 5 — Soot & Charcoal Ink
Evening, grinders. In the Scriptorium we grind charcoal down on a plate with a muller, in slow circular motions, until the mixture is smooth — your second motion, put to ink. The binder persuades the particles to stay; the grinding persuades them to be fine enough to need persuading. Make the ink here, and you will feel your own lesson working under a different name.

Creative Arts · Unit IV, Lesson 15 — Pigments, Paints & Color Charts
Bench set, scholars. In the Workshop we grind earth pigment in a mortar kept for pigment work only — never for food — a spoonful at a time, pestle moving in circles, exactly as Muddlenook teaches it, then mull it into paint and chart every swatch with a label. Same stone, same patience, same dust discipline. Come and make the color itself.
Further Reading & Sources
- Mortar and pestle — Wikipedia overview: history from the Stone Age, materials, cultural forms from the molcajete to the suribachi, and the Wedgwood porcelain mortar of 1759.
- Quern-stone — Wikipedia overview of the mortar's great cousin: saddle querns, rotary querns, and ten thousand years of grinding grain.
- Science Museum Group Collection: mortar and pestle search — Browse real historical mortars: bronze apothecary mortars, Wedgwood porcelain, glass laboratory mortars, and wooden grain mortars.
Browse the Potions shelf in the school Library for readable editions of these works.
Submit your work for this lesson using the form below.
CONTINUE IN THE POTIONS LABORATORY
← Previous · Lesson 6: Apothecary Weights & Measures Next · Lesson 8: The Simples Census →
Unit I — Foundations of the Laboratory Potions Laboratory — All 52 Lessons
The rest of Unit I: Lesson 1 · Welcome to the Laboratory · Lesson 2 · Scriptorium & Zoning · Lesson 3 · Vessels & Glasswork · Lesson 4 · Labels & Seals · Lesson 5 · Recipe Journals · Lesson 6 · Weights & Measures · Lesson 8 · Simples Census · Lesson 9 · Hearth Clearance