

POTIONS
Unit I · Lesson 4LABELS, WAX SEALS & INGREDIENT MARKINGS
Professor Crimblebrew Muddlenook
Master Apothecary • Potions
Head of House Meridies • School of Evershade
Professor's Introduction

Good morning, scholars. Your shelves are filling nicely. I have walked past several of your workstations this week, and I am pleased to report: clean glass, orderly rows, lids fitted. You are beginning to look like apothecaries.
Today we do the thing that makes all of that order mean something. We name things.
There is a jar in every old laboratory that the professor will not open. Every laboratory has one. It sits at the back of a shelf, its contents a mystery, its label long since fallen off or never written at all. It might hold harmless salt. It might hold something that stains everything it touches. Nobody knows, because somebody, years ago, thought: I will remember what is in this jar.
They did not remember. Nobody ever remembers. That is the first law of the archive, and it is the whole of today's lesson: label everything, before you fill it, every time, no exceptions. Not when it is convenient. Before.
Today you will learn how apothecaries have marked their vessels for six hundred years, from painted inscriptions baked onto the jar itself to the paper label and the wax seal. You will learn what a proper label carries, and you will learn the old shorthand marks, because you will meet them in every historical recipe you ever read. Then you will do the work: every vessel on your shelf gets its name, two jars get their wax seals, and your archive gets its first batch numbers.
Everything in its place, scholars. Especially its name.
— Professor Crimblebrew Muddlenook, Potions Laboratory • Master Apothecary • Head of House Meridies
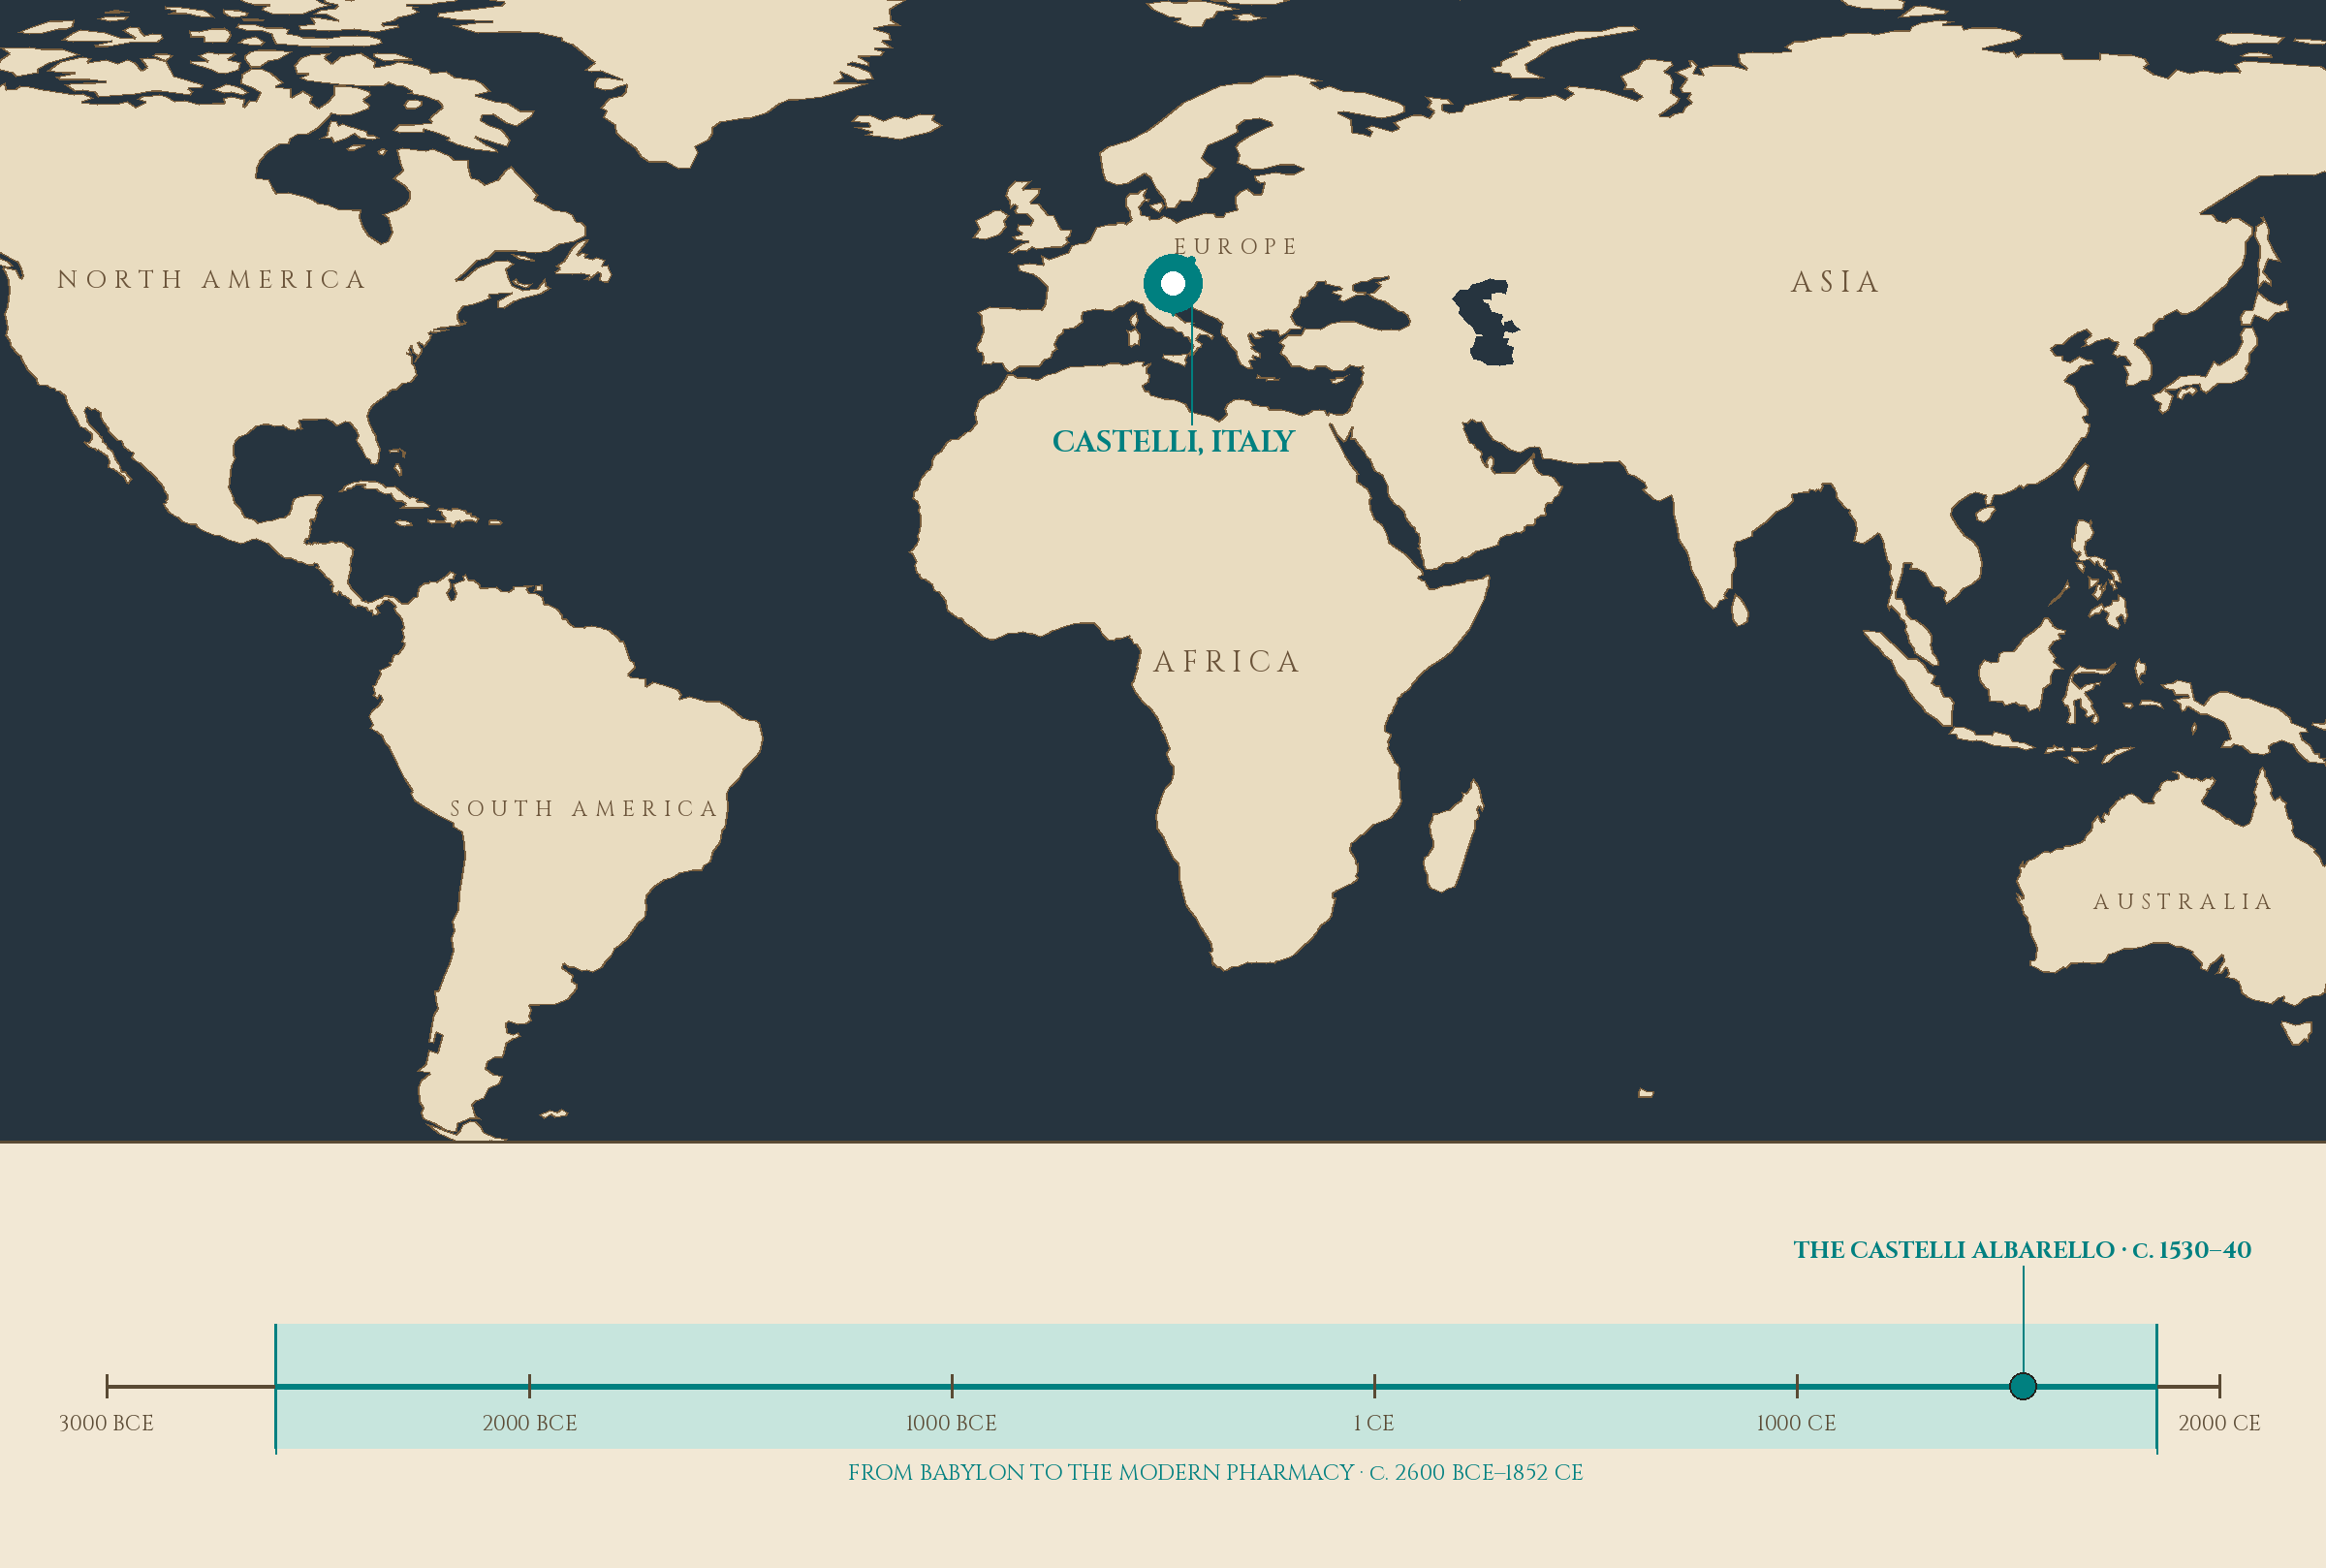
Pin: CASTELLI, ITALY. Timeline stop: THE CASTELLI ALBARELLO · c. 1530–40.
Lesson Objectives
By the end of this lesson, you will be able to:
- State the archive's first law and explain, in your own words, why every vessel is labeled before it is filled
- Describe the albarello and explain how its painted inscription served as a permanent label
- List the four things every proper laboratory label carries: contents, date, preparer, and warnings
- Read the common marks of apothecary shorthand: the symbols for scruple, dram, and ounce, and the abbreviations aa, q.s., and ss
- Explain what a wax seal on a laboratory jar promises, and how it differs from the document seals studied in Scrollwork
- Label a full set of laboratory vessels, seal two jars with wax under adult supervision, and assign your first batch numbers with matching archive entries
Reading this lesson: ★ marks the passages to remember. They return on the unit quiz and the class test. Check in questions ask the material back as you go; answer them in your workbook when you meet them.
Working this lesson: Your assignment packet is the first download on this page. Work in it as the lesson moves along, answering each exercise as its subject is taught — or read the lesson through for your notes and take the exercises as homework afterward. Both are proper ways to sit this class. Signposts in the reading tell you where each exercise belongs. Written answers are short answers in your own words; a few honest lines are worth more than a filled page.
Your Assignment Packet
This lesson's exercises live in its packet: the Lexicon Handout (every term, course terms marked ◆), Materials, Guided Practice, the Assignment Manual with its answer key for self-checking, the Reflection Questions, and the Workbook Checklist. Download the packet before you begin and keep it beside you as you read.
Safety Briefing
Read this section completely before touching any materials. Professor Muddlenook's first rule of the laboratory is that no procedure begins until the safety briefing is understood.
★ Hot wax burns. Sealing a jar requires melted wax, and melted wax is hot enough to raise a blister. All wax melting is done by or with an adult, in a heat-safe vessel over gentle heat, never with an open flame held directly under wax, and never left unattended. Keep fingers, sleeves, and loose hair well clear of the melting vessel. If hot wax touches skin, cool it at once under cool running water and tell your adult.
★ Label before you fill, never after. This is a safety rule, not just a tidiness rule. An unlabeled vessel holding an unknown substance is a hazard, because you cannot judge a risk you cannot name. From today forward: the label goes on the empty jar, and only then does anything go into the jar.
★ Never taste to identify. If you ever find an unlabeled jar, on your shelf or anywhere else, you do not taste it, smell it deeply, or touch its contents to find out what it is. You treat it as unknown, you ask your adult, and the two of you decide together whether it can be identified safely or must be discarded. Your tongue is not a laboratory instrument.
Paper, string, and small parts. Labels, string ties, and wax sticks are small. Keep them away from younger siblings and pets, and keep your work surface clear of clutter while the wax is hot.
A standing rule for this class. Nothing in the Potions Laboratory is ever presented as medicine, and no lesson will ever give you amounts to take or to use on the body. We study how materials behave, how they were used historically, and how to handle them safely. The historical practices in this lesson are presented as history. That is the whole of it, and it is plenty.
❦ In your workbook: record the safety briefing in your own way — hot wax, label before you fill, never taste to identify, and the standing rule — copy, sketch, or note what matters.
Mise en Place
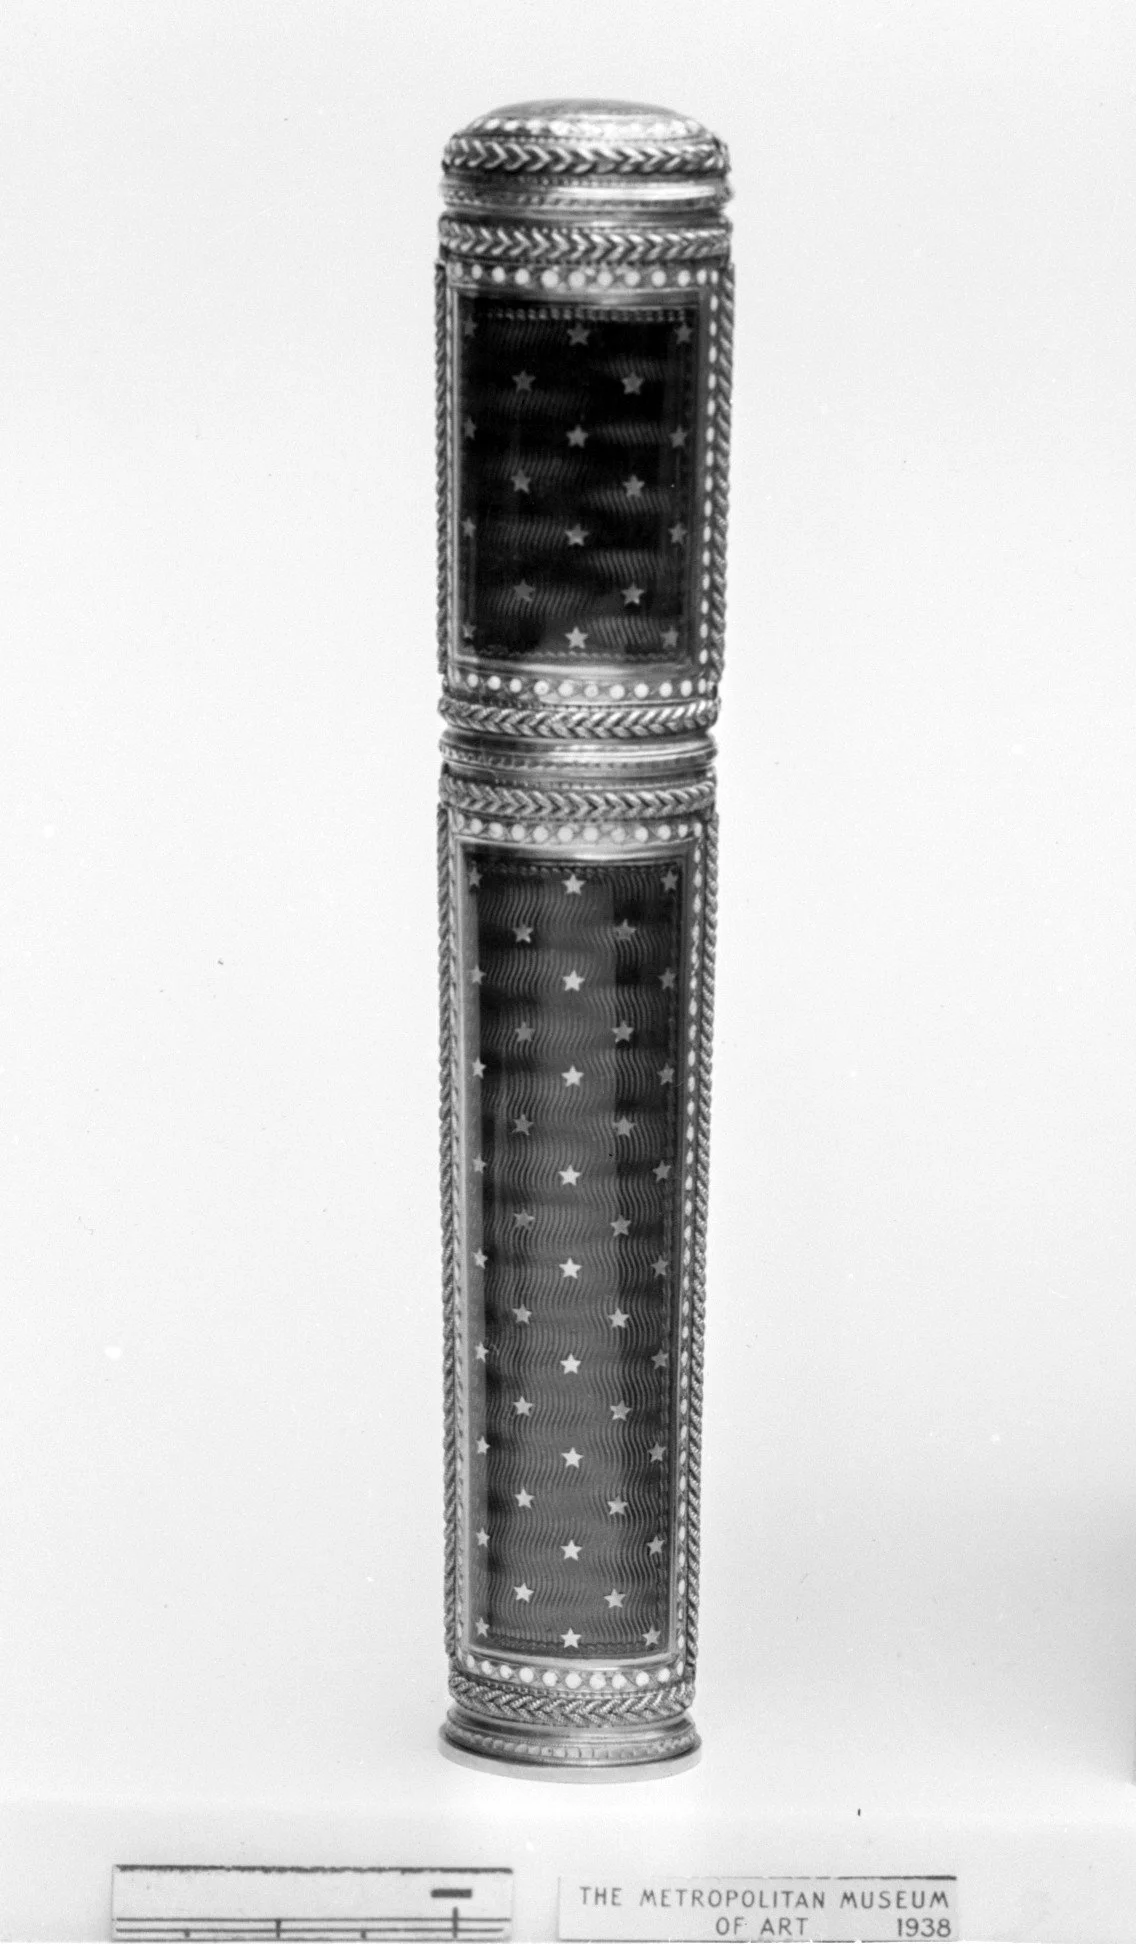
A sealing-wax case of 1784–85: even the wax itself was kept in a named, fitted case.
The Metropolitan Museum of Art, Open Access (CC0).
A meticulous laboratory begins with everything gathered before work starts. Assemble the following.
Level One — household items:
- Your full vessel set from Lesson 3, clean, dry, and shelved: every jar, bottle, and tin you chose.
- Blank adhesive labels (or plain paper cut into label-sized pieces, plus clear tape to fix them).
- A pen with permanent ink for writing labels. Pencil smudges; choose pen.
- String or ribbon and scissors for tie-on labels, if any of your vessels have necks suited to them.
- Two small heat-safe jars with lids or corks for the wax-sealing exercise. They may be empty or hold dry, harmless contents such as rice or dried beans.
- Sealing wax sticks or wax beads in any color, and a metal spoon or small heat-safe pouring vessel. A candle warmer or a supervised stovetop on its lowest setting provides the heat.
- A coin, button, or carved stamp to press as your seal matrix. Anything with a clear raised pattern will do.
- Your laboratory journal and a pencil for the batch-number entries.
- A ruler, for keeping your labels straight. Crooked labels are readable labels, but straight labels are happier ones.
Level Two — historically closer:
- A stick of traditional shellac-based sealing wax with a wick, the kind sold for letter sealing, instead of glue-gun style wax.
- A brass seal matrix or signet with your initial, for a period-correct impression.
- Gummed paper labels (the kind you dampen to stick), which behave like nineteenth-century apothecary labels.
- A quill or dip pen and iron gall style ink for writing labels in a historical hand. (Your Scrollwork lessons have prepared you for this. Show off a little.)
❦ In your workbook: record your mise en place in your own way — what you gathered, at which level, and what you substituted — copy, sketch, or note what matters.
The Archive's First Law: Label Everything
Every archive in the world runs on promises. The catalog promises that the entry matches the shelf. The shelf promises that the jar matches the entry. And the label is where those promises are written down, in ink, where everyone can see them.
★ The first law is simple: label everything, before you fill it, every time, no exceptions. It is called the first law because every other law of the archive depends on it. A batch number is useless if you cannot tell which jar it belongs to. A date is useless if you cannot tell what was dated. An observation log is useless if the jar it describes could be any of three jars.
Professor Muddlenook keeps a small collection of cautionary tales on this subject. They are all true in the way that matters, which is to say they have happened to real apothecaries, though the professor has kindly changed the names and softened the endings.
The Tale of the Two White Powders. An apprentice, in a hurry, set two jars of white powder on the bench and labeled neither, meaning to do it after. After never came. One powder was for cleaning glassware. The other was for a preparation. The apprentice could not tell them apart by looking, and this is the point of the story: nobody can tell them apart by looking. Both jars had to be discarded, and the apprentice spent the afternoon re-making both powders and labeling them first. The professor considers this a happy ending. The powders were cheap. The lesson was not.
The Tale of the Undated Jar. A student sealed a jar beautifully, wax and all, and wrote the contents on the label in her finest hand. She did not write the date. Three years later she found the jar and could not remember whether it was three weeks old or three years old. A wax seal keeps air out, but it does not keep time out. The jar was retired unopened, which is the correct ending, and the student now dates everything down to the day.
The Tale of the Borrowed Jar. Two students shared a shelf. One borrowed the other's jar of dried material for a comparison, returned it, and forgot to mention it. The owner found the jar lighter than her records said it should be, and spent a week convinced she had mismeasured. She had not. The jar simply had no label saying who had touched it last. The professor's ruling: the label carries the preparer's name, so that questions have somewhere to go.
Check in: Each of the three tales fails on a different missing piece of the label. Which tale is about the date, which about the preparer — and what did the first tale's apprentice lose by labeling "after" instead of before?
None of these stories ends in disaster, and that is deliberate. In a well-run laboratory, the first law turns disasters into afternoons. The unlabeled jar is not a tragedy. It is a jar you must throw away, and the discipline to throw it away rather than guess. Guessing is the one thing the laboratory never does.
❦ In your workbook: record the archive's first law in your own way — the law itself, and what each of the three tales cost — copy, sketch, or note what matters.
A Short History of the Apothecary's Label
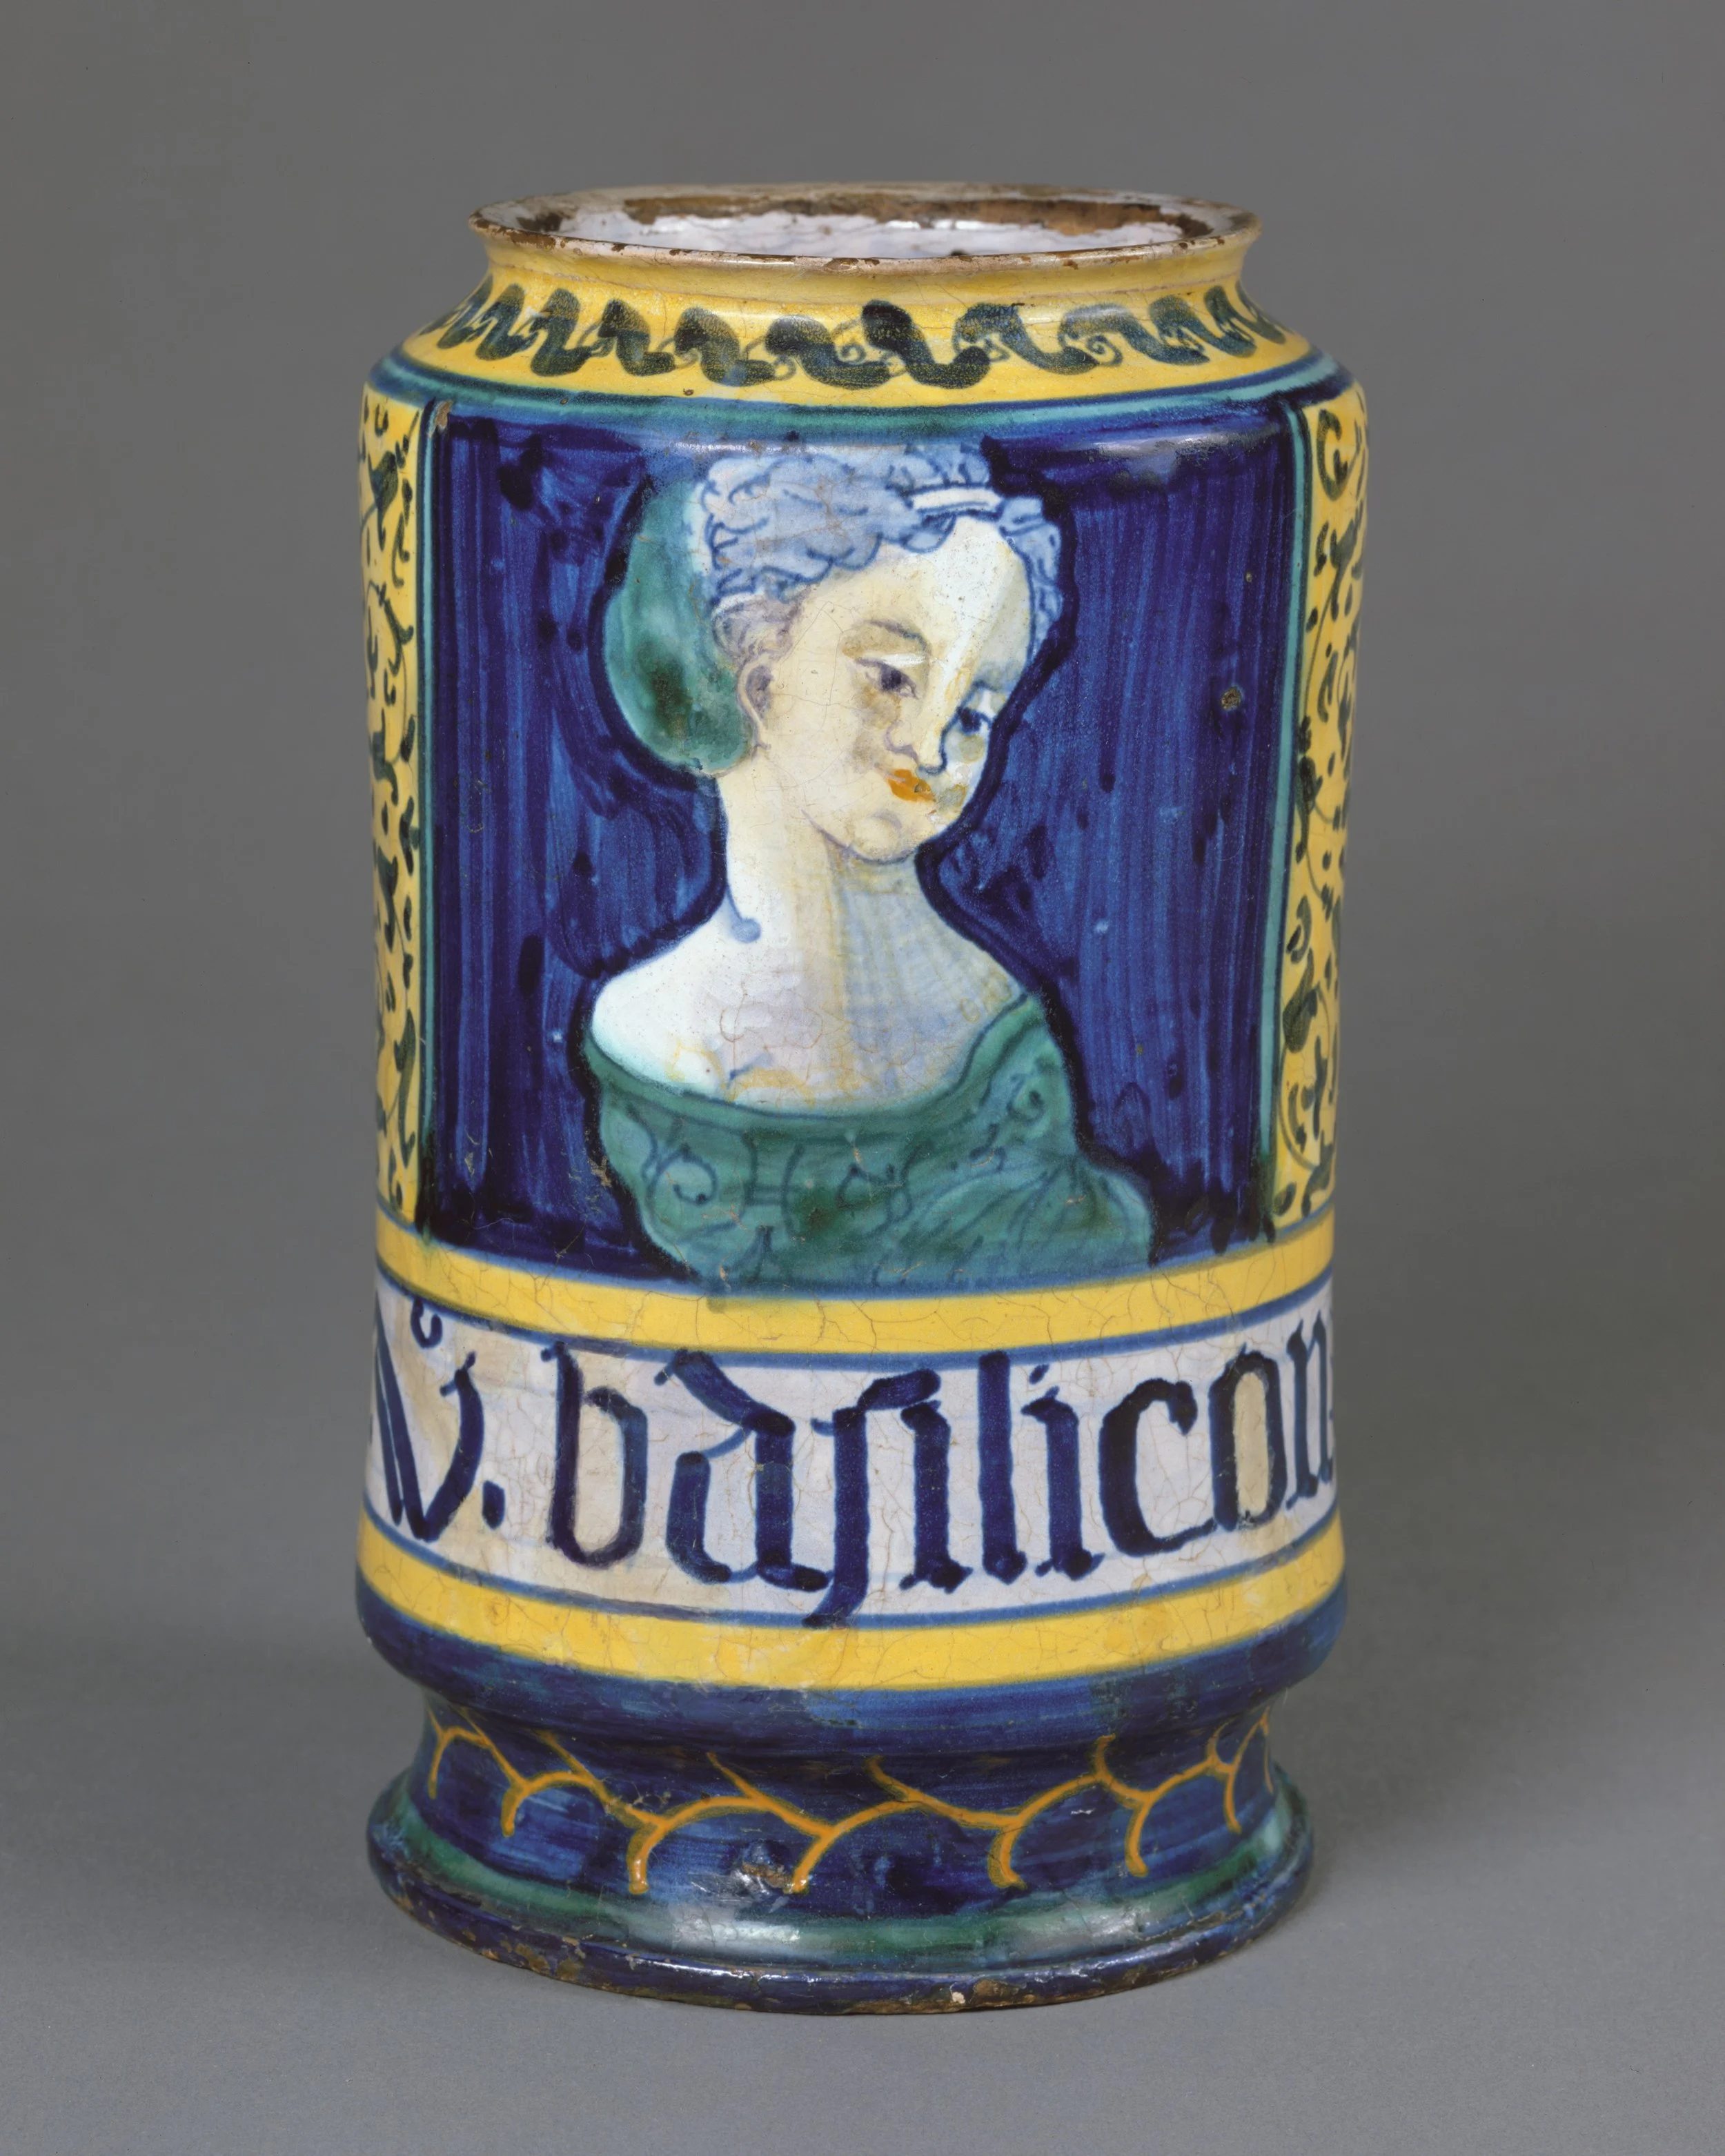
The lesson's own jar: a Castelli albarello, ca. 1530–40. Its contents are named in the painted band — a label baked into the jar at the kiln.
The Metropolitan Museum of Art, Open Access (CC0).
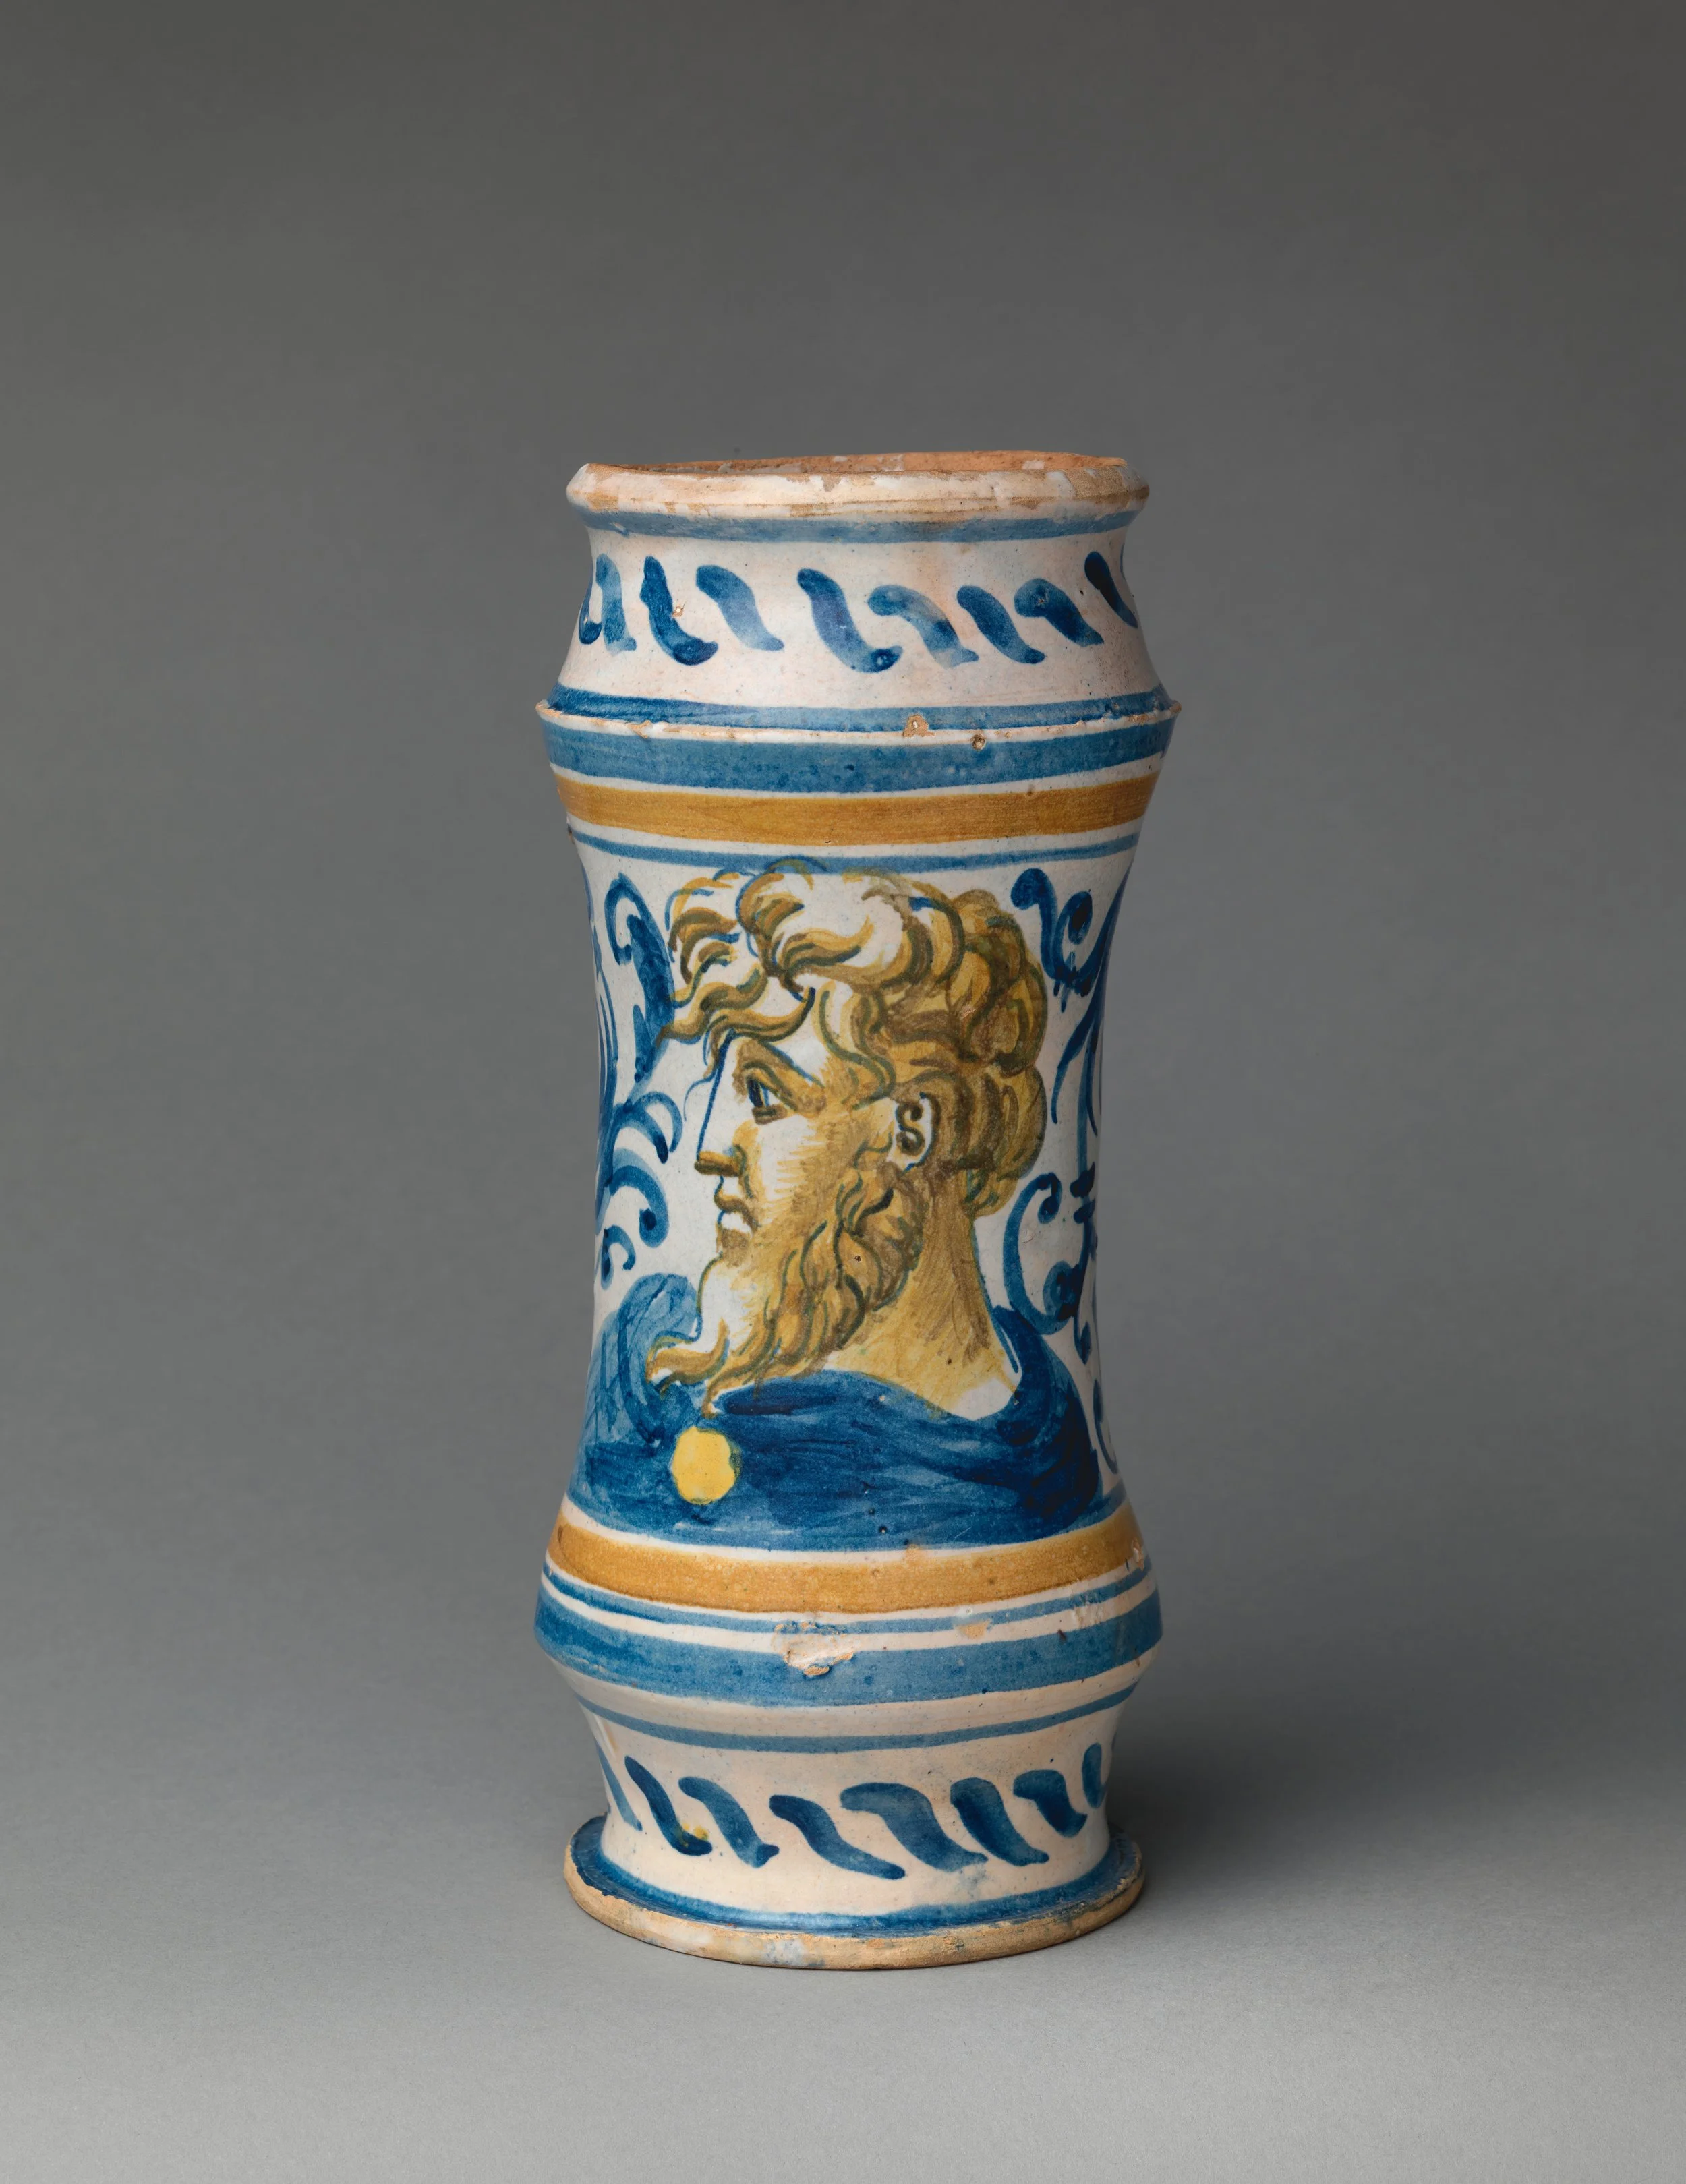
The albarello's narrow waist: shaped to be gripped and lifted from a crowded shelf with one hand.
The Metropolitan Museum of Art, Open Access (CC0).
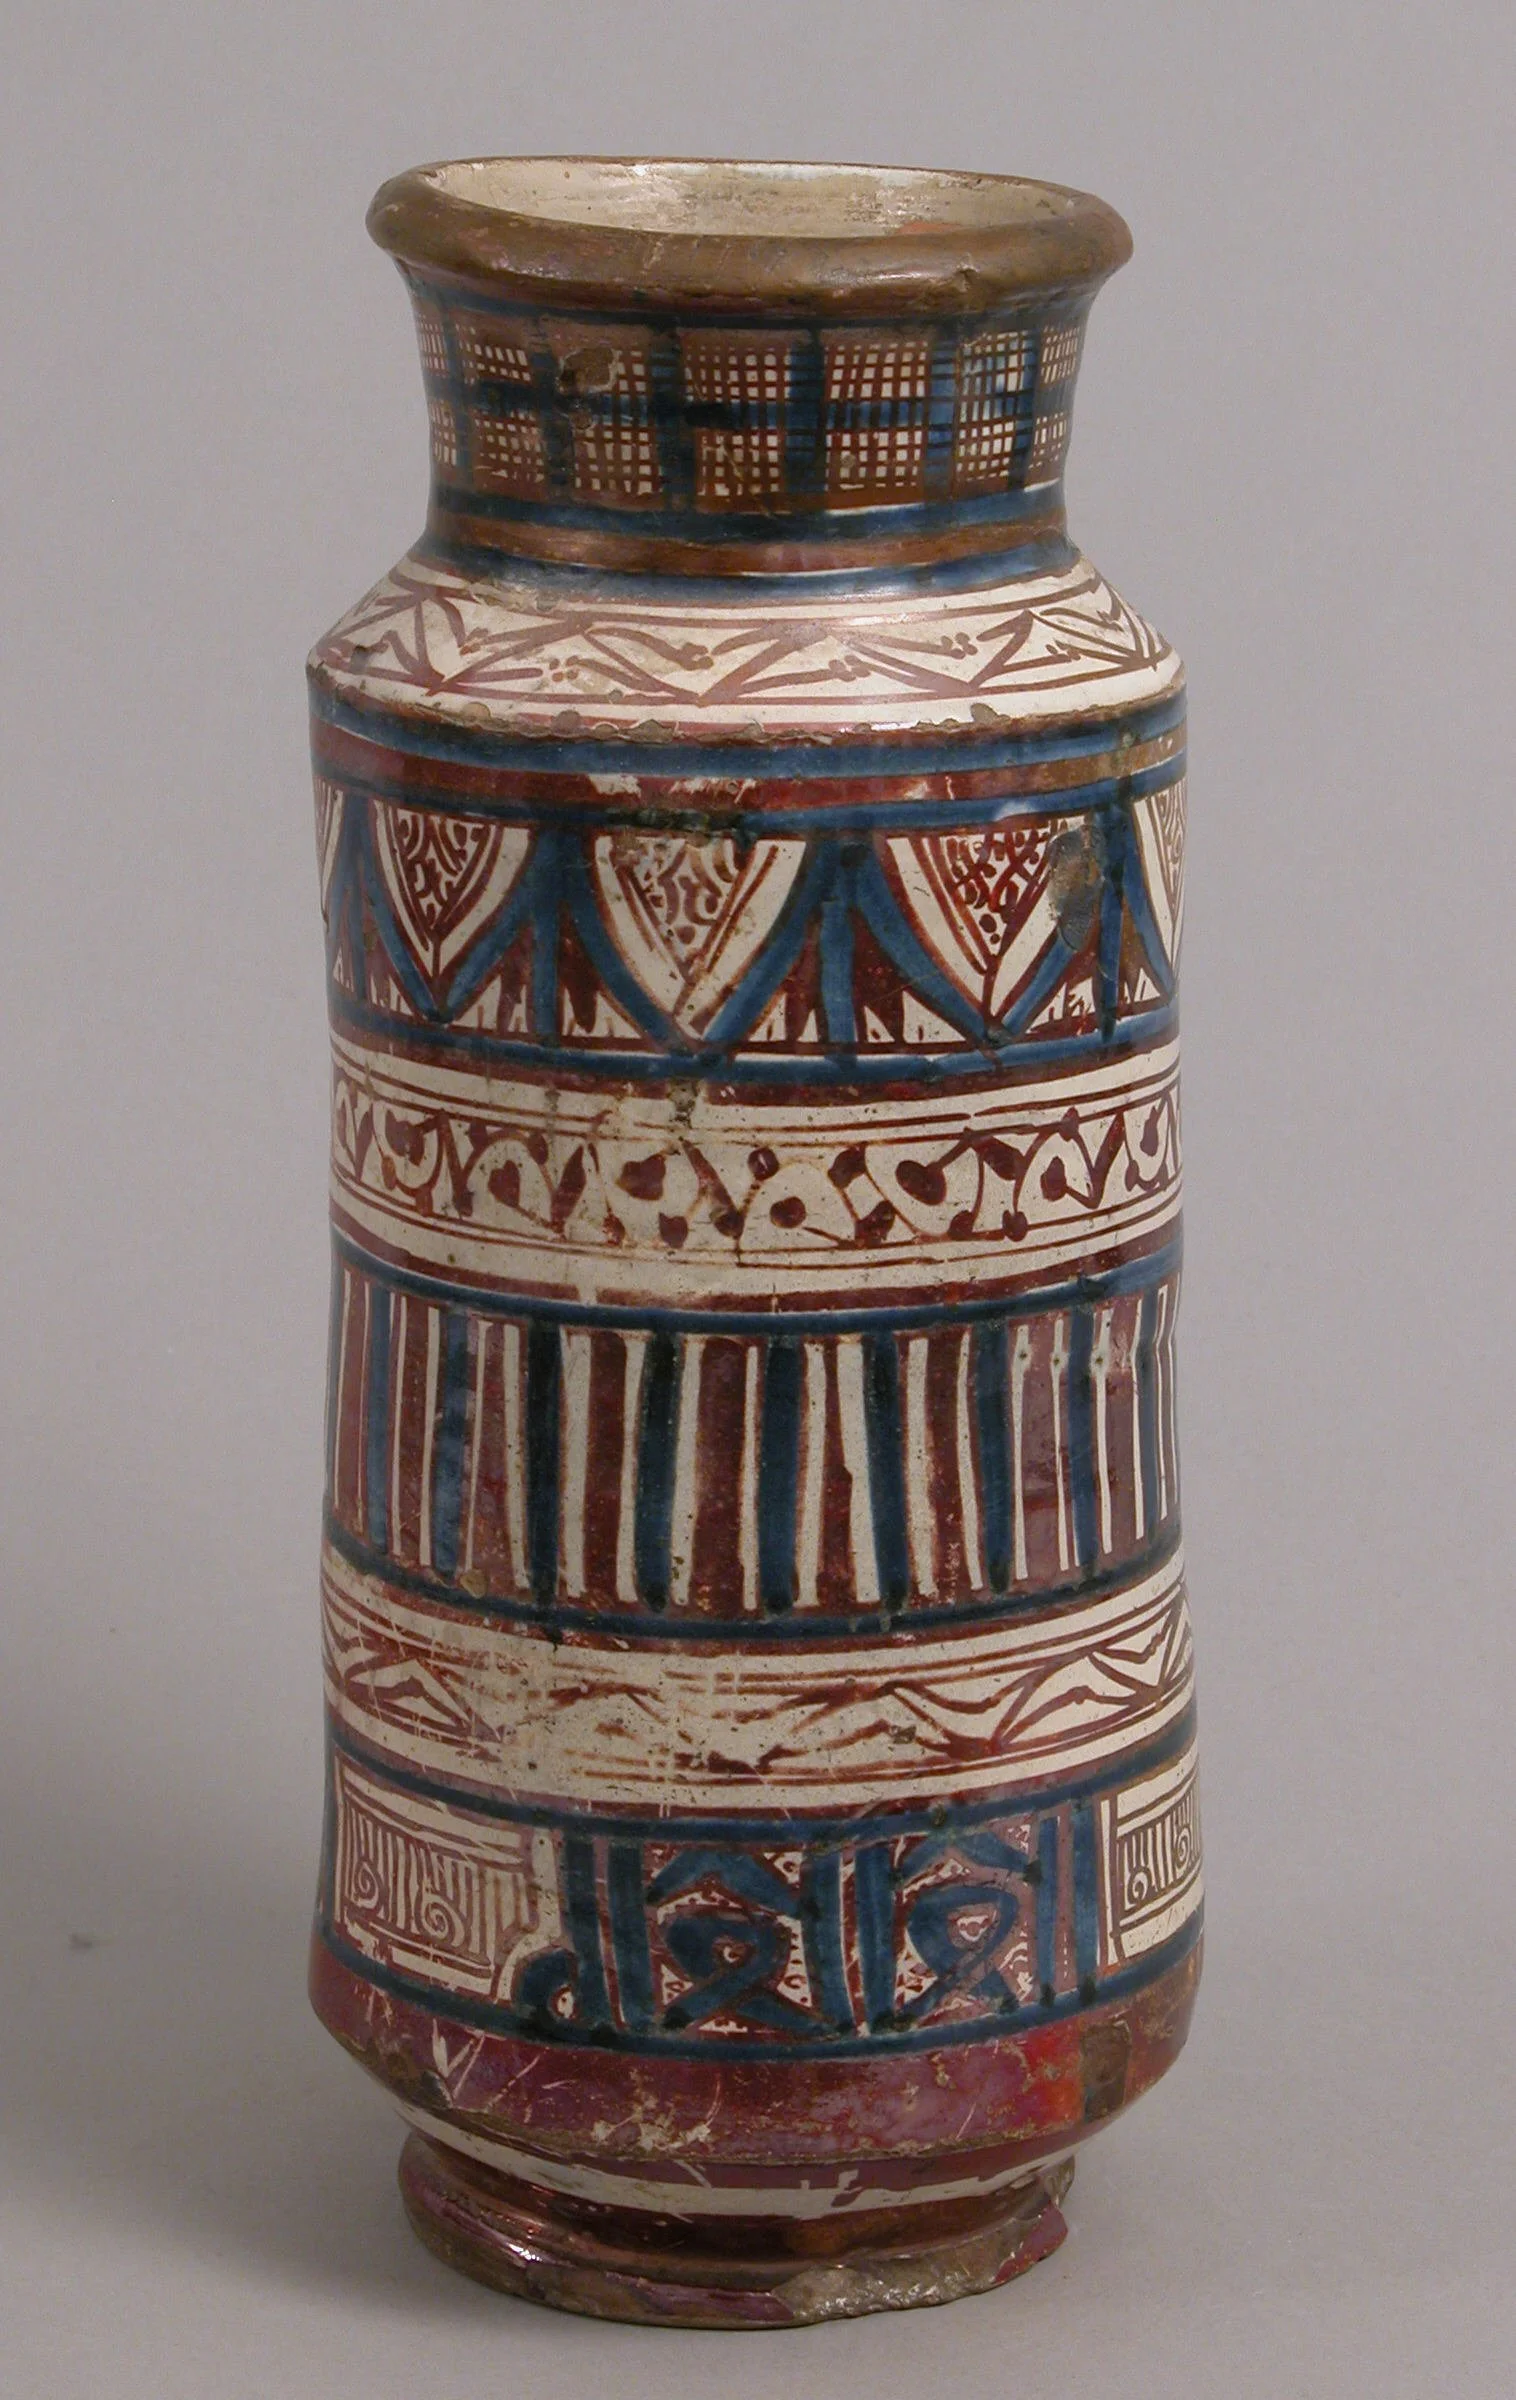
A pharmacy jar of 1400–1450, from the tradition that carried the albarello across the Islamic world and Spain.
The Metropolitan Museum of Art, Open Access (CC0).
Long before paper labels, the label was the jar.
The albarello was the apothecary's workhorse for centuries: a cylindrical earthenware jar, often tin-glazed so its surface shone white, shaped with a narrow waist so it could be gripped and lifted from a crowded shelf with one hand. Albarelli were made across the Islamic world and Spain, and reached their most splendid form in Renaissance Italy, where workshops in places like Castelli and Deruta painted them with flowers, portraits, and coats of arms. You can still see them in museums today, including a fine example made around 1530 to 1540 now kept at the Metropolitan Museum of Art.
★ What matters for our lesson is what was painted on them besides the decoration: the name of the contents. An albarello might carry its inscription in a painted cartouche, naming the ointment or powder inside in Latin or the local language. The label could not fall off, fade in damp air, or be swapped onto the wrong jar, because it was baked into the jar itself at the kiln. When the jar said what it held, it said so permanently. Six hundred years later, we can still read some of them. That is labeling with commitment.
Not every vessel could be an inscribed showpiece. Everyday jars were closed with cloth, parchment, or paper tied over the mouth, sometimes with the contents written on the cover itself. A jar might wear a parchment cap inked with its name, sealed down with wax or tied with string. The writing was the label, and the cover was the seal, and the two jobs were already joined: to name the thing, and to show whether it had been opened.
Paper labels as we know them, printed or handwritten slips pasted to glass bottles, became common in the eighteenth and nineteenth centuries, when glass bottles replaced many earthenware jars and printed labels could be made cheaply and identically. Walk through a reconstructed nineteenth-century apothecary, such as the great European apothecary collection kept by the Smithsonian, and you will see shelves of bottles wearing paper labels like uniforms: every one named, every one dated in the hand of whoever filled it. The technology changed. The first law did not.
Your laboratory sits in this long line. Your adhesive labels are the descendants of painted cartouches. Your pen is the descendant of the painter's brush. When you write a jar's name on its label, you are doing what apothecaries have done since before anyone in your family was born. Do it as if someone will read it in six hundred years. Someone might.
❦ In your workbook: record the history of the apothecary's label in your own way — the baked-in inscription, the tied cover, and the paper label — copy, sketch, or note what matters.
What a Proper Label Carries
★ A proper laboratory label carries four things. Four, always four, in the same order, so that anyone trained in this laboratory can read any label at a glance.
1. Contents. What is in the jar, named plainly and exactly. Not "herb mix." Not "the blue stuff." The full name, spelled correctly. If the jar is empty and waiting for service, write EMPTY in clear letters, because an empty jar with no label is just a future mystery.
2. Date. The day the jar was filled or sealed, written the same way every time. The professor recommends the form 12 OCT 2026: day, three-letter month, year. Numbers alone cause arguments across countries, and the laboratory does not hold arguments. It holds records.
3. Preparer. The name or initials of the person who filled and labeled the jar. This is not vanity. This is so that when a question arises three months later, it has somewhere to go. Every label is signed.
4. Warnings. Anything a future reader needs to know before opening the jar. DISPLAY ONLY. NOT FOR CONSUMPTION. KEEP AWAY FROM YOUNGER SIBLINGS. HANDLE WITH CARE. If there is nothing to warn about, write NOTHING HAZARDOUS, because a blank warning space looks exactly like a forgotten warning space, and the first law has no patience for ambiguity.
Write the label before you fill the jar. Place it where it can be read without picking the jar up. Write large enough to read at arm's length. If you make a mistake, do not cross it out and write over it. Start a fresh label. A label with a correction on it is a label with a question on it, and questions belong in the journal, not on the glass.
Check in: A label reads "DRIED BEANS — filled last Tuesday — mine." Which of the four elements are wrong or missing, and how should each be fixed?
Scholars, a word about handwriting. Your label is a promise to a future reader, and that reader may be you, in a hurry, in poor light, three months from now. Write like you mean it. Print if your cursive runs wild. Slow down. The two minutes you spend writing clearly will save someone, someday, from the Tale of the Two White Powders. I speak from experience. The professor's own early labels were, I confess, written in a hurry, and one of them caused an entire afternoon of re-measuring. We do not speak of it further.
— Professor Crimblebrew Muddlenook, Potions Laboratory • Master Apothecary • Head of House Meridies
❦ In your workbook: record what a proper label carries in your own way — the four elements, in order, and the rule for a spoiled label — copy, sketch, or note what matters.
In your packet: Exercise I — The Vessel Census Labeling ⚒ begins here. Work it now, or mark the place and take it as homework — your choice.
The Apothecary's Shorthand
Open any historical book of recipes, a pharmacopoeia, a handwritten receipt book from two hundred years ago, and you will meet a forest of strange marks. The apothecaries wrote in shorthand, for the same reason you text in abbreviations: speed, space, and the fact that everyone in the trade knew the code.
You do not need to write in this shorthand. Your labels will be in plain words, because plain words are the clearest promise. But you need to read it, because the historical sources you will study are full of it, and misreading a mark is the fastest way to misunderstand a recipe.
Here are the marks you will meet most often. Learn them the way you learned the alphabet: by recognition, not by use.
The weight symbols. The old apothecaries weighed in grains, scruples, drams, and ounces, a system inherited from Rome and used in pharmacies well into the twentieth century. (You will learn to actually weigh in Lesson 6. Today is for reading only.)
- ℈ is the scruple, 20 grains. The name comes from the Latin scrupulus, a small pebble, which is a lovely thing to call a weight.
- ʒ is the dram (also spelled drachm), 3 scruples or 60 grains.
- ℥ is the ounce, 8 drams or 480 grains. Note the apothecaries' ounce, 12 to the pound, which is not the same as the kitchen ounce you know. Lesson 6 will sort this out properly.
- ℔ is the pound, 12 ounces in this system.
The word abbreviations. A few Latin shortcuts appear constantly:
- aa stands for ana, meaning "of each." If a recipe lists three ingredients followed by aa, it means take the stated amount of each one.
- q.s. stands for quantum satis, "as much as suffices," meaning add enough to achieve the result, no more.
- ss stands for semis, "half." Written after a quantity, it halves it.
Check in: A receipt lists three ingredients followed by "aa ʒ ss." Reading only — what does the mark after the list tell you, and what does "ss" do to the dram?
You will notice something about these marks: they are compact, precise, and completely opaque to anyone outside the trade. That was partly the point. But opacity is the enemy of the first law, which is why your labels use plain words. Shorthand is for reading history. Plain speech is for running a laboratory.
★ One more marking belongs here, and it is the one you will actually use: the batch number. Every filling of every jar gets a number, unique to that filling, written on the label and in the journal. Your scheme for this course is simple: the letter P for Potions, then the unit, then the lesson, then the filling number. The first jar you fill today becomes P-1-04-01. The second, P-1-04-02. When you look at jar P-1-04-01 next month, the number will walk you straight to the journal entry that describes exactly what went into it, when, and by whom. In Lesson 44 you will meet the full batch-record system this grows into. For now, the number is the thread. Do not lose the thread.
❦ In your workbook: record the apothecary's shorthand in your own way — the four weight symbols, the three abbreviations, and your batch-number scheme — copy, sketch, or note what matters.
Wax Seals for the Laboratory
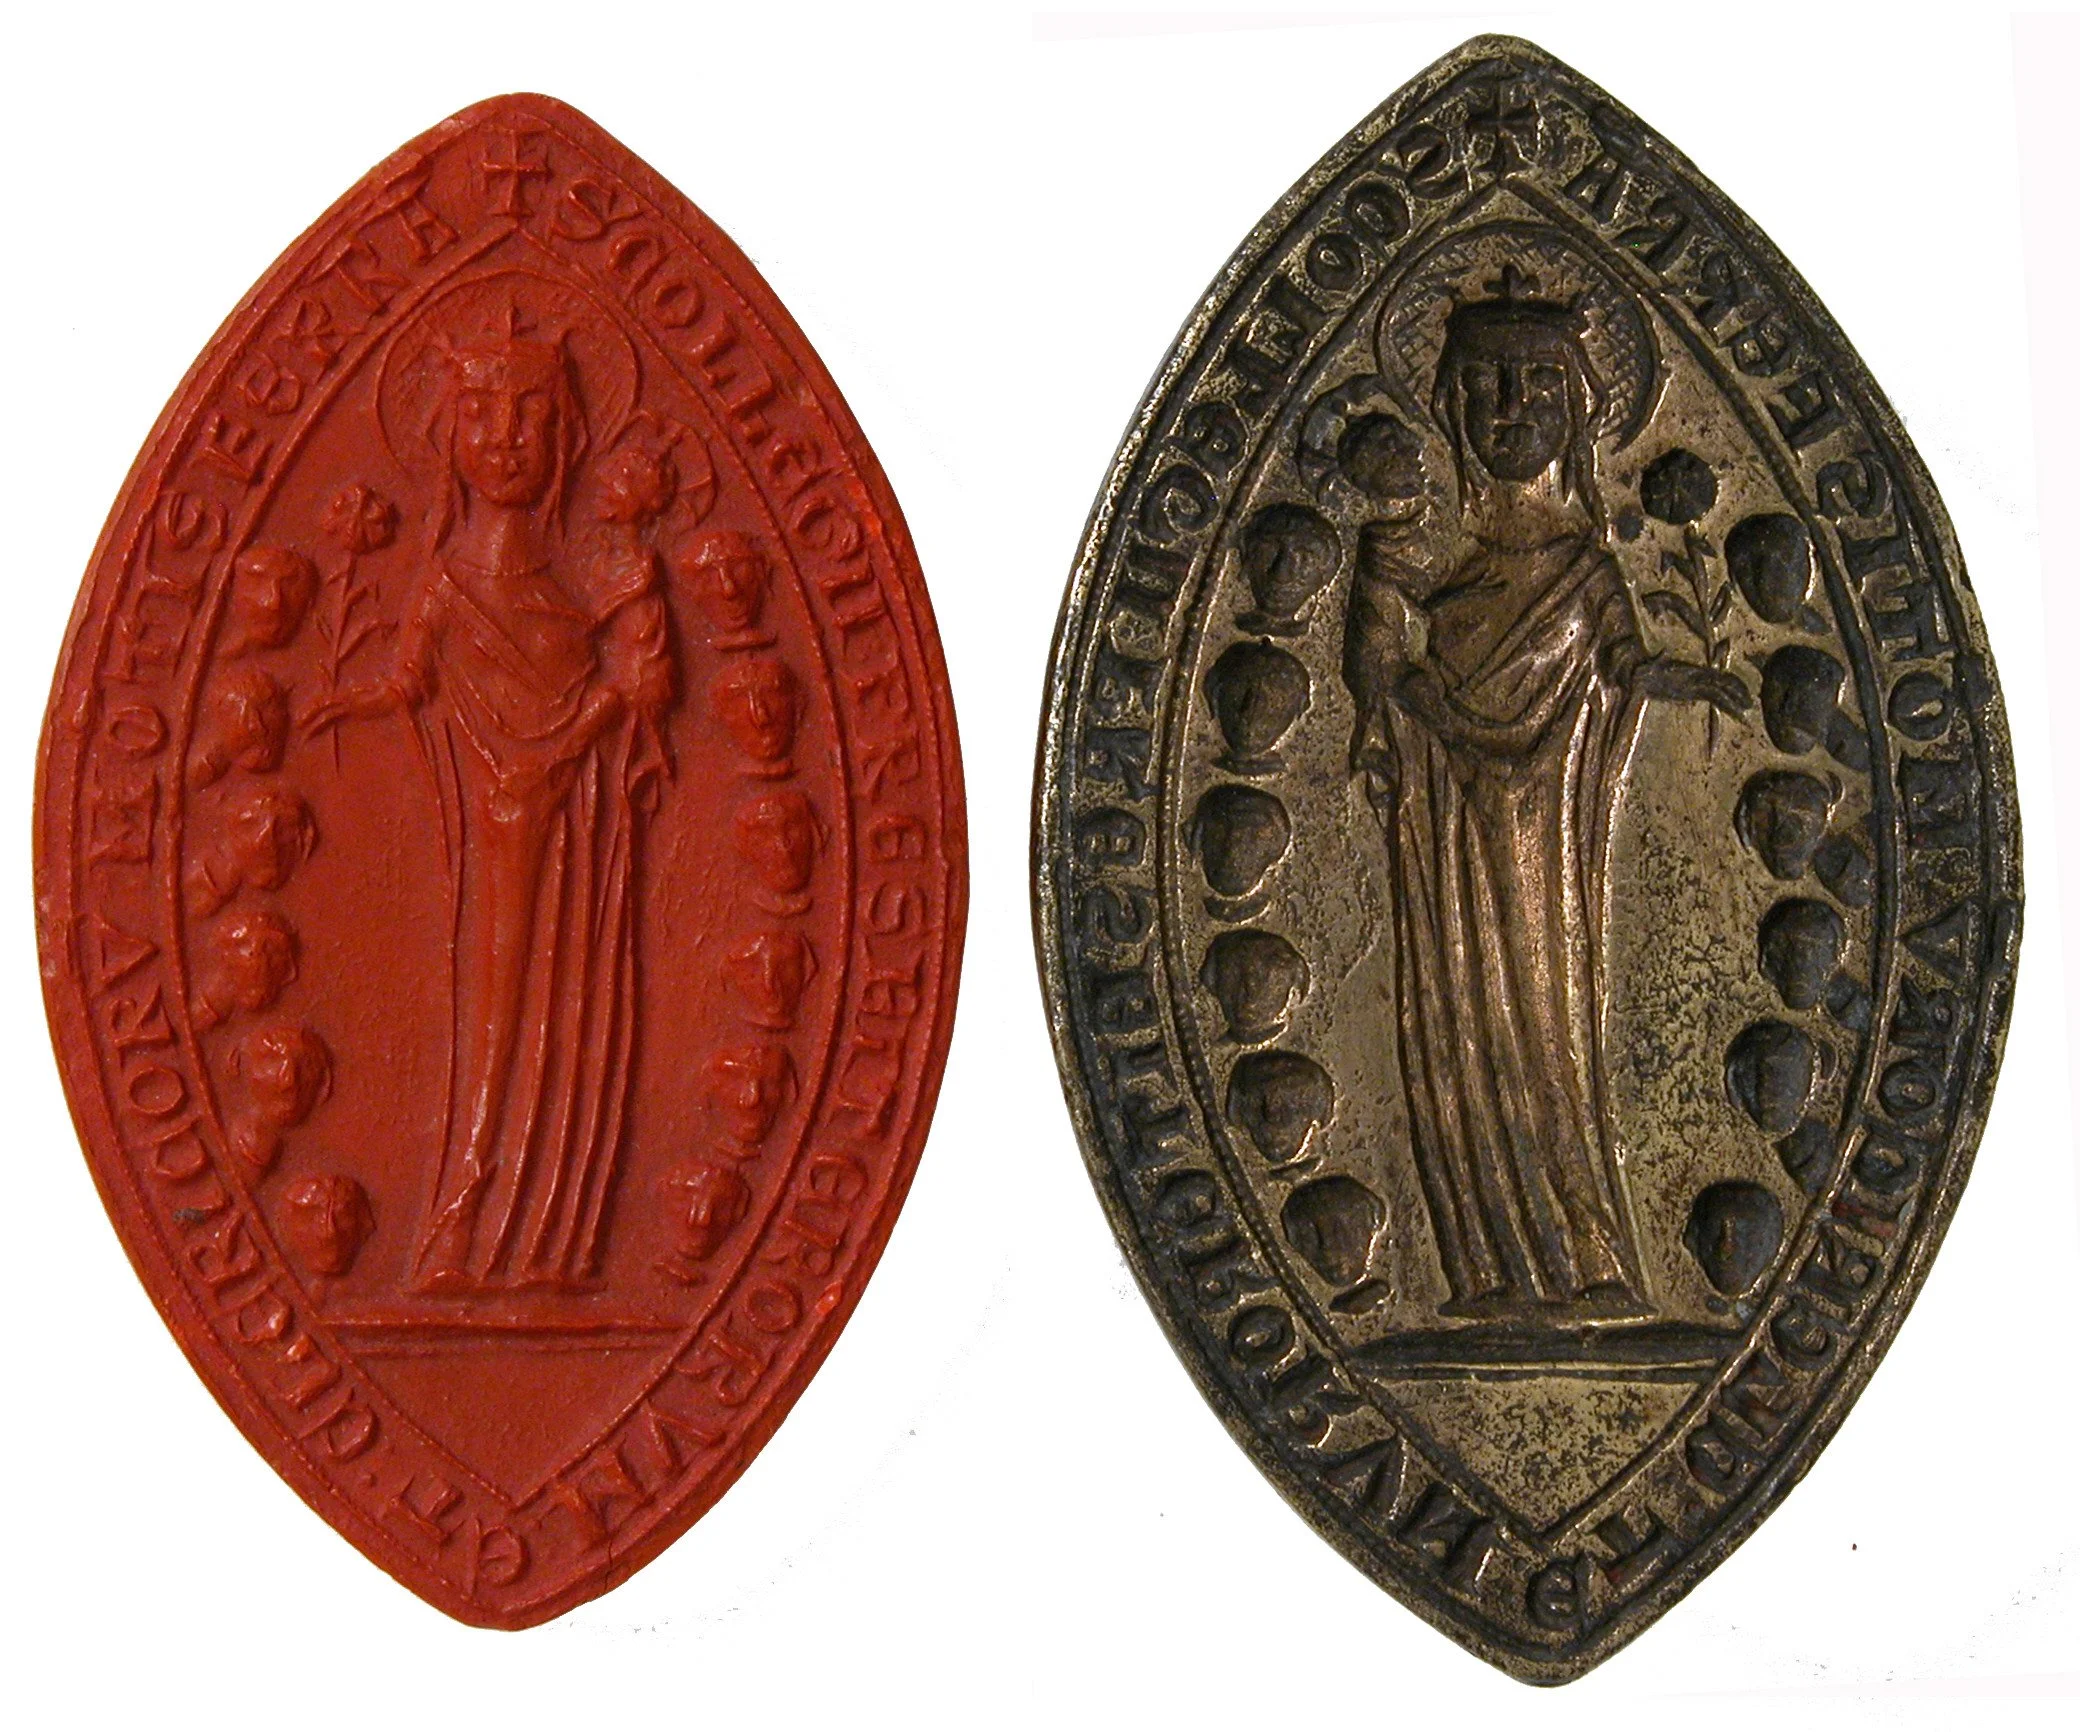
Matrix and impression: the bronze die (right) and the red wax child it presses (left). Your coin or stamp does the same work on a jar.
The Metropolitan Museum of Art, Open Access (CC0).
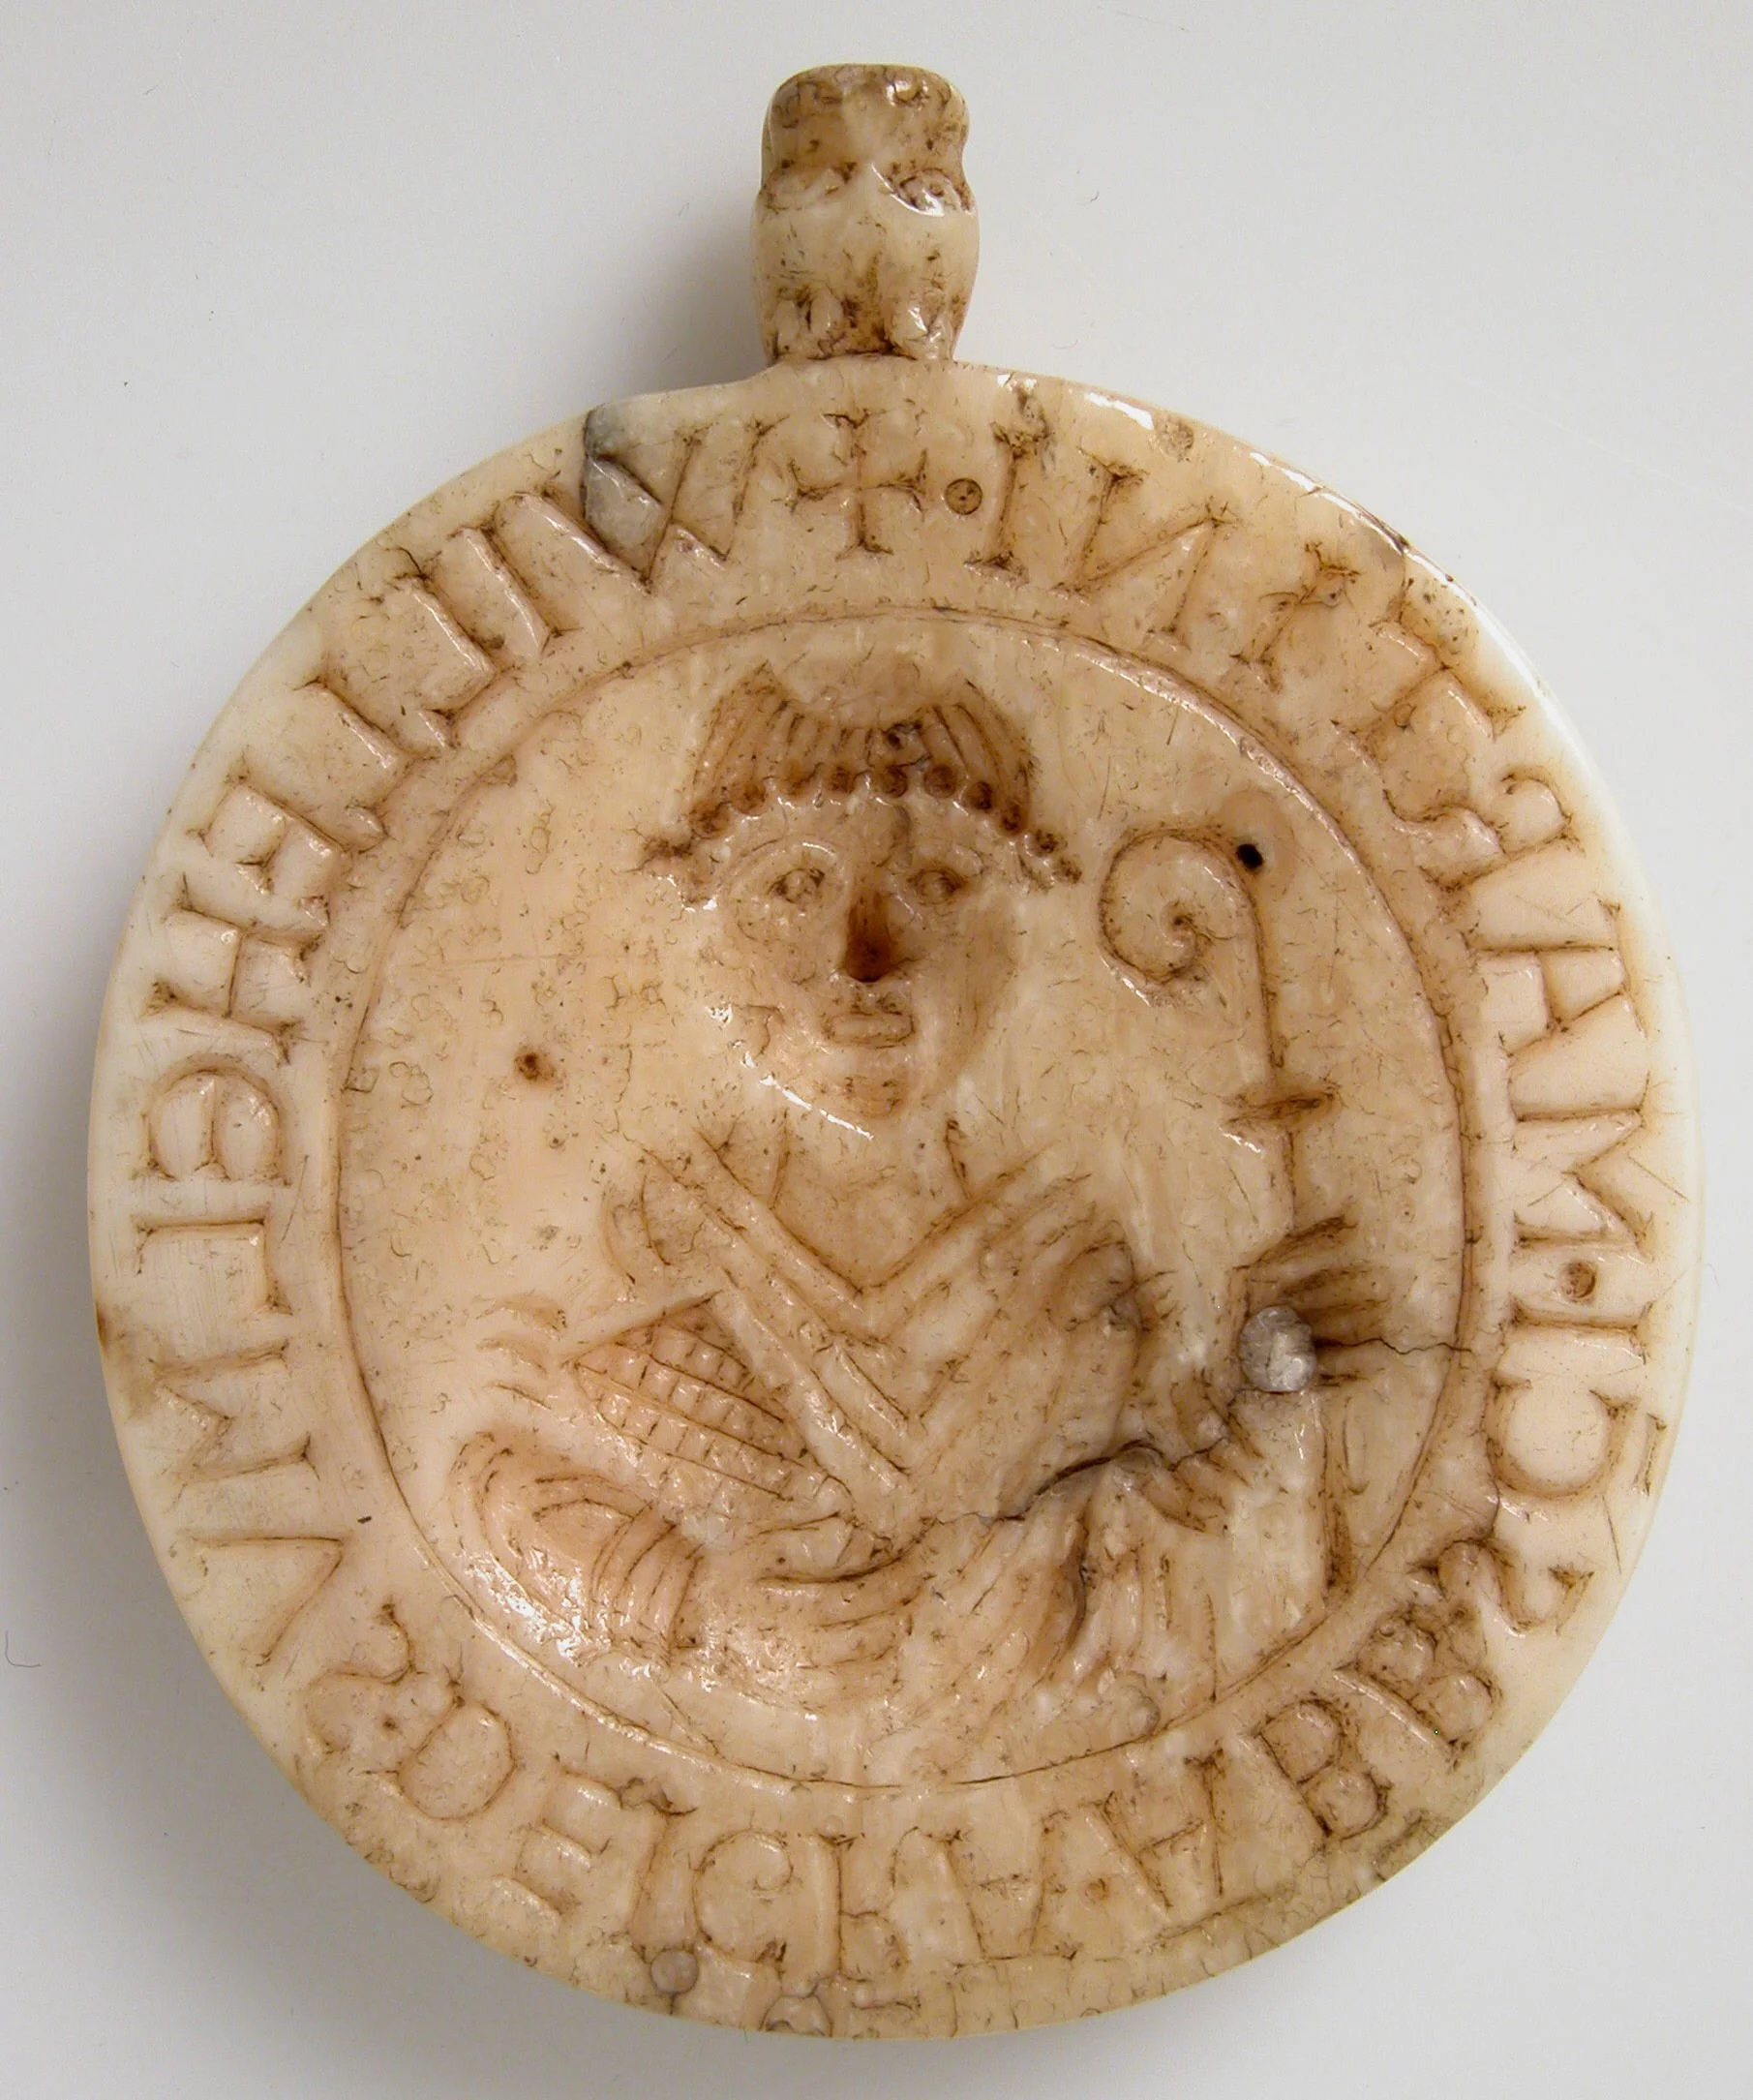
A seal matrix of before 1152: the owner's name runs around the rim, so every impression signs itself.
The Metropolitan Museum of Art, Open Access (CC0).
A label names the jar. A wax seal makes a promise about it.
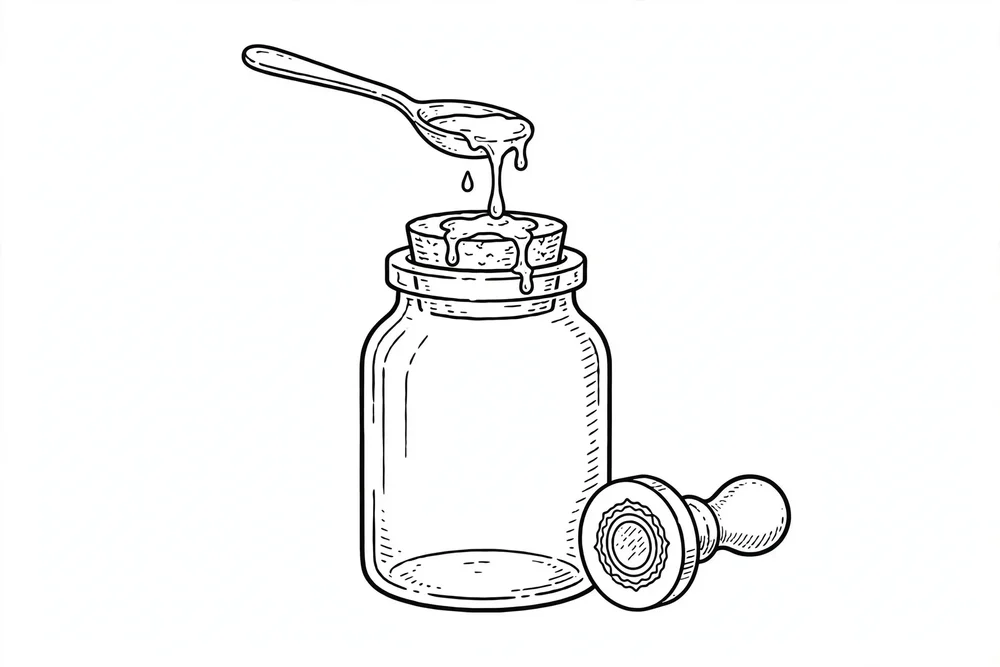
★ The promise is this: this jar has not been opened since I closed it. Melted wax is poured or dripped over the lid, the cork, or the tied cover, and while it is soft, a stamp, a coin, or a carved matrix is pressed into it. When the wax hardens, it locks the closure in place. If anyone opens the jar, the seal breaks, and the breakage shows. The seal does not keep the jar shut. The lid, the cork, or the tied cover does that. The wax only shows whether anyone has opened it since it was sealed.
This is called a tamper-evident seal, and the idea is older than glass bottles. Jars of preserves, bottles of wine, packets of valuable powders: anything worth protecting from quiet opening has been sealed with wax at some point in its history. The apothecary's shelf was full of such seals, because an apothecary's reputation rested on the claim that what was in the jar was what the label said, untouched since sealing.
Cork and wax are for dry goods and bottles made for keeping or display. A liquid in use gets a proper cap — wax over a damp cork traps moisture, and mold grows where no one can see it.
Note what the seal does not promise. It does not promise the contents are still good. Wax keeps air out, but it does not keep time out, as the Tale of the Undated Jar reminds us. That is why the seal and the label work together: the label carries the date, the seal carries the promise, and between them the jar tells its whole story.
Your Scrollwork classmates study seals too, in Scrollwork Unit VI Lesson 22, and you should visit that lesson when you can. But understand the division of labor, because it matters. Scrollwork owns the scribe's seal: the seal on a document, which authenticates the writer and proves the letter is genuine. We own the laboratory seal: the seal on a jar, which proves the vessel is unopened. Same wax, same pressing, different promise. A scribe seals words. An apothecary seals things. When you want to know how seals are designed, cut, and authenticated as craft, go to Scrollwork. When you want to seal a jar, you are home.
Dating the seal is a small art worth learning. After you press your matrix, and while the wax is still soft, you can scratch the date into the wax beside the impression with a pin: 12 OCT 2026. Now the seal carries the same date as the label, and the two agree with each other, and the archive's promises line up like jars on a shelf. Which is exactly how Professor Muddlenook likes them.
Check in: Your sealed jar's wax is unbroken, but its label has no date. What can you still claim about the jar, and what can you no longer claim?
❦ In your workbook: record wax seals for the laboratory in your own way — the promise, what the seal does not promise, and the scribe's seal against the laboratory's — copy, sketch, or note what matters.
In your packet: Exercise II — Two Sealed Jars ⚒ begins here. Work it now, or mark the place and take it as homework — your choice.
A Sealed Note from Professor Timberclank

Professor Muddlenook teaches what the seal promises. The handling of hot wax is workshop work, and that part is mine to speak to. Four rules, and they are enough.
First: the wax is melted by your adult, over gentle heat, and it is never hurried. Wax brought up slowly pours clean and holds fast. Wax rushed over high heat smokes, scorches, and bites.
Second: nothing is held in the hand over hot wax. Set the jar down on the bench, square and steady, before the spoon comes near it, and keep fingers, sleeves, and loose hair behind the edge of the bench while the wax is liquid.
Third: pour once, press once, and then leave the seal alone until it is hard and cool. A seal poked, tilted, or lifted early will crack, and a cracked seal keeps no promise. If an impression spoils, let it cool, peel the wax away, and pour that jar again. Spoiled wax is a small thing.
Fourth, and it stands over the other three: if wax touches skin, if a jar tips, if anything at all feels wrong, we stop. We make it safe. Then we begin again. Cool running water on a burn, at once, and tell your adult. No seal in this school is worth a blister, and no scholar of mine works on to hide a mistake.
For the full handling lesson, see Creative Arts Lesson 5, 'Adhesives, Heat, Wax & Glass.'
— Professor Cogbranch Timberclank, Creative Arts Workshop • Master Artisan • Head of House Occidens
Procedure
Work slowly and in order. An adult must be present for all wax melting.
Part One: Labeling the vessel set.
- Lay out every vessel from Lesson 3 on a clear table, lids off, in a row. Count them. Write the count in your journal. This is your census, and every vessel on it gets a label today.
- For each vessel in turn, decide its status. If it currently holds something, write the contents exactly. If it is empty and waiting, write EMPTY: READY FOR SERVICE. There is no third option. Every vessel is either named or declared empty.
- Write one label per vessel with all four elements: contents, date in the form 12 OCT 2026, your name or initials as preparer, and warnings. For empty vessels awaiting service, the warning line reads NOTHING HAZARDOUS: AWAITING CONTENTS.
- Fix each label where it can be read without lifting the jar. Smooth it flat. Check every label at arm's length: if you cannot read it from a step back, rewrite it larger.
- Return the vessels to the shelf in your chosen order. Record the order in your journal with one line per vessel and its status.
Part Two: Sealing two jars.
- Choose two jars with lids or corks. Close them firmly. If a jar has a cloth or paper cover tied over its mouth instead of a lid, tie it now, snug and square-knotted.
- Have your adult melt a small amount of sealing wax in the heat-safe vessel over gentle heat. While it melts, lay a sheet of scrap paper under your work area. Wax drips, and planning for drips is part of the craft.
- When the wax flows smoothly, your adult pours or spoons a coin-sized pool where the lid meets the jar, bridging the two so the lid cannot turn without breaking the wax. Work on one jar at a time.
- While the wax is still soft, press your seal matrix, coin, or stamp firmly into the pool and lift it straight away. Do not wiggle. Admire the impression, briefly, then leave the wax completely alone until it is hard and cool.
- With a pin, scratch the date beside the impression: 12 OCT 2026. Add both jars' batch numbers to their labels if they are not there already.
- Repeat for the second jar. Let both seals harden fully before shelving the jars.
Part Three: First batch numbers.
- Open your journal to a fresh page. Title it BATCH REGISTER: UNIT I.
- For each vessel you labeled today, write one line: batch number (P-1-04-01 onward, in the order you labeled them), vessel description, contents or EMPTY, date, and your initials. The two sealed jars get a note: SEALED, with the seal date.
- Read the register back to yourself, top to bottom. Every vessel on the shelf should appear exactly once. If one is missing, find it and add it. The register is complete when the shelf and the page agree.
In your packet: Exercise III — The First Batch Register ◐ begins here. Work it now, or mark the place and take it as homework — your choice.
Cleanup
Let all wax cool completely before touching the work area. Peel cooled drips from the scrap paper and discard them. If wax reached the table, let it harden fully, then lift it gently with a fingernail or a plastic scraper. Warm soapy water removes the last traces.
Wipe the seal matrix clean while it is still slightly warm, or pick cooled wax from its crevices with a pin. A clean matrix makes a clean impression next time.
Return every vessel to its shelf place. File the scrap paper with your wax notes, or recycle it. Wash your hands. A tidy bench is the visible form of a tidy mind, and Professor Muddlenook can tell the state of a student's archive from the state of their bench at a glance. Make sure the glance is a pleasant one.
❦ In your workbook: record the cleanup in your own way — cooled wax first, a clean matrix, every vessel back in its shelf place — copy, sketch, or note what matters.
Archive Entry
Today's archive entry is the Batch Register page itself, and it deserves the full formal treatment, because this page is the foundation everything else will be built on.
Copy your register onto its permanent page if you drafted it roughly. Rule the columns straight: batch number, vessel, contents, date, preparer, notes. Write the date of the entry at the top. Sign it.
Below the register, write a short paragraph answering three questions: Which vessel was hardest to label, and why? How did your two seals turn out? What will you do differently next time you seal a jar? Honest answers only. The archive is not impressed by perfection. It is impressed by accuracy.
File any leftover blank labels with your supplies, and note in the journal where you keep them. Future you, mid-lesson and in a hurry, will be grateful.
❦ In your workbook: record the archive entry in your own way — the register's columns, the three honest questions, and where your spare labels live — copy, sketch, or note what matters.
Guided Observation
Observation begins the moment the work ends. Watch your labels and seals the way you would watch a preparation: with attention, over time.
Check each wax seal once it is fully cool. A good seal is smooth, unbroken, and firmly attached to both lid and jar. If a seal cracked while cooling, note it honestly in the register and re-seal the jar. A cracked seal is not a failure of character. It is information: the wax was too cool, or the pool too thin. Note the cause if you can tell, and do better on the next jar.
Over the coming week, glance at your labels daily. Do any edges lift? Does any ink smudge when brushed? A label that fails in a week would have failed in a month, and the laboratory would rather learn it now. Record any label failures and what you changed: a different pen, a smoother jar surface, tape over the top as protection.
Test your batch register at the end of the week. Close the journal, look at the shelf, and point to each jar in turn, reciting its batch number from memory. Then open the journal and check. The goal is not memorization. The goal is a system so orderly that checking it feels almost unnecessary, and the discipline to check it anyway.
❦ In your workbook: record the guided observation in your own way — the seal check, the week's label watch, and the register test — copy, sketch, or note what matters.
Materials
Required (Level One — household items)
- Your full vessel set from Lesson 3, clean, dry, and shelved: every jar, bottle, and tin you chose.
- Blank adhesive labels (or plain paper cut into label-sized pieces, plus clear tape to fix them).
- A pen with permanent ink for writing labels. Pencil smudges; choose pen.
- String or ribbon and scissors for tie-on labels, if any of your vessels have necks suited to them.
- Two small heat-safe jars with lids or corks for the wax-sealing exercise. They may be empty or hold dry, harmless contents such as rice or dried beans.
- Sealing wax sticks or wax beads in any color, and a metal spoon or small heat-safe pouring vessel. A candle warmer or a supervised stovetop on its lowest setting provides the heat.
- A coin, button, or carved stamp to press as your seal matrix. Anything with a clear raised pattern will do.
- Your laboratory journal and a pencil for the batch-number entries.
- A ruler, for keeping your labels straight. Crooked labels are readable labels, but straight labels are happier ones.
- A sheet of scrap paper to lay under the sealing work, and a pin for scratching the date beside each seal impression.
Suggested (Level Two — historically closer)
- A stick of traditional shellac-based sealing wax with a wick, the kind sold for letter sealing, instead of glue-gun style wax.
- A brass seal matrix or signet with your initial, for a period-correct impression.
- Gummed paper labels (the kind you dampen to stick), which behave like nineteenth-century apothecary labels.
- A quill or dip pen and iron gall style ink for writing labels in a historical hand. (Your Scrollwork lessons have prepared you for this. Show off a little.)
Reflection Questions
Answer the following questions in your workbook.
- The first law of the archive says to label everything before filling, every time, with no exceptions. Why "before" and not "as soon as convenient"? What goes wrong in the gap between filling and labeling?
- An albarello's inscription was baked into the jar at the kiln and could never fall off, fade, or be swapped. What did apothecaries gain with that permanence, and what did they lose compared to a paper label you can rewrite?
- A wax seal on a jar and a wax seal on a letter are made the same way, but Professor Muddlenook says the promise is different. Explain the difference in your own words.
- The old shorthand marks (℈, ʒ, ℥, aa, q.s.) are compact and precise, yet the lesson tells you to write your labels in plain words. Why is plain speech better for running a laboratory, even though shorthand is faster?
- Imagine you find an unlabeled jar on your shelf six months from now. Walk through exactly what you would do, step by step, following this lesson's rules. What would you refuse to do, and why?
Workbook Checklist — Lesson 4
In my workbook I have:
- ☐ stated the archive's first law and why the label goes on before the filling, every time
- ☐ recorded the safety briefing: hot wax with an adult, label before you fill, never taste to identify
- ☐ labeled every vessel in my set with all four elements — contents, date, preparer, warnings — or designed the full census in my workbook
- ☐ sealed two jars with an adult present, dates scratched beside the impressions — or designed both seals in my workbook for a supervised sitting
- ☐ read the shorthand marks by recognition: ℈ scruple, ʒ dram, ℥ ounce, and aa, q.s., ss
- ☐ opened the BATCH REGISTER: UNIT I with every vessel entered exactly once, the sealed jars noted SEALED
☐ Lesson completed Date: ___ Signature: ___
The Professor's Closing Note
A final word, scholars: look at your shelf. Every vessel named. Two jars sealed like promises. A register page with your own handwriting marching down it in order. This is what a laboratory looks like when it is working properly, and you built it in a single lesson.
There will come a day, and it is not far off, when you reach for a jar in the middle of a complicated preparation and you will not hesitate, because the label will tell you exactly what it is, the date will tell you exactly how old it is, and the seal will tell you no one has touched it since. On that day, remember this lesson, and thank the scholar who labeled everything. That scholar is you.
— Professor Crimblebrew Muddlenook, Potions Laboratory • Master Apothecary • Head of House Meridies
Cross-Class Connections

Scrollwork · Unit VI, Lesson 22 — Wax Seals & Authentication
Scholars of the Laboratory, a word from the Library. You seal things; we seal words. Come and learn how a matrix is cut, how an impression authenticates a document, and how a broken seal exposes a tampered letter — then bring that craft home, and your jar seals will carry an authority your coin alone cannot give them. The wax is the same. The promise is different, and now you know both.
Creative Arts · Unit I, Lesson 5 — Adhesives, Heat, Wax & Glass
Professor Muddlenook sent you my four rules for hot wax; this Workshop lesson is where those rules live. Come and learn the glue families, the hot wax boundaries, and the safe handling of glass at the bench — the handling under the promise. Wax brought up slowly pours clean and holds fast, here as there.

Herbology · Unit IV, Lesson 29 — Pressing & Preserving Plant Specimens
From the Greenhouse, scholars: a pressed plant without a label is a beautiful mystery and a scientific dead end — Professor Muddlenook's first law, wearing gardening gloves. Come and press a specimen with us, and write its complete label — plant name, date, place, habitat, collector — when you press, not later. Your shelf discipline will feel entirely at home on the herbarium sheet.
Further Reading & Sources
- Albarello — Wikipedia: history of the pharmacy jar from its Islamic origins through Spanish and Italian maiolica, with a gallery of dated examples.
- Apothecary jar (albarello), Italian, ca. 1530–40 — The Metropolitan Museum of Art: a Castelli maiolica drug jar from the Robert Lehman Collection; study its shape, its flanged lip, and imagine the inscription it once carried.
- Majolica Albarello from the Carafano Collection — St. John's University: two inscribed jars with their contents identified from the painted labels ("el lenitive," "ung saline"), showing exactly how the inscription served as the label.
- Apothecaries' system — Wikipedia: the old weight system behind the shorthand marks in this lesson: grains, scruples, drams, ounces, and their symbols.
- Bristol-Myers Squibb European Apothecary — Smithsonian National Museum of American History: the largest collection of its kind in North America, spanning the 15th to 19th centuries; picture these shelves when you arrange your own.
Browse the Potions shelf in the school Library for readable editions of these works.
Submit your work for this lesson using the form below.
CONTINUE IN THE POTIONS LABORATORY
← Previous · Lesson 3: Vessels, Jars & Blown Glasswork Next · Lesson 5: Recipe Journals & Archival Notes →
Unit I — Foundations of the Laboratory Potions Laboratory — All 52 Lessons
The rest of Unit I: Lesson 1 · Welcome to the Laboratory · Lesson 2 · Scriptorium & Zoning · Lesson 3 · Vessels & Glasswork · Lesson 5 · Recipe Journals · Lesson 6 · Weights & Measures · Lesson 7 · Grinding · Lesson 8 · Simples Census · Lesson 9 · Hearth Clearance