

POTIONS
Unit VI · Lesson 51WAX SEALS & COLORED MATRIX BLENDS
Professor Crimblebrew Muddlenook
Master Apothecary • Potions
Head of House Meridies • School of Evershade
Professor's Introduction

A sealed note from Professor Muddlenook.
Scholars, you have spent this unit learning what botanical materials do when they are heated, melted, blended, and cast. Balms, candles, soaps. Today we turn those same skills toward one of the oldest manufactured materials in the apothecary's world: sealing wax.
A word of orientation before we begin, because two of our sister disciplines touch this subject and I will not step on their work. In the Scrollwork Library, Professor Nocturne teaches the seal itself: the matrix, the impression, what a seal proves about a document and its maker. That is his territory, and Lesson 22 of his course covers it properly. Heraldry, the full science of coats of arms and their colors, belongs to a future class of its own. My territory is the material in your spoon. What the wax is made of. How the color gets into it and stays there. Why one wax shatters and another bends. That is laboratory work, and it is ours.
Everything in its place, scholars. Let us begin.
— Professor Crimblebrew Muddlenook, Potions Laboratory • Master Apothecary • Head of House Meridies

Potions map — the class base map, unmarked for this lesson.
Lesson Objectives
By completing this lesson, you will be able to:
- Name the four historical ingredients of traditional sealing wax and explain what each one does.
- Explain why pigment in molten wax is a suspension, not a solution, and why that matters at the workbench.
- Describe how sealing wax recipes changed from the Middle Ages to the early modern period, and why.
- Blend two wax colors into a marbled pour and cast a clean practice seal.
- Design a simple archival color-marking system for your own laboratory, inspired by heraldic tinctures.
Reading this lesson: ★ marks the passages to remember. They return on the Unit VI Quiz and the class test. Check in questions ask the material back as you go; answer them in your workbook when you meet them.
Working this lesson: Your assignment packet is the first download on this page. Work in it as the lesson moves along, answering each exercise as its subject is taught — or read the lesson through for your notes and take the exercises as homework afterward. Both are proper ways to sit this class. Signposts in the reading tell you where each exercise belongs. Written answers are short answers in your own words; a few honest lines are worth more than a filled page.
Your Assignment Packet
This lesson's exercises live in its packet: the Lexicon Handout (every term, course terms marked ◆), Materials, Guided Practice — the marbling and casting procedures printed in full — the Assignment Manual with its answer key for self-checking, the Reflection Questions, and the Workbook Checklist. Download the packet before you begin and keep it beside you as you read.
Safety Briefing
Read this entire section before you touch any material. There will be a short quiz question on it, and Professor Muddlenook checks.
Hot wax burns are worse than hot water burns. Water runs off skin. Molten wax sticks to skin and keeps burning. If wax lands on you, do not peel it while it is hot. Cool it under gently running cool water first, then remove it. Treat every burn with cool water and tell an adult at once.
Open flame rules. Tie back long hair. Clear the workbench of paper, cloth, and clutter. Never leave a flame unattended, not for a moment. A tealight is small, but it is still fire.
Ventilation. Heated resins and waxes release fumes. Work near an open window or with a fan moving air. If you feel dizzy or headachy, stop and get fresh air.
Adult supervision is required for every heating step in this lesson. No exceptions.
Vermilion is forbidden in this laboratory. The classic red of historical sealing wax came from vermilion, which is mercury sulfide. Mercury poisoning is real and cumulative. We study vermilion. We never handle it. Your red wax will use modern pigments, and the lesson will say so plainly.
Low-temperature glue guns only if you choose the glue-gun method. High-temperature guns can scorch wax and burn skin faster.
Check in: Wax lands on your skin. What do you do first, and what do you never do — and which pigment is forbidden in this laboratory, and why?
❦ In your workbook: record the safety briefing in your own way — the burn rule, the flame rules, ventilation, supervision, the forbidden pigment, and the glue-gun rule — copy, sketch, or note what matters.
Mise en Place
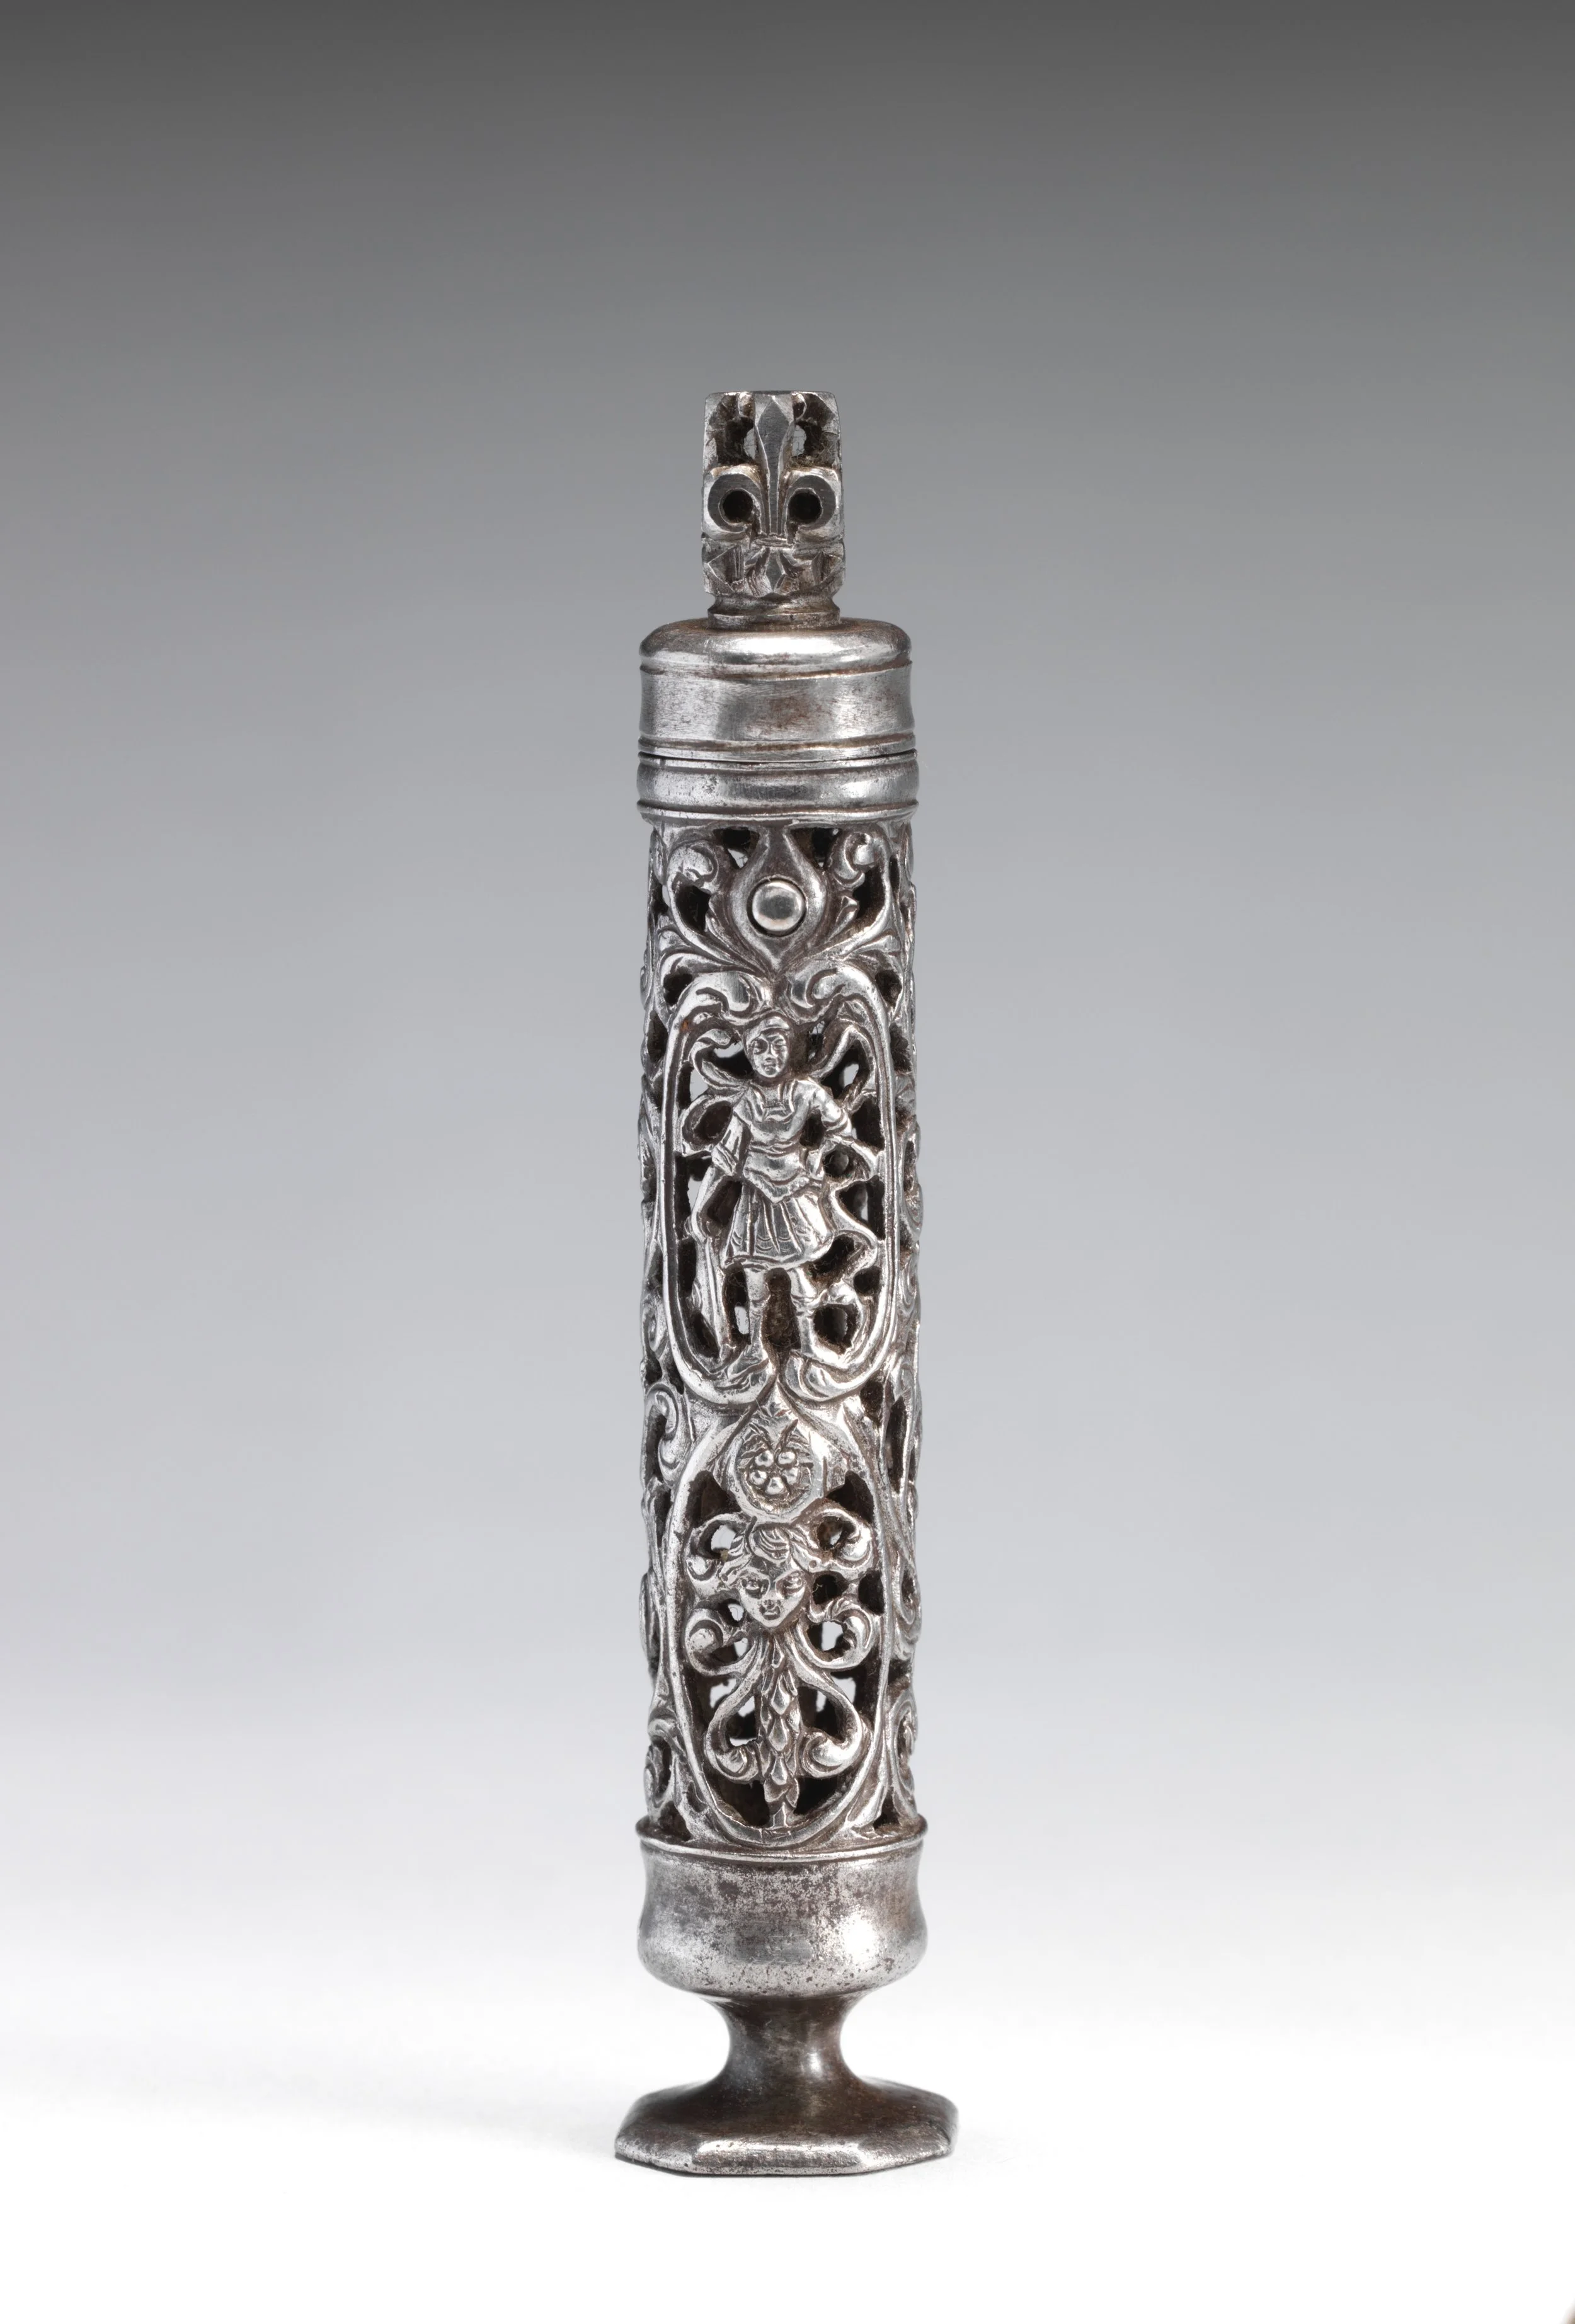
A sealing wax case of the seventeenth century, cast iron: the wax stick lived in a pierced case that stood on its own seal foot. Mise en place is not a modern fussiness — the material always had its proper housing.
Sealing wax case, 17th century, The Metropolitan Museum of Art (Met Open Access). Public domain.
Level One — household items
- Two sticks of flexible sealing wax in different colors (craft stores sell them; choose any two you like)
- A low-temperature glue gun, OR a metal teaspoon, a tealight, and a heat-safe saucer
- Parchment paper or a silicone mat as your casting surface
- A practice matrix: a coin, a flat button, or the back of a signet-style ring. Lightly dust it with cornstarch or talc as a release agent
- A timer or clock
- A toothpick or pin for the marbling swirl
- Your laboratory journal and a pencil
- Cool running water access nearby, in case of drips
Level Two — historically closer
- Traditional shellac-based sealing wax sticks (sold as "traditional" or "classic" sealing wax; check the label for shellac)
- A brass seal stamp if you have or can borrow one
- A small heat-safe spoon held over a candle flame, the historical melting method
- Everything from Level One
❦ In your workbook: record your mise en place in your own way — what you laid out, at which level, and what you substituted — copy, sketch, or note what matters.
What Sealing Wax Is Made Of
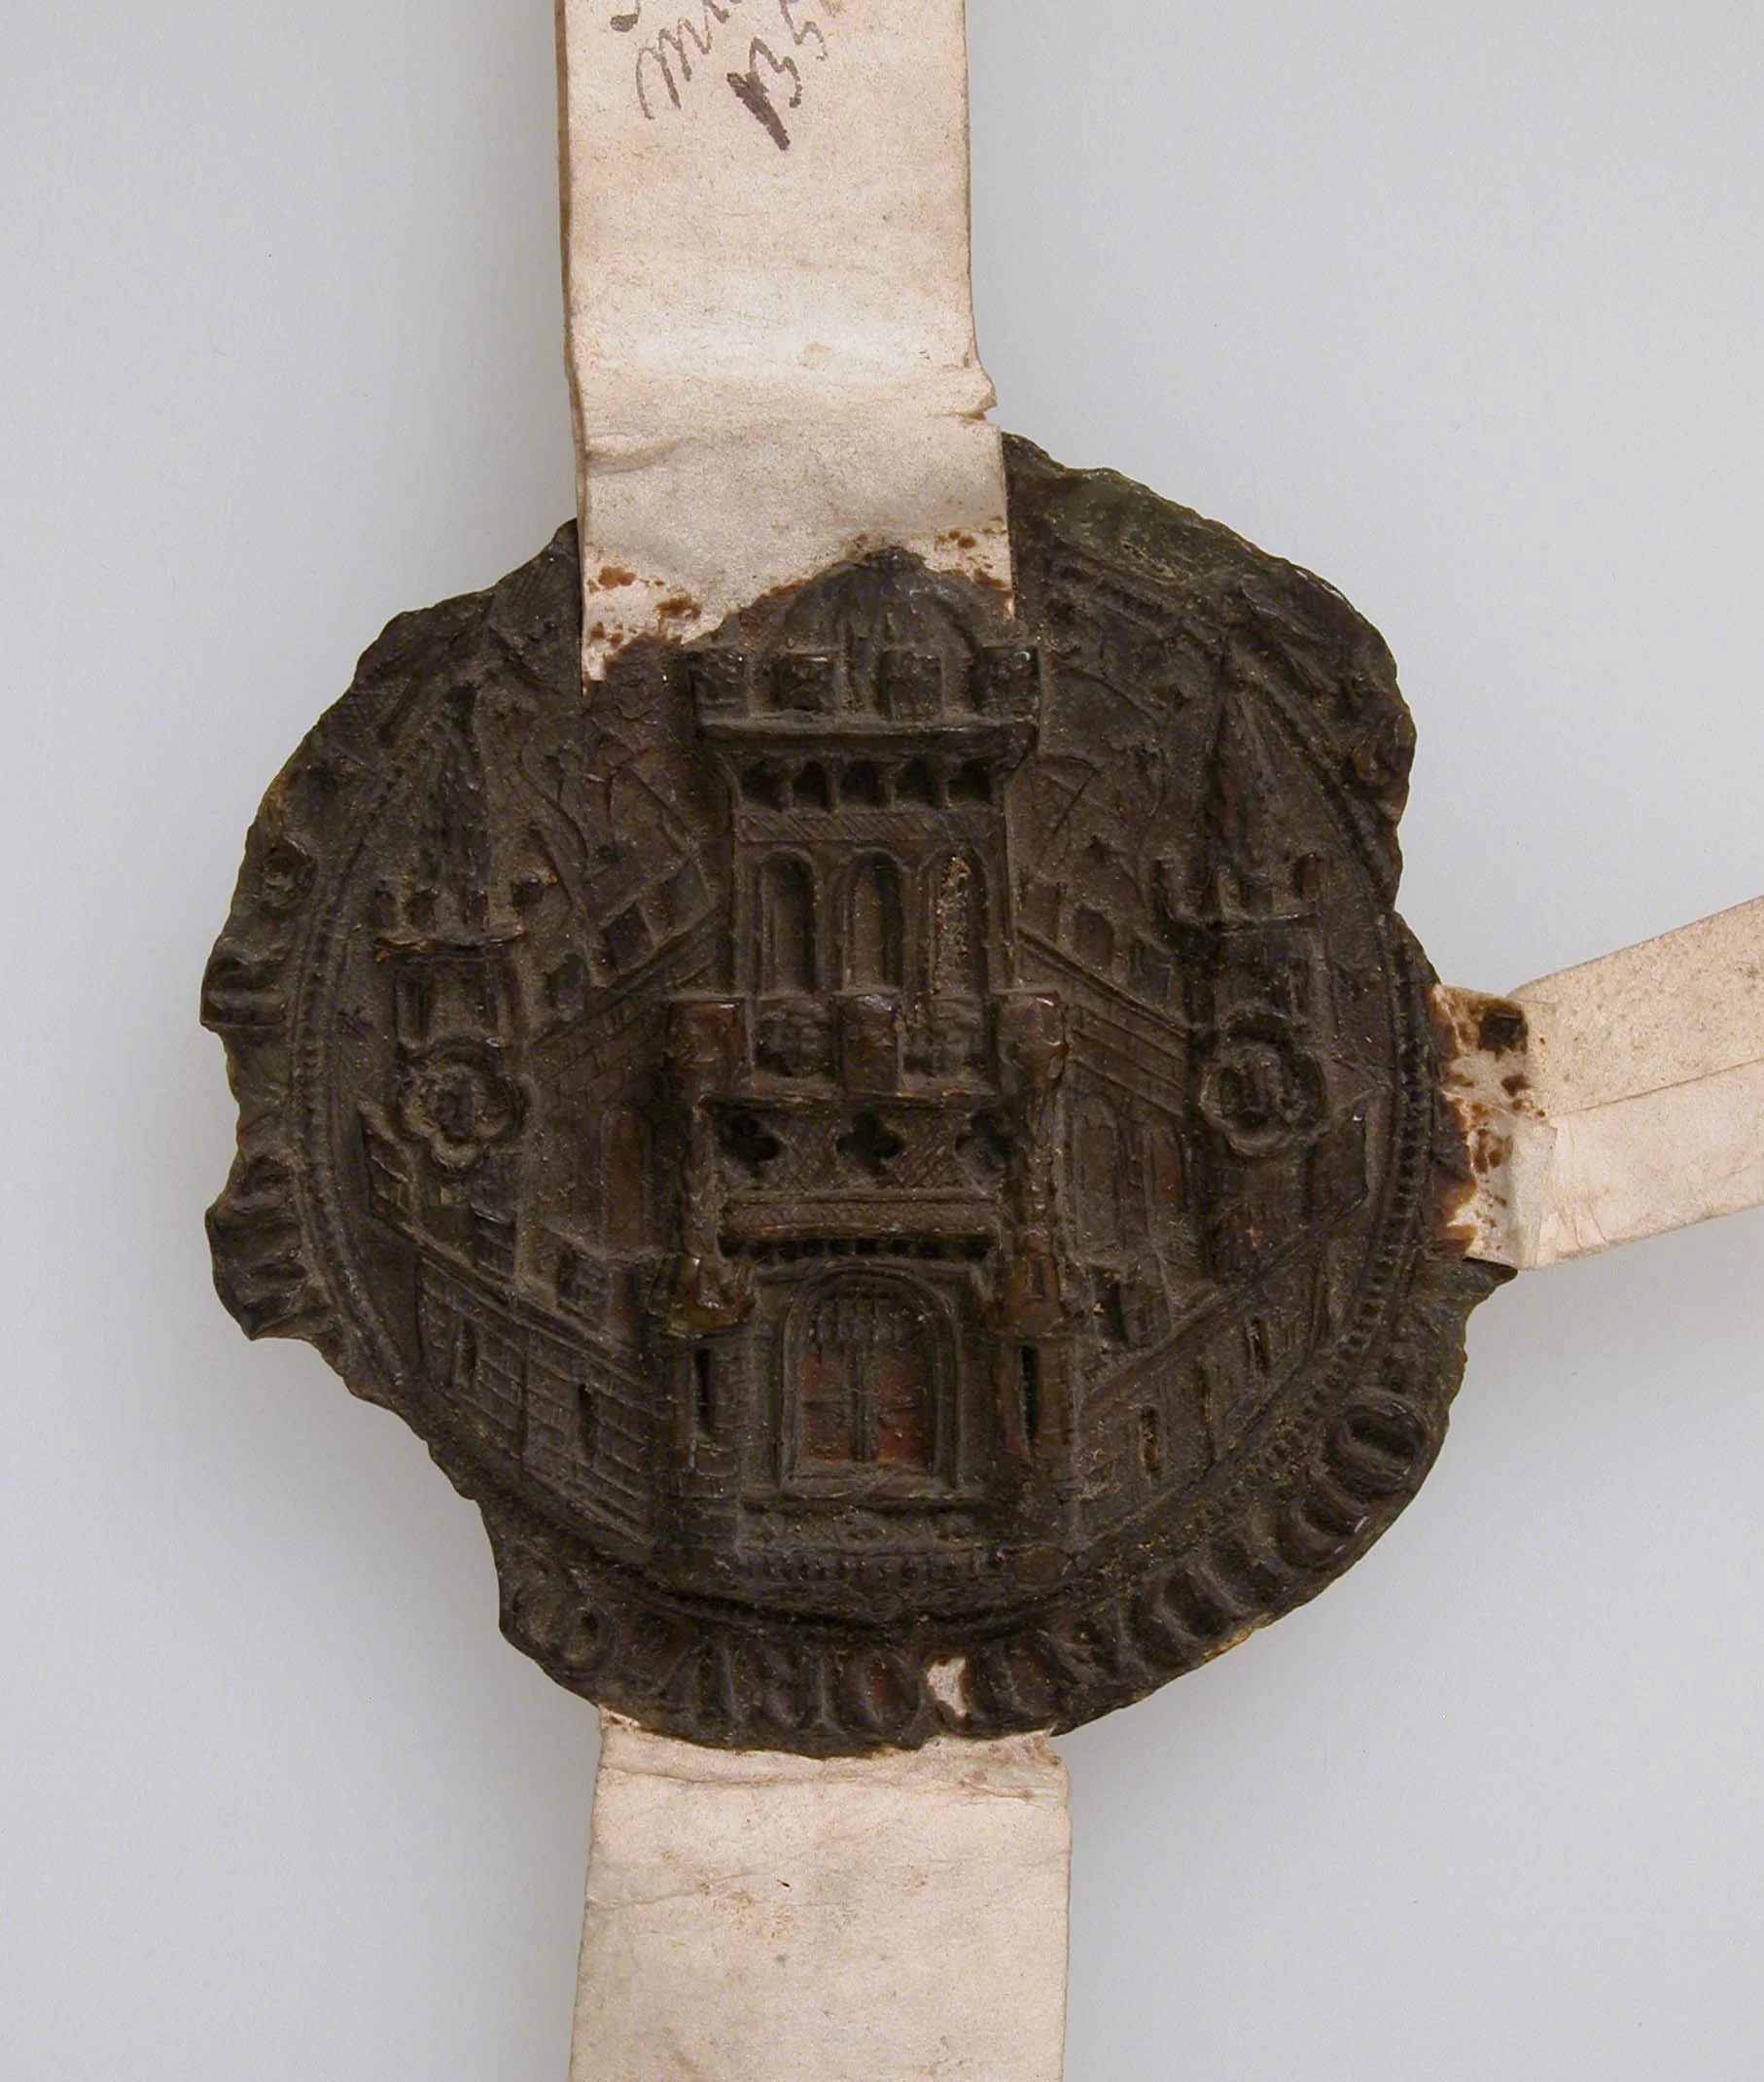
Seal impression of the municipal seal of Middelburg, about 1374, in brown wax: the medieval recipe — beeswax cut with resin — doing its job across six hundred years. The resin was not decoration; this surviving crispness is what it bought.
Seal Impression, Municipal Seal of Middelburg, ca. 1374, The Metropolitan Museum of Art (Met Open Access). Public domain.
Sealing wax is not simply colored wax. It is a manufactured material, compounded from several ingredients that each do a job. The recipe changed over time, and the change tells a story about trade.
The medieval recipe was simple: beeswax mixed with Venice turpentine, a greenish-yellow resinous extract of the European larch tree. The earliest wax of this kind was uncolored. Later, artisans colored it red with vermilion. Pure beeswax cracks as it ages, so the resin was not decoration. It acted as a natural plasticizer, making the wax more flexible and durable, and it helped the matrix leave a crisp impression.
★ The early modern recipe arrived with a major shift after European trade with the Indies opened. From the sixteenth century, sealing wax was compounded of shellac, turpentine, resin, and chalk or plaster, with coloring matter, often vermilion or red lead, and not necessarily beeswax at all. This is the wax most people picture: hard, glossy, brittle, brilliant red.
Meet the four ingredients:
Shellac. A resin secreted by the lac insect, a tiny scale insect native to India and Southeast Asia. Harvested as sticklac from tree branches and refined, shellac became one of the great traded resins of the early modern world. In sealing wax it is the backbone: it gives the wax its hardness, its gloss, and its brittleness.
Turpentine (spirits of turpentine). The volatile distillate of pine resin. In the wax pot it acts as a solvent and softener, helping the hard resins melt together evenly. It evaporates as the wax is worked, so the finished seal is harder than the working mixture.
Rosin (colophony). The solid residue left after turpentine is distilled from pine oleoresin. Rosin adds body and helps the wax take a sharp impression from the matrix. Medieval artisans used it for the same reason they used Venice turpentine: flexibility and a clean print.
Pigment. The coloring matter, ground fine and stirred in. Vermilion gave the classic red. Lampblack, the soot of burned oils, gave black. By the nineteenth century the palette had widened enormously: gold from mica, blue from smalt, green from verdigris, white from bismuth compounds. Each pigment is a solid powder. Remember that. It matters in the next section.
Chalk or plaster was sometimes added as a filler and stiffener, especially in coarser grades used for sealing wine bottles and preserves rather than documents.
Check in: What was the medieval recipe, what replaced it from the sixteenth century — and what job does each of the four ingredients do?
❦ In your workbook: record what sealing wax is made of in your own way — the two recipes, the trade story between them, and the four ingredients with their jobs — copy, sketch, or note what matters.
In your packet: Exercise I — Wax Composition Study ◐ begins here. Work it now, or mark the place and take it as homework — your choice.
Pigment Suspension in Molten Wax
Here is the laboratory heart of the lesson.
When you stir pigment into molten wax, the pigment does not dissolve. A dissolved substance disappears into its solvent at the molecular level, like sugar in tea. Pigment particles are far too large for that. They remain as solid particles distributed through the liquid wax. The mixture looks uniformly colored, but it is a suspension: solid particles carried in a liquid, not dissolved in it.
You met the formal definition in Lesson 20, with clay in water as the standard example. Molten sealing wax is the same system wearing fancier clothes. And suspensions have a rule you already know: ★ given time, the particles settle.
This is why the wax must be stirred before pouring. If a pot of red wax sits undisturbed, the heavy pigment drifts downward. The first pour from an unstirred pot comes out pale and waxy; the last pour comes out dark and gritty. Historical wax makers knew this. Modern manufacturers know this. Your spoon knows this. ★ Stir, then pour, promptly.
Particle size matters too. Pigment ground finer stays suspended longer and gives a smoother, more even color. Coarse pigment settles fast and can feel gritty under the matrix, spoiling the crispness of the impression. When you ground ochre in Lesson 21, you were practicing exactly this skill: the fineness of the grind controls the behavior of the suspension.
Check in: Why is pigment in molten wax a suspension and not a solution — and what happens, pour by pour, if the pot sits unstirred?
❦ In your workbook: record pigment suspension in your own way — solution against suspension, the settling rule, and why the grind controls the color — copy, sketch, or note what matters.
The Classic Colors
Why red? Partly fashion, partly chemistry, partly meaning. Red was the premium color because vermilion was expensive and brilliant, and a red seal announced importance before the document was even opened. The British Crown assigned different seal colors to different types of documents, a filing system written in wax.
Know the historical palette and its hazards:
- Red: vermilion (mercury sulfide). Brilliant, expensive, toxic. Studied, never handled.
- Black: lampblack (soot carbon). Safe, ancient, still used.
- Gold: mica powder. A shimmer, not a true metallic color.
- Blue: smalt or verditer in the nineteenth century.
- Green: verdigris (a copper compound). Beautiful and corrosive; it can eat paper over time.
- White: various bismuth or lead compounds historically. Lead white is toxic; another study-only pigment.
The pattern to notice: the most brilliant historical colors are often the most poisonous. Mercury, lead, copper, arsenic compounds all made vivid pigments. The apothecary's rule, which you will carry into every future class: ★ brilliance is not safety. Admire the color. Respect the chemistry. Choose the modern substitute at the workbench.
Check in: Which classic color is safe, ancient, and still used — and what is the apothecary's rule the palette teaches?
❦ In your workbook: record the classic colors in your own way — the six colors, their pigments, and which are study-only — copy, sketch, or note what matters.
Professor Muddlenook's Mid-Lesson Note
A sealed note from Professor Muddlenook.
You may have noticed that this lesson keeps one foot in the Scrollwork Library. That is deliberate, and I want you to understand the boundary clearly, because it is a model for how the whole school fits together.
Professor Nocturne teaches what a seal means. I teach what a seal is made of. Meaning belongs to the scribe. Matter belongs to the laboratory. Neither of us could do the other's job, and neither of us needs to. When you press your practice seal today, you will be doing both at once: his craft in your hand, my craft in your spoon. That is how a school works.
Stir the wax. Mind the flame. Continue.
— Professor Crimblebrew Muddlenook, Potions Laboratory • Master Apothecary • Head of House Meridies
Blending Custom Colors: Marbling
Now the practical art. You will blend two wax colors into a marbled pour.
A marbled seal is made by pouring two colors so they swirl together without fully mixing. The technique depends on everything you have learned:
- Melt both colors separately. Each in its own spoon, or two glue-gun sticks ready. Keep both fluid at the same time; timing matters.
- Pour the first color onto your parchment in a small pool, about the size of a coin.
- Pour the second color into the center of the first pool while both are still fully liquid.
- Swirl once, lightly, with the tip of a toothpick or pin. One slow spiral. If you stir, you get mud. If you swirl once, you get marble.
- Stamp immediately. Press your dusted practice matrix straight down into the pool. Hold still for a slow count of ten. Do not wiggle; wiggling blurs the design.
- Lift straight up. Admire. Record.
Why does this work? The two waxes are the same material in different colors, so they merge at the boundary without repelling. The single swirl stretches the boundary into ribbons. The stamp freezes the pattern the instant the wax cools below its working temperature. You are painting with viscosity and timing.
Record in your journal: the two colors used, the pour order, the swirl direction, and whether the marble came out as ribbons, clouds, or mud. Mud means you stirred. Ribbons mean you have the touch.
Check in: One swirl or many — and what does each give you?
❦ In your workbook: record the marbling technique in your own way — the six steps, the one-swirl rule, and ribbons against clouds against mud — copy, sketch, or note what matters.
In your packet: Exercise II — Custom Color Blend & Marbled Seal ⚒ begins here. Work it now, or mark the place and take it as homework — your choice.
The Casting Procedure, Step by Step
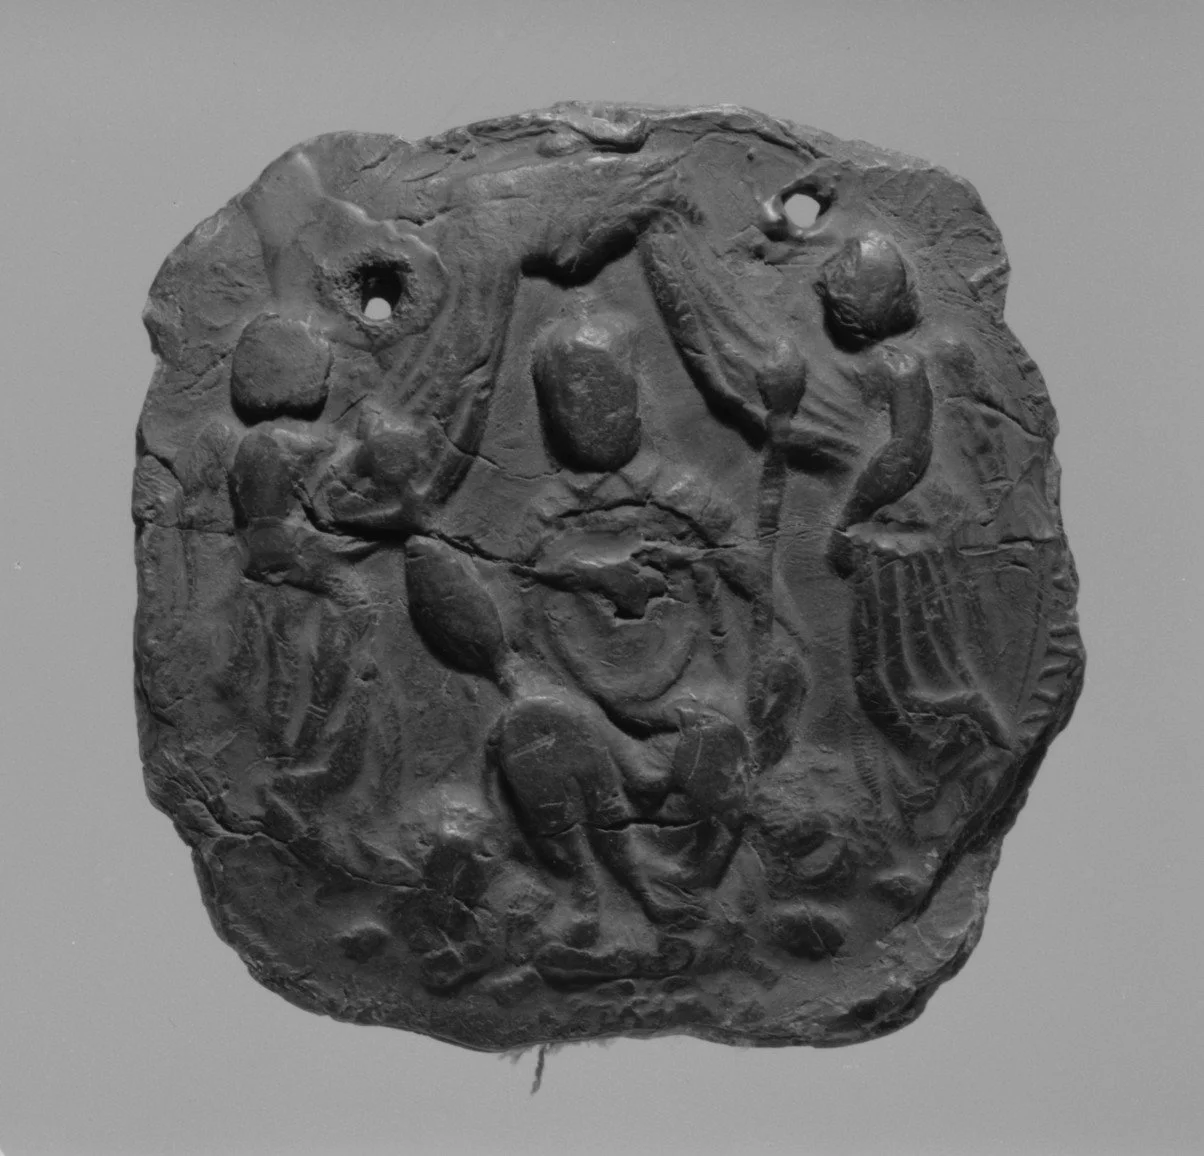
A seal of Louis XIV (1661–1715) in dark wax, cracked across its face: the early modern shellac wax kept its gloss and lost its give. A cracked seal was tamper evidence built into the material — the flaw and the feature are the same crack.
Seal of Louis XIV, 1661–1715, The Metropolitan Museum of Art (Met Open Access). Public domain.
For a clean single-color seal:
- Prepare the matrix. Dust your coin, button, or stamp lightly with cornstarch or talc, then tap off the excess. The dust is a release agent; it keeps the wax from gripping the metal.
- Melt the wax. Low-temperature glue gun, or a teaspoon of wax chips held over a tealight until fully liquid. The wax should flow like honey, not smoke. Smoking wax is overheated; let it cool slightly.
- Pour a pool about the size of a large coin onto the parchment. Work steadily; hesitation makes lumpy seals.
- Stamp. Press the matrix straight down into the center of the pool. Firm, even pressure. Count to ten slowly.
- Lift straight up. If the wax clings to the matrix, your dusting was too thin or the wax was too hot. Note it and adjust.
- Cool completely before handling. Warm seals smudge.
Traditional versus flexible. If you are working at Level Two with shellac-based wax, expect brittleness. The seal may crack if flexed, and the edges may chip. This is not a flaw in your technique. ★ Traditional sealing wax is supposed to be brittle: a cracked seal told the recipient the document had been opened. Tamper evidence, built into the material. Modern flexible wax survives the postal system precisely because it bends instead of breaking. Know which wax you are holding, and judge it by the right standard.
Check in: The wax clings to the matrix when you lift. What are the two likely causes — and why is a cracked traditional seal not a failure?
❦ In your workbook: record the casting procedure in your own way — the six steps, the honey test for the melt, and traditional against flexible — copy, sketch, or note what matters.
Guided Observation: Reading Your Own Seals
This lesson's observation is bench work, done with your own practice seals in front of you: you read the seals you cast the way this lesson taught you to read the material — for the suspension's evidence, the grind's evidence, and the wax's own standard — because a seal records its making whether you meant it to or not.
Work through it in order.
Read the color. Hold your best seal beside your weakest. Is the color even, or does one pour run pale where its neighbor runs dark? An unstirred pot pours pale first and dark and gritty last: uneven color is the settling rule, written in wax.
Read the surface. Run a fingertip lightly over a cooled seal. Grit under the matrix means coarse pigment, and coarse pigment settles fast and spoils the crispness of the impression. Smoothness is the grind, felt.
Read the edges. If you cast at Level Two in traditional shellac wax, look for the chips and hairline cracks the lesson promised. Judge the seal by its own standard: brittleness is tamper evidence in the traditional wax, and a flaw only in the flexible.
Consider:
- Which of your seals shows the suspension's settling most plainly, and what would stirring have changed?
- Where does the marble hold its ribbons, and where did it slide toward mud — and which step decided it?
- What single observation from your own seals would you write at the head of your color-blend record?
❦ In your workbook: record the guided observation in your own way — the color read, the surface read, and the edges read against each wax's own standard — copy, sketch, or note what matters.
Archival Markings & Heraldic Symbolism
The laboratory does not only make seals. It organizes itself with them.
Historically, seal color carried meaning. Different colors marked different kinds of documents, different offices, different levels of authority. Your laboratory can borrow this idea. A color-marking system lets you read a shelf at a glance: red seals for active experiments, green for completed archives, black for hazardous materials, gold for the master copies. Design the system once, write it down, and follow it always. That is what archives are.
Heraldry offers the vocabulary. The heraldic tinctures, the formal colors of coats of arms, are seven: Or (gold), Argent (silver or white), Gules (red), Azure (blue), Vert (green), Sable (black), and Purpure (purple). You do not need the full science of heraldry here; that belongs to a future class. But the idea is worth stealing: a small, fixed set of colors, each with an assigned meaning, used consistently. That is an archival marking system, and it is five hundred years old.
Your Exercise III asks you to design one for your own laboratory: no more than five colors, each assigned to a category of your archive, with the key recorded in your journal. ★ Muddlenook's rule: if you cannot explain your system to a stranger in thirty seconds, it is too complicated.
Check in: Name the seven heraldic tinctures — and what does Muddlenook's thirty-second rule test?
❦ In your workbook: record archival markings in your own way — seal color as meaning, the seven tinctures, and the thirty-second rule — copy, sketch, or note what matters.
In your packet: Exercise III — Archival Color-Marking System ◐ begins here. Work it now, or mark the place and take it as homework — your choice.
Cleanup
- Extinguish every flame before you do anything else. Check twice.
- Let all wax cool completely before touching or storing it.
- Scrape cooled drips from the work surface with a fingernail or blunt knife; do not use sharp blades on tabletops.
- Wipe the matrix clean with a soft cloth while it is still barely warm, never with water on hot metal.
- Store wax sticks upright in a cool place. Heat softens them even in the box.
- Wash hands after handling pigments or wax dust.
❦ In your workbook: record the cleanup in your own way — flame out first, cool before storing, and hands washed — copy, sketch, or note what matters.
Archive Entry
File in your laboratory archive:
- Your marbled seal (or a sketch of it, if you gave it away)
- Your best single-color practice seal
- The color-blend record: colors, pour order, swirl result
- Your archival color-marking key from Exercise III
- One paragraph: what surprised you about working with molten wax
Label everything with the lesson number and date. An unlabeled seal is a rumor. A labeled seal is a record.
Materials
Everything in its place, before we begin. For this lesson you will need:
Required (Level One — household items)
- Two sticks of flexible sealing wax in different colors (craft stores sell them; choose any two you like)
- A low-temperature glue gun, OR a metal teaspoon, a tealight, and a heat-safe saucer
- Parchment paper or a silicone mat as your casting surface
- A practice matrix: a coin, a flat button, or the back of a signet-style ring. Lightly dust it with cornstarch or talc as a release agent
- A toothpick or pin for the marbling swirl
- A timer or clock
- Your laboratory journal and a pencil
- Cool running water access nearby, in case of drips
Suggested (Level Two — historically closer)
- Traditional shellac-based sealing wax sticks (sold as "traditional" or "classic" sealing wax; check the label for shellac)
- A brass seal stamp if you have or can borrow one
- A small heat-safe spoon held over a candle flame, the historical melting method
- A notebook page for recording the brittleness comparison: traditional versus flexible
- Everything from Level One
Safety Notes
- Hot wax sticks to skin and keeps burning, which makes wax burns worse than hot water burns. Cool any burn under gently running cool water first, then remove the wax. Tell an adult at once.
- Every heating step requires an adult present. Tie back long hair, clear the bench of paper and clutter, and never leave a flame unattended.
- Work with ventilation: an open window or a fan. Heated resins and waxes release fumes; stop for fresh air if you feel dizzy or headachy.
- Vermilion and other historical mercury or lead pigments are forbidden in the student laboratory. We study them; we never handle them. Use modern pigments only.
- If using a glue gun, low-temperature only. High-temperature guns scorch wax and burn skin faster.
- Let every seal cool completely before handling. Warm seals smudge, and warm wax sticks to fingers.
Reflection Questions
Answer the following questions in your workbook.
- Why did medieval artisans add Venice turpentine or rosin to beeswax instead of using pure beeswax?
- Traditional shellac sealing wax is brittle. Why was that historically acceptable, even useful, and why does the modern postal system prefer flexible wax?
- Using the Lesson 20 definition of suspension, explain what happens inside a pot of molten red sealing wax that sits unstirred for ten minutes.
- Why does Professor Muddlenook forbid handling vermilion in the student laboratory?
- This lesson covers the materials of sealing wax. What does Scrollwork Lesson 22 cover instead, and why does the school divide the subject that way?
Workbook Checklist — Lesson 51
In my workbook I have:
- ☐ recorded the safety briefing: the burn rule, the flame rules, ventilation, supervision, and the forbidden pigment
- ☐ named the four historical ingredients of traditional sealing wax and what each one does
- ☐ explained why pigment in molten wax is a suspension, not a solution, and why the pot is stirred before pouring
- ☐ compared the medieval recipe with the early modern recipe and what changed between them
- ☐ cast at least three marbled seals, one variable changed each time, and recorded colors / pour order / swirl / verdict for each — or worked the three pours as reasoned workbook sketches
- ☐ cast a clean single-color practice seal by the six-step casting procedure
- ☐ designed my archival color-marking system: no more than five colors, the key written in my journal, and the stranger test performed
- ☐ filed my archive entry: the marbled seal, the best practice seal, the color-blend record, the marking key, and the surprise paragraph, all labeled with the lesson number and date
☐ Lesson completed Date: ___ Signature: ___
The Professor's Closing Note
A sealed note from Professor Muddlenook.
You began this unit melting beeswax for balms. You end it melting shellac for seals. Different materials, same discipline: heat control, timing, observation, record. That is what the laboratory teaches, underneath all the recipes. The materials change. The method does not.
File your seals with care. The archive grows, and it is beginning to look like the work of a real apothecary. Because it is.
In good order, scholars.
— Professor Crimblebrew Muddlenook, Potions Laboratory • Master Apothecary • Head of House Meridies
PROFESSOR CRIMBLEBREW MUDDLENOOK
Potions Laboratory
Master Apothecary • Head of House Meridies
Cross-Class Connections

Scrollwork · Unit VI, Lesson 22 — Wax Seals & Authentication
You have learned what the wax in your spoon is made of, scholars. Now come to my Library and learn what the seal upon your letter proves. Here the matrix is the mother and the impression her child: how a seal authenticates a document, why its design had to be unique, and why the matrix died with its owner. Professor Muddlenook owns the material, and he is right to guard it. The meaning is mine to teach. Press your seal in his laboratory first; then come and learn what you have been pressing.
Scrollwork · Unit II, Lesson 7 — Red Inks & Rubrication
Your professor forbids vermilion at his bench, and so do I at mine. Come and learn the pigment's full history in my Library: the brilliant red the medieval world prized, mercury and all, admired in manuscripts and never ground, bought, or brought to the desk. His red wax takes its color from modern pigments; my red letters take theirs from safer reds. Two classrooms, one discipline — come and see where the rule was written first.
Scrollwork · Unit II, Lesson 5 — Soot & Charcoal Ink
The lampblack that blacks Professor Muddlenook's sealing wax blacks my ink first, scholars: the soot of burned oils, ground fine and carried in a binder, resting on the page rather than dissolving into it — a suspension on paper, as his pigment is a suspension in wax. Come and make the scribe's first black in my Library, and you will understand the safe black of his palette from the inside.
PROFESSOR QUILLBERRY NOCTURNE
Scrollwork Library
Further Reading & Sources
- Sealing wax — Wikipedia: composition history, the medieval-to-early-modern recipe shift, the nineteenth-century color palette.
- Seals — The National Archives (UK) research guide: what seals are, how they authenticated documents, how they spread through society.
- Sigillography — Wikipedia: the study of seals as a discipline.
- Sigillography and the chemical composition of medieval wax seals — Vectree knowledge map: beeswax chemistry, Venice turpentine and resins as plasticizers, how additives changed melting point and impression quality.
Browse the Potions shelf in the school Library for readable editions of these works.
You seal vessels here, to keep their contents. In the Scrollwork Library, wax does older work: it witnesses. A sealed letter carries its proof on its face, and the matrix is a signature no hand can borrow. Lesson 22 teaches wax as authentication. The scholar who seals a bottle should know what a seal once proved.
Scrollwork · Lesson 22: Wax Seals & AuthenticationPROFESSOR QUILLBERRY NOCTURNE · SCROLLWORK LIBRARY
Submit your work for this lesson using the form below.
CONTINUE IN THE POTIONS LABORATORY
← Previous · Lesson 50: Paper Aging & Manuscript Staining Next · Lesson 52: The Apothecary's Continuing Ledger →
Unit VI — Fragrance, Pigments & Botanical Arts Potions Laboratory — All 52 Lessons
The rest of Unit VI: Lesson 45 · Pomanders · Lesson 46 · Volatile Spirits · Lesson 47 · Burn Blends · Lesson 48 · Carbon & Oak Gall Inks · Lesson 49 · Plant & Berry Stains · Lesson 50 · Paper Aging · Lesson 52 · Continuing Ledger · The Capstone · The Apothecary's Signature Formula