
POTIONS
Unit V · Lesson 36CANDLES & AROMATIC WAX CASTING
Professor Crimblebrew Muddlenook
Master Apothecary • Potions
Head of House Meridies • School of Evershade
Professor's Introduction

Sealed with the teal wax of Professor Crimblebrew Muddlenook, Master Apothecary of the Potions Laboratory, Head of House Meridies.
Scholars, the candle is the humblest preparation in this laboratory, and one of the most honest. It asks only three things of you: the right wax, the right wick, and your full attention. Give it those, and it will teach you about heat, patience, and order. Deny it any one of them, and it will teach you about soot on the ceiling instead.
We are not making light sources today. We are making a study piece: a container candle you will cast, cure, observe, and archive. You will light it exactly as many times as the observation log requires, with an adult beside you, and never once leave it burning alone. The laboratory rewards the careful and embarrasses the careless. Choose which you will be before you touch the wax.
In good order, scholars. The double boiler awaits.
— Professor Crimblebrew Muddlenook, Potions Laboratory • Master Apothecary • Head of House Meridies
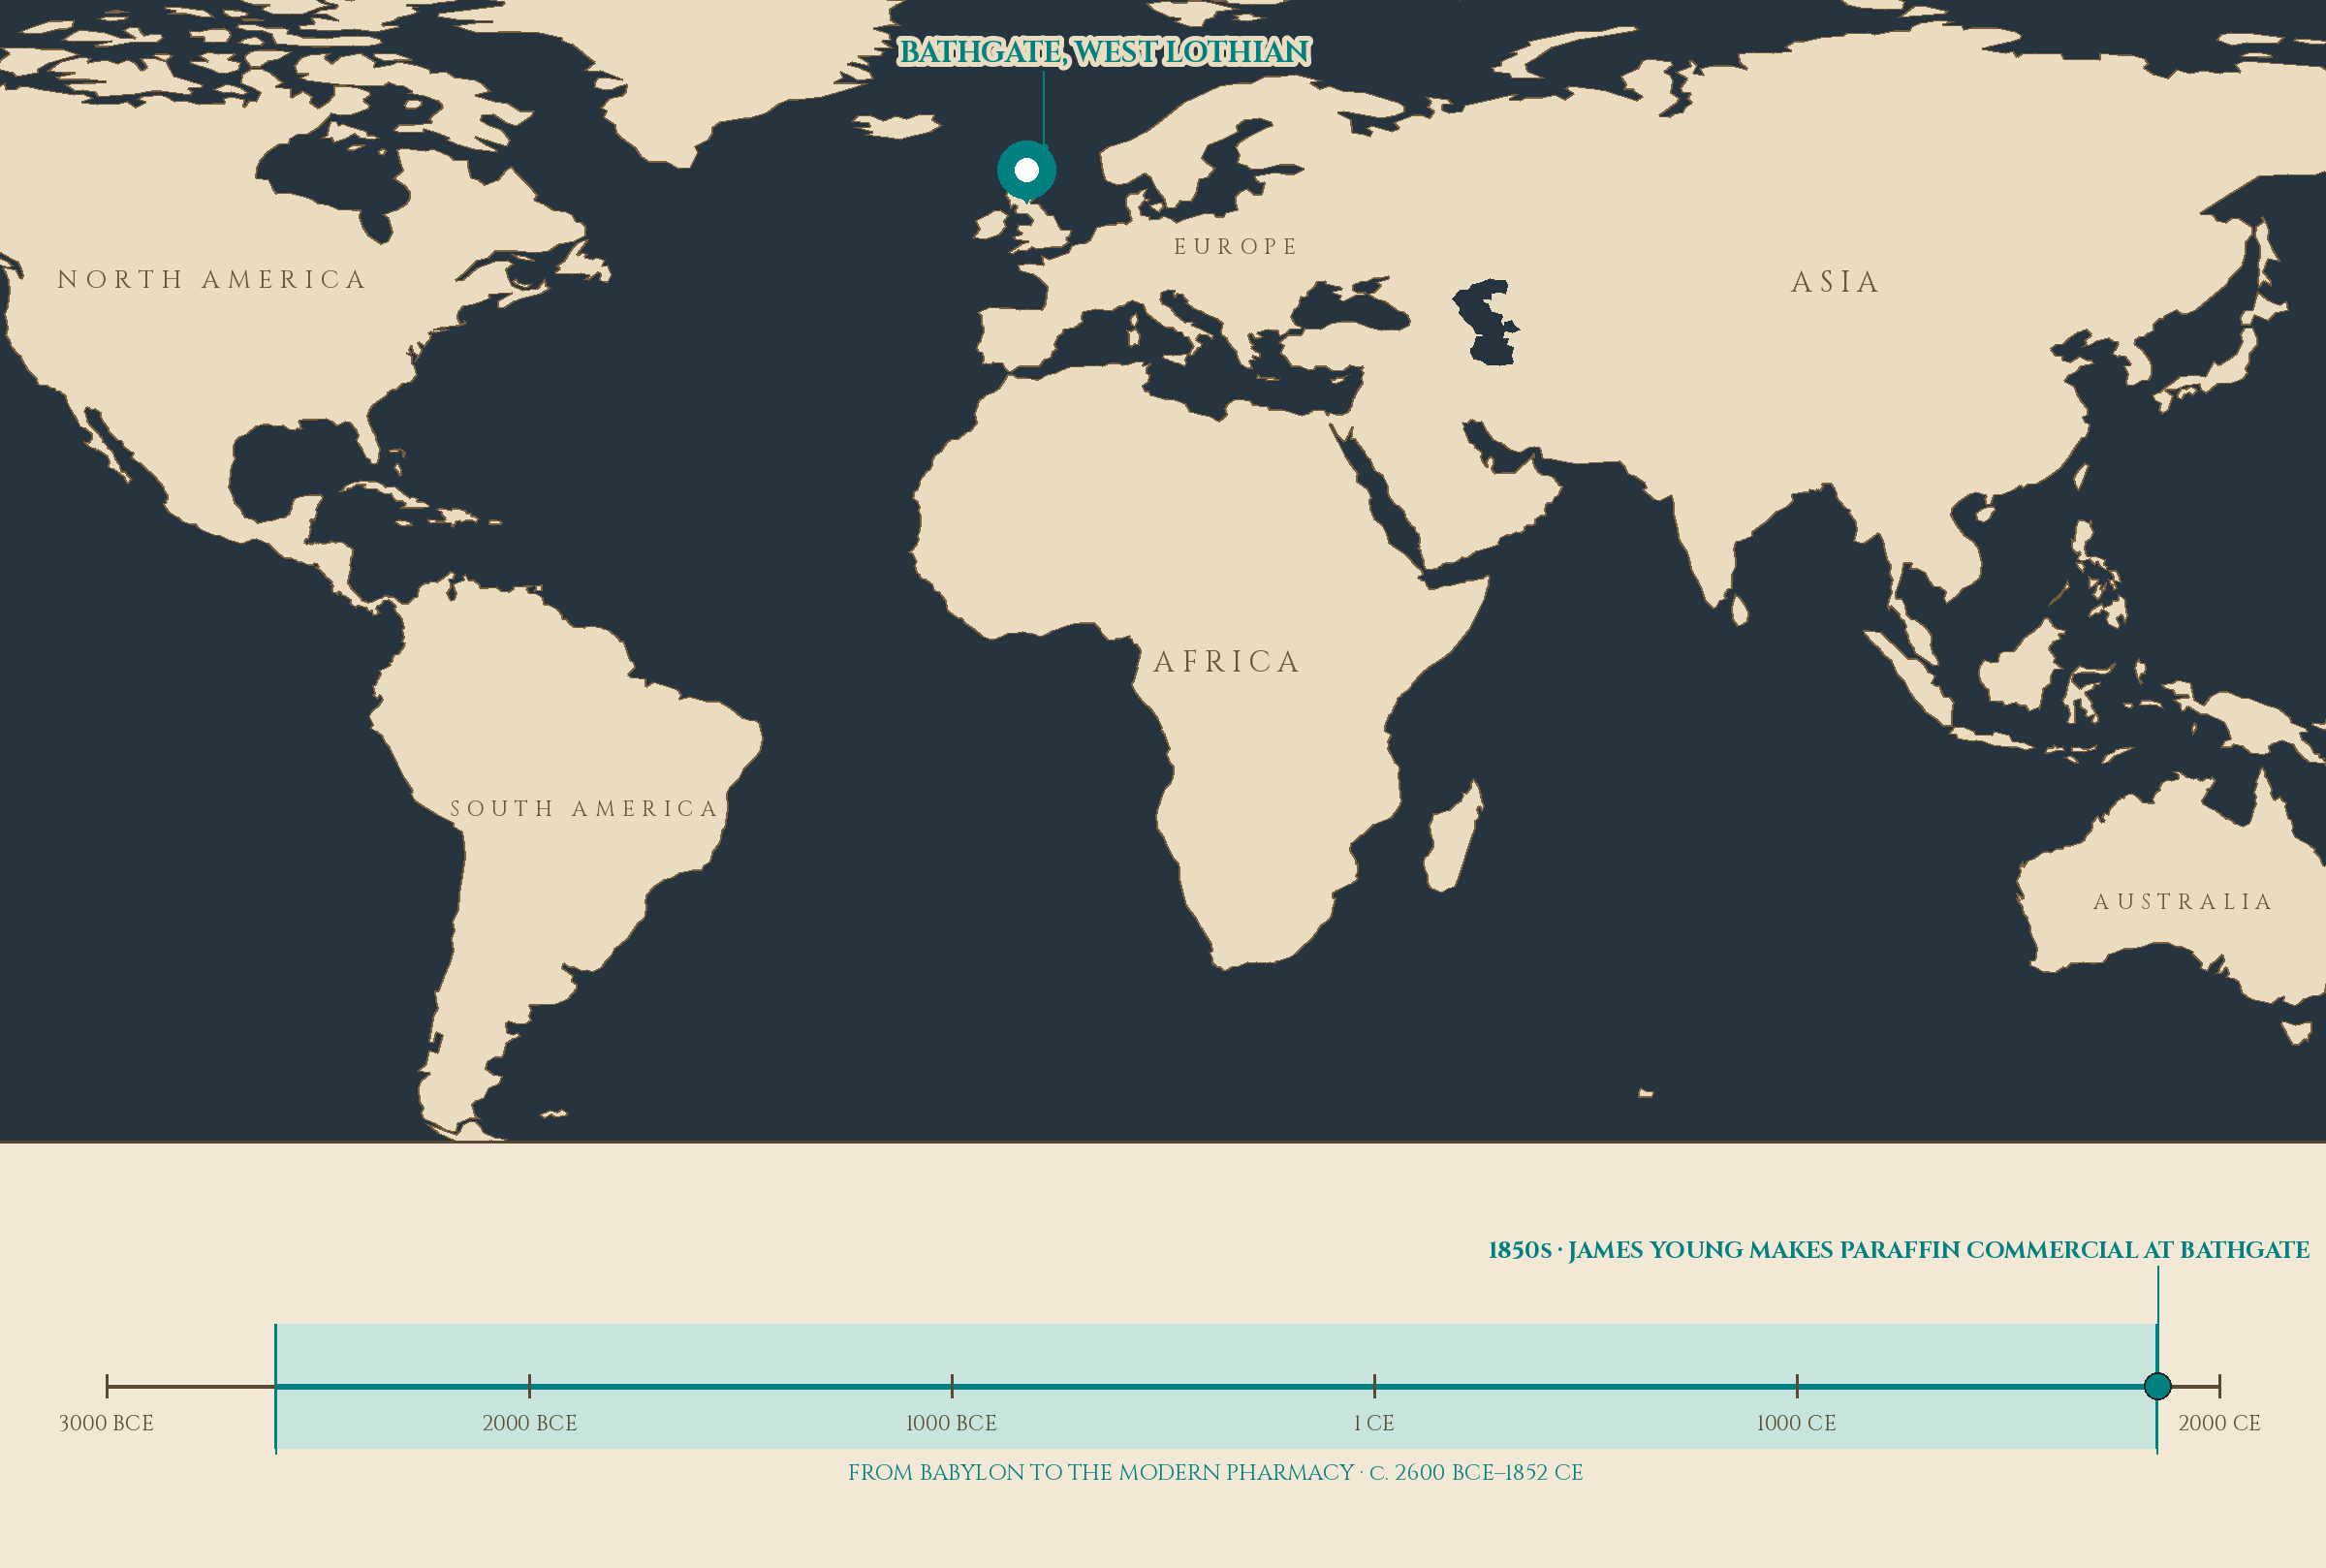
Pin: Bathgate, West Lothian. Timeline stop: 1850s · JAMES YOUNG MAKES PARAFFIN COMMERCIAL AT BATHGATE.
Lesson Objectives
By completing this lesson, you will be able to:
- Trace the history of candle making from tallow dips to paraffin, naming the materials and inventions that changed the craft.
- Explain how a wick works through capillary action and why wick size and centering control the burn.
- Describe wax cooling behavior, including shrinkage, sinkholes, and bloom, and pour to avoid them.
- Define fragrance load, cold throw, and hot throw, and explain how fragrance is suspended in wax.
- Cast a simple container candle as a display piece, following full laboratory safety discipline.
- Record a burn observation log and diagnose common candle faults (tunneling, mushrooming, sooting).
Reading this lesson: ★ marks the passages to remember. They return in the Unit V Quiz and at the capstone. Check in questions ask the material back as you go; answer them in your workbook when you meet them.
Working this lesson: Your assignment packet is the first download on this page. Work in it as the lesson moves along, answering each exercise as its subject is taught — or read the lesson through for your notes and take the exercises as homework afterward. Both are proper ways to sit this class. Signposts in the reading tell you where each exercise belongs. Written answers are short answers in your own words; a few honest lines are worth more than a filled page.
Your Assignment Packet
This lesson's exercises live in its packet: the Lexicon Handout (every term, course terms marked ◆), Materials, Guided Practice — the casting procedure, the burn observation log, the cleanup, and the archive entry, printed in full so you can work at your own bench with your adult beside you — the Assignment Manual with its self-check, the Reflection Questions, and the Workbook Checklist. Download the packet before you begin and keep it beside you as you read.
About this lesson's quiz, plainly: the source lesson carries its own short quiz (seven multiple-choice and five true/false questions). Under the classroom model a quiz checks each unit, not each lesson, so those questions are gathered into the Unit V Quiz pool rather than printed in this packet; the exercises below are this lesson's own assessed work.
Safety Briefing
Read this entire section before you touch any material. Professor Muddlenook is firm on this point.
- Open flame. This lesson involves a burning candle during the observation exercise. An adult must be present for every lighting. Never leave a burning candle unattended, not for a moment, not in a metal sink, not anywhere. Extinguish the candle before you leave the room.
- Hot wax. Melted wax causes serious burns. Melt wax only in a double boiler, never over direct flame and never in a microwave. Wear oven mitts. Keep a clear workspace. If wax spills on skin, cool under running water; do not peel hot wax.
- Ventilation. Work in a ventilated room. Fragrance oils and heated wax release vapors; keep your face out of the rising steam and scent.
- Flash point. Never overheat wax. If wax begins to smoke, remove it from heat immediately. Never add fragrance oil to smoking wax.
- Glass safety. Use only heat-safe containers. Inspect jars for cracks before pouring. Never pour boiling-hot wax; respect the pour temperature.
- The finished candle is a display and study piece. It is not a toy, not a nightlight, and not to be burned casually. Burn only for the observation log, with adult supervision, then extinguish.
Check in: For which three moments of this lesson must an adult be present — and what is the one thing a burning candle must never be left doing?
❦ In your workbook: record the safety briefing in your own way — open flame and the adult beside you, hot wax and the double boiler only, ventilation, flash point, glass safety, and the finished candle as a display and study piece — copy, sketch, or note what matters.
In your packet: Guided Practice — the casting procedure begins here in the reading below, printed in full in the packet. Work it as you reach it, or mark the place and take it as homework — your choice.
The Chandlers of Old
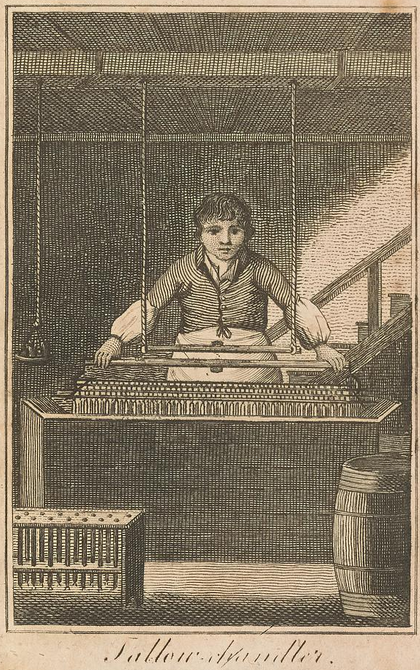
A tallow chandler at his dipping frame, from The Book of Trades (1811): rows of dips on the frame before him, a candle mold rack at his feet. London's tallow chandlers had been a company for five centuries by the time this plate was cut.
Unknown artist, "Tallow-chandler," The Book of Trades, or Library of the Useful Arts, Part II (1811), via Wikimedia Commons. Public domain.
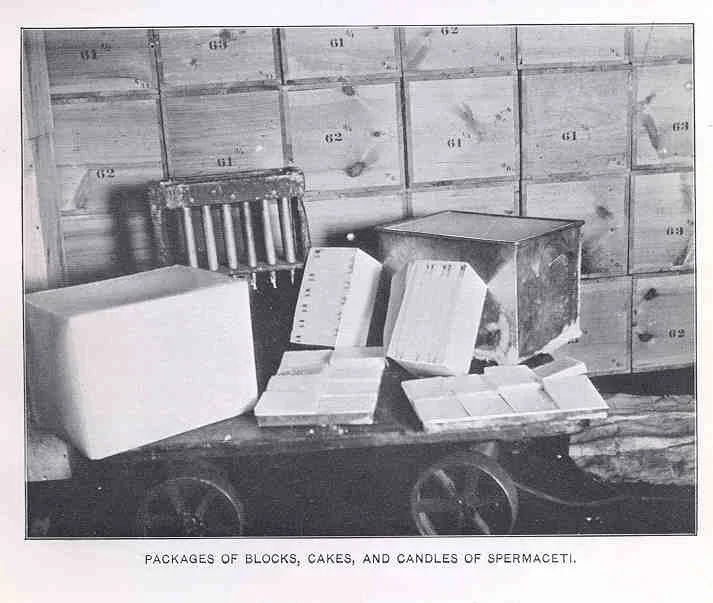
Blocks, cakes, and candles of spermaceti, photographed for a United States fisheries report: the waxy oil of the sperm whale's head, pressed into the bright, clean-burning candles the lesson sets between tallow and paraffin. The caption names the goods; the numbered bins behind are the works' storage, not a recipe.
Plate from the U.S. Fish Commission / Fisheries and Fishery Industries report series (FMIB 33990), via Wikimedia Commons. Public domain.
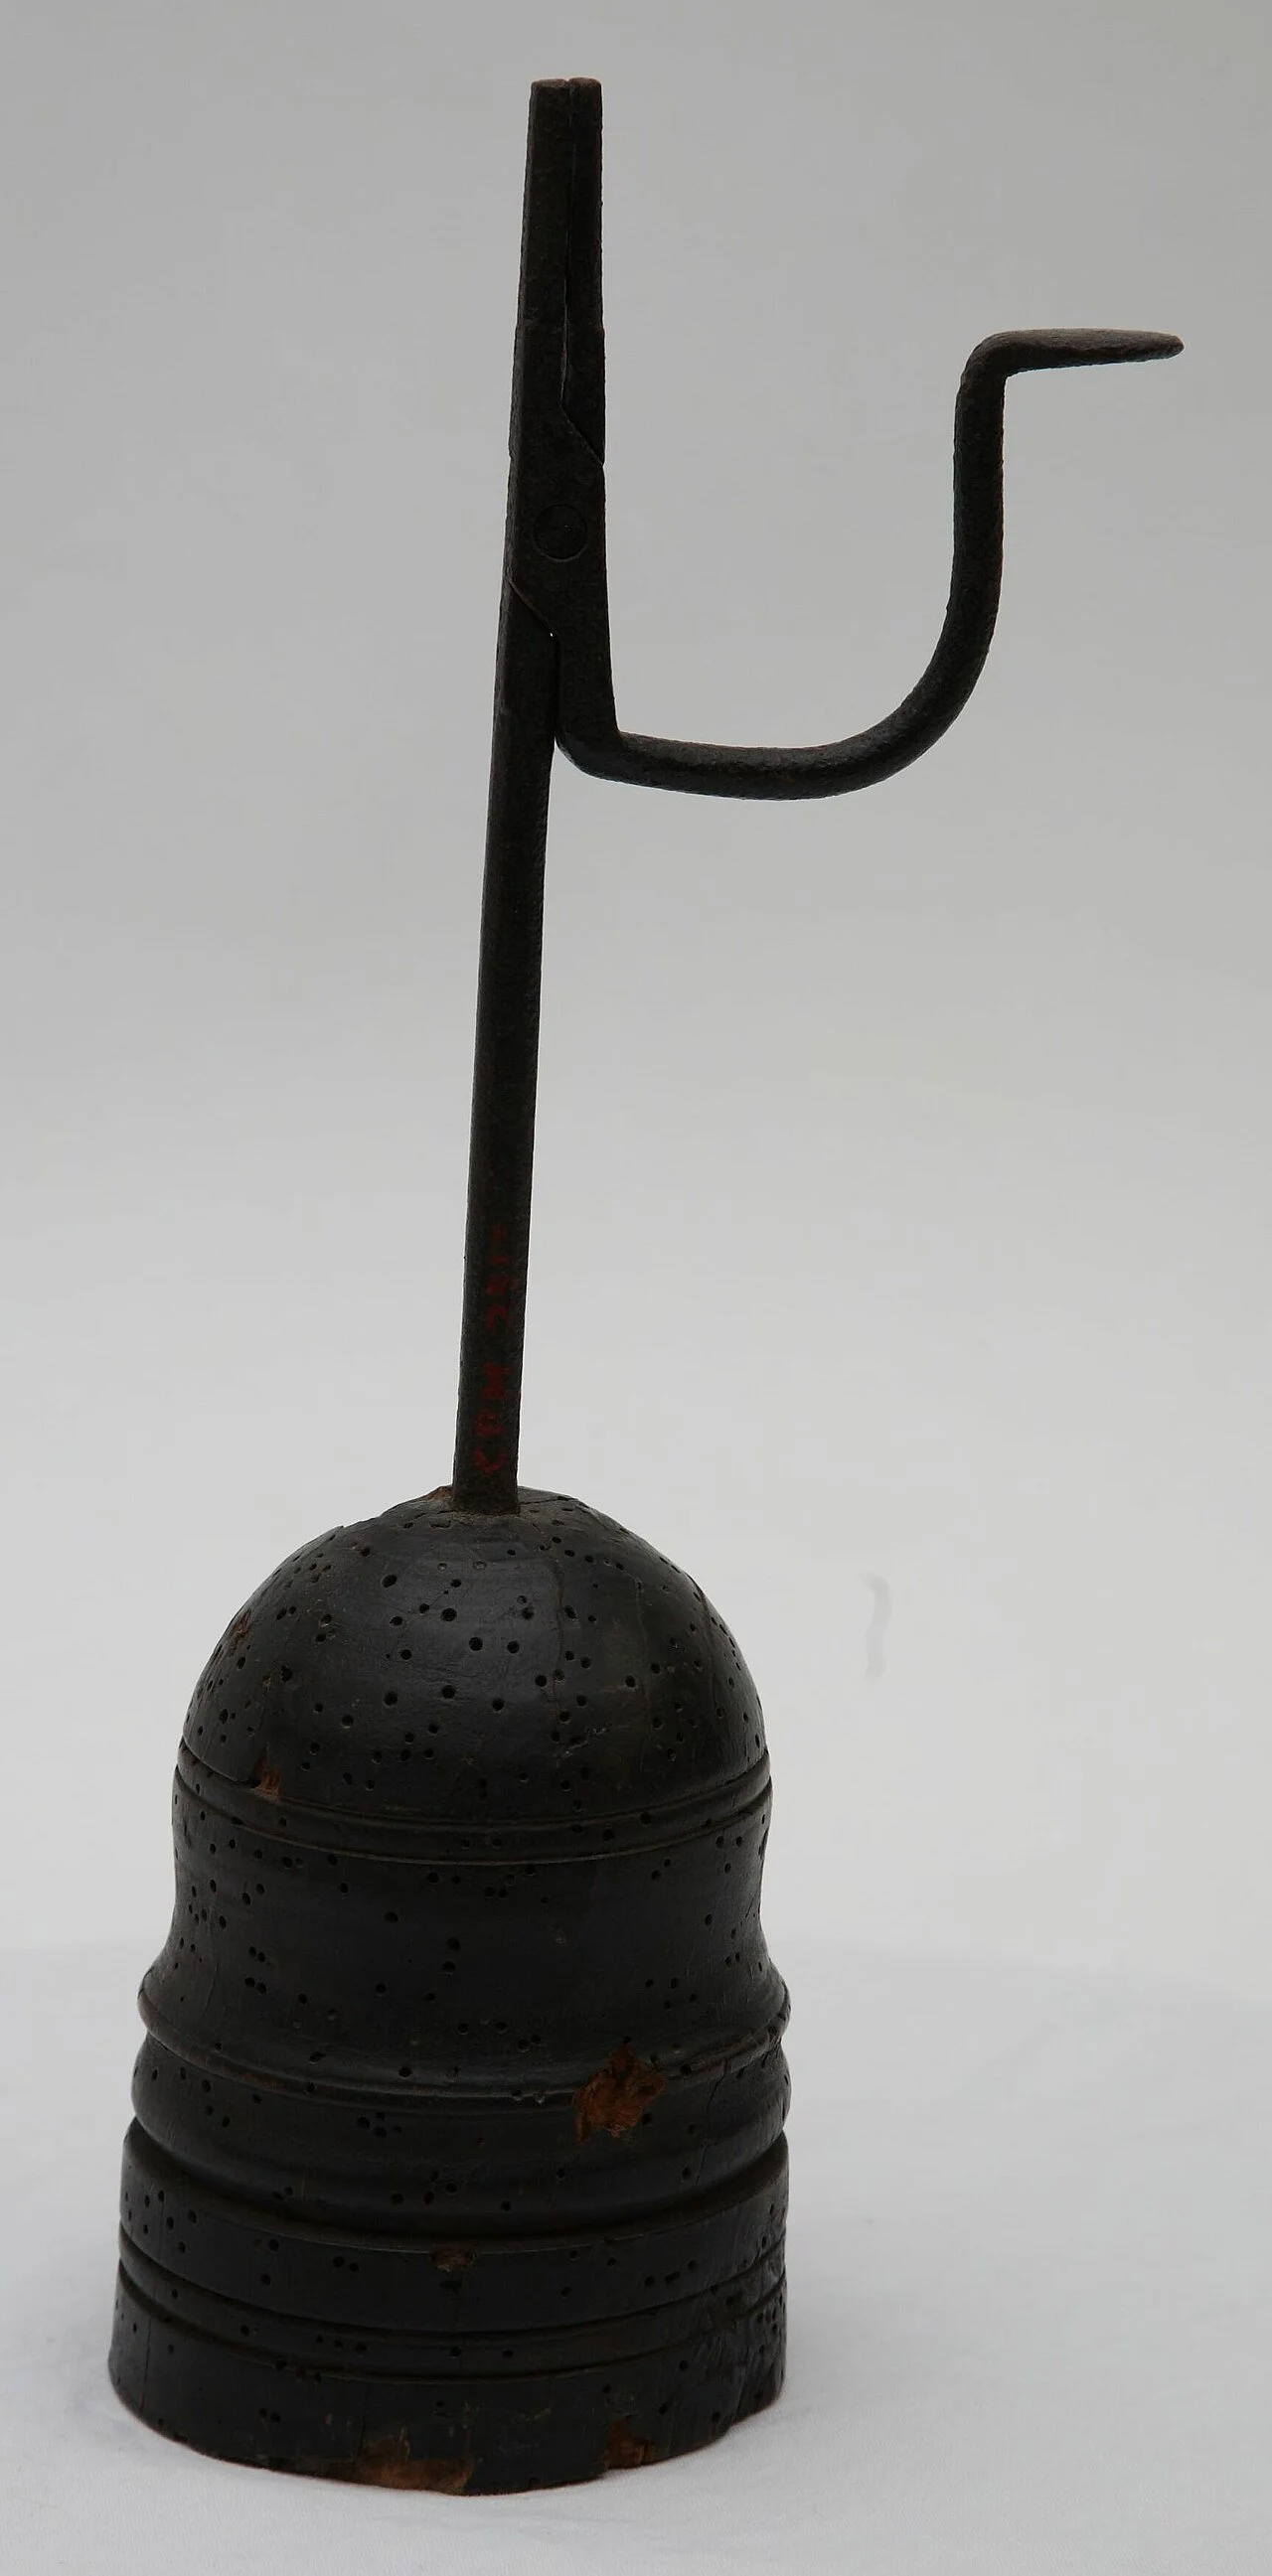
A rushlight holder: iron jaws on a turned wooden base, made to grip a length of rush pith dipped in grease — the candle so humble it needed no spun wick at all. The pitted base is the pest damage of centuries, recorded honestly.
Rushlight holder, museum photograph via the Digital Public Library of America (DPLA), via Wikimedia Commons. Public domain.
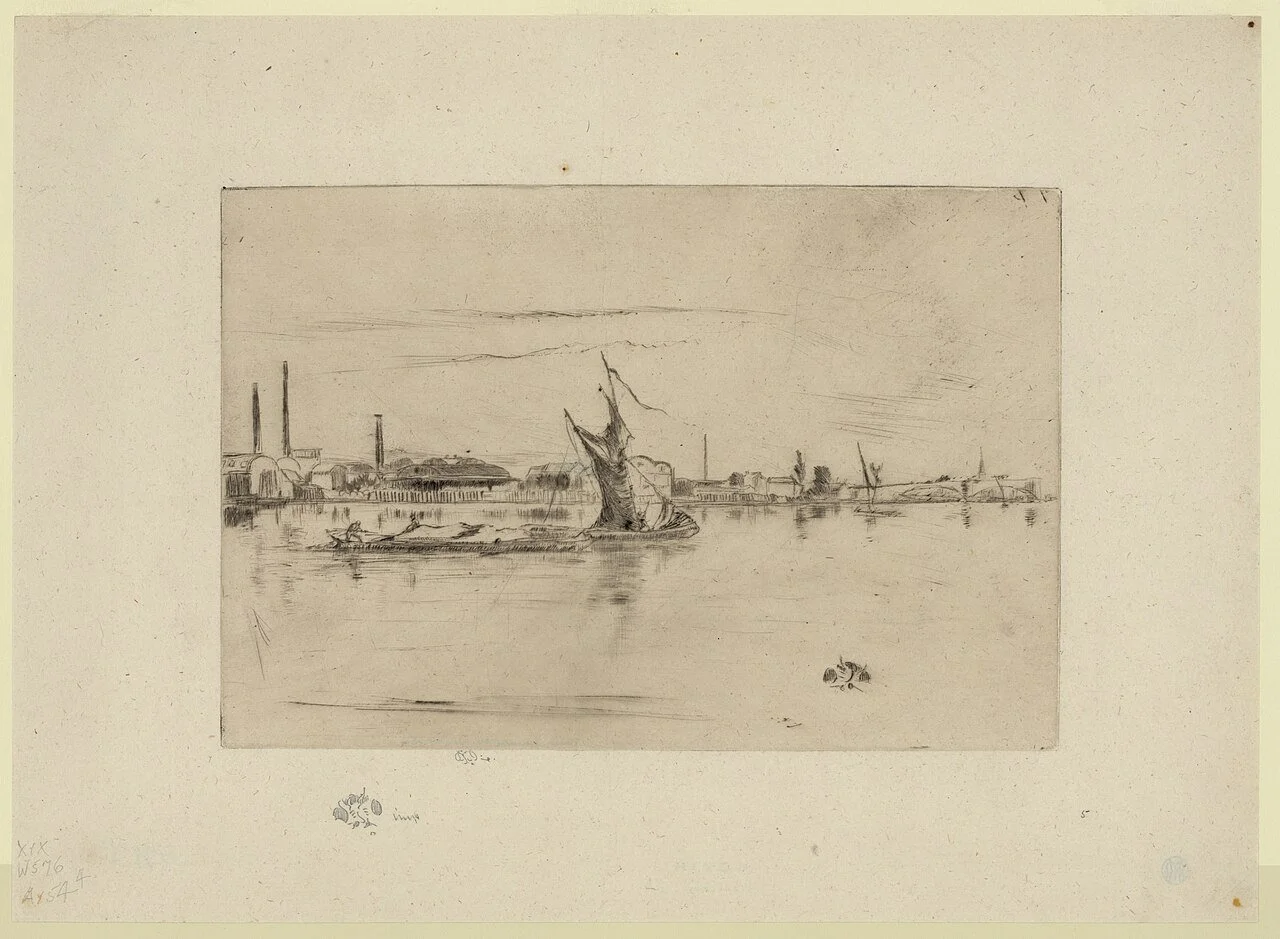
Price's Candle-Works across the Thames, etched by James McNeill Whistler about 1875: by the century's end this London firm was the largest candle manufacturer in the world — Morgan's machine and Young's paraffin, grown to factory scale.
James McNeill Whistler, Price's Candle-Works (c. 1875), etching, Library of Congress (LCCN 2003687763), via Wikimedia Commons. Public domain.
Long before the laboratory had gaslight or electric bulbs, it had candles, and before it had candles worth studying, it had a trade. The candle maker was called a chandler, and the trade was old enough and organized enough that London's tallow chandlers had formed their own company by the early 1300s. A chandler's year was measured in tallow: the rendered fat of cattle and sheep, cheap, abundant, and famously foul-smelling when it burned.
Tallow was the people's candle. The rich burned beeswax, which was clean and sweet-smelling but costly, since every pound of it represented the labor of thousands of bees. The poorest burned rushlights: lengths of rush pith peeled, dried, and dipped in grease, a candle so humble it needed no wick of spun thread at all. Between those extremes sat spermaceti candles, pressed from the waxy oil found in the head of the sperm whale, prized in the 1700s and 1800s for a bright, clean flame.
The craft changed in the 1800s, and it changed fast. In 1834, Joseph Morgan of Manchester patented a candle-making machine that could turn out some fifteen hundred molded candles an hour, putting affordable candles within reach of households that had once counted every tallow dip. Around the same years, candle makers began braiding wicks from tightly woven cotton instead of simply twisting them. A braided wick curls back into the flame as it burns, consuming its own tip. These self-trimming wicks, which we still use today, ended the age of the servant standing by with the snuffers.
Then came the waxes. In 1830 the German chemist Karl von Reichenbach isolated a clean-burning, nearly odorless wax from distilled wood tar and named it paraffin, from Latin words meaning "little affinity," for its refusal to react with much of anything. In the 1850s the Scottish chemist James Young made paraffin commercially viable, distilling it from coal and oil shales at Bathgate in West Lothian. By the end of the century, most manufactured candles were paraffin blended with stearic acid, a hardener whose chemistry had been worked out by the French chemist Michel Chevreul. In 1879, Thomas Edison's practical incandescent lamp began the candle's long retreat from necessity to decoration. The laboratory kept the craft anyway, because a candle remains the finest small-scale teacher of heat management we possess.
Scholars, note the pattern of this history: a cheap abundant material, then a better material, then a machine, then a better wick, then a better wax. Every improvement answered a complaint. When you cast your candle today and something goes wrong, you are standing in a very old line of complainers. Record the complaint. Fix it. That is the craft.
— Professor Crimblebrew Muddlenook, Potions Laboratory • Master Apothecary • Head of House Meridies
Check in: Name the pattern of this history in order — and what did each improvement answer?
❦ In your workbook: record the chandlers' history in your own way — tallow and its company, beeswax and rushlights, spermaceti, Morgan's machine, the braided wick, paraffin from Reichenbach to Young, and Edison's lamp — copy, sketch, or note what matters.
In your packet: Exercise I — The Chandler's Timeline ⚒ begins here. Work it now, or mark the place and take it as homework — your choice.
The Behavior of Wax
Wax is a material with opinions, and it expresses them while cooling. Understand its opinions and you can work with them; ignore them and you will meet the sinkhole.
Every wax has a melting point, the temperature where it turns fully liquid. Beeswax melts near 62 to 64 degrees Celsius. Paraffin melts lower, soy wax lower still, and each blend has its own range. But the melting point is only the beginning of the story. What matters for casting is the pour temperature: the temperature of the wax at the moment you pour it into the container. ★ Pour too hot and the wax shrinks dramatically as it cools, pulling away from the container walls and leaving a crater, the sinkhole, around the wick. Pour too cool and the wax sets before it has settled, trapping air and giving a rough, pitted surface.
Cooling is where the faults appear. Wax contracts as it solidifies. In a container candle this contraction can open a hidden cavity beneath the surface around the wick, which is why candle makers pour in two stages: a main pour, then a small relief pour after the first has set, to fill the shrinkage. Wax can also bloom: a whitish, dusty film that appears on the surface days or weeks later as fats migrate to the surface. Wax bloom is harmless and can be polished away with a soft cloth, but it is a sign the candle cooled too fast or the room swung between warm and cold.
Your job is to give the wax a calm, draft-free cooling. No refrigerator, no open window, no jostling the jar. Wax rewards stillness.
Check in: What happens when wax is poured too hot, and what happens when it is poured too cool — and what is the two-stage answer to shrinkage?
❦ In your workbook: record the behavior of wax in your own way — melting point against pour temperature, shrinkage and the sinkhole, the relief pour, bloom and what it signs, and the calm draft-free cooling — copy, sketch, or note what matters.
In your packet: Exercise II — The Wax Comparison ◐ begins here. Work it now, or mark the place and take it as homework — your choice.
The Wick: A Small Engine
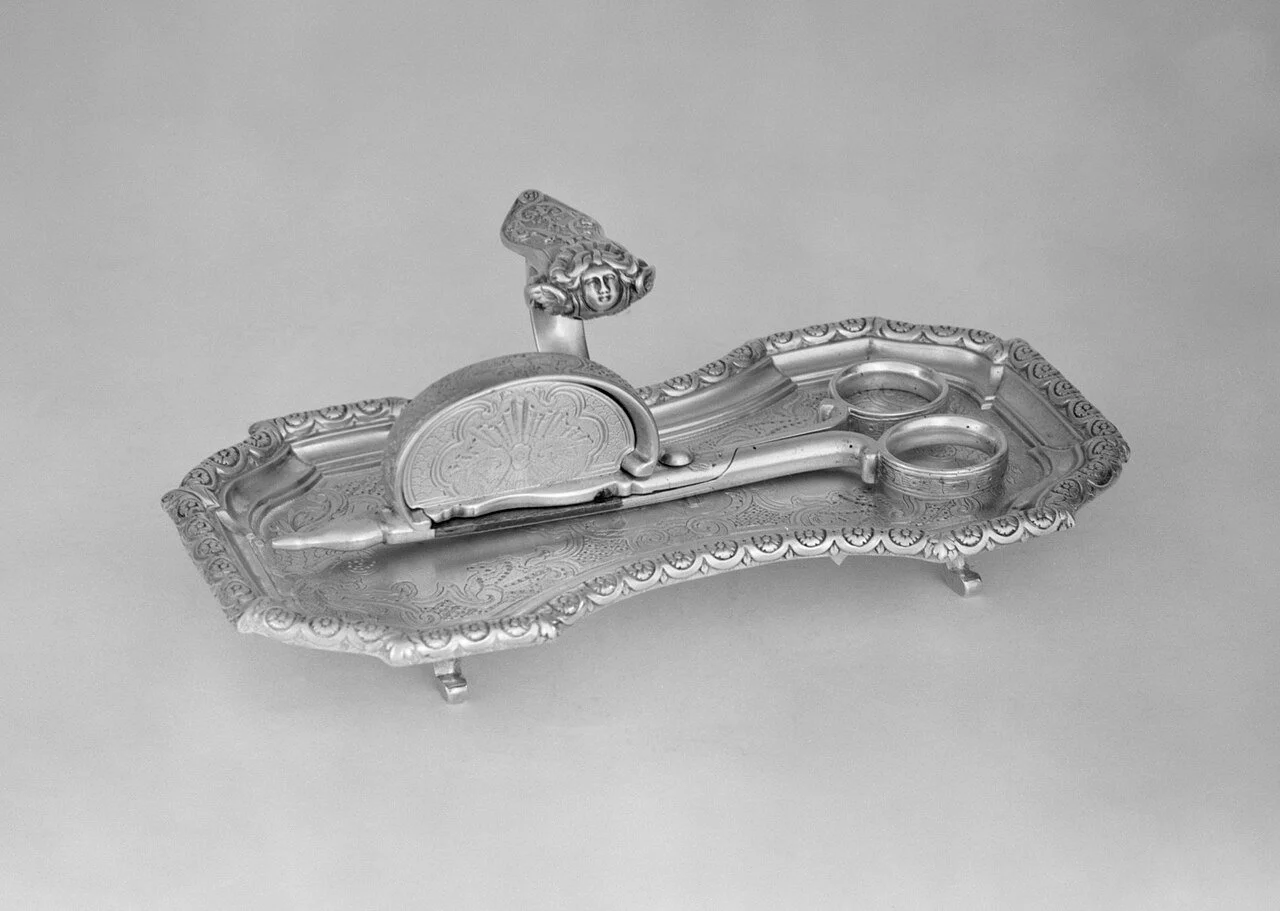
Snuffers on their tray: the scissor-box that trimmed a burning wick and caught the charred end, standard equipment wherever candles burned — until the braided self-trimming wick curled into the flame and did the work itself. Trim your wick anyway; the laboratory verifies.
Snuffer tray with snuffers, The Metropolitan Museum of Art (Open Access), via Wikimedia Commons. CC0.
★ The flame you see is not burning the wick. It is burning vaporized wax, and the wick is the engine that delivers it. A candle wick works by capillary action: the braided fibers draw liquid wax upward into the flame, where the heat vaporizes it and it combusts. The wick itself chars slowly at the tip. This is why a candle can burn for hours on a wick only millimeters thick: the wick is a pump, not the fuel.
Three things about the wick decide the quality of the burn.
First, size. A wick too small for its container makes a small flame and a small melt pool, the circle of liquid wax around the wick. If the melt pool never reaches the container's edge, the candle tunnels: it burns a narrow shaft down the middle and leaves a ring of unmelted wax, wasted and ugly. A wick too large makes a tall, smoky flame, a scorching hot jar, and soot. Wick sizing is a matching problem, and candle makers solve it by testing, which is exactly what your observation log will teach you to do.
Second, centering. A wick that leans burns one side of the container hotter than the other, melts the wax unevenly, and can overheat the glass. Center the wick when you pour, and check it again as the wax begins to set. A pencil laid across the jar mouth, with the wick tied or clipped to it, is the traditional centering tool, and it has not been improved upon.
Third, trimming. Before every lighting, trim the wick to about six millimeters, roughly a quarter inch. A long wick makes a large, unstable flame that smokes and mushrooms, forming a carbon bulb at the tip. Trimmed wicks burn cleaner, and the self-trimming braided wick does part of this work itself by curling into the flame. Trim it anyway. The laboratory does not trust a mechanism it has not verified.
Check in: What is actually burning in a candle flame — and what three things about the wick decide the quality of the burn?
❦ In your workbook: record the wick in your own way — capillary action and the pump that is not the fuel, size and the melt pool, centering with the pencil across the jar mouth, and trimming to six millimeters before every lighting — copy, sketch, or note what matters.
Fragrance in the Melt
A scented candle carries its fragrance suspended in the wax, and the craft of it is a matter of proportion and timing. Fragrance load is the percentage of fragrance oil relative to wax weight. ★ Most container candles carry between six and ten percent. More is not better: overloaded wax sweats oil, burns poorly, and can be unsafe. Measure by weight, on a scale, like every other formulation in this laboratory.
Two terms describe what you will smell. Cold throw is the fragrance a candle gives off unlit, sitting on the shelf. Hot throw is the fragrance released while burning, carried on the warmed air above the melt pool. A candle can have a strong cold throw and a weak hot throw, or the reverse; the two are different measurements, and your observation log will record both.
Add fragrance oil to the wax after melting, at the temperature the wax maker recommends, usually a little below the pour temperature, and stir gently but thoroughly for a full minute or two. Stirring distributes the oil evenly through the wax. Fragrance oils have flash points, temperatures at which their vapors can ignite, so never add fragrance to wax that is smoking or overheated, and never heat fragrance oil directly. The oil goes into warm wax, off the heat, stirred calmly. Order, scholars.
Fragrance layering, which you studied in Lesson 14, applies here as it does everywhere: top notes arrive first and fade fastest, base notes linger. A candle built only from bright top notes smells exciting in the jar and vanishes within an hour of burning. The patient candle maker anchors the blend.
Check in: What range does a container candle's fragrance load usually carry, how is it measured — and what is the difference between cold throw and hot throw?
❦ In your workbook: record fragrance in the melt in your own way — load by weight at six to ten percent, the two throws as two different measurements, oil into warm wax off the heat and never into smoking wax, and top notes anchored by base notes — copy, sketch, or note what matters.
Guided Practice: Casting a Container Candle
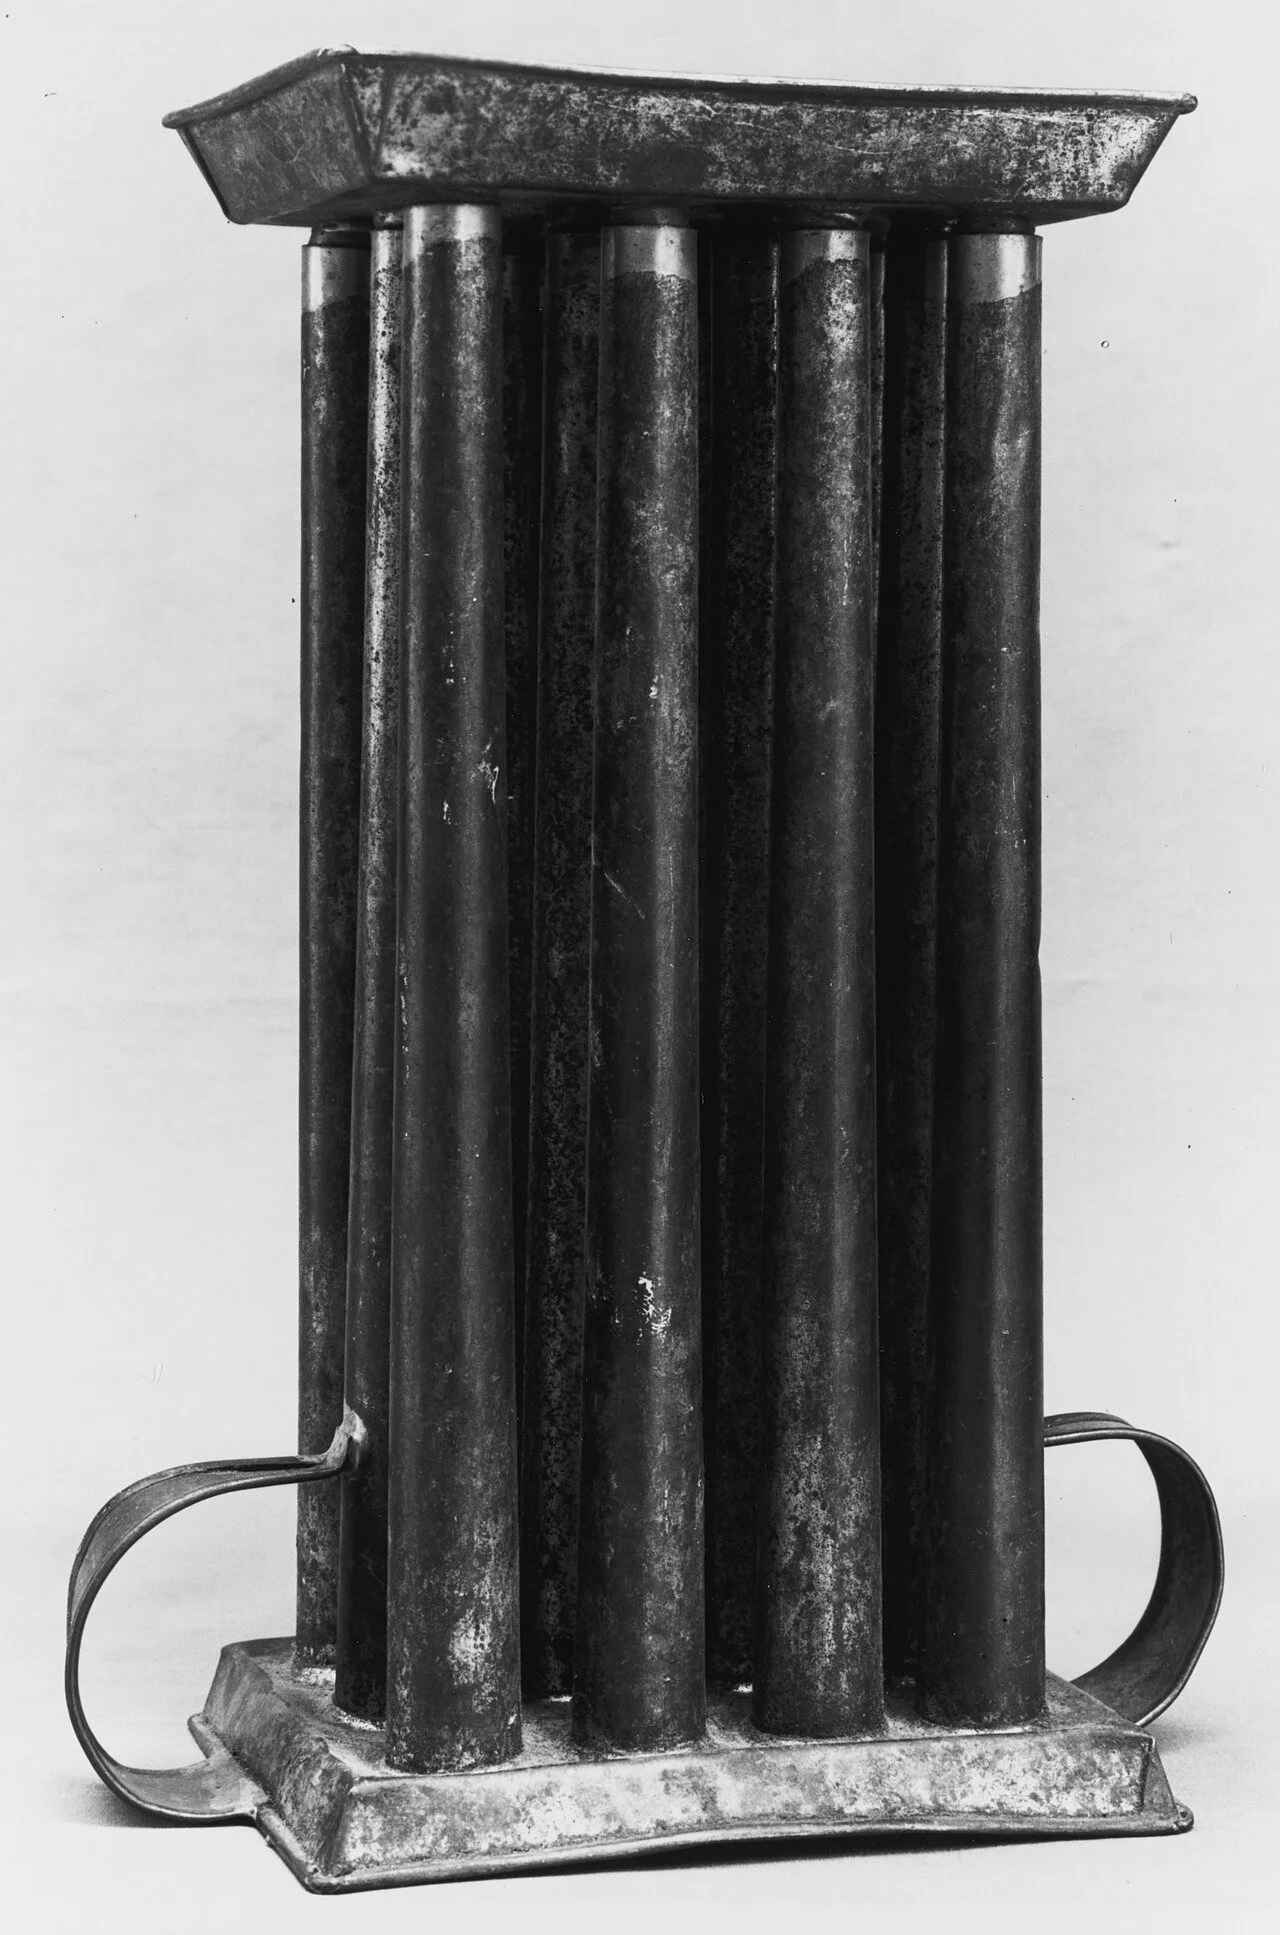
A tin candle mold: wax poured into each tube around a centered wick, cooled, and drawn out as a free-standing pillar — the molded candle this lesson sets against your container candle, which is cast into the vessel it will burn in and never comes out.
Candle Mold, The Metropolitan Museum of Art (Open Access), via Wikimedia Commons. CC0.
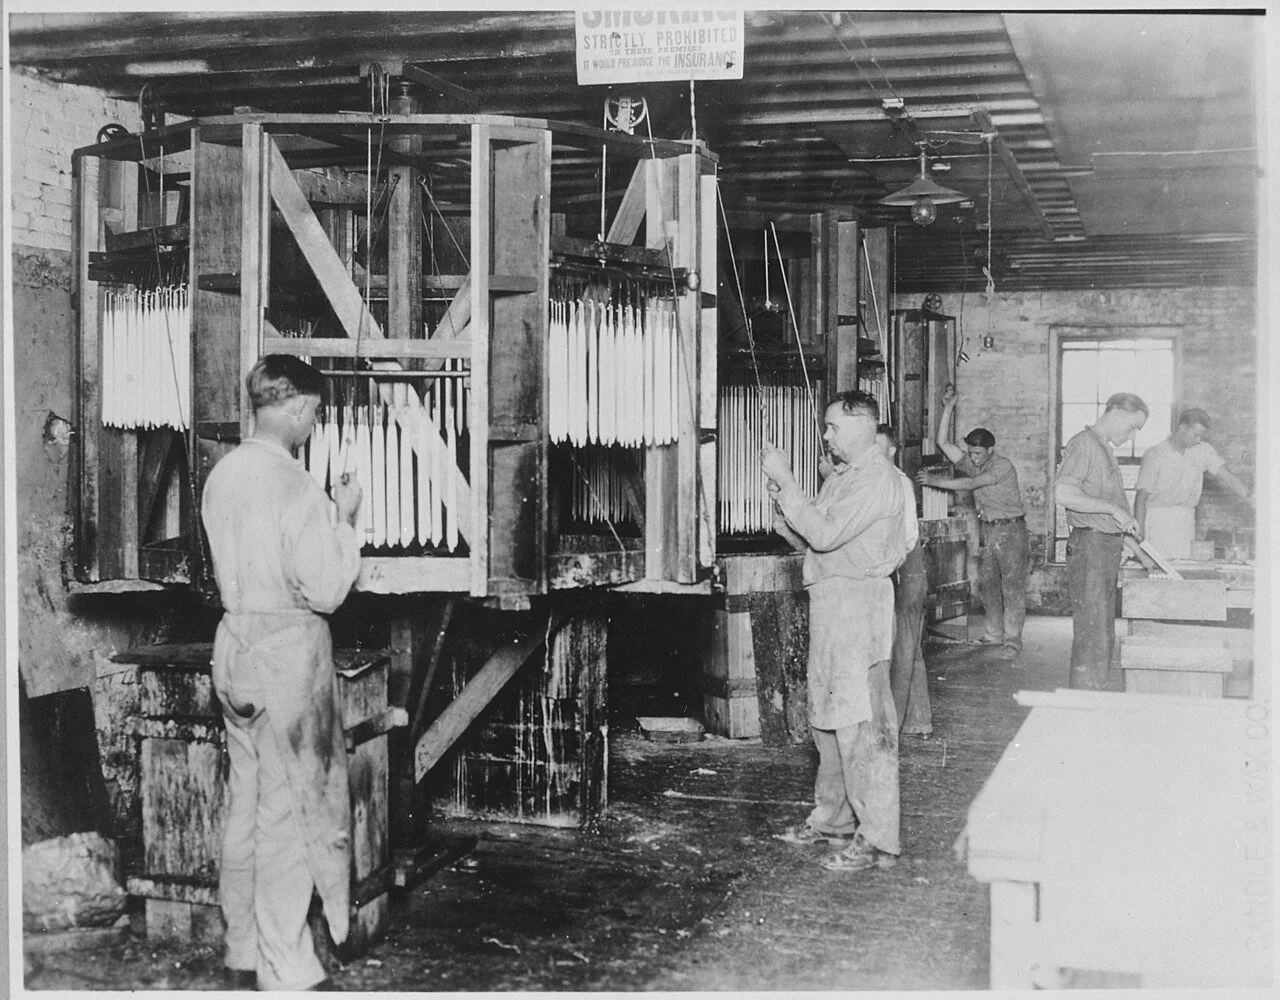
Hand-dipping at the Saint Louis Candle and Wax Company, 1927: the tallow dipper's frame grown to factory size, rows of tapers turning through the wax. Read the sign overhead — a works full of wax and flame lived by this lesson's first rule.
Workmen hand-dipping candles at the Saint Louis Candle and Wax Company, 1927, U.S. National Archives (NARA 512799), via Wikimedia Commons. Public domain.
This lesson's practice is the casting itself, done in order, with an adult beside you. Read the whole procedure before you begin, then work it step by step.
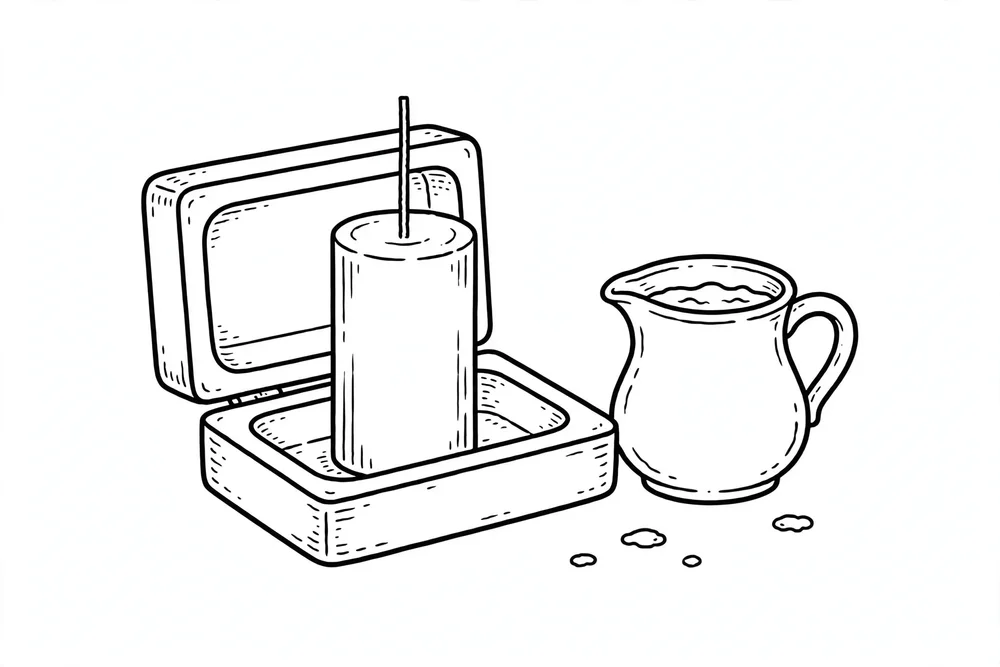
Procedure: Casting a Container Candle
- Prepare the container. Clean and dry the jar. Stick the wick base to the exact center of the jar bottom. Lay a pencil across the mouth and tie or clip the wick upright to it, centered and taut.
- Weigh the wax. Weigh enough wax flakes to fill the jar, plus a little extra for the relief pour. Record the weight in your archive.
- Melt gently. Bring the double boiler water to a bare simmer. Add the wax to the upper vessel and melt slowly, stirring occasionally. Watch the thermometer; do not let the wax exceed 85 degrees Celsius.
- Add fragrance (optional). Remove the wax from heat. When it has cooled to the pour temperature recommended for your wax (about 60 to 65 degrees for soy), stir in the fragrance oil at your chosen load, six percent is a sound first attempt. Stir gently for two full minutes.
- Pour. Pour slowly into the centered jar, leaving about a centimeter of headspace. Do not move the jar.
- Cool undisturbed. Let the candle cool at room temperature, away from drafts, for several hours. Do not refrigerate.
- Relief pour. Once set, if a sinkhole or crater has formed around the wick, poke a few relief holes with a skewer and pour a small amount of reserved melted wax to fill them.
- Cure. Rest the candle 24 to 48 hours before the first lighting. Trim the wick to six millimeters.
Observation: The Burn Log
With an adult present, light the candle and observe for one hour, then extinguish. Record:
- Time to full melt pool, and whether the pool reached the container edge.
- Flame character: steady, tall, flickering, smoking?
- Cold throw before lighting versus hot throw during the burn.
- Any tunneling, mushrooming, or soot on the jar.
If the candle tunnels, note it without disappointment: your wick was undersized for the container, and the log entry is the valuable part. A failed batch honestly recorded teaches more than a lucky success unexamined. (You will study failure properly in Lesson 42.)
Cleanup
Extinguish the candle fully; confirm no ember remains on the wick. Wipe the pouring vessel with paper towels while still warm, then wash with hot soapy water. Collect wax drips from newspaper and discard; do not pour liquid wax down the drain. Return all materials to labeled storage. Wash hands.
Archive Entry
File in your laboratory archive: the wax weight, fragrance load percentage, pour temperature, cooling notes, the burn log, and your diagnosis of the burn. Sketch the melt pool at thirty minutes. Note what you would change next time. The archive is where a single candle becomes a repeatable method.
Check in: At what temperature ceiling must the melting wax stay, and how long does the candle rest before its first lighting — and what four things does the burn log record?
❦ In your workbook: record the casting in your own way — the eight steps in their order, the burn log's four records, the cleanup with no wax down the drain, and the archive entry that makes one candle a repeatable method — copy, sketch, or note what matters.
In your packet: Exercise III — The Burn Diagnosis ✎ begins here. Work it now, or mark the place and take it as homework — your choice.
Materials
Everything in its place, before we begin. For this candle lesson you will need:
Level One — household items
- Soy wax flakes or clean pieces of old unscented candles, enough to fill your container twice over (wax shrinks; you will do a relief pour).
- A heat-safe glass jar or tin for the container. A clean jam jar is ideal.
- A pre-waxed wick with an adhesive sticker base, or cotton string and a pencil for centering.
- A double boiler setup: a saucepan with two inches of water and a heat-safe bowl or old pouring jug that sits above the water, not in it.
- A kitchen thermometer (candy or meat thermometer).
- A kitchen scale for weighing wax and fragrance.
- Fragrance (optional): a few drops of essential oil, or a small amount of dried lavender buds pressed into the cooled surface as decoration only.
- Newspaper to protect the work surface, oven mitts, and an adult.
Level Two — historically closer
- Beeswax pastilles, the traditional chandler's wax.
- A proper wick-centering device and a pouring pitcher with a spout.
- A wick trimmer for the quarter-inch cut.
- A dedicated candle thermometer clipped to the pouring vessel.
Safety Notes
- Never leave a burning candle unattended; extinguish before leaving the room.
- Melt wax only in a double boiler; never over direct flame.
- Wear oven mitts; treat all melted wax as a burn hazard.
- Work ventilated; never add fragrance to smoking or overheated wax.
- Adult supervision required for all melting, pouring, and burning.
- The finished candle is a display and study piece, not a toy or nightlight.
Reflection Questions
Answer the following questions in your workbook.
- Why did tallow remain the common candle fuel for centuries despite its unpleasant smell?
- How does a braided wick's curling behavior make it "self-trimming," and what problem did this solve?
- Explain the difference between cold throw and hot throw, and why a candle maker measures both.
- Why does pouring wax too hot cause sinkholes, and what is the purpose of the relief pour?
- A classmate's container candle has tunneled badly after two hours of burning. Diagnose the fault and prescribe the correction.
Workbook Checklist — Lesson 36
In my workbook I have:
- ☐ recorded the safety briefing: an adult present for every lighting, melting, and pouring, and a burning candle never left unattended
- ☐ built the chandler's timeline with at least eight entries, each with its date or era, its material or invention, and the complaint it answered
- ☐ recorded how the wick works by capillary action — a pump, not the fuel — and how size, centering, and trimming decide the burn
- ☐ recorded wax cooling behavior: pour temperature, shrinkage, the sinkhole, the relief pour, and bloom
- ☐ recorded fragrance load by weight at six to ten percent, and the difference between cold throw and hot throw
- ☐ cast my container candle by the eight steps, in order, with the wick centered and the wax never above 85 degrees Celsius
- ☐ kept the burn log for one supervised hour: melt pool, flame character, both throws, and any tunneling, mushrooming, or sooting
- ☐ filed the archive entry: wax weight, fragrance load, pour temperature, cooling notes, burn log, diagnosis, and the melt-pool sketch at thirty minutes
- ☐ written my formal burn diagnosis, with a cause and a correction for every fault — or what went right, and why
☐ Lesson completed Date: ___ Signature: ___
The Professor's Closing Note
Sealed with the teal wax of Professor Crimblebrew Muddlenook, Master Apothecary of the Potions Laboratory, Head of House Meridies.
In good order, scholars. Unit V has moved you from extraction — drawing compounds out of a material with a liquid — into composition, and this candle is composition in miniature: a fuel, a carrier, a fragrance, and a vessel, balanced by measurement and judged by observation. Keep the log honest. The next lesson builds on everything you recorded here.
— Professor Crimblebrew Muddlenook, Potions Laboratory • Master Apothecary • Head of House Meridies
PROFESSOR CRIMBLEBREW MUDDLENOOK
Potions Laboratory
Master Apothecary • Head of House Meridies
Cross-Class Connections

Herbology · Unit IV, Lesson 28 — Drying Herbs the Traditional Way
Come up to the Greenhouse, candle-makers, and see where your decoration begins. In my greenhouse the woody herbs — lavender among them — hang in bundles and dry on screens until crispness says they are done, so the buds Professor Muddlenook lets you press into a cooled candle's surface arrive dried by a method, not by luck. Bring your patience from the pour; drying asks for the same stillness.
PROFESSOR BERYL FERNFOOT
Herbology Greenhouse • Master Herbalist • Head of House Oriens

Scrollwork · Unit VI, Lesson 22 — Wax Seals & Authentication
You have cast wax to burn it, scholars. Now come and press wax to keep it. In the Scriptorium we take up sealing wax — a different formulation for a different purpose, resinous and brittle where your candle wax is fuel — and we do not substitute one for the other, exactly as your professor warns. Come and learn what a seal's wax must do that a candle's never will.
PROFESSOR QUILLBERRY NOCTURNE
Scrollwork Library

Creative Arts · Unit I, Lesson 5 — Adhesives, Heat, Wax & Glass
Wax is honest material, scholars, and it punishes hurry in my workshop the same as in his laboratory. In my workshop you will learn the glue families, the boundaries of hot wax, and the safe handling of glass — and make a supervised pour of wax into a practice mold, on scrap first, as always. Bring the order Professor Muddlenook taught you; it is the same order here.
PROFESSOR COGBRANCH TIMBERCLANK
Creative Arts Workshop
Further Reading & Sources
- History of candle making — Wikipedia: Morgan's machine, braided wicks, Young's paraffin works, Price's Candles.
- Candle wick — Wikipedia: capillary action, wick types, self-trimming braids, sizing effects.
- Tallow candles, dipping, trimming the wick, snuffing — Old and Interesting: tallow trade, rushlights, braided wick history.
- RSC honours forgotten Scottish scientific hero — Royal Society of Chemistry: James Young's shale oil and paraffin works.
- The History of Candlemaking — AshWood Candles: Tallow Chandlers 1300, Morgan 1834, Young paraffin, Edison 1879.
Browse the Potions shelf in the school Library for readable editions of these works.
LESSON 36 · CANDLES
Try It in the Laboratory
The lesson taught the wax and the wick. The Experiment builds your own candle — beeswax or soy, scented with an infused oil from the same page, with the never-leave-it-alone law standing.
— Professor Crimblebrew Muddlenook, Potions Laboratory
Submit your work for this lesson using the form below.
CONTINUE IN THE POTIONS LABORATORY
← Previous · Lesson 35: Balms, Salves & Cerates Next · Lesson 37: Sachets & Household Storage Blends →
Unit V — Botanical Formulations Potions Laboratory — All 52 Lessons
The rest of Unit V: Lesson 35 · Balms & Salves · Lesson 37 · Sachets & Blends · Lesson 38 · Whipped Emulsion · Lesson 39 · Crystalline Scrubs · Lesson 40 · Melt & Pour Soap · Lesson 41 · Cold-Process Soap · Lesson 42 · The Failed Batch · Lesson 43 · Experimental Formula · Lesson 44 · Formulation Matrix