

POTIONS
Unit V · Lesson 40SOAPMAKING: MELT & POUR ARTISTRY
Professor Crimblebrew Muddlenook
Master Apothecary • Potions
Head of House Meridies • School of Evershade
Professor's Introduction

Scholars, today you become soapmakers without touching a single grain of lye. The base before you has already passed through the fire of saponification at the manufacturer's works. The dangerous chemistry is finished, and what remains is artistry. Do not mistake artistry for carelessness. Melted base burns like hot wax, impatience ruins layers, and a bar poured without a plan is a bar poured twice. Sketch first. Measure twice. Pour once. Then we shall see what your hands have learned. — Professor Crimblebrew Muddlenook, Potions Laboratory • Master Apothecary • Head of House Meridies
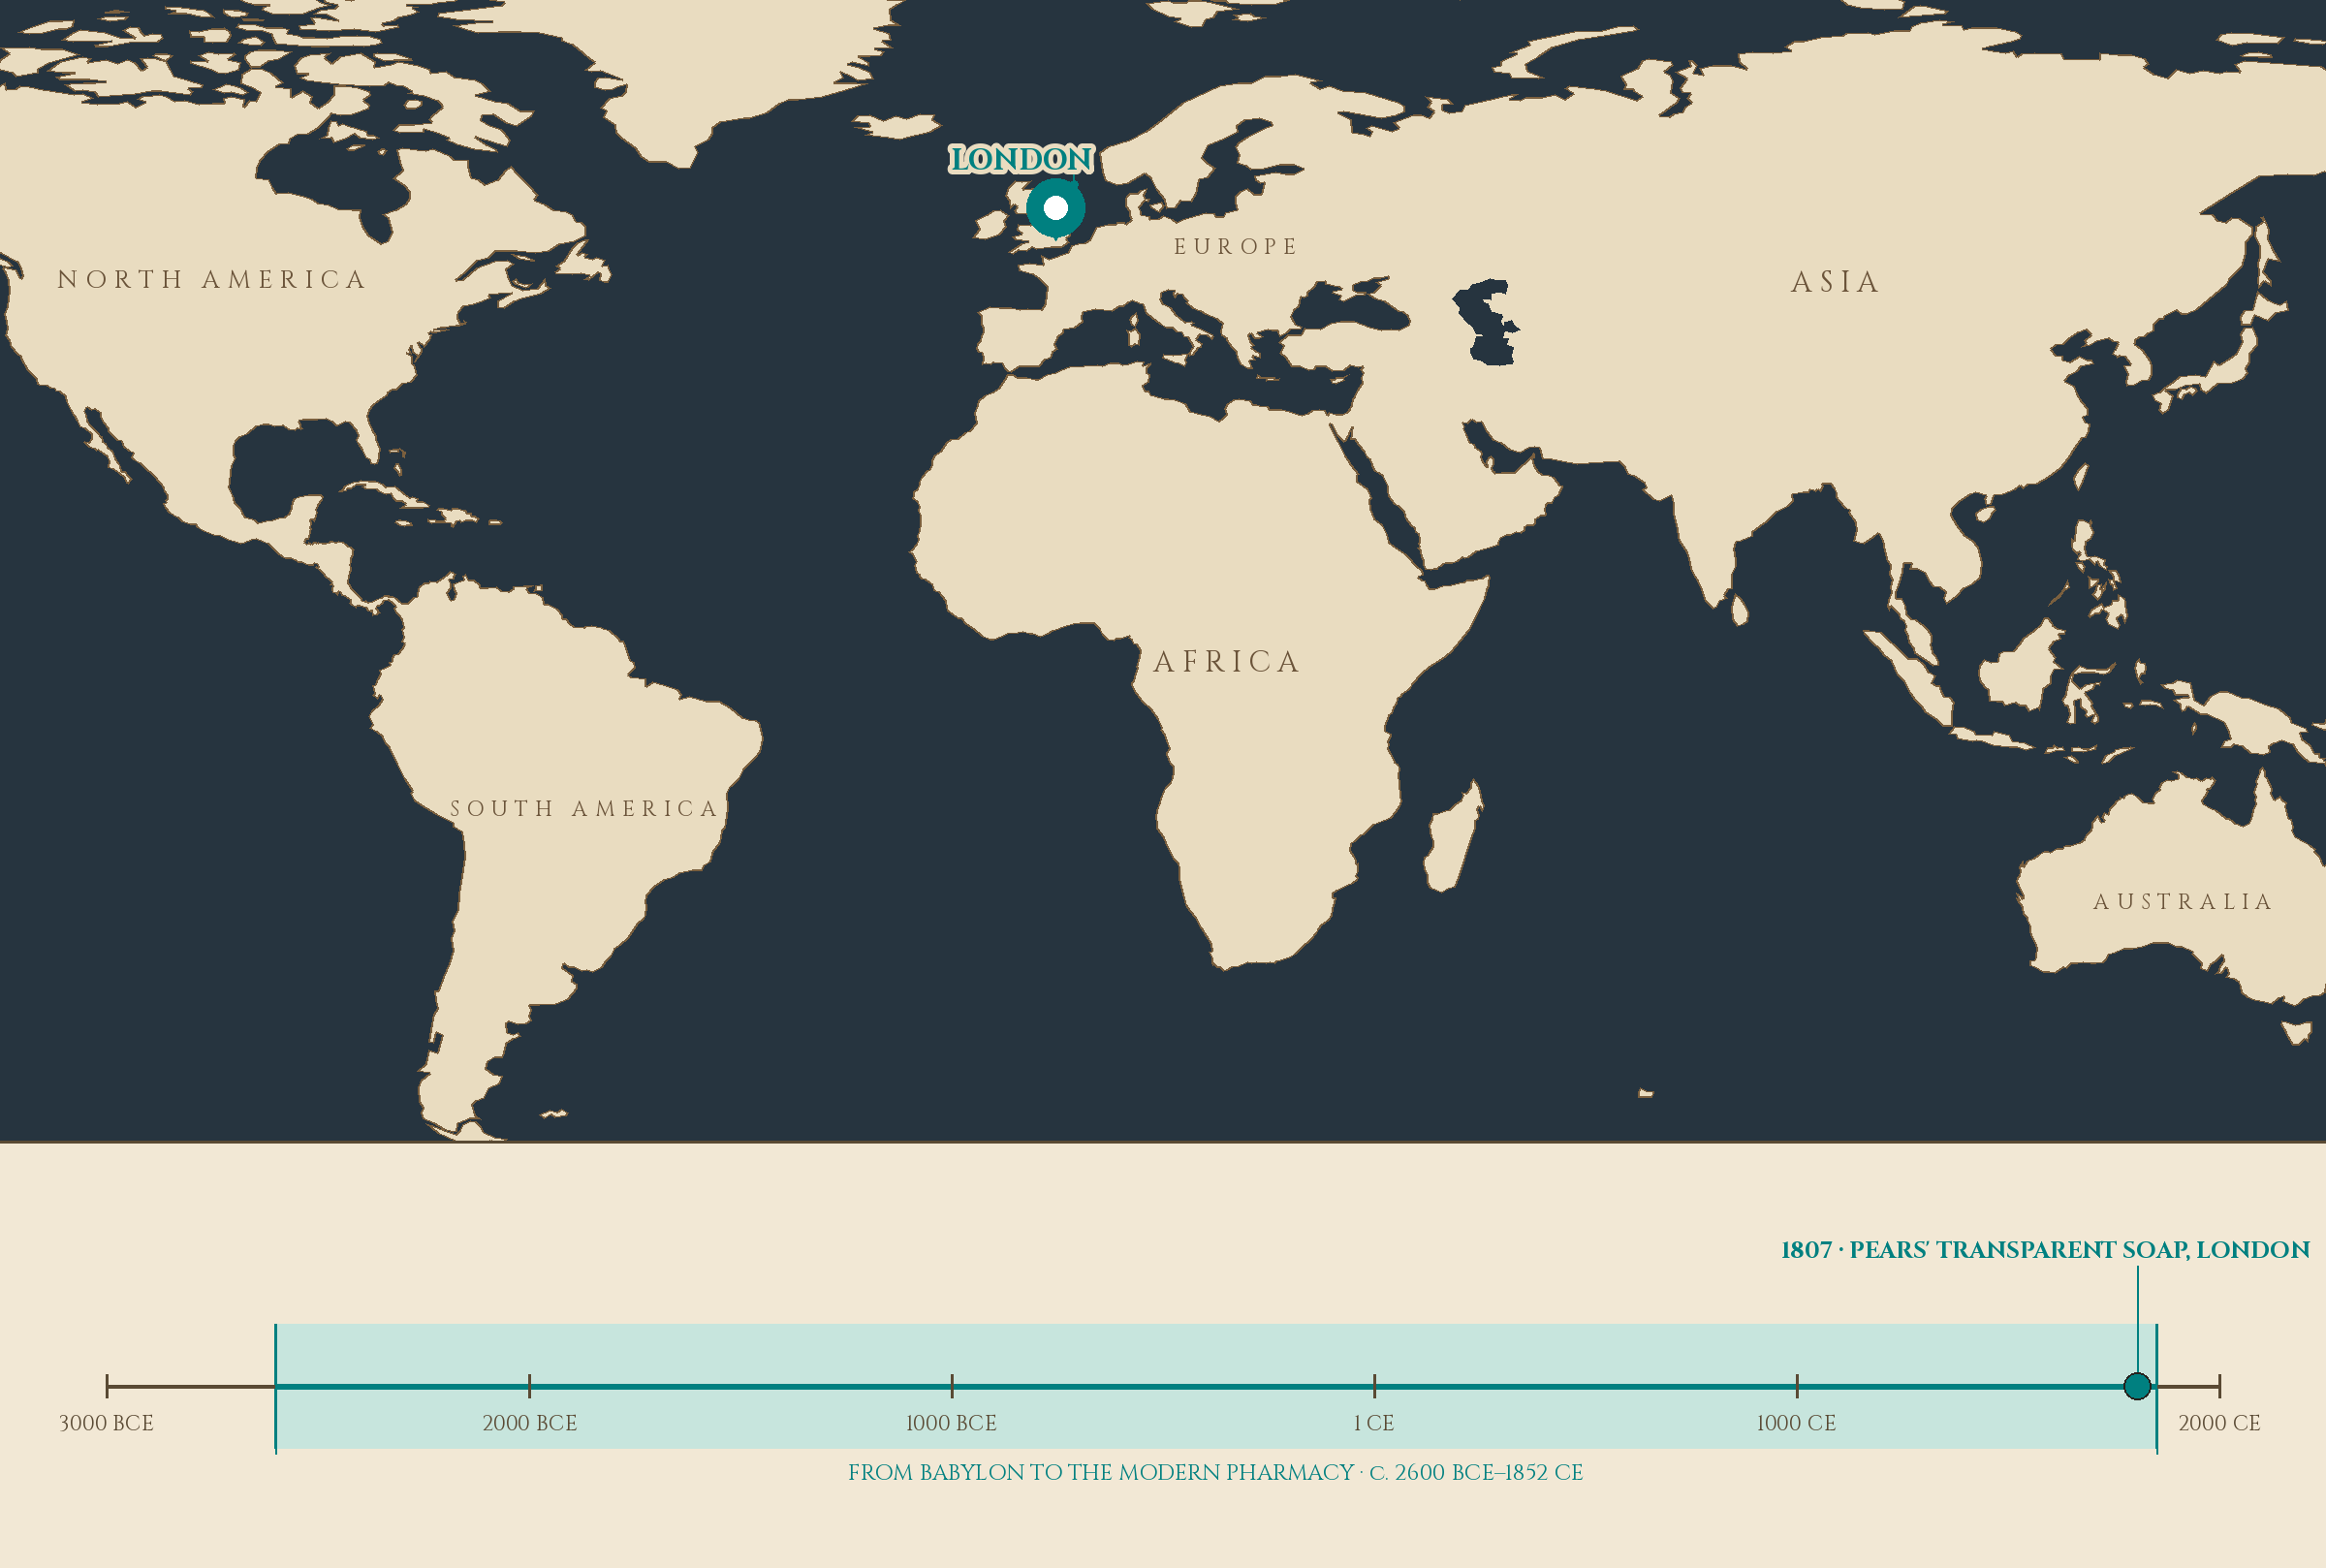
Pin: London. Timeline stop: 1807 · PEARS' TRANSPARENT SOAP, LONDON.
Lesson Objectives
By completing this lesson, you will be able to:
- Explain what a melt-and-pour soap base is and why it requires no lye handling.
- Melt a soap base gently and safely using short heat bursts or a double boiler.
- Color a base with pigments and natural colorants, and predict how alkalinity affects color.
- Embed dried botanicals and suspend inclusions using pour-temperature control.
- Cast layered bars with clean adhesion between layers.
- Design a bar on paper before pouring, then evaluate the finished piece after a 48-hour watch.
Reading this lesson: ★ marks the passages to remember. They return in the Unit V Quiz and at the capstone. Check in questions ask the material back as you go; answer them in your workbook when you meet them.
Working this lesson: Your assignment packet is the first download on this page. Work in it as the lesson moves along, answering each exercise as its subject is taught — or read the lesson through for your notes and take the exercises as homework afterward. Both are proper ways to sit this class. Signposts in the reading tell you where each exercise belongs. Written answers are short answers in your own words; a few honest lines are worth more than a filled page.
Your Assignment Packet
This lesson's exercises live in its packet: the Lexicon Handout (every term, course terms marked ◆), Materials, Guided Practice — the two-bar procedure and the observation record, printed in full so you can work at your own bench with your adult supervisor — the Assignment Manual with its self-check, the Reflection Questions, and the Workbook Checklist. Download the packet before you begin and keep it beside you as you read.
Safety Briefing
Read every line before you touch the base.
- Melted soap base is hot. It melts near 60 to 70 degrees Celsius (140 to 160 Fahrenheit) and burns skin like hot candle wax. Handle vessels with dry cloths or mitts, pour slowly, and keep your face and hands clear of rising steam.
- Heat-safe vessels only. Melt in a microwave-safe measuring cup or a heat-safe bowl over a double boiler. Never melt base in thin plastic that can warp, and never place it over direct high flame.
- Short bursts, stirred between. In a microwave, heat 20 to 30 seconds at a time and stir between bursts. On a double boiler, keep the water at a bare simmer. Never boil the base. Scorched base yellows, smells burnt, and sweats badly later.
- An adult must supervise all heating. No exceptions. The adult handles the microwave door and the double boiler; the scholar handles the stirring, the sketching, and the pouring once the vessel is set safely down.
- Rubbing alcohol is flammable. The spritz bottle stays capped until the moment of use, is sprayed only onto cooling soap, and is never used near the stove, the microwave, or any open flame. Spray away from your face.
- Protect your surfaces. Pigmented base stains cloth, wood, and paper permanently. Cover the worktable with newspaper or a washable cloth and wear an apron or old shirt.
- These are decorative display pieces. The bars you cast are for study, gift, and display. Do not present them as anything else, and label every finished bar with its ingredients and the date.
- No lye in this lesson. Cold-process soapmaking, which uses sodium hydroxide, belongs to Lesson 41 under strict laboratory discipline. Do not improvise lye methods here.
Before any preparation touches more than a fingertip: test a little on the inside of your wrist, wait a full day, and do not use it if the skin reddens, itches, or stings. Never use a preparation on broken or irritated skin.
Check in: At what temperature range does the base melt, and what does scorched base do afterward — and who handles the microwave door and the double boiler, every time, without exception?
❦ In your workbook: record the safety briefing in your own way — the hot base and its vessels, short bursts and the bare simmer, the adult at every heating, the capped alcohol bottle kept from flame, protected surfaces, display-only bars labeled, and no lye in this lesson — copy, sketch, or note what matters.
What Melt-and-Pour Is
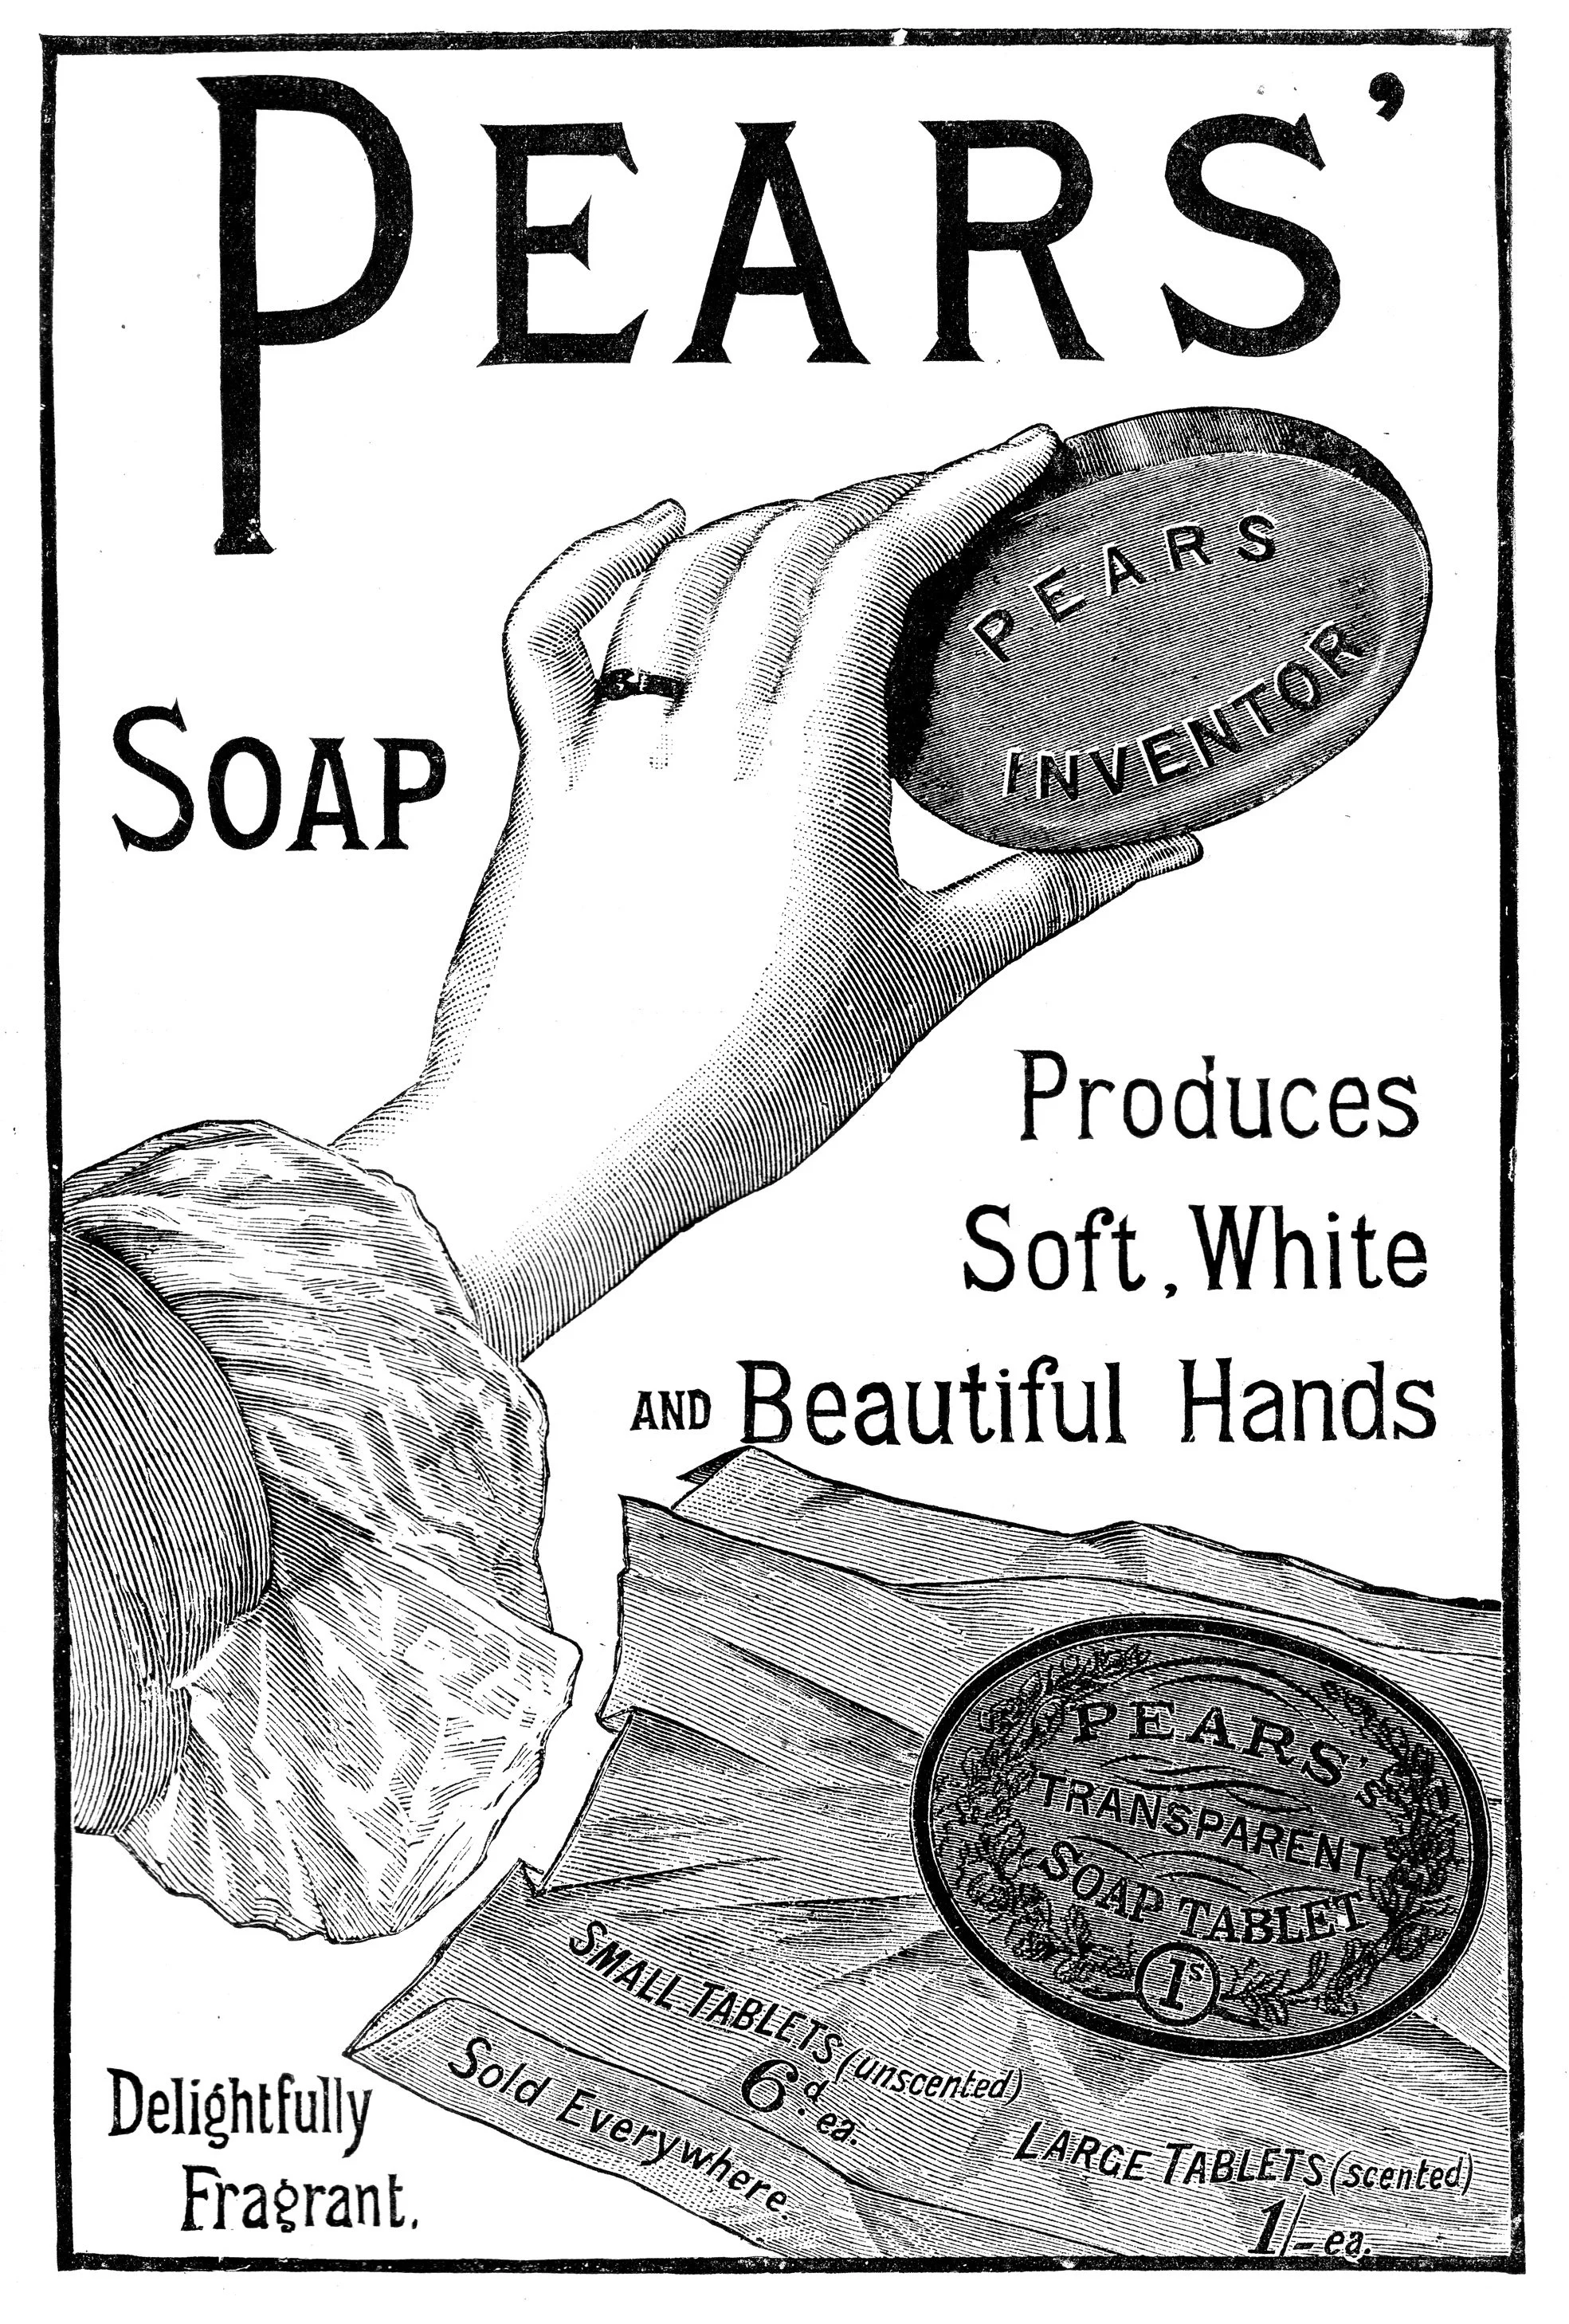
Pears' transparent soap as its makers advertised it in 1886: the oval tablet held up to the light, "transparent" as the selling word. The soap itself dates to London, 1807 — the first mass-market translucent soap, made clear by its glycerin — and the clear base on your bench is its descendant in miniature. The advertisement's promises are period copy; the clarity is the lesson.
Pears' Soap advertisement, Frank Leslie's Popular Monthly Magazine, January 1886, via Wikimedia Commons. Public domain.
Every bar of true soap was born in a chemical reaction called saponification, in which fats meet a strong alkali and become soap and glycerin. In the cold-process method you will study in Lesson 41, you perform that reaction yourself, and you handle the lye with full laboratory discipline. ★ In melt-and-pour, the manufacturer has already performed it. The base you hold is finished soap, solidified, cut, and sold for remelting. Your work begins where the chemistry ends.
Remelting soap is not a modern shortcut. Milled and remelted soaps were a luxury trade in eighteenth-century France, where fine toilet soaps were ground, scented, and reformed into smooth tablets. What is modern is the glycerin base itself: clear, sweet-smelling, and eager to melt. Its most famous ancestor is Pears soap, first sold in London in 1807 as the world's first mass-market translucent soap, made transparent by its glycerin content. When you melt a clear base today, you are repeating, in miniature, the trick that made Pears famous: glycerin and clarity, hand in hand.
Check in: Who performs the saponification in melt-and-pour — and where does your own work begin?
❦ In your workbook: record what melt-and-pour is in your own way — saponification finished at the works, the base as finished soap sold for remelting, the French milled-soap trade, and Pears, London, 1807 — copy, sketch, or note what matters.
Know Your Base
Bases come in families, and each behaves slightly differently at the pour.
- Clear base is transparent and shows embedded botanicals like insects in amber. It takes vivid color.
- White base contains a whitening mineral and is opaque. Colors turn pastel in it, and embeds hide beneath the surface.
- Goat's milk, shea butter, and honey bases are creamy and opaque, prized for a rich look and label appeal. They melt the same way as the others.
All of them melt gently, all of them set at room temperature, and none of them asks you to handle lye. Choose one clear and one white or creamy base for today's two-bar exercise, so you can compare them side by side.
Check in: Which base shows embedded botanicals like insects in amber — and what happens to colors mixed into a white base?
❦ In your workbook: record the base families in your own way — clear and transparent, white and opaque, the creamy bases, all melting gently and setting at room temperature — copy, sketch, or note what matters.
Melting, the Gentle Way
Chop the base into uniform cubes about two centimeters across. Small, even pieces melt evenly; one great slab melts outside-in and scorches before the center softens. (Lesson 23's teaching on surface area returns to serve you here.)
★ Melt in short bursts: 20 to 30 seconds in the microwave, then stir, then repeat. Over a double boiler, keep the water at the barest simmer and stir the base as it softens. You are aiming for just melted: fluid, steaming faintly, with no lumps. The moment it reaches that state, remove it from the heat. An overheated base turns yellow, develops a burnt smell that no fragrance will cover, and sweats heavily for days afterward. Patience at the melting stage is repaid at every later stage.
Check in: Why are the cubes chopped small and even — and what three things happen to an overheated base?
❦ In your workbook: record the gentle melt in your own way — even two-centimeter cubes, short bursts stirred between, the barest simmer, and just melted as the moment to come off the heat — copy, sketch, or note what matters.
Color: A First Pass at Pigments
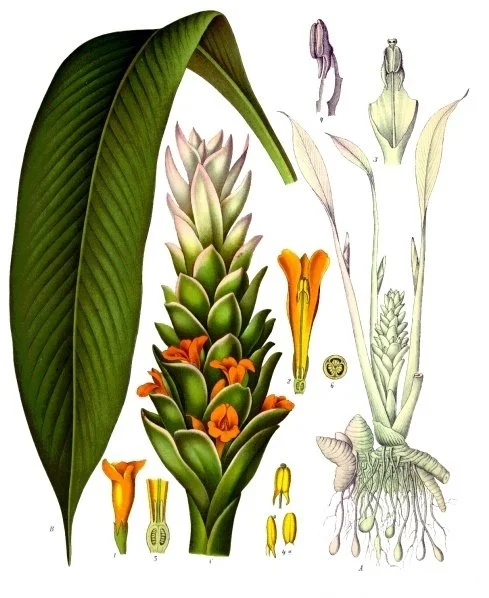
Turmeric, Curcuma longa, in Köhler's Medizinal-Pflanzen: leaf, flower spike, and the rhizome at right whose powder gives this lesson its gold. Test it as the lesson directs — one drop on white paper before the batch is committed.
Curcuma longa plate, Köhler's Medizinal-Pflanzen, via Wikimedia Commons. Public domain.
A pigment is a colored particle that lends its color to a surrounding medium without dissolving. Cosmetic micas, iron oxides, and ultramarines are the laboratory's reliable colorants: a very small amount, stirred thoroughly into the melted base, gives strong, stable color. Start with less than you think you need. You can always add; you cannot subtract.
Natural colorants work too, with honest limitations. Turmeric gives gold, paprika gives peach, cocoa powder gives brown, activated charcoal gives grey-black, and clays give muted earth tones. ★ Here is a piece of chemistry worth recording: soap is alkaline, and alkalinity is unkind to many natural reds, purples, and berry tones, which often morph to brown or grey in the bar. That is not failure; it is information. Unit VI will take pigments much further. For today, test every colorant with a single drop on white paper before committing the batch.
Scholars, color is added to the base, never the other way around, and it is stirred, never beaten. Beaten base is full of air, and air becomes bubbles, and bubbles become pocks in your finished bar. Stir like you mean it, and mean it calmly. — Professor Crimblebrew Muddlenook, Potions Laboratory • Master Apothecary • Head of House Meridies
Check in: Turmeric gives gold and paprika gives peach. What does soap's alkalinity do to many natural reds, purples, and berry tones — and what do you do with every colorant before committing the batch?
❦ In your workbook: record color in your own way — pigment as the particle that does not dissolve, the reliable micas and oxides, the natural colorants and their honest limits, and the drop test on white paper — copy, sketch, or note what matters.
In your packet: Exercise I — Base Comparison ◐ begins here. Work it now, or mark the place and take it as homework — your choice.
Scent, Briefly
Scent is garnish in this lesson, not the subject. If you scent your bars, add fragrance oil or essential oil only after the base has cooled slightly past its hottest point; heat drives volatile compounds into the air, which is the same lesson Lesson 14 taught about fragrance and temperature. Use small amounts, record exactly what you added, and save your serious perfumery studies for Unit VI, where they belong.
Check in: When is scent added to the base — and why does the timing matter?
❦ In your workbook: record scent in your own way — garnish, not the subject, added after slight cooling, in small amounts, and recorded exactly — copy, sketch, or note what matters.
Botanicals: The Dried-Only Rule
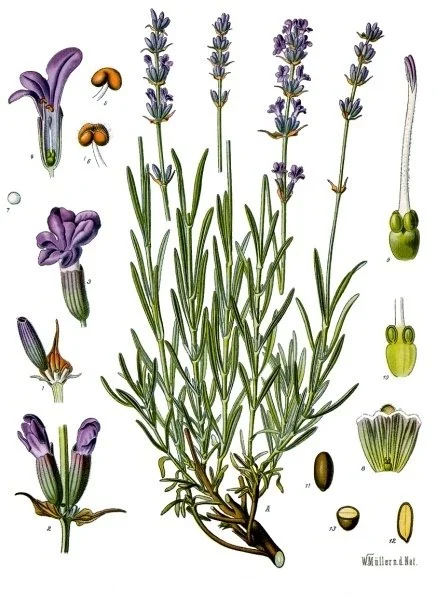
Lavender, Lavandula angustifolia, in Köhler's Medizinal-Pflanzen: the buds on their spikes are this lesson's classic embed — but only once they pass the snap test, crisp and completely dry. A bud that bends instead of breaking stays out of the bar.
Lavandula angustifolia plate, Köhler's Medizinal-Pflanzen, via Wikimedia Commons. Public domain.
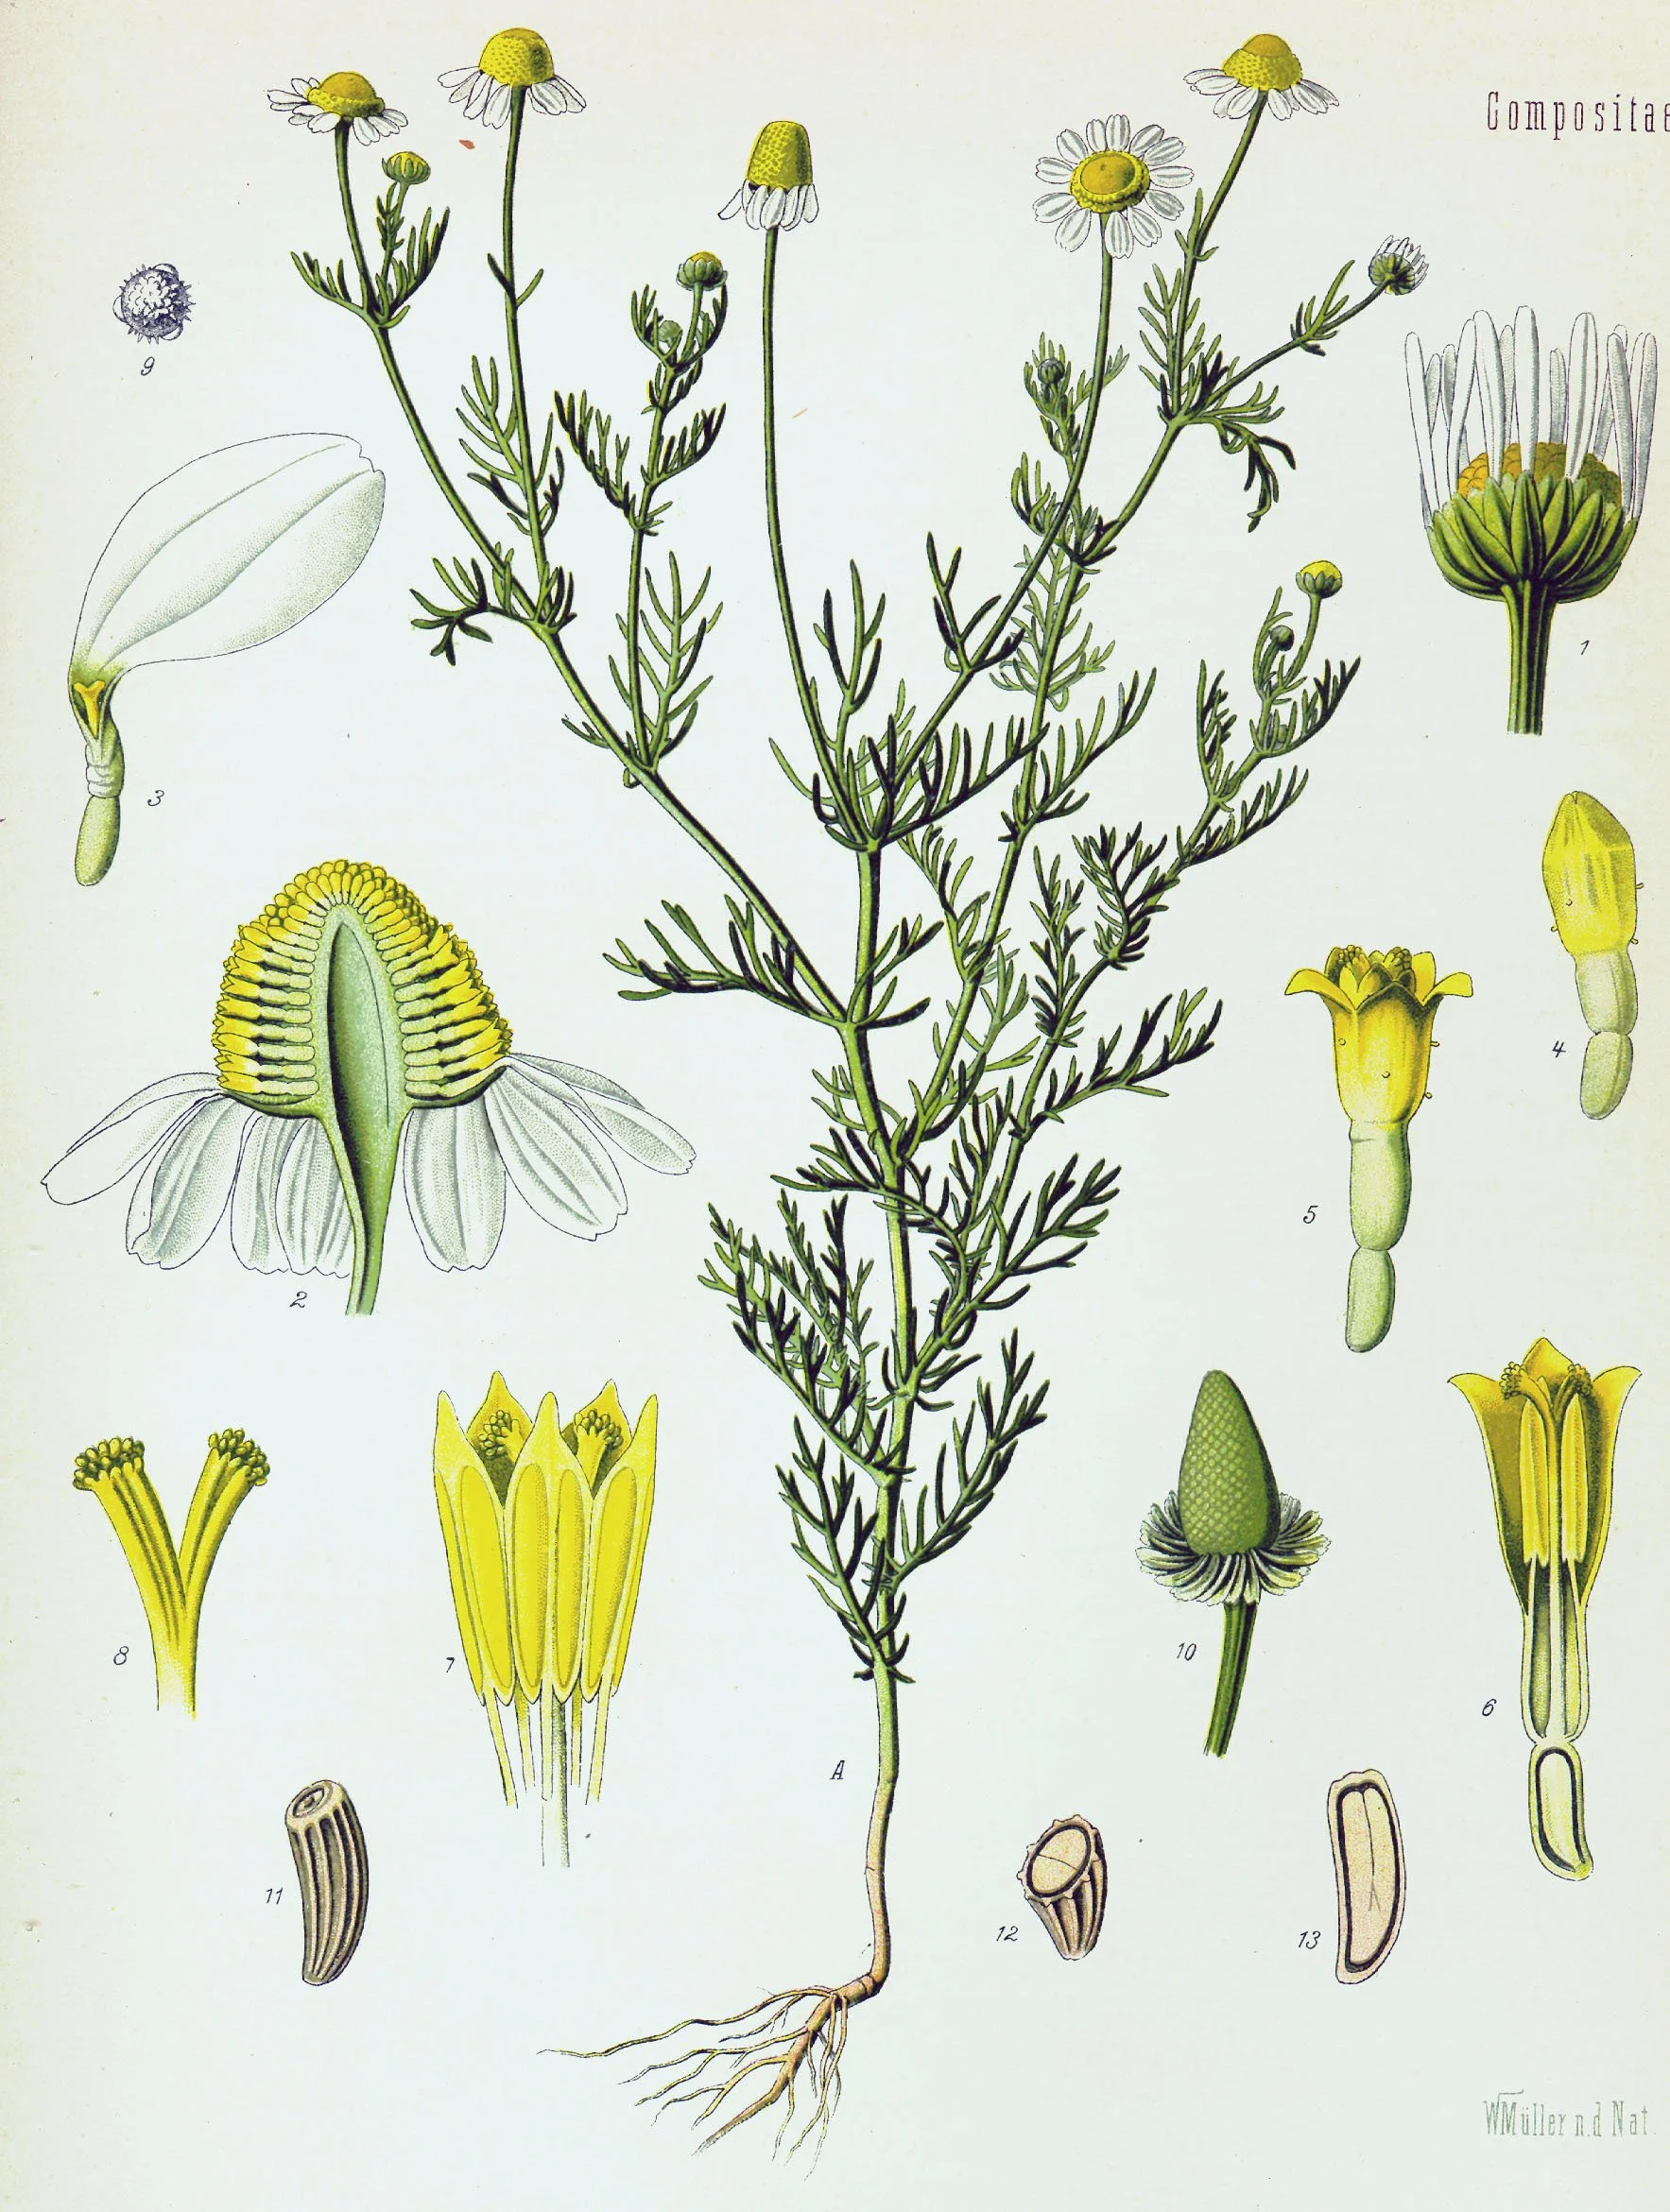
Chamomile, Matricaria recutita, in Köhler's Medizinal-Pflanzen: the little white-and-gold heads are Level One's embed, dried until they crumble at a touch. The cut-open head at left shows the flower's hollow heart — the structure the drying has to empty of moisture before the bar may have it.
Matricaria recutita plate, Köhler's Medizinal-Pflanzen, via Wikimedia Commons. Public domain.
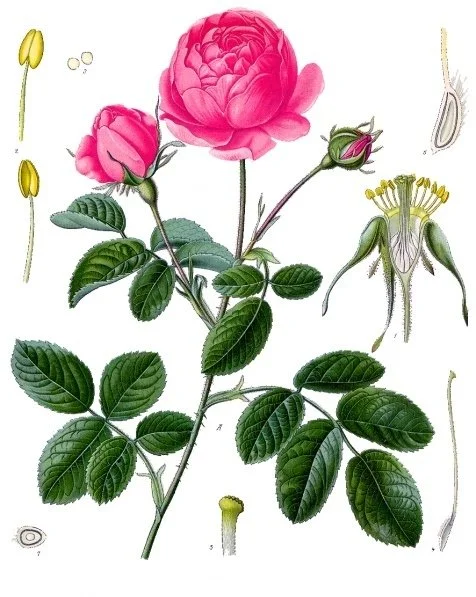
The cabbage rose, Rosa centifolia, in Köhler's Medizinal-Pflanzen: Level Two's rosebuds come from a flower built like this — dozens of petals folded tight, which is exactly why a rosebud needs longer to dry through than a petal, and why the snap test, not the calendar, decides.
Rosa centifolia plate, Köhler's Medizinal-Pflanzen, via Wikimedia Commons. Public domain.
★ Only fully dried botanicals may enter a soap bar. Lavender buds, calendula petals, rosebuds, chamomile flowers, and cornflower petals are the classic embeds: beautiful, stable, and honest about what they are. They must be crisply, completely dry. Snap a bud between your fingers; if it bends instead of breaking, it is not dry enough.
Fresh or damp botanicals are forbidden in soap. Moisture trapped inside a bar feeds mold, and a moldy bar is a failed bar: Lesson 15's receiving-bench teaching applies here with full force. A bar is a sealed, warm, slightly damp environment, which is exactly what fungi enjoy. Dried only. No exceptions, no matter how pretty the fresh petal looks.
Design note: botanicals pressed against the outer surface of the bar will bleed color and turn soft and dark with use. Botanicals suspended in the center stay beautiful. Plan your placement accordingly.
Check in: How do you test a bud for dryness with your fingers — and what does trapped moisture feed inside a finished bar?
❦ In your workbook: record the dried-only rule in your own way — the classic embeds, the snap test, moisture feeding mold, and center placement over surface placement — copy, sketch, or note what matters.
Suspension: Timing the Pour
Lesson 20 taught you what a suspension is: solid particles distributed through a fluid, destined to settle given time. A soap bar is a suspension frozen mid-set, and your pour temperature decides where everything freezes.
Pour the base too hot and thin, and every embed sinks to the bottom of the mold like stones in a pond. Pour it too cool, and it sets mid-pour into lumps, and your layers will never bond. The working window is the moment the melted base has thickened slightly, flowing like warm honey rather than water. At that viscosity (a word Scrollwork's scribes taught you in Unit II, now doing laboratory work), embeds stay where you place them.
Technique for suspended botanicals: pour a thin layer of base, let it skin over, arrange your dried botanicals on that skin, then pour the remaining base gently over them. The first layer holds them; the second layer seals them.
Check in: What happens to embeds poured too hot and thin, and what happens poured too cool — and what does the working window flow like?
❦ In your workbook: record suspension and the pour in your own way — the bar as a suspension frozen mid-set, the honey-thick window, and the skin, arrange, and seal technique — copy, sketch, or note what matters.
Layered Casting
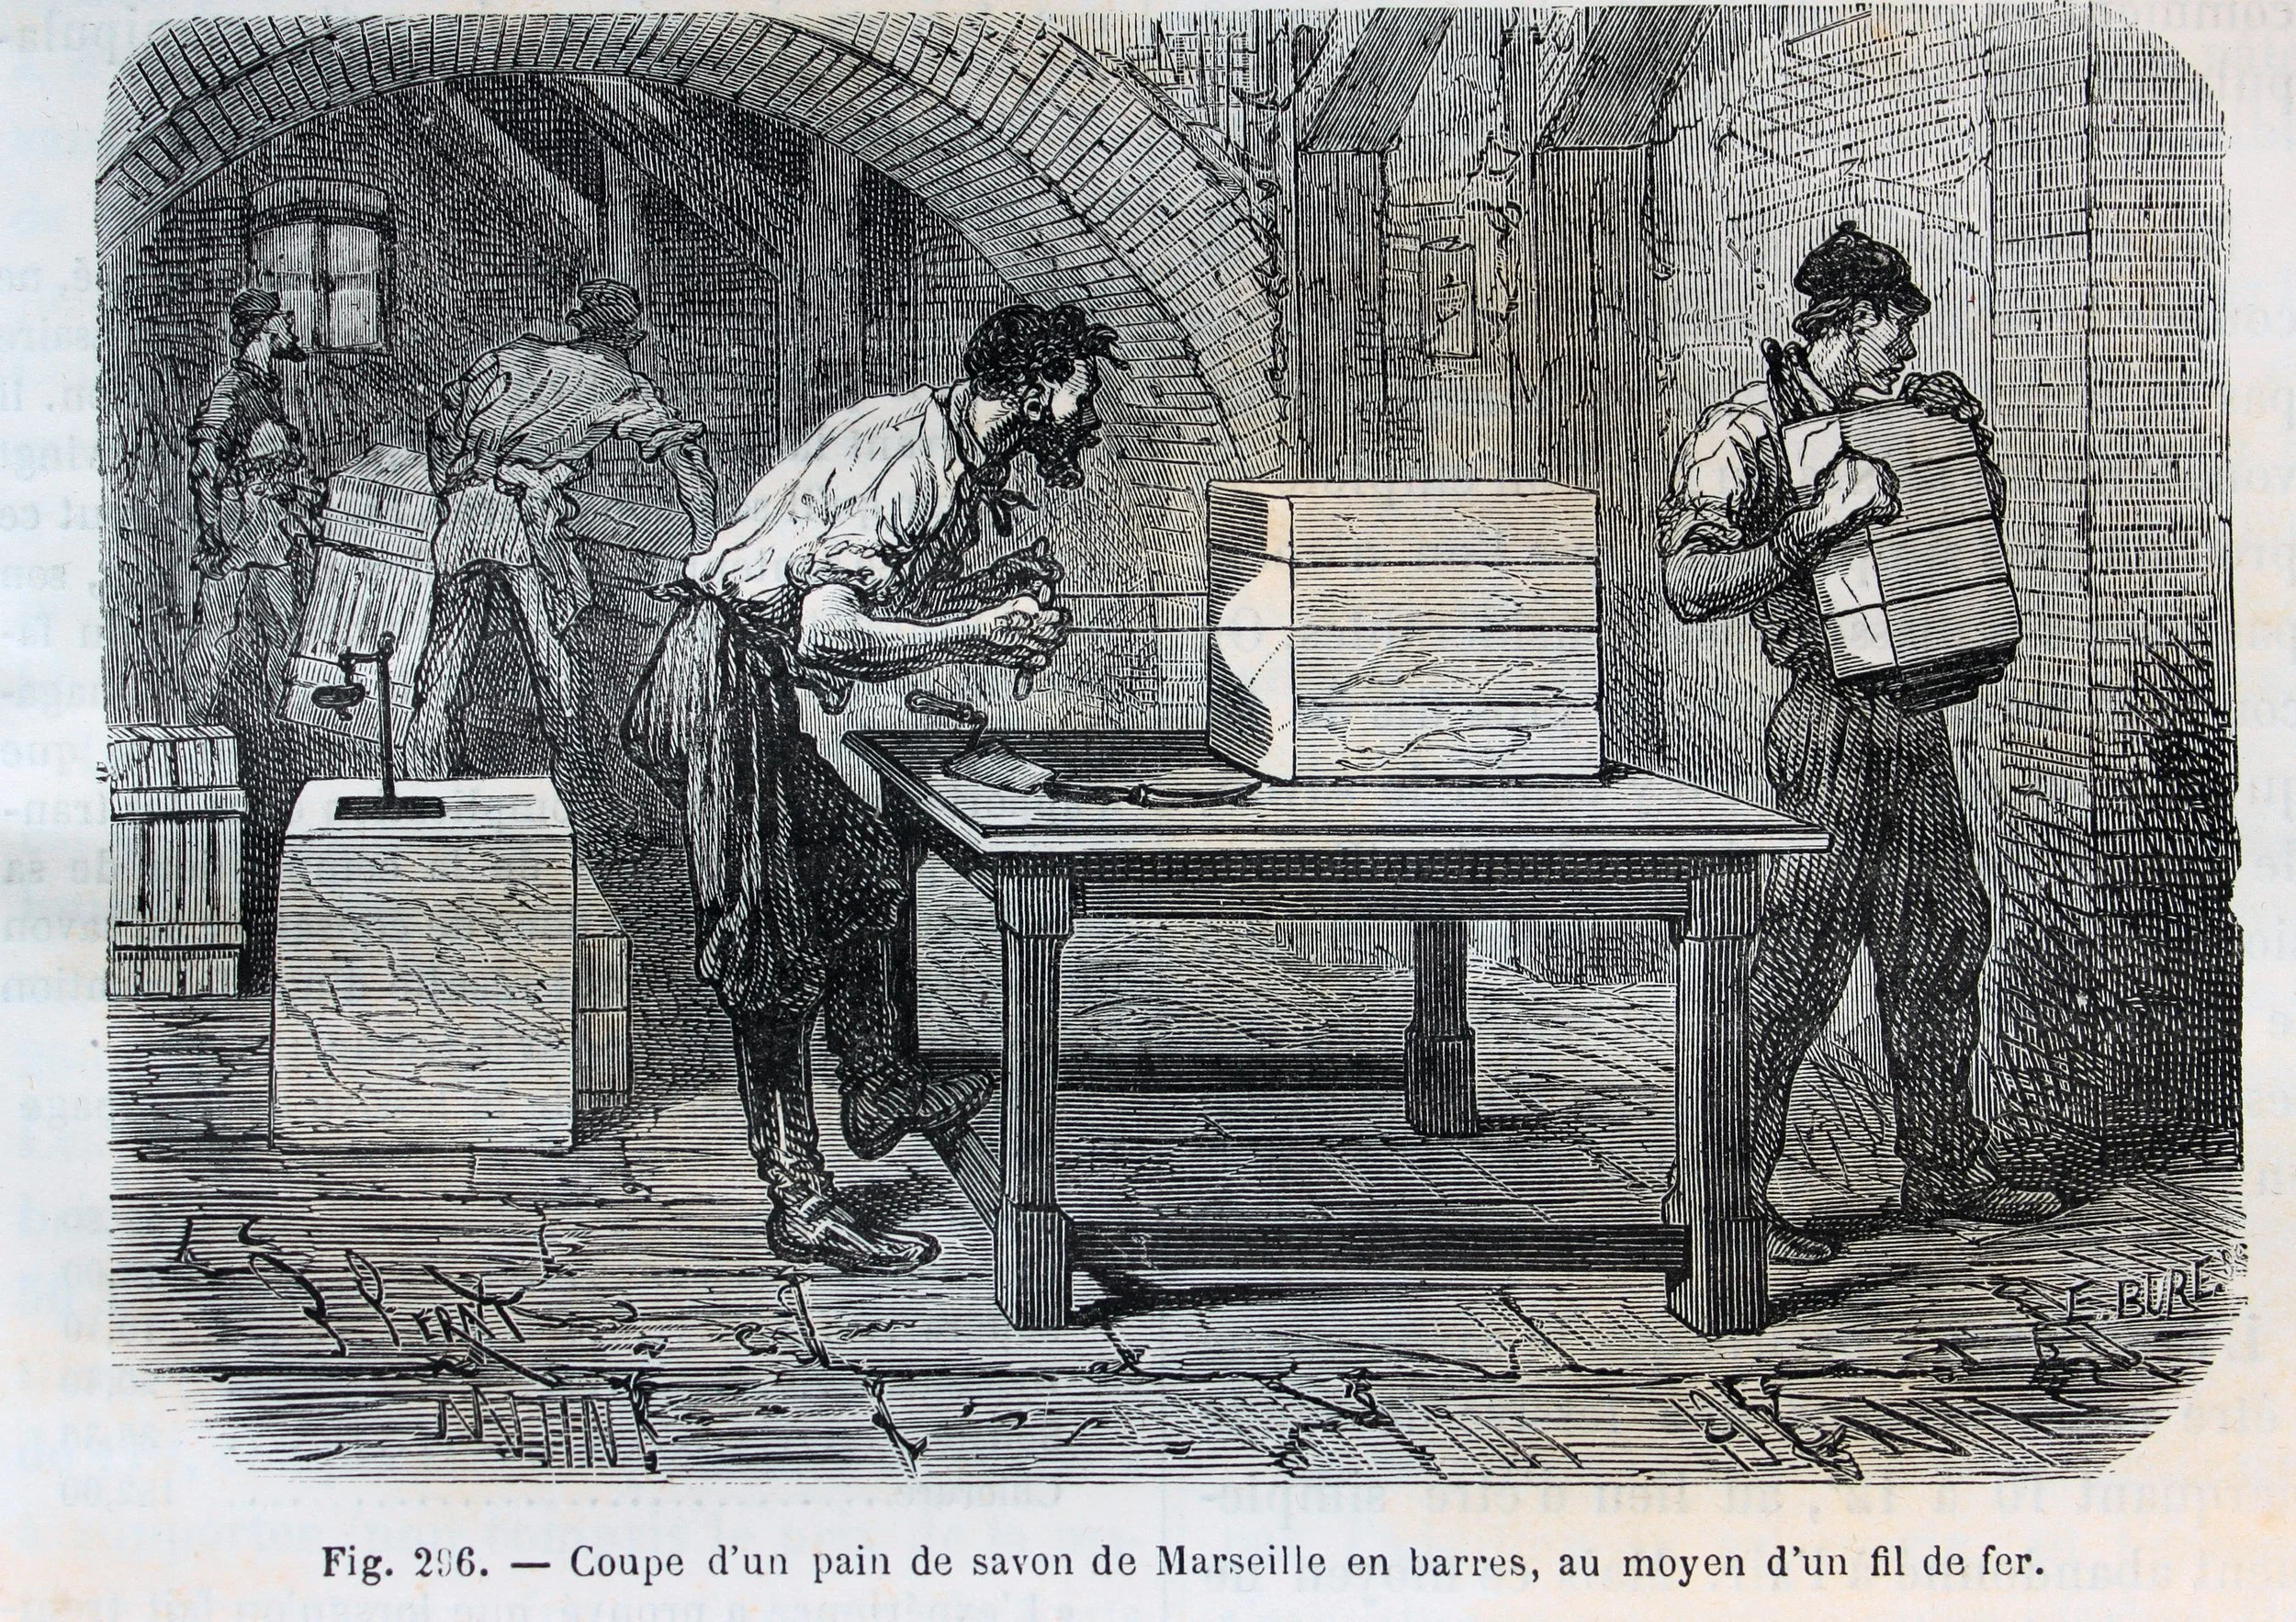
Cutting a loaf of Marseille soap into bars with a wire, from Figuier's Les Merveilles de l'Industrie (1873): the cast soap, fully set, divided at the bench. Your bars leave their molds instead of meeting the wire — but the discipline is the same one this room runs on: cast it true, let it set undisturbed, and only then handle it.
Engraving from Louis Figuier, Les Merveilles de l'Industrie (1873), via Wikimedia Commons. Public domain.
Striped and layered bars are cast one layer at a time. ★ Pour the first layer and wait until it is firm but still tacky: press it lightly with a fingertip, and it should dent without sticking. Too hot, and the new layer melts into the old one and the colors bleed. Too cool and fully hard, and the layers may separate later like pages.
Between layers, spritz the set surface lightly with rubbing alcohol. The alcohol spritz does two jobs at once: it pops any surface bubbles, and it slightly softens the set surface so the new layer grips it. This is the layer bonder's whole secret, and it takes three seconds. Then pour the next layer gently, ideally over the back of a spoon so the stream does not crater the layer below.
Check in: The first layer should dent without sticking before the next pour. What two jobs does the alcohol spritz do between layers?
❦ In your workbook: record layered casting in your own way — firm but tacky, the three-second spritz and its two jobs, and the next layer poured over the back of a spoon — copy, sketch, or note what matters.
Design Before You Pour
No base is melted until the bar exists on paper. Sketch each bar: its colors, its layers, where the botanicals sit, which base you are using. Write the pour order beside the sketch. Muddlenook's order of operations is plan, melt, pour, observe. Scholars who skip the sketch always discover, mid-pour, that they wanted the stripe on the other side.
Check in: What four things does the sketch record — and what is Muddlenook's order of operations?
❦ In your workbook: record design before pouring in your own way — colors, layers, botanical placement, and base on paper first, with the pour order written beside the sketch — copy, sketch, or note what matters.
Procedure: Two Bars, Two Designs
- Sketch. Draw both bars in your journal with colors, layers, and embed placement marked, and write the pour order for each.
- Prepare the molds. Set silicone molds or lined tins on a level, protected surface. Have the alcohol spritz, thermometer, and botanicals within reach.
- Melt the first base. Chop, melt in short bursts, stir between. Remove from heat the moment it is fluid.
- Color and scent. Stir in colorant; test a drop on white paper. Add scent only after slight cooling, if using.
- Pour with intention. Cast the first bar according to your sketch: layers, skins, embeds, spritzes between layers.
- Repeat for the second bar with the contrasting base, a different design.
- Rest. Leave both bars completely undisturbed until fully hard and cool, at least two hours. Do not poke them to check.
Check in: How long do both bars rest undisturbed — and what must be within reach before the first pour?
❦ In your workbook: record the two-bar procedure in your own way — sketch, prepare, melt, color and scent, pour with intention, repeat in contrast, and rest untouched — copy, sketch, or note what matters.
In your packet: Exercise II — The Two-Bar Design ⚒ begins here. Work it now, with your adult supervisor, or mark the place and take it as homework — your choice.
Observation
Record in your formulation journal: base type for each bar, colorants and amounts, botanicals used, approximate pour temperatures or descriptions (thin as water, thick as honey), time from pour to firm, and any defects (bubbles, bleeding layers, sunk embeds, surface film). Defects are data. The failed batch lesson (Lesson 42) will teach you to love them.
Check in: Name the six things the formulation journal records for each bar — and what are defects, in this laboratory?
❦ In your workbook: record the observation discipline in your own way — base, colorants, botanicals, pour description, time to firm, and defects written down as data — copy, sketch, or note what matters.
In your packet: Exercise III — The 48-Hour Watch ◐ begins here. Work it now, or mark the place and take it as homework — your choice.
Cleanup
Wash the measuring cup and stir sticks while still warm; soap, obligingly, cleans itself. Wipe molds dry. Return unused base to an airtight bag; it absorbs moisture from the air if left open. Cap the alcohol bottle immediately and store it away from heat. Wipe pigmented spills at once; dried pigment stains.
Check in: Why does unused base go back into an airtight bag — and what happens to the alcohol bottle the moment you finish with it?
❦ In your workbook: record cleanup in your own way — vessels washed warm, molds wiped dry, base bagged airtight, alcohol capped and away from heat, and spills wiped at once — copy, sketch, or note what matters.
Archive Entry
File in your formulation archive: the two sketches, the pour record for each bar, the observation notes, and a verdict on each design (what worked, what you would change). Date every page. A soapmaker's archive is a library of pours, and every future bar will borrow from it.
Check in: What four things are filed for the two bars — and what is a soapmaker's archive?
❦ In your workbook: record the archive entry in your own way — sketches, pour records, observation notes, and a verdict on each design, every page dated — copy, sketch, or note what matters.
Guided Observation: Reading Your Two Bars
This lesson's observation is the record itself, kept complete: you set the two finished bars beside their paper sketches and read the pour back from the evidence — base, color, placement, and defects — because a bar you cannot account for teaches nothing twice.
Work through it in order.
Open the formulation journal. Record in your formulation journal: base type for each bar, colorants and amounts, botanicals used, approximate pour temperatures or descriptions (thin as water, thick as honey), time from pour to firm, and any defects (bubbles, bleeding layers, sunk embeds, surface film).
Read the defects as data. Defects are data. The failed batch lesson (Lesson 42) will teach you to love them.
File the pour. File in your formulation archive: the two sketches, the pour record for each bar, the observation notes, and a verdict on each design (what worked, what you would change). Date every page.
Consider:
- Where did an embed end up against where the sketch placed it — and what does its final position say about the pour's viscosity at that moment?
- Which bar's color sits closer to its white-paper drop test, and what does the difference teach about the base it was cast in?
- What single sentence of your verdict will the next bar borrow first?
❦ In your workbook: record the guided observation in your own way — the six journal facts for each bar, the defects read as data, and the filed verdict — copy, sketch, or note what matters.
Materials
Everything in its place, before we begin. For this soapmaking lesson you will need:
Level One — household items
- Melt-and-pour soap base, clear or white, from a craft supplier (about 500 grams is plenty for two bars and experiments).
- A microwave-safe glass measuring cup with a pouring spout, or a small heat-safe bowl and a saucepan for a double boiler.
- Silicone molds, or a muffin tin lined with paper cups.
- Rubbing alcohol (isopropyl) in a small clean spray bottle, kept capped.
- A spoon or wooden stir stick, and a kitchen thermometer if you have one.
- Dried botanicals: lavender buds, calendula petals, or chamomile flowers. They must be fully, crisply dry.
- Color: a pinch of turmeric, cocoa powder, or paprika for natural tints; or a small amount of cosmetic mica powder if available.
- Cling film for wrapping finished bars, plus paper, pencil, newspaper, and your laboratory journal.
Level Two — historically closer
- Goat's milk, shea butter, or honey melt-and-pour base for a creamier bar.
- A wooden soap mold with a liner, the traditional casting vessel.
- Natural colorants: madder root powder, spirulina, activated charcoal, or cosmetic clays.
- Dried rosebuds, cornflower petals, or calendula from an apothecary supplier.
- A small amount of fragrance oil or essential oil (added cool, sparingly).
- A brass or steel dairy thermometer for precise pour temperatures.
Safety Notes
- Melted soap base is hot enough to burn like candle wax. Handle vessels with dry cloths or mitts, pour slowly, and keep hands and face clear of steam.
- Melt only in short bursts (20 to 30 seconds), stirring between, or over a double boiler at a bare simmer. Never boil the base and never use direct high heat.
- An adult must supervise all heating. The adult handles the microwave door and the double boiler; the scholar stirs, sketches, and pours once the vessel is safely set down.
- Rubbing alcohol is flammable. Keep the spritz bottle capped until the moment of use, spray only onto cooling soap, and never use it near the stove, microwave, or any flame.
- Cover the worktable and wear an apron or old shirt: pigmented base stains cloth, wood, and paper permanently.
- These bars are decorative display pieces. Label every finished bar with its ingredients and the date. This lesson uses no lye; do not improvise cold-process methods here.
Reflection Questions
Answer the following questions in your workbook.
- Why must every botanical embedded in soap be fully dried, and what happens if this rule is broken?
- You pour the second layer of a striped bar while the first layer is still liquid and hot. Predict the result and explain the mechanism.
- What two jobs does the rubbing alcohol spritz perform between layers?
- A scholar wants a vivid berry-red bar and plans to stir in crushed fresh raspberries. Identify the two separate problems with this plan.
- How does melt-and-pour differ from the cold-process method of Lesson 41, and why is melt-and-pour the safe starting point for a beginning soapmaker?
Workbook Checklist — Lesson 40
In my workbook I have:
- ☐ explained what a melt-and-pour base is and why it requires no lye handling — the saponification already finished at the manufacturer's works
- ☐ melted a soap base gently and safely in short bursts or over a double boiler, just melted and off the heat, with my adult supervisor at every heating — or recorded the gentle melt in full as a workbook study
- ☐ colored a base with pigments and natural colorants, drop-tested on white paper first, and predicted how alkalinity morphs natural reds, purples, and berry tones
- ☐ embedded only fully dried botanicals, snap-tested crisp, and suspended inclusions by pour-temperature control in the honey-thick window
- ☐ cast layered bars with clean adhesion — firm but tacky, an alcohol spritz between layers, the next pour over the back of a spoon
- ☐ designed both bars on paper before pouring, pour orders written, then evaluated the finished pieces after the 48-hour watch, wrapped against unwrapped
- ☐ read the Safety Briefing completely before touching the base, and kept every guardrail: heat-safe vessels, capped alcohol away from flame, protected surfaces, bars labeled and display-only, and no lye in this lesson
☐ Lesson completed Date: ___ Signature: ___
The Professor's Closing Note
Honest work, scholars: you have now cast soap without once handling lye, and your bars are honest work. Next lesson, we take up the alkali itself: saponification, trace, and cure, under the strictest safety discipline of this unit. Come to Lesson 41 rested, gloved, and exact. The crucible does not forgive wandering attention, but it richly rewards the prepared. — Professor Crimblebrew Muddlenook, Potions Laboratory • Master Apothecary • Head of House Meridies
PROFESSOR CRIMBLEBREW MUDDLENOOK
Potions Laboratory
Master Apothecary • Head of House Meridies
Cross-Class Connections

Herbology · Unit IV, Lesson 28 — Drying Herbs the Traditional Way
Come up to the Greenhouse before you cast, soapmakers, and learn the keeping your embeds depend on. In my greenhouse we hang bundles in dark, moving air and screen-dry the delicate leaves, and we judge every batch by the crispness test — a leaf that crumbles, a stem that snaps — because a botanical sealed into Professor Muddlenook's warm bar with its moisture still inside it will feed the mold his lesson warns you of. Bring me your lavender and calendula while they are still fresh, and we will make them dry enough to trust.
PROFESSOR BERYL FERNFOOT
Herbology Greenhouse • Master Herbalist • Head of House Oriens

Scrollwork · Unit II, Lesson 5 — Soot & Charcoal Ink
You judge a pour by its thickness, scholars: thin as water and your flowers sink, thick as honey and they hold. In my Scriptorium we judge an ink by the same measure and call it by its own name — viscosity. Come and mix a working carbon ink, and watch soot hold in suspension in water that wants to let it fall, and you will understand your soap base the better for having watched my ink misbehave.
PROFESSOR QUILLBERRY NOCTURNE
Scrollwork Library

Creative Arts · Unit IV, Lesson 15 — Pigments, Paints & Color Charts
Professor Muddlenook tests his color with one drop on white paper before he commits the batch. In my workshop we keep that same discipline at full size: grind a safe pigment, mull it into paint, and paint it out onto a labeled color chart another scholar could work from. Bring your turmeric golds and charcoal greys, soapmakers — we will chart them properly, on scrap first, as always.
PROFESSOR COGBRANCH TIMBERCLANK
Creative Arts Workshop
Further Reading & Sources
- Soap — history from Babylonian tablets to the modern bar
- Pears soap — the first mass-market translucent glycerin soap, 1807)
- Saponification — the chemistry behind every true soap (preview of Lesson 41)
- Glycerol — why soap draws moisture from the air
- Lemon soap object card — scented soap made in Williamsburg, Virginia, in the 1700s (Kansas Historical Society)
Browse the Potions shelf in the school Library for readable editions of these works.
Finis. In good order, scholars.
LESSON 40 · MELT & POUR SOAP
Try It in the Laboratory
The lesson taught the base and the pour. The Experiment builds your own melt-and-pour soap — choose your base, your botanical, and it writes the recipe, with the discoloration notes built in.
— Professor Crimblebrew Muddlenook, Potions Laboratory
Submit your work for this lesson using the form below.
CONTINUE IN THE POTIONS LABORATORY
← Previous · Lesson 39: Crystalline Scrubs & Bath Preparations Next · Lesson 41: Soapmaking: The Cold-Process Crucible →
Unit V — Botanical Formulations Potions Laboratory — All 52 Lessons
The rest of Unit V: Lesson 35 · Balms & Salves · Lesson 36 · Candles & Wax · Lesson 37 · Sachets & Blends · Lesson 38 · Whipped Emulsion · Lesson 39 · Crystalline Scrubs · Lesson 41 · Cold-Process Soap · Lesson 42 · The Failed Batch · Lesson 43 · Experimental Formula · Lesson 44 · Formulation Matrix