

POTIONS
Unit V · Lesson 35BALMS, SALVES & CERATES
Professor Crimblebrew Muddlenook
Master Apothecary • Potions
Head of House Meridies • School of Evershade
Professor's Introduction

Unit V moves the laboratory from extraction into formulation: you will now build finished preparations. This first lesson teaches the semi-solid family: balms, salves, cerates, unguents, and ointments, and the formulator's two great levers: the wax-to-oil ratio and texture reading. You will make a simple beeswax-and-olive-oil balm in the double boiler (two stacked vessels, the lower one's simmering water warming the contents of the upper one), learn to judge its texture the way an apothecary does, and file the batch in your archive as a display preparation.
Come in, and mind the labels. For four units you have gathered, judged, ground, filtered, and extracted. Your shelves hold oils, waters, tinctures (alcoholic preparations made by soaking a botanical in spirit), and resins (hardened plant secretions, sticky when fresh, that harden on exposure to air), each one labeled and waiting. Today we begin to combine them.
Formulation is where the apothecary's patience becomes visible. An infused oil — oil that has drawn compounds from a botanical steeped in it — is a fine thing, but it runs off the skin and stains the shelf. Blend that same oil with wax in the right proportion, and it becomes a balm. It stays where it is put, it spreads under the finger, and it keeps for months. The difference between a spill and a preparation is often nothing more than wax, heat, and judgment.
A word of orientation before we touch the stove. The words we use today (balm, salve (a thick ointment spread on as a protective layer), cerate (a firm, wax-based preparation), unguent (a soft, spreadable ointment based on oils, waxes, or fats), ointment) are old workshop words, and you met most of them in Lesson 19 among the oils and waxes. We return to them now as things you will make, not merely materials you will study. And I must be plain about one point, as I will be in every formulation lesson: nothing we make in this laboratory is medicine, and no preparation in this course promises healing. A balm protects. A salve soothes by its texture. That is the honest boundary, and we will not cross it.
Everything in its place, scholars. Wash your hands, and let us begin.
— Professor Crimblebrew Muddlenook, Potions Laboratory • Master Apothecary • Head of House Meridies
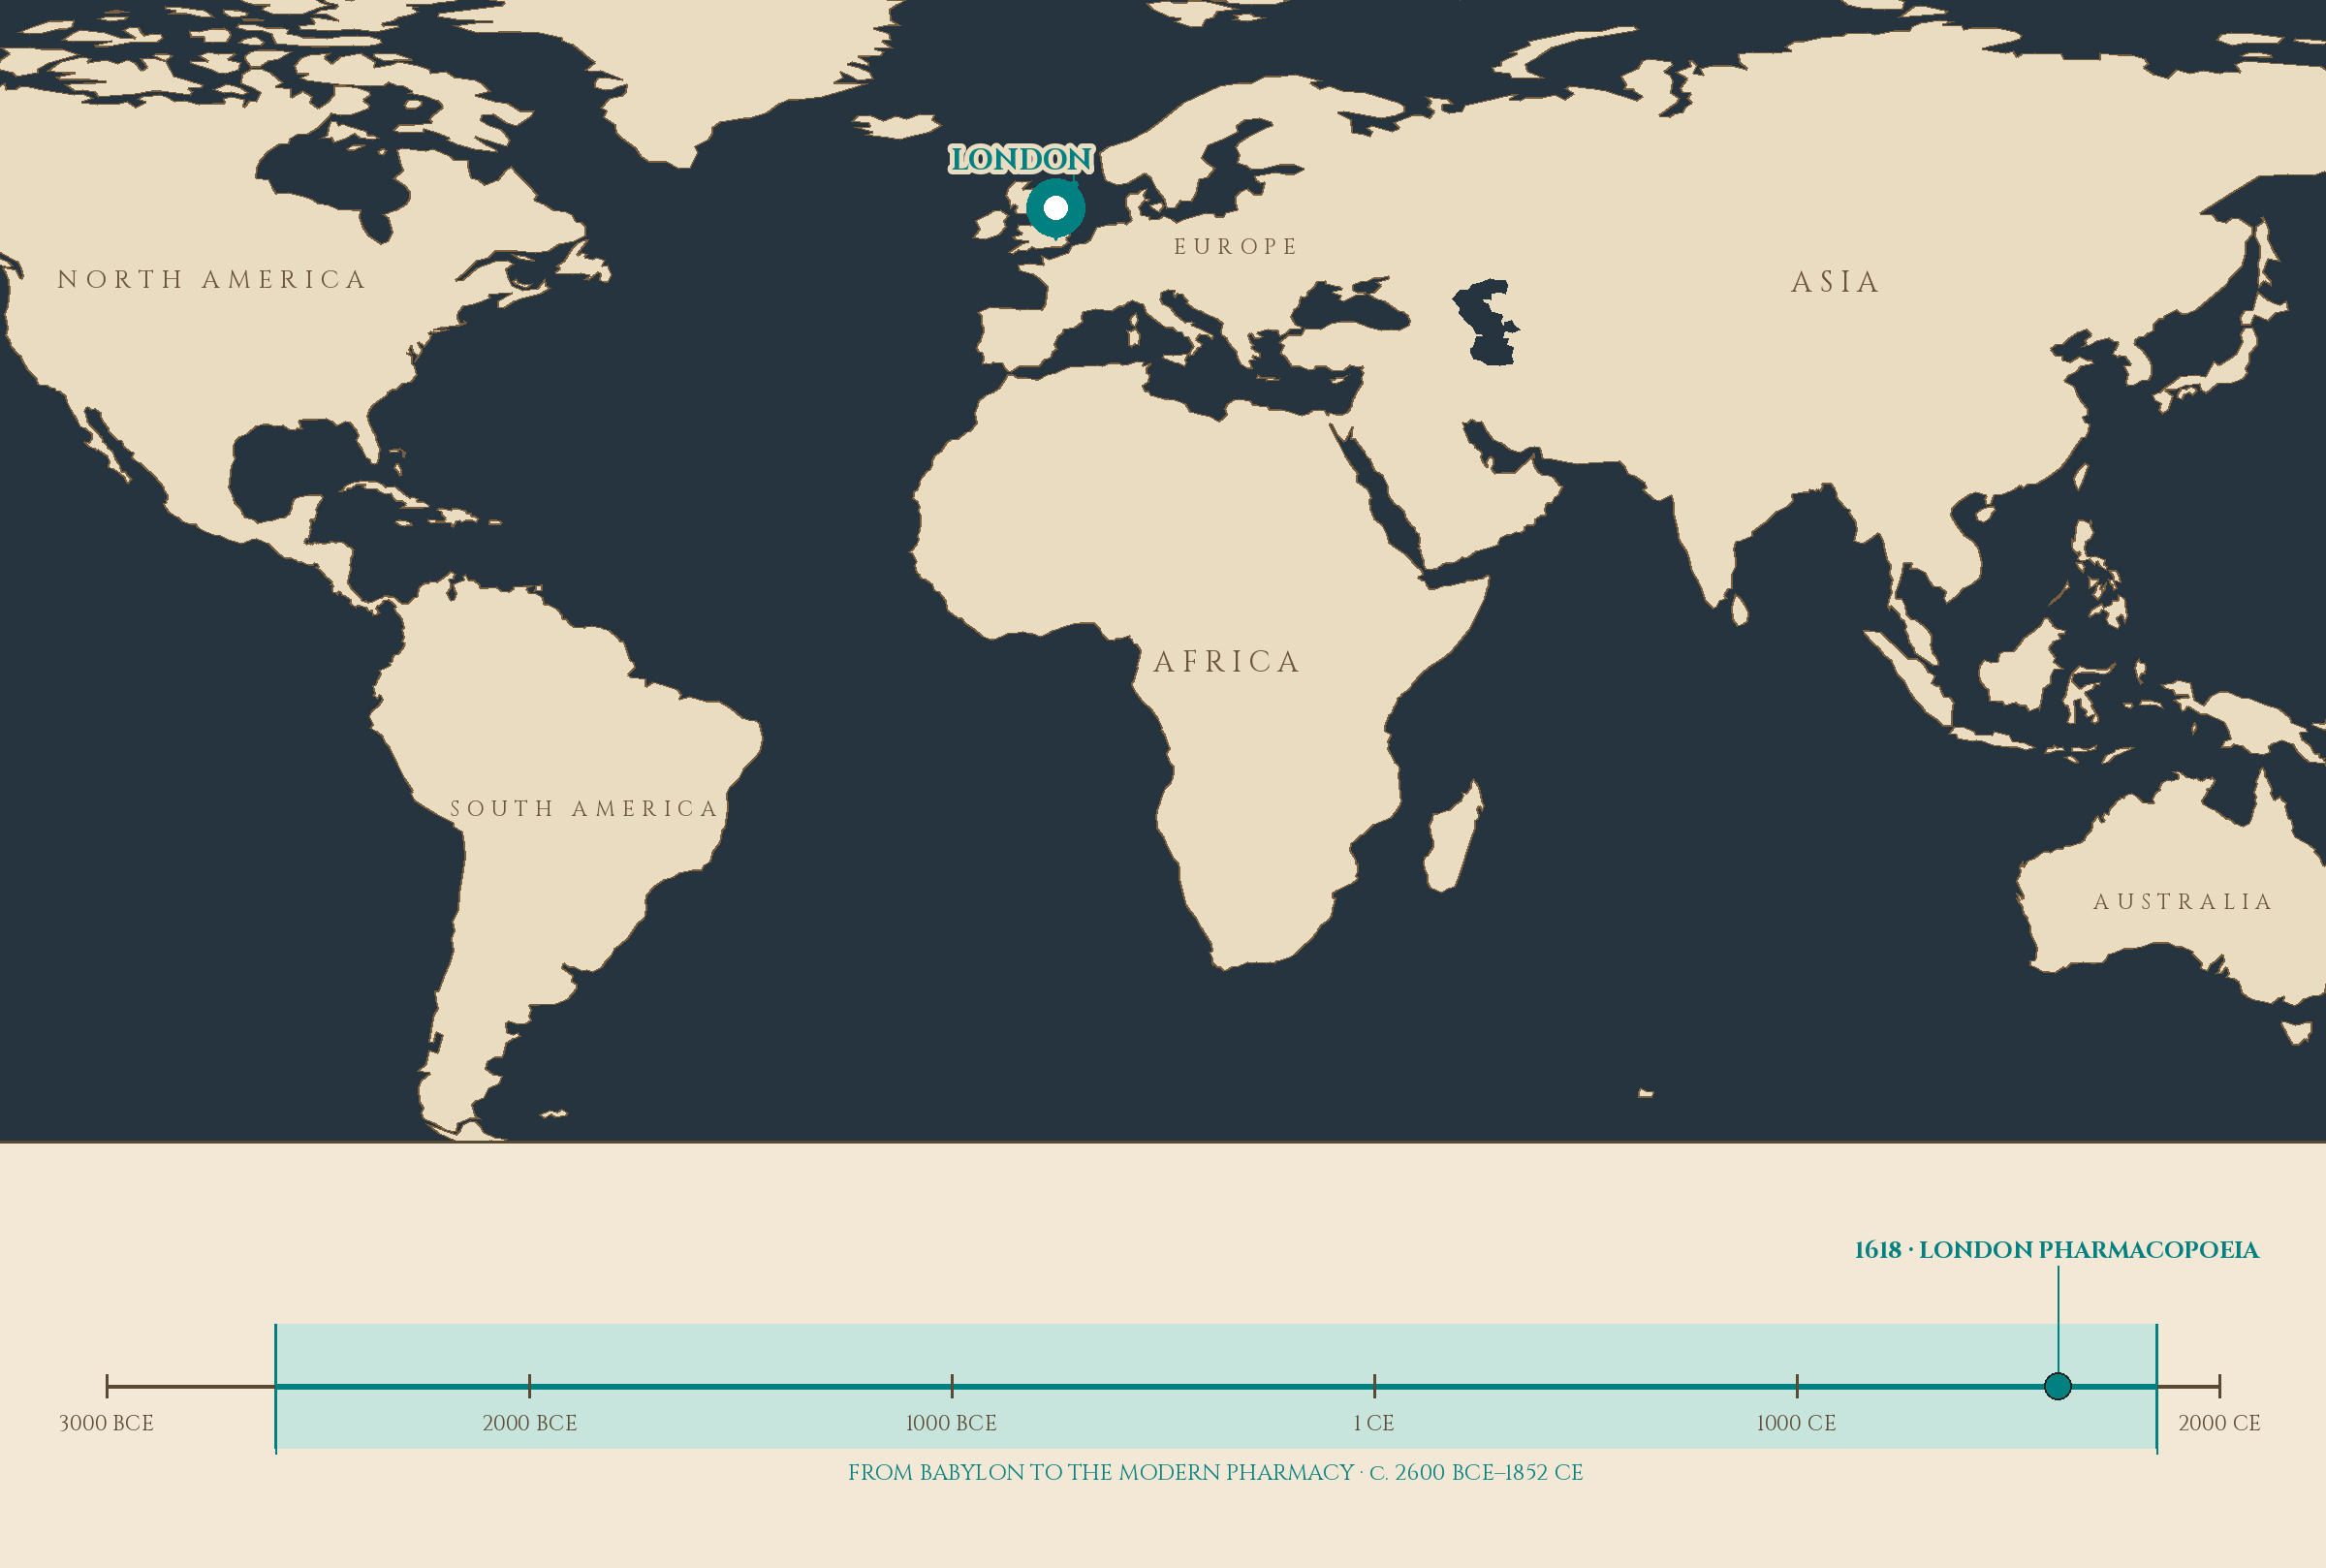
Pin: London. Timeline stop: 1618 · LONDON PHARMACOPOEIA.
Lesson Objectives
By the end of this lesson, you will be able to:
- Name the five members of the semi-solid family (balm, salve, cerate, unguent, ointment) and explain what distinguishes each in the apothecary's vocabulary
- Explain how the wax-to-oil ratio controls firmness, and predict the texture of a 1:4, 1:3, and 1:2 preparation
- Demonstrate the double boiler method for melting wax into oil safely
- Judge a finished balm by spreadability, graininess, and the cooling curve, and describe what each observation means
- Make a simple beeswax-and-olive-oil display balm, label it correctly, and file a batch record in your archive
- Describe two historical salve systems and explain why apothecaries kept both simple and compound formulas
Reading this lesson: ★ marks the passages to remember. They carry the ratio standard, the three texture readings, and the safety spine this lesson is assessed by, and they return in the Unit V Quiz, in the lessons ahead, and at the capstone. Check in questions ask the material back as you go; answer them in your workbook when you meet them.
Working this lesson: Your assignment packet is the first download on this page. Work in it as the lesson moves along, answering each exercise as its subject is taught — or read the lesson through for your notes and take the exercises as homework afterward. Both are proper ways to sit this class. Signposts in the reading tell you where each exercise belongs. Written answers are short answers in your own words; a few honest lines are worth more than a filled page.
Your Assignment Packet
This lesson's exercises live in its packet: the Lexicon Handout (every term, course terms marked ◆), Materials, Guided Practice — the display balm procedure in its seven steps, the ratio table, and the three texture readings, printed in full so you can work through them at your own bench — the Assignment Manual with its self-check, the Reflection Questions, and the Workbook Checklist. Download the packet before you begin and keep it beside you as you read.
Safety Briefing
Read this section completely before touching any materials. Professor Muddlenook's first rule of the laboratory is that no procedure begins until the safety briefing is understood.
Heated oils and wax. This lesson's procedure melts beeswax into warm olive oil. Hot oil and hot wax burn skin on contact, and they do not cool quickly. Use a double boiler (Lesson 35 Lexicon) for all melting. Never melt wax over direct flame or on a bare burner. Keep a dry cloth or oven mitt at hand for handles, and keep your face and loose sleeves away from rising steam.
The double boiler rule. The lower pot holds simmering water; the upper vessel holds the wax and oil. Never let the lower pot boil dry. Check the water level before you begin and add hot water if it runs low. Never leave a heating vessel unattended, even for a moment. An adult must be present for every heating step in this lesson.
Wax on skin. If hot wax touches skin, cool the spot under cool running water immediately. Do not try to peel cooling wax off; let water do the work. Small contact burns are treated with cool water and reported to an adult. This is why we melt gently and pour carefully.
Display-only labeling. Everything you make in this lesson is a study preparation. Label every tin or jar "DISPLAY ONLY — NOT FOR CONSUMPTION" before you pour. Preparations made in this course are never medicine, never food, and never cosmetics for use; they are material studies for the archive.
Cleanup and drains. Never pour melted wax or oily mixtures down a sink drain: wax hardens in pipes and causes blockages. Wipe vessels with paper towels while still warm, then wash with hot water and soap. Dispose of paper towels in the household waste.
A standing rule for this class. Nothing in the Potions Laboratory is ever presented as medicine, and no lesson will ever give you amounts to take. We study how materials behave, how they were used historically, and how to handle them safely. That is the whole of it, and it is plenty.
Before any preparation touches more than a fingertip: test a little on the inside of your wrist, wait a full day, and do not use it if the skin reddens, itches, or stings. Never use a preparation on broken or irritated skin.
Check in: What must be present for every heating step in this lesson — and what words must be written on every tin or jar before you pour?
❦ In your workbook: record the safety briefing in your own way — heated oils and wax, the double boiler rule, wax on skin, display-only labeling, cleanup and drains, and the standing rule — copy, sketch, or note what matters.
Mise en Place
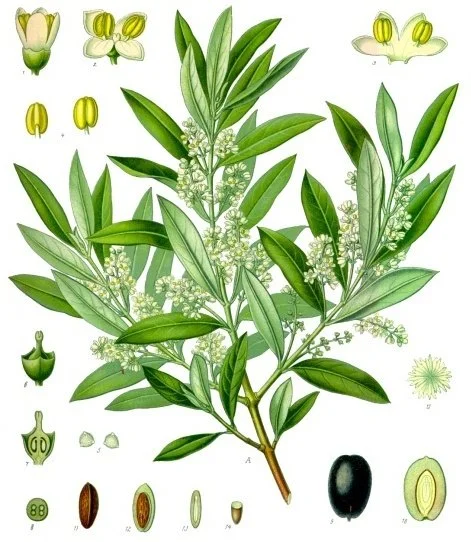
The olive, Olea europaea — the tree whose oil is this lesson's oil phase: blossom, leaf, and fruit on one plate, the way the tradition recorded a material before it was put to work. A study portrait; your oil is judged at the bench by the ratio you weigh, never from a picture.
Olea europaea, plate 229 from Köhler's Medizinal-Pflanzen, via Wikimedia Commons. Public domain.
A meticulous laboratory begins with everything gathered before work starts. Assemble the following.
Level One — household items:
- Beeswax: a small block or a handful of pellets, about 15 grams (roughly one tablespoon of pellets). Craft-store or farmers'-market beeswax is fine.
- Olive oil: 45 milliliters (about three tablespoons). Plain olive oil, not extra-virgin; the refined kind behaves more predictably.
- A double boiler setup: a saucepan plus a heat-safe bowl or smaller pot that sits securely on top without touching the water below. A metal mixing bowl over a saucepan works well.
- A kitchen scale if you have one, or measuring spoons for the ratio worksheet.
- Small clean tins or jars with lids: two or three, for the batch and its variants.
- Paper labels and a pen, plus a strip of masking tape.
- Paper towels, a wooden stir stick or chopstick, and an oven mitt or dry cloth.
- Your laboratory journal and a pencil for the batch record.
Level Two — historically closer:
- Beeswax in a block, cut with a warm knife, as the apothecary cut it from the comb block.
- A small brass or copper saucepan for the water bath, with a ceramic or glass inner vessel.
- A glass stirring rod instead of the chopstick.
- Paper labels written in ink, sealed with a drop of wax, in the apothecary manner.
Check in: Which Level One item does the ratio worksheet depend on if you have it — and what does the Level Two list change about the labels?
❦ In your workbook: record the mise en place in your own way — the Level One bench as you will assemble it, and the Level Two historically closer forms — copy, sketch, or note what matters.
The Semi-Solid Family
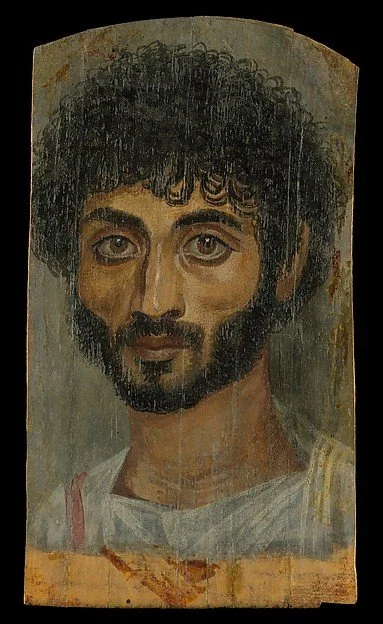
A portrait painted in encaustic — pigment suspended in hot beeswax — on limewood, Roman-era Egypt, 160–180 CE. The same wax this lesson melts gently for balms here carries a face across eighteen centuries: beeswax is the ancient standard because it lasts, and the ratio table is how you borrow that lastingness by measure.
Portrait of a thin-faced, bearded man, encaustic on limewood, 160–180 CE. The Metropolitan Museum of Art, Rogers Fund, 1909 (object 547856). Public domain (Met Open Access).
The apothecary's vocabulary for semi-solid preparations is old, and the words overlap in the historical record: the same preparation might be called a salve in one dispensatory and an unguent in another. For this course we use the words the way Lesson 19 defined them, with one addition.
Balm (Lesson 19, canonical). A protective preparation, usually firmer than an ointment, traditionally based on waxes and oils. In this course the word is used for protective, lingering preparations, never as a promise of healing.
Salve (Lesson 19, canonical). A soothing-textured preparation, historically the general workshop word for anything spreadable that was neither liquid nor solid.
Cerate (Lesson 19, canonical). A wax-based preparation named from the Latin cera, wax; firmer than a salve, made to hold its shape.
Unguent (Lesson 19, canonical). From the Latin unguentum, an anointing preparation; the classical and medieval word for a soft, fatty preparation, often olive-oil based.
Ointment. The modern workshop word for a smooth, homogeneous semi-solid preparation. In this lesson we use ointment for any well-made, lump-free preparation regardless of its exact ratio. It is a standard of quality as much as a category.
The distinctions matter less than the discipline behind them: every one of these words names a preparation whose texture was chosen, not accidental. Choosing the texture is the formulator's work, and the instrument for choosing it is the ratio.
Check in: Name the five members of the semi-solid family — and which single word of the five names a standard of quality as much as a category?
❦ In your workbook: record the semi-solid family in your own way — the five words with what distinguishes each, and the discipline behind them: texture chosen, not accidental — copy, sketch, or note what matters.
Wax-to-Oil Ratios: The Formulator's Lever
A balm is, at its simplest, wax plus oil. The wax gives structure; the oil gives spreadability. Change the proportion and you change the preparation. This is the first great lever of formulation, and it is beautifully predictable.
The ratio is always stated wax : oil, by weight when you can weigh, by volume when you must measure.
| Ratio (wax : oil) | Character | Behavior |
|---|---|---|
| 1 : 5 | Very soft | Barely holds shape; spreads like thick oil |
| 1 : 4 | Soft | Dips under the finger; good for a gentle balm |
| 1 : 3 | Standard | The classic balm: firm in the tin, yielding under the finger |
| 1 : 2 | Firm | Holds a peak; a proper cerate |
| 1 : 1 | Very firm | A wax bar; useful for sticks, too hard for tins |
A few truths about ratios that every formulator learns:
- The oil matters. A light oil like fractionated coconut oil makes a softer preparation at the same ratio than a heavier olive oil. When you change oils, expect to adjust.
- The wax matters more. Beeswax is the traditional standard and the one we use today. Harder waxes (candelilla, carnauba) need less wax for the same firmness; softer ones need more. Paraffin wax, the 19th-century petroleum product, makes a glossier but less traditional preparation.
- Temperature matters most of all. A balm that is perfect in a cool laboratory turns soft in a warm kitchen. Historical apothecaries adjusted ratios by season: stiffer in summer, softer in winter. You will learn to do the same.
Sealed note the second. Scholars, I once watched an apprentice double the wax "to be safe" and produce a preparation so firm it could have sealed a letter. The ratio is not a suggestion. Weigh your wax, measure your oil, and write both numbers in the batch record before you heat anything. The laboratory forgives many mistakes; it does not forgive guessing.
— Professor Crimblebrew Muddlenook, Potions Laboratory • Master Apothecary • Head of House Meridies
Check in: At which ratio does a preparation hold a peak as a proper cerate — and which of the three truths (oil, wax, temperature) matters most of all?
❦ In your workbook: record the wax-to-oil ratios in your own way — the five-row table from very soft to very firm, the ratio stated wax : oil, and the three truths about oil, wax, and temperature — copy, sketch, or note what matters.
In your packet: Exercise I — The Ratio Worksheet ⚒ begins here. Work it now, or mark the place and take it as homework — your choice.
Texture Balancing: Reading the Balm
The second great lever is judgment: reading the texture of what you have made and knowing what to adjust. Apothecaries read texture with three tests.
Spreadability. Scoop a pea-sized amount and spread it on a clean glass tile or the back of a spoon. The preparation is display-only and never a cosmetic for use, so the test runs on tile or spoon, never on skin, and is wiped off immediately after. A good balm glides with light pressure and leaves an even, thin film. If it drags and skips, it is too firm: more oil next batch. If it slides like liquid and will not stay put, it is too soft: more wax next batch.
Graininess. Press a small amount between the back of a spoon and a glass tile and draw them apart. A well-made balm spreads perfectly smooth. Grit or grain means the wax cooled too quickly or was stirred unevenly as it set, and the wax crystallized into grains instead of a smooth matrix. Graininess is the most common beginner fault, and the cure is in the cooling: pour at the right moment and leave the tin completely still while it sets.
The cooling curve. Watch the balm as it cools in the tin. It should pass from liquid to a soft skin on the surface, then firm evenly from the edges inward over twenty to forty minutes. If the center sinks or cracks, the tin was moved during setting or cooled too fast (a cold windowsill will do it). A cracked surface is a record of impatience. Note it in the batch record and do not move the next tin.
★ These three readings (spread, grain, cooling) are the whole of texture balancing. Write all three in every batch record. Over the course of Unit V you will build a personal library of what each ratio feels like, and your hands will learn what your eyes now must be taught.
Check in: A balm drags and skips under the finger, and a second balm's center has sunk and cracked. What does each reading tell the formulator to change?
❦ In your workbook: record texture balancing in your own way — the three tests, what a good balm does under each, and what each fault (dragging, grain, a sunk or cracked center) directs you to change — copy, sketch, or note what matters.
In your packet: Exercise II — The Texture Reading ◐ begins here. Work it now, or mark the place and take it as homework — your choice.
Historical Salve Systems
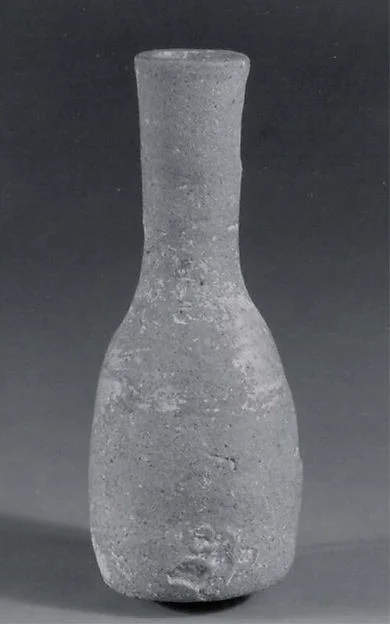
An unguentarium: the bottle an unguent traveled in, of the kind the unguentarii of Rome sold in small flasks and boxes near the baths. Packaging and labeling were part of the craft from the beginning — which is why your tins are labeled before you pour.
Unguentarium, ceramic, Nabataean, ca. 1st century CE. The Metropolitan Museum of Art, Gift of the American Expedition to Petra, 1967 (object 325888). Public domain (Met Open Access).
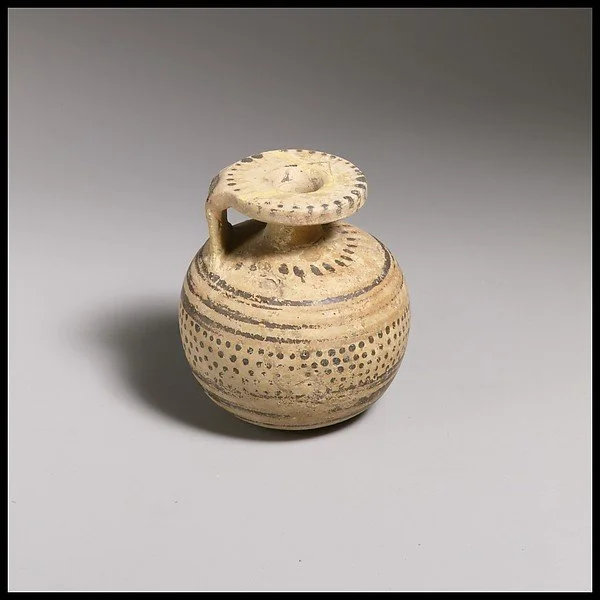
An aryballos, the small flask that carried oil drop by drop. The unguentarii's soft preparations began in this world: oil too precious to pour freely, kept in vessels sized to the hand. Your balm is that same oil, given structure by wax so it stays where it is put.
Aryballos, terracotta, Italic (Etruria), 6th century BCE. The Metropolitan Museum of Art, Purchase, 1896 (object 246117). Public domain (Met Open Access).
Semi-solid preparations are among the oldest formulations in the record, because the need they serve is so basic: something that stays where it is put.
Galen's cold cream (Lesson 19) is the famous ancestor: the 2nd-century physician's emulsion of wax, oil, and water, still recognizable in the structure of modern creams. It belongs to the emulsion family you will meet in Lesson 38, but its wax-and-oil skeleton is the same skeleton you are building today.
The unguentarii of Rome were the makers and sellers of unguents: perfumed oils and soft preparations sold in small flasks and boxes. Their shops stood near the baths, and their trade was as much about fragrance and presentation as about the preparation itself. The lesson for us: packaging and labeling were part of the craft from the beginning, which is why your tins must be labeled before you pour.
Simple versus compound. The old dispensatories divided preparations into simples (one active ingredient in a base) and compounds (several ingredients combined). The London Pharmacopoeia of 1618, the book that standardized English apothecary practice, listed its unguents with exact weights, and its compound formulas ran to a dozen ingredients. The discipline we borrow from them is not their recipes but their record-keeping: every ingredient weighed, every step written, every batch reproducible.
The waxes themselves have a history. Beeswax is the ancient standard, gathered from hives for thousands of years. Tallow served where beeswax was scarce. And in 1830 the German chemist Karl von Reichenbach isolated paraffin wax from wood tar, a cheaper, cleaner-burning wax that transformed candle-making and eventually found its way into preparations as well. It makes a glossier balm than beeswax, but the traditionalist keeps beeswax for the archive and notes paraffin as the modern alternative.
Check in: What discipline does this lesson borrow from the London Pharmacopoeia of 1618 — their recipes, or their record-keeping — and what three record habits name it?
❦ In your workbook: record the historical salve systems in your own way — Galen's cold cream, the unguentarii of Rome, simple versus compound, and the history of the waxes from beeswax to paraffin — copy, sketch, or note what matters.
In your packet: Exercise III — The Historical Salve Study ✎ begins here. Work it now, or mark the place and take it as homework — your choice.
The Procedure: Making the Display Balm
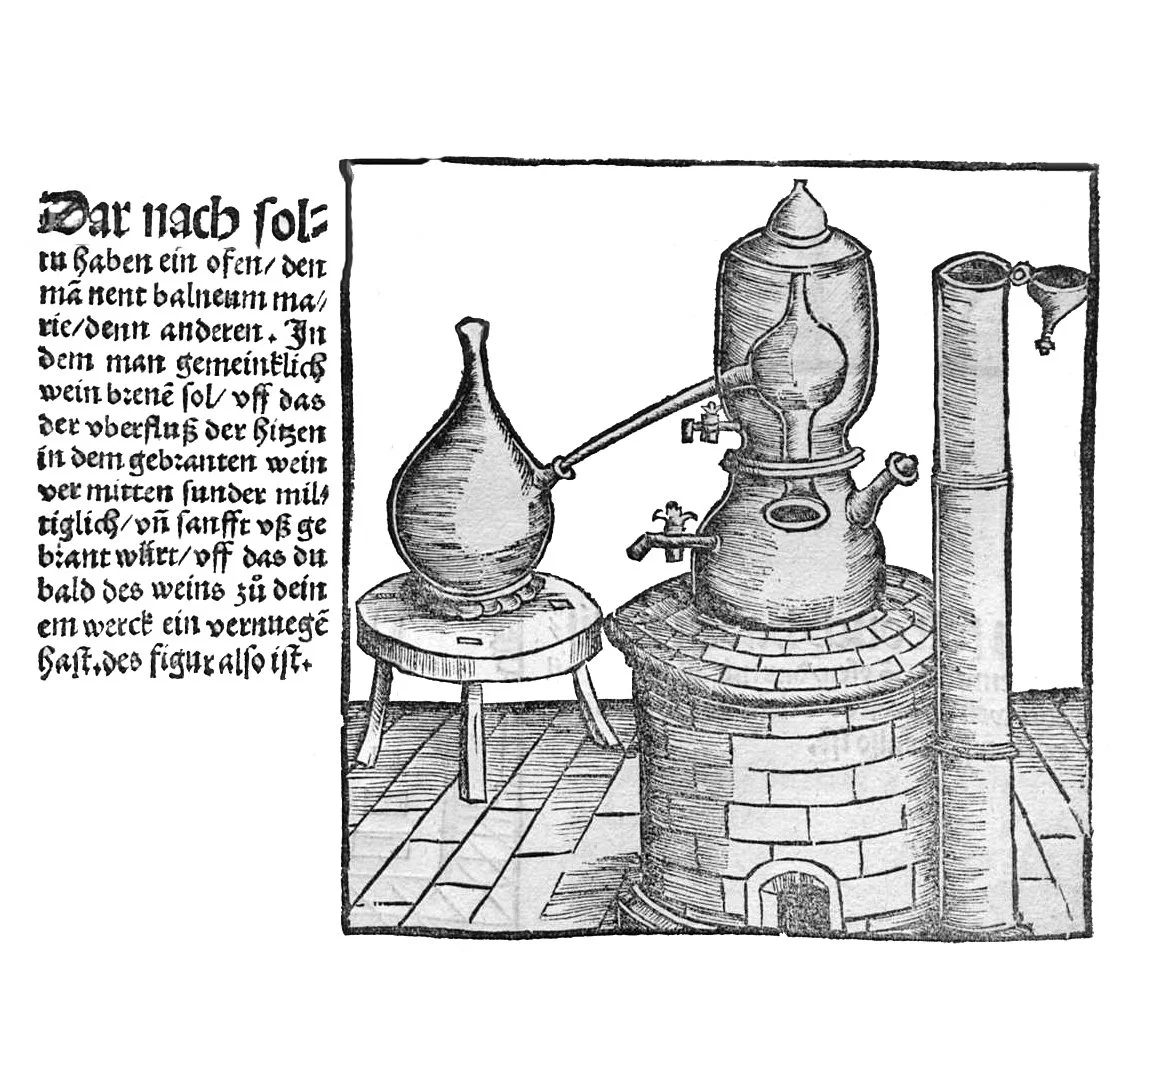
The water bath at work: Brunschwig's woodcut of a still heated in Maria's bath — the furnace is lettered, in the prose beside it, a balneum marie. Your double boiler is this bath on a modern stove: a lower vessel of simmering water warming an upper one, so wax melts gently and never meets direct flame.
Hieronymus Brunschwig, distillation furnace woodcut (1512), via Wikimedia Commons. Public domain.
Today you will make a simple beeswax-and-olive-oil balm at the standard 1:3 ratio. It is a study preparation: display-only, labeled before pouring, filed in the archive.
Step 1 — Prepare the labels. Write on each label: the preparation name ("Standard Display Balm, 1:3"), today's date, and "DISPLAY ONLY — NOT FOR CONSUMPTION." Set the labels beside the tins. Muddlenook's rule: the label is written before the heat is lit.
Step 2 — Weigh and measure. Weigh 15 grams of beeswax (about one tablespoon of pellets). Measure 45 milliliters of olive oil (about three tablespoons). This is the standard 1:3 ratio by rough volume, one part wax to three parts oil: the classic balm of the ratio table. Write both numbers in your journal now.
Step 3 — Build the double boiler. Fill the saucepan one-third full with water and bring it to a bare simmer: small bubbles, not a rolling boil. Set the heat-safe bowl on top; it must sit securely without touching the water. An adult must be present from this step onward.
Step 4 — Melt the wax into the oil. Place the beeswax and the olive oil together in the upper bowl. Stir gently with the wooden stick as the wax melts. Do not rush with higher heat: gentle melting gives a smoother preparation. When the last fleck of wax has disappeared and the liquid is clear and uniform, remove the bowl from the heat using the oven mitt.
Step 5 — The spoon test. Dip the wooden stick and let a drop fall onto a cool saucer. Wait one minute. Touch the drop: at 1:3 it should dent softly under the finger. This is your preview of the batch's texture. If you are making variants later, this test is how you compare ratios.
Step 6 — Pour. Pour the liquid into the prepared tins in one steady motion. Fill each tin nearly to the top. Then, and this is the hard part, do not touch them. Set the tins somewhere at room temperature, away from drafts and cold windowsills, and leave them completely still for at least one hour.
Step 7 — Label and record. Affix the labels. In your journal, write the batch record: date, wax weight, oil volume, ratio, melting notes, cooling observations, and the three texture readings once the balm has set.
Check in: From which step onward must an adult be present — and what seven things does the batch record hold?
❦ In your workbook: record the procedure in your own way — the seven steps from labels written first to the batch record filed last, the 15 grams and 45 milliliters, and the hour of stillness — copy, sketch, or note what matters.
Observation: What the Balm Teaches
Return to the tins after one hour. Read each balm the way the lesson taught you.
- Surface: smooth and even, or cracked, sunken, or wrinkled? Note what the cooling curve tells you.
- Firmness: press gently with a clean fingertip. Does it yield like the classic balm, or is it softer or firmer than you expected?
- Spreadability: the glass-tile test, spread thin on a clean tile (or the back of a spoon) and wiped off immediately after.
- Graininess: the spoon-and-tile test, a small amount pressed thin and drawn apart.
Write all four observations in the batch record, then write one sentence of formulator's judgment: next batch, I would change ___. That sentence is the most valuable line in the record. Formulation is learned in the revision, not in the first pour.
If your balm is grainy, you have learned the cooling lesson firsthand, and you are in excellent historical company. Note it, and pour the next batch a little cooler and leave it a little more still.
Check in: What is the most valuable line in the batch record — and where is formulation learned, in the first pour or in the revision?
❦ In your workbook: record the observation in your own way — surface, firmness, spreadability, and graininess read in order, and your own formulator's judgment sentence — copy, sketch, or note what matters.
Cleanup
Wax cleanup is a discipline of its own. While the bowl is still warm, wipe it thoroughly with paper towels, then wash with hot water and soap. Never pour wax or oily liquid down the drain: it hardens in pipes. Soak the wooden stick in hot soapy water and wipe clean. Wash your hands. Return every tool to its place; the laboratory is reset only when everything is where it belongs.
Check in: Why is the bowl wiped while it is still warm — and when is the laboratory reset?
❦ In your workbook: record the cleanup in your own way — warm wiping before washing, the drain rule, and the reset standard — copy, sketch, or note what matters.
Archive Entry
File the batch record in your potions journal under a new section: Formulation Records. Each entry holds the date, the full ratio, the texture readings, the formulator's judgment sentence, and a small sketch or description of the tin. Future lessons will add emulsion records, scrub records, and soap records beside it. The journal is becoming a formulary: the apothecary's own book of preparations.
Check in: Under what new section of your archive is the batch record filed — and what five things does each entry hold?
❦ In your workbook: record the archive entry in your own way — the Formulation Records section, its five holdings, and the records future lessons will add beside yours — copy, sketch, or note what matters.
Guided Observation: Reading a Finished Balm
This lesson's observation is bench work, done with your own tins an hour after the pour: you read a finished balm the way the lesson taught you, surface first and judgment last — because a formulator who cannot read a batch cannot revise it.
Work through it in order.
Read the surface. Surface: smooth and even, or cracked, sunken, or wrinkled? Note what the cooling curve tells you.
Press for firmness. Firmness: press gently with a clean fingertip. Does it yield like the classic balm, or is it softer or firmer than you expected?
Run the two texture tests. Spreadability: the glass-tile test, wiped off immediately after. Graininess: the spoon-and-tile test.
Write the judgment sentence. Write all four observations in the batch record, then write one sentence of formulator's judgment: next batch, I would change ___. That sentence is the most valuable line in the record. Formulation is learned in the revision, not in the first pour.
Consider:
- Which of the four readings surprised you most, and what ratio or cooling change does it point to?
- If your balm is grainy, you have learned the cooling lesson firsthand, and you are in excellent historical company. What will you pour cooler, and leave more still, next batch?
- What single sentence in this lesson would you write at the head of your Formulation Records?
❦ In your workbook: record the guided observation in your own way — the surface read, the firmness pressed, the two texture tests run, and the judgment sentence written — copy, sketch, or note what matters.
Materials
Everything in its place, before we begin. A meticulous laboratory begins with everything gathered before work starts. Assemble the following.
Level One — household items
- Beeswax: a small block or a handful of pellets, about 15 grams (roughly one tablespoon of pellets). Craft-store or farmers'-market beeswax is fine.
- Olive oil: 45 milliliters (about three tablespoons). Plain olive oil, not extra-virgin; the refined kind behaves more predictably.
- A double boiler setup: a saucepan plus a heat-safe bowl or smaller pot that sits securely on top without touching the water below. A metal mixing bowl over a saucepan works well.
- A kitchen scale if you have one, or measuring spoons for the ratio worksheet.
- Small clean tins or jars with lids: two or three, for the batch and its variants.
- Paper labels and a pen, plus a strip of masking tape.
- Paper towels, a wooden stir stick or chopstick, and an oven mitt or dry cloth.
- Your laboratory journal and a pencil for the batch record.
Level Two — historically closer
- Beeswax in a block, cut with a warm knife, as the apothecary cut it from the comb block.
- A small brass or copper saucepan for the water bath, with a ceramic or glass inner vessel.
- A glass stirring rod instead of the chopstick.
- Paper labels written in ink, sealed with a drop of wax, in the apothecary manner.
Safety Notes
- Hot oil and hot wax burn skin on contact. Use the double boiler for all melting; never melt wax over direct flame. Keep an oven mitt or dry cloth at hand and keep your face and loose sleeves away from rising steam.
- Never let the lower pot boil dry, and never leave a heating vessel unattended. An adult must be present for every heating step.
- If hot wax touches skin, cool under cool running water immediately; do not peel cooling wax off.
- Label every tin or jar DISPLAY ONLY — NOT FOR CONSUMPTION before you pour. Nothing made in this course is medicine, food, or cosmetics for use.
- Never pour melted wax or oily mixtures down a sink drain. Wipe vessels with paper towels while still warm, then wash with hot water and soap.
Reflection Questions
Answer the following questions in your workbook.
- Why is the wax-to-oil ratio stated as wax : oil rather than oil : wax, and what does the order tell you about which ingredient the formulator treats as the controlling one?
- Your balm cooled with a cracked, sunken center. Using the cooling curve, diagnose exactly what went wrong and describe two specific changes you would make for the next batch.
- An apothecary's notebook lists a preparation as "cerate" rather than "salve." What does that single word tell you about the preparation's expected firmness, and why would the distinction matter to someone reaching for the jar?
- Why does this lesson insist that the label be written before the heat is lit? Give two practical reasons and one reason of laboratory discipline.
- The lesson defines balm as protective, never healing-promising. In your own words, explain why that boundary matters for a student formulator: what goes wrong when the words are allowed to promise more than the preparation can do?
Workbook Checklist — Lesson 35
In my workbook I have:
- ☐ named the five members of the semi-solid family and what distinguishes each in the apothecary's vocabulary
- ☐ recorded the safety briefing whole: heated oils and wax, the double boiler rule, wax on skin, display-only labeling, cleanup and drains, and the standing rule
- ☐ reproduced the ratio table's five rows and predicted the texture of 1:4, 1:3, and 1:2 preparations
- ☐ written both numbers — wax weight and oil volume — in the batch record before heating anything
- ☐ made the display balm by the double boiler method, with an adult present for every heating step, and labeled every tin before pouring
- ☐ read the finished balm by spreadability, graininess, and the cooling curve, and written all three readings in the batch record
- ☐ written my one-sentence formulator's judgment: next batch, I would change ___
- ☐ filed the batch record under Formulation Records in my archive, with date, full ratio, texture readings, judgment sentence, and a sketch or description of the tin
- ☐ completed the historical salve study: one system, three questions answered, source cited, no preparation made from the historical recipe
☐ Lesson completed Date: ___ Signature: ___
The Professor's Closing Note
Well done, scholars. You have made your first formulation, and more importantly, you have read it honestly. The balm in your tin is not perfect (no first batch is), but the record beside it is the beginning of something real.
Keep the ratio worksheet from this lesson. In the lessons ahead you will return to it with emulsions (mixtures in which droplets of one liquid are dispersed through another liquid it does not mix with), with scrubs, with soaps, and each time the numbers will mean more because your hands will remember what 1:3 feels like.
One caution as we enter the formulation unit: the stove is now a regular instrument of this laboratory, and heat deserves the same respect you give to blades and to alcohol. The adult-supervision rule stands for every heating step in every lesson of this unit, without exception.
In good order, scholars. Next lesson: candles, and the patient behavior of cooling wax.
— Professor Crimblebrew Muddlenook, Potions Laboratory • Master Apothecary • Head of House Meridies
PROFESSOR CRIMBLEBREW MUDDLENOOK
Potions Laboratory
Master Apothecary • Head of House Meridies
Cross-Class Connections

Herbology · Unit V, Lesson 36 — The Materia Botanica: Building Your Herbal
Come up to the Greenhouse, formulators, and see the book your batch records feed. In my greenhouse every plant gets one entry in our shared Materia Botanica: my growing notes beside Professor Muddlenook's preparation notes, in a fixed order, so the olive whose oil fills your tins is the same plant whose life the entry records. Bring your new Formulation Records section with you — we will find its entries their growing halves.
PROFESSOR BERYL FERNFOOT
Herbology Greenhouse • Master Herbalist • Head of House Oriens

Scrollwork · Unit VI, Lesson 23 — Archive Labels & Library Systems
You have labeled a tin before the heat was lit. Now come and label a library. In my Scriptorium we take up the label, the list, and the shelfmark at the scale of whole collections — how a record is made findable, and why a batch record that cannot be found again might as well never have been written. Your formulary has begun, scholars. Come and learn to keep it.
PROFESSOR QUILLBERRY NOCTURNE
Scrollwork Library

Creative Arts · Unit II, Lesson 11 — Case Binding & Archival Boxes
A formulary deserves a case built to fit it, scholars. In my workshop you will learn to case a book to measure and to build the archival box in which a great record rests: boards cut square, a case built to fit the book it houses, a box that will outlast everyone in the room. Build the practice corner first, on scrap, as always. Then bring your formulation records when they have grown into a book, and we will house them properly.
PROFESSOR COGBRANCH TIMBERCLANK
Creative Arts Workshop
Further Reading & Sources
- Paraffin wax — Wikipedia — history: Reichenbach's 1830 isolation, petroleum refining, and the candle-making revolution.
- Beeswax — Wikipedia — composition, melting behavior, and historical uses of the traditional structuring wax.
- Galen — Wikipedia — the 2nd-century physician behind cold cream and the foundations of compound pharmacy.
- London Pharmacopoeia — Wellcome Collection — search the collection for the 1618 pharmacopoeia and its standardized unguent formulas. (Search "London Pharmacopoeia 1618" on the site.)
- Ointment — Britannica — search "ointment" for the pharmaceutical definition and the distinction between ointments, creams, and pastes. (Use the site search.)
- Cosmetics in ancient Rome — Wikipedia — the unguentarii, their shops, and the trade in perfumed oils and soft preparations.
Browse the Potions shelf in the school Library for readable editions of these works.
LESSON 35 · BALMS, SALVES & CERATES
Try It in the Laboratory
The lesson taught the chain — oil first, then wax, then tin. The Experiment builds the whole chain with you, stage by stage, and bottles the leftover oil as it goes.
— Professor Crimblebrew Muddlenook, Potions Laboratory
DEEP SHELF · THE LOTION CAULDRON
This Lesson Feeds a Cauldron
The formulator's discipline you learned here — phases, ratios, and keeping — is what holds a lotion together. The Lotion Cauldron stands on this lesson, on Infused Lipids, and on Hydro-Infusions, and it keeps its ratios as strictly as this lesson keeps its balms.
— Professor Crimblebrew Muddlenook, Potions Laboratory
Submit your work for this lesson using the form below.
CONTINUE IN THE POTIONS LABORATORY
← Previous · Lesson 34: The Extraction Ledger Next · Lesson 36: Candles & Aromatic Wax Casting →
Unit V — Botanical Formulations Potions Laboratory — All 52 Lessons
The rest of Unit V: Lesson 36 · Candles & Wax · Lesson 37 · Sachets & Blends · Lesson 38 · Whipped Emulsion · Lesson 39 · Crystalline Scrubs · Lesson 40 · Melt & Pour Soap · Lesson 41 · Cold-Process Soap · Lesson 42 · The Failed Batch · Lesson 43 · Experimental Formula · Lesson 44 · Formulation Matrix