

POTIONS
Unit V · Lesson 42THE FAILED BATCH
Professor Crimblebrew Muddlenook
Master Apothecary • Potions
Head of House Meridies • School of Evershade
Professor's Introduction

Hands clean, benches clear. Today I am going to ask you to do something no teacher has asked you to do before: I want you to fail. Deliberately. Carefully. With your journal open and your pencil ready.
Every preparation you have made in this unit, the balms, the candles, the emulsions, the soaps, carried a small chance of going wrong. Separation. Graininess. Cracking. Spoilage. These are not signs that you are a poor apothecary. They are signs that you are working with real materials, and real materials have opinions.
The historical apothecaries understood this. Their workshops kept waste books alongside their recipe books, pages where ruined batches were recorded with the same care as successful ones: what went in, what went wrong, and what the evidence suggested. A failed batch, properly recorded, is not waste. It is tuition, already paid. Today you will learn to collect it.
So. Aprons on, journals open, and let us break something beautifully.
— Professor Crimblebrew Muddlenook, Potions Laboratory • Master Apothecary • Head of House Meridies

Potions map — the class base map, unmarked for this lesson.
Lesson Objectives
By the end of this lesson, you will be able to:
- Name and describe the seven most common formulation failures: separation, graininess, cracking, spoilage, instability, poor suspension, and syneresis
- Explain, in plain language, why emulsions separate, using the concepts of coalescence and droplet size
- Diagnose a failed preparation from its visible evidence using a failure-diagnosis chart
- Deliberately break a small test emulsion and record the failure like a historical apothecary
- Start a permanent failure ledger for your laboratory archive
Reading this lesson: ★ marks the passages to remember. They return in the Unit V Quiz and at the capstone. Check in questions ask the material back as you go; answer them in your workbook when you meet them.
Working this lesson: Your assignment packet is the first download on this page. Work in it as the lesson moves along, answering each exercise as its subject is taught — or read the lesson through for your notes and take the exercises as homework afterward. Both are proper ways to sit this class. Signposts in the reading tell you where each exercise belongs. Written answers are short answers in your own words; a few honest lines are worth more than a filled page.
Your Assignment Packet
This lesson's exercises live in its packet: the Lexicon Handout (every term, course terms marked ◆), Materials, Guided Practice — the failure-diagnosis chart and the five-step deliberate-break procedure, printed in full so you can work at your own bench — the Assignment Manual with its self-check, the Reflection Questions, and the Workbook Checklist. Download the packet before you begin and keep it beside you as you read.
About this lesson's quiz, plainly: the source lesson's own quiz (seven multiple-choice and five true/false questions) does not live in this packet or in the manual below. Under the classroom model it pools, with the other Unit V lessons' questions, into the Unit V Quiz — the ★ passages and ★ exercises in this lesson are the material it draws on.
Safety Briefing
Read this section completely before touching any materials. Professor Muddlenook's first rule of the laboratory is that no procedure begins until the safety briefing is understood.
Heat. The deliberate-break exercise uses warm (not hot) water. Any heating must be done by or with an adult. Never leave a warming vessel unattended. Test water temperature with the back of your hand before pouring; if it is uncomfortable, it is too hot.
Glass. You will be shaking a sealed jar vigorously. Use a sturdy jar with a tight-fitting lid, and check the lid twice before shaking. Hold the jar away from your face and away from other people while shaking. If a jar cracks, stop, set it down, and clean up with an adult; do not handle broken glass with bare hands.
Skin and eyes. Wash your hands after handling oils and emulsifier materials. Keep mixtures away from your eyes. If anything splashes into an eye, rinse with clean water for several minutes and tell an adult.
Spoiled materials. One of the failure types in this lesson is spoilage. If you encounter a preparation at home that smells sour, looks moldy, or has changed color unexpectedly, do not taste it and do not try to rescue it. Record it in your failure ledger, then discard it. A spoiled batch is evidence, not salvage.
A standing rule for this class. Nothing in the Potions Laboratory is ever presented as medicine, and no lesson will ever give you amounts to take. We study how materials behave, how they were used historically, and how to handle them safely. That is the whole of it, and it is plenty.
Check in: Which failure type must never be tasted and never rescued — and what two things do you do with it instead?
❦ In your workbook: record the safety briefing in your own way — warm not hot water and an adult for heating, the lid checked twice, hands washed and eyes protected, and the spoiled-materials rule: record it, then discard it — copy, sketch, or note what matters.
The Apothecary's Philosophy of Failure
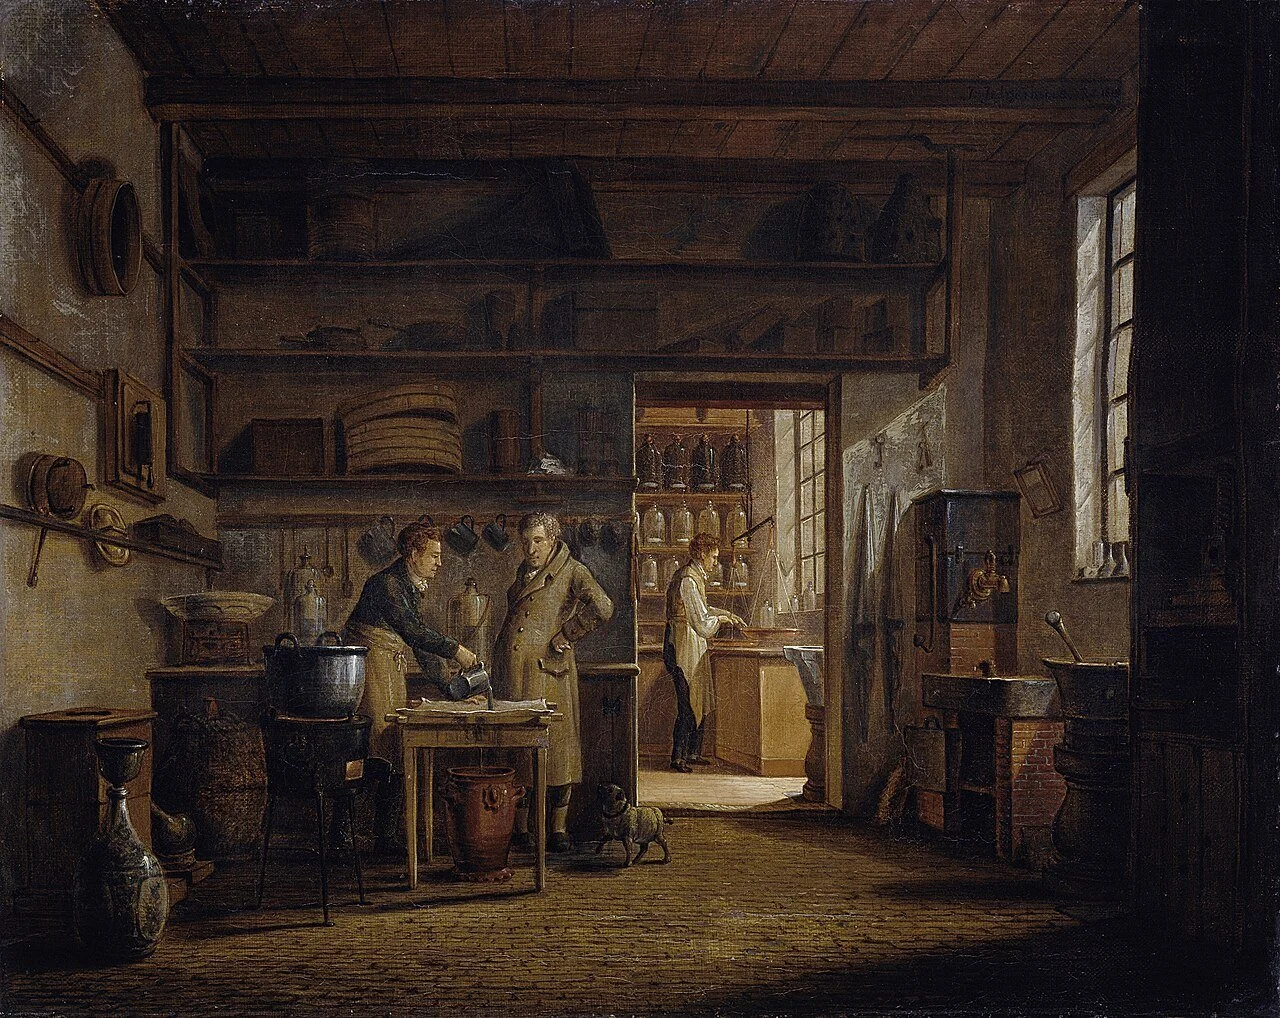
The laboratory of apothecary Anthony d'Ailly's Amsterdam pharmacy, the 'Stoockhuys,' painted by Johannes Jelgerhuis: vessels on every shelf, a balance in the back room, and work going forward at two benches at once. A shop run at this scale could not afford an unrecorded failure — the waste book was how it remembered.
Johannes Jelgerhuis, Interior of the Laboratory of the Pharmacy 'Het Stoockhuys' of Apothecary Anthony d'Ailly (Rijksmuseum, SK-A-2714), via Wikimedia Commons. Public domain.
Before we break anything, a word about why this lesson exists.
The historical apothecary worked without thermometers, without pH strips, without the chemistry that explains why a preparation behaves as it does. What they had was observation, repetition, and records. When a batch of salve separated or a soap cracked, they could not look up the cause. They could only look at the evidence, compare it with earlier failures, and adjust.
★ This is why the waste book mattered. A recipe book tells you what worked once. A failure ledger tells you what goes wrong always, and under which conditions. The apothecary who recorded ten separated emulsions knew more about emulsions than the one who made a single perfect batch and stopped.
Modern science has since named the mechanisms: droplets merging, crystals reforming, microbes feeding. You will learn those names today. But the method is older than the names. Look closely. Record honestly. Compare. Adjust. That is troubleshooting, and it is the most transferable skill in this entire course, because every laboratory, in every century, produces failures.
There is an old workshop saying, scholars, and I have had it painted above my own workbench: "The batch teaches; the ledger remembers." A perfect record of a failed preparation is worth more than a vague memory of a successful one. Write down everything, especially the parts that embarrass you. The ledger does not judge. It only remembers, so that you do not have to fail the same way twice.
— Professor Crimblebrew Muddlenook, Potions Laboratory • Master Apothecary • Head of House Meridies
Check in: What three things did the historical apothecary have in place of thermometers, pH strips, and chemistry — and what four verbs name the method that is older than the mechanisms' names?
❦ In your workbook: record the philosophy of failure in your own way — the waste book beside the recipe book, what each one teaches, and "The batch teaches; the ledger remembers" — copy, sketch, or note what matters.
Seven Common Failures
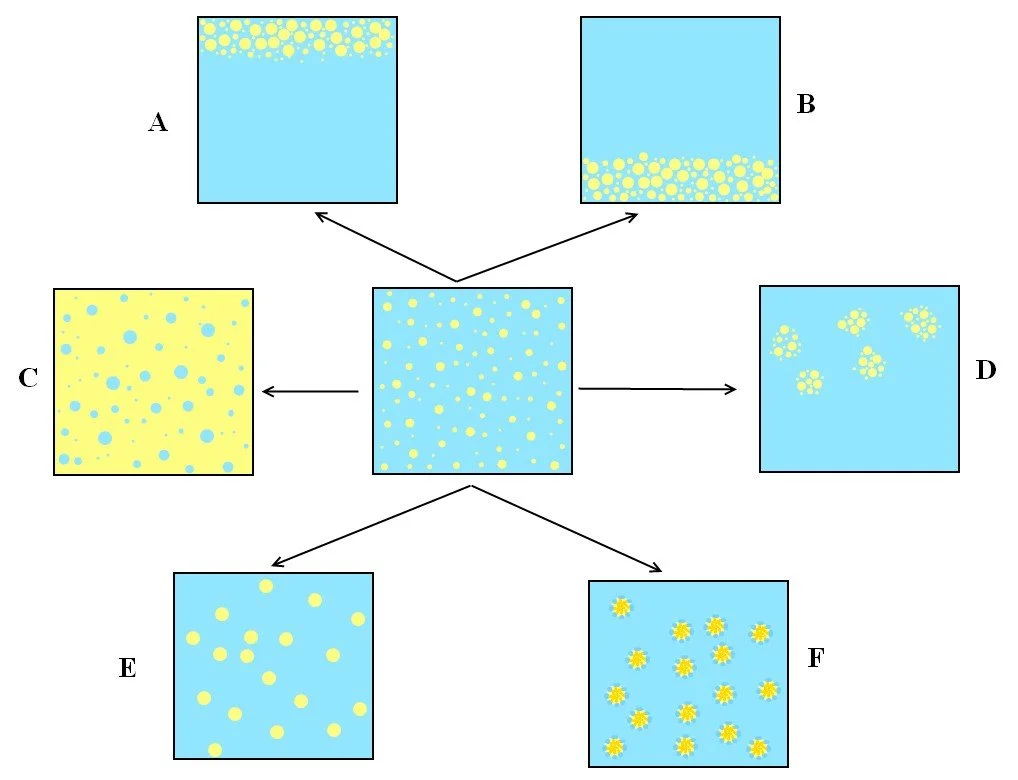
How an emulsion comes apart, drawn as a diagram: from the even droplets at center, A is creaming (droplets risen, not yet merged) and E is coalescence (droplets merged into larger ones) — the two stages this lesson teaches you to tell apart, because a creamed emulsion can often be re-whisked and a coalesced one cannot. (The remaining panels name the diagram's other processes: B sedimentation, C phase inversion, D flocculation, F Ostwald ripening.)
"Emulsion destabilization" diagram, via Wikimedia Commons. CC0.
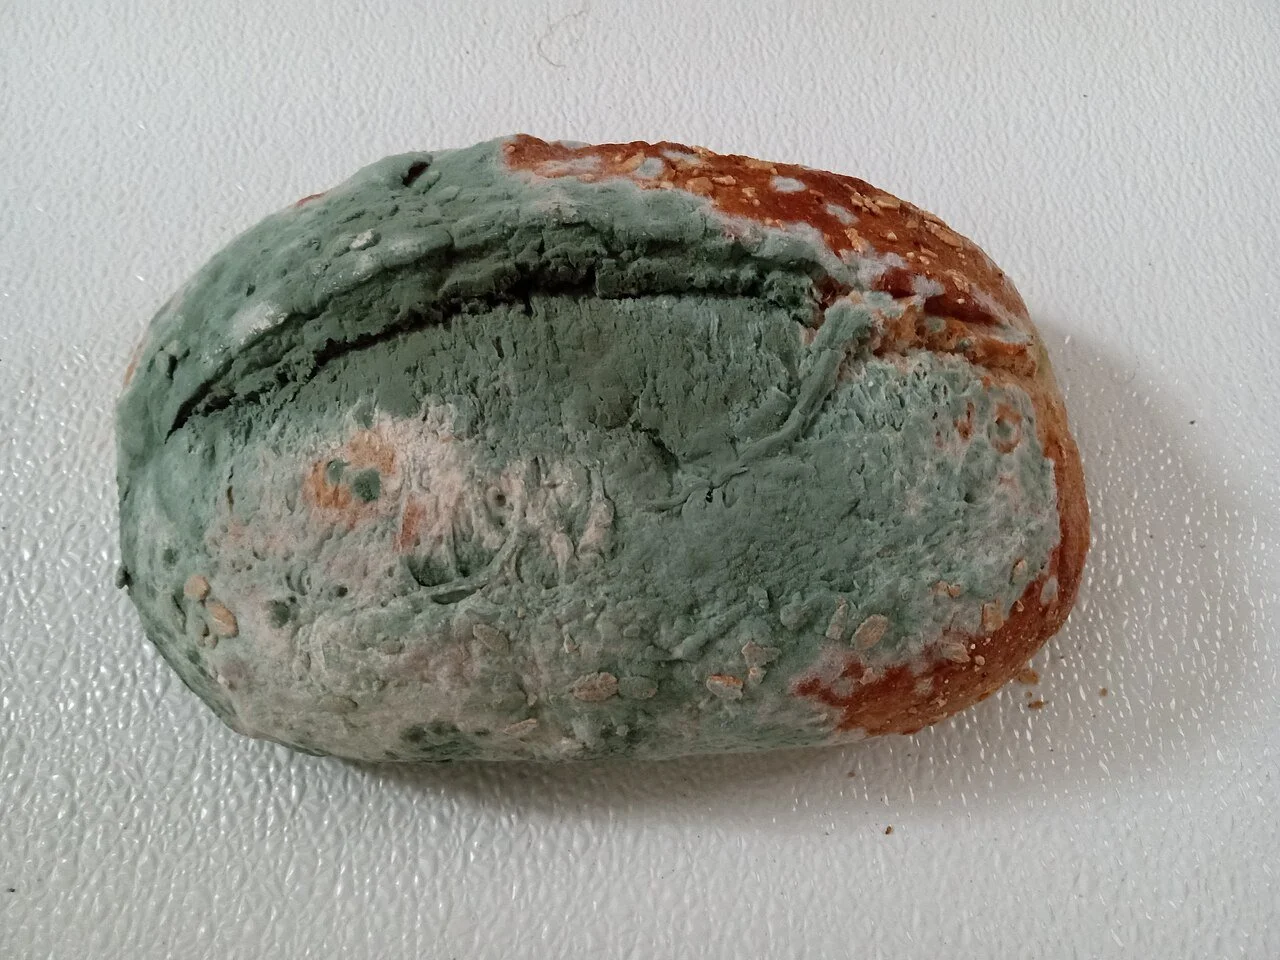
Spoilage, photographed plainly: a loaf taken over by mold. This is the evidence the Safety Briefing names — a preparation that looks moldy is never tasted and never rescued. It is recorded in the failure ledger, then discarded. A spoiled batch is evidence, not salvage.
Photograph by Muldoonsamuel55, via Wikimedia Commons. CC0.
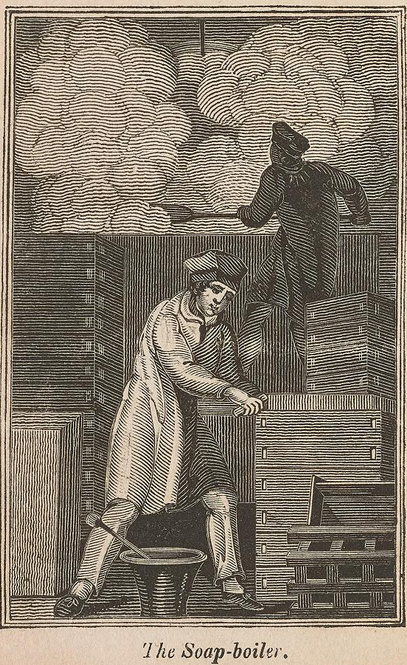
The Soap-boiler," from The Book of Trades (1815): the historical soapmaker at his frames, in the steam of the boiling house. His bars cured in rooms like this one, and when a bar cracked, the evidence he read — overheating, a too-fast cool — is the same evidence your diagnosis chart teaches.
"The Soap-boiler," from Thomas Faussett, The Book of Trades, or, Library of the Useful Arts, Part I (1815), via Wikimedia Commons. Public domain.
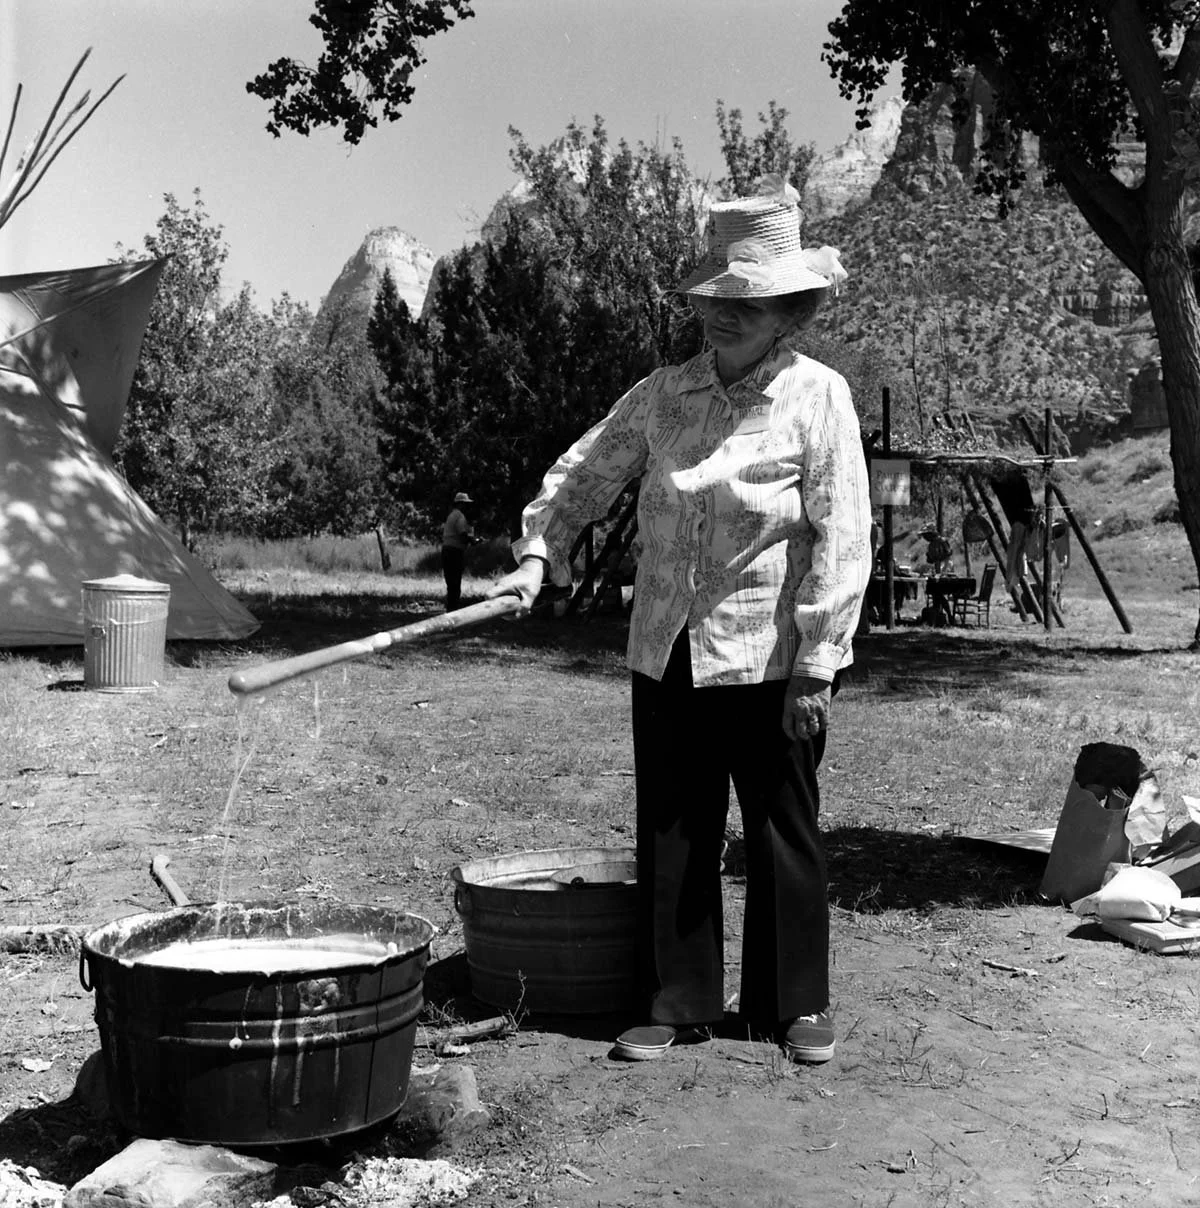
Hand-dipped candles demonstrated at the Zion National Park Folklife Festival, 1978: wicks on a frame, drawn dripping from the wax vat. Candle wax remembers how it was cooled — poured too hot or cooled too fast in a draft, the surface contracts and splits. The cooling, not the dipping, is where cracking is decided.
U.S. National Park Service photograph, Zion National Park Nature Center Folklife Festival (September 1978), via Wikimedia Commons. Public domain.
Every failure below is something you may meet in your own work. Learn to recognize each by its evidence.
1. Separation
The most common failure of all: a preparation that was uniform when you made it divides into layers on standing. In an emulsion, oil rises and water sinks. Separation announces itself plainly: a visible line, an oily film, a watery layer at the bottom of the jar.
★ Why it happens: oil and water do not want to mix. An emulsion holds them together only as tiny droplets, and tiny droplets are always trying to rejoin into larger ones, a process called coalescence. The smaller the droplets and the thicker the surrounding liquid, the slower this happens. Shake oil and water in a jar and they separate in seconds. Add an emulsifier and whisk thoroughly, and the same mixture may hold for hours or days. But given enough time, or enough heat, or a hard knock, the droplets find each other again. Separation is not a mystery. It is the materials returning to their preferred arrangement.
2. Graininess
A texture failure: a balm, salve, or scrub that should feel smooth instead feels sandy or gritty. Run it between your fingers and you feel distinct particles.
Why it happens: something that was dissolved or melted has come out and formed crystals. In sugar scrubs, sugar recrystallizes if the mixture cools unevenly or is stirred at the wrong moment. In wax-and-oil balms, fats can form grainy crystals if the melted mixture is cooled too quickly or unevenly. Graininess can also come from simple under-mixing: powders never fully incorporated. The evidence is in the fingers. Smooth means success; grit means crystals.
3. Cracking
A structural failure: a soap bar develops fissures as it cures, or a candle's surface splits. In cold-process soap, cracking most often means the batter overheated during saponification or dried too fast; the outside hardened while the inside was still reacting. In candles, pouring wax that is too hot, or cooling the candle too quickly in a draft, pulls the surface apart as it contracts.
Why it matters beyond looks: cracks are not only ugly. They are weak points where moisture enters, where a soap bar breaks in use, where a candle burns unevenly. A cracked preparation is a compromised preparation, and the crack is the evidence of haste: too much heat, too fast a cool, too little patience.
4. Spoilage
A biological failure: a preparation grows mold, turns sour, or changes color and smell in ways the formula never intended. Any preparation containing water can spoil, because water is what microbes need. Preparations made only of oils, waxes, and dry powders rarely spoil; water is the invitation.
Historical apothecaries fought spoilage with the tools they had: keeping water out where possible, using honey or high-sugar syrups that microbes cannot easily colonize, storing preparations cool and dark, and making small batches to be used quickly. They could not see microbes, but they could see the results, and they recorded them. ★ Your rule is the same as theirs: when in doubt, throw it out. A spoiled batch is never rescued. It is recorded, then discarded.
5. Instability
The general term for a preparation that changes over time in ways you did not plan: colors fade, fragrances flatten, textures shift, liquids thicken or thin. Instability is the slow version of the other failures. Heat, light, and air are its usual drivers, which is why every lesson in this course has repeated the same storage counsel: cool, dark, sealed, labeled.
6. Poor Suspension
A distribution failure: solid particles that should stay evenly mixed instead sink to the bottom or float to the top. In scrubs, salt or sugar settles into a hard layer. In a shaken preparation, botanical bits drift down within minutes. You met suspension as a concept in Lesson 20 with salts and clays; here it returns as a failure mode.
Why it happens: particles sink or float according to their density relative to the surrounding medium and the thickness of that medium. Thick, viscous bases hold particles up; thin, watery ones let them fall. Poor suspension is fixed the way separation is fixed: change the particle size, change the thickness of the base, or accept that the preparation must be stirred before use and label it honestly as such.
7. Syneresis
The weeping failure: liquid beads or pools on the surface of a gel, salve, or soap, or seeps out around the edges. The preparation has not separated into clean layers; it is crying out small amounts of liquid. Syneresis happens when the structure holding the liquid contracts or relaxes: a gel network tightening, a soap continuing to lose water as it cures, a salve stored somewhere too warm. A little weeping in a curing soap is normal and expected. Persistent weeping in a finished preparation means the formula's liquid and structure are not in balance.
Check in: Name the seven failures from their evidence alone: layers on standing, grit between the fingers, fissures across a bar, mold and a sour smell, fading color over weeks, a hard layer of solids at the bottom, and beads of liquid on the surface.
❦ In your workbook: record the seven failures in your own way — each one's evidence, its cause, and the one rule that belongs to spoilage alone — copy, sketch, or note what matters.
The Failure-Diagnosis Chart
Muddlenook's diagnostic method, in one table. Match the evidence to the failure, then to the likely cause, then to the correction. Copy this chart into your failure ledger; you will use it for the rest of the course.
| Evidence | Failure | Likely cause | Correction to try |
|---|---|---|---|
| Oily layer on top, watery layer below | Separation | Droplets coalescing; mixture not whisked long enough; too little emulsifier | Re-whisk thoroughly; increase emulsifier slightly; store cool and still |
| Gritty or sandy texture between fingers | Graininess | Crystals reformed on cooling; powders under-mixed | Remelt gently and cool slowly with stirring; sift powders before adding |
| Fissures across a soap bar or candle surface | Cracking | Overheating during reaction; cooling too fast; poured too hot | Slow the cool; pour cooler; insulate the mold; reduce batch heat |
| Sour smell, mold spots, unexpected color change | Spoilage | Water present plus warmth, air, and time | Discard the batch; next time reduce water, store cool and dark, make smaller batches |
| Color fading, fragrance flattening over weeks | Instability | Heat, light, or air exposure | Store cool, dark, and sealed; shorten the intended shelf life |
| Hard layer of solids at the bottom of the jar | Poor suspension | Base too thin for the particle size | Thicken the base; grind particles finer; or label "stir before use" |
| Beads or pools of liquid on the surface | Syneresis | Structure contracting; stored too warm | Cool storage; rebalance liquid to structure in the next batch |
| Curdled, lumpy texture after adding an acid or heating | Curdling | Acid or heat shock breaking the emulsion | Add acids slowly and cool; re-whisk; if broken, restart the emulsion |
Check in: A jar shows beads of liquid on its surface but no layers. Which row of the chart claims it — and what correction does that row give first?
❦ In your workbook: record the failure-diagnosis chart in your own way — the evidence in the first column is the column you will actually use at the bench, so copy that column with special care — copy, sketch, or note what matters.
In your packet: Exercise II — The Case Files ✎ begins here. Work it now, or mark the place and take it as homework — your choice.
The Procedure: Break It, Then Diagnose
Today you will make two small test emulsions, keep one as your control, and deliberately break the other. Your journal stays open throughout. Every observation is evidence.
Step 1 — The control that fails on its own. Pour two spoonfuls of water and two spoonfuls of oil into the first jar. Seal the lid tightly. Shake hard for a full thirty seconds. Set the jar down and start your timer. Watch and record: how long before a visible line appears? How long before the layers fully separate? This is your baseline: oil and water, unassisted, returning to their preferred arrangement. Most students see complete separation within minutes.
Step 2 — The assisted emulsion. Pour two spoonfuls of water and two spoonfuls of oil into the second jar. Add a single drop of liquid dish soap, no more. Seal and shake hard for a full thirty seconds, exactly as before. Set it down beside the first jar. Record the difference: the mixture should look cloudy and uniform, with no immediate line. Note the time. This cloudy stability is what an emulsifier buys you: the soap molecules surround the oil droplets and keep them from coalescing, at least for a while.
Step 3 — The deliberate break. Now break the second jar on purpose. Choose ONE of the following, with an adult present:
- Heat shock: pour in a spoonful of warm (not hot) water, seal, and shake gently. Then set the jar in the bowl of warm water for five minutes.
- Acid shock: add a spoonful of white vinegar, seal, and shake gently.
Record what happens and when: does the cloudiness clear? Does an oily layer appear? How does the broken jar compare to the control jar from Step 1?
Step 4 — Diagnose. Open your failure-diagnosis chart. Match your evidence to a row. Write the diagnosis in your journal in this form: "Evidence: [what you saw]. Failure: [name]. Likely cause: [your reasoning]." Then write one sentence on what you would change if you were making this preparation for real.
Step 5 — The honest label. Write a small label for the broken jar: what it is, the date, and the words "BROKEN ON PURPOSE — Lesson 42." File it with your archive entries. An apothecary labels failures with the same care as successes.
Check in: What is the one difference between the control jar and the assisted jar at the moment both are shaken — and which two shocks may you choose from to break the assisted jar, with an adult present?
❦ In your workbook: record the procedure in your own way — the control, the assisted emulsion, your chosen shock, and your diagnosis written in the Step 4 form — copy, sketch, or note what matters.
In your packet: Exercise I — The Deliberate Break ⚒ begins here. Work it now, or mark the place and take it as homework — your choice.
Observation: What the Break Teaches
Compare your two jars side by side and answer in your journal:
- How long did the unassisted jar take to separate completely? How long has the assisted jar held?
- Which break method did you choose, and what was the first visible sign that the emulsion was failing?
- The dish soap is a stand-in for the emulsifiers in real preparations: beeswax, lanolin, and the natural emulsifiers in botanical materials you studied in Lesson 19. What does this exercise suggest about why historical recipes are so particular about their wax-to-oil ratios?
- If you were scaling this up to a real salve, what would you do differently to prevent this failure?
There is no shame in any answer here. The jar that broke fastest taught you the most.
Check in: In your own two jars, which held longer — and what single sentence in this section tells you why the faster failure is not the worse lesson?
❦ In your workbook: record the observation in your own way — the two times side by side, the first visible sign of failure, and your answer on the wax-to-oil ratio — copy, sketch, or note what matters.
Cleanup
The procedure is not complete until the laboratory is restored.
- Pour the jar contents into the trash or down the drain with running water; the amounts are tiny and household-safe. Do not make a habit of pouring oils down the drain in large quantities; today's spoonfuls are negligible.
- Wash all jars with hot soapy water, rinse, and dry. A jar that still smells of oil is not clean; wash it again.
- Wipe all work surfaces. Oil travels; check the table edges.
- Wash your hands thoroughly.
- Confirm that your failure-diagnosis chart is copied into your ledger and your observations are dated before you leave the table.
A clean laboratory is a safe laboratory, and a safe laboratory is a productive one. This is not fussiness. It is the foundation everything else stands on.
Check in: What two written records must be confirmed — one copied, one dated — before you leave the table?
❦ In your workbook: record the cleanup in your own way — jars washed until no oil smell remains, surfaces wiped including the table edges, and the chart and dated observations confirmed — copy, sketch, or note what matters.
A Historical Note: The Waste Book
The failure ledger you started today has ancestors. Historical workshops kept waste books, daybooks, and memorandum books where ruined batches were entered alongside successful ones. The great soapmakers, chandlers, and apothecaries of the past could not run a chemical analysis on a failed batch; they ran the only analysis available, which was comparison: this batch against the last, this failure against the ones before it.
Some of the most useful knowledge in the history of formulation came from failures. The understanding that water invites spoilage came from watching which preparations kept and which did not. The practice of pouring candles cooler came from cracked surfaces. Every correction in your diagnosis chart was first discovered by someone standing over a ruined batch, refusing to waste the lesson along with the materials.
Your waste book joins that tradition today. Keep it honestly. It will become the most consulted volume in your archive.
Check in: What was the only analysis available to a historical workshop over a failed batch — and which two corrections in your own chart does this note trace back to failures?
❦ In your workbook: record the waste book in your own way — its ancestors among the daybooks and memorandum books, comparison as the historical analysis, and the two corrections failure taught — copy, sketch, or note what matters.
In your packet: Exercise III — The Failure Ledger ◐ begins here. Work it now, or mark the place and take it as homework — your choice.
Guided Observation: Reading the Two Jars
This lesson's observation is bench work, done with both jars in front of you and the failure-diagnosis chart open: you read a broken emulsion the way a historical apothecary read a ruined batch, from its evidence alone.
Work through it in order.
Compare the jars. Compare your two jars side by side. The control jar shows oil and water, unassisted, returning to their preferred arrangement; the assisted jar shows what a single drop of stand-in emulsifier bought, and for how long.
Read the break. Which break method did you choose, and what was the first visible sign that the emulsion was failing? Does the cloudiness clear? Does an oily layer appear? How does the broken jar compare to the control jar from Step 1?
Follow the droplets. The dish soap is a stand-in for the emulsifiers in real preparations: beeswax, lanolin, and the natural emulsifiers in botanical materials you studied in Lesson 19. What does this exercise suggest about why historical recipes are so particular about their wax-to-oil ratios?
Consider:
- How long did the unassisted jar take to separate completely? How long has the assisted jar held?
- If you were scaling this up to a real salve, what would you do differently to prevent this failure?
- There is no shame in any answer here. The jar that broke fastest taught you the most.
❦ In your workbook: record the guided observation in your own way — the jars compared, the break read from its first visible sign, and the droplets followed back to the wax-to-oil ratio — copy, sketch, or note what matters.
Materials
Everything in its place, before we begin. A meticulous laboratory begins with everything gathered before work starts. Assemble the following.
Level One — household items
- Two small, sturdy glass jars with tight lids (jam jars are ideal), plus one extra jar
- A light cooking oil (sunflower, canola, or light olive oil)
- Tap water
- White vinegar
- A teaspoon
- A small bottle of liquid dish soap (our stand-in emulsifier, for study only)
- Warm tap water in a heat-safe bowl (adult to handle)
- Paper towels and a damp cloth
- Your laboratory journal and a pencil
- A timer or clock
Level Two — historically closer
- A small brass or ceramic dish for warming oil, in place of the bowl
- Beeswax pastilles and a double-boiler setup, to observe a true wax-stabilized emulsion alongside the soap-stabilized one (adult required for all heating)
- Linen cloth squares for straining, as the historical workshop used
- A bound waste book, or a dedicated section of your archive labeled "Failure Ledger," kept the way apothecaries kept theirs
Safety Notes
- Any heating is done by or with an adult. Use warm, not hot, water; test with the back of your hand first. Never leave a warming vessel unattended.
- Check each jar lid twice before shaking. Hold the jar away from your face and away from other people while shaking. If a jar cracks, stop and clean up with an adult; never handle broken glass with bare hands.
- Wash your hands after handling oils and soap. Keep mixtures away from your eyes; rinse with clean water for several minutes and tell an adult if splashing occurs.
- If you meet a spoiled preparation at home (sour smell, mold, unexpected color change), do not taste it and do not try to rescue it. Record it in your failure ledger, then discard it.
- Nothing in the Potions Laboratory is medicine, and no lesson gives amounts to take. We study how materials behave, how they were used historically, and how to handle them safely.
Reflection Questions
Answer the following questions in your workbook.
- Why is a failure ledger more valuable to an apothecary than a recipe book alone?
- Explain coalescence in your own words, and describe how it leads to separation in an emulsion.
- Your balm feels gritty between your fingers. Name the failure, explain what caused it, and describe two corrections you could try.
- A student says, "My emulsion separated, so I must have done everything wrong." Using what this lesson taught, explain why that conclusion is too harsh and what the student should do instead.
- Why must a spoiled preparation always be discarded rather than rescued, and what storage habits reduce the chance of spoilage?
Workbook Checklist — Lesson 42
In my workbook I have:
- ☐ named and described the seven common failures — separation, graininess, cracking, spoilage, instability, poor suspension, and syneresis — each from its evidence
- ☐ explained, in plain language, why emulsions separate, using coalescence and droplet size
- ☐ copied the failure-diagnosis chart into my Failure Ledger by hand, all eight rows
- ☐ performed the deliberate break: control jar, assisted emulsion, one chosen shock with an adult present, and the honest label
- ☐ written my diagnosis in the Step 4 form — evidence, failure, likely cause — and one sentence on what I would change
- ☐ diagnosed all four case files from the chart: failure, likely cause, and one correction each
- ☐ opened the Failure Ledger and made its first three entries, each with what went in, what went wrong, the evidence, my diagnosis, and what I would change, every entry dated
- ☐ recorded the spoilage rule in full: never tasted, never rescued — recorded in the ledger, then discarded
☐ Lesson completed Date: ___ Signature: ___
Cross-Class Connections

Herbology · Unit IV, Lesson 28 — Drying Herbs the Traditional Way
Come up to the Greenhouse, failure-keepers, and learn spoilage's prevention at its source. In my greenhouse we take the water away — hang bundles small, screen-dry the tender leaves, judge by crispness — because the organisms that spoil plant material need moisture to grow, and what is truly dry cannot take their hold. Then we store the harvest labeled, dated, and airtight, cool and dark. Bring your failure ledger: the entries drying prevents are the best ones in it, because they never had to be written.
PROFESSOR BERYL FERNFOOT
Herbology Greenhouse • Master Herbalist • Head of House Oriens

Scrollwork · Unit II, Lesson 5 — Soot & Charcoal Ink
You have met poor suspension as a failure in Professor Muddlenook's laboratory. Now come and meet it as a craft in mine. In the Scriptorium we suspend soot in water that would rather let it settle, and gum arabic does the holding — the binder keeps the stubborn company dispersed until the pen can carry it, then holds the pigment on the page as the line dries. His settled scrub and my settled ink are the same evidence, scholars. Come and read both.
Scrollwork · Unit VI, Lesson 23 — Archive Labels & Library Systems
You have opened a failure ledger. Now come and learn how a record stays findable. In my Scriptorium we take up the tituli, the shelfmark, and the catalog at the scale of whole collections — because a ledger entry that cannot be found again in five years might as well never have been written, and his ledger is meant to be the most consulted volume in your archive.
PROFESSOR QUILLBERRY NOCTURNE
Scrollwork Library

Creative Arts · Unit I, Lesson 1 — Welcome to the Creative Arts Workshop
A failed batch and a spoiled cut are kin, scholars. In my workshop the covenant says it plain: a mistake brought to the bench is information, not failure, and nobody is shamed for an error they report honestly. Bring your ruined work to the bench where it can be examined — his jars, my boards, the same rule — instead of into a drawer where it can only be repeated.
Creative Arts · Unit II, Lesson 11 — Case Binding & Archival Boxes
His lesson asks for a bound waste book, kept the way apothecaries kept theirs. In my workshop you will learn to case such a book to measure and to build the archival box in which it rests: boards cut square, a case built to fit the book it houses, a box that will outlast everyone in the room. Build the practice corner first, on scrap, as always. Then bring your failure ledger, and we will house the most honest book in your laboratory properly.
PROFESSOR COGBRANCH TIMBERCLANK
Creative Arts Workshop
The Professor's Closing Note
Well done, scholars. You have named seven failures, broken an emulsion — a mixture in which droplets of one liquid are dispersed through another liquid it does not mix with — on purpose, diagnosed the evidence, and opened the most honest book in your laboratory.
I want you to remember one thing from today above all others: the apothecaries history remembers were not the ones who never failed. They were the ones who failed carefully, recorded everything, and never failed the same way twice. Perfection is not the standard of this laboratory. Attention is.
Keep your failure ledger beside your recipe journal from this day forward. When the next batch goes wrong, and it will, you will know exactly what to do: observe, diagnose, record, adjust. That is the whole craft, in four words.
In good order, and in good spirits,
— Professor Crimblebrew Muddlenook, Potions Laboratory • Master Apothecary • Head of House Meridies
PROFESSOR CRIMBLEBREW MUDDLENOOK
Potions Laboratory
Master Apothecary • Head of House Meridies
Further Reading & Sources
- Emulsion Chemistry — Encyclopaedia Britannica — the chemistry of emulsions: how droplets behave and why mixtures separate.
- Science History Institute — background on the history and chemistry of soapmaking and laboratory practice from the institute's collections.
- Soap Queen — practical guidance on cold-process soapmaking, including common failures such as cracking, seizing, and separation.
- CandleScience — guides to candle-making, including troubleshooting for cracking, wet spots, and poor adhesion.
- Institute of Food Technologists — accessible explanations of emulsion science, coalescence, and stabilizers from food science.
Browse the Potions shelf in the school Library for readable editions of these works.
Submit your work for this lesson using the form below.
CONTINUE IN THE POTIONS LABORATORY
← Previous · Lesson 41: Soapmaking: The Cold-Process Crucible Next · Lesson 43: The Experimental Formula →
Unit V — Botanical Formulations Potions Laboratory — All 52 Lessons
The rest of Unit V: Lesson 35 · Balms & Salves · Lesson 36 · Candles & Wax · Lesson 37 · Sachets & Blends · Lesson 38 · Whipped Emulsion · Lesson 39 · Crystalline Scrubs · Lesson 40 · Melt & Pour Soap · Lesson 41 · Cold-Process Soap · Lesson 43 · Experimental Formula · Lesson 44 · Formulation Matrix