

POTIONS
Unit V · Lesson 39CRYSTALLINE SCRUBS & BATH PREPARATIONS
Professor Crimblebrew Muddlenook
Master Apothecary • Potions
Head of House Meridies • School of Evershade
Professor's Introduction

Notebooks ready, scholars. Before we begin, look at your hand. Now look at a spoonful of table salt beside a spoonful of coarse sea salt. Same substance, different grain, different behavior entirely. One pours like sand through an hourglass. The other crunches and catches the light in cubes you can almost see.
Today we study texture itself: not as a feeling on skin, but as a property of materials that can be observed, measured, and recorded. Grain size, crystal shape, how particles sit in oil, how a mixture changes over days on the shelf. These are laboratory questions, and they have laboratory answers.
You will make a scrub in this lesson. I want you to understand precisely what that means and what it does not mean. You are making a study preparation: an object for observation, comparison, and record-keeping. It is not a cosmetic. It will not touch skin. It will sit in its jar, labeled honestly, and teach you everything a jar of grain and oil can teach. An apothecary's first discipline is knowing exactly what a preparation is, and exactly what it is not.
Everything in its place, scholars. Let us begin.
— Professor Crimblebrew Muddlenook, Potions Laboratory • Master Apothecary • Head of House Meridies

Potions map — the class base map, unmarked for this lesson.
Lesson Objectives
By the end of this lesson, you will be able to:
- Explain how crystal shape differs between salt and sugar, and why grain size changes a preparation's behavior
- Describe what a suspension is in a formulation context, and predict how particles behave in oil over time
- Prepare a labeled study scrub in three grain grades using safe kitchen materials
- Compare the three grades by observation on paper and glass, using proper texture vocabulary
- Record a formal texture description suitable for your laboratory archive
- Explain why the study scrub is display-only, and state the laboratory rule behind that decision
Reading this lesson: ★ marks the passages to remember. They carry the crystal, suspension, and labeling standards this lesson is assessed by, and they return in the Unit V Quiz and at the class test. Check in questions ask the material back as you go; answer them in your workbook when you meet them.
Working this lesson: Your assignment packet is the first download on this page. Work in it as the lesson moves along, answering each exercise as its subject is taught — or read the lesson through for your notes and take the exercises as homework afterward. Both are proper ways to sit this class. Signposts in the reading tell you where each exercise belongs. Written answers are short answers in your own words; a few honest lines are worth more than a filled page.
Your Assignment Packet
This lesson's exercises live in its packet: the Lexicon Handout (every term, course terms marked ◆), Materials, Guided Practice — the grain-size comparison worked as a guided bench reading — the Assignment Manual with its self-check, the Reflection Questions, and the Workbook Checklist. Download the packet before you begin and keep it beside you as you read.
About this lesson's quiz, plainly: the source packet for this lesson carried a short lesson quiz. Under the classroom model it leaves the lesson packet and pools whole into the Unit V Quiz, where its questions — crystal systems, the suspension governors, the scrub–emulsion boundary, and the display-only rule — will meet you again. The exercises below are this lesson's assessment work, and the ★ on each one marks the work the quiz and the class test draw on.
Safety Briefing
Read this section completely before touching any materials. Professor Muddlenook's first rule of the laboratory is that no procedure begins until the safety briefing is understood.
★ The display-only rule. The scrub you make in this lesson is a study object. It is for looking, comparing, and recording. It is not for use on skin, and this is not negotiable. There are three reasons, and I expect you to be able to state all three. First, we cannot know your skin's sensitivities, and the laboratory does not gamble with them. Second, a preparation made on a workbench is not made under the clean conditions a skin product requires. Third, and most important for your training: the discipline of this class is to study materials as materials. The moment you treat a study preparation as a finished cosmetic, you have stopped observing and started assuming. Your jar will be labeled STUDY PREPARATION, DISPLAY ONLY, NOT FOR USE ON SKIN, and it will mean exactly that.
A standing rule for this class. Nothing in the Potions Laboratory is ever presented as medicine, and no lesson will ever give you amounts to take. We make no claims about what any preparation does to or for the body. We study how materials behave, how they were handled historically, and how to work with them safely. Exfoliation, in this lesson, is a mechanical word: it describes particles loosening other particles. It is not a promise about skin.
Dust. Fine salt and sugar dust irritate the nose and throat when poured carelessly. Pour slowly, keep your face back from the bowl, and work in a ventilated area. If you sneeze, step away and let the air settle.
The lab bench is not the kitchen. Although every ingredient in this lesson comes from the kitchen, once it enters the laboratory it follows laboratory rules. Nothing from the workbench goes into mouths. Wash your hands before and after the procedure. This is the habit that keeps every future lesson safe, including the ones with materials far less forgiving than salt.
Oil and surfaces. Oil spills make floors treacherous and workbenches sticky. Wipe spills immediately with a dry cloth first, then wash. Keep your jar away from the bench edge.
Before any preparation touches more than a fingertip: test a little on the inside of your wrist, wait a full day, and do not use it if the skin reddens, itches, or stings. Never use a preparation on broken or irritated skin.
Check in: State all three reasons the study scrub is labeled display-only — and what does exfoliation mean in this lesson, and what does it not promise?
❦ In your workbook: record the safety briefing in your own way — the display-only rule and its three reasons, the standing no-medicine rule, dust, the bench-is-not-the-kitchen rule, and oil and surfaces — copy, sketch, or note what matters.
In your packet: the Materials page carries this briefing's rules again in short form as its Safety Notes. Work them as you reach them in the reading, or mark the place and take them as homework — your choice.
Grain Structures: Reading the Crystal
Every scrub begins as crystals, so we begin by reading them.
Table salt and granulated sugar look alike in the jar: white, granular, pourable. Under the magnifier they tell different stories. Salt is sodium chloride, the mineral halite, and it crystallizes in the cubic system: its atoms stack in cubes, and its grains, when well formed, are tiny cubes with square faces. Sugar is sucrose, and it crystallizes in the monoclinic system: a less symmetrical stacking that produces grains shaped like small skewed prisms rather than cubes. Two white powders, two different architectures. (You studied crystal habit as a diagnostic tool in Lesson 20; this is that principle at work on the formulation bench.)
Grain size is the second thing to read, and for this lesson it matters more than crystal system. Grain size is simply how large the individual crystals are, and it controls texture directly. Fine grains pack closely, pour smoothly, and feel uniform. Coarse grains catch light on more faces, pour with a rattle, and feel distinct under the spoon. The same substance at two grain sizes behaves like two different materials, which is why the apothecary specifies grain as carefully as identity. ★ "Salt" is not a complete description. "Coarse salt" is.
There is a third reading: uniformity. Table salt is milled to a consistent fine grain; every crystal is nearly the same size. Coarse sea salt is far less uniform; crystals vary widely. Uniformity affects how a mixture behaves over time, because mixed sizes settle and separate differently than matched sizes. Note it in your records. The laboratory notices everything.
Check in: Salt and sugar are both white and granular. Which crystal system does each one crystallize in — and why does grain size matter more than crystal system for this lesson?
❦ In your workbook: record reading the crystal in your own way — the cubic and monoclinic architectures, grain size as a formulation decision, and uniformity as the third reading — copy, sketch, or note what matters.
Suspended Additives: What Floats in the Jar
A scrub is a suspension: solid particles held, for a time, within a liquid medium. (The canonical definition stands in Lesson 20; here is the formulation context.) The salt or sugar does not dissolve in the oil, or dissolves only slightly. It hangs in the oil, distributed through it, and given time it settles. That settling is not a failure. It is physics, and the apothecary plans for it.
★ Three things govern how a suspension behaves. The first is particle size: fine grains stay suspended longer than coarse ones, because smaller particles settle more slowly through a viscous medium. The second is the medium's viscosity, its resistance to flow (the canonical definition is in Scrollwork, Unit II, Lesson 5; in the laboratory it means simply how thick the oil feels when you stir it). Thicker oil holds particles up longer; thin oil lets them fall faster. The third is density difference: the greater the gap between the particle's density and the oil's density, the faster the settling.
Suspended additives are anything else the maker puts into the jar: dried petals, ground oats, seeds, bits of peel. Historically these were often decorative, a way to show the buyer what was inside, and they change texture as well as appearance. A petal is soft and light; it floats and stays. A seed is hard and dense; it sinks and waits at the bottom. When you read a historical formula that lists inclusions, ask the suspension question: where does each particle want to be, and how long will the oil hold it there?
Check in: Name the three governors of suspension behavior — and why does a petal stay up in the jar while a seed sinks and waits at the bottom?
❦ In your workbook: record suspended additives in your own way — the suspension defined, settling as physics to plan for, the three governors, and where a petal and a seed each want to be — copy, sketch, or note what matters.
A Sealed Note from Professor Muddlenook
Scholars, a word about the jar you are about to make, because I can see the question forming.
You are wondering why a preparation made from salt, sugar, and kitchen oil, three things you have all eaten, must be labeled as if it were something dangerous. It is a fair question, and it deserves a straight answer.
The label does not say the jar is dangerous. The label says the jar is a study object. Those are different statements, and the laboratory insists on the difference. In this classroom you are learning to think like an apothecary, and an apothecary's first duty is precision about what a preparation is for. This scrub was made to be observed, compared, and recorded. It was not made under the conditions, or with the testing, that a preparation for skin requires. To use it on skin would be to pretend it is something it is not, and pretense is the one thing the laboratory never permits.
There will be lessons ahead where the materials themselves demand respect: lye, alcohol, heated wax. The discipline you practice today, on harmless salt and sugar, is the same discipline that will keep you safe then. Label honestly. Observe strictly. Never assume.
In good order,
— Professor Crimblebrew Muddlenook, Potions Laboratory • Master Apothecary • Head of House Meridies
❦ In your workbook: record the sealed note in your own way — what the label says, what it does not say, and why the discipline practiced on salt and sugar is the discipline that keeps you safe with harder materials — copy, sketch, or note what matters.
The Procedure: Making a Study Scrub
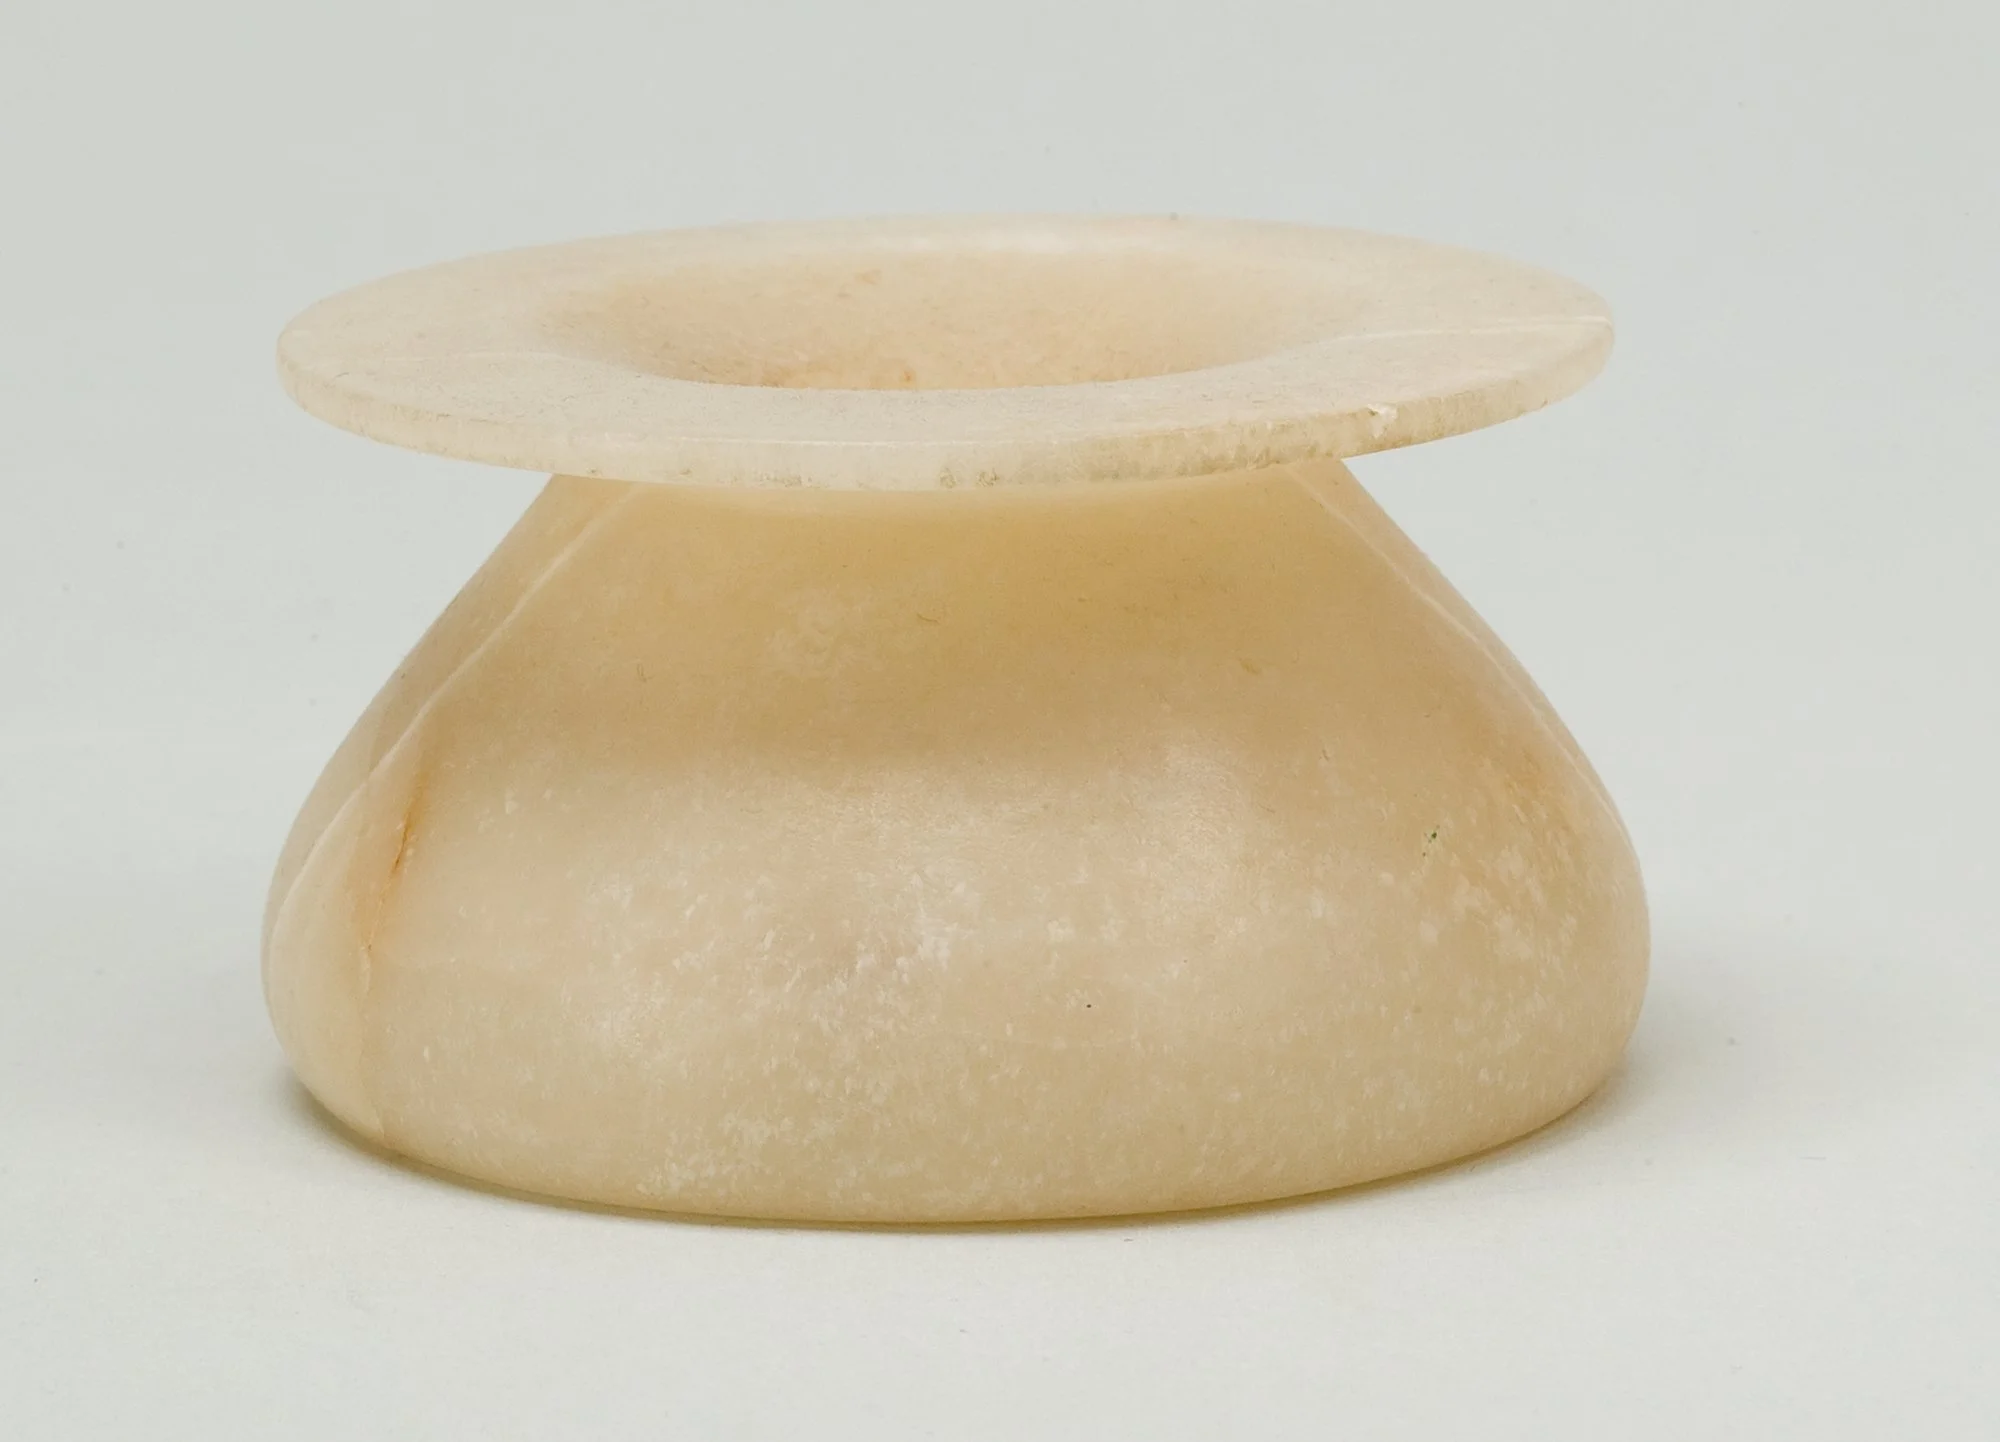
A cosmetic jar of travertine, Egypt, about 1550–1300 BCE: wide mouth, honest stone, made to hold a prepared substance and to be opened daily. Your three small jars — glass, lidded, and labeled in clear letters — are this vessel's working descendants.
Cosmetic jar, ca. 1550–1300 BCE, travertine (Egyptian alabaster), The Metropolitan Museum of Art (object 544024). CC0 / public domain (Met Open Access).
Work cleanly and in order. You will make three small batches, one per grain grade.
Step 1 — Prepare the bench. Cover your work surface. Set out the three jars, open and ready. Lay out the paper plates for later. Put on an apron if you have one; oil spots are forever.
Step 2 — Measure the dry grain. Into the mixing bowl, place four tablespoons of the fine grain (table salt). Level each spoonful with a straight edge, as you learned in the weights and measures discipline. Note the grain in your journal: fine, uniform, cubic tendencies visible under the magnifier.
Step 3 — Add oil gradually. Add one tablespoon of oil. Stir slowly and observe: the grain darkens, clumps lightly, and the mixture thickens. Add a second tablespoon only if the mixture looks dry and crumbly. You are aiming for damp sand, not soup. Record exactly how much oil each grade required; this is data.
Step 4 — Jar and label. Spoon the mixture into the first jar. Label it immediately, before you touch the next grade: the grain used, the oil used, the date, and in clear letters, STUDY PREPARATION, DISPLAY ONLY, NOT FOR USE ON SKIN. An unlabeled jar in this laboratory is a failed jar, whatever is inside it.
Step 5 — Repeat for the medium and coarse grades. Wash and dry the bowl between batches so no grains carry over. Use granulated sugar for the medium grade and coarse salt for the coarse grade. You will find the coarse grade needs slightly more oil to reach the same damp-sand state; record the difference.
Step 6 — The settling watch begins. Set the three jars side by side where they will not be disturbed. You will observe them over the coming week for Exercise II.
Check in: What consistency are you aiming for when the oil goes in — and what four things does every jar's label carry, word for word in the case of the last one?
❦ In your workbook: record the procedure in your own way — the six steps in their order, the damp-sand target, the exact oil each grade required, and the label written before the next grade is touched — copy, sketch, or note what matters.
In your packet: Exercise I — The Three-Grade Grain Study ⚒ begins here. Work it now, or mark the place and take it as homework — your choice.
In your packet: Exercise II — The Suspension Watch ◐ begins here, at Step 6. Work it now, or mark the place and take it as homework — your choice.
Observation: The Grain-Size Comparison
Now the real work of the lesson: reading what you made.
Place a spoonful of each grade on its own white paper plate. Do not touch them with your fingers; use the back of the spoon to spread and press. Observe each in turn, and record the following for all three:
- Grain shape under the magnifier. Can you see the cubic tendency in the salt? The skewed prisms of the sugar? Sketch what you see; a sketch is worth a paragraph in the archive.
- Uniformity. Are the grains matched in size, or mixed? Rank the three grades from most to least uniform.
- How the oil sits. Does the oil coat every grain evenly, or pool in places? Press with the spoon back: does oil squeeze out freely, or stay held?
- Pour behavior. Tilt the plate slightly. Which grade moves first? Which holds its shape? Pour a spoonful from a small height and watch how it lands.
- Settling in the jar. Look at the jars without disturbing them. Is a layer of clear oil forming at the top of any jar? Which one, and how quickly?
Write your comparison as a short formal paragraph per grade, then one paragraph comparing all three. Use the texture vocabulary from your lexicon: grain, uniformity, suspension, viscosity. A good archive entry lets a stranger who never saw your bench understand exactly what was in each jar and how it behaved.
Check in: Which five things do you observe and record for all three grades — and which four lexicon words must your comparison paragraphs use?
❦ In your workbook: record the grain-size comparison in your own way — the five observations for each grade, your uniformity ranking, and the formal paragraphs, one per grade and one comparing all three — copy, sketch, or note what matters.
In your packet: Exercise III — The Texture Ledger Page ⚒ begins here. Work it now, or mark the place and take it as homework — your choice.
Texture Variation: What the Apothecary Reads
Texture is information, and the trained apothecary reads it the way you now read grain.
When historical makers judged a preparation's texture, they worked in a fixed order: look first, then touch the test surface (never the skin; the workshop used glass tiles, porcelain dishes, and the back of the spoon), then record. They asked the same questions you asked in your comparison: Is the grain uniform? Does the medium hold the particles or release them? Has anything changed since yesterday? A preparation that was smooth on Monday and grainy on Friday has told you something, usually about settling, crystallization, or moisture, and the archive entry for Friday should say so.
★ Note the boundary between a scrub and its neighbors. A scrub is a suspension: particles in oil, settling over time. An emulsion, which you studied in Lesson 38, is a different architecture entirely: two liquids forced to mix, stabilized against separation. Do not confuse them in your records. The scrub in your jar will settle; that is its nature, honestly labeled. The emulsion in Lesson 38 resists settling; that is its nature, honestly labeled. The laboratory's whole art is knowing which nature you are working with.
Check in: In what fixed order did historical makers judge texture — and what is the architectural difference between a scrub and an emulsion?
❦ In your workbook: record texture variation in your own way — look, test surface, record, in that order, the three questions the makers asked, and the scrub–emulsion boundary — copy, sketch, or note what matters.
A Note on Salt, Sugar, and the Bath
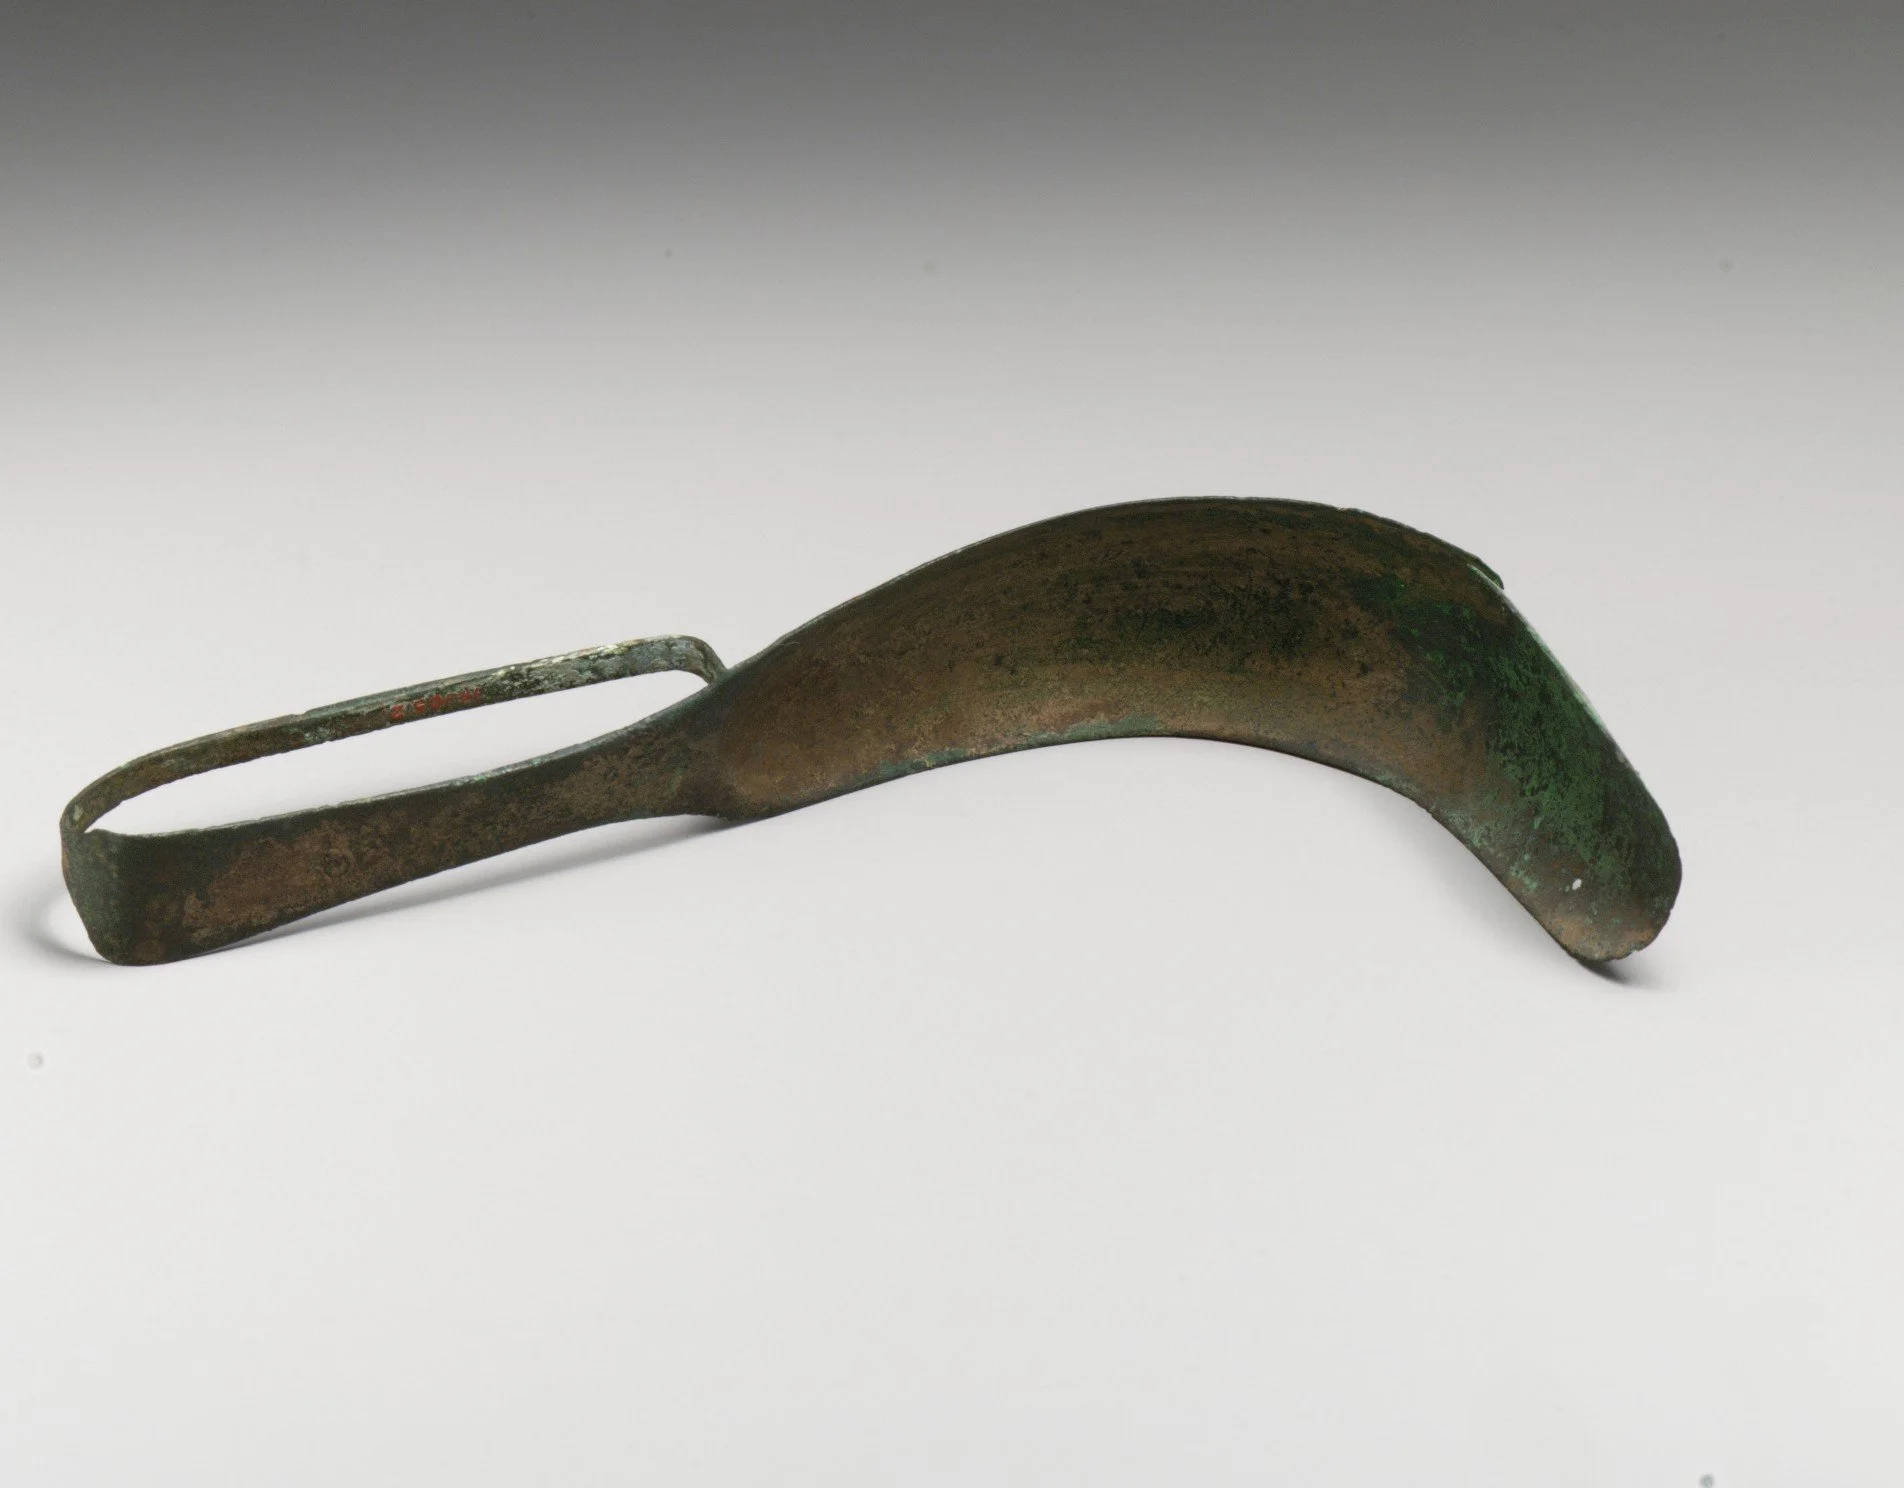
A bronze strigil, Greek, 5th–4th century BCE — the curved scraper of the ancient bath. The Romans cleaned themselves with oil and this instrument, not with salt scrubs: their tradition was oil and scraping, and accuracy about that is this lesson's whole point.
Bronze strigil (scraper), Greek, 5th–4th century BCE, The Metropolitan Museum of Art (object 248881). CC0 / public domain (Met Open Access).
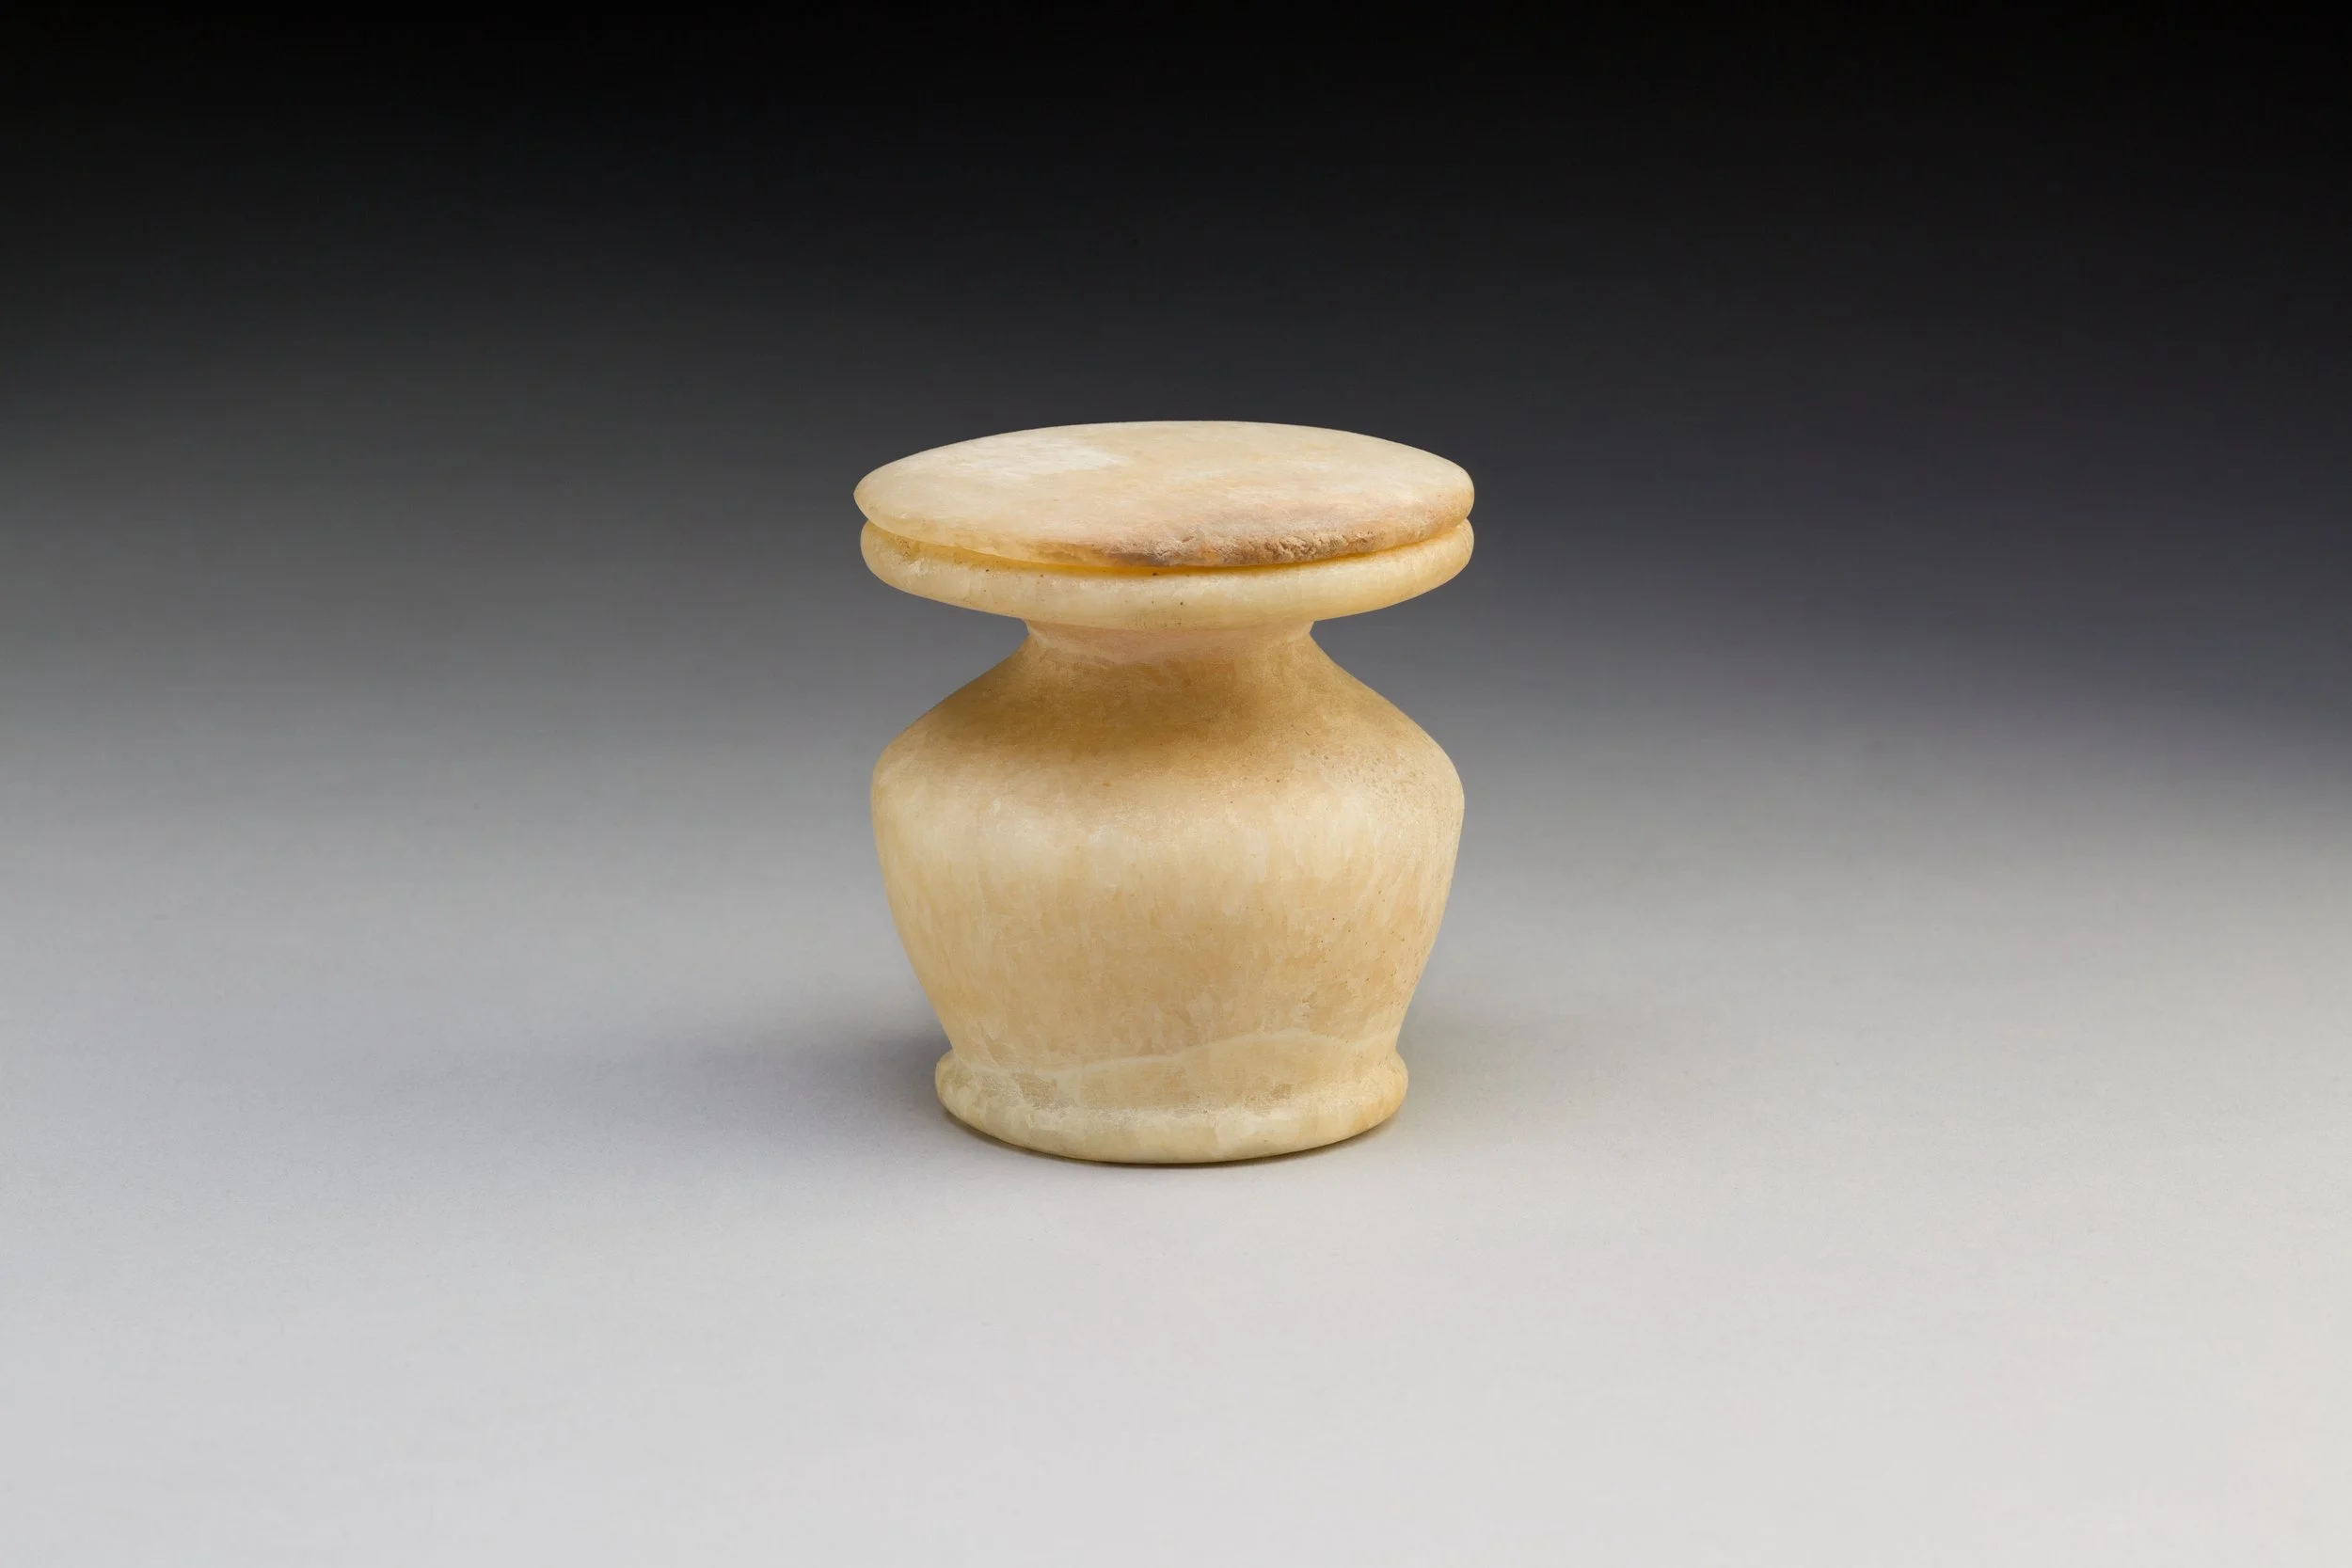
The lesson's own cited jar: a New Kingdom kohl jar of travertine, about 1504–1447 BCE, from the burial goods of the scribe Amenemhat — jarred, lidded, and shelved more than three thousand years ago. Theirs were for use. Yours are for study. The label is what tells the difference.
Kohl Jar, New Kingdom, Dynasty 18 (early), ca. 1504–1447 BCE, travertine (Egyptian alabaster), The Metropolitan Museum of Art (object 549125). CC0 / public domain (Met Open Access).
A short history, because the materials deserve it.
Salt's relationship with bathing is ancient. The mineral-rich waters of the Dead Sea region were prized in antiquity, and salt itself, as a trade good and preservative, sat on apothecary shelves for millennia before anyone thought to put it in a jar with oil. The Romans, whose bathing culture was the most elaborate of the ancient world, cleaned themselves with oil and the strigil, a curved scraper, rather than with salt scrubs; their tradition was about oil and scraping, not grain and rubbing. Accuracy matters here: the past used what it used, not what we imagine.
Sugar's story is shorter and more luxurious. For most of history, sugar was a precious import, far too costly to grind into a bath preparation. Only when sugar became an ordinary pantry good did sugar-based preparations become ordinary too. Your medium-grade jar, made with granulated sugar, belongs to the modern chapter of this history.
And the jar itself has ancestors. The Metropolitan Museum of Art holds ancient Egyptian cosmetic vessels, alabaster jars that once contained oils, ointments, and kohl, proof that prepared substances for the body have been jarred, labeled in their fashion, and shelved for thousands of years. Your three labeled jars stand in a very long line. Yours are for study. Theirs were for use. The label is what tells the difference, and the label is everything.
Check in: How did the Romans actually clean themselves, if not with salt scrubs — and why do sugar-based preparations belong to the modern chapter of this history?
❦ In your workbook: record salt, sugar, and the bath in your own way — the Dead Sea's prized waters, oil and the strigil, sugar's luxury past, and the Egyptian jars your three jars descend from — copy, sketch, or note what matters.
Cleanup
Scrape remaining mixture into the waste, not the drain: oil and grain in quantity will trouble your plumbing. Wipe the bowl with a dry cloth first to remove the oil, then wash normally. Wash the spoons and dry them. Wipe the bench. Check the floor for oil spots.
Return your three jars to their observation station. Confirm each label is legible and complete: grain, oil, date, and the display-only statement. File today's observations in your archive. Wash your hands.
Check in: Why does the remaining mixture go into the waste and not the drain — and what four things must each returned jar's label show, complete and legible?
❦ In your workbook: record cleanup in your own way — waste not drain, the dry cloth before washing, the bench and floor check, and the jars returned with their labels confirmed — copy, sketch, or note what matters.
Guided Observation: Reading the Three Jars
This lesson's observation is bench work, done with your three labeled jars and your white plates open: you read grain the way the archive will read your record of it, testing whether your words let a stranger who never saw your bench understand exactly what was in each jar.
Work through it in order.
Read the grain first. Place a spoonful of each grade on its own white paper plate. Do not touch them with your fingers; use the back of the spoon to spread and press. Under the magnifier, look for the cubic tendency in the salt and the skewed prisms of the sugar, and sketch what you see.
Rank the uniformity. Are the grains matched in size, or mixed? Rank the three grades from most to least uniform, and note how the oil sits on each: does it coat every grain evenly, or pool in places? Press with the spoon back: does oil squeeze out freely, or stay held?
Watch the pour and the settling. Tilt the plate slightly. Which grade moves first? Which holds its shape? Then look at the jars without disturbing them. Is a layer of clear oil forming at the top of any jar? Which one, and how quickly?
Consider:
- Which grade's record was hardest to write precisely, and which single observation — shape, uniformity, oil, pour, or settling — carried the most information in it?
- Your coarse grade needed slightly more oil to reach the same damp-sand state. What does that difference tell you about grain as a formulation variable?
- If a scholar read only your three formal paragraphs a year from now, could they rebuild your bench exactly? Which sentence would you strengthen first?
❦ In your workbook: record the guided observation in your own way — the grain read and sketched, the uniformity ranked, the pour watched, and the settling noted without disturbing the jars — copy, sketch, or note what matters.
Materials
Lay out everything before you begin. A tidy bench is a safe bench.
Level One — household items
- Table salt (fine grain), about half a cup
- Granulated white sugar (medium grain), about half a cup
- Coarse salt (kosher salt or coarse sea salt; large grain), about half a cup
- A neutral oil: plain olive oil or sunflower oil from the kitchen, about half a cup total
- Three small clean jars with lids, or small bowls covered with wrap
- Teaspoons and tablespoons for measuring
- A mixing bowl and spoon
- White paper plates or sheets of white paper for the comparison observations
- A magnifying glass, if you have one
- Paper labels and a pen
- Your laboratory journal and a pencil
Level Two — historically closer
- Epsom salt in place of table salt for the fine grade, so you can compare a different crystal habit
- Raw or demerara sugar for the medium grade, to observe larger, less uniform crystals
- Small glass jars with tight lids, the apothecary's standard vessel
- A brass or wooden spoon for mixing, as the old workshops used
- Parchment labels tied with string, in the archival manner
Safety Notes
- Your scrub is a study object, display only, not for use on skin. Label every jar STUDY PREPARATION, DISPLAY ONLY, NOT FOR USE ON SKIN before you begin the next grade. An unlabeled jar is a failed jar.
- Nothing in the Potions Laboratory is medicine, and no lesson gives amounts to take. No claim is made about what any preparation does to or for the body. Exfoliation here is a mechanical word only.
- Pour salt and sugar slowly and keep your face back from the bowl; fine dust irritates the nose and throat. Work in a ventilated area.
- Once ingredients enter the laboratory they follow laboratory rules: nothing from the workbench goes into mouths. Wash your hands before and after the procedure.
- Wipe oil spills immediately with a dry cloth first, then wash. Keep jars away from the bench edge.
Reflection Questions
Answer the following questions in your workbook.
- Why does the laboratory require the study scrub to be labeled display-only, even though every ingredient comes from the kitchen? Give all three reasons from the safety briefing.
- Salt and sugar look alike in the jar. What two structural differences does the magnifier reveal, and why does grain size matter more than crystal system for this lesson's purposes?
- Name the three governors of suspension behavior and explain, in your own words, how each one affects how long grains stay suspended in oil.
- A classmate's scrub separated overnight into a clear oil layer over packed grain, and she calls it a failed batch. Using this lesson's vocabulary, explain why she is wrong and what the jar is actually doing.
- A scrub and an emulsion both contain oil. Explain the architectural difference between them and why the laboratory records must never confuse the two.
Workbook Checklist — Lesson 39
In my workbook I have:
- ☐ stated all three reasons the study scrub is labeled display-only, and what exfoliation means — and does not promise — in this lesson
- ☐ recorded salt's cubic system and sugar's monoclinic system, and why grain size matters more than crystal system here
- ☐ recorded the three governors of suspension behavior — particle size, viscosity, and density difference — and where a petal and a seed each settle
- ☐ prepared the fine, medium, and coarse study scrubs, labeled every jar before beginning the next grade, and recorded the exact oil each grade required
- ☐ completed the five observations for all three grades — grain shape, uniformity, how the oil sits, pour behavior, and settling — with a formal paragraph per grade and one comparison paragraph
- ☐ kept the seven-day suspension watch without disturbing the jars, and written its conclusion from particle size
- ☐ designed the texture ledger page with its eight fields and used it to record one scrub completely
- ☐ recorded the scrub–emulsion boundary, and why the laboratory's records must never confuse the two
☐ Lesson completed Date: ___ Signature: ___
The Professor's Closing Note
Well done, scholars. You have read crystals, built suspensions, compared three grades of grain, and labeled every jar honestly. Your bench is clean, your archive is richer, and not a single preparation has been asked to be something it is not.
Carry three things from this lesson. First: grain size is a formulation decision, not a decoration; it changes how a preparation behaves. Second: a suspension — a mixture in which solid particles are spread through a liquid without dissolving — settles, and settling is physics to be planned for, not failure to be hidden. Third: the label is the laboratory's conscience. What the jar is, the label says; what the jar is not, the label refuses.
Watch your jars over the coming week. They will teach you the rest.
In good order,
— Professor Crimblebrew Muddlenook, Potions Laboratory • Master Apothecary • Head of House Meridies
PROFESSOR CRIMBLEBREW MUDDLENOOK
Potions Laboratory
Master Apothecary • Head of House Meridies
Cross-Class Connections
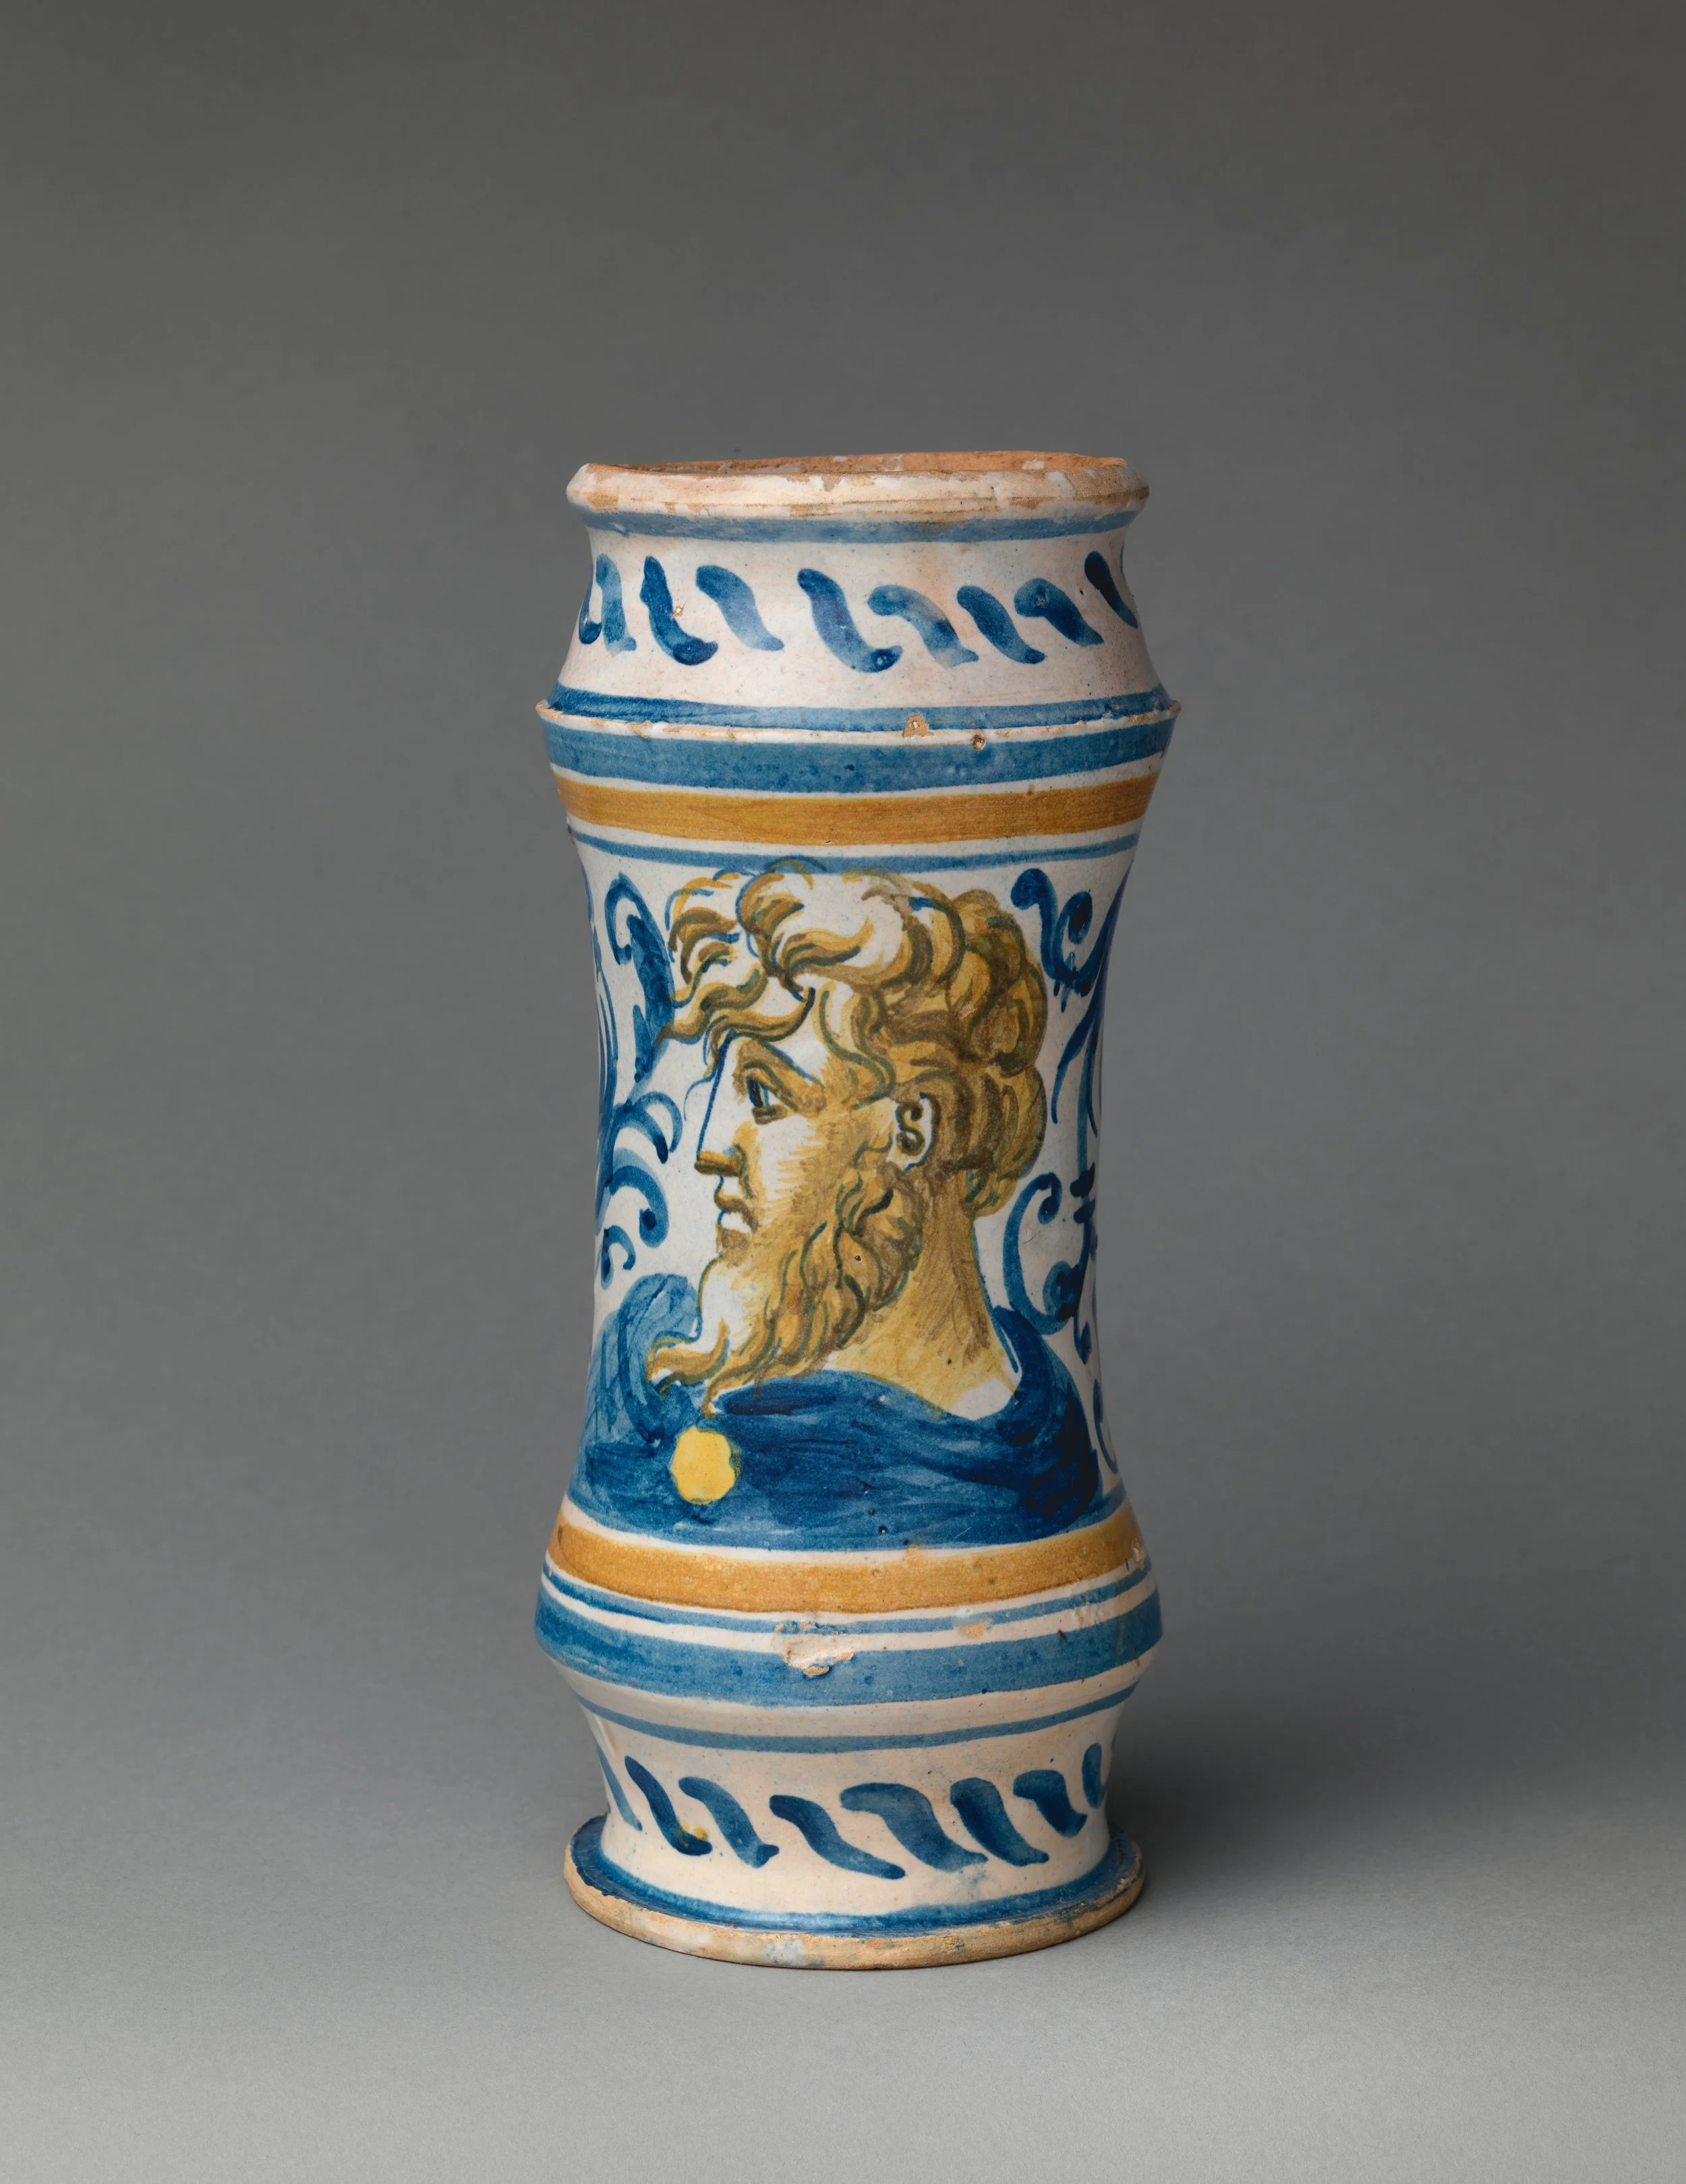
An albarello, about 1545: the apothecary's cylindrical jar, its painted front doing the work of a label, a signboard, and a filing system before paper labels existed. Professor Timberclank's scholars raise this same vessel in clay; Professor Muddlenook's scholars fill its descendants and label them honestly.
Albarello, ca. 1545, faience (tin-glazed earthenware), The Metropolitan Museum of Art (object 194298). CC0 / public domain (Met Open Access).

Scrollwork · Unit II, Lesson 5 — Soot & Charcoal Ink
You have met viscosity in Professor Muddlenook's laboratory, where it holds your grains up or lets them fall. Come and meet it at my desk, where it does the same work for a line of ink: too thin, and the soot spreads and feathers into the page; too thick, and it will not flow from the pen at all. We read our ink the way you read your jars, scholars — by watching how it moves. Come and watch it move.
PROFESSOR QUILLBERRY NOCTURNE
Scrollwork Library

Creative Arts · Unit IV, Lesson 16 — Printmaking, Stamps & the Label Station
Professor Muddlenook tells you the label is the laboratory's conscience. In my workshop we build the station where such labels get made: stamp and ink in order, label stock squared, impressions racked to dry, the run printed before the jars are waiting. A label is a small promise — the jar holds what it claims, and the maker stands behind both. Bring your three study jars' names, scholars, and we will print them the way promises should be printed: cleanly, legibly, and the same way ten times running.
Creative Arts · Unit V, Lesson 20 — Clay II: Vessels, Tiles, Relief & Molds
Your three labeled jars stand in a long line, and in my workshop you will build the ancestor they descend from: the albarello, the apothecary's cylindrical jar, raised by coil and slab with a plain front panel where its painted name did the work of a label, a signboard, and a filing system all at once. Build the practice tiles first, on scrap, as always. Then raise the jar, and you will understand in your hands why Professor Muddlenook's laboratory shelves its preparations the way it does.
PROFESSOR COGBRANCH TIMBERCLANK
Creative Arts Workshop
Further Reading & Sources
- Halite — Virtual Museum of Molecules and Minerals, University of Wisconsin — halite's cubic crystal system, cleavage, and properties, with rotatable crystal models.
- Cane Sugar — Wikipedia — sucrose's monoclinic crystal structure and the crystallization behavior behind grain size.
- The Origins and Meanings of Pharmacy Symbols — Wellcome Collection — the apothecary tradition behind the laboratory's labeling and archival discipline.
- Kohl Jar, New Kingdom — The Metropolitan Museum of Art — an ancient Egyptian cosmetic vessel, ancestor of the honestly labeled jar.
- Beauty and Cosmetics in Ancient Egypt — Wikipedia — oils, ointments, and vessels in the ancient body-preparation tradition.
Browse the Potions shelf in the school Library for readable editions of these works.
LESSON 39 · CRYSTALLINE SCRUBS & BATH PREPARATIONS
Try It in the Laboratory
Salt and sugar, in their three grain grades — this lesson taught how the crystals behave. The Experiment builds your own bath salts around them: salts, a botanical, and an accent that belongs in warm water.
— Professor Crimblebrew Muddlenook, Potions Laboratory
Submit your work for this lesson using the form below.
CONTINUE IN THE POTIONS LABORATORY
← Previous · Lesson 38: The Whipped Emulsion Next · Lesson 40: Soapmaking: Melt & Pour Artistry →
Unit V — Botanical Formulations Potions Laboratory — All 52 Lessons
The rest of Unit V: Lesson 35 · Balms & Salves · Lesson 36 · Candles & Wax · Lesson 37 · Sachets & Blends · Lesson 38 · Whipped Emulsion · Lesson 40 · Melt & Pour Soap · Lesson 41 · Cold-Process Soap · Lesson 42 · The Failed Batch · Lesson 43 · Experimental Formula · Lesson 44 · Formulation Matrix